
Red Hat Training
A Red Hat training course is available for Red Hat Fuse
Chapter 7. Installing JBoss Developer Studio
7.1. Install JBoss Developer Studio
Procedure 7.1. Install with the Universal Installer
- Log into the Customer Portal at https://access.redhat.com.
- From the menu bar click .
- Under , click .
Figure 7.1. Download Red Hat JBoss Middleware Software on the Customer Portal
- Under Software Downloads, select the following options:
- From the Product list, select JBoss Developer Studio.
- From the Version list, select 7.1.x.
- For the JBoss Developer Studio universal installer, click for the
Red Hat JBoss Developer Studio 7.1.x Stand Alone Universal Binarydownload file. - For the JBoss Developer Studio and JBoss EAP universal installer, click for the
Red Hat JBoss Developer Studio 7.1.x Universal Binary with JBoss EAPdownload file.
This downloads a universal installer.jarfile.- On the command line, navigate to
path/to/.jarand enterjava -jar jbdevstudio-product-universal-version.jar
where version is substituted to match the name of the.jarfile.Note
Alternatively, to start the installer you may be able to double-click the.jarfile. - When the Installer window opens, click .
- After reading and agreeing to the terms of the End User License Agreement, click I accept the terms of this license agreement and click .
- In the Select the installation path field, type the path where you want JBoss Developer Studio to be installed or click to navigate to the location. When the Select the installation path field shows the correct path, click . When you are prompted about the specified location being created or overwritten, review the message and, if satisfied, click or as appropriate.

Figure 7.2. Installation Step 3: Select Target Folder
- In the Select Java VM step, Default Java VM is automatically selected. Ensure that the disabled text field contains the path of the Java developer kit you want to use. This is based on the default Java developer kit of your system. To change the specified Java developer kit, click Specific Java VM and type the path of the Java developer kit in the text field or use the button to locate the Java developer kit. When the text field shows the correct Java developer kit path, click .
Important
You must specify a Java developer kit with a 32-bit JRE to install a 32-bit version of JBoss Developer Studio and a 64-bit JRE to install a 64-bit version of JBoss Developer Studio. To change the bit version of the Java developer kit to be used for installing JBoss Developer Studio, complete the appropriate step for your operating system:- On OS X operating systems, from the Installation type list click the appropriate bit version.
- On Linux distributions and Microsoft Windows operating systems, in the text field type the path to the appropriate bit version of the Java developer kit.

Figure 7.3. Installation Step 4: Select Java VM
- Review the details in the Summary Information window and, if they are correct, click . Installation commences.
- When the Pack installation progress bar shows Finished, click . The installation process is now complete.
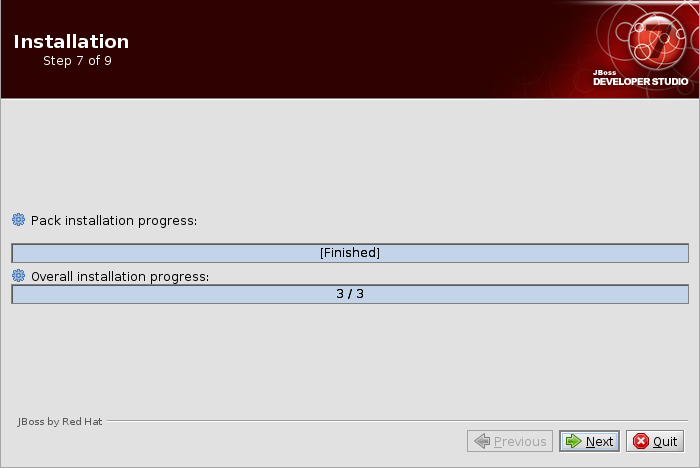
Figure 7.4. Installation Step 7: Installation Progress in Finished State
- To create shortcuts for starting JBoss Developer Studio, select the Create shortcuts in the Start-Menu and Create additional shortcut on the desktop check boxes and click .
- To automatically start JBoss Developer Studio when the Installer window closes, select the Run JBoss Developer Studio after installation check box. Click to close the Installer window.
Important
Linux distributions have a maximum number of files that a process can have open at one time. If this maximum number of files is set too low, JBoss Developer Studio will not start. You must open the
/etc/security/limits.conf file and ensure that the soft nofile and hard nofile variables have values of 9216 at a minimum. If the variables have smaller values, the values must be increased to 9216. If the variables are not specified, the following lines must be added to the file:
* soft nofile 9216
* hard nofile 9216
7.2. Installing JBoss Developer Studio Integration Stack
JBoss Developer Studio Integration Stack is not packaged as part of JBoss Developer Studio installations. These plug-ins must be installed independently through JBoss Central, as detailed in the procedure below.
Procedure 7.2. Install JBoss Developer Studio Integration Stack
- Start JBoss Developer Studio.
- In JBoss Central, select the Software/Update tab. Scroll through the list to locate JBoss Developer Studio Integration Stack. Select the check box next to JBoss Integration and SOA Development and click .

Figure 7.5. Find JBoss Developer Studio Integration Stack in JBoss Central Software/Update Tab
- In the Install wizard, ensure the check boxes are selected for the software you want to install and click . It is recommended that you install all of the selected components.
- Review the details of the items listed for install and click . After reading and agreeing to the license(s), click I accept the terms of the license agreement(s) and click . The Installing Software window opens and reports the progress of the installation.
- During the installation process you may receive warnings about installing unsigned content. If this is the case, check the details of the content and if satisfied click to continue with the installation.

Figure 7.6. Warning Prompt for Installing Unsigned Content
- Once installing is complete, you are prompted to restart the IDE. Click to restart now and if you need to save any unsaved changes to open projects. Note that changes do not take effect until the IDE is restarted.
Once installed, you may need to complete additional configuration actions before you can use the individual JBoss Developer Studio Integration Stack components. For plug-in specific configuration information, see the appropriate Red Hat JBoss product documentation available from https://access.redhat.com/site/documentation on the Red Hat Customer Portal.
Important
The installation method for early releases of JBoss Developer Studio Integration Stack may vary from that given here. For instructions, see the appropriate Red Hat JBoss product documentation available from https://access.redhat.com/site/documentation on the Red Hat Customer Portal.