
Using A-MQ Broker
For use with A-MQ Broker 7.0
Legal Notice
Abstract
Chapter 1. Overview
A-MQ Broker is a full-featured, message-oriented middleware broker. It offers specialized queueing behaviors, message persistence, and manageability. Core messaging is provided by Apache ActiveMQ with support for different messaging styles such as publish-subscribe, point-to-point, and store-and-forward. It supports multiple protocols and client languages, freeing you to use many if not all of your application assets. Lastly, A-MQ Broker is supported to work with Red Hat JBoss Enterprise Application Platform.
A-MQ Broker is based on Apache ActiveMQ Artemis.
1.1. Key Features
Supports multiple wire protocols
- AMQP
- Artemis Core Protocol
- HornetQ Core Protocol
- MQTT
- OpenWire (Used by A-MQ 6 clients)
- STOMP
- Supports JMS 2.0
- Clustering and high availability options
- Fast, native-IO persistence
- Fully transactional (including XA support)
- Written in Java for broad platform support
- Choice of Management Interfaces: A-MQ Console and/or API
1.2. Key Concepts
Messaging brokers allow you to loosely couple heterogeneous systems together, while typically providing reliability, transactions, and many other features.
Unlike systems based on a Remote Procedure Call (RPC) pattern, messaging systems primarily use an asynchronous message-passing pattern with no tight relationship between requests and responses. Most messaging systems also support a request-response mode, but this is not a primary feature of messaging systems.
Designing systems to be asynchronous from end to end allows you to really take advantage of your hardware resources, minimizing the number of threads blocking on IO operations, and to use your network bandwidth to its full capacity. With an RPC approach you have to wait for a response for each request you make so are limited by the network round-trip time, or latency, of your network. With an asynchronous system you can pipeline flows of messages in different directions, so you are limited by the network bandwidth, not the latency. This typically allows you to create much higher performance applications.
Messaging systems decouple the senders of messages from the consumers of messages. The senders and consumers of messages are completely independent and know nothing of each other. This allows you to create flexible, loosely coupled systems.
1.3. Supported Configurations
In order to be running in a supported configuration, A-MQ Broker must be running on an appropriate combination of operating system and certified JDK implementation. The table below provides a matrix of supported JDK implementations by the version of Red Hat Enterprise Linux (RHEL) operating system.
Table 1.1. Supported RHEL and JDK combinations
| Operating System | OpenJDK 8 | Oracle JDK 8 | IBM JDK 8 |
|---|---|---|---|
| RHEL 6 x86 | Yes | Yes | - |
| RHEL 6 x86-64 | Yes | Yes | Yes |
| RHEL 7 x86-64 | Yes | Yes | Yes |
A-MQ Broker also supports configurations using operating systems other than RHEL. Below is a list of combinations by JDK version.
Other Supported JDK and OS Combinations
-
Oracle JDK 8
Solaris 10 (x86, x86-64, and SPARC)
Solaris 11 (x86, x86-64, and SPARC)
Windows Server 2012 R2 (x86-64 only) -
IBM JDK 8
AIX 7.1 -
HP JVM 1.8
HP-UX 11i
A-MQ Broker also includes the A-MQ Console, a GUI-based management tool. The table below lists the supported web browsers when using A-MQ Console.
Supported Versions of Web Browsers
-
Chrome 44
-
Firefox 40
-
Internet Explorer 10 and 11
Chapter 2. Installation
2.1. Prerequisites
A-MQ Broker requires the following components.
- JRE 1.8 (for running A-MQ Broker)
- JDK 1.8 (for running the examples)
- Maven 3.2 (for running the examples)
Note that the broker runtime requires only a JRE. However, running the included examples requires a full JDK as well as Maven.
If you are installing A-MQ Broker on a supported version of Red Hat Enterprise Linux, you can use the yum command to install any needed pre-requisites. For example, the command below will install OpenJDK 1.8 and Maven.
$ sudo yum install java-1.8.0-openjdk maven
You can also download supported versions of a JDK and Maven from their respective websites, OpenJDK and Apache Maven for example. Consult Supported Configurations to ensure you are using a supported version of Java.
2.2. Download an A-MQ Broker Archive
A platform-independent, archived distribution of A-MQ Broker is available for download from the Red Hat Customer Portal. See Using Your Subscription for more information on how to access the customer portal using your Red Hat subscription. You can download a copy of the distribution by following the steps below.
- Open a browser and log in to the Red Hat Customer Portal at https://access.redhat.com.
- Click Downloads.
- Click Red Hat JBoss A-MQ in the Product Downloads list.
- Select the correct A-MQ Broker version from the Version drop-down menu.
Select your preferred archive for Red Hat JBoss 7.x.x Broker:
- An archive in .zip format (for any supported OS: Linux, Unix, or Windows) or
-
An archive in .tar.gz format (for any supported OS with the
tarandgunzipcommands, typically *nix)
- Click the Download link of your preferred archive.
2.3. Extract the .zip Archive
Once the zip file has been downloaded, you can install A-MQ Broker by extracting the zip file contents, as done in the steps below.
If necessary, move the zip file to the server and location where A-MQ Broker should be installed.
NoteThe user who will be running A-MQ Broker must have read and write access to this directory.
Extract the zip archive.
$ unzip jboss-amq-7.x.x.zip
NoteFor Windows Server, right-click the zip file and select Extract All.
The directory created by extracting the archive is the top-level directory for the A-MQ Broker installation. This is referred to as <install-dir>.
2.4. Extract the .tar.gz Archive
Once the tar.gz file has been downloaded, you can install A-MQ Broker by first de-compressing the contents of the tar archive and then extracting A-MQ Broker from the tar archive itself. The steps are captured below.
If necessary, move the tar.gz file to the server and location where A-MQ Broker should be installed.
NoteThe user who will be running A-MQ Broker must have read and write access to this directory.
Decompress the tar archive
$ gunzip jboss-amq-7.x.x.tar.gz
Extract A-MQ Broker from the decompressed tar archive
$ tar -xvf jboss-amq-7.x.x.tar
2.5. Archive Contents
The directory created by extracting the archive is the top-level directory for the A-MQ Broker installation. This directory is referred to as <install-dir> and includes a number of important directories noted in the table below.
-
Archive Contents of
<install-dir>
| If you want to find… | Look here… |
|---|---|
| API documentation | <install-dir>/web/api |
| Binaries and scripts needed to run A-MQ Broker | <install-dir>/bin |
| Configuration files | <install-dir>/etc |
| JMS and Java EE examples | <install-dir>/examples |
| Jars and libraries needed to run A-MQ Broker | <install-dir>/lib |
| XML Schemas used to validate A-MQ Broker configuration files | <install-dir>/schema |
| Web context loaded when A-MQ Broker runs. | <install-dir>/web |
Chapter 3. Getting Started
This chapter lets you get started with A-MQ Broker right away by creating your first broker instance and by running one of the examples included as part of the installation. Next, this chapter will provide an overview of the basic configuration elements and concepts. Later chapters will provide details for the topics introduced here.
3.1. Create a Broker Instance
To A-MQ Brokera broker instance is a directory containing all the configuration and runtime data, such as logs and data files. The runtime data is associated with a unique broker process,
To create a broker instance, follow the steps below.
Determine a directory location for the broker instance. For example
/var/lib/amq7NoteOn Unix systems, it is recommended that you store the runtime data under the
/var/libdirectory.Use the
artemis createcommand to create the broker under the location used in Step 1. For example, to create the broker instancemybrokerunder the/var/lib/amq7directory, run the following commands.$ sudo mkdir /var/lib/amq7 $ cd /var/lib/amq7 $ sudo <install-dir>/bin/artemis create mybrokerThe
artemis createcommand will ask a series of questions in order to configure the broker instance.The following example shows the command-line interactive process when creating a broker instance.
Creating ActiveMQ Artemis instance at: /var/lib/amq7/mybroker

--user: is mandatory with this configuration:
Please provide the default username:
<username>

--password: is mandatory with this configuration:
Please provide the default password:
<password>

--role: is mandatory with this configuration:
Please provide the default role:
amq

--allow-anonymous | --require-login: is mandatory with this configuration:
Allow anonymous access? (Y/N):
Y

Auto tuning journal ...
done! Your system can make 19.23 writes per millisecond, your journal-buffer-timeout will be 52000

You can now start the broker by executing:

"/var/lib/amq7/mybroker/bin/artemis" run

Or you can run the broker in the background using:

"/var/lib/amq7/mybroker/bin/artemis-service" start
The artemis create command will prompt for mandatory property values only. For the full list of properties available when creating an instance, run the artemis help create command.
The broker instance created by artemis create will have the directory structure detailed in the table below. The location of the broker instance is known as the <broker-instance-dir>.
- Contents of a broker instance directory
| If you want to find… | Look here… |
| Scripts that launch and manage the instance |
|
| Configuration files |
|
| Storage for persistent messages |
|
| Log files |
|
| Temporary files |
|
3.2. Start a Broker Instance
Once the broker is created, use the artemis script in the <broker-instance-dir>/bin directory to start it. For example, to start a broker instance installed at /var/lib/amq7/mybroker, use the following command.
$ /var/lib/amq7/mybroker/bin/artemis run
The broker will produce output similar to the following.
 ____          _   _   _       _        _         __  __  ___  _____
|  _ \ ___  __| | | | | | __ _| |_     / \       |  \/  |/ _ \|___  |
| |_) / _ \/ _` | | |_| |/ _` | __|   / _ \ _____| |\/| | | | |  / /
|  _ <  __/ (_| | |  _  | (_| | |_   / ___ \_____| |  | | |_| | / /
|_| \_\___|\__,_| |_| |_|\__,_|\__| /_/   \_\    |_|  |_|\__\_\/_/

Red Hat A-MQ7 7.0.0.ER12-redhat-1


14:46:15,468 INFO  [org.apache.activemq.artemis.integration.bootstrap] AMQ101000: Starting ActiveMQ Artemis Server
14:46:15,479 INFO  [org.apache.activemq.artemis.core.server] AMQ221000: live Message Broker is starting with configuration Broker Configuration (clustered=false,journalDirectory=./data/journal,bindingsDirectory=./data/bindings,largeMessagesDirectory=./data/large-messages,pagingDirectory=./data/paging)
14:46:15,497 INFO  [org.apache.activemq.artemis.core.server] AMQ221012: Using AIO Journal
14:46:15,525 INFO  [org.apache.activemq.artemis.core.server] AMQ221043: Protocol module found: [artemis-server]. Adding protocol support for: CORE
14:46:15,527 INFO  [org.apache.activemq.artemis.core.server] AMQ221043: Protocol module found: [artemis-amqp-protocol]. Adding protocol support for: AMQP
14:46:15,527 INFO  [org.apache.activemq.artemis.core.server] AMQ221043: Protocol module found: [artemis-hornetq-protocol]. Adding protocol support for: HORNETQ
14:46:15,528 INFO  [org.apache.activemq.artemis.core.server] AMQ221043: Protocol module found: [artemis-mqtt-protocol]. Adding protocol support for: MQTT
14:46:15,529 INFO  [org.apache.activemq.artemis.core.server] AMQ221043: Protocol module found: [artemis-openwire-protocol]. Adding protocol support for: OPENWIRE
14:46:15,530 INFO  [org.apache.activemq.artemis.core.server] AMQ221043: Protocol module found: [artemis-stomp-protocol]. Adding protocol support for: STOMP
14:46:15,825 INFO  [org.apache.activemq.artemis.core.server] AMQ221052: trying to deploy topic jms.topic.myTopic
14:46:15,828 INFO  [org.apache.activemq.artemis.core.server] AMQ221003: Trying to deploy queue jms.queue.DLQ
14:46:15,833 INFO  [org.apache.activemq.artemis.core.server] AMQ221003: Trying to deploy queue jms.queue.ExpiryQueue
14:46:16,062 INFO  [org.apache.activemq.artemis.core.server] AMQ221020: Started Acceptor at localhost:61616 for protocols [CORE,MQTT,AMQP,HORNETQ,STOMP,OPENWIRE]
14:46:16,065 INFO  [org.apache.activemq.artemis.core.server] AMQ221020: Started Acceptor at localhost:5445 for protocols [HORNETQ,STOMP]
14:46:16,069 INFO  [org.apache.activemq.artemis.core.server] AMQ221020: Started Acceptor at localhost:5672 for protocols [AMQP]
14:46:16,071 INFO  [org.apache.activemq.artemis.core.server] AMQ221020: Started Acceptor at localhost:1883 for protocols [MQTT]
14:46:16,073 INFO  [org.apache.activemq.artemis.core.server] AMQ221020: Started Acceptor at localhost:61613 for protocols [STOMP]
14:46:16,073 INFO  [org.apache.activemq.artemis.core.server] AMQ221007: Server is now live
14:46:16,073 INFO  [org.apache.activemq.artemis.core.server] AMQ221001: Apache ActiveMQ Artemis Message Broker version 1.2.0.amq-700006 [amq, nodeID=71ecbb84-176e-11e6-be67-54ee7531eccb]
SLF4J: Failed to load class "org.slf4j.impl.StaticLoggerBinder".
SLF4J: Defaulting to no-operation (NOP) logger implementation
SLF4J: See http://www.slf4j.org/codes.html#StaticLoggerBinder for further details.
INFO  | main | Initialized artemis-plugin plugin
14:46:17,116 INFO  [org.apache.activemq.artemis] AMQ241001: HTTP Server started at http://localhost:8161
14:46:17,116 INFO  [org.apache.activemq.artemis] AMQ241002: Artemis Jolokia REST API available at http://localhost:8161/jolokia
3.3. Run the Examples
A-MQ Broker ships with many example programs that highlight various basic and advanced features of the product. They can be found under <install-dir>/examples. The examples require a supported release of the Java Development Kit (JDK) and Maven version 3.2 to build and execute. Consult Supported Configurations for details about JDK support.
An excellent example to use as a "sanity test" of your installation is the queue example. To build and run the example, navigate to the <install-dir>/examples/features/standard/queue directory and run the mvn verify command.
$ cd <install-dir>/examples/features/standard/queue
$ mvn verify
Maven will then start the broker and run the example program. Once completed the output should look something like the below example. Note that the example may take a long time to complete the first time since Maven will download any missing dependencies required to run the example.
[INFO] Scanning for projects...
[INFO]
[INFO] ------------------------------------------------------------------------
[INFO] Building ActiveMQ Artemis JMS Queue Example 1.2.0.amq-700
[INFO] ------------------------------------------------------------------------
 ...
server-out:11:30:45,534 INFO  [org.apache.activemq.artemis.core.server] AMQ221001: Apache ActiveMQ Artemis Message Broker version 1.2.0.amq-700 [0.0.0.0, nodeID=e748cdbd-232c-11e6-b145-54ee7531eccb]
[INFO] Server started
[INFO]
[INFO] --- artemis-maven-plugin:1.2.0.amq-700:runClient (runClient) @ queue ---
Sent message: This is a text message
server-out:11:30:46,545 INFO  [org.apache.activemq.artemis.core.server] AMQ221003: Trying to deploy queue jms.queue.exampleQueue
Received message: This is a text message
[INFO]
[INFO] --- artemis-maven-plugin:1.2.0.amq-700:cli (stop) @ queue ---
[INFO] ------------------------------------------------------------------------
[INFO] BUILD SUCCESS
[INFO] ------------------------------------------------------------------------
[INFO] Total time: 6.368 s
[INFO] Finished at: 2016-05-26T11:30:47+01:00
[INFO] Final Memory: 44M/553M
[INFO] ------------------------------------------------------------------------
3.4. Review Default Configuration
Now that you have an instance of a broker running, it is time to walk through common configuration elements and the default options that are included when the A-MQ Broker is started "out of the box". Most of the configuration discussed here is found in <broker-instance-dir>/etc/broker.xml, but the last section is dedicated to another configuration file <broker-instance-dir>/etc/bootstrap.xml which as its name implies is used by A-MQ Broker as it first begins execution and so is the first configuration file read.
3.4.1. broker.xml
3.4.1.1. Network Connections
Brokers listen for incoming client connections by using an acceptor configuration element to define the port and protocols a client can use to make connections. Be default A-MQ Broker includes configuration for several acceptors.
broker.xml<configuration> ... <core> ... <acceptors> <!-- Default ActiveMQ Artemis Acceptor. Multi-protocol adapter. Currently supports ActiveMQ Artemis Core, OpenWire, STOMP, AMQP, MQTT, and HornetQ Core. --> <!-- performance tests have shown that openWire performs best with these buffer sizes --> <acceptor name="artemis">tcp://0.0.0.0:61616?tcpSendBufferSize=1048576;tcpReceiveBufferSize=1048576</acceptor> <!-- AMQP Acceptor. Listens on default AMQP port for AMQP traffic.--> <acceptor name="amqp">tcp://0.0.0.0:5672?protocols=AMQP</acceptor> <!-- STOMP Acceptor. --> <acceptor name="stomp">tcp://0.0.0.0:61613?protocols=STOMP</acceptor> <!-- HornetQ Compatibility Acceptor. Enables HornetQ Core and STOMP for legacy HornetQ clients. --> <acceptor name="hornetq">tcp://0.0.0.0:5445?protocols=HORNETQ,STOMP</acceptor> <!-- MQTT Acceptor --> <acceptor name="mqtt">tcp://0.0.0.0:1883?protocols=MQTT</acceptor> </acceptors> ... </core> </configuration>
A connector works as the counterpart to an acceptor. Out of the box, does not have any pre-configured connectors. Connectors are used when the broker needs to communicate to other brokers in its cluster or when remote clients establish connections to the server by using JNDI.
See Configuring Transports for details on acceptors and connectors configuration. For more information on the protocols supported by the broker, refer to Configuring Protocols.
3.4.1.2. Addresses and Queues
A-MQ Broker includes a JMS wrapper for what is known as its Core API, which allows you to define your messaging destinations as either JMS or Core based. For example, the default broker.xml defines two JMS queues, one to handle messages that arrive with no known destination, a Dead Letter Queue (DLQ); and a queue to place messages that have live passed their expiration and therefore should not be routed to a destination.
<configuration>
 <jms xmlns="urn:activemq:jms">
   <queue name="DLQ"/>
   <queue name="ExpiryQueue"/>
 </jms>
 ...
</configuration>
The default configuration also uses the concept of an address-setting to establish a default, or catch all, set of configuration that will be applied to any created queue or topic.
<configuration>
 ...
 <core>
  ...
  <address-settings>
   <!--default for catch all-->
   <address-setting match="#">
      <dead-letter-address>jms.queue.DLQ</dead-letter-address>
      <expiry-address>jms.queue.ExpiryQueue</expiry-address>
      <redelivery-delay>0</redelivery-delay>
      <max-size-bytes>10485760</max-size-bytes>
      <message-counter-history-day-limit>10</message-counter-history-day-limit>
      <address-full-policy>BLOCK</address-full-policy>
   </address-setting>
  </address-settings>
 </core>
</configuration>
Note how the address-setting uses a wildcard syntax to dictate which queues and topics are to have the configuration applied. In this case the single # symbol tells A-MQ Broker to apply the configuration to all queues and topics.
3.4.1.3. Security
A-MQ Broker contains a flexible role-based security model for applying security to queues, based on their addresses. Also, just like an address setting, you can use a wildcard syntax, as does the default configuration.
<configuration>
  ...
  <core>
    ...
    <security-settings>
       <security-setting match="#">
          <permission type="createNonDurableQueue" roles="amq"/>
          <permission type="deleteNonDurableQueue" roles="amq"/>
          <permission type="createDurableQueue" roles="amq"/>
          <permission type="deleteDurableQueue" roles="amq"/>
          <permission type="consume" roles="amq"/>
          <permission type="send" roles="amq"/>
          <!-- we need this otherwise ./artemis data imp wouldn't work -->
          <permission type="manage" roles="amq"/>
       </security-setting>
    </security-settings>
    ...
  </core>
</configuration>
Note the seven types of permission that can be used as part security setting. See Configuring Security for more details on permission types and the rest of security topics.
3.4.1.4. Persistence
By default A-MQ Broker persistence uses an append only file journal that consists of a set of files on disk that are used to save messages, transactions, and other state.
There are several elements that are needed to configure the broker to persist to a message journal. These include the following.
<configuration>
  ...
  <core>
    ...
    <persistence-enabled>true</persistence-enabled>
    <!-- this could be ASYNCIO or NIO -->
    <journal-type>NIO</journal-type>
    <paging-directory>./data/paging</paging-directory>
    <bindings-directory>./data/bindings</bindings-directory>
    <journal-directory>./data/journal</journal-directory>
    <large-messages-directory>./data/large-messages</large-messages-directory>
    <journal-min-files>2</journal-min-files>
    <journal-pool-files>-1</journal-pool-files>
  ...
  </core>
</configuration>
When persistence-enabled is true the journal persists to the directories specified and using the specified journal type of NIO. Alternative journal types are ASYNCIO and JDBC.
For more details on configuring persistence, refer to Configuring Persistence.
3.4.2. bootstrap.xml
The bootstrap configuration file, <broker-instance-dir>/etc/bootstrap.xml, is read when the broker first starts. It is used to configure the web server, security, and the broker configuration file.
<broker xmlns="http://activemq.org/schema">
   <jaas-security domain="activemq"/>
   <server configuration="file:${artemis.instance}/etc/broker.xml"/>
   <!-- The web server is only bound to loalhost by default -->
   <web bind="http://localhost:8161" path="web">
       <app url="jolokia" war="jolokia-war-1.3.2.redhat-1.war"/>
       <app url="hawtio" war="hawtio-web.war"/>
       <app url="artemis-plugin" war="artemis-plugin.war"/>
   </web>
</broker>
Note that you can change the location for the broker.xml configuration file and for the bound url of the web server and its applications, including A-MQ Console.
For more details on the console persistence, see Using A-MQ 7 Console.
Chapter 4. Configuring Network Connections
This chapter provides information about A-MQ Broker network connections and how you configure them. The two primary configuration elements to configure network connection, Acceptors and Connectors, are discussed first. The chapter then turns to the topic of Netty and the role it plays in providing the underlying network connectivity. Lastly, these concepts come together when configuration steps for TCP, HTTP, and TLS/SSL network connections are explained.
4.1. Acceptors
One of the most important concepts in broker transports is the acceptor. Acceptors define the way connections are made to the broker. Below is a typical acceptor that might be in found inside the configuration file broker.xml.
<acceptors>
   <acceptor name="artemis">tcp://localhost:61617</acceptor>
</acceptors>
Note that each acceptors is grouped inside an acceptors element. There is no upper limit to the number of acceptors you can list per server.
The acceptor can also be configured with a set of key, value pairs used to configure the specific transport, the set of valid key-value pairs depends on the specific transport be used and are passed straight through to the underlying transport. These are set on the URI as part of the query, like so:
<acceptor name="artemis">tcp://localhost:61617?sslEnabled=true;key-store-path=/path</acceptor>
For details on connector configuration parameters, see Acceptor and Connector Configuration Parameters.
4.2. Connectors
Whereas acceptors are used on the server to define how the server accepts connections, connectors are used by a client to define how it connects to a server.
Below is a typical connector as defined in a broker.xml configuration file:
<connectors>
   <connector name="netty">tcp://localhost:61617</connector>
</connectors>
Note that connectors are defined inside a connectors element. There is no upper limit to the number of connectors per server.
You typically define connectors on the server, as opposed to defining them on the client, for the following reasons:
- The server needs to know how to connect to other servers. For example, when one server is bridged to another or when a server takes part in a cluster.
- The server is being used by a client to look up JMS connection factory instances. In these cases, JNDI needs to know details of the connection factories used to create client connections. The information is configured on the server and provided to the client when a JNDI lookup is performed. See Configure a Connection on the Client Side for more information.
Like acceptors, connectors have their configuration attached to the query string of their URI. Below is an example of a connector that has the tcpNoDelay parameter set to false, which turns off Nagle’s alogrithm for this connection.
<connector name="netty-connector">tcp://localhost:61616?tcpNoDelay=false</connector>
For details on connector configuration parameters, see Acceptor and Connector Configuration Parameters.
4.3. In VM and Netty Connections
Every acceptor and connector contains a URI that defines the type of connection to create.
Using vm in the URI schema will create an In VM connection, which is used when a broker needs to communicate with another broker running in the same virtual machine.
Using tcp in the URI schema will create a Netty connection. [Netty](http://netty.io/) is a high performance low level network library that allows network connections to be configured in several different ways: using Java IO or NIO, TCP sockets, SSL/TLS, even tunneling over HTTP or HTTPS. Netty also allows for a single port to be used for all messaging protocols. The broker will automatically detect which protocol is being used and direct the incoming message to the appropriate broker handler.
See Configuring Messaging Protocols for details on how to configure protocols for your network connections.
4.4. Configuring In VM Connections
In-VM connections are used by local clients running in the same JVM as the server. The client can be be an application or another broker. For an In VM connection, the authority part of the URI defines a unique server id. In fact, no other part of the URI is needed, so the result is a typically short URI as in the examples below:
<acceptor name="in-vm-acceptor">vm://0</acceptor>
<connector name="in-vm-connector">vm://0</connector>
The above acceptor is configured to accept connections from the server with the id of 0, which is running in the same virtual machine. As for the connector, it defines how to establish an in vm connection to the same server 0.
An In Vm connection can be used when multiple brokers are co-located in the same virtual machine, as part of a high availability solution for example.
4.5. Configuring Netty TCP Connections
For Netty connections the host and the port of the URI define what host and port the connection will be used for the connection.
<acceptor name="netty-acceptor">tcp://localhost:61617</acceptor>
<connector name="netty-connector">tcp://localhost:61617</connector>
Netty TCP is a basic, unencrypted, TCP-based transport. It can be configured to use blocking Java IO or the newer, non blocking Java NIO. Java NIO is preferred for better scalability with many concurrent connections. However, using the old IO can sometimes give you better latency than NIO when you are less worried about supporting many thousands of concurrent connections.
If you are running connections across an untrusted network, please bear in mind this network connection is unencrypted. You may want to consider using an SSL or HTTPS configuration to encrypt messages sent over this connection if encryption is a priority. Please refer to Configuring Transport Layer Security for details.
When using the Netty TCP transport, all connections are initiated from the client side. In other words, the server does not initiate any connections to the client, which works well with firewall policies that force connections to be initiated from one direction.
All the valid Netty transport keys are defined in the class org.apache.activemq.artemis.core.remoting.impl.netty.TransportConstants. Most parameters can be used either with acceptors or connectors, some only work with acceptors.
For details on configuration parameters, see Acceptor and Connector Configuration Parameters.
4.6. Configuring Netty HTTP Connections
Netty HTTP tunnels packets over the HTTP protocol. It can be useful in scenarios where firewalls only allow HTTP traffic to pass.
To enable a connection for HTTP set the httpEnabled parameter to true on the connector’s URI. There are no changes needed or an acceptor, simply use the same URI configuration as any non-HTTP connection. The configuration below is a basic example of an HTTP-enabled acceptor and connector.
<connector name="netty-connector">tcp://localhost:8080?httpEnabled=true</connector>
<acceptor name="netty-acceptor">tcp://localhost:8080 </acceptor>
For a full working example showing how to use Netty HTTP, see the http-transport example, located under <install-dir>/examples/standard.
Netty HTTP uses the same properties as Netty TCP but also has its own configuration properties. For details on HTTP-related and other configuration parameters, see Acceptor and Connector Configuration Parameters.
4.7. Configuring Netty TLS/SSL Connections
You can also configure connections to use TLS/SSL. Please refer to Configuring Transport Layer Security for details.
4.8. Configuring Connections on the Client Side
Connectors are also used indirectly in client applications. For example, a connector is created when client code programmatically configures a core ClientSessionFactory to communicate with a broker. In this case there is no need to define a connector in the server side configuration. Instead, configuration is defined programmatically in the client code and tells the ClientSessionFactory which connection to use.
Below is an example of creating a ClientSessionFactory which will connect directly to an acceptor. It uses the standard Netty TCP transport and will connect on port 61617 of localhost, the default host location.
Map<String, Object> connectionParams = new HashMap<String, Object>();

connectionParams.put(org.apache.activemq.artemis.core.remoting.impl.netty.TransportConstants.PORT_PROP_NAME,
                    61617);

TransportConfiguration transportConfiguration =
    new TransportConfiguration(
    "org.apache.activemq.artemis.core.remoting.impl.netty.NettyConnectorFactory",
    connectionParams);

ServerLocator locator = ActiveMQClient.createServerLocatorWithoutHA(transportConfiguration);

ClientSessionFactory sessionFactory = locator.createClientSessionFactory();

ClientSession session = sessionFactory.createSession(...);
Similarly, if you are using JMS, you can configure the JMS connection factory directly on the client side without having to define a connector on the server side.
Map<String, Object> connectionParams = new HashMap<String, Object>();

connectionParams.put(org.apache.activemq.artemis.core.remoting.impl.netty.TransportConstants.PORT_PROP_NAME, 61617);

TransportConfiguration transportConfiguration =
    new TransportConfiguration(
    "org.apache.activemq.artemis.core.remoting.impl.netty.NettyConnectorFactory",
    connectionParams);

ConnectionFactory connectionFactory = ActiveMQJMSClient.createConnectionFactoryWithoutHA(JMSFactoryType.CF, transportConfiguration);

Connection jmsConnection = connectionFactory.createConnection();
Chapter 5. Configuring Protocols
A-MQ Broker has a pluggable protocol architecture and supports several wire protocols. Each protocol is shipped as its own module (or jar) and will be available if the jar is available on the classpath.
The broker ships with support for the following protocols:
In addition to the protocols above, the broker also offers support for its own highly performant native protocol "Core".
In order to make use of a particular protocol, a transport must be configured with the desired protocol enabled. See [Configure Network Connections] for more information.
The default configuration shipped with the broker distribution comes with a number of acceptors already defined, one for each of the above protocols plus a generic acceptor that supports all protocols. To enable a protocol on a particular acceptor simply add a url parameter "protocol=AMQP,STOMP" to the acceptor url. Where the value of the parameter is a comma separated list of protocol names. If the protocol parameter is omitted from the url all protocols are enabled.
<!-- The following example enables only MQTT on port 1883 -->
<acceptors>
   <acceptor>tcp://localhost:1883?protocols=MQTT</acceptor>
</acceptors>

<!-- The following example enables MQTT and AMQP on port 61617 -->
<acceptors>
   <acceptor>tcp://localhost:1883?protocols=MQTT,AMQP</acceptor>
</acceptors>

<!-- The following example enables all protocols on 61616 -->
<acceptors>
   <acceptor>tcp://localhost:61616</acceptor>
</acceptors>
5.1. AMQP
The broker supports the [AMQP 1.0](https://www.oasis-open.org/committees/tc_home.php?wg_abbrev=amqp) specification. To enable AMQP configure a Netty Acceptor to receive AMQP clients, like so:
<acceptor name="amqp-acceptor">tcp://localhost:5672?protocols=AMQP</acceptor>
The broker will then accept AMQP 1.0 clients on port 5672 which is the default AMQP port.
5.1.1. Security
The broker accepts AMQP SASL Authentication and will use this to map onto the underlying session created for the connection so you can use the normal broker security configuration.
5.1.2. Links
An AMQP link is a uni-directional transport for messages between a source and a target, i.e. a client and the broker. A link will have an endpoint of which there are two kinds, a sender and a receiver. At the broker, a sender will have its messages converted into a broker message and forwarded to its destination or target. A receiver will map onto a broker’s consumer and convert broker messages back into AMQP messages before being delivered.
5.1.3. Destinations
If an AMQP link is dynamic, a temporary queue will be created and either the remote source or the remote target address will be set to the name of the temporary queue. If the link is not dynamic, the address of the remote target or source will be used for the queue. If the remote target or source does not exist, an exception will be sent.
Note
For the next version we will add a flag to automatically create durable queue but for now you will have to add them via the configuration
5.1.4. Topics
Although AMQP has no notion of topics it is still possible to treat AMQP consumers or receivers as subscriptions rather than just consumers on a queue. By default any receiving link that attaches to an address with the prefix jms.topic. will be treated as a subscription and a subscription queue will be created. If the Terminus Durability is either UNSETTLED_STATE or CONFIGURATION then the queue will be made durable, similar to a JMS durable subscription and given a name made up from the container ID and the link name, something like my-container-id:my-link-name. if the Terminus Durability is configured as NONE then a volatile queue will be created.
The prefix can be changed by configuring the Acceptor and setting the pubSubPrefix like so
<acceptor name="amqp">tcp://0.0.0.0:5672?protocols=AMQP;pubSubPrefix=foo.bar.</acceptor>
A-MQ Broker also supports the qpid-jms client and will respect its use of topics regardless of the prefix used for the address.
5.1.5. Coordinators and Handling Transactions
An AMQP links target can also be a Coordinator, the Coordinator is used to handle transactions. If a coordinator is used the underlying HormetQ session will be transacted and will be either rolled back or committed via the coordinator.
Note
AMQP allows the use of multiple transactions per session,
amqp:multi-txns-per-ssn, however in this version the broker will only support single transactions per session
5.2. MQTT
MQTT is a light weight, client to server, publish / subscribe messaging protocol. MQTT has been specifically designed to reduce transport overhead (and thus network traffic) and code footprint on client devices. For this reason MQTT is ideally suited to constrained devices such as sensors and actuators and is quickly becoming the defacto standard communication protocol for Internet of Things(IoT).
The broker supports MQTT v3.1.1 (and also the older v3.1 code message format). To enable MQTT, simply add an appropriate acceptor with the MQTT protocol enabled. For example:
<acceptor name="mqtt">tcp://localhost:1883?protocols=MQTT</acceptor>
By default the configuration created for the broker has the above acceptor already defined, MQTT is also active by default on the generic acceptor defined on port 61616 (where all protocols are enabled), in the out of the box configuration.
The best source of information on the MQTT protocol is in the specification. The MQTT v3.1.1 specification can be downloaded from the OASIS website here: http://docs.oasis-open.org/mqtt/mqtt/v3.1.1/os/mqtt-v3.1.1-os.html
Some note worthy features of MQTT are explained below:
5.2.1. Quality of Service
MQTT offers 3 quality of service levels.
Each message (or topic subscription) can define a quality of service that is associated with it. The quality of service level defined on a topic is the maximum level a client is willing to accept. The quality of service level on a message is the desired quality of service level for this message. The broker will attempt to deliver messages to subscribers at the highest quality of service level based on what is defined on the message and topic subscription.
Each quality of service level offers a level of guarantee by which a message is sent or received:
- Quality of Service(QoS) 0: AT MOST ONCE: Guarantees that a particular message is only ever received by the subscriber a maximum of one time. This does mean that the message may never arrive. The sender and the receiver will attempt to deliver the message, but if something fails and the message does not reach its destination (say due to a network connection) the message may be lost. This QoS has the least network traffic overhead and the least burden on the client and the broker and is often useful for telemetry data where it does not matter if some of the data is lost.
- QoS 1: AT LEAST ONCE: Guarantees that a message will reach it’s intended recipient one or more times. The sender will continue to send the message until it receives an acknowledgment from the recipient, confirming it has received the message. The result of this QoS is that the recipient may receive the message multiple times, and also increases the network overhead than QoS 0, (due to acks). In addition more burden is placed on the sender as it needs to store the message and retry should it fail to receive an ack in a reasonable time.
- QoS 2: EXACTLY ONCE: The most costly of the QoS (in terms of network traffic and burden on sender and receiver) this QoS will ensure that the message is received by a recipient exactly one time. This ensures that the receiver never gets any duplicate copies of the message and will eventually get it, but at the extra cost of network overhead and complexity required on the sender and receiver.
5.2.2. Retained Messages
MQTT has an interesting feature in which messages can be "retained" for a particular address. This means that once a retain message has been sent to an address, any new subscribers to that address will receive the last sent retain message before any others messages, this happens even if the retained message was sent before a client has connected or subscribed. An example of where this feature might be useful is in environments such as IoT where devices need to quickly get the current state of a system when they are on boarded into a system.
5.2.3. Will Messages
A will message can be sent when a client initially connects to a broker. Clients are able to set a "will message" as part of the connect packet. If the client abnormally disconnects, say due to a device or network failure the broker will proceed to publish the will message to the specified address (as defined also in the connect packet). Other subscribers to the will topic receive the will message and can react to it saccordingly. This feature can be useful in an IoT style scenario to detect errors across a potentially large scale deployment of devices.
5.2.4. Wild card subscriptions
MQTT addresses are hierarchical much like a file system, and use "/" character to separate hierarchical levels. Subscribers are able to subscribe to specific topics or to whole branches of a hierarchy.
To subscribe to branches of an address hierarchy a subscriber can use wild cards.
There are 2 types of wild card in MQTT:
- # Multi level wild card. Adding this wild card to an address would match all branches of the address hierarchy under a specified node. For example: /uk/# Would match /uk/cities, /uk/cities/newcastle and also /uk/rivers/tyne. Subscribing to an address "#" would result in subscribing to all topics in the broker. This can be useful, but should be done so with care since it has significant performance implications.
- + Single level wild card. Matches a single level in the address hierarchy. For example /uk/+/stores would match /uk/newcastle/stores but not /uk/cities/newcastle/stores.
5.3. OpenWire
The broker supports the [OpenWire](http://activemq..org/openwire.html) protocol so that a broker JMS client can talk directly to a broker. To enable OpenWire support configure a Netty Acceptor like so:
<acceptor name="openwire-acceptor">tcp://localhost:61616?protocols=OPENWIRE</acceptor>
The broker will then listens on port 61616 for incoming openwire commands. Please note the "protocols" option is not mandatory here. The openwire configuration conforms to the brokers "Single Port" feature. Please refer to [Configuring Single Port](#configuring-transports.single-port) for details.
Please refer to the openwire example for more coding details.
Currently we support OpenWire clients that are using standard JMS APIs. In the future we will get more support for some advanced, OpenWire specific features into the broker.
5.4. Stomp
Stomp is a text-orientated wire protocol that allows Stomp clients to communicate with Stomp Brokers. The broker supports Stomp 1.0, 1.1 and 1.2.
Stomp clients are available for several languages and platforms making it a good choice for interoperability.
5.4.1. Native Stomp support
The broker provides native support for Stomp. To be able to send and receive Stomp messages, configure a NettyAcceptor with a protocols parameter set to have stomp:
<acceptor name="stomp-acceptor">tcp://localhost:61613?protocols=STOMP</acceptor>
With this configuration, the broker will accept Stomp connections on the port 61613 (which is the default port of the Stomp brokers).
See the stomp example located under <install-dir>/examples/protocols which shows how to configure a broker with Stomp.
5.4.2. Limitations
The broker currently does not support virtual hosting, which means the 'host' header in CONNECT frame will be ignored.
Message acknowledgements are not transactional. The ACK frame can not be part of a transaction (it will be ignored if its transaction header is set).
5.4.3. Message IDs
When receiving Stomp messages via a JMS consumer or a QueueBrowser, the messages by default will not contain any JMS properties, such as JMSMessageID. Because this may inconvenience clients who want to use an ID, the broker provides a parameter to set a message ID on each incoming Stomp message. If you want each Stomp message to have a unique ID, just set the stompEnableMessageId to true, as in the example below:
<acceptor name="stomp-acceptor">tcp://localhost:61613?protocols=STOMP;stompEnableMessageId=true</acceptor>
When the server starts with the above setting, each stomp message sent through this acceptor will have an extra property added. The property key is amq-message-id and the value is a String representation of a long type internal message id prefixed with “STOMP”, like:
amq-message-id : STOMP12345
If stomp-enable-message-id is not specified in the configuration, the default is false.
5.4.4. Handling Large Messages
Stomp clients may send very large bodies of frames which can exceed the size of the brokers server’s internal buffer, causing unexpected errors. To prevent this situation from happening, the broker provides a Stomp configuration attribute stompMinLargeMessageSize. This attribute can be configured inside a stomp acceptor, as a parameter. For example:
<acceptor name="stomp-acceptor">tcp://localhost:61613?protocols=STOMP;stompMinLargeMessageSize=10240</acceptor>
The type of this attribute is integer. When this attributed is configured, the broker will check the size of the body of each Stomp frame coming from connections established with this acceptor. If the size of the body is equal to or greater than the value of stompMinLargeMessageSize, the message will be persisted as a large message. When a large message is delivered to a stomp consumer, the HorentQ server will automatically handle the conversion from a large message to a normal message, before sending it to the client.
If a large message is compressed, the server will uncompressed it before sending it to stomp clients. The default value of stompMinLargeMessageSize is the same as the default value of [min-large-message-size](#large-messages.core.config).
5.4.5. Heart-beating
The broker specifies a minimum value for both client and server heart-beat intervals. The minimum interval for both client and server heartbeats is 500 milliseconds. That means if a client sends a CONNECT frame with heartbeat values lower than 500, the server will default the value to 500 milliseconds regardless of the values of the heart-beat header in the frame.
5.4.5.1. Connection-ttl
STOMP clients should always send a DISCONNECT frame before closing their connections. In this case the server will clear up any server side resources such as sessions and consumers synchronously. However if STOMP clients exit without sending a DISCONNECT frame or if they crash the server will have no way of knowing immediately whether the client is still alive or not. STOMP connections therefore default to a connection-ttl value of 1 minute. This value can be overridden using connection-ttl-override.
If you need a specific connectionTtl for your stomp connections without affecting the connectionTtlOverride setting, you can configure your stomp acceptor with the connectionTtl property, which is used to set the ttl for connections that are created from that acceptor. For example:
<acceptor name="stomp-acceptor">tcp://localhost:61613?protocols=STOMP;connectionTtl=20000</acceptor>
The above configuration will make sure that any stomp connection that is created from that acceptor will have its connection-ttl set to 20 seconds.
Note
Please note that the STOMP protocol version 1.0 does not contain any heartbeat frame. It is therefore the user’s responsibility to make sure data is sent within connection-ttl or the server will assume the client is dead and clean up server side resources. With
Stomp 1.1users can use heart-beats to maintain the life cycle of stomp connections.
5.4.6. Sending and Consuming Stomp Messages from JMS or A-MQ Broker Core API
Stomp is mainly a text-orientated protocol. To make it simpler to interoperate with JMS and broker Core API, our Stomp implementation checks for presence of the content-length header to decide how to map a Stomp message to a JMS message or a Core message.
If the Stomp message does not have a content-length header, it will be mapped to a JMS TextMessage or a Core message with a single nullable SimpleString in the body buffer.
Alternatively, if the Stomp message has a content-length header, it will be mapped to a JMS BytesMessage or a Core message with a byte[] in the body buffer.
The same logic applies when mapping a JMS message or a Core message to Stomp. A Stomp client can check the presence of the content-length header to determine the type of the message body (String or bytes).
5.4.7. Mapping Destinations to A-MQ Broker Addresses and Queues
Stomp clients deal with destinations when sending messages and subscribing. Destination names are string values which are mapped to some form of destination on the server - how the server translates these is left to the server implementation.
In brokers, these destinations are mapped to addresses and queues. When a Stomp client sends a message (using a SEND frame), the specified destination is mapped to an address. When a Stomp client subscribes (or unsubscribes) for a destination (using a SUBSCRIBE or UNSUBSCRIBE frame), the destination is mapped to a broker queue.
5.4.8. JMS Destinations
JMS destinations are also mapped to broker addresses and queues. If you want to use Stomp to send messages to JMS destinations, the Stomp destinations must follow the same convention:
Send or subscribe to a JMS Queue by prepending the queue name by
jms.queue.. For example, to send a message to theordersJMS Queue, the Stomp client must send the frame:SEND destination:jms.queue.orders hello queue orders ^@
Send or subscribe to a JMS Topic by prepending the topic name by
jms.topic.. For example to subscribe to thestocksJMS Topic, the Stomp client must send the frame:SUBSCRIBE destination:jms.topic.stocks ^@
Chapter 6. Configuring Destinations
A-MQ Broker implements its own messaging API known as the Core API. Because many users will be more comfortable using JMS, A-MQ Broker provides a JMS-based wrapper around the Core API. Including both the Core API and the JMS wrapper gives you the option to build agnostic messaging applications or to build JMS-based applications. This chapter will show you both methods, Core and JMS, and will introduce you to the A-MQ Broker concept of address settings. As you’ll see any queue and topic is ultimately bound to an address setting.
6.1. Queues
There are two types of queues that can be configured in the broker: a JMS queue and a Core queue. If you want a queue that is exposed to a JMS client and is also manageable via the JMS Management resources, then you should configure a JMS queue. This is configured in the jms root element in the <broker-instance-dir>/etc/broker.xml configuration file.
<jms xmlns="urn:activemq:jms">
   <queue name="myQueue"/>
</jms>
This example creates a durable JMS queue called myQueue. There are two optional parameters that can also be configured on a JMS queue.
Table 6.1. Optional JMS Queue Parameters
| Parameter | Description | Default Value |
|---|---|---|
|
| Whether the queue and its messages are persisted | True |
|
| A message selector to filter messages arriving on the queue | null |
A JMS queue creates a Core queue under the covers using the jms.queue. prefix for the queue name and address.
If you do not want to expose the queue to a JMS client or manage it using the JMS management resources, you can use a Core queue. This is configured in the queues element within the core root element found in the <broker-instance-dir>/etc/broker.xml configuration file.
<core xmlns="urn:activemq:core">
   <queues>
      <queue name="myQueue">
         <address>myAddress</address>
      </queue>
   </queues>
</core>
This will create a Core queue named myQueue with the address myAddress. Messages sent to the address myAddress will be forwarded to the queue myQueue. Consumers that consume from myQueue will receive the messages. Note that the optional parameters durable and filter serve the same purpose as durable and selector for JMS queues.
If you are using any other client apart from the A-MQ Core JMS client you can interact with JMS queues by adding the prefix jms.queue..
For more details on how queues interoperate with different protocols, refer to Configuring Protocols.
6.2. Topics
JMS Topics are fully supported and are implemented as facades that wrap A-MQ Broker queues and addresses. Like queues, topics are configured in the jms root element found in the <broker-instance-dir>/etc/broker.xml configuration file.
<jms xmlns="urn:activemq:jms">
   <topic name="myTopic"/>
</jms>
This example creates a JMS topic called myTopic which can be used with a JMS client.
If you are using any other client apart from the A-MQ Core JMS client you can interact with a JMS topic by adding the prefix jms.topic.. Messages sent to this address will be forwarded to any Core queues with this address. For receivers, this differs depending on the protocol.
For a details on how JMS topics interoperate with different protocols, refer to Configuring Protocols.
6.3. Address Settings
A-MQ Broker has several configurable options which control aspects of how and when a message is delivered, how many attempts should be made, and when the message expires. These configuration options all exist within the <address-setting> configuration element. You can have A-MQ Broker apply a single <address-setting> to multiple destinations by using a wildcard syntax.
The A-MQ Broker Wildcard Syntax
Apache ActiveMQ Artemis uses a specific syntax for representing wildcards in security settings, address settings and when creating consumers.
The syntax is similar to that used by AMQP.
An Apache ActiveMQ Artemis wildcard expression contains words delimited by the character ‘.’ (full stop).
The special characters ‘=’ and ‘*’ also have special meaning and can take the place of a word.
The character ‘=’ means 'match any sequence of zero or more words'.
The character ‘*’ means 'match a single word'.
The examples in the table below illustrate how wildcards are used to match a set of addresses.
Table 6.2. Wildcard Examples
| Example | Description |
|---|---|
| news.europe.# |
Matches |
| news.* |
Matches |
| news.*.sport |
Matches |
The use of a single # for the name attribute makes this default address-setting the configuration to be used for all destinations since # matches any address. You can continue to apply this catch-all configuration to all of your addresses, or you can add a new address-setting for each address or group of addresses that requires its own configuration set.
Chapter 7. Configuring Security
Security across the broker can be enabled or disabled via <security-enabled> in the <core> element of the broker.xml configuration file.
To disable security specify false for <security-enabled>.
To enable security specify true for <security-enabled>. Security is enabled by default.
For performance reasons security is cached and invalidated every so often. To change this period set the property security-invalidation-interval, which is in milliseconds. The default is 10000.
7.1. Configuring Authentication
Support for authentication is provided by pluggable "login modules" based on the Java Authentication and Authorization Service (JAAS) specification. A-MQ Broker includes login modules to cover most use cases. Per JAAS, login modules are configured in a configuration file called login.config. In short, the file defines:
-
An alias for a configuration (e.g.
activemq). -
The implementation class (e.g.,
org.apache.activemq.artemis.spi.core.security.jaas.PropertiesLoginModule). -
A flag which indicates whether the success of the LoginModule is
required,requisite,sufficient, oroptional. - A list of configuration options specific to the login module implementation.
By default, the location and name of login.config is specified on the command line which is set by etc/artemis.profile on linux and etc\artemis.profile.cmd on Windows.
See Oracle’s tutorial for more information on how to use login.config.
Below are some of the most common use cases addressed by the login modules that are included with A-MQ Broker.
7.1.1. Configuring Guest Authentication
Aside from having no authentication at all, "anonymous access" is the most basic configuration. In this configuration, any user who connects without credentials or with the wrong credentials will be authenticated automatically and assigned a specific user and role. This functionality is provided by the "Guest" login module.
activemq {
  org.apache.activemq.artemis.spi.core.security.jaas.GuestLoginModule required
      org.apache.activemq.jaas.guest.user="guest"
      org.apache.activemq.jaas.guest.role="guest";
};
In this configuration the "Guest" login module will assign users the username "guest" and the role "guest". This is relevant for role-based authorization which is discussed in a subsequent section.
The "entry" is "activemq" and that name would be referenced in bootstrap.xml like so:
<jaas-security domain="activemq"/>
Guest Login Module Details
The guest login module allows users without credentials (and, depending on how it is configured, possibly also users with invalid credentials) to access the broker. It is implemented by org.apache.activemq.artemis.spi.core.security.jaas.GuestLoginModule.
-
org.apache.activemq.jaas.guest.user- the user name to assign; default is "guest" -
org.apache.activemq.jaas.guest.role- the role name to assign; default is "guests" -
credentialsInvalidate- boolean flag; iftrue, reject login requests that include a password (i.e. guest login succeeds only when the user does not provide a password); default isfalse -
debug- boolean flag; iftrue, enable debugging; this is used only for testing or debugging; normally, it should be set tofalse, or omitted; default isfalse
It is common for the guest login module to be chained with another login module, such as a properties login module. Read more about that use-case in the Section 7.1.5, “Configuring Multiple Login Modules for Authentication” section.
7.1.2. Configuring Basic User and Password Authentication
When basic username and password validation is required the simplest option is to use the "Properties" login module. This login module will check the user’s credentials against a set of local property files. Here’s an example login.config:
activemq {
    org.apache.activemq.artemis.spi.core.security.jaas.PropertiesLoginModule required
        org.apache.activemq.jaas.properties.user="users.properties"
        org.apache.activemq.jaas.properties.role="roles.properties";
};
The user properties file follows the pattern of user=password. For example:
user1=secret
user2=swordfish
user3=myPassword
There are 3 users defined here - user1, user2, and user3. The user1 user has a password of secret while user2 has a password of swordfish and user3 has a password of myPassword.
The role properties file follows the pattern of role=user where the user can be a comma delimited list of users in that particular role. For example:
admin=user1,user2
developer=user3
There are 2 groups defined here - admin and developer. The users user1 and user2 belong to the admin role and the user user3 belongs to the developer role.
The "entry" is "activemq" and that name would be referenced in bootstrap.xml like so:
<jaas-security domain="activemq"/>
Basic User and Password Login Module Details
The JAAS properties login module provides a simple store of authentication data, where the relevant user data is stored in a pair of flat files. This is convenient for demonstrations and testing, but for an enterprise system, the integration with LDAP is preferable. It is implemented by org.apache.activemq.artemis.spi.core.security.jaas.PropertiesLoginModule.
-
org.apache.activemq.jaas.properties.user- the path to the file which contains user and password properties -
org.apache.activemq.jaas.properties.role- the path to the file which contains user and role properties -
debug- boolean flag; iftrue, enable debugging; this is used only for testing or debugging; normally, it should be set tofalse, or omitted; default isfalse
In the context of the properties login module, the users.properties file consists of a list of properties of the form, UserName=Password. For example, to define the users system, user, and guest, you could create a file like the following:
system=manager
user=password
guest=password
The roles.properties file consists of a list of properties of the form, Role=UserList, where UserList is a comma-separated list of users. For example, to define the roles admins, users, and guests, you could create a file like the following:
admins=system
users=system,user
guests=guest
7.1.3. Configuring Certificate Based Authentication
The JAAS certificate authentication login module must be used in combination with SSL and the clients must be configured with their own certificate. In this scenario, authentication is actually performed during the SSL/TLS handshake, not directly by the JAAS certificate authentication plug-in.
The role of the plug-in is as follows:
- To further constrain the set of acceptable users, because only the user DNs explicitly listed in the relevant properties file are eligible to be authenticated.
- To associate a list of groups with the received user identity, facilitating integration with authorization.
- To require the presence of an incoming certificate (by default, the SSL/TLS layer is configured to treat the presence of a client certificate as optional).
The JAAS certificate login module stores a collection of certificate DNs in a pair of flat files. The files associate a username and a list of group IDs with each DN.
The certificate login module is implemented by org.apache.activemq.artemis.spi.core.security.jaas.TextFileCertificateLoginModule.
The following activemq login entry shows how to configure certificate login module in the login.config file:
activemq {
    org.apache.activemq.artemis.spi.core.security.jaas.TextFileCertificateLoginModule
        debug=true
        org.apache.activemq.jaas.textfiledn.user="users.properties"
        org.apache.activemq.jaas.textfiledn.role="roles.properties";
};
In the preceding example, the JAAS realm is configured to use a single org.apache.activemq.artemis.spi.core.security.jaas.TextFileCertificateLoginModule login module. The options supported by this login module are as follows:
-
debug- boolean flag; if true, enable debugging; this is used only for testing or debugging; normally, it should be set tofalse, or omitted; default isfalse -
org.apache.activemq.jaas.textfiledn.user- specifies the location of the user properties file (relative to the directory containing the login configuration file). -
org.apache.activemq.jaas.textfiledn.role- specifies the location of the role properties file (relative to the directory containing the login configuration file).
In the context of the certificate login module, the users.properties file consists of a list of properties of the form, UserName=StringifiedSubjectDN. For example, to define the users, system, user, and guest, one could create a file like the following:
system=CN=system,O=Progress,C=US
user=CN=humble user,O=Progress,C=US
guest=CN=anon,O=Progress,C=DE
Each username is mapped to a subject DN, encoded as a string (where the string encoding is specified by RFC 2253). For example, the system username is mapped to the CN=system,O=Progress,C=US subject DN. When performing authentication, the plug-in extracts the subject DN from the received certificate, converts it to the standard string format, and compares it with the subject DNs in the users.properties file by testing for string equality. Consequently, you must be careful to ensure that the subject DNs appearing in the users.properties file are an exact match for the subject DNs extracted from the user certificates.
Note: Technically, there is some residual ambiguity in the DN string format. For example, the domainComponent attribute could be represented in a string either as the string, DC, or as the OID, 0.9.2342.19200300.100.1.25. Normally, you do not need to worry about this ambiguity. But it could potentially be a problem, if you changed the underlying implementation of the Java security layer.
The easiest way to obtain the subject DNs from the user certificates is by invoking the keytool utility to print the certificate contents. To print the contents of a certificate in a keystore, perform the following steps:
Export the certificate from the keystore file into a temporary file. For example, to export the certificate with alias
broker-localhostfrom thebroker.kskeystore file, enter the following command:keytool -export -file broker.export -alias broker-localhost -keystore broker.ks -storepass password
After running this command, the exported certificate is in the file,
broker.export.Print out the contents of the exported certificate. For example, to print out the contents of
broker.export, enter the following command:keytool -printcert -file broker.export
Which should produce output similar to that shown here:
Owner: CN=localhost, OU=broker, O=Unknown, L=Unknown, ST=Unknown, C=Unknown
Issuer: CN=localhost, OU=broker, O=Unknown, L=Unknown, ST=Unknown, C=Unknown
Serial number: 4537c82e
Valid from: Thu Oct 19 19:47:10 BST 2006 until: Wed Jan 17 18:47:10 GMT 2007
Certificate fingerprints:
         MD5:  3F:6C:0C:89:A8:80:29:CC:F5:2D:DA:5C:D7:3F:AB:37
         SHA1: F0:79:0D:04:38:5A:46:CE:86:E1:8A:20:1F:7B:AB:3A:46:E4:34:5C
The string following
Owner:gives the subject DN. The format used to enter the subject DN depends on your platform. TheOwner:string above could be represented as eitherCN=localhost,\ OU=broker,\ O=Unknown,\ L=Unknown,\ ST=Unknown,\ C=UnknownorCN=localhost,OU=broker,O=Unknown,L=Unknown,ST=Unknown,C=Unknown.
The roles.properties file consists of a list of properties of the form, Role=UserList, where UserList is a comma-separated list of users. For example, to define the roles admins, users, and guests, you could create a file like the following:
admins=system
users=system,user
guests=guest
7.1.4. Configuring LDAP Authentication
The LDAP login module enables authentication and authorization by checking the incoming credentials against user data stored in a central X.500 directory server. It is implemented by org.apache.activemq.artemis.spi.core.security.jaas.LDAPLoginModule.
Here’s an example login.config:
activemq {
    org.apache.activemq.artemis.spi.core.security.jaas.LDAPLoginModule required
        debug=true
        initialContextFactory=com.sun.jndi.ldap.LdapCtxFactory
        connectionURL="ldap://localhost:1024"
        connectionUsername="uid=admin,ou=system"
        connectionPassword=secret
        connectionProtocol=s
        authentication=simple
        userBase="ou=system"
        userSearchMatching="(uid={0})"
        userSearchSubtree=false
        roleBase="ou=system"
        roleName=cn
        roleSearchMatching="(member=uid={1},ou=system)"
        roleSearchSubtree=false
        ;
};-
initialContextFactory- must always be set tocom.sun.jndi.ldap.LdapCtxFactory -
connectionURL- specify the location of the directory server using an ldap URL, ldap://Host:Port. One can optionally qualify this URL, by adding a forward slash,/, followed by the DN of a particular node in the directory tree. For example, ldap://ldapserver:10389/ou=system. -
authentication- specifies the authentication method used when binding to the LDAP server. Can take either of the values,simple(username and password) ornone(anonymous). -
connectionUsername- the DN of the user that opens the connection to the directory server. For example,uid=admin,ou=system. Directory servers generally require clients to present username/password credentials in order to open a connection. -
connectionPassword- the password that matches the DN fromconnectionUsername. In the directory server, in the DIT, the password is normally stored as auserPasswordattribute in the corresponding directory entry. -
connectionProtocol- any value is supported but is effectively unused. In the future, this option may allow one to select the Secure Socket Layer (SSL) for the connection to the directory server. This option must be set explicitly because it has no default value. -
userBase- selects a particular subtree of the DIT to search for user entries. The subtree is specified by a DN, which specifies the base node of the subtree. For example, by setting this option toou=User,ou=ActiveMQ,ou=system, the search for user entries is restricted to the subtree beneath theou=User,ou=ActiveMQ,ou=systemnode. userSearchMatching- specifies an LDAP search filter, which is applied to the subtree selected byuserBase. Before passing to the LDAP search operation, the string value provided here is subjected to string substitution, as implemented by thejava.text.MessageFormatclass. Essentially, this means that the special string,{0}, is substituted by the username, as extracted from the incoming client credentials.After substitution, the string is interpreted as an LDAP search filter, where the LDAP search filter syntax is defined by the IETF standard, RFC 2254. A short introduction to the search filter syntax is available from Oracle’s JNDI tutorial, Search Filters.
For example, if this option is set to
(uid={0})and the received username isjdoe, the search filter becomes(uid=jdoe)after string substitution. If the resulting search filter is applied to the subtree selected by the user base,ou=User,ou=ActiveMQ,ou=system, it would match the entry,uid=jdoe,ou=User,ou=ActiveMQ,ou=system(and possibly more deeply nested entries, depending on the specified search depth—see theuserSearchSubtreeoption).-
userSearchSubtree- specify the search depth for user entries, relative to the node specified byuserBase. This option is a boolean.falseindicates it will try to match one of the child entries of theuserBasenode (maps tojavax.naming.directory.SearchControls.ONELEVEL_SCOPE).trueindicates it will try to match any entry belonging to the subtree of theuserBasenode (maps tojavax.naming.directory.SearchControls.SUBTREE_SCOPE). -
userRoleName- specifies the name of the multi-valued attribute of the user entry that contains a list of role names for the user (where the role names are interpreted as group names by the broker’s authorization plug-in). If this option is omitted, no role names are extracted from the user entry. -
roleBase- if role data is stored directly in the directory server, one can use a combination of role options (roleBase,roleSearchMatching,roleSearchSubtree, androleName) as an alternative to (or in addition to) specifying theuserRoleNameoption. This option selects a particular subtree of the DIT to search for role/group entries. The subtree is specified by a DN, which specifies the base node of the subtree. For example, by setting this option toou=Group,ou=ActiveMQ,ou=system, the search for role/group entries is restricted to the subtree beneath theou=Group,ou=ActiveMQ,ou=systemnode. -
roleName- specifies the attribute type of the role entry that contains the name of the role/group (e.g. C, O, OU, etc.). If this option is omitted the role search feature is effectively disabled. roleSearchMatching- specifies an LDAP search filter, which is applied to the subtree selected byroleBase. This works in a similar manner to theuserSearchMatchingoption, except that it supports two substitution strings. The substitution string{0}substitutes the full DN of the matched user entry (that is, the result of the user search). For example, for the user,jdoe, the substituted string could beuid=jdoe,ou=User,ou=ActiveMQ,ou=system. The substitution string{1}substitutes the received username. For example,jdoe.If this option is set to
(member=uid={1})and the received username isjdoe, the search filter becomes(member=uid=jdoe)after string substitution (assuming ApacheDS search filter syntax). If the resulting search filter is applied to the subtree selected by the role base,ou=Group,ou=ActiveMQ,ou=system, it matches all role entries that have amemberattribute equal touid=jdoe(the value of amemberattribute is a DN).This option must always be set, even if role searching is disabled, because it has no default value.
If OpenLDAP is used, the syntax of the search filter is
(member:=uid=jdoe).roleSearchSubtree- specify the search depth for role entries, relative to the node specified byroleBase. This option can take boolean values, as follows:-
false(default) - try to match one of the child entries of the roleBase node (maps tojavax.naming.directory.SearchControls.ONELEVEL_SCOPE). -
true— try to match any entry belonging to the subtree of the roleBase node (maps tojavax.naming.directory.SearchControls.SUBTREE_SCOPE).
-
-
debug- boolean flag; iftrue, enable debugging; this is used only for testing or debugging; normally, it should be set tofalse, or omitted; default isfalse
Add user entries under the node specified by the userBase option. When creating a new user entry in the directory, choose an object class that supports the userPassword attribute (for example, the person or inetOrgPerson object classes are typically suitable). After creating the user entry, add the userPassword attribute, to hold the user’s password.
If role data must be stored in dedicated role entries (where each node represents a particular role), create a role entry as follows. Create a new child of the roleBase node, where the objectClass of the child is groupOfNames. Set the cn (or whatever attribute type is specified by roleName) of the new child node equal to the name of the role/group. Define a member attribute for each member of the role/group, setting the member value to the DN of the corresponding user (where the DN is specified either fully, uid=jdoe,ou=User,ou=ActiveMQ,ou=system, or partially, uid=jdoe).
If roles need to be added to user entries, that requires directory schema customization by adding a suitable attribute type to the user entry’s object class. The chosen attribute type must be capable of handling multiple values.
7.1.5. Configuring Multiple Login Modules for Authentication
It is possible to combine login modules to accommodate more complex use-cases. The most common reason to combine login modules is to support authentication for both anonymous users and users who submit credentials.
The following snippet shows how to configure a JAAS login entry for the use case where users with no credentials or invalid credentials are logged in as guests (via the guest login module) and users who submit valid credentials are logged in with the corresponding role/permissions (via the properties login module).
activemq {
  org.apache.activemq.artemis.spi.core.security.jaas.PropertiesLoginModule sufficient
      debug=true
      org.apache.activemq.jaas.properties.user="users.properties"
      org.apache.activemq.jaas.properties.role="roles.properties";

  org.apache.activemq.artemis.spi.core.security.jaas.GuestLoginModule sufficient
      debug=true
      org.apache.activemq.jaas.guest.user="guest"
      org.apache.activemq.jaas.guest.role="restricted";
};
Depending on the user login data, authentication proceeds as follows:
- User logs in with a valid password — the properties login module successfully authenticates the user and returns immediately. The guest login module is not invoked.
- User logs in with an invalid password — the properties login module fails to authenticate the user, and authentication proceeds to the guest login module. The guest login module successfully authenticates the user and returns the guest principal.
- User logs in with a blank password — the properties login module fails to authenticate the user, and authentication proceeds to the guest login module. The guest login module successfully authenticates the user and returns the guest principal.
The following example shows how to configure a JAAS login entry for the use case where only those users with no credentials are logged in as guests. To support this use case, you must set the credentialsInvalidate option to true in the configuration of the guest login module. One should also note that, compared with the preceding example, the order of the login modules is reversed and the flag attached to the properties login module is changed to requisite.
activemq {
    org.apache.activemq.artemis.spi.core.security.jaas.GuestLoginModule sufficient
        debug=true
       credentialsInvalidate=true
       org.apache.activemq.jaas.guest.user="guest"
       org.apache.activemq.jaas.guest.role="guests";

    org.apache.activemq.artemis.spi.core.security.jaas.PropertiesLoginModule requisite
        debug=true
        org.apache.activemq.jaas.properties.user="users.properties"
        org.apache.activemq.jaas.properties.role="roles.properties";
};
Depending on the user login data, authentication proceeds as follows:
- User logs in with a valid password — the guest login module fails to authenticate the user (because the user has presented a password while the credentialsInvalidate option is enabled) and authentication proceeds to the properties login module. The properties login module successfully authenticates the user and returns.
- User logs in with an invalid password — the guest login module fails to authenticate the user and authentication proceeds to the properties login module. The properties login module also fails to authenticate the user. The net result is an authentication failure.
- User logs in with a blank password — the guest login module successfully authenticates the user and returns immediately. The properties login module is not invoked.
7.2. Configuring Authorization
The broker supports a flexible role-based security model for applying security to queues based on their respective address. It is important to understand that queues are bound to addresses either one-to-one (for point-to-point style messaging) or many-to-one (for pub/sub style messaging). When a message is sent to an address the server looks up the set of queues that are bound to that address and routes the message to that set of queues.
Permissions are defined against the queues based on their address via the <security-setting> element in broker.xml. Multiple instances of <security-setting> can be defined in <security-settings>. An exact match on the address can be used or a wildcard match can be used using the wildcard characters # and *.
Seven different permissions can be given to the set of queues which match the address. Those permissions are:
-
createDurableQueue. This permission allows the user to create a durable queue under matching addresses. -
deleteDurableQueue. This permission allows the user to delete a durable queue under matching addresses. -
createNonDurableQueue. This permission allows the user to create a non-durable queue under matching addresses. -
deleteNonDurableQueue. This permission allows the user to delete a non-durable queue under matching addresses. -
send. This permission allows the user to send a message to matching addresses. -
consume. This permission allows the user to consume a message from a queue bound to matching addresses. -
manage. This permission allows the user to invoke management operations by sending management messages to the management address.
For each permission, a list of roles who are granted that permission is specified. If the user has any of those roles, he/she will be granted that permission for that set of addresses.
7.2.1. Configuring Message Production for a Single Address
Here is a simple example of what might go in broker.xml to allow message production on an address named queue1:
<security-settings>
    <security-setting match="queue1">
        <permission type="send" roles="producer"/>
    </security-setting>
</security-settings>
The match of the <security-setting> defines the name of the address to which the permission should apply, queue1 in this case. The send permission is granted to users in the producer role.
7.2.2. Configuring Message Consumption for a Single Address
Here is a simple example of what might go in broker.xml to allow message consumption on an address named queue1:
<security-settings>
    <security-setting match="queue1">
        <permission type="consume" roles="consumer"/>
    </security-setting>
</security-settings>
The match of the <security-setting> defines the name of the address to which the permission should apply, queue1 in this case. The consume permission is granted to users in the consumer role.
7.2.3. Configuring Complete Access on All Addresses
Here is what might go in broker.xml to allow complete access to addresses and and queues. This would be useful, for example, in a development scenario where anonymous authentication was configured to assign the role guest to every user:
<security-settings>
    <security-setting match="#">
        <permission type="createDurableQueue" roles="guest"/>
        <permission type="deleteDurableQueue" roles="guest"/>
        <permission type="createNonDurableQueue" roles="guest"/>
        <permission type="deleteNonDurableQueue" roles="guest"/>
        <permission type="send" roles="guest"/>
        <permission type="consume" roles="guest"/>
        <permission type="manage" roles="guest"/>
    </security-setting>
</security-settings>
The match of the <security-setting> defines a wildcard for the address to which the permission should apply, # in this case. All permissions are granted to users in the guest role.
For information about more complex use-cases see the Section 7.2.5, “Configure Multiple Security Settings for Address Groups and Sub-groups” section.
7.2.4. Configure LDAP Authorization
The LegacyLDAPSecuritySettingPlugin security-setting-plugin will read the security information that was previously handled by LDAPAuthorizationMap and the cachedLDAPAuthorizationMap in Apache ActiveMQ 5.x and turn it into corresponding security settings where possible. The security implementations of the two brokers do not match perfectly
so some translation must occur to achieve near equivalent functionality.
Here is an example of the plugin’s configuration:
<security-setting-plugin class-name="org.apache.activemq.artemis.core.server.impl.LegacyLDAPSecuritySettingPlugin">
   <setting name="initialContextFactory" value="com.sun.jndi.ldap.LdapCtxFactory"/>
   <setting name="connectionURL" value="ldap://localhost:1024"/>
   <setting name="connectionUsername" value="uid=admin,ou=system"/>
   <setting name="connectionPassword" value="secret"/>
   <setting name="connectionProtocol" value="s"/>
   <setting name="authentication" value="simple"/>
</security-setting-plugin>
-
class-name. The implementation isorg.apache.activemq.artemis.core.server.impl.LegacyLDAPSecuritySettingPlugin. -
initialContextFactory. The initial context factory used to connect to LDAP. It must always be set tocom.sun.jndi.ldap.LdapCtxFactory(i.e. the default value). -
connectionURL. Specifies the location of the directory server using an LDAP URL,ldap://Host:Port. You can optionally qualify this URL, by adding a forward slash,/, followed by the DN of a particular node in the directory tree. For example,ldap://ldapserver:10389/ou=system. The default isldap://localhost:1024. -
connectionUsername. The DN of the user that opens the connection to the directory server. For example,uid=admin,ou=system. Directory servers generally require clients to present username/password credentials in order to open a connection. -
connectionPassword. The password that matches the DN fromconnectionUsername. In the directory server, in the DIT, the password is normally stored as auserPasswordattribute in the corresponding directory entry. -
connectionProtocol- any value is supported but is effectively unused. In the future, this option may allow one to select the Secure Socket Layer (SSL) for the connection to the directory server. This option must be set explicitly because it has no default value. -
authentication. Specifies the authentication method used when binding to the LDAP server. Can take either of the values,simple(username and password, the default value) ornone(anonymous). Note: Simple Authentication and Security Layer (SASL) authentication is currently not supported. -
destinationBase. Specifies the DN of the node whose children provide the permissions for all destinations. In this case the DN is a literal value (that is, no string substitution is performed on the property value). For example, a typical value of this property isou=destinations,o=ActiveMQ,ou=system(i.e. the default value). -
filter. Specifies an LDAP search filter, which is used when looking up the permissions for any kind of destination. The search filter attempts to match one of the children or descendants of the queue or topic node. The default value is(cn=*). -
roleAttribute. Specifies an attribute of the node matched byfilter, whose value is the DN of a role. Default value isuniqueMember. -
adminPermissionValue. Specifies a value that matches theadminpermission. The default value isadmin. -
readPermissionValue. Specifies a value that matches thereadpermission. The default value isread. -
writePermissionValue. Specifies a value that matches thewritepermission. The default value iswrite. -
enableListener. Whether or not to enable a listener that will automatically receive updates made in the LDAP server and update the broker’s authorization configuration in real-time. The default value istrue.
The name of the queue or topic defined in LDAP will serve as the "match" for the security-setting, the permission value will be mapped from the ActiveMQ 5.x type to the Artemis type, and the role will be mapped as-is. Since the name of the queue or topic coming from LDAP will server as the "match" for the security-setting the security-setting may not be applied as expected to JMS destinations since Artemis always prefixes JMS destinations with "jms.queue." or "jms.topic." as necessary.
ActiveMQ 5.x only has 3 permission types - read, write, and admin. These permission types are described on their website. However, as described previously, ActiveMQ Artemis has 6 permission types - createDurableQueue, deleteDurableQueue, createNonDurableQueue, deleteNonDurableQueue, send, consume, and manage. Here’s how the old types are mapped to the new types:
-
read-consume -
write-send -
admin-createDurableQueue,deleteDurableQueue,createNonDurableQueue,deleteNonDurableQueue
As mentioned, there are a few places where a translation was performed to achieve some equivalence.:
-
This mapping does not include the Artemis
managepermission type since there is no type analogous for that in ActiveMQ 5.x. The
adminpermission in ActiveMQ 5.x relates to whether or not the broker will auto-create a destination if it does not exist and the user sends amessage to it. Artemis automatically allows the automatic creation of a destination if the user has permission to send message to it. Therefore, the plugin will map the `admin` permission to the 4 aforementioned permissions in Artemis.
7.2.5. Configure Multiple Security Settings for Address Groups and Sub-groups
Let us take a simple example, here’s a security block from
broker.xml file:
<security-setting match="globalqueues.europe.#">
   <permission type="createDurableQueue" roles="admin"/>
   <permission type="deleteDurableQueue" roles="admin"/>
   <permission type="createNonDurableQueue" roles="admin, guest, europe-users"/>
   <permission type="deleteNonDurableQueue" roles="admin, guest, europe-users"/>
   <permission type="send" roles="admin, europe-users"/>
   <permission type="consume" roles="admin, europe-users"/>
</security-setting>
The ‘#’ character signifies "any sequence of words". Words are delimited by the ‘.’ character. For a full description of the wildcard syntax please see [Understanding the Wildcard Syntax](wildcard-syntax.md). The above security block applies to any address that starts with the string "globalqueues.europe.":
Only users who have the admin role can create or delete durable queues bound to an address that starts with the string "globalqueues.europe."
Any users with the roles admin, guest, or europe-users can create or delete temporary queues bound to an address that starts with the string "globalqueues.europe."
Any users with the roles admin or europe-users can send messages to these addresses or consume messages from queues bound to an address that starts with the string "globalqueues.europe."
The mapping between a user and what roles they have is handled by the security manager. Apache ActiveMQ Artemis ships with a user manager that reads user credentials from a file on disk, and can also plug into JAAS or JBoss Application Server security.
For more information on configuring the security manager, please see 'Changing the Security Manager'.
There can be zero or more security-setting elements in each xml file. Where more than one match applies to a set of addresses the more specific match takes precedence.
Let us look at an example of that, here’s another security-setting block:
<security-setting match="globalqueues.europe.orders.#">
   <permission type="send" roles="europe-users"/>
   <permission type="consume" roles="europe-users"/>
</security-setting>
In this security-setting block the match 'globalqueues.europe.orders.#' is more specific than the previous match 'globalqueues.europe.\#'. So any addresses which match 'globalqueues.europe.orders.\#' will take their security settings only from the latter security-setting block.
Note that settings are not inherited from the former block. All the settings will be taken from the more specific matching block, so for the address 'globalqueues.europe.orders.plastics' the only permissions that exist are send and consume for the role europe-users. The permissions createDurableQueue, deleteDurableQueue, createNonDurableQueue, deleteNonDurableQueue are not inherited from the other security-setting block.
By not inheriting permissions, it allows you to effectively deny permissions in more specific security-setting blocks by simply not specifying them. Otherwise it would not be possible to deny permissions in sub-groups of addresses.
7.3. Configuring Transport Layer Security
There are two basic use cases for transport layer security (TLS):
- "One-way" where only the server presents a certificate. This is the most common use case.
- "Two-way" where both the server and the client present certificates. This is sometimes called mutual authentication.
7.3.1. Configuring One-way TLS
One-way TLS is configured in the URL of the relevant acceptor in broker.xml. Here is a very basic acceptor configuration which does not use TLS:
<acceptor name="artemis">tcp://0.0.0.0:61616</acceptor>
Here is that same acceptor configured to use one-way TLS:
<acceptor name="artemis">tcp://0.0.0.0:61616?sslEnabled=true;keyStorePath=../etc/broker.keystore;keyStorePassword=1234!</acceptor>
This acceptor uses 3 additional parameters - sslEnabled, keyStorePath, and keyStorePassword. These 3, at least, are required to enable one-way TLS.
7.3.2. Configuring Two-way TLS
Two-way TLS uses the same sslEnabled, keyStorePath, and keyStorePassword properties as one-way TLS, but it adds needClientAuth to tell the client it should present a certificate of its own. For example:
<acceptor name="artemis">tcp://0.0.0.0:61616?sslEnabled=true;keyStorePath=../etc/broker.keystore;keyStorePassword=1234!;needClientAuth=true</acceptor>
This configuration assumes that the client’s certificate will be signed by a trusted provider. If the client’s certificate is not signed by a trusted provider (e.g., it is self-signed) then the server will need to import the client’s certificate into a trust-store and configure the acceptor with trustStorePath and trustStorePassword. For example:
<acceptor name="artemis">tcp://0.0.0.0:61616?sslEnabled=true;keyStorePath=../etc/broker.keystore;keyStorePassword=1234!;needClientAuth=true;trustStorePath=../etc/client.truststore;trustStorePassword=5678!</acceptor>
TLS Configuration Details
-
sslEnabled. Must betrueto enable TLS. Default isfalse. keyStorePath. When used on anacceptorthis is the path to the TLS key store on the server which holds the server’s certificates (whether self-signed or signed by an authority).When used on a
connectorthis is the path to the client-side TLS key store which holds the client certificates. This is only relevant for aconnectorif you are using 2-way TLS (i.e., mutual authentication). Although this value is configured on the server, it is downloaded and used by the client. If the client needs to use a different path from that set on the server then it can override the server-side setting by either using the customaryjavax.net.ssl.keyStoresystem property or the ActiveMQ-specificorg.apache.activemq.ssl.keyStoresystem property. The ActiveMQ-specific system property is useful if another component on client is already making use of the standard, Java system property.keyStorePassword. When used on anacceptorthis is the password for the server-side keystore.When used on a
connectorthis is the password for the client-side keystore. This is only relevant for aconnectorif you are using 2-way TLS (i.e. mutual authentication). Although this value can be configured on the server, it is downloaded and used by the client. If the client needs to use a different password from that set on the server then it can override the server-side setting by either using the customaryjavax.net.ssl.keyStorePasswordsystem property or the ActiveMQ-specificorg.apache.activemq.ssl.keyStorePasswordsystem property. The ActiveMQ-specific system property is useful if another component on client is already making use of the standard, Java system property.trustStorePath. When used on anacceptorthis is the path to the server-side TLS key store that holds the keys of all the clients that the server trusts. This is only relevant for anacceptorif you are using 2-way TLS (i.e., mutual authentication).When used on a
connectorthis is the path to the client-side TLS key store which holds the public keys of all the servers that the client trusts. Although this value can be configured on the server, it is downloaded and used by the client. If the client needs to use a different path from that set on the server then it can override the server-side setting by either using the customary "javax.net.ssl.trustStore" system property or the ActiveMQ-specific "org.apache.activemq.ssl.trustStore" system property. The ActiveMQ-specific system property is useful if another component on client is already making use of the standard, Java system property.trustStorePassword. When used on anacceptorthis is the password for the server-side trust store. This is only relevant for anacceptorif you are using 2-way TLS (i.e., mutual authentication).When used on a
connectorthis is the password for the client-side truststore. Although this value can be configured on the server, it is downloaded and used by the client. If the client needs to use a different password from that set on the server then it can override the server-side setting by either using the customaryjavax.net.ssl.trustStorePasswordsystem property or the ActiveMQ-specificorg.apache.activemq.ssl.trustStorePasswordsystem property. The ActiveMQ-specific system property is useful if another component on client is already making use of the standard, Java system property.-
enabledCipherSuites. Whether used on anacceptororconnectorthis is a comma separated list of cipher suites used for TLS communication. The default value isnullwhich means the JVM’s default will be used. -
enabledProtocols. Whether used on anacceptororconnectorthis is a comma separated list of protocols used for TLS communication. The default value isnullwhich means the JVM’s default will be used. -
needClientAuth. This property is only for anacceptor. It tells a client connecting to this acceptor that 2-way TLS is required. Valid values aretrueorfalse. Default isfalse.
7.3.3. Client-side Considerations
A-MQ Broker supports multiple protocols, and each protocol and platform will have different ways to specify TLS parameters. However, in the case of a client using the Core protocol (e.g., a bridge) the TLS parameters are configured on the connector URL much like on the broker’s acceptor.
Chapter 8. Configuring Persistence
In this chapter we will describe how persistence works with Red Hat JBoss A-MQ Broker 7.0.0 and how to configure it.
The broker ships with two persistence options. The brokers File journal which is highly optimized for the messaging use case and gives great performance, and also brokers JDBC Store, which uses JDBC to connect to a database of your choice.
8.1. A-MQ Broker 7.0.0 File Journal (Default)
A brokers file journal is an append only journal. It consists of a set of files on disk. Each file is pre-created to a fixed size and initially filled with padding. As operations are performed on the server, e.g. add message, update message, delete message, records are appended to the journal. When one journal file is full the broker moves to the next one.
Because records are only appended, i.e. added to the end of the journal we minimise disk head movement, i.e. we minimise random access operations which is typically the slowest operation on a disk.
Making the file size configurable means that an optimal size can be chosen, i.e. making each file fit on a disk cylinder. Modern disk topologies are complex and we are not in control over which cylinder(s) the file is mapped onto so this is not an exact science. But by minimising the number of disk cylinders the file is using, we can minimise the amount of disk head movement, since an entire disk cylinder is accessible simply by the disk rotating - the head does not have to move.
As delete records are added to the journal, the broker has a sophisticated file garbage collection algorithm which can determine if a particular journal file is needed any more - i.e. has all its data been deleted in the same or other files. If so, the file can be reclaimed and re-used.
The broker also has a compaction algorithm which removes dead space from the journal and compresses up the data so it takes up less files on disk.
The journal also fully supports transactional operation if required, supporting both local and XA transactions.
The majority of the journal is written in Java, however we abstract out the interaction with the actual file system to allow different pluggable implementations. the broker ships with two implementations:
Java [NIO](http://en.wikipedia.org/wiki/New_I/O).
The first implementation uses standard Java NIO to interface with the file system. This provides extremely good performance and runs on any platform where there's a Java 6+ runtime.
Linux Asynchronous IO
The second implementation uses a thin native code wrapper to talk to the Linux asynchronous IO library (AIO). With AIO, the broker will be called back when the data has made it to disk, allowing us to avoid explicit syncs altogether and simply send back confirmation of completion when AIO informs us that the data has been persisted.
Using AIO will typically provide even better performance than using Java NIO.
The AIO journal is only available when running Linux kernel 2.6 or later and after having installed libaio (if it is not already installed). For instructions on how to install libaio please see Installing AIO section.
Also, please note that AIO will only work with the following file systems: ext2, ext3, ext4, jfs, xfs. With other file systems, e.g. NFS it may appear to work, but it will fall back to a slower synchronous behaviour. Don't put the journal on a NFS share!
For more information on libaio please see [lib AIO](libaio.md).
libaio is part of the kernel project.
The standard The broker core uses two instances of the journal:
Bindings journal.
This journal is used to store bindings related data. That includes the set of queues that are deployed on the server and their attributes. It also stores data such as id sequence counters.
The bindings journal is always a NIO journal as it is typically low throughput compared to the message journal.
The files on this journal are prefixed as `activemq-bindings`. Each file has a `bindings` extension. File size is `1048576`, and it is located at the bindings folder.
JMS journal.
This journal instance stores all JMS related data, This is basically any JMS Queues, Topics and Connection Factories and any JNDI bindings for these resources.
Any JMS Resources created via the management API will be persisted to this journal. Any resources configured via configuration files will not. The JMS Journal will only be created if JMS is being used.
The files on this journal are prefixed as `activemq-jms`. Each file has a `jms` extension. File size is `1048576`, and it is located at the bindings folder.
Message journal.
This journal instance stores all message related data, including the message themselves and also duplicate-id caches.
By default the broker will try and use an AIO journal. If AIO is not available, e.g. the platform is not Linux with the correct kernel version or AIO has not been installed then it will automatically fall back to using Java NIO which is available on any Java platform.
The files on this journal are prefixed as `activemq-data`. Each file has a `amq` extension. File size is by the default `10485760` (configurable), and it is located at the journal folder.
For large messages, the broker persists them outside the message journal. This is discussed in [Large Messages](large-messages.md).
The broker can also be configured to page messages to disk in low memory situations. This is discussed in [Paging](paging.md).
If no persistence is required at all, the broker can also be configured not to persist any data at all to storage as discussed in the Configuring the broker for Zero Persistence section.
8.2. Configuring the bindings journal
The bindings journal is configured using the following attributes in broker.xml
bindings-directoryThis is the directory in which the bindings journal lives. The default value is `data/bindings`.
create-bindings-dirIf this is set to `true` then the bindings directory will be automatically created at the location specified in `bindings-directory` if it does not already exist. The default value is `true`
8.3. Configuring the JMS journal
The JMS configuration shares its configuration with the bindings journal.
8.4. Configuring the message journal
The message journal is configured using the following attributes in broker.xml
journal-directoryThis is the directory in which the message journal lives. The default value is `data/journal`.
For the best performance, we recommend the journal is located on its own physical volume in order to minimise disk head movement. If the journal is on a volume which is shared with other processes which might be writing other files (e.g. bindings journal, database, or transaction coordinator) then the disk head may well be moving rapidly between these files as it writes them, thus drastically reducing performance.
When the message journal is stored on a SAN we recommend each journal instance that is stored on the SAN is given its own LUN (logical unit).
create-journal-dirIf this is set to `true` then the journal directory will be automatically created at the location specified in `journal-directory` if it does not already exist. The default value is `true`
journal-typeValid values are `NIO` or `ASYNCIO`.
Choosing `NIO` chooses the Java NIO journal. Choosing `AIO` chooses the Linux asynchronous IO journal. If you choose `AIO` but are not running Linux or you do not have libaio installed then the broker will detect this and automatically fall back to using `NIO`.
journal-sync-transactionalIf this is set to true then the broker will make sure all transaction data is flushed to disk on transaction boundaries (commit, prepare and rollback). The default value is `true`.
journal-sync-non-transactionalIf this is set to true then the broker will make sure non transactional message data (sends and acknowledgements) are flushed to disk each time. The default value for this is `true`.
journal-file-sizeThe size of each journal file in bytes. The default value for this is `10485760` bytes (10MiB).
journal-min-filesThe minimum number of files the journal will maintain. When the broker starts and there is no initial message data, the broker will pre-create `journal-min-files` number of files.
Creating journal files and filling them with padding is a fairly expensive operation and we want to minimise doing this at run-time as files get filled. By pre-creating files, as one is filled the journal can immediately resume with the next one without pausing to create it.
Depending on how much data you expect your queues to contain at steady state you should tune this number of files to match that total amount of data.
journal-pool-filesThe system will create as many files as needed however when reclaiming files it will shrink back to the `journal-pool-files`.
The default to this parameter is -1, meaning it will never delete files on the journal once created.
Notice that the system can not grow infinitely as you are still required to use paging for destinations that can
grow indefinitely.
Notice: in case you get too many files you can use [compacting](tools.md).
journal-max-ioWrite requests are queued up before being submitted to the system for execution. This parameter controls the maximum number of write requests that can be in the IO queue at any one time. If the queue becomes full then writes will block until space is freed up.
When using NIO, this value should always be equal to `1`
When using AIO, the default should be `500`.
The system maintains different defaults for this parameter depending on whether it is NIO or AIO (default for NIO is 1, default for AIO is 500)
There is a limit and the total max AIO can't be higher than what is configured at the OS level (/proc/sys/fs/aio-max-nr) usually at 65536.
journal-buffer-timeoutInstead of flushing on every write that requires a flush, we maintain an internal buffer, and flush the entire buffer either when it is full, or when a timeout expires, whichever is sooner. This is used for both NIO and AIO and allows the system to scale better with many concurrent writes that require flushing.
This parameter controls the timeout at which the buffer will be flushed if it hasn't filled already. AIO can typically cope with a higher flush rate than NIO, so the system maintains different defaults for both NIO and AIO (default for NIO is 3333333 nanoseconds - 300 times per second, default for AIO is 500000 nanoseconds - ie. 2000 times per second).
> **Note**
>
> By increasing the timeout, you may be able to increase system
> throughput at the expense of latency, the default parameters are
> chosen to give a reasonable balance between throughput and
> latency.
journal-buffer-sizeThe size of the timed buffer on AIO. The default value is `490KiB`.
journal-compact-min-filesThe minimal number of files before we can consider compacting the journal. The compacting algorithm will not start until you have at least `journal-compact-min-files`
Setting this to 0 will disable the feature to compact completely. This could be dangerous though as the journal could grow indefinitely. Use it wisely!
The default for this parameter is `10`
journal-compact-percentageThe threshold to start compacting. When less than this percentage is considered live data, we start compacting. Note also that compacting will not start until you have at least `journal-compact-min-files` data files on the journal
The default for this parameter is `30`
8.5. An important note on disabling disk write cache.
Warning
Most disks contain hardware write caches. A write cache can increase the apparent performance of the disk because writes just go into the cache and are then lazily written to the disk later.
This happens irrespective of whether you have executed a fsync() from the operating system or correctly synced data from inside a Java program!
By default many systems ship with disk write cache enabled. This means that even after syncing from the operating system there is no guarantee the data has actually made it to disk, so if a failure occurs, critical data can be lost.
Some more expensive disks have non volatile or battery backed write caches which will not necessarily lose data on event of failure, but you need to test them.
If your disk does not have an expensive non volatile or battery backed cache and it is not part of some kind of redundant array (e.g. RAID), and you value your data integrity you need to make sure disk write cache is disabled.
Be aware that disabling disk write cache can negatively effect performance. If you have been used to using disks with write cache enabled in their default setting, unaware that your data integrity could be compromised, then disabling it will give you an idea of how fast your disk can perform when acting really reliably.
On Linux you can inspect and/or change your disk’s write cache settings using the tools
hdparm(for IDE disks) orsdparmorsginfo(for SDSI/SATA disks)On Windows you can check / change the setting by right clicking on the disk and clicking properties.
8.6. Installing AIO
The Java NIO journal gives great performance, but If you are running the broker using Linux Kernel 2.6 or later, we highly recommend you use the AIO journal for the very best persistence performance.
it is not possible to use the AIO journal under other operating systems or earlier versions of the Linux kernel.
If you are running Linux kernel 2.6 or later and do not already have libaio installed, you can easily install it using the following steps:
Using yum, (e.g. on Fedora or Red Hat Enterprise Linux):
yum install libaio
Using aptitude, (e.g. on Ubuntu or Debian system):
apt-get install libaio
8.7. Configuring for JDBC Persistence
The broker JDBC persistence store is still under development and only supports persistence of standard messages and bindings (this is everything except large messages and paging). The JDBC store uses a JDBC connection to store messages and bindings data in records in database tables. The data stored in the database tables is encoded using Red Hat JBoss A-MQ Broker 7.0.0 journal encoding.
To configure the broker to use a database for persisting messages and bindings data you must do two things.
- Add the appropriate JDBC client libraries to the Artemis runtime. You can do this by dropping the relevant jars in the lib folder of the brokers distribution.
-
create a store element in your broker.xml configuration file under the
coreelement. For example:
<store>
   <database-store>
      <jdbc-connection-url>jdbc:derby:data/derby/database-store;create=true</jdbc-connection-url>
      <bindings-table-name>BINDINGS_TABLE</bindings-table-name>
      <message-table-name>MESSAGE_TABLE</message-table-name>
      <large-message-table-name>LARGE_MESSAGES_TABLE</large-message-table-name>
      <jdbc-driver-class-name>org.apache.derby.jdbc.EmbeddedDriver</jdbc-driver-class-name>
   </database-store>
</store>jdbc-connection-urlThe full JDBC connection URL for your database server. The connection url should include all configuration parameters and database name.
bindings-table-nameThe name of the table in which bindings data will be persisted for the broker. Specifying table names allows users to share single database amongst multiple servers, without interference.
message-table-nameThe name of the table in which bindings data will be persisted for the broker. Specifying table names allows users to share single database amongst multiple servers, without interference.
large-message-table-nameThe name of the table in which messages and related data will be persisted for the broker. Specifying table names allows users to share single database amongst multiple servers, without interference.
jdbc-driver-class-nameThe fully qualified class name of the desired database Driver.
8.8. Configuring for Zero Persistence
In some situations, zero persistence is sometimes required for a messaging system. Configuring the broker to perform zero persistence is straightforward. Simply set the parameter persistence-enabled in broker.xml to false.
Please note that if you set this parameter to false, then zero persistence will occur. That means no bindings data, message data, large message data, duplicate id caches or paging data will be persisted.
Chapter 9. Configuring Resource Limits
Sometimes it is helpful to set particular limits on what certain users can do beyond the normal security settings related to authorization and authentication. For example, one can limit how many connections a user can create or how many queues a user can create.
9.1. Configuring Connection and Queue Limits
Here is an example of the XML used to set resource limits:
<resource-limit-settings>
   <resource-limit-setting match="myUser">
      <max-connections>5</max-connections>
      <max-queues>3</max-queues>
   </resource-limit-setting>
</resource-limit-settings>
Unlike the match from address-setting, this match does not use any wildcard syntax. It is a simple 1:1 mapping of the limits to a user.
-
max-connections. Defines how many connections the matched user can make to the broker. The default is-1, which means there is no limit. -
max-queues. Defines how many queues the matched user can create. The default is-1, which means there is no limit.
Chapter 10. Configuring Clustering
Broker clusters allow groups of brokers to be grouped together in order to share message processing load. Each active node in the cluster is an active Broker broker which manages its own messages and handles its own connections.
The cluster is formed by each node declaring cluster connections to other nodes in the core configuration file broker.xml. When a node forms a cluster connection to another node, it creates a core bridge connection between itself and the other node. These cluster connections allow messages to flow between the nodes of the cluster to balance load.
Nodes can be connected together to form a cluster in many different topologies. You can also balance client connections across the nodes of the cluster, and redistribute messages between nodes to avoid starvation.
Another important part of clustering is broker discovery, in which brokers can broadcast their connection details to enable clients and other brokers to connect to them with minimal configuration.
After a cluster node has been configured, it is common to copy that configuration to other nodes to produce a symmetric cluster. However, when copying the broker files, do not copy any of the following directories from one node to another:
-
bindings -
journal -
large-messages
When a node is started for the first time and initializes its journal files, it also persists a special identifier to the journal directory. This id must be unique among nodes in the cluster, or the cluster will not form properly.
10.1. Cluster Topologies
Broker clusters can be connected together in many different topologies. However, symmetric and chain clusters are the most common. You can also scale clusters up and down without message loss.
10.1.1. Symmetric Clusters
With a symmetric cluster, every node in the cluster is connected to every other node in the cluster. This means that every node in the cluster is no more than one hop away from every other node.
To form a symmetric cluster, every node in the cluster defines a cluster connection with the attribute max-hops set to 1. Typically, the cluster connection will use broker discovery in order to know what other brokers in the cluster it should connect to, although it is possible to explicitly define each target broker too in the cluster connection if, for example, UDP is not available on your network.
With a symmetric cluster, each node knows about all the queues that exist on all of the other nodes, and what consumers they have. With this knowledge, it can determine how to load balance and redistribute messages around the nodes.
10.1.2. Chain Clusters
With a chain cluster, each node in the cluster is not connected to every node in the cluster directly. Instead, the nodes form a chain with a node on each end of the chain and all other nodes just connecting to the previous and next nodes in the chain.
An example of a chain cluster would be a three node chain consisting of nodes A, B and C. Node A is hosted in one network and has many producer clients connected to it sending order messages. Due to corporate policy, the order consumer clients need to be hosted in a different network, and that network is only accessible via a third network. In this setup, node B acts as a mediator with no producers or consumers on it. Any messages arriving on node A will be forwarded to node B, which will in turn forward them to node C where they can be consumed. Node A does not need to directly connect to C, but all of the nodes can still act as a part of the cluster.
To set up a cluster in this way, node A would define a cluster connection that connects to node B, and node B would define a cluster connection that connects to node C. In this case, the cluster connections only need to be in one direction, because messages are moving from node A→B→C and never from C→B→A.
For this topology, you would set max-hops to 2. With a value of 2, the knowledge of what queues and consumers that exist on node C would be propagated from node C to node B to node A. Node A would then know to distribute messages to node B when they arrive, even though node B has no consumers itself. It would know that a further hop away is node C, which does have consumers.
10.1.3. Scaling Clusters
If the size of a cluster changes frequently in your environment, you can scale it up or down with no message loss (even for non-durable messages).
You can scale up clusters by adding nodes, in which case there is no risk of message loss. Similarly, you can scale clusters down by removing nodes. However, to prevent message loss, you must first configure the broker to send its messages to another node in the cluster.
To scale down a cluster:
-
On the node you want to scale down, set
scale-downtotrue. If necessary, set
scale-down-group-nameto the name of the group that contains the broker to which you want the messages to be sent.If cluster nodes are grouped together with different
scale-down-group-namevalues, be careful how you set this parameter. If all of the nodes in a single group are shut down, then the messages from that node or group will be lost.-
If the broker is using multiple cluster connections, then set
scale-down-clusternameto identify the name of thecluster-connectionwhich should be used for scaling down. Shut down the node gracefully.
The broker finds another node in the cluster and sends all of its messages (both durable and non-durable) to that node. The messages are processed in order and go to the back of the respective queues on the other node (just as if the messages were sent from an external client for the first time).
10.2. Broker Discovery
Broker discovery is a mechanism by which brokers can propagate their connection details to the following:
- Messaging clients. A messaging client wants to be able to connect to the brokers of the cluster without having specific knowledge of which brokers in the cluster are online at any one time.
- Other brokers. Brokers in a cluster want to be able to create cluster connections to each other without having prior knowledge of all the other brokers in the cluster.
This information about the cluster topology is sent around normal broker connections to clients and to other brokers over cluster connections. The initial connection is made using dynamic discovery techniques like UDP and JGroups, or by providing a list of initial connectors.
10.2.1. Dynamic Discovery
Broker discovery uses UDP, multicast, or JGroups to broadcast broker connection settings.
10.2.2. Configuring Broadcast Groups
A broadcast group is the means by which a broker broadcasts connectors over the network. A connector defines a way in which a client (or other broker) can make connections to the broker. For more information about connectors, see Chapter 4, Configuring Network Connections.
The broadcast group takes a set of connector pairs. Each connector pair contains connection settings for a live and backup broker (if one exists), and broadcasts them on the network. Depending on which broadcasting technique you use to configure the cluster, the connector pair information is broadcasted through either UDP or JGroups.
Broadcast groups are defined in the broker configuration file broker.xml. There can be many broadcast groups per broker. All broadcast groups must be defined in a broadcast-groups element.
10.2.2.1. Configuring a UDP Broadcast Group
Below is an example broadcast group from broker.xml that defines a UDP broadcast group:
<broadcast-groups>
   <broadcast-group name="my-broadcast-group">
      <local-bind-address>172.16.9.3</local-bind-address>
      <local-bind-port>5432</local-bind-port>
      <group-address>231.7.7.7</group-address>
      <group-port>9876</group-port>
      <broadcast-period>2000</broadcast-period>
      <connector-ref connector-name="netty-connector"/>
   </broadcast-group>
</broadcast-groups>
You can typically use the default broadcast group parameters. However, you can specify any of the following:
nameattribute- Each broadcast group in the broker must have a unique name.
local-bind-address- This is the local bind address to which the datagram socket is bound. If you have multiple network interfaces on your broker, you would specify which one you wish to use for broadcasts. If this property is not specified, then the socket will be bound to the wildcard address, an IP address chosen by the kernel. This is a UDP specific attribute.
local-bind-port-
If you want to specify a local port to which the datagram socket is bound, you can specify it here. In most cases, you would just use the default value of
-1, which signifies that an anonymous port should be used. This parameter is always specified in conjunction withlocal-bind-address. This is a UDP specific attribute. group-address-
The multicast address to which the data will be broadcast. It is a class D IP address in the range
224.0.0.0to239.255.255.255, inclusive. The address224.0.0.0is reserved and is not available for use. This parameter is mandatory. This is a UDP specific attribute. group-port- The UDP port number used for broadcasting. This parameter is mandatory. This is a UDP specific attribute.
broadcast-period-
The period in milliseconds between consecutive broadcasts. This parameter is optional, the default value is
2000milliseconds. connector-ref-
The connector and optional backup connector that will be broadcast (see Section 4.2, “Connectors” for more information. The connector to be broadcast is specified by the
connector-nameattribute.
10.2.2.2. Configuring a JGroups Broadcast Group
This example shows a broadcast group that defines a JGroups broadcast group:
<broadcast-groups>
   <broadcast-group name="my-broadcast-group">
      <jgroups-file>test-jgroups-file_ping.xml</jgroups-file>
      <jgroups-channel>activemq_broadcast_channel</jgroups-channel>
      <broadcast-period>2000</broadcast-period>
    <connector-ref connector-name="netty-connector"/>
   </broadcast-group>
</broadcast-groups>
To use JGroups to broadcast, you must specify the following:
nameattribute- Each broadcast group in the broker must have a unique name.
jgroups-file- The name of JGroups configuration file to initialize JGroups channels. The file must be in the Java resource path so that the broker can load it.
jgroups-channel- The name of the JGroups channel to connect to for broadcasting.
broadcast-period-
The period in milliseconds between consecutive broadcasts. This parameter is optional, the default value is
2000milliseconds. connector-ref-
The connector and optional backup connector that will be broadcast (see Section 4.2, “Connectors” for more information. The connector to be broadcast is specified by the
connector-nameattribute.
The following is an example of a JGroups file:
<config xmlns="urn:org:jgroups"
 xmlns:xsi="http://www.w3.org/2001/XMLSchema-instance"
 xsi:schemaLocation="urn:org:jgroups http://www.jgroups.org/schema/JGroups-3.0.xsd">
 <TCP loopback="true"
    recv_buf_size="20000000"
    send_buf_size="640000"
    discard_incompatible_packets="true"
    max_bundle_size="64000"
    max_bundle_timeout="30"
    enable_bundling="true"
    use_send_queues="false"
    sock_conn_timeout="300"

    thread_pool.enabled="true"
    thread_pool.min_threads="1"
    thread_pool.max_threads="10"
    thread_pool.keep_alive_time="5000"
    thread_pool.queue_enabled="false"
    thread_pool.queue_max_size="100"
    thread_pool.rejection_policy="run"

    oob_thread_pool.enabled="true"
    oob_thread_pool.min_threads="1"
    oob_thread_pool.max_threads="8"
    oob_thread_pool.keep_alive_time="5000"
    oob_thread_pool.queue_enabled="false"
    oob_thread_pool.queue_max_size="100"
    oob_thread_pool.rejection_policy="run"/>

 <FILE_PING location="../file.ping.dir"/>
 <MERGE2 max_interval="30000"
    min_interval="10000"/>
 <FD_SOCK/>
 <FD timeout="10000" max_tries="5" />
 <VERIFY_SUSPECT timeout="1500"  />
 <BARRIER />
 <pbcast.NAKACK
    use_mcast_xmit="false"
    retransmit_timeout="300,600,1200,2400,4800"
    discard_delivered_msgs="true"/>
 <UNICAST timeout="300,600,1200" />
 <pbcast.STABLE stability_delay="1000" desired_avg_gossip="50000"
    max_bytes="400000"/>
 <pbcast.GMS print_local_addr="true" join_timeout="3000"
    view_bundling="true"/>
 <FC max_credits="2000000"
    min_threshold="0.10"/>
 <FRAG2 frag_size="60000"  />
 <pbcast.STATE_TRANSFER/>
 <pbcast.FLUSH timeout="0"/>
</config>
The file content defines a JGroups protocol stack. If you want the broker to use this stack for channel creation, make sure that the value of jgroups-file in your broadcast-group/discovery-group configuration is the name of this JGroups configuration file.
10.2.3. Discovery Groups
While the broadcast group defines how connector information is broadcast from a broker, a discovery group defines how connector information is received from a broadcast endpoint (a UDP multicast address or JGroup channel).
A discovery group maintains a list of connector pairs - one for each broadcast by a different broker. As it receives broadcasts on the broadcast endpoint from a particular broker, it updates its entry in the list for that broker.
If it has not received a broadcast from a particular broker for a length of time, it will remove that broker’s entry from its list.
Discovery groups are used in two places in the broker:
- By cluster connections so they know how to obtain an initial connection to download the topology.
- By messaging clients so they know how to obtain an initial connection to download the topology.
Although a discovery group always accepts broadcasts, its current list of available live and backup brokers is only used when an initial connection is made. After that point, broker discovery is performed over the normal broker connections.
Each discovery group must be configured with a broadcast endpoint (UDP or JGroups) that matches its broadcast group counterpart. For example, if broadcast is configured using UDP, the discovery group must also use UDP, and the same multicast address.
10.2.4. Configuring Discovery Groups on the Broker
For cluster connections, you define discovery groups in the broker.xml configuration file, in the discovery-groups element. You can define multiple discovery groups.
10.2.4.1. Configuring a UDP Discovery Group
This example shows a UDP discovery group:
<discovery-groups>
   <discovery-group name="my-discovery-group">
      <local-bind-address>172.16.9.7</local-bind-address>
      <group-address>231.7.7.7</group-address>
      <group-port>9876</group-port>
      <refresh-timeout>10000</refresh-timeout>
   </discovery-group>
</discovery-groups>
You can specify the following parameters:
nameattribute- Each discovery group must have a unique name per broker.
local-bind-address- If you are running with multiple network interfaces on the same machine, you can use this element to specify that this discovery group only listens to a specific interface. This is a UDP specific attribute.
group-address-
The multicast IP address of the group on which to listen. It should match the
group-addressin the broadcast group from which you want to listen. This parameter is mandatory. This is a UDP specific attribute. group-port-
The UDP port of the multicast group. It should match the
group-portin the broadcast group from which you wish to listen. This parameter is mandatory. This is a UDP specific attribute. refresh-timeout-
The period the discovery group waits after receiving the last broadcast from a particular broker before removing that broker’s connector pair entry from its list. You would normally set this to a value significantly higher than the
broadcast-periodon the broadcast group, or - due to a slight difference in timing - brokers might intermittently disappear from the list even though they are still broadcasting. This parameter is optional. The default value is10000milliseconds (10 seconds).
10.2.4.2. Configuring a JGroups Discovery Group
This example shows a JGroups discovery group:
<discovery-groups>
   <discovery-group name="my-broadcast-group">
      <jgroups-file>test-jgroups-file_ping.xml</jgroups-file>
      <jgroups-channel>activemq_broadcast_channel</jgroups-channel>
      <refresh-timeout>10000</refresh-timeout>
   </discovery-group>
</discovery-groups>
To receive broadcasts from JGroups channels, you must specify the following:
nameattribute- Each discovery group must have a unique name per broker.
jgroups-file- The name of JGroups configuration file to be used to initialize JGroups channels. The file must be in the Java resource path so that the broker can load it.
jgroups-channel- The name that the JGroups channels connect to for receiving broadcasts.
refresh-timeout-
The period the discovery group waits after receiving the last broadcast from a particular broker before removing that broker’s connector pair entry from its list. You would normally set this to a value significantly higher than the
broadcast-periodon the broadcast group, or - due to a slight difference in timing - brokers might intermittently disappear from the list even though they are still broadcasting. This parameter is optional. The default value is10000milliseconds (10 seconds).
10.2.5. Configuring Clients to Discover Brokers
You can use JMS or the core API to configure a broker client to discover a list of brokers to which it can connect.
10.2.5.1. Discovering Brokers Using JMS and JNDI
If you are using JMS and JNDI on the client to look up your JMS connection factory instances, then you can specify these parameters in the JNDI context environment (for example, in jndi.properties).
To configure a client to discover brokers, verify that the host:port combination matches the group-address and group-port from the corresponding broadcast-group on the broker. For example:
java.naming.factory.initial = ActiveMQInitialContextFactory
connectionFactory.myConnectionFactory=udp://231.7.7.7:9876
In the broker.xml configuration file, the element discovery-group-ref specifies the name of a discovery group.
When a client application downloads this connection factory from JNDI, and JMS connections are created from it, those connections are load-balanced across the list of brokers that the discovery group maintains by listening on the multicast address specified in the discovery group configuration.
10.2.5.2. Discovering Brokers Using JMS Only
If you are not using JNDI to look up connection factories, you can instantiate the JMS connection factory directly.
To discover brokers, specify the discovery group parameters when creating the JMS connection factory. For example:
final String groupAddress = "231.7.7.7";

final int groupPort = 9876;

ConnectionFactory jmsConnectionFactory =
ActiveMQJMSClient.createConnectionFactory(new DiscoveryGroupConfiguration(groupAddress, groupPort,
                       new UDPBroadcastGroupConfiguration(groupAddress, groupPort, null, -1)), JMSFactoryType.CF);

Connection jmsConnection1 = jmsConnectionFactory.createConnection();

Connection jmsConnection2 = jmsConnectionFactory.createConnection();
If you want to change the default refresh timeout, in DiscoveryGroupConfiguration, set the refresh-timeout by using the setter method setDiscoveryRefreshTimeout().`
You can also set the amount of time to wait before the connection factory creates the first connection. By default, the connection factory will wait for 10000 milliseconds. However, you may need to change this value to ensure that the connection factory has sufficient time to receive broadcasts from all nodes in the cluster before it attempts to create a connection. To change this value, in DiscoveryGroupConfiguration use the setter method setDiscoveryInitialWaitTimeout().
10.2.5.3. Discovering Brokers Using the Core API
If you are using the core API to directly instantiate ClientSessionFactory instances, then you can specify the discovery group parameters directly when creating the session factory. For example:
final String groupAddress = "231.7.7.7";
final int groupPort = 9876;
BrokerLocator factory = ActiveMQClient.createBrokerLocatorWithHA(new DiscoveryGroupConfiguration(groupAddress, groupPort,
                           new UDPBroadcastGroupConfiguration(groupAddress, groupPort, null, -1))));
ClientSessionFactory factory = locator.createSessionFactory();
ClientSession session1 = factory.createSession();
ClientSession session2 = factory.createSession();
If you want to change the default refresh timeout, in DiscoveryGroupConfiguration, set the refresh-timeout by using the setter method setDiscoveryRefreshTimeout().`
You can also set the amount of time to wait before the connection factory creates the first connection. By default, the connection factory will wait for 10000 milliseconds. However, you may need to change this value to ensure that the connection factory has sufficient time to receive broadcasts from all nodes in the cluster before it attempts to create a connection. To change this value, in DiscoveryGroupConfiguration use the setter method setDiscoveryInitialWaitTimeout().
10.2.6. Discovering Brokers Using Static Connectors
If you cannot use UDP on your network, you can discover brokers by configuring the connections with a list of possible brokers. This list can be a single broker that you know will always be available, or a list of brokers where at least one will be available.
If you provide a list of brokers, you do not need to know where every broker is going to be hosted. Instead, you can configure these brokers to connect to the reliable brokers. After they are connected, the connection details are propagated by the broker to which it is connected.
10.2.6.1. Configuring a Cluster Connection
For cluster connections, you should verify that the connectors are defined properly. For more information, see Section 4.2, “Connectors”.
10.2.6.2. Discovering Brokers Statically Using JMS and JNDI
If you are using JMS and JNDI on the client to look up your JMS connection factory instances, then you can specify these parameters in the JNDI context environment (for example, in jndi.properties).
To configure a client to discover brokers, verify that the host:port combination matches the group-address and group-port from the corresponding broadcast-group on the broker. For example:
java.naming.factory.initial=org.apache.activemq.artemis.jndi.ActiveMQInitialContextFactory
connectionFactory.myConnectionFactory=(tcp://myhost:61616,tcp://myhost2:61616)
The connectionFactory.myConnectionFactory contains a list of brokers to use for the connection factory. When this connection factory used client application and JMS connections are created from it, those connections will be load-balanced across the list of brokers defined within the parentheses (). The parentheses are expanded so that the same query can be appended after the last bracket.
10.2.6.3. Discovering Brokers Statically Using JMS Only
If you are not using JNDI to look up connection factories, you can instantiate the JMS connection factory directly.
To discover brokers, specify the discovery group parameters when creating the JMS connection factory. For example:
HashMap<String, Object> map = new HashMap<String, Object>();
map.put("host", "myhost");
map.put("port", "61616");
TransportConfiguration server1 = new TransportConfiguration(NettyConnectorFactory.class.getName(), map);
HashMap<String, Object> map2 = new HashMap<String, Object>();
map2.put("host", "myhost2");
map2.put("port", "61617");
TransportConfiguration server2 = new TransportConfiguration(NettyConnectorFactory.class.getName(), map2);

ActiveMQConnectionFactory cf = ActiveMQJMSClient.createConnectionFactoryWithHA(JMSFactoryType.CF, server1, server2);
10.2.6.4. Discovering Brokers Statically Using the Core API
If you are using the core API, you can configure client discovery as follows:
HashMap<String, Object> map = new HashMap<String, Object>();
map.put("host", "myhost");
map.put("port", "61616");
TransportConfiguration server1 = new TransportConfiguration(NettyConnectorFactory.class.getName(), map);
HashMap<String, Object> map2 = new HashMap<String, Object>();
map2.put("host", "myhost2");
map2.put("port", "61617");
TransportConfiguration server2 = new TransportConfiguration(NettyConnectorFactory.class.getName(), map2);

BrokerLocator locator = ActiveMQClient.createBrokerLocatorWithHA(server1, server2);
ClientSessionFactory factory = locator.createSessionFactory();
ClientSession session = factory.createSession();
10.3. Broker-Side Message Load Balancing
If cluster connections are defined between nodes of a cluster, then the broker will load balance messages arriving at a particular node from a client.
For example, consider a cluster of four nodes A, B, C, and D arranged in a symmetric cluster (for more information, see Symmetric Clusters). A queue called OrderQueue is deployed on each node of the cluster.
Client Ca is connected to node A, sending orders to the broker. Order processor clients Pa, Pb, Pc, and Pd are connected to each of the nodes (A, B, C, and D). If no cluster connection was defined on node A, then as order messages arrive on node A, they will all stay in OrderQueue on node A, and will only be consumed by the order processor client attached to node A, (Pa).
However, if you define a cluster connection on node A, then as ordered messages arrive on node A, instead of all of them going into the local OrderQueue instance, they are distributed in a round-robin fashion between all of the nodes of the cluster. The messages are forwarded from the receiving node to other nodes of the cluster. This is all done on the broker side, and the client maintains a single connection to node A.
Messages arriving on node A could be distributed in the following order between the nodes: B, D, C, A, B, D, C, A, B, D. The exact order depends on the order the nodes started up, but the algorithm used is round-robin.
You can configure broker cluster connections to always load-balance messages in a round-robin fashion even if there are matching consumers on other nodes. Alternatively, you can configure the cluster connections to only distribute to other nodes if they have matching consumers.
10.3.1. Configuring Cluster Connections
Cluster connections group brokers into clusters so that messages can be load-balanced between the nodes of the cluster. You can configure multiple cluster connections for each broker.
To configure cluster connections, in the broker.xml configuration file, add cluster-connection elements like the following:
<cluster-connections>
   <cluster-connection name="my-cluster">
      <address>jms</address>
      <connector-ref>netty-connector</connector-ref>
      <check-period>1000</check-period>
      <connection-ttl>5000</connection-ttl>
      <min-large-message-size>50000</min-large-message-size>
      <call-timeout>5000</call-timeout>
      <retry-interval>500</retry-interval>
      <retry-interval-multiplier>1.0</retry-interval-multiplier>
      <max-retry-interval>5000</max-retry-interval>
      <initial-connect-attempts>-1</initial-connect-attempts>
      <reconnect-attempts>-1</reconnect-attempts>
      <use-duplicate-detection>true</use-duplicate-detection>
      <message-load-balancing>ON_DEMAND</message-load-balancing>
      <max-hops>1</max-hops>
      <confirmation-window-size>32000</confirmation-window-size>
      <call-failover-timeout>30000</call-failover-timeout>
      <notification-interval>1000</notification-interval>
      <notification-attempts>2</notification-attempts>
      <discovery-group-ref discovery-group-name="my-discovery-group"/>
   </cluster-connection>
</cluster-connections>
In the above cluster connection, all parameters have been explicitly specified. You can configure the following parameters:
addressEach cluster connection only applies to addresses that match the specified address field. An address is matched on the cluster connection when it begins with the string specified in this element. The address field on a cluster connection also supports comma separated lists and an exclude syntax (
!). To prevent an address from being matched on this cluster connection, prepend a cluster connection address string with!.In the case shown above, the cluster connection will load-balance messages sent to addresses that start with
jms. This cluster connection will, in effect, apply to all JMS queues and topics, because they map to core queues that start with "jms".The address can be any value, and you can have many cluster connections with different values of
address, simultaneously balancing messages for those addresses, potentially to different clusters of brokers. By having multiple cluster connections on different addresses, a single broker can effectively take part in multiple clusters simultaneously.You should be careful not to have multiple cluster connections with overlapping values of an
address(for example, "europe" and "europe.news"), because the same messages could then be distributed between more than one cluster connection, possibly resulting in duplicate deliveries.Examples:
jms.eu-
matches all addresses starting with
jms.eu !jms.eu-
matches all addresses except for those starting with
jms.eu jms.eu.uk,jms.eu.de-
matches all addresses starting with either
jms.eu.ukorjms.eu.de jms.eu,!jms.eu.uk-
matches all addresses starting with
jms.eu, but not those starting withjms.eu.uk
NoteAddress exclusion always takes precedence over address inclusion. Also, wild-card matching is not supported.
This parameter is mandatory.
connector-ref- The connector which will be sent to other nodes in the cluster so that they have the correct cluster topology. This parameter is mandatory.
check-period- The period (in milliseconds) used to check if the cluster connection has failed to receive pings from another broker. The default is 30000.
connection-ttl- How long a cluster connection should stay alive if it stops receiving messages from a specific node in the cluster. The default is 60000.
min-large-message-size- If the message size (in bytes) is larger than this value, then it will be split into multiple segments when sent over the network to other cluster members. The default is 102400.
call-timeout- When a packet is sent over a cluster connection, and it is a blocking call, this value is how long the broker will wait (in milliseconds) for the reply before throwing an exception. The default is 30000.
retry-intervalInternally, cluster connections cause bridges to be created between the nodes of the cluster. If the cluster connection is created and the target node has not been started or is booting, then the cluster connections from other nodes will retry connecting to the target until it comes back up, in the same way as a bridge does.
This parameter determines the interval in milliseconds between retry attempts. It has the same meaning as the
retry-intervalon a bridge.This parameter is optional, and its default value is 500 milliseconds.
retry-interval-multiplier-
The multiplier used to increase the
retry-intervalafter each reconnect attempt. The default is 1. max-retry-interval- The maximum delay (in milliseconds) for retries. The default is 2000.
initial-connect-attempts- The number of times the system will try to connect a node in the cluster initially. If the max-retry is achieved, this node will be considered permanently down, and the system will not route messages to this node. The default is -1 (infinite retries).
reconnect-attempts- The number of times the system will try to reconnect to a node in the cluster. If the max-retry is achieved, this node will be considered permanently down and the system will stop routing messages to this node. The default is -1 (infinite retries).
use-duplicate-detectionCluster connections use bridges to link the nodes, and bridges can be configured to add a duplicate ID property in each message that is forwarded. If the target node of the bridge crashes and then recovers, messages might be resent from the source node. By enabling duplicate detection, any duplicate messages will be filtered out and ignored on receipt at the target node.
This parameter has the same meaning as
use-duplicate-detectionon a bridge. The default isTrue.message-load-balancingThis parameter determines if and how messages will be distributed between other nodes of the cluster. It can be one of three values:
OFF,STRICT, orON_DEMAND(default). This parameter replaces the deprecatedforward-when-no-consumersparameter.If this is set to
OFF, then messages will never be forwarded to another node in the cluster.If this is set to
STRICT, then each incoming message will be forwarded round-robin even though the same queues on the other nodes of the cluster may have no consumers at all, or they may have consumers that have non-matching message filters (selectors). The broker will not forward messages to other nodes if there are no queues of the same name on the other nodes, even if this parameter is set toSTRICT. UsingSTRICTis like setting the legacyforward-when-no-consumersparameter totrue.If this is set to
ON_DEMAND, then the broker will only forward messages to other nodes of the cluster if the address to which they are being forwarded has queues which have consumers, and if those consumers have message filters (selectors). At least one of those selectors must match the message. UsingON_DEMANDis like setting the legacyforward-when-no-consumersparameter tofalse.max-hopsWhen a cluster connection determines the set of nodes to which it might load-balance a message, those nodes do not have to be directly connected to it through a cluster connection. The broker can be configured to also load-balance messages to nodes which might be connected to it only indirectly with other brokers as intermediates in a chain.
This allows the broker to be configured in more complex topologies and still provide message load-balancing.
The default value for this parameter is
1, which means messages are only load-balanced to other brokers that are directly connected to this broker. This parameter is optional.confirmation-window-size-
The size (in bytes) of the window used for sending confirmations from the broker connected to. When the broker receives
confirmation-window-sizebytes, it notifies its client. The default is 1048576. A value of -1 means no window. producer-window-size- The size for producer flow control over cluster connection. By default, it is disabled through the cluster connection bridge, but you may want to set a value if you are using really large messages in cluster. A value of -1 means no window.
call-failover-timeout-
Similar to
call-timeout, but used when a call is made during a failover attempt. The default is -1 (no timeout). notification-interval- How often (in milliseconds) the cluster connection should broadcast itself when attaching to the cluster. The default is 1000.
notification-attempts- How many times the cluster connection should broadcast itself when connecting to the cluster. The default is 2.
discovery-group-refThe discovery group to be used to obtain the list of other brokers in the cluster to which this cluster connection should connect.
Alternatively, if you would like your cluster connections to use a static list of brokers for discovery, you can specify the following elements:
<cluster-connection name="my-cluster">
   ...
   <static-connectors>
      <connector-ref>server0-connector</connector-ref>
      <connector-ref>server1-connector</connector-ref>
   </static-connectors>
</cluster-connection>
In this example, there is a set of two brokers of which one will always be available. If there are other brokers in the cluster, they will be discovered by one of these connectors when an initial connection is made.
10.3.2. Configuring Cluster User Credentials
When creating connections between nodes of a cluster to form a cluster connection, the broker uses a cluster user and cluster password.
To configure the cluster user and password, in the broker.xml configuration file, specify the following:
<cluster-user>ACTIVEMQ.CLUSTER.ADMIN.USER</cluster-user>
<cluster-password>CHANGE ME!!</cluster-password>
You should change these values from their default, or remote clients will be able to make connections to the broker using the default values. The broker will also detect the default credentials when it starts, and display a warning.
10.4. Client-Side Load Balancing
With broker client-side load balancing, subsequent sessions created using a single session factory can be connected to different nodes of the cluster. This allows sessions to spread smoothly across the nodes of a cluster and not be "clumped" on any particular node.
The load balancing policy to be used by the client factory is configurable. The broker provides four out-of-the-box load balancing policies, and you can also implement your own.
The following table describes the four load balancing policies:
| Policy | Description |
|---|---|
| Round Robin | The first node is chosen randomly then each subsequent node is chosen sequentially in the same order. For example, nodes could be chosen in any of the following sequences:
Use |
| Random | Each node is chosen randomly.
Use |
| Random Sticky | The first node is chosen randomly and then reused for subsequent connections.
Use |
| First Element | The first (that is, 0th) node is always returned.
Use |
You can also implement your own policy by implementing the interface org.apache.activemq.artemis.api.core.client.loadbalance.ConnectionLoadBalancingPolicy
Specifying which load balancing policy to use differs whether you are using JMS or the core API. If you do not specify a policy then the default will be used, which is org.apache.activemq.artemis.api.core.client.loadbalance.RoundRobinConnectionLoadBalancingPolicy.
If you are using JMS, and you are using JNDI on the client to look up your JMS connection factory instances, then you can specify these parameters in the JNDI context environment (for example jndi.properties) to specify the load balancing policy directly:
java.naming.factory.initial=org.apache.activemq.artemis.jndi.ActiveMQInitialContextFactory
connection.myConnectionFactory=tcp://localhost:61616?loadBalancingPolicyClassName=org.apache.activemq.artemis.api.core.client.loadbalance.RandomConnectionLoadBalancingPolicy
The above example would instantiate a JMS connection factory that uses the random connection load balancing policy.
If you are using JMS, but you are instantiating your connection factory directly on the client side, then you can set the load-balancing policy using the setter on the ActiveMQConnectionFactory before using it:
ConnectionFactory jmsConnectionFactory = ActiveMQJMSClient.createConnectionFactory(...);
jmsConnectionFactory.setLoadBalancingPolicyClassName("com.acme.MyLoadBalancingPolicy");
If you are using the core API, you can set the load- balancing policy directly on the BrokerLocator instance you are using:
BrokerLocator locator = ActiveMQClient.createBrokerLocatorWithHA(server1, server2);
locator.setLoadBalancingPolicyClassName("com.acme.MyLoadBalancingPolicy");
The set of brokers over which the factory load balances can be determined in one of two ways:
- Specifying brokers explicitly
- Using discovery
10.5. Specifying Members of a Cluster Explicitly
You can control which brokers connect to each other in the cluster. This is typically used to form non-symmetrical clusters such as chain clusters or ring clusters.
To specify members of a cluster explicitly, specify a static list of connectors like the following:
<cluster-connection name="my-cluster">
   <address>jms</address>
   <connector-ref>netty-connector</connector-ref>
   <retry-interval>500</retry-interval>
   <use-duplicate-detection>true</use-duplicate-detection>
   <message-load-balancing>STRICT</message-load-balancing>
   <max-hops>1</max-hops>
   <static-connectors allow-direct-connections-only="true">
      <connector-ref>server1-connector</connector-ref>
   </static-connectors>
</cluster-connection>
In this example, the allow-direct-connections-only attribute is set so that the only broker to which this broker can connect is server1-connector.
10.6. Message Redistribution
You can configure the broker to automatically redistribute messages from queues that do not have any consumers to queues that do have consumers.
If message load balancing is OFF or ON_DEMAND, messages are not moved to queues that do not have consumers to consume them. However, if a matching consumer on a queue closes after the messages have been sent to the queue, the messages will stay in the queue without being consumed. This scenario is called starvation, and message redistribution can be used to move these messages to queues with matching consumers.
By default, message redistribution is disabled, but you can enable it for an address, and can configure the redistribution delay to define how often the messages should be redistributed.
To enable message redistribution, in the broker.xml configuration file:
-
Verify that
message-load-balancingis set toON_DEMAND. Enable message redistribution for a queue.
For example:
<address-settings>
   <address-setting match="jms.#">
      <redistribution-delay>0</redistribution-delay>
   </address-setting>
</address-settings>
The
address-settingsblock sets aredistribution-delayof0for any queue which is bound to an address that starts with "jms.". All JMS queues and topic subscriptions are bound to addresses that start with "jms.", so the above would enable instant (no delay) redistribution for all JMS queues and topic subscriptions.The attribute
matchcan be an exact match or it can be a string that conforms to the broker wildcard syntax (described in the section called “The A-MQ Broker Wildcard Syntax”).The element
redistribution-delaydefines the delay in milliseconds after the last consumer is closed on a queue before redistributing messages from that queue to other nodes of the cluster which do have matching consumers. A delay of 0 means the messages will be immediately redistributed. A value of-1signifies that messages will never be redistributed. The default value is-1.In most cases, you should set a delay before redistributing, because it is common for a consumer to close but another one to be quickly created on the same queue.
Chapter 11. Configuring High Availability and Failover
High availability is the ability for the system to continue functioning after failure of one or more of the servers.
A part of high availability is failover which is the ability for client connections to migrate from one server to another in event of server failure so client applications can continue to operate.
For the remainder of this chapter the term Clients only refers to the A-MQ7 JMS Core Client.
11.1. Live - Backup Groups
A-MQ Broker 7.0.0 allows servers to be linked together as live - backup groups where each live server can have 1 or more backup servers. A backup server is owned by only one live server. Backup servers are not operational until failover occurs, however 1 chosen backup, which will be in passive mode, announces its status and waits to take over the live servers work.
Before failover, only the live server is serving the clients while the backup servers remain passive or awaiting to become a backup server. When a live server crashes or is brought down in the correct mode, the backup server currently in passive mode will become live and another backup server will become passive. If a live server restarts after a failover then it will have priority and be the next server to become live when the current live server goes down, if the current live server is configured to allow automatic failback then it will detect the live server coming back up and automatically stop.
11.1.1. HA Policies
The broker supports two different strategies for backing up a server shared store and replication. Which is configured via the ha-policy configuration element.
<ha-policy>
   <replication/>
</ha-policy>
or
<ha-policy>
   <shared-store/>
</ha-policy>
As well as these 2 strategies there is also a 3rd called live-only. This of course means there will be no Backup Strategy and is the default if none is provided, however this is used to configure scale-down, covered in a later chapter.
The ha-policy configurations replaces any current HA configuration in the root of the broker.xml configuration. All old configuration is now deprecated although best efforts will be made to honor it if configured this way.
Only persistent message data will survive failover. Any non persistent message data will not be available after failover.
The ha-policy type configures which strategy a cluster should use to provide the backing up of a servers data. Within this configuration element is configured how a server should behave within the cluster, either as a master (live), slave (backup) or colocated (both live and backup). This would look something like:
<ha-policy>
   <replication>
      <master/>
   </replication>
</ha-policy>
or
<ha-policy>
   <shared-store/>
      <slave/>
   </shared-store/>
</ha-policy>
or
<ha-policy>
   <replication>
      <colocated/>
   </replication>
</ha-policy>
11.1.2. Data Replication HA Policy
When using replication, the live and the backup servers do not share the same data directories, all data synchronization is done over the network. Therefore all (persistent) data received by the live server will be duplicated to the backup.

Notice that upon start-up the backup server will first need to synchronize all existing data from the live server before becoming capable of replacing the live server should it fail. So unlike when using shared storage, a replicating backup will not be a fully operational backup right after start-up, but only after it finishes synchronizing the data with its live server. The time it will take for this to happen will depend on the amount of data to be synchronized and the connection speed.
In general, synchronization occurs in parallel with current network traffic so this will not cause any blocking on current clients. However, there is a critical moment at the end of this process where the replicating server must complete the synchronization and ensure the replica acknowledges this completion. This exchange between the replicating server and replica will block any journal related operations. The maximum length of time that this exchange will block is controlled by the initial-replication-sync-timeout configuration element.
Replication will create a copy of the data at the backup. One issue to be aware of is: in case of a successful fail-over, the backup’s data will be newer than the one at the live’s storage. If you configure your live server to perform a failback to live server when restarted, it will synchronize its data with the backup’s. If both servers are shutdown, the administrator will have to determine which one has the latest data.
The replicating live and backup pair must be part of a cluster. The Cluster Connection also defines how backup servers will find the remote live servers to pair with. See Configure Clusters for details on how this is done, and how to configure a cluster connection. Notice that:
- Both live and backup servers must be part of the same cluster. Notice that even a simple live/backup replicating pair will require a cluster configuration.
- Their cluster user and password must match.
Within a cluster, there are two ways that a backup server will locate a live server to replicate from, these are:
-
specifying a node group. You can specify a group of live servers that a backup server can connect to. This is done by configuringgroup-namein either themasteror theslaveelement of thebroker.xml. A Backup server will only connect to a live server that shares the same node group name -
connecting to any live. This will be the behavior ifgroup-nameis not configured allowing a backup server to connect to any live server
As an example of using group-name, suppose you have 5 live servers and 6 backup servers. You could divide the servers into two groups.
-
Live servers
live1,live2,live3use agroup-nameoffish, while serverslive4,live5usebird. -
Backup servers
backup1,backup2,backup3,backup4use the configured withgroup-name=fish, and serversbackup5,backup6withgroup-name=bird
After joining the cluster the backups with group-name=fish will search for live servers with group-name=fish to pair with. Since there is one backup too many, the fish will remain with one spare backup. Meanwhile, the 2 backups with group-name=bird will pair with live servers live4 and live5.
The backup will search for any live server that it is configured to connect to. It then tries to replicate with each live server in turn until it finds a live server that has no current backup configured. If no live server is available it will wait until the cluster topology changes and repeats the process.
This is an important distinction from a shared-store backup, if a backup starts and does not find a live server, the server will just activate and start to serve client requests. In the replication case, the backup just keeps waiting for a live server to pair with. Note that in replication the backup server does not know whether any data it might have is up to date, so it really cannot decide to activate automatically. To activate a replicating backup server using the data it has, the administrator must change its configuration to make it a live server by changing slave to master.
Much like in the shared-store case, when the live server stops or crashes, its replicating backup will become active and take over its duties. Specifically, the backup will become active when it loses connection to its live server. This can be problematic because this can also happen because of a temporary network problem. In order to address this issue, the backup will try to determine whether it still can connect to the other servers in the cluster. If it can connect to more than half the servers, it will become active, if more than half the servers also disappeared with the live, the backup will wait and try reconnecting with the live. This avoids a split brain situation.
11.1.2.1. Configuring Data Replication
To configure the live and backup servers to be a replicating pair, configure the live server in ' broker.xml to have:
<ha-policy>
   <replication>
      <master/>
   </replication>
</ha-policy>
.
<cluster-connections>
   <cluster-connection name="my-cluster">
    ...
   </cluster-connection>
</cluster-connections>
The backup server must be similarly configured but as a slave
<ha-policy>
   <replication>
      <slave/>
   </replication>
</ha-policy>
Replication Configuration Details
The following table lists all the ha-policy configuration elements for HA strategy Replication for master:
Table 11.1. HA Replication Master Policy
| Name |
| Description |
| check-for-live-server |
| Whether to check the cluster for a (live) server using our own server ID when starting up. This option is only necessary for performing 'fail-back' on replicating servers |
| cluster-name |
|
Name of the cluster configuration to use for replication. This setting is only necessary if you configure multiple cluster connections. If configured then the connector configuration of the cluster configuration with this name will be used when connecting to the cluster to discover if a live server is already running, see |
| group-name |
| If set, backup servers will only pair with live servers with matching group-name. |
| initial-replication-sync-timeout |
| The amount of time the replicating server will wait at the completion of the initial replication process for the replica to acknowledge it has received all the necessary data. The default is 30,000 milliseconds. Note: during this interval any journal related operations will be blocked |
The following table lists all the ha-policy configuration elements for HA strategy Replication for slave:
Table 11.2. HA Replication Slave Policy
| Name | Description |
| cluster-name |
Name of the cluster configuration to use for replication. This setting is only necessary if you configure multiple cluster connections. If configured then the connector configuration of the cluster configuration with this name will be used when connecting to the cluster to discover if a live server is already running, see |
| group-name | If set, backup servers will only pair with live servers with matching group-name |
| max-saved-replicated-journals-size | This specifies how many times a replicated backup server can restart after moving its files on start. Once there are this number of backup journal files the server will stop permanently after if fails back |
| allow-failback | Whether a server will automatically stop when a another places a request to take over its place. The use case is when the backup has failed over |
| initial-replication-sync-timeout | After failover and the slave has become live, this is set on the new live server. It represents the amount of time the replicating server will wait at the completion of the initial replication process for the replica to acknowledge it has received all the necessary data. The default is 30,000 milliseconds. <strong>Note</strong>: during this interval any journal related operations will be blocked |
11.1.3. Shared Store HA Policy
When using a shared store, both live and backup servers share the same entire data directory using a shared file system. This means the paging directory, journal directory, large messages and binding journal.
When failover occurs and a backup server takes over, it will load the persistent storage from the shared file system and clients can connect to it.
This style of high availability differs from data replication in that it requires a shared file system which is accessible by both the live and backup nodes. Typically this will be some kind of high performance Storage Area Network (SAN). Red Hat does not recommend you use Network Attached Storage (NAS), e.g. NFS mounts to store any shared journal (NFS is slow).
The advantage of shared-store high availability is that no replication occurs between the live and backup nodes, this means it does not suffer any performance penalties due to the overhead of replication during normal operation.
The disadvantage of shared store replication is that it requires a shared file system, and when the backup server activates it needs to load the journal from the shared store which can take some time depending on the amount of data in the store.
If you require the highest performance during normal operation, have access to a fast SAN and live with a slightly slower failover (depending on amount of data).

11.1.3.2. Configuring Failing Back
After a live server has failed and a backup taken has taken over its duties, you may want to restart the live server and have clients fail back.
In case of "shared disk", simply restart the original live server and kill the new live server by can do this by killing the process itself. Alternatively you can set allow-fail-back to true on the slave config which will force the backup that has become live to automatically stop. This configuration would look like:
<ha-policy>
   <shared-store>
      <slave>
         <allow-failback>true</allow-failback>
      </slave>
   </shared-store>
</ha-policy>
In replication HA mode you need to set an extra property check-for-live-server to true in the master configuration. If set to true, during start-up a live server will first search the cluster for another server using its nodeID. If it finds one, it will contact this server and try to "fail-back". Since this is a remote replication scenario, the "starting live" will have to synchronize its data with the server running with its ID, once they are in sync, it will request the other server (which it assumes it is a back that has assumed its duties) to shutdown for it to take over. This is necessary because otherwise the live server has no means to know whether there was a fail-over or not, and if there was if the server that took its duties is still running or not. To configure this option at your broker.xml configuration file as follows:
<ha-policy>
   <replication>
      <master>
         <check-for-live-server>true</check-for-live-server>
      <master>
   </replication>
</ha-policy>Be aware that if you restart a live server while after failover has occurred then this value must be set to ``. If not the live server will restart and server the same messages that the backup has already handled causing duplicates.
It is also possible, in the case of shared store, to cause failover to occur on normal server shutdown, to enable this set the following property to true in the ha-policy configuration on either the master or slave like so:
<ha-policy>
   <shared-store>
      <master>
         <failover-on-shutdown>true</failover-on-shutdown>
      </master>
   </shared-store>
</ha-policy>
By default this is set to false, if by some chance you have set this to false but still want to stop the server normally and cause failover then you can do this by using the management API.
You can also force the running live server to shutdown when the old live server comes back up allowing the original live server to take over automatically by setting the following property in the broker.xml configuration file as follows:
<ha-policy>
   <shared-store>
      <slave>
         <allow-failback>true</allow-failback>
      </slave>
   </shared-store>
</ha-policy>
Shared Store Configuration Details
The following table lists all the ha-policy configuration elements for HA strategy shared store for master:
Table 11.3. HA Shared Store Master Policy
| Name |
| Description |
| failover-on-server-shutdown |
| If set to true then when this server is stopped normally the backup will become live assuming failover. If false then the backup server will remain passive. Note that if false you want failover to occur the you can use the the management API as explained at //todo add when managemnt written |
The following table lists all the ha-policy configuration elements for HA strategy Shared Store for slave.
.HA Shared Store Slave Policy
| Name |
| Description |
| failover-on-server-shutdown |
| In the case of a backup that has become live. then when set to true then when this server is stopped normally the backup will become live assuming failover. If false then the backup server will remain passive. |
| allow-failback |
| Whether a server will automatically stop when a another places a request to take over its place. The use case is when the backup has failed over |
11.1.3.3. Colocated Backup Servers
It is also possible when running standalone to colocate backup servers in the same JVM as another live server. Live Servers can be configured to request another live server in the cluster to start a backup server in the same JVM either using shared store or replication. The new backup server will inherit its configuration from the live server creating it apart from its name, which will be set to colocated_backup_n where n is the number of backups the server has created, and any directories and its Connectors and Acceptors which are discussed later on in this chapter. A live server can also be configured to allow requests from backups and also how many backups a live server can start. this way you can evenly distribute backups around the cluster. This is configured via the ha-policy element in the broker.xml file , as in the example below.
<ha-policy>
   <replication>
      <colocated>
         <request-backup>true</request-backup>
         <max-backups>1</max-backups>
         <backup-request-retries>-1</backup-request-retries>
         <backup-request-retry-interval>5000</backup-request-retry-interval>
         <master/>
         <slave/>
      </colocated>
   <replication>
</ha-policy>
The above example is configured to use replication, in this case the master and slave configurations must match those for normal replication as in the previous chapter. A shared-store ha policy is also supported.

11.1.3.4. Configuring Connectors and Acceptors
If the HA Policy is colocated then connectors and acceptors will be inherited from the live server creating it and offset depending on the setting of backup-port-offset configuration element. If this is set to say 100 (which is the default) and a connector is using port 61616 then this will be set to 5545 for the first server created, 5645 for the second and so on.
For INVM connectors and Acceptors the id will have colocated_backup_n appended, where n is the backup server number.
11.1.3.5. Remote Connectors
It may be that some of the Connectors configured are for external servers and hence should be excluded from the offset. for instance a Connector used by the cluster connection to do quorum voting for a replicated backup server, these can be omitted from being offset by adding them to the ha-policy configuration like so:
<ha-policy>
   <replication>
      <colocated>
         <excludes>
            <connector-ref>remote-connector</connector-ref>
         </excludes>
      ...
</ha-policy>
11.1.3.6. Configuring Journal Directories
Directories for the Journal, Large messages and Paging will be set according to what the HA strategy is. If shared store the the requesting server will notify the target server of which directories to use. If replication is configured then directories will be inherited from the creating server but have the new backups name appended.
The following table lists all the ha-policy configuration elements for colocated policy.
Table 11.4. HA Replication Colocation Policy
| Name |
| Description |
| request-backup |
| If true then the server will request a backup on another node. |
| backup-request-retries |
| How many times the live server will try to request a backup, -1 means for ever. |
| backup-request-retry-interval |
| How long to wait for retries between attempts to request a backup server. |
| max-backups |
| How many backups a live server can create. |
| backup-port-offset |
| The offset to use for the Connectors and Acceptors when creating a new backup server. |
11.1.4. Scaling Down
An alternative to using Live/Backup groups is to configure scaledown. when configured for scale down a server can copy all its messages and transaction state to another live server. The advantage of this is that you do not need full backups to provide some form of HA, however there are disadvantages with this approach the first being that it only deals with a server being stopped and not a server crash. The caveat here is if you configure a backup to scale down.
Another disadvantage is that it is possible to lose message ordering. This happens in the following scenario, say you have 2 live servers and messages are distributed evenly between the servers from a single producer, if one of the servers scales down then the messages sent back to the other server will be in the queue after the ones already there, so server 1 could have messages 1,3,5,7,9 and server 2 would have 2,4,6,8,10, if server 2 scales down the order in server 1 would be 1,3,5,7,9,2,4,6,8,10.

11.1.4.1. Configuring Scaling Down for Live Servers
The configuration for a live server to scale down would be something like:
<ha-policy>
   <live-only>
      <scale-down>
         <connectors>
            <connector-ref>server1-connector</connector-ref>
         </connectors>
      </scale-down>
   </live-only>
</ha-policy>
In this instance the server is configured to use a specific connector to scale down, if a connector is not specified then the first INVM connector is chosen, this is to make scale down fromm a backup server easy to configure. It is also possible to use discovery to scale down, this would look like:
<ha-policy>
   <live-only>
      <scale-down>
         <discovery-group-ref discovery-group-name="my-discovery-group"/>
      </scale-down>
   </live-only>
</ha-policy>
11.1.4.2. Configuring Scaling Down for Server Groups
It is also possible to configure servers to only scale down to servers that belong in the same group. This is done by configuring the group-name, as in the following example.
<ha-policy>
   <live-only>
      <scale-down>
         ...
         <group-name>my-group</group-name>
      </scale-down>
   </live-only>
</ha-policy>
In this scenario only servers that belong to the group my-group will be scaled down to
11.1.4.3. Configuring Scaling Down for Backup Servers
It is also possible to mix scale down with HA via backup servers. If a slave is configured to scale down then after failover has occurred, instead of starting fully the backup server will immediately scale down to another live server. The most appropriate configuration for this is using the colocated approach. it means as you bring up live server they will automatically be backed up by server and as live servers are shutdown, there messages are made available on another live server. A typical configuration would look like:
<ha-policy>
   <replication>
      <colocated>
         <backup-request-retries>44</backup-request-retries>
         <backup-request-retry-interval>33</backup-request-retry-interval>
         <max-backups>3</max-backups>
         <request-backup>false</request-backup>
         <backup-port-offset>33</backup-port-offset>
         <master>
            <group-name>purple</group-name>
            <check-for-live-server>true</check-for-live-server>
            <cluster-name>abcdefg</cluster-name>
         </master>
         <slave>
            <group-name>tiddles</group-name>
            <max-saved-replicated-journals-size>22</max-saved-replicated-journals-size>
            <cluster-name>33rrrrr</cluster-name>
            <restart-backup>false</restart-backup>
            <scale-down>
               <!--a grouping of servers that can be scaled down to-->
               <group-name>boo!</group-name>
               <!--either a discovery group-->
               <discovery-group-ref discovery-group-name="wahey"/>
            </scale-down>
         </slave>
      </colocated>
   </replication>
</ha-policy>
11.1.4.4. Scaling Down and Clients
When a server is stopping and preparing to scale down it will send a message to all its clients informing them which server it is scaling down to before disconnecting them. At this point the client will reconnect however this will only succeed once the server has completed scaledown. This is to ensure that any state such as queues or transactions are there for the client when it reconnects. The normal reconnect settings apply when the client is reconnecting so these should be high enough to deal with the time needed to scale down.
11.2. Failover
The broker defines two types of client failover:
- Automatic client failover
- Application-level client failover
The broker also provides 100% transparent automatic reattachment of connections to the same server (e.g. in case of transient network problems). This is similar to failover, except it is reconnecting to the same server.
During failover, if the client has consumers on any non persistent or temporary queues, those queues will be automatically recreated during failover on the backup node, since the backup node will not have any knowledge of non persistent queues.
11.2.1. Automatic Client Failover
The brokers clients can be configured to receive knowledge of all live and backup servers, so that in event of connection failure at the client - live server connection, the client will detect this and reconnect to the backup server. The backup server will then automatically recreate any sessions and consumers that existed on each connection before failover, thus saving the user from having to hand-code manual reconnection logic.
Clients detect connection failure when it has not received packets from the server within the time given by client-failure-check-period. If the client does not receive data in good time, it will assume the connection has failed and attempt failover. Also if the socket is closed by the OS, usually if the server process is killed rather than the machine itself crashing, then the client will failover straight away.
Clients can be configured to discover the list of live-backup server groups in a number of different ways. They can be configured explicitly or probably the most common way of doing this is to use server discovery for the client to automatically discover the list. Alternatively, the clients can explicitly connect to a specific server and download the current servers and backups. For full details on how to configure server discovery, please See Configure Clusters for more information.
To enable automatic client failover, the client must be configured to allow non-zero reconnection attempts.
By default failover will only occur after at least one connection has been made to the live server. In other words, by default, failover will not occur if the client fails to make an initial connection to the live server - in this case it will simply retry connecting to the live server according to the reconnect-attempts property and fail after this number of attempts.
11.2.1.1. Failing over during the Initial Connection
Since the client does not learn about the full topology until after the first connection is made there is a window where it does not know about the backup. If a failure happens at this point the client can only try reconnecting to the original live server. To configure how many attempts the client will make you can set the property initialConnectAttempts on the ClientSessionFactoryImpl or ActiveMQConnectionFactory or initial-connect-attempts in xml. The default for this is 0, that is try only once. Once the number of attempts has been made an exception will be thrown.
11.2.1.2. A Note on Server Replication
The broker does not replicate full server state between live and backup servers. When the new session is automatically recreated on the backup it will not have any knowledge of messages already sent or acknowledged in that session. Any in-flight sends or acknowledgements at the time of failover might also be lost.
By replicating full server state, theoretically A-MQ Broker could provide a 100% transparent seamless failover, which would avoid any lost messages or acknowledgements, however this comes at a great cost: replicating the full server state (including the queues, session, etc.). This would require replication of the entire server state machine; every operation on the live server would have to replicated on the replica server(s) in the exact same global order to ensure a consistent replica state. This is extremely hard to do in a performant and scalable way, especially when one considers that multiple threads are changing the live server state concurrently.
It is possible to provide full state machine replication using techniques such as virtual synchrony, but this does not scale well and effectively serializes all operations to a single thread, dramatically reducing concurrency.
Other techniques for multi-threaded active replication exist such as replicating lock states or replicating thread scheduling but this is very hard to achieve at a Java level.
Consequently it has decided it was not worth massively reducing performance and concurrency for the sake of 100% transparent failover. Even without 100% transparent failover, it is simple to guarantee once and only once delivery, even in the case of failure, by using a combination of duplicate detection and retrying of transactions. However this is not 100% transparent to the client code.
11.2.1.3. Handling Blocking Calls During Failover
If the client code is in a blocking call to the server, waiting for a response to continue its execution, when failover occurs, the new session will not have any knowledge of the call that was in progress. This call might otherwise hang for ever, waiting for a response that will never come.
To prevent this, the broker will unblock any blocking calls that were in progress at the time of failover by making them throw a javax.jms.JMSException (if using JMS), or a ActiveMQException with error code ActiveMQException.UNBLOCKED. It is up to the client code to catch this exception and retry any operations if desired.
If the method being unblocked is a call to commit(), or prepare(), then the transaction will be automatically rolled back and the broker will throw a javax.jms.TransactionRolledBackException (if using JMS), or a ActiveMQException with error code ActiveMQException.TRANSACTION_ROLLED_BACK if using the core API.
11.2.1.4. Handling Failover With Transactions
If the session is transactional and messages have already been sent or acknowledged in the current transaction, then the server cannot be sure that messages sent or acknowledgements have not been lost during the failover.
Consequently the transaction will be marked as rollback-only, and any subsequent attempt to commit it will throw a javax.jms.TransactionRolledBackException (if using JMS), or a ActiveMQException with error code ActiveMQException.TRANSACTION_ROLLED_BACK if using the core API.
The caveat to this rule is when XA is used either via JMS or through the core API. If 2 phase commit is used and prepare has already been called then rolling back could cause a HeuristicMixedException. Because of this the commit will throw a XAException.XA_RETRY exception. This informs the Transaction Manager that it should retry the commit at some later point in time, a side effect of this is that any non persistent messages will be lost. To avoid this use persistent messages when using XA. With acknowledgements this is not an issue since they are flushed to the server before prepare gets called.
It is up to the user to catch the exception, and perform any client side local rollback code as necessary. There is no need to manually rollback the session - it is already rolled back. The user can then just retry the transactional operations again on the same session.
If failover occurs when a commit call is being executed, the server, as previously described, will unblock the call to prevent a hang, since no response will come back. In this case it is not easy for the client to determine whether the transaction commit was actually processed on the live server before failure occurred.
If XA is being used either via JMS or through the core API then an XAException.XA_RETRY is thrown. This is to inform Transaction Managers that a retry should occur at some point. At some later point in time the Transaction Manager will retry the commit. If the original commit has not occurred then it will still exist and be committed, if it does not exist then it is assumed to have been committed although the transaction manager may log a warning.
To remedy this, the client can simply enable duplicate detection in the transaction, and retry the transaction operations again after the call is unblocked. If the transaction had indeed been committed on the live server successfully before failover, then when the transaction is retried, duplicate detection will ensure that any durable messages resent in the transaction will be ignored on the server to prevent them getting sent more than once.
By catching the rollback exceptions and retrying, catching unblocked calls and enabling duplicate detection, once and only once delivery guarantees for messages can be provided in the case of failure, guaranteeing 100% no loss or duplication of messages.
11.2.1.5. Handling Failover With Non Transactional Sessions
If the session is non transactional, messages or acknowledgements can be lost in the event of failover.
If you wish to provide once and only once delivery guarantees for non transacted sessions too, enabled duplicate detection, and catch unblock exceptions.
11.2.2. Getting Notified of Connection Failure
JMS provides a standard mechanism for getting notified asynchronously of connection failure: java.jms.ExceptionListener. Please consult the JMS javadoc or any good JMS tutorial for more information on how to use this.
The broker core API also provides a similar feature in the form of the class org.apache.activemq.artemis.core.client.SessionFailureListener
Any ExceptionListener or SessionFailureListener instance will always be called by the broker on event of connection failure, irrespective of whether the connection was successfully failed over, reconnected or reattached, however you can find out if reconnect or reattach has happened by either the failedOver flag passed in on the connectionFailed on SessionfailureListener or by inspecting the error code on the javax.jms.JMSException which will be one of the following:
JMSException error codes .HA Replication Colocation Policy
| Error code | Description |
| FAILOVER | Failover has occurred and the server has successfully reattached or reconnected |
| DISCONNECT | No failover has occurred and the server is disconnected |
11.2.3. Application-Level Failover
In some cases you may not want automatic client failover, and prefer to handle any connection failure yourself, and code your own manually reconnection logic in your own failure handler. This is known as application-level failover, since the failover is handled at the user application level.
To implement application-level failover, if you are using JMS then you need to set an ExceptionListener class on the JMS connection. The ExceptionListener will be called by the broker in the event that connection failure is detected. In your ExceptionListener, you would close your old JMS connections, potentially look up new connection factory instances from JNDI and creating new connections.
If you are using the core API, then the procedure is very similar: you would set a FailureListener on the core ClientSession instances.
Chapter 12. Configuring Logging
A-MQ Broker uses the JBoss Logging framework to do its logging and is configurable via the <broker-instance-dir>/etc/logging.properties configuration file. This configuration file is a list of key value pairs.
There are six loggers available which are configured by the `loggers' key.
loggers=org.jboss.logging,org.apache.activemq.artemis.core.server,org.apache.activemq.artemis.utils,org.apache.activemq.artemis.journal,org.apache.activemq.artemis.jms.server,org.apache.activemq.artemis.integration.bootstrap
Table 12.1. Loggers
| Logger | Description |
|---|---|
|
| Logs any calls not handled by the Brokers loggers |
|
| Logs the Broker core |
|
| Logs utility calls |
|
| Logs Journal calls |
|
| Logs JMS calls |
|
| Logs bootstrap calls |
By default there are two loggers configured by default by the logger.handlers key.
logger.handlers=FILE,CONSOLE
As the names suggest these log to the console and to a file.
12.1. Changing the Logging Level
The default logging level for all loggers is INFO and is configured on the root logger.
logger.level=INFO
All other loggers specified can be configured individually via the logger name.
logger.org.apache.activemq.artemis.core.server.level=INFO
logger.org.apache.activemq.artemis.journal.level=INFO
logger.org.apache.activemq.artemis.utils.level=INFO
logger.org.apache.activemq.artemis.jms.level=INFO
logger.org.apache.activemq.artemis.integration.bootstrap.level=INFO
The root logger configuration will always be the finest logging logged even if the other logges have a finer logging configuration.
Table 12.2. Available Logging Levels
| Level | Description |
|---|---|
| FATAL | Use the FATAL level priority for events that indicate a critical service failure. If a service issues a FATAL error it is completely unable to service requests of any kind. |
| ERROR | Use the ERROR level priority for events that indicate a disruption in a request or the ability to service a request. A service should have some capacity to continue to service requests in the presence of ERRORs. |
| WARN | Use the WARN level priority for events that may indicate a non-critical service error. Resumable errors, or minor breaches in request expectations fall into this category. The distinction between WARN and ERROR may be hard to discern and so its up to the developer to judge. The simplest criterion is would this failure result in a user support call. If it would use ERROR. If it would not use WARN. |
| INFO | Use the INFO level priority for service life-cycle events and other crucial related information. Looking at the INFO messages for a given service category should tell you exactly what state the service is in. |
| DEBUG | Use the DEBUG level priority for log messages that convey extra information regarding life-cycle events. Developer or in depth information required for support is the basis for this priority. The important point is that when the DEBUG level priority is enabled, the JBoss server log should not grow proportionally with the number of server requests. Looking at the DEBUG and INFO messages for a given service category should tell you exactly what state the service is in, as well as what server resources it is using: ports, interfaces, log files, etc. |
| TRACE | Use TRACE the level priority for log messages that are directly associated with activity that corresponds requests. Further, such messages should not be submitted to a Logger unless the Logger category priority threshold indicates that the message will be rendered. Use the Logger.isTraceEnabled() method to determine if the category priority threshold is enabled. The point of the TRACE priority is to allow for deep probing of the JBoss server behavior when necessary. When the TRACE level priority is enabled, you can expect the number of messages in the JBoss server log to grow at least a x N, where N is the number of requests received by the server, a some constant. The server log may well grow as power of N depending on the request-handling layer being traced. |
12.2. Configuring Console Logging
Console Logging can be configured via the following keys.
handler.CONSOLE=org.jboss.logmanager.handlers.ConsoleHandler
handler.CONSOLE.properties=autoFlush
handler.CONSOLE.level=DEBUG
handler.CONSOLE.autoFlush=true
handler.CONSOLE.formatter=PATTERN
handler.CONSOLE refers to the name given in the logger.handlers key.
Table 12.3. Available Console Configuration
| Property | Description |
|---|---|
|
| The handler’s name. |
|
| The character encoding used by this Handler. |
|
| The log level specifying which message levels will be logged by this. Message levels lower than this value will be discarded. |
|
| Defines a formatter. See Section 12.4, “Configuring the Logging Format”. |
|
| Automatically flush after each write. |
|
| Defines the target of the console handler. The value can either be SYSTEM_OUT or SYSTEM_ERR. |
12.3. Configuring File Logging
File Logging can be configured via the following keys.
handler.FILE=org.jboss.logmanager.handlers.PeriodicRotatingFileHandler
handler.FILE.level=DEBUG
handler.FILE.properties=suffix,append,autoFlush,fileName
handler.FILE.suffix=.yyyy-MM-dd
handler.FILE.append=true
handler.FILE.autoFlush=true
handler.FILE.fileName=${artemis.instance}/log/artemis.log
handler.FILE.formatter=PATTERN
handler.FILE refers to the name given in the logger.handlers key.
Table 12.4. Available Console Configuration
| Property | Description |
|---|---|
|
| The handler’s name. |
|
| The character encoding used by this Handler. |
|
| The log level specifying which message levels will be logged by this. Message levels lower than this value will be discarded. |
|
| Defines a formatter. See Section 12.4, “Configuring the Logging Format”. |
|
| Automatically flush after each write. |
|
| Specify whether to append to the target file. |
|
| The file description consisting of the path and optional relative to path. |
12.4. Configuring the Logging Format
The formatter describes how log messages should be shown. The following is the default configuration.
formatter.PATTERN=org.jboss.logmanager.formatters.PatternFormatter
formatter.PATTERN.properties=pattern
formatter.PATTERN.pattern=%d{HH:mm:ss,SSS} %-5p [%c] %s%E%n
Where %s is the message and %E is the exception if one exists.
The format is the same as the Log4J format. A full description can be found here.
12.5. Client or Embedded Server Logging
Firstly, if you want to enable logging on the client side you need to include the JBoss logging jars in your library. If you are using maven add the following dependencies.
<dependency>
   <groupId>org.jboss.logmanager</groupId>
   <artifactId>jboss-logmanager</artifactId>
   <version>1.5.3.Final</version>
</dependency>
<dependency>
   <groupId>org.apache.activemq</groupId>
   <artifactId>activemq-core-client</artifactId>
   <version>1.0.0.Final</version>
</dependency>
There are two properties you need to set when starting your java program. The first is to set the Log Manager to use the JBoss Log Manager. This is done by setting the -Djava.util.logging.manager property. For example, -Djava.util.logging.manager=org.jboss.logmanager.LogManager.
The second is to set the location of the logging.properties file to use. This is done via the -Dlogging.configuration. For instance, -Dlogging.configuration=file:///home/user/projects/myProject/logging.properties.
The value for this needs to be valid URL.
The following is a typical logging.properties for a client.
# Root logger option
loggers=org.jboss.logging,org.apache.activemq.artemis.core.server,org.apache.activemq.artemis.utils,org.apache.activemq.artemis.journal,org.apache.activemq.artemis.jms,org.apache.activemq.artemis.ra

# Root logger level
logger.level=INFO
# Apache ActiveMQ Artemis logger levels
logger.org.apache.activemq.artemis.core.server.level=INFO
logger.org.apache.activemq.artemis.utils.level=INFO
logger.org.apache.activemq.artemis.jms.level=DEBUG

# Root logger handlers
logger.handlers=FILE,CONSOLE

# Console handler configuration
handler.CONSOLE=org.jboss.logmanager.handlers.ConsoleHandler
handler.CONSOLE.properties=autoFlush
handler.CONSOLE.level=FINE
handler.CONSOLE.autoFlush=true
handler.CONSOLE.formatter=PATTERN

# File handler configuration
handler.FILE=org.jboss.logmanager.handlers.FileHandler
handler.FILE.level=FINE
handler.FILE.properties=autoFlush,fileName
handler.FILE.autoFlush=true
handler.FILE.fileName=activemq.log
handler.FILE.formatter=PATTERN

# Formatter pattern configuration
formatter.PATTERN=org.jboss.logmanager.formatters.PatternFormatter
formatter.PATTERN.properties=pattern
formatter.PATTERN.pattern=%d{HH:mm:ss,SSS} %-5p [%c] %s%E%n
Chapter 13. Managing A-MQ Broker
A-MQ Broker provides both a graphical as well as a programming interface to help you manage your brokers.
13.1. Using A-MQ Console
The broker ships with HawtIO which is a modular web console for managing Java applications and a HawtIO broker plugin that exposes custom functionality. Both HawtIO and the broker plugin ship as a WAR file and are deployed via the Jetty Web Server. The WAR files are configured in the <broker-instance-dir>/etc/bootstrap.xml configuration file.
<app url="hawtio" war="hawtio-web.war"/>
<app url="artemis-plugin" war="artemis-plugin.war"/>
To disable the management console simply remove these entries.
HawtIO uses Java Management Extensions (JMX) to expose management functionality from the Java runtime via management beans. The broker exposes all of its messaging resources as management beans, including the broker itself, JMS queues, JMS topics, and other objects.
The broker can also be managed via JMX directly or via JMS. For a complete explanation of all management functionality refer to the management_api chapter.
13.1.1. Configuring Console Security
You will also need to configure credentials for logging into HawtIO. When you create an instance of A-MQ Broker you will be prompted for a default user and role. To use this for the HawtIO login credentials, update the JAVA_ARGS property in the artemis.profile configuration file and add the default role. So, if you set the default role as admin then add the following.
The security realm and role used by HawtIO are configured in the <broker-instance-dir>/etc/artemis.profile file.
-Dhawtio.realm=activemq -Dhawtio.role=admin -Dhawtio.rolePrincipalClasses=org.apache.activemq.artemis.spi.core.security.jaas.RolePrincipal
By default HawtIO will use the default security realm of activemq, which is configured by default in the <broker-instance-dir>/etc/login.config file.
The role used by HawtIO should be configured in the <broker-instance-dir>/etc/artemis-roles.properties file. Any user that has been assigned this role will be allowed access to log in to the management console. For a full explanation of configuring security with the broker, refer to Configuring Security.
13.1.2. Logging in to the Console
If you are using the default broker configuration, then simply go to http://localhost:8161/hawtio/login and log in using any user credentials that have the role configured for HawtIO.

After a successful login you will see an Artemis tab displayed. Click on this to see a screen like the following.

If you have installed HawtIO standalone and want to connect to a remote broker, you will need to connect to it by clicking on the connect tab and entering the Jolokia path.

13.1.3. Accessing the HawtIO Console Securely
You can access the HawtIO console securely using https. Use the following steps.
Open the
bootstrap.xmlfile and find the section shown below.<web bind="http://localhost:8161" path="web"> <app url="jolokia" war="jolokia-war-1.3.3.war"/> </web>Edit that section to match the following.
<web bind="https://localhost:8443"
    path="web"
    keyStorePath="${artemis.instance}/etc/keystore.jks"
    keyStorePassword="password">
    <app url="jolokia" war="jolokia-war-1.3.3.war"/>
</web>
Configure the following properties.
keyStorePath- The path of the key store file.
keyStorePassword- The key store’s password.
clientAuth-
The boolean flag indicates whether or not client authentication is required. The default is
false. trustStorePath-
The path of the trust store file. This is needed only if clientAuth is
true. trustStorePassword- The trust store’s password.
13.1.4. The JMX Tree
When clicking on the Artemis tab on the left you will see a sanitized version of the Artemis JMX tree. This is the entry point into the extra functionality that the Artemis HawtIO plugin gives you, as well as the the usual JMX attributes and operations. To view the full JMX tree, click on the JMX tab.
13.1.5. Creating a Queue
To Create a new JMS queue, click on the Queue folder in the JMX tree. In the Create tab, enter the name of the queue you want to create, and then click Create queue.

Alternatively, if the Queue folder is not showing, click on the Server folder in the JMX tree. In the Create tab, choose the queue option and click on Create queue.

13.1.6. Creating a Topic
Creating a topic is exactly the same as Creating a queue except that you either click on the Topic folder in the JMX tree or choose the Topic option when using the server option.
13.1.7. Sending a Message
Sometimes it is desirable to test an installation by sending a test message or to simply send a message. To do this, choose the queue from the JMX tab that you want to send the message to and click on the Send tab. Fill in the message content and any headers and click on the Send message button.
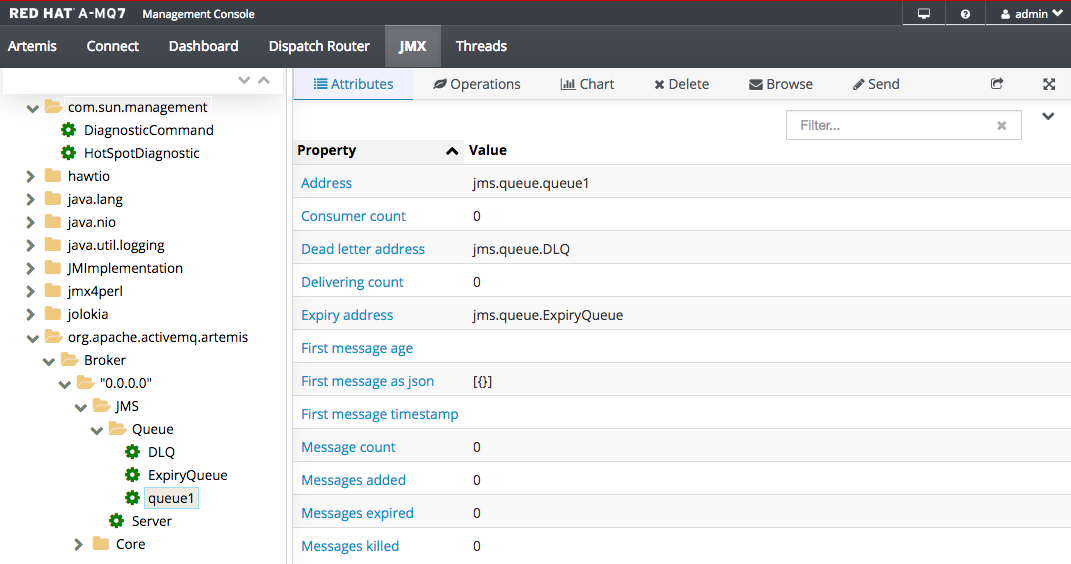
13.1.8. Browsing a Queue
It is also possible to browse a queue and inspect the messages in that queue. To do this, click on the queue you want to browse in the JMX tree and click on the Browse tab. By default, you will see the first 200 messages that are in the queue.

The default of 200 messages can be configured in A-MQ Broker in the Address Settings by configuring management-browse-page-size.
It is also possible to look at the message content by clicking on the message ID of the message you want to view. You will then see something like the following.

This screen will allow you to iterate over the browsed messages using the casette buttons and also move or delete the messages.
13.1.8.1. Deleting Messages
It is possible to delete one or more messages by choosing the messages in the browse screen and then clicking the Delete button in the top right.
13.1.8.2. Moving Messages
It is possible to move a single message from one queue to another by clicking on the Move button in the top right and then entering the queue that you would like to move it to.
13.1.8.3. Resending Messages
It is possible to resend a message as a new message by clicking on the Resend button in the top right, which will take you to the send screen.
13.1.9. The Broker Diagram
The Broker Diagram shows a visualisation of all the resources in an Artemis Topology, including brokers (master and slave), queues, topics and consumers. To view the diagram, click on the Diagram tab.

To control what appears in the diagram, click on the View drop down in the top right and choose what you want to appear.
Table 13.1. Available Diagram Resources
| Consumers | All the Consumers connected |
| Producers | All the Producers connected (currently not supported) |
| Queues | All the Queues that have consumers connected |
| Topics | All the Topics that have consumers connected |
| All Queues | All the Queues |
| Topics | All the Topics |
| Brokers | All the Master Brokers in the current VM |
| Slave Brokers | All Slave Brokers in the current VM |
| Network | All the remote Brokers if the broker type is chosen above |
| Details Panel | Info about the highlighted resource shown on the right |
| Hover Text | Extra info shown when hovering over the resource |
| Label | Adds a label to the resource |
13.1.10. Preferences
There are some preferences that are needed for certain screens. These can be set by using the user drop down box in the top right hand corner and choosing the Preferences option and clicking on the Artemis tab.
Table 13.2. Available Preferences
| User name | The user name used for security when sending messages, etc. |
| Password | The password used for security when sending messages, etc. |
| DLQ | The name of the dead letter queue; this will expose a Retry button when browsing the queue to allow retying the message send |
| ExpiryQueue | The name of the expiry queue; this will expose a Retry button when browsing the queue to allow retying the message send |
| Browse byte messages | How bytes messages should be viewed when browsing a queue |
13.2. Management API
A-MQ Broker 7.0.0 has an extensive management API that allows a user to modify a brokers configuration, create new resources (e.g., JMS queues and topics), inspect these resources (e.g., how many messages are currently held in a queue) and interact with it (e.g., to remove messages from a queue). All the operations allows a client to manage the broker. It also allows clients to subscribe to management notifications.
There are three ways to manage the broker:
- Using JMX — JMX is the standard way to manage Java applications
- Using the core API — management operations are sent to the broker using core messages
- Using the JMS API — management operations are sent to the broker using JMS messages
Although there are three different ways to manage the broker each API supports the same functionality. If it is possible to manage a resource using JMX it is also possible to achieve the same result using Core messages or JMS messages.
This choice depends on your requirements, your application settings and your environment to decide which way suits you best.
Regardless of the way you invoke management operations, the management API is the same.
For each managed resource, there exists a Java interface describing what can be invoked for this type of resource.
The broker exposes its managed resources in 2 packages:
-
Core resources are located in the
org.apache.activemq.artemis.api.core.managementpackage -
JMS resources are located in the
org.apache.activemq.artemis.api.jms.managementpackage
The way to invoke a management operations depends whether JMX, core messages, or JMS messages are used.
A few management operations require a filter parameter to chose which messages are involved by the operation. Passing null or an empty string means that the management operation will be performed on all messages.
13.2.1. Core Server Management
Listing, creating, deploying and destroying queues
A list of deployed core queues can be retrieved using the
getQueueNames()method.Core queues can be created or destroyed using the management operations
createQueue()ordeployQueue()ordestroyQueue())on theActiveMQServerControl(with the ObjectNameorg.apache.activemq.artemis:type=Broker,brokerName=<broker name>,module=Core,serviceType=Serveror the resource namecore.server)createQueuewill fail if the queue already exists whiledeployQueuewill do nothing.Pausing and resuming Queues
The
QueueControlcan pause and resume the underlying queue. When a queue is paused, it will receive messages but will not deliver them. When it is resumed, it’ll begin delivering the queued messages, if any.Listing and closing remote connections
Client’s remote addresses can be retrieved using
listRemoteAddresses(). It is also possible to close the connections associated with a remote address using thecloseConnectionsForAddress()method.Alternatively, connection IDs can be listed using
listConnectionIDs()and all the sessions for a given connection ID can be listed usinglistSessions().Transaction heuristic operations
In case of a server crash, when the server restarts, it it possible that some transaction requires manual intervention. The
listPreparedTransactions()method lists the transactions which are in the prepared states (the transactions are represented as opaque Base64 Strings.) To commit or rollback a given prepared transaction, thecommitPreparedTransaction()orrollbackPreparedTransaction()method can be used to resolve heuristic transactions. Heuristically completed transactions can be listed using thelistHeuristicCommittedTransactions()andlistHeuristicRolledBackTransactionsmethods.Enabling and resetting Message counters
Message counters can be enabled or disabled using the
enableMessageCounters()ordisableMessageCounters()method. To reset message counters, it is possible to invokeresetAllMessageCounters()andresetAllMessageCounterHistories()methods.Retrieving the server configuration and attributes
The
ActiveMQServerControlexposes the brokers configuration through all its attributes (e.g.getVersion()method to retrieve the server’s version, etc.)Listing, creating and destroying Core bridges and diverts
A list of deployed core bridges (or diverts) can be retrieved using the
getBridgeNames()(orgetDivertNames()) method.Core bridges (or diverts) can be created or destroyed using the management operations
createBridge()anddestroyBridge()(orcreateDivert()anddestroyDivert()) on theActiveMQServerControl(with the ObjectNameorg.apache.activemq.artemis:module=Core,type=Serveror the resource namecore.server).Stopping the server and force failover to occur with any currently attached clients
Use the
forceFailover()on theActiveMQServerControl(with the ObjectNameorg.apache.activemq.artemis:type=Broker,brokerName=<broker name>,module=Core,serviceType=Serveror the resource namecore.server)NoteSince this method actually stops the server you will probably receive some sort of error depending on which management service you use to call it.
13.2.1.1. Core Address Management
Core addresses can be managed using the AddressControl class (with the ObjectName org.apache.activemq.artemis:type=Broker,brokerName=<broker name>,module=Core,serviceType=Address,name="<the address name>" or the resource name core.address.<the address name>).
Modifying roles and permissions for an address
You can add or remove roles associated to a queue using the
addRole()orremoveRole()methods. You can list all the roles associated to the queue with thegetRoles()method
13.2.1.2. Core Queue Management
The bulk of the core management API deals with core queues. The QueueControl class defines the Core queue management operations (with the ObjectName org.apache.activemq.artemis:type=Broker,brokerName=<broker name>,module=Core,serviceType=Queue,address="<the bound address>",name="<the queue name>" or the resource name core.queue.<the queue name>).
Most of the management operations on queues take either a single message ID (e.g. to remove a single message) or a filter (e.g. to expire all messages with a given property.)
Expiring, sending to a dead letter address and moving messages
Messages can be expired from a queue by using the
expireMessages()method. If an expiry address is defined, messages will be sent to it, otherwise they are discarded. The queue’s expiry address can be set with thesetExpiryAddress()method.Messages can also be sent to a dead letter address with the
sendMessagesToDeadLetterAddress()method. It returns the number of messages which are sent to the dead letter address. If a dead letter address is not defined, message are removed from the queue and discarded. The queue’s dead letter address can be set with thesetDeadLetterAddress()method.Messages can also be moved from a queue to another queue by using the
moveMessages()method.Listing and removing messages
Messages can be listed from a queue by using the
listMessages()method which returns an array ofMap, oneMapfor each message.Messages can also be removed from the queue by using the
removeMessages()method which returns abooleanfor the single message ID variant or the number of removed messages for the filter variant. TheremoveMessages()method takes afilterargument to remove only filtered messages. Setting the filter to an empty string will in effect remove all messages.Counting messages
The number of messages in a queue is returned by the
getMessageCount()method. Alternatively, thecountMessages()will return the number of messages in the queue which match a given filterChanging message priority
The message priority can be changed by using the
changeMessagesPriority()method which returns abooleanfor the single message ID variant or the number of updated messages for the filter variant.Message counters
Message counters can be listed for a queue with the
listMessageCounter()andlistMessageCounterHistory()methods (see the Message Counters section). The message counters can also be reset for a single queue using theresetMessageCounter()method.Retrieving the queue attributes
The
QueueControlexposes Core queue settings through its attributes (e.g.getFilter()to retrieve the queue’s filter if it was created with one,isDurable()to know whether the queue is durable or not, etc.)Pausing and resuming Queues
The
QueueControlcan pause and resume the underlying queue. When a queue is paused, it will receive messages but will not deliver them. When it is resume, it’ll begin delivering the queued messages, if any.
13.2.1.3. Other Core Resources Management
The broker allows to start and stop its remote resources (acceptors, diverts, bridges, etc.) so that a server can be taken off line for a given period of time without stopping it completely (e.g. if other management operations must be performed such as resolving heuristic transactions). These resources are
Acceptors
They can be started or stopped using the
start()or.stop()method on theAcceptorControlclass (with the ObjectNameorg.apache.activemq.artemis:type=Broker,brokerName=<broker name>,module=Core,serviceType=Acceptor,name="<the acceptor name>"or the resource namecore.acceptor.<the address name>). The acceptors parameters can be retrieved using theAcceptorControlattributes. See Configure Network Connections for more information about Acceptors.Diverts
They can be started or stopped using the
start()orstop()method on theDivertControlclass (with the ObjectNameorg.apache.activemq.artemis:type=Broker,brokerName=<broker name>,module=Core,serviceType=Divert,name=<the divert name>or the resource namecore.divert.<the divert name>). Diverts parameters can be retrieved using theDivertControlattributes.Bridges
They can be started or stopped using the
start()(resp.stop()) method on theBridgeControlclass (with the ObjectNameorg.apache.activemq.artemis:type=Broker,brokerName=<broker name>,module=Core,serviceType=Bridge,name="<the bridge name>"or the resource namecore.bridge.<the bridge name>). Bridges parameters can be retrieved using theBridgeControlattributes. See Configure Clustering for more information.Broadcast groups
They can be started or stopped using the
start()orstop()method on theBroadcastGroupControlclass (with the ObjectNameorg.apache.activemq.artemis:type=Broker,brokerName=<broker name>,module=Core,serviceType=BroadcastGroup,name="<the broadcast group name>"or the resource namecore.broadcastgroup.<the broadcast group name>). Broadcast groups parameters can be retrieved using theBroadcastGroupControlattributes. See Configure Clustering for more information.Discovery groups
They can be started or stopped using the
start()orstop()method on theDiscoveryGroupControlclass (with the ObjectNameorg.apache.activemq.artemis:type=Broker,brokerName=<broker name>,module=Core,serviceType=DiscoveryGroup,name="<the discovery group name>"or the resource namecore.discovery.<the discovery group name>). Discovery groups parameters can be retrieved using theDiscoveryGroupControlattributes. See Configure Clustering for more information.Cluster connections
They can be started or stopped using the
start()orstop()method on theClusterConnectionControlclass (with the ObjectNameorg.apache.activemq.artemis:type=Broker,brokerName=<broker name>,module=Core,serviceType=ClusterConnection,name="<the cluster connection name>"or the resource namecore.clusterconnection.<the cluster connection name>). Cluster connections parameters can be retrieved using theClusterConnectionControlattributes. See Configure Clustering for more information.
13.2.2. JMS Server Management
JMS Resources (connection factories and destinations) can be created using the JMSServerControl class (with the ObjectName org.apache.activemq.artemis:type=Broker,brokerName=<broker name>,module=JMS,serviceType=Server or the resource name jms.server).
Listing, creating, destroying connection factories
Names of the deployed connection factories can be retrieved by the
getConnectionFactoryNames()method.JMS connection factories can be created or destroyed using the
createConnectionFactory()methods ordestroyConnectionFactory()methods. These connection factories are bound to JNDI so that JMS clients can look them up. If a graphical console is used to create the connection factories, the transport parameters are specified in the text field input as a comma-separated list of key=value (e.g.key1=10, key2="value", key3=false). If there are multiple transports defined, you need to enclose the key/value pairs between curly braces. For example{key=10}, {key=20}. In that case, the firstkeywill be associated to the first transport configuration and the secondkeywill be associated to the second transport configuration. See Configure Network Connections for more information.Listing, creating, destroying queues
Names of the deployed JMS queues can be retrieved by the
getQueueNames()method.JMS queues can be created or destroyed using the
createQueue()methods ordestroyQueue()methods. These queues are bound to JNDI so that JMS clients can look them up.Listing, creating, and destroying topics
Names of the deployed topics can be retrieved by the
getTopicNames()method.JMS topics can be created or destroyed using the
createTopic()ordestroyTopic()methods. These topics are bound to JNDI so that JMS clients can look them up.Listing and closing remote connections
JMS Clients remote addresses can be retrieved using
listRemoteAddresses(). It is also possible to close the connections associated with a remote address using thecloseConnectionsForAddress()method.Alternatively, connection IDs can be listed using
listConnectionIDs()and all the sessions for a given connection ID can be listed usinglistSessions().
13.2.2.1. JMS ConnectionFactory Management
JMS Connection Factories can be managed using the ConnectionFactoryControl class (with the ObjectName org.apache.activemq.artemis:type=Broker,brokerName=<broker name>,module=JMS,serviceType=ConnectionFactory,name="<the connection factory name>" or the resource name jms.connectionfactory.<the connection factory name>).
Retrieving connection factory attributes
The
ConnectionFactoryControlexposes JMS ConnectionFactory configuration through its attributes (e.g.getConsumerWindowSize()to retrieve the consumer window size for flow control,isBlockOnNonDurableSend()to know whether the producers created from the connection factory will block or not when sending non-durable messages, etc.)
13.2.2.2. JMS Queue Management
JMS queues can be managed using the JMSQueueControl class (with the ObjectName org.apache.activemq.artemis:type=Broker,brokerName=<broker name>,module=JMS,serviceType=Queue,name="<the queue name>" or the resource name jms.queue.<the queue name>).
The management operations on a JMS queue are very similar to the operations on a core queue.
Expiring, sending to a dead letter address, and moving messages
Messages can be expired from a queue by using the
expireMessages()method. If an expiry address is defined, messages will be sent to it, otherwise they are discarded. The queue’s expiry address can be set with thesetExpiryAddress()method.Messages can also be sent to a dead letter address with the
sendMessagesToDeadLetterAddress()method. It returns the number of messages which are sent to the dead letter address. If a dead letter address is not defined, message are removed from the queue and discarded. The queue’s dead letter address can be set with thesetDeadLetterAddress()method.Messages can also be moved from a queue to another queue by using the
moveMessages()method.Listing and removing messages
Messages can be listed from a queue by using the
listMessages()method which returns an array ofMap, oneMapfor each message.Messages can also be removed from the queue by using the
removeMessages()method which returns abooleanfor the single message ID variant or the number of removed messages for the filter variant. TheremoveMessages()method takes afilterargument to remove only filtered messages. Setting the filter to an empty string will in effect remove all messages.Counting messages
The number of messages in a queue is returned by the
getMessageCount()method. Alternatively, thecountMessages()will return the number of messages in the queue which match a given filterChanging message priority
The message priority can be changed by using the
changeMessagesPriority()method which returns abooleanfor the single message ID variant or the number of updated messages for the filter variant.Message counters
Message counters can be listed for a queue with the
listMessageCounter()andlistMessageCounterHistory()methods (see the Message Counters section).Retrieving the queue attributes
The
JMSQueueControlexposes JMS queue settings through its attributes (e.g.isTemporary()to know whether the queue is temporary or not,isDurable()to know whether the queue is durable or not, etc.)Pausing and resuming queues
The
JMSQueueControlcan pause and resume the underlying queue. When the queue is paused it will continue to receive messages but will not deliver them. When resumed again it will deliver the enqueued messages, if any.
13.2.2.3. JMS Topic Management
JMS Topics can be managed using the TopicControl class (with the ObjectName org.apache.activemq.artemis:type=Broker,brokerName=<broker name>,module=JMS,serviceType=Topic,name="<the topic name>" or the resource name jms.topic.<the topic name>).
Listing subscriptions and messages
JMS topics subscriptions can be listed using the
listAllSubscriptions(),listDurableSubscriptions(),listNonDurableSubscriptions()methods. These methods return arrays ofObjectrepresenting the subscriptions information (subscription name, client ID, durability, message count, etc.). It is also possible to list the JMS messages for a given subscription with thelistMessagesForSubscription()method.Dropping subscriptions
Durable subscriptions can be dropped from the topic using the
dropDurableSubscription()method.Counting subscriptions messages
The
countMessagesForSubscription()method can be used to know the number of messages held for a given subscription (with an optional message selector to know the number of messages matching the selector)
13.2.3. Manage Via JMX
The broker can be managed using JMX. The management API is exposed by the broker using MBeans interfaces. The broker registers its resources with the domain org.apache.activemq.
For example, the ObjectName to manage a JMS Queue exampleQueue is:
org.apache.activemq.artemis:type=Broker,brokerName=<broker name>,module=JMS,serviceType=Queue,name="exampleQueue"
and the MBean is:
org.apache.activemq.artemis.api.jms.management.JMSQueueControl
The MBean’s ObjectName are built using the helper class org.apache.activemq.artemis.api.core.management.ObjectNameBuilder. You can also use jconsole to find the ObjectName of the MBeans you want to manage.
Managing the broker using JMX is identical to management of any Java Applications using JMX. It can be done by reflection or by creating proxies of the MBeans.
13.2.3.1. Configure JMX Management
By default, JMX is enabled to manage the broker. It can be disabled by setting jmx-management-enabled to false in broker.xml:
<jmx-management-enabled>false</jmx-management-enabled>
If JMX is enabled, the broker can be managed locally using jconsole.
Remote connections to JMX are not enabled by default for security reasons. Please refer to Java Management guide to configure the server for remote management (system properties must be set in run.sh or run.bat scripts).
By default, the broker uses the JMX domain "org.apache.activemq.artemis". To manage several brokers from the same MBeanServer, the JMX domain can be configured for each individual broker by setting jmx-domain in broker.xml:
<jmx-domain>my.org.apache.activemq</jmx-domain>
13.2.3.2. MBeanServer configuration
When the broker is run in standalone, it uses the Java Virtual Machine’s Platform MBeanServer to register its MBeans. By default Jolokia is also deployed to allow access to the mbean server via rest.
13.2.3.3. Exposing JMX using Jolokia
The default Broker configuration ships with the Jolokia http agent deployed as a Web Application. Jolokia is a remote JMX over HTTP bridge that exposed mBeans, for more information refer to the Jolokia Documentation. As a simple example, direct your web browser to the url http://localhost:8161/jolokia/read/org.apache.activemq.artemis:module=Core,type=Server/Version after starting a broker instance to query the broker’s version.
This response would give you back something like the following:
{"timestamp":1422019706,"status":200,"request":{"mbean":"org.apache.activemq.artemis:type=Broker,brokerName=<broker name>,module=Core,serviceType=Server","attribute":"Version","type":"read"},"value":"1.0.0.SNAPSHOT (Active Hornet, 126)"}13.2.4. Manage Via Core API
The core management API in A-MQ Broker is called by sending Core messages to a special address, the management address.
Management messages are regular Core messages with well-known properties that the server needs to understand to interact with the management API:
- The name of the managed resource
- The name of the management operation
- The parameters of the management operation
When such a management message is sent to the management address, The broker will handle it, extract the information, invoke the operation on the managed resources and send a management reply to the management message’s reply-to address (specified by ClientMessageImpl.REPLYTO_HEADER_NAME).
A ClientConsumer can be used to consume the management reply and retrieve the result of the operation (if any) stored in the reply’s body. For portability, results are returned as a JSON String rather than Java Serialization (the org.apache.activemq.artemis.api.core.management.ManagementHelper can be used to convert the JSON string to Java objects).
These steps can be simplified to make it easier to invoke management operations using Core messages:
-
Create a
ClientRequestorto send messages to the management address and receive replies. -
Create a
ClientMessage. -
Use the helper class
org.apache.activemq.artemis.api.core.management.ManagementHelperto fill the message with the management properties. -
Send the message using the
ClientRequestor. -
Use the helper class
org.apache.activemq.artemis.api.core.management.ManagementHelperto retrieve the operation result from the management reply.
For example, to find out the number of messages in the core queue exampleQueue:
ClientSession session = ...
ClientRequestor requestor = new ClientRequestor(session, "jms.queue.activemq.management");
ClientMessage message = session.createMessage(false);
ManagementHelper.putAttribute(message, "core.queue.exampleQueue", "messageCount");
session.start();
ClientMessage reply = requestor.request(m);
int count = (Integer) ManagementHelper.getResult(reply);
System.out.println("There are " + count + " messages in exampleQueue");
Management operation name and parameters must conform to the Java interfaces defined in the management packages.
Names of the resources are built using the helper class org.apache.activemq.artemis.api.core.management.ResourceNames and are straightforward (core.queue.exampleQueue for the Core Queue exampleQueue, jms.topic.exampleTopic for the JMS Topic exampleTopic, etc.).
13.2.4.1. Configure Core Management
The management address to send management messages is configured in broker.xml:
<management-address>jms.queue.activemq.management</management-address>
By default, the address is jms.queue.activemq.management (it is prepended by "jms.queue" so that JMS clients can also send management messages).
The management address requires a special user permission manage to be able to receive and handle management messages. This is also configured in broker.xml:
<security-setting match="jms.queue.activemq.management">
 <permission type="manage" roles="admin" />
</security-setting>
13.2.5. Manage Via JMS Messages
Using JMS messages to manage A-MQ Broker is very similar to using core API.
An important difference is that JMS requires a JMS queue to send the messages to (instead of an address for the core API).
The management queue is a special queue and needs to be instantiated directly by the client:
Queue managementQueue = ActiveMQJMSClient.createQueue("activemq.management");All the other steps are the same than for the Core API but they use JMS API instead:
-
Create a
QueueRequestorto send messages to the management address and receive replies. -
Create a
Message. -
Use the helper class
org.apache.activemq.artemis.api.jms.management.JMSManagementHelperto fill the message with the management properties. -
Send the message using the
QueueRequestor. -
Use the helper class
org.apache.activemq.artemis.api.jms.management.JMSManagementHelperto retrieve the operation result from the management reply.
For example, to know the number of messages in the JMS queue exampleQueue:
Queue managementQueue = ActiveMQJMSClient.createQueue("activemq.management");

QueueSession session = ...
QueueRequestor requestor = new QueueRequestor(session, managementQueue);
connection.start();
Message message = session.createMessage();
JMSManagementHelper.putAttribute(message, "jms.queue.exampleQueue", "messageCount");
Message reply = requestor.request(message);
int count = (Integer)JMSManagementHelper.getResult(reply);
System.out.println("There are " + count + " messages in exampleQueue");
13.2.5.1. Configure Management Via JMS Message
Whether JMS or the core API is used for management, the configuration steps are the same. See Configure Core Management.
13.2.6. Management Notifications
The broker emits notifications to inform listeners of potentially interesting events (creation of new resources, security violation, etc.).
These notifications can be received by 3 different ways:
- JMX notifications
- Core messages
- JMS messages
13.2.6.1. JMX Notifications
If JMX is enabled (see the Configure JMX section), JMX notifications can be received by subscribing to 2 MBeans:
-
org.apache.activemq.artemis:type=Broker,brokerName=<broker name>,module=Core,serviceType=Serverfor notifications on Core resources -
org.apache.activemq.artemis:type=Broker,brokerName=<broker name>,module=JMS,serviceType=Serverfor notifications on JMS resources
13.2.6.2. Core Messages Notifications
The broker defines a special management notification address. Core queues can be bound to this address so that clients will receive management notifications as Core messages.
A Core client which wants to receive management notifications must create a core queue bound to the management notification address. It can then receive the notifications from its queue.
Notifications messages are regular core messages with additional properties corresponding to the notification (its type, when it occurred, the resources which were concerned, etc.).
Since notifications are regular core messages, it is possible to use message selectors to filter out notifications and receives only a subset of all the notifications emitted by the server.
13.2.6.2.1. Configuring The Core Management Notification Address
The management notification address to receive management notifications is configured in broker.xml:
<management-notification-address>activemq.notifications</management-notification-address>
By default, the address is activemq.notifications.
13.2.6.3. JMS Message Notifications
The brokers notifications can also be received using JMS messages. It is similar to receiving notifications using Core API but an important difference is that JMS requires a JMS Destination to receive the messages (preferably a Topic).
To use a JMS Destination to receive management notifications, you must change the server’s management notification address to start with jms.queue if it is a JMS Queue or jms.topic if it is a JMS Topic:
<!-- notifications will be consumed from "notificationsTopic" JMS Topic -->
<management-notification-address>jms.topic.notificationsTopic</management-notification-address>
Once the notification topic is created, you can receive messages from it or set a MessageListener:
Topic notificationsTopic = ActiveMQJMSClient.createTopic("notificationsTopic");

Session session = ...
MessageConsumer notificationConsumer = session.createConsumer(notificationsTopic);
notificationConsumer.setMessageListener(new MessageListener()
{
   public void onMessage(Message notif)
   {
      System.out.println("------------------------");
      System.out.println("Received notification:");
      try
      {
         Enumeration propertyNames = notif.getPropertyNames();
         while (propertyNames.hasMoreElements())
         {
            String propertyName = (String)propertyNames.nextElement();
            System.out.format("  %s: %s\n", propertyName, notif.getObjectProperty(propertyName));
         }
      }
      catch (JMSException e)
      {
      }
      System.out.println("------------------------");
   }
});
13.2.6.4. Notification Types and Headers
Below is a list of all the different kinds of notifications as well as which headers are on the messages. Every notification has a _AMQ_NotifType (value noted in parentheses) and _AMQ_NotifTimestamp header. The timestamp is the un-formatted result of a call to java.lang.System.currentTimeMillis().
BINDING_ADDED(0)`_AMQ_Binding_Type`, `_AMQ_Address`, `_AMQ_ClusterName`, `_AMQ_RoutingName`, `_AMQ_Binding_ID`, `_AMQ_Distance`, `_AMQ_FilterString`
BINDING_REMOVED(1)`_AMQ_Address`, `_AMQ_ClusterName`, `_AMQ_RoutingName`, `_AMQ_Binding_ID`, `_AMQ_Distance`, `_AMQ_FilterString`
CONSUMER_CREATED(2)`_AMQ_Address`, `_AMQ_ClusterName`, `_AMQ_RoutingName`, `_AMQ_Distance`, `_AMQ_ConsumerCount`, `_AMQ_User`, `_AMQ_RemoteAddress`, `_AMQ_SessionName`, `_AMQ_FilterString`
CONSUMER_CLOSED(3)`_AMQ_Address`, `_AMQ_ClusterName`, `_AMQ_RoutingName`, `_AMQ_Distance`, `_AMQ_ConsumerCount`, `_AMQ_User`, `_AMQ_RemoteAddress`, `_AMQ_SessionName`, `_AMQ_FilterString`
SECURITY_AUTHENTICATION_VIOLATION(6)`_AMQ_User`
SECURITY_PERMISSION_VIOLATION(7)`_AMQ_Address`, `_AMQ_CheckType`, `_AMQ_User`
DISCOVERY_GROUP_STARTED(8)`name`
DISCOVERY_GROUP_STOPPED(9)`name`
BROADCAST_GROUP_STARTED(10)`name`
BROADCAST_GROUP_STOPPED(11)`name`
BRIDGE_STARTED(12)`name`
BRIDGE_STOPPED(13)`name`
CLUSTER_CONNECTION_STARTED(14)`name`
CLUSTER_CONNECTION_STOPPED(15)`name`
ACCEPTOR_STARTED(16)`factory`, `id`
ACCEPTOR_STOPPED(17)`factory`, `id`
PROPOSAL(18)`_JBM_ProposalGroupId`, `_JBM_ProposalValue`, `_AMQ_Binding_Type`, `_AMQ_Address`, `_AMQ_Distance`
PROPOSAL_RESPONSE(19)`_JBM_ProposalGroupId`, `_JBM_ProposalValue`, `_JBM_ProposalAltValue`, `_AMQ_Binding_Type`, `_AMQ_Address`, `_AMQ_Distance`
CONSUMER_SLOW(21)`_AMQ_Address`, `_AMQ_ConsumerCount`, `_AMQ_RemoteAddress`, `_AMQ_ConnectionName`, `_AMQ_ConsumerName`, `_AMQ_SessionName`
13.2.7. Message Counters
Message counters can be used to obtain information on queues over time as The broker keeps a history on queue metrics.
They can be used to show trends on queues. For example, using the management API, it would be possible to query the number of messages in a queue at regular interval. However, this would not be enough to know if the queue is used: the number of messages can remain constant because nobody is sending or receiving messages from the queue or because there are as many messages sent to the queue than messages consumed from it. The number of messages in the queue remains the same in both cases but its use is widely different.
Message counters gives additional information about the queues:
countThe total number of messages added to the queue since the server was started
countDeltaThe number of messages added to the queue since the last message counter update
messageCountThe current number of messages in the queue
messageCountDeltaThe overall number of messages added/removed from the queue since the last message counter update. For example, if
messageCountDeltais equal to-10this means that overall 10 messages have been removed from the queue (e.g. 2 messages were added and 12 were removed)lastAddTimestampThe timestamp of the last time a message was added to the queue
udpateTimestampThe timestamp of the last message counter update
These attributes can be used to determine other meaningful data as well. For example, to know specifically how many messages were consumed from the queue since the last update simply subtract the
messageCountDeltafromcountDelta.
13.2.7.1. Configure Message Counters
By default, message counters are disabled as it might have a small negative effect on memory.
To enable message counters, you can set it to true in broker.xml:
<message-counter-enabled>true</message-counter-enabled>
Message counters keeps a history of the queue metrics (10 days by default) and samples all the queues at regular interval (10 seconds by default). If message counters are enabled, these values should be configured to suit your messaging use case in broker.xml:
<!-- keep history for a week -->
<message-counter-max-day-history>7</message-counter-max-day-history>
<!-- sample the queues every minute (60000ms) -->
<message-counter-sample-period>60000</message-counter-sample-period>
Message counters can be retrieved using the Management API. For example, to retrieve message counters on a JMS Queue using JMX:
// retrieve a connection to the brokers MBeanServer
MBeanServerConnection mbsc = ...
JMSQueueControlMBean queueControl = (JMSQueueControl)MBeanServerInvocationHandler.newProxyInstance(mbsc,
   on,
   JMSQueueControl.class,
   false);
// message counters are retrieved as a JSON String
String counters = queueControl.listMessageCounter();
// use the MessageCounterInfo helper class to manipulate message counters more easily
MessageCounterInfo messageCounter = MessageCounterInfo.fromJSON(counters);
System.out.format("%s message(s) in the queue (since last sample: %s)\n",
messageCounter.getMessageCount(),
messageCounter.getMessageCountDelta());
Chapter 14. Troubleshooting A-MQ Broker
14.1. Tuning JMS
There are a few areas where some tweaks can be done if you are using the JMS API.
- Disable message ID. Use the setDisableMessageID() method on the MessageProducer class to disable message IDs if you do not need them. This decreases the size of the message and also avoids the overhead of creating a unique ID.
-
Disable message timestamp. Use the
setDisableMessageTimeStamp()method on the MessageProducer class to disable message timestamps if you do not need them. -
Avoid
ObjectMessage.ObjectMessageis convenient but it comes at a cost. The body of aObjectMessageuses Java serialization to serialize it to bytes. The Java serialized form of even small objects is very verbose so takes up a lot of space on the wire, also Java serialization is slow compared to custom marshalling techniques. Only useObjectMessageif you really cannot use one of the other message types, that is if you do not know the type of the payload until run-time. -
Avoid
AUTO_ACKNOWLEDGE.AUTO_ACKNOWLEDGEmode requires an acknowledgement to be sent from the server for each message received on the client, this means more traffic on the network. If you can, useDUPS_OK_ACKNOWLEDGEor useCLIENT_ACKNOWLEDGEor a transacted session and batch up many acknowledgements with one acknowledge/commit. -
Avoid durable messages. By default, JMS messages are durable. If you do not need durable messages then set them to be
non-durable. Durable messages incur a lot more overhead in persisting them to storage. - Batch many sends or acknowledgements in a single transaction. The ActiveMQ Artemis server embedded in A-MQ Broker 7.0.0 will only require a network round trip on the commit, not on every send or acknowledgement.
14.2. Tuning Persistence
- Put the message journal on its own physical volume. If the disk is shared with other processes, for example transaction coordinator, database or other journals, which are also reading and writing from it, then this may greatly reduce performance since the disk head may be skipping between the different files. One of the advantages of an append only journal is that disk head movement is minimized. This advantage is lost if the disk is shared. If you are using paging or large messages, make sure they are put on separate volumes too.
-
Minimum number of journal files. Set
journal-min-filesparameter to a number of files that would fit your average sustainable rate. If you see new files being created on the journal data directory too often, that is, lots of data is being persisted, you need to increase the minimal number of files, this way the journal would reuse more files instead of creating new data files. - Journal file size. The journal file size must be aligned to the capacity of a cylinder on the disk. The default value of 10MB should be enough on most systems.
-
Use AIO journal. For Linux operating system, keep your journal type as
AIO.AIOwill scale better than Java NIO. -
Tune
journal-buffer-timeout. The timeout can be increased to increase throughput at the expense of latency. -
If you are running AIO you might be able to get improved performance by increasing
journal-max-ioparameter value. Do not change this parameter if you are running NIO.
14.3. Other Tunings
There are various places in A-MQ Broker messaging where we can perform some tuning:
- Use Asynchronous Send Acknowledgements. If you need to send durable messages non transactional and you need a guarantee that they have reached the server by the time the call to send() returns, do not set durable messages to be sent blocking, instead use asynchronous send acknowledgements to get your acknowledgements of send back in a separate stream.
-
Use
pre-acknowledgemode. Withpre-acknowledgemode, messages are acknowledged before they are sent to the client. This reduces the amount of acknowledgement traffic on the wire. -
Disable security. There is a small performance boost when you disable security by setting the
security-enabledattribute to false. -
Disable persistence. You can turn off message persistence altogether by setting
persistence-enabledto false. -
Sync transactions lazily. Setting
journal-sync-transactionalto false gives better transactional persistent performance at the expense of some possibility of loss of transactions on failure. -
Sync non transactional lazily. Setting
journal-sync-non-transactionalto false gives better non-transactional persistent performance at the expense of some possibility of loss of durable messages on failure -
Send messages non blocking. Setting
block-on-durable-sendandblock-on-non-durable-sendto false (if you are using JMS and JNDI) or directly on the ServerLocator. This means you do not have to wait a whole network round trip for every message sent. -
If you have very fast consumers, you can increase
consumer-window-size. This effectively disables consumer flow control. -
Use the core API not JMS. Using the JMS API you will have slightly lower performance than using the core API, since all JMS operations need to be translated into core operations before the server can handle them. If using the core API try to use methods that take
SimpleStringas much as possible.SimpleString, unlike java.lang.String does not require copying before it is written to the wire, so if you re-use SimpleString instances between calls then you can avoid some unnecessary copying.
14.4. Avoiding Anti-Patterns
Re-use connections / sessions / consumers / producers. Probably the most common messaging anti-pattern we see is users who create a new connection/session/producer for every message they send or every message they consume. This is a poor use of resources. These objects take time to create and may involve several network round trips. Always re-use them.
NoteSome popular libraries such as the Spring JMS Template use these anti-patterns. If you are using Spring JMS Template, you may get poor performance. The Spring JMS Template can only safely be used in an application server which caches JMS sessions, example, using JCA), and only then for sending messages. It cannot be safely be used for synchronously consuming messages, even in an application server.
- Avoid fat messages. Verbose formats such as XML take up a lot of space on the wire and performance will suffer as result. Avoid XML in message bodies if you can.
- Do not create temporary queues for each request. This common anti-pattern involves the temporary queue request-response pattern. With the temporary queue request-response pattern a message is sent to a target and a reply-to header is set with the address of a local temporary queue. When the recipient receives the message they process it then send back a response to the address specified in the reply-to. A common mistake made with this pattern is to create a new temporary queue on each message sent. This drastically reduces performance. Instead the temporary queue should be re-used for many requests.
- Do not use Message-Driven Beans for the sake of it. As soon as you start using MDBs you are greatly increasing the codepath for each message received compared to a straightforward message consumer, since a lot of extra application server code is executed.
14.5. Handling Slow Consumers
A slow consumer with a server-side queue (e.g. JMS topic subscriber) can pose a significant problem for broker performance. If messages build up in the consumer’s server-side queue then memory will begin filling up and the broker may enter paging mode which would impact performance negatively. However, criteria can be set so that consumers which don’t acknowledge messages quickly enough can potentially be disconnected from the broker which in the case of a non-durable JMS subscriber would allow the broker to remove the subscription and all of its messages freeing up valuable server resources.
Appendix A. Reference Material
A.1. Acceptor and Connector Configuration Parameters
All the valid Netty transport keys are defined in the class org.apache.activemq.artemis.core.remoting.impl.netty.TransportConstants.
The last two columns mark whether the parameter can be used as part of the XML configuration for an acceptor or for a connector. Note that some parameters work only with acceptors.
Table A.1. Acceptor and Connector Parameters
| Parameter name | Description | Acceptor | Connector |
|---|---|---|---|
| batchDelay |
Before writing packets to the transport, the broker can be configured to batch up writes for a maximum of | Yes | Yes |
| connectionsAllowed |
Limits the number of connections which the acceptor will allow. When this limit is reached a DEBUG level message is issued to the log, and the connection is refused. The type of client in use will determine what happens when the connection is refused. In the case of a | Yes | No |
| directDeliver |
When a message arrives on the server and is delivered to waiting consumers, by default, the delivery is done on the same thread as that on which the message arrived. This gives good latency in environments with relatively small messages and a small number of consumers, but at the cost of overall throughput and scalability - especially on multi-core machines. If you want the lowest latency and a possible reduction in throughput then you can use the default value for | Yes | Yes |
| host |
Used in the core API only and not XML configuration these are set in the URI host and port. This specifies the host name or IP address to connect to (when configuring a connector) or to listen on (when configuring an acceptor). The default value for this property is | No | No |
| httpEnabled | This is now no longer needed. With single port support the broker will now automatically detect if http is being used and configure itself. | No | No |
| httpClientIdleTime | How long a client can be idle before sending an empty http request to keep the connection alive. | Yes | No |
| httpClientIdleScanPeriod | How often, in milliseconds, to scan for idle clients. | Yes | No |
| httpResponseTime | How long the server can wait before sending an empty http response to keep the connection alive. | Yes | No |
| httpServerScanPeriod | How often, in milliseconds, to scan for clients needing responses. | Yes | No |
| httpRequiresSessionId | If true the client will wait after the first call to receive a session id. Used when an http connector is connecting to a servlet acceptor. This configuration is not recommended. | Yes | Yes |
| localAddress | When configuring a Netty Connector, it is possible to specify which local address the client will use when connecting to the remote address. This is typically used in the Application Server or when running Embedded to control which address is used for outbound connections. If the local-address is not set then the connector will use any local address available. | No | Yes |
| localPort | When configuring a Netty Connector it is possible to specify which local port the client will use when connecting to the remote address. This is typically used in the Application Server or when running Embedded to control which port is used for outbound connections. If the local-port default is used, which is 0, then the connector will let the system pick up an ephemeral port. Valid ports are 0 to 65535 | No | Yes |
| nioRemotingThreads |
When configured to use NIO, the broker will by default use a number of threads equal to three times the number of cores (or hyper-threads) as reported by | Yes | Yes |
| port |
Used only with the core API only and not in XML configuration. Specifies the port to connect to (when configuring a connector) or to listen on (when configuring an acceptor). The default value for this property is | No | No |
| tcpNoDelay |
If this is | Yes | Yes |
| tcpReceiveBufferSize |
This parameter determines the size of the TCP receive buffer in bytes. The default value is | Yes | Yes |
| tcpSendBufferSize |
This parameter determines the size of the TCP send buffer in bytes. The default value is TCP buffer sizes should be tuned according to the bandwidth and latency of your network. Here’s a good link that explains the theory behind [this](http://www-didc.lbl.gov/TCP-tuning/). In summary TCP send/receive buffer sizes should be calculated as: buffer_size = bandwidth * RTT.
Where bandwidth is in bytes per second and network round trip time (RTT) is in seconds. RTT can be easily measured using the For fast networks you may want to increase the buffer sizes from the defaults. | Yes | Yes |
A.2. Address Setting Attributes
The table below lists all of the configuration attributes of an address-setting.
Table A.2. Address Setting Attributes
| Name | Description |
|---|---|
| address-full-policy |
Determines what happens when an address where max-size-bytes is specified becomes full. Accepted values are |
| auto-create-jms-queues |
Determines whether the A-MQ Broker should automatically create a JMS queue corresponding to the address settings match when a JMS producer or a consumer tries to use such a queue. The default is |
| auto-delete-jms-queues |
Determines whether A-MQ Broker should automatically delete auto-created JMS queues when they have no consumers and no messages. The default is |
| dead-letter-address | The address to send dead messages to. See Configuring Dead Letter Addresses for more information. |
| expiry-address | The address that will receive expired messages. See Configuring Message Expiry for details. |
| expiry-delay |
Defines the expiration time in milliseconds that will be used for messages using the default expiration time. Default is |
| last-value-queue | Defines whether a queue only uses last values or not. See Last-Value Queues for more information. |
| max-delivery-attempts |
Defines how many time a cancelled message can be redelivered before sending to the dead-letter-address. Default is |
| max-redelivery-delay |
Maximum value for the redelivery-delay (in ms). Default is |
| max-size-bytes |
The max size for this address in bytes. Default is |
| message-counter-history-day-limit |
Day limit for the message counter history. Default is |
| page-max-cache-size |
The number of page files to keep in memory to optimize IO during paging navigation. Default is |
| page-size-bytes |
The paging size in bytes. Default is |
| redelivery-delay |
Defines how long to wait before attempting redelivery of a cancelled message in milliseconds. Default is |
| redelivery-multiplier |
Multiplier to apply to the redelivery-delay parameter. Default is |
| redistribution-delay |
Defines how long to wait in milliseconds after the last consumer is closed on a queue before redistributing any messages. Default is |
| send-to-dla-on-no-route |
When set to |
| slow-consumer-check-period |
How often to check in seconds for slow consumers. Default is |
| slow-consumer-policy |
Determines what happens when a slow consumer is identified. Valid options are |
| slow-consumer-threshold |
The minimum rate of message consumption allowed before a consumer is considered slow. Default is |
A.3. Using Your Subscription
Accessing Your Account
- Go to https://access.redhat.com/.
- If you do not already have an account, create one.
- Log in to your account.
Activating a Subscription
- Go to https://access.redhat.com/.
- Navigate to My Subscriptions.
- Navigate to Activate a subscription and enter your 16-digit activation number.
Downloading Zip and Tar Files
To access zip or tar files, use the customer portal to find the relevant files for download. If you are using RPM packages, this step is not required.
- Go to https://access.redhat.com/products/red-hat-jboss-a-mq/.
- Navigate to Download Latest.
- Select the Download link for your component.
Registering Your System for Packages
To install RPM packages on Red Hat Enterprise Linux, your system must be registered. If you are using zip or tar files, this step is not required.
- Go to https://access.redhat.com/.
- Navigate to Registration Assistant.
- Select your OS version and continue to the next page.
- Use the listed command in your system terminal to complete the registration.
To learn more see How to Register and Subscribe a System to the Red Hat Customer Portal.
Comments