
Red Hat Training
A Red Hat training course is available for Red Hat OpenStack Platform
Director Installation and Usage
An end-to-end scenario on using Red Hat OpenStack Platform director to create an OpenStack cloud
Abstract
Chapter 1. Introduction
The Red Hat OpenStack Platform director is a toolset for installing and managing a complete OpenStack environment. It is based primarily on the OpenStack project TripleO, which is an abbreviation for "OpenStack-On-OpenStack". This project takes advantage of OpenStack components to install a fully operational OpenStack environment. This includes new OpenStack components that provision and control bare metal systems to use as OpenStack nodes. This provides a simple method for installing a complete Red Hat OpenStack Platform environment that is both lean and robust.
The Red Hat OpenStack Platform director uses two main concepts: an undercloud and an overcloud. The undercloud installs and configures the overcloud. The next few sections outline the concept of each.
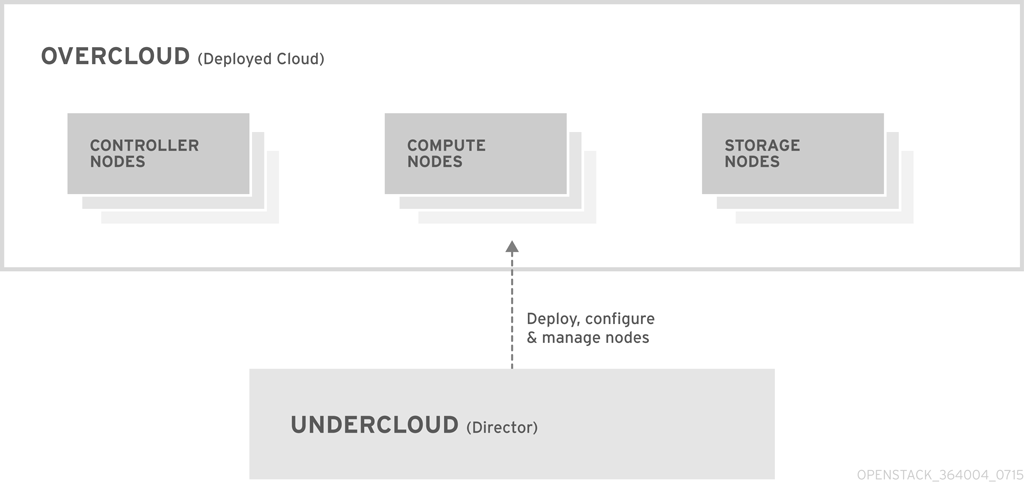
1.1. Undercloud
The undercloud is the main director node. It is a single-system OpenStack installation that includes components for provisioning and managing the OpenStack nodes that form your OpenStack environment (the overcloud). The components that form the undercloud provide the multiple functions:
- Environment Planning
- The undercloud provides planning functions for users to create and assign certain node roles. The undercloud includes a default set of nodes such as Compute, Controller, and various storage roles, but also provides the ability to use custom roles. In addition, you can select which OpenStack Platform services to include on each node role, which provides a method to model new node types or isolate certain components on their own host.
- Bare Metal System Control
- The undercloud uses out-of-band management interface, usually Intelligent Platform Management Interface (IPMI), of each node for power management control and a PXE-based service to discover hardware attributes and install OpenStack to each node. This provides a method to provision bare metal systems as OpenStack nodes. See Appendix B, Power Management Drivers for a full list of power management drivers.
- Orchestration
- The undercloud provides a set of YAML templates that acts as a set of plans for your environment. The undercloud imports these plans and follows their instructions to create the resulting OpenStack environment. The plans also include hooks that allow you to incorporate your own customizations as certain points in the environment creation process.
- Command Line Tools and a Web UI
- The Red Hat OpenStack Platform director performs these undercloud functions through a terminal-based command line interface or a web-based user interface.
- Undercloud Components
The undercloud uses OpenStack components as its base tool set. This includes the following components:
- OpenStack Identity (keystone) - Provides authentication and authorization for the director’s components.
- OpenStack Bare Metal (ironic) and OpenStack Compute (nova) - Manages bare metal nodes.
- OpenStack Networking (neutron) and Open vSwitch - Controls networking for bare metal nodes.
- OpenStack Image Service (glance) - Stores images that are written to bare metal machines.
- OpenStack Orchestration (heat) and Puppet - Provides orchestration of nodes and configuration of nodes after the director writes the overcloud image to disk.
OpenStack Telemetry (ceilometer) - Performs monitoring and data collection. This also includes:
- OpenStack Telemetry Metrics (gnocchi) - Provides a time series database for metrics.
- OpenStack Telemetry Alarming (aodh) - Provides an alarming component for monitoring.
- OpenStack Telemetry Event Storage (panko) - Provides event storage for monitoring.
- OpenStack Workflow Service (mistral) - Provides a set of workflows for certain director-specific actions, such as importing and deploying plans.
- OpenStack Messaging Service (zaqar) - Provides a messaging service for the OpenStack Workflow Service.
OpenStack Object Storage (swift) - Provides object storage for various OpenStack Platform components, including:
- Image storage for OpenStack Image Service
- Introspection data for OpenStack Bare Metal
- Deployment plans for OpenStack Workflow Service
1.2. Overcloud
The overcloud is the resulting Red Hat OpenStack Platform environment created using the undercloud. This includes different nodes roles which you define based on the OpenStack Platform environment you aim to create. The undercloud includes a default set of overcloud node roles, which include:
- Controller
Nodes that provide administration, networking, and high availability for the OpenStack environment. An ideal OpenStack environment recommends three of these nodes together in a high availability cluster.
A default Controller node contains the following components:
- OpenStack Dashboard (horizon)
- OpenStack Identity (keystone)
- OpenStack Compute (nova) API
- OpenStack Networking (neutron)
- OpenStack Image Service (glance)
- OpenStack Block Storage (cinder)
- OpenStack Object Storage (swift)
- OpenStack Orchestration (heat)
- OpenStack Telemetry (ceilometer)
- OpenStack Telemetry Metrics (gnocchi)
- OpenStack Telemetry Alarming (aodh)
- OpenStack Telemetry Event Storage (panko)
- OpenStack Clustering (sahara)
- OpenStack Shared File Systems (manila)
- OpenStack Bare Metal (ironic)
- MariaDB
- Open vSwitch
- Pacemaker and Galera for high availability services.
- Compute
These nodes provide computing resources for the OpenStack environment. You can add more Compute nodes to scale out your environment over time. A default Compute node contains the following components:
- OpenStack Compute (nova)
- KVM/QEMU
- OpenStack Telemetry (ceilometer) agent
- Open vSwitch
- Storage
Nodes that provide storage for the OpenStack environment. This includes nodes for:
- Ceph Storage nodes - Used to form storage clusters. Each node contains a Ceph Object Storage Daemon (OSD). In addition, the director installs Ceph Monitor onto the Controller nodes in situations where it deploys Ceph Storage nodes.
Block storage (cinder) - Used as external block storage for HA Controller nodes. This node contains the following components:
- OpenStack Block Storage (cinder) volume
- OpenStack Telemetry (ceilometer) agent
- Open vSwitch.
Object storage (swift) - These nodes provide a external storage layer for OpenStack Swift. The Controller nodes access these nodes through the Swift proxy. This node contains the following components:
- OpenStack Object Storage (swift) storage
- OpenStack Telemetry (ceilometer) agent
- Open vSwitch.
1.3. High Availability
The Red Hat OpenStack Platform director uses a Controller node cluster to provide high availability services to your OpenStack Platform environment. The director installs a duplicate set of components on each Controller node and manages them together as a single service. This type of cluster configuration provides a fallback in the event of operational failures on a single Controller node; this provides OpenStack users with a certain degree of continuous operation.
The OpenStack Platform director uses some key pieces of software to manage components on the Controller node:
- Pacemaker - Pacemaker is a cluster resource manager. Pacemaker manages and monitors the availability of OpenStack components across all nodes in the cluster.
- HAProxy - Provides load balancing and proxy services to the cluster.
- Galera - Replicates the Red Hat OpenStack Platform database across the cluster.
- Memcached - Provides database caching.
Red Hat OpenStack Platform director automatically configures the bulk of high availability on Controller nodes. However, the nodes require some manual configuration to enable power management controls. This guide includes these instructions.
1.4. Ceph Storage
It is common for large organizations using OpenStack to serve thousands of clients or more. Each OpenStack client is likely to have their own unique needs when consuming block storage resources. Deploying glance (images), cinder (volumes) and/or nova (Compute) on a single node can become impossible to manage in large deployments with thousands of clients. Scaling OpenStack externally resolves this challenge.
However, there is also a practical requirement to virtualize the storage layer with a solution like Red Hat Ceph Storage so that you can scale the Red Hat OpenStack Platform storage layer from tens of terabytes to petabytes (or even exabytes) of storage. Red Hat Ceph Storage provides this storage virtualization layer with high availability and high performance while running on commodity hardware. While virtualization might seem like it comes with a performance penalty, Ceph stripes block device images as objects across the cluster; this means large Ceph Block Device images have better performance than a standalone disk. Ceph Block devices also support caching, copy-on-write cloning, and copy-on-read cloning for enhanced performance.
See Red Hat Ceph Storage for additional information about Red Hat Ceph Storage.
Chapter 2. Requirements
This chapter outlines the main requirements for setting up an environment to provision Red Hat OpenStack Platform using the director. This includes the requirements for setting up the director, accessing it, and the hardware requirements for hosts that the director provisions for OpenStack services.
Prior to deploying Red Hat OpenStack Platform, it is important to consider the characteristics of the available deployment methods. For more information, refer to the Installing and Managing Red Hat OpenStack Platform.
2.1. Environment Requirements
Minimum Requirements:
- 1 host machine for the Red Hat OpenStack Platform director
- 1 host machine for a Red Hat OpenStack Platform Compute node
- 1 host machine for a Red Hat OpenStack Platform Controller node
Recommended Requirements:
- 1 host machine for the Red Hat OpenStack Platform director
- 3 host machines for Red Hat OpenStack Platform Compute nodes
- 3 host machines for Red Hat OpenStack Platform Controller nodes in a cluster
- 3 host machines for Red Hat Ceph Storage nodes in a cluster
Note the following:
- It is recommended to use bare metal systems for all nodes. At minimum, the Compute nodes require bare metal systems.
- All overcloud bare metal systems require an Intelligent Platform Management Interface (IPMI). This is because the director controls the power management.
-
Set the each node’s internal BIOS clock to UTC. This prevents issues with future-dated file timestamps when
hwclocksynchronizes the BIOS clock before applying the timezone offset. - To deploy overcloud Compute nodes on POWER (ppc64le) hardware, read the overview in Appendix G, Red Hat OpenStack Platform for POWER (Technology Preview).
Do not upgrade to the Red Hat Enterprise Linux 7.3 kernel without also upgrading from Open vSwitch (OVS) 2.4.0 to OVS 2.5.0. If only the kernel is upgraded, then OVS will stop functioning.
2.2. Undercloud Requirements
The undercloud system hosting the director provides provisioning and management for all nodes in the overcloud.
- An 8-core 64-bit x86 processor with support for the Intel 64 or AMD64 CPU extensions.
- A minimum of 16 GB of RAM.
A minimum of 100 GB of available disk space on the root disk. This includes:
- 10 GB for container images
- 10 GB to accommodate QCOW2 image conversion and caching during the node provisioning process
- 80 GB+ for general usage, logging, metrics, and growth
- A minimum of 2 x 1 Gbps Network Interface Cards. However, it is recommended to use a 10 Gbps interface for Provisioning network traffic, especially if provisioning a large number of nodes in your overcloud environment.
- The latest minor version of Red Hat Enterprise Linux installed as the host operating system.
- SELinux is enabled in Enforcing mode on the host.
2.2.1. Virtualization Support
Red Hat only supports a virtualized undercloud on the following platforms:
| Platform | Notes |
|---|---|
| Kernel-based Virtual Machine (KVM) | Hosted by Red Hat Enterprise Linux 5, 6, and 7 as listed on certified hypervisors |
| Red Hat Enterprise Virtualization | Hosted by Red Hat Enterprise Virtualization 3.0, 3.1, 3.2, 3.3, 3.4, 3.5, 3.6, and 4.0 as listed on certified hypervisors |
| Microsoft Hyper-V | Hosted by versions of Hyper-V as listed on the Red Hat Customer Portal Certification Catalogue. |
| VMware ESX and ESXi | Hosted by versions of ESX and ESXi as listed on the Red Hat Customer Portal Certification Catalogue. |
Red Hat OpenStack Platform director requires the latest version of Red Hat Enterprise Linux as the host operating system. This means your virtualization platform must also support the underlying Red Hat Enterprise Linux version.
Virtual Machine Requirements
Resource requirements for a virtual undercloud are similar to those of a bare metal undercloud. You should consider the various tuning options when provisioning such as network model, guest CPU capabilities, storage backend, storage format, and caching mode.
Network Considerations
Note the following network considerations for your virtualized undercloud:
- Power Management
-
The undercloud VM requires access to the overcloud nodes' power management devices. This is the IP address set for the
pm_addrparameter when registering nodes. - Provisioning network
-
The NIC used for the provisioning (
ctlplane) network requires the ability to broadcast and serve DHCP requests to the NICs of the overcloud’s bare metal nodes. As a recommendation, create a bridge that connects the VM’s NIC to the same network as the bare metal NICs.
A common problem occurs when the hypervisor technology blocks the undercloud from transmitting traffic from an unknown address. - If using Red Hat Enterprise Virtualization, disable anti-mac-spoofing to prevent this. - If using VMware ESX or ESXi, allow forged transmits to prevent this.
Example Architecture
This is just an example of a basic undercloud virtualization architecture using a KVM server. It is intended as a foundation you can build on depending on your network and resource requirements.
The KVM host uses two Linux bridges:
- br-ex (eth0)
- Provides outside access to the undercloud
- DHCP server on outside network assigns network configuration to undercloud using the virtual NIC (eth0)
- Provides access for the undercloud to access the power management interfaces for the bare metal servers
- br-ctlplane (eth1)
- Connects to the same network as the bare metal overcloud nodes
- Undercloud fulfills DHCP and PXE boot requests through virtual NIC (eth1)
- Bare metal servers for the overcloud boot through PXE over this network
The KVM host requires the following packages:
$ yum install libvirt-client libvirt-daemon qemu-kvm libvirt-daemon-driver-qemu libvirt-daemon-kvm virt-install bridge-utils rsync
The following command creates the undercloud virtual machine on the KVM host and create two virtual NICs that connect to the respective bridges:
$ virt-install --name undercloud --memory=16384 --vcpus=4 --location /var/lib/libvirt/images/rhel-server-7.4-x86_64-dvd.iso --disk size=100 --network bridge=br-ex --network bridge=br-ctlplane --graphics=vnc --hvm --os-variant=rhel7
This starts a libvirt domain. Connect to it with virt-manager and walk through the install process. Alternatively, you can perform an unattended installation using the following options to include a kickstart file:
--initrd-inject=/root/ks.cfg --extra-args "ks=file:/ks.cfg"
Once installation completes, SSH into the instance as the root user and follow the instructions in Chapter 4, Installing the Undercloud
Backups
To back up a virtualized undercloud, there are multiple solutions:
- Option 1: Follow the instructions in the Back Up and Restore the Director Undercloud Guide.
- Option 2: Shut down the undercloud and take a copy of the undercloud virtual machine storage backing.
- Option 3: Take a snapshot of the undercloud VM if your hypervisor supports live or atomic snapshots.
If using a KVM server, use the following procedure to take a snapshot:
-
Make sure
qemu-guest-agentis running on the undercloud guest VM. - Create a live snapshot of the running VM:
$ virsh snapshot-create-as --domain undercloud --disk-only --atomic --quiesce
- Take a copy of the (now read-only) QCOW backing file
$ rsync --sparse -avh --progress /var/lib/libvirt/images/undercloud.qcow2 1.qcow2
- Merge the QCOW overlay file into the backing file and switch the undercloud VM back to using the original file:
$ virsh blockcommit undercloud vda --active --verbose --pivot
2.3. Networking Requirements
The undercloud host requires at least two networks:
- Provisioning network - Provides DHCP and PXE boot functions to help discover bare metal systems for use in the overcloud. Typically, this network must use a native VLAN on a trunked interface so that the director serves PXE boot and DHCP requests. Some server hardware BIOSes support PXE boot from a VLAN, but the BIOS must also support translating that VLAN into a native VLAN after booting, otherwise the undercloud will not be reachable. Currently, only a small subset of server hardware fully supports this feature. This is also the network you use to control power management through Intelligent Platform Management Interface (IPMI) on all overcloud nodes.
- External Network - A separate network for external access to the overcloud and undercloud. The interface connecting to this network requires a routable IP address, either defined statically, or dynamically through an external DHCP service.
This represents the minimum number of networks required. However, the director can isolate other Red Hat OpenStack Platform network traffic into other networks. Red Hat OpenStack Platform supports both physical interfaces and tagged VLANs for network isolation.
Note the following:
Typical minimal overcloud network configuration can include:
- Single NIC configuration - One NIC for the Provisioning network on the native VLAN and tagged VLANs that use subnets for the different overcloud network types.
- Dual NIC configuration - One NIC for the Provisioning network and the other NIC for the External network.
- Dual NIC configuration - One NIC for the Provisioning network on the native VLAN and the other NIC for tagged VLANs that use subnets for the different overcloud network types.
- Multiple NIC configuration - Each NIC uses a subnet for a different overcloud network type.
- Additional physical NICs can be used for isolating individual networks, creating bonded interfaces, or for delegating tagged VLAN traffic.
- If using VLANs to isolate your network traffic types, use a switch that supports 802.1Q standards to provide tagged VLANs.
- During the overcloud creation, you will refer to NICs using a single name across all overcloud machines. Ideally, you should use the same NIC on each overcloud node for each respective network to avoid confusion. For example, use the primary NIC for the Provisioning network and the secondary NIC for the OpenStack services.
- Make sure the Provisioning network NIC is not the same NIC used for remote connectivity on the director machine. The director installation creates a bridge using the Provisioning NIC, which drops any remote connections. Use the External NIC for remote connections to the director system.
The Provisioning network requires an IP range that fits your environment size. Use the following guidelines to determine the total number of IP addresses to include in this range:
- Include at least one IP address per node connected to the Provisioning network.
- If planning a high availability configuration, include an extra IP address for the virtual IP of the cluster.
Include additional IP addresses within the range for scaling the environment.
NoteDuplicate IP addresses should be avoided on the Provisioning network. For more information, see Section 3.2, “Planning Networks”.
NoteFor more information on planning your IP address usage, for example, for storage, provider, and tenant networks, see the Networking Guide.
- Set all overcloud systems to PXE boot off the Provisioning NIC, and disable PXE boot on the External NIC (and any other NICs on the system). Also ensure that the Provisioning NIC has PXE boot at the top of the boot order, ahead of hard disks and CD/DVD drives.
- All overcloud bare metal systems require a supported power management interface, such as an Intelligent Platform Management Interface (IPMI). This allows the director to control the power management of each node.
- Make a note of the following details for each overcloud system: the MAC address of the Provisioning NIC, the IP address of the IPMI NIC, IPMI username, and IPMI password. This information will be useful later when setting up the overcloud nodes.
- If an instance needs to be accessible from the external internet, you can allocate a floating IP address from a public network and associate it with an instance. The instance still retains its private IP but network traffic uses NAT to traverse through to the floating IP address. Note that a floating IP address can only be assigned to a single instance rather than multiple private IP addresses. However, the floating IP address is reserved only for use by a single tenant, allowing the tenant to associate or disassociate with a particular instance as required. This configuration exposes your infrastructure to the external internet. As a result, you might need to check that you are following suitable security practices.
- To mitigate the risk of network loops in Open vSwitch, only a single interface or a single bond may be a member of a given bridge. If you require multiple bonds or interfaces, you can configure multiple bridges.
- It is recommended to use DNS hostname resolution so that your overcloud nodes can connect to external services, such as the Red Hat Content Delivery Network and network time servers.
Your OpenStack Platform implementation is only as secure as its environment. Follow good security principles in your networking environment to ensure that network access is properly controlled. For example:
- Use network segmentation to mitigate network movement and isolate sensitive data; a flat network is much less secure.
- Restrict services access and ports to a minimum.
- Ensure proper firewall rules and password usage.
- Ensure that SELinux is enabled.
For details on securing your system, see:
2.4. Overcloud Requirements
The following sections detail the requirements for individual systems and nodes in the overcloud installation.
2.4.1. Compute Node Requirements
Compute nodes are responsible for running virtual machine instances after they are launched. Compute nodes must support hardware virtualization. Compute nodes must also have enough memory and disk space to support the requirements of the virtual machine instances they host.
- Processor
- 64-bit x86 processor with support for the Intel 64 or AMD64 CPU extensions, and the AMD-V or Intel VT hardware virtualization extensions enabled. It is recommended this processor has a minimum of 4 cores.
- IBM POWER 8 processor.
- Memory
- A minimum of 6 GB of RAM. Add additional RAM to this requirement based on the amount of memory that you intend to make available to virtual machine instances.
- Disk Space
- A minimum of 40 GB of available disk space.
- Network Interface Cards
- A minimum of one 1 Gbps Network Interface Cards, although it is recommended to use at least two NICs in a production environment. Use additional network interface cards for bonded interfaces or to delegate tagged VLAN traffic.
- Power Management
- Each Controller node requires a supported power management interface, such as an Intelligent Platform Management Interface (IPMI) functionality, on the server’s motherboard.
2.4.2. Controller Node Requirements
Controller nodes are responsible for hosting the core services in a RHEL OpenStack Platform environment, such as the Horizon dashboard, the back-end database server, Keystone authentication, and High Availability services.
- Processor
- 64-bit x86 processor with support for the Intel 64 or AMD64 CPU extensions.
- Memory
Minimum amount of memory is 32 GB. However, the amount of recommended memory depends on the number of vCPUs (which is based on CPU cores multiplied by hyper-threading value). Use the following calculations as guidance:
Controller RAM minimum calculation:
- Use 1.5 GB of memory per vCPU. For example, a machine with 48 vCPUs should have 72 GB of RAM.
Controller RAM recommended calculation:
- Use 3 GB of memory per vCPU. For example, a machine with 48 vCPUs should have 144 GB of RAM
For more information on measuring memory requirements, see "Red Hat OpenStack Platform Hardware Requirements for Highly Available Controllers" on the Red Hat Customer Portal.
- Disk Storage and Layout
By default, the Telemetry (
gnocchi) and Object Storage (swift) services are both installed on the Controller, with both configured to use the root disk. These defaults are suitable for deploying small overclouds built on commodity hardware; such environments are typical of proof-of-concept and test environments. These defaults also allow the deployment of overclouds with minimal planning but offer little in terms of workload capacity and performance.In an enterprise environment, however, this could cause a significant bottleneck, as Telemetry accesses storage constantly. This results in heavy disk I/O usage, which severely impacts the performance of all other Controller services. In this type of environment, you need to plan your overcloud and configure it accordingly.
Red Hat provides several configuration recommendations for both Telemetry and Object Storage. See Deployment Recommendations for Specific Red Hat OpenStack Platform Services for details.
- Network Interface Cards
- A minimum of 2 x 1 Gbps Network Interface Cards. Use additional network interface cards for bonded interfaces or to delegate tagged VLAN traffic.
- Power Management
- Each Controller node requires a supported power management interface, such as an Intelligent Platform Management Interface (IPMI) functionality, on the server’s motherboard.
2.4.3. Ceph Storage Node Requirements
Ceph Storage nodes are responsible for providing object storage in a RHEL OpenStack Platform environment.
- Processor
- 64-bit x86 processor with support for the Intel 64 or AMD64 CPU extensions.
- Memory
- Memory requirements depend on the amount of storage space. Ideally, use at minimum 1 GB of memory per 1 TB of hard disk space.
- Disk Space
- Storage requirements depends on the amount of memory. Ideally, use at minimum 1 GB of memory per 1 TB of hard disk space.
- Disk Layout
The recommended Red Hat Ceph Storage node configuration requires at least three or more disks in a layout similar to the following:
-
/dev/sda- The root disk. The director copies the main Overcloud image to the disk. -
/dev/sdb- The journal disk. This disk divides into partitions for Ceph OSD journals. For example,/dev/sdb1,/dev/sdb2,/dev/sdb3, and onward. The journal disk is usually a solid state drive (SSD) to aid with system performance. /dev/sdcand onward - The OSD disks. Use as many disks as necessary for your storage requirements.NoteRed Hat OpenStack Platform director uses
ceph-ansible, which does not support installing the OSD on the root disk of Ceph Storage nodes. This means you need at least two or more disks for a supported Ceph Storage node.
-
- Network Interface Cards
- A minimum of one 1 Gbps Network Interface Cards, although it is recommended to use at least two NICs in a production environment. Use additional network interface cards for bonded interfaces or to delegate tagged VLAN traffic. It is recommended to use a 10 Gbps interface for storage node, especially if creating an OpenStack Platform environment that serves a high volume of traffic.
- Power Management
- Each Controller node requires a supported power management interface, such as an Intelligent Platform Management Interface (IPMI) functionality, on the server’s motherboard.
See the Deploying an Overcloud with Containerized Red Hat Ceph guide for more information about installing an overcloud with a Ceph Storage cluster.
2.4.4. Object Storage Node Requirements
Object Storage nodes provides an object storage layer for the overcloud. The Object Storage proxy is installed on Controller nodes. The storage layer will require bare metal nodes with multiple number of disks per node.
- Processor
- 64-bit x86 processor with support for the Intel 64 or AMD64 CPU extensions.
- Memory
- Memory requirements depend on the amount of storage space. Ideally, use at minimum 1 GB of memory per 1 TB of hard disk space. For optimal performance, it is recommended to use 2 GB per 1 TB of hard disk space, especially for small file (less 100GB) workloads.
- Disk Space
Storage requirements depends on the capacity needed for the workload. It is recommended to use SSD drives to store the account and container data. The capacity ratio of account and container data to objects is of about 1 per cent. For example, for every 100TB of hard drive capacity, provide 1TB of SSD capacity for account and container data.
However, this depends on the type of stored data. If STORING mostly small objects, provide more SSD space. For large objects (videos, backups), use less SSD space.
- Disk Layout
The recommended node configuration requires a disk layout similar to the following:
-
/dev/sda- The root disk. The director copies the main overcloud image to the disk. -
/dev/sdb- Used for account data. -
/dev/sdc- Used for container data. -
/dev/sddand onward - The object server disks. Use as many disks as necessary for your storage requirements.
-
- Network Interface Cards
- A minimum of 2 x 1 Gbps Network Interface Cards. Use additional network interface cards for bonded interfaces or to delegate tagged VLAN traffic.
- Power Management
- Each Controller node requires a supported power management interface, such as an Intelligent Platform Management Interface (IPMI) functionality, on the server’s motherboard.
2.5. Repository Requirements
Both the undercloud and overcloud require access to Red Hat repositories either through the Red Hat Content Delivery Network, or through Red Hat Satellite 5 or 6. If using a Red Hat Satellite Server, synchronize the required repositories to your OpenStack Platform environment. Use the following list of CDN channel names as a guide:
Do not upgrade to the Red Hat Enterprise Linux 7.3 kernel without also upgrading from Open vSwitch (OVS) 2.4.0 to OVS 2.5.0. If only the kernel is upgraded, then OVS will stop functioning.
Table 2.1. OpenStack Platform Repositories
| Name | Repository | Description of Requirement |
|---|---|---|
| Red Hat Enterprise Linux 7 Server (RPMs) |
| Base operating system repository for x86_64 systems. |
| Red Hat Enterprise Linux 7 Server - Extras (RPMs) |
| Contains Red Hat OpenStack Platform dependencies. |
| Red Hat Enterprise Linux 7 Server - RH Common (RPMs) |
| Contains tools for deploying and configuring Red Hat OpenStack Platform. |
| Red Hat Satellite Tools for RHEL 7 Server RPMs x86_64 |
| Tools for managing hosts with Red Hat Satellite 6. |
| Red Hat Enterprise Linux High Availability (for RHEL 7 Server) (RPMs) |
| High availability tools for Red Hat Enterprise Linux. Used for Controller node high availability. |
| Red Hat Enterprise Linux OpenStack Platform 12 for RHEL 7 (RPMs) |
| Core Red Hat OpenStack Platform repository. Also contains packages for Red Hat OpenStack Platform director. |
| Red Hat Ceph Storage OSD 2 for Red Hat Enterprise Linux 7 Server (RPMs) |
| (For Ceph Storage Nodes) Repository for Ceph Storage Object Storage daemon. Installed on Ceph Storage nodes. |
| Red Hat Ceph Storage MON 2 for Red Hat Enterprise Linux 7 Server (RPMs) |
| (For Ceph Storage Nodes) Repository for Ceph Storage Monitor daemon. Installed on Controller nodes in OpenStack environments using Ceph Storage nodes. |
| Red Hat Ceph Storage Tools 2 for Red Hat Enterprise Linux 7 Server (RPMs) |
| Provides tools for nodes to communicate with the Ceph Storage cluster. This repository should be enabled for all nodes when deploying an overcloud with a Ceph Storage cluster. |
OpenStack Platform Repositories for IBM POWER
These repositories are used for in the Appendix G, Red Hat OpenStack Platform for POWER (Technology Preview) feature.
| Name | Repository | Description of Requirement |
|---|---|---|
| Red Hat Enterprise Linux for IBM Power, little endian |
| Base operating system repository for ppc64le systems. |
| Red Hat OpenStack Platform 12 for RHEL 7 (RPMs) |
| Core Red Hat OpenStack Platform repository for ppc64le systems. |
To configure repositories for your Red Hat OpenStack Platform environment in an offline network, see "Configuring Red Hat OpenStack Platform Director in an Offline Environment" on the Red Hat Customer Portal.
Chapter 3. Planning your Overcloud
The following section provides some guidelines on planning various aspects of your Red Hat OpenStack Platform environment. This includes defining node roles, planning your network topology, and storage.
3.1. Planning Node Deployment Roles
The director provides multiple default node types for building your overcloud. These node types are:
- Controller
Provides key services for controlling your environment. This includes the dashboard (horizon), authentication (keystone), image storage (glance), networking (neutron), orchestration (heat), and high availability services. A Red Hat OpenStack Platform environment requires three Controller nodes for a highly available environment.
NoteEnvironments with one node can be used for testing purposes. Environments with two nodes or more than three nodes are not supported.
- Compute
- A physical server that acts as a hypervisor, and provides the processing capabilities required for running virtual machines in the environment. A basic Red Hat OpenStack Platform environment requires at least one Compute node.
- Ceph Storage
- A host that provides Red Hat Ceph Storage. Additional Ceph Storage hosts scale into a cluster. This deployment role is optional.
- Swift Storage
- A host that provides external object storage for OpenStack’s swift service. This deployment role is optional.
The following table provides some example of different overclouds and defines the node types for each scenario.
Table 3.1. Node Deployment Roles for Scenarios
| Controller | Compute | Ceph Storage | Swift Storage | Total | |
| Small overcloud | 3 | 1 | - | - | 4 |
| Medium overcloud | 3 | 3 | - | - | 6 |
| Medium overcloud with additional Object storage | 3 | 3 | - | 3 | 9 |
| Medium overcloud with Ceph Storage cluster | 3 | 3 | 3 | - | 9 |
In addition, consider whether to split individual services into custom roles. For more information on the composable roles architecture, see "Composable Services and Custom Roles" in the Advanced Overcloud Customization guide.
3.2. Planning Networks
It is important to plan your environment’s networking topology and subnets so that you can properly map roles and services to correctly communicate with each other. Red Hat OpenStack Platform uses the neutron networking service, which operates autonomously and manages software-based networks, static and floating IP addresses, and DHCP. The director deploys this service on each Controller node in an overcloud environment.
Red Hat OpenStack Platform maps the different services onto separate network traffic types, which are assigned to the various subnets in your environments. These network traffic types include:
Table 3.2. Network Type Assignments
| Network Type | Description | Used By |
| IPMI | Network used for power management of nodes. This network is predefined before the installation of the undercloud. | All nodes |
| Provisioning / Control Plane | The director uses this network traffic type to deploy new nodes over PXE boot and orchestrate the installation of OpenStack Platform on the overcloud bare metal servers. This network is predefined before the installation of the undercloud. | All nodes |
| Internal API | The Internal API network is used for communication between the OpenStack services using API communication, RPC messages, and database communication. | Controller, Compute, Cinder Storage, Swift Storage |
| Tenant | Neutron provides each tenant with their own networks using either VLAN segregation (where each tenant network is a network VLAN), or tunneling (through VXLAN or GRE). Network traffic is isolated within each tenant network. Each tenant network has an IP subnet associated with it, and network namespaces means that multiple tenant networks can use the same address range without causing conflicts. | Controller, Compute |
| Storage | Block Storage, NFS, iSCSI, and others. Ideally, this would be isolated to an entirely separate switch fabric for performance reasons. | All nodes |
| Storage Management | OpenStack Object Storage (swift) uses this network to synchronize data objects between participating replica nodes. The proxy service acts as the intermediary interface between user requests and the underlying storage layer. The proxy receives incoming requests and locates the necessary replica to retrieve the requested data. Services that use a Ceph backend connect over the Storage Management network, since they do not interact with Ceph directly but rather use the frontend service. Note that the RBD driver is an exception, as this traffic connects directly to Ceph. | Controller, Ceph Storage, Cinder Storage, Swift Storage |
| External | Hosts the OpenStack Dashboard (horizon) for graphical system management, the public APIs for OpenStack services, and performs SNAT for incoming traffic destined for instances. If the external network uses private IP addresses (as per RFC-1918), then further NAT must be performed for traffic originating from the internet. | Controller and undercloud |
| Floating IP | Allows incoming traffic to reach instances using 1-to-1 IP address mapping between the floating IP address, and the IP address actually assigned to the instance in the tenant network. If hosting the Floating IPs on a VLAN separate from External, you can trunk the Floating IP VLAN to the Controller nodes and add the VLAN through Neutron after overcloud creation. This provides a means to create multiple Floating IP networks attached to multiple bridges. The VLANs are trunked but are not configured as interfaces. Instead, neutron creates an OVS port with the VLAN segmentation ID on the chosen bridge for each Floating IP network. | Controller |
| Management | Provides access for system administration functions such as SSH access, DNS traffic, and NTP traffic. This network also acts as a gateway for non-Controller nodes | All nodes |
In a typical Red Hat OpenStack Platform installation, the number of network types often exceeds the number of physical network links. In order to connect all the networks to the proper hosts, the overcloud uses VLAN tagging to deliver more than one network per interface. Most of the networks are isolated subnets but some require a Layer 3 gateway to provide routing for Internet access or infrastructure network connectivity.
It is recommended that you deploy a project network (tunneled with GRE or VXLAN) even if you intend to use a neutron VLAN mode (with tunneling disabled) at deployment time. This requires minor customization at deployment time and leaves the option available to use tunnel networks as utility networks or virtualization networks in the future. You still create Tenant networks using VLANs, but you can also create VXLAN tunnels for special-use networks without consuming tenant VLANs. It is possible to add VXLAN capability to a deployment with a Tenant VLAN, but it is not possible to add a Tenant VLAN to an existing overcloud without causing disruption.
The director provides a method for mapping six of these traffic types to certain subnets or VLANs. These traffic types include:
- Internal API
- Storage
- Storage Management
- Tenant Networks
- External
- Management
Any unassigned networks are automatically assigned to the same subnet as the Provisioning network.
The diagram below provides an example of a network topology where the networks are isolated on separate VLANs. Each overcloud node uses two interfaces (nic2 and nic3) in a bond to deliver these networks over their respective VLANs. Meanwhile, each overcloud node communicates with the undercloud over the Provisioning network through a native VLAN using nic1.

The following table provides examples of network traffic mappings different network layouts:
Table 3.3. Network Mappings
| Mappings | Total Interfaces | Total VLANs | |
| Flat Network with External Access | Network 1 - Provisioning, Internal API, Storage, Storage Management, Tenant Networks Network 2 - External, Floating IP (mapped after overcloud creation) | 2 | 2 |
| Isolated Networks | Network 1 - Provisioning Network 2 - Internal API Network 3 - Tenant Networks Network 4 - Storage Network 5 - Storage Management Network 6 - Storage Management Network 7 - External, Floating IP (mapped after overcloud creation) | 3 (includes 2 bonded interfaces) | 7 |
3.3. Planning Storage
Using LVM on a guest instance that uses a backend cinder-volume of any driver or backend type results in issues with performance and volume visibility and availability. These issues can be mitigated using a LVM filter. For more information, please refer to section 2.1 Back Ends in the Storage Guide and KCS article 3213311, "Using LVM on a cinder volume exposes the data to the compute host."
The director provides different storage options for the overcloud environment. This includes:
- Ceph Storage Nodes
The director creates a set of scalable storage nodes using Red Hat Ceph Storage. The overcloud uses these nodes for:
- Images - Glance manages images for VMs. Images are immutable. OpenStack treats images as binary blobs and downloads them accordingly. You can use glance to store images in a Ceph Block Device.
- Volumes - Cinder volumes are block devices. OpenStack uses volumes to boot VMs, or to attach volumes to running VMs. OpenStack manages volumes using cinder services. You can use cinder to boot a VM using a copy-on-write clone of an image.
- File Systems - Manila shares are backed by file systems. OpenStack users manage shares using manila services. You can use manila to manage shares backed by a CephFS file system with data on the Ceph Storage Nodes.
Guest Disks - Guest disks are guest operating system disks. By default, when you boot a virtual machine with nova, its disk appears as a file on the filesystem of the hypervisor (usually under
/var/lib/nova/instances/<uuid>/). Every virtual machine can be booted inside Ceph directly without using cinder, which lets you perform maintenance operations with the live-migration process. Additionally, if the hypervisor dies, you can triggernova evacuateand run the virtual machine elsewhere.ImportantIf you want to boot virtual machines in Ceph (ephemeral backend or boot from volume), the glance image format must be
RAWformat. Ceph does not support other image formats such as QCOW2 or VMDK for hosting a virtual machine disk.
See Red Hat Ceph Storage Architecture Guide for additional information.
- Swift Storage Nodes
- The director creates an external object storage node. This is useful in situations where you need to scale or replace controller nodes in your overcloud environment but need to retain object storage outside of a high availability cluster.
Chapter 4. Installing the Undercloud
The first step to creating your Red Hat OpenStack Platform environment is to install the director on the undercloud system. This involves a few prerequisite steps to enable the necessary subscriptions and repositories.
4.1. Creating a Director Installation User
The director installation process requires a non-root user to execute commands. Use the following commands to create the user named stack and set a password:
[root@director ~]# useradd stack
[root@director ~]# passwd stack  # specify a password
Disable password requirements for this user when using sudo:
[root@director ~]# echo "stack ALL=(root) NOPASSWD:ALL" | tee -a /etc/sudoers.d/stack
[root@director ~]# chmod 0440 /etc/sudoers.d/stack
Switch to the new stack user:
[root@director ~]# su - stack
[stack@director ~]$
Continue the director installation as the stack user.
4.2. Creating Directories for Templates and Images
The director uses system images and Heat templates to create the overcloud environment. To keep these files organized, we recommend creating directories for images and templates:
[stack@director ~]$ mkdir ~/images
[stack@director ~]$ mkdir ~/templates
Other sections in this guide use these two directories to store certain files.
4.3. Setting the Hostname for the System
The director requires a fully qualified domain name for its installation and configuration process. This means you may need to set the hostname of your director’s host. Check the hostname of your host:
[stack@director ~]$ hostname    # Checks the base hostname
[stack@director ~]$ hostname -f # Checks the long hostname (FQDN)
If either commands do not report the correct hostname or report an error, use hostnamectl to set a hostname:
[stack@director ~]$ sudo hostnamectl set-hostname manager.example.com
[stack@director ~]$ sudo hostnamectl set-hostname --transient manager.example.com
The director also requires an entry for the system’s hostname and base name in /etc/hosts. For example, if the system is named manager.example.com, then /etc/hosts requires an entry like:
127.0.0.1 manager.example.com manager localhost localhost.localdomain localhost4 localhost4.localdomain4
4.4. Registering your System
To install the Red Hat OpenStack Platform director, first register the host system using Red Hat Subscription Manager, and subscribe to the required channels.
Register your system with the Content Delivery Network, entering your Customer Portal user name and password when prompted:
[stack@director ~]$ sudo subscription-manager register
Find the entitlement pool ID for Red Hat OpenStack Platform director. For example:
[stack@director ~]$ sudo subscription-manager list --available --all --matches="Red Hat OpenStack"
Subscription Name:   Name of SKU
Provides:            Red Hat Single Sign-On
                     Red Hat Enterprise Linux Workstation
                     Red Hat CloudForms
                     Red Hat OpenStack
                     Red Hat Software Collections (for RHEL Workstation)
                     Red Hat Virtualization
SKU:                 SKU-Number
Contract:            Contract-Number
Pool ID:             Valid-Pool-Number-123456
Provides Management: Yes
Available:           1
Suggested:           1
Service Level:       Support-level
Service Type:        Service-Type
Subscription Type:   Sub-type
Ends:                End-date
System Type:         Physical
Locate the
Pool IDvalue and attach the Red Hat OpenStack Platform 12 entitlement:[stack@director ~]$ sudo subscription-manager attach --pool=Valid-Pool-Number-123456
Disable all default repositories, and then enable the required Red Hat Enterprise Linux repositories:
[stack@director ~]$ sudo subscription-manager repos --disable=*
[stack@director ~]$ sudo subscription-manager repos --enable=rhel-7-server-rpms --enable=rhel-7-server-extras-rpms --enable=rhel-7-server-rh-common-rpms --enable=rhel-ha-for-rhel-7-server-rpms --enable=rhel-7-server-openstack-12-rpms
These repositories contain packages the director installation requires.
Only enable the repositories listed in Section 2.5, “Repository Requirements”. Additional repositories can cause package and software conflicts. Do not enable any additional repositories.
Perform an update on your system to make sure you have the latest base system packages:
[stack@director ~]$ sudo yum update -y
[stack@director ~]$ sudo reboot
The system is now ready for the director installation.
4.5. Installing the Director Packages
Use the following command to install the required command line tools for director installation and configuration:
[stack@director ~]$ sudo yum install -y python-tripleoclient
This installs all packages required for the director installation.
If you aim to create an overcloud with Ceph Storage nodes, install the additional ceph-ansible package:
[stack@director ~]$ sudo yum install -y ceph-ansible
4.6. Configuring the Director
The director installation process requires certain settings to determine your network configurations. The settings are stored in a template located in the stack user’s home directory as undercloud.conf.
Red Hat provides a basic template to help determine the required settings for your installation. Copy this template to the stack user’s home directory:
[stack@director ~]$ cp /usr/share/instack-undercloud/undercloud.conf.sample ~/undercloud.conf
The undercloud.conf file contains settings to configure your undercloud. If you omit or comment out a parameter, the undercloud installation uses the default value.
The template contains two sections: [DEFAULT] and [auth]. The [DEFAULT] section contains the following parameters:
- undercloud_hostname
- Defines the fully qualified host name for the undercloud. If set, the undercloud installation configures all system host name settings. If left unset, the undercloud uses the current host name, but the user must configure all system host name settings appropriately.
- local_ip
-
The IP address defined for the director’s Provisioning NIC. This is also the IP address the director uses for its DHCP and PXE boot services. Leave this value as the default
192.168.24.1/24unless you are using a different subnet for the Provisioning network, for example, if it conflicts with an existing IP address or subnet in your environment. - network_gateway
The gateway for the overcloud instances. This is the undercloud host, which forwards traffic to the External network. Leave this as the default
192.168.24.1unless you are either using a different IP address for the director or want to directly use an external gateway.NoteThe director’s configuration script also automatically enables IP forwarding using the relevant
sysctlkernel parameter.- undercloud_public_host
-
The IP address defined for the director’s Public API when using SSL/TLS. This is an IP address for accessing the director endpoints externally over SSL/TLS. The director configuration attaches this IP address to its software bridge as a routed IP address, which uses the
/32netmask. - undercloud_admin_host
-
The IP address defined for the director’s Admin API when using SSL/TLS. This is an IP address for administration endpoint access over SSL/TLS. The director configuration attaches this IP address to its software bridge as a routed IP address, which uses the
/32netmask. - undercloud_nameservers
- A list of DNS nameservers to use for the undercloud hostname resolution.
- undercloud_ntp_servers
- A list of network time protocol servers to help synchronize the undercloud’s date and time.
- undercloud_service_certificate
- The location and filename of the certificate for OpenStack SSL/TLS communication. Ideally, you obtain this certificate from a trusted certificate authority. Otherwise generate your own self-signed certificate using the guidelines in Appendix A, SSL/TLS Certificate Configuration. These guidelines also contain instructions on setting the SELinux context for your certificate, whether self-signed or from an authority.
- generate_service_certificate
-
Defines whether to generate an SSL/TLS certificate during the undercloud installation, which is used for the
undercloud_service_certificateparameter. The undercloud installation saves the resulting certificate/etc/pki/tls/certs/undercloud-[undercloud_public_vip].pem. The CA defined in thecertificate_generation_caparameter signs this certificate. - certificate_generation_ca
-
The
certmongernickname of the CA that signs the requested certificate. Only use this option if you have set thegenerate_service_certificateparameter. If you select thelocalCA, certmonger extracts the local CA certificate to/etc/pki/ca-trust/source/anchors/cm-local-ca.pemand adds it to the trust chain. - service_principal
- The Kerberos principal for the service using the certificate. Only use this if your CA requires a Kerberos principal, such as in FreeIPA.
- local_interface
The chosen interface for the director’s Provisioning NIC. This is also the device the director uses for its DHCP and PXE boot services. Change this value to your chosen device. To see which device is connected, use the
ip addrcommand. For example, this is the result of anip addrcommand:2: eth0: <BROADCAST,MULTICAST,UP,LOWER_UP> mtu 1500 qdisc pfifo_fast state UP qlen 1000 link/ether 52:54:00:75:24:09 brd ff:ff:ff:ff:ff:ff inet 192.168.122.178/24 brd 192.168.122.255 scope global dynamic eth0 valid_lft 3462sec preferred_lft 3462sec inet6 fe80::5054:ff:fe75:2409/64 scope link valid_lft forever preferred_lft forever 3: eth1: <BROADCAST,MULTICAST,UP,LOWER_UP> mtu 1500 qdisc noop state DOWN link/ether 42:0b:c2:a5:c1:26 brd ff:ff:ff:ff:ff:ffIn this example, the External NIC uses
eth0and the Provisioning NIC useseth1, which is currently not configured. In this case, set thelocal_interfacetoeth1. The configuration script attaches this interface to a custom bridge defined with theinspection_interfaceparameter.- local_mtu
-
MTU to use for the
local_interface. - network_cidr
-
The network that the director uses to manage overcloud instances. This is the Provisioning network, which the undercloud’s
neutronservice manages. Leave this as the default192.168.24.0/24unless you are using a different subnet for the Provisioning network. - masquerade_network
-
Defines the network that will masquerade for external access. This provides the Provisioning network with a degree of network address translation (NAT) so that it has external access through the director. Leave this as the default (
192.168.24.0/24) unless you are using a different subnet for the Provisioning network. - dhcp_start; dhcp_end
- The start and end of the DHCP allocation range for overcloud nodes. Ensure this range contains enough IP addresses to allocate your nodes.
- hieradata_override
-
Path to
hieradataoverride file. If set, the undercloud installation copies this file under/etc/puppet/hieradataand sets it as the first file in the hierarchy. Use this to provide custom configuration to services beyond theundercloud.confparameters. - net_config_override
-
Path to network configuration override template. If set, the undercloud uses a JSON format template to configure the networking with
os-net-config. This ignores the network parameters set inundercloud.conf. See/usr/share/instack-undercloud/templates/net-config.json.templatefor an example. - inspection_interface
-
The bridge the director uses for node introspection. This is custom bridge that the director configuration creates. The
LOCAL_INTERFACEattaches to this bridge. Leave this as the defaultbr-ctlplane. - inspection_iprange
-
A range of IP address that the director’s introspection service uses during the PXE boot and provisioning process. Use comma-separated values to define the start and end of this range. For example,
192.168.24.100,192.168.24.120. Make sure this range contains enough IP addresses for your nodes and does not conflict with the range fordhcp_startanddhcp_end. - inspection_extras
-
Defines whether to enable extra hardware collection during the inspection process. Requires
python-hardwareorpython-hardware-detectpackage on the introspection image. - inspection_runbench
-
Runs a set of benchmarks during node introspection. Set to
trueto enable. This option is necessary if you intend to perform benchmark analysis when inspecting the hardware of registered nodes. See Section 6.2, “Inspecting the Hardware of Nodes” for more details. - inspection_enable_uefi
- Defines whether to support introspection of nodes with UEFI-only firmware. For more information, see Appendix D, Alternative Boot Modes.
- enable_node_discovery
-
Automatically enroll any unknown node that PXE-boots the introspection ramdisk. New nodes use the
fake_pxedriver as a default but you can setdiscovery_default_driverto override. You can also use introspection rules to specify driver information for newly enrolled nodes. - discovery_default_driver
-
Sets the default driver for automatically enrolled nodes. Requires
enable_node_discoveryenabled and you must include the driver in theenabled_driverslist. See Appendix B, Power Management Drivers for a list of supported drivers. - undercloud_debug
-
Sets the log level of undercloud services to
DEBUG. Set this value totrueto enable. - undercloud_update_packages
- Defines whether to update packages during the undercloud installation.
- enable_tempest
-
Defines whether to install the validation tools. The default is set to
false, but you can can enable usingtrue. - enable_telemetry
-
Defines whether to install OpenStack Telemetry services (ceilometer, aodh, panko, gnocchi) in the undercloud. In Red Hat OpenStack Platform 12, the metrics backend for telemetry is provided by gnocchi. Setting
enable_telemetryparameter totruewill install and set up telemetry services automatically. The default value isfalse, which disables telemetry on the undercloud. This parameter is required if using other products that consume metrics data, such as Red Hat CloudForms. - enable_ui
-
Defines Whether to install the director’s web UI. This allows you to perform overcloud planning and deployments through a graphical web interface. For more information, see Chapter 7, Configuring a Basic Overcloud with the Web UI. Note that the UI is only available with SSL/TLS enabled using either the
undercloud_service_certificateorgenerate_service_certificate. - enable_validations
- Defines whether to install the requirements to run validations.
- enable_legacy_ceilometer_api
-
Defines whether to enable legacy OpenStack Telemetry service (Ceilometer) API in the Undercloud. Note the legacy API is deprecated and will be removed in a future release. Please use the newer components installed with
enable_telemetry. - enable_novajoin
-
Defines whether to install the
novajoinmetadata service in the Undercloud. - ipa_otp
-
Defines the one time password to register the Undercloud node to an IPA server. This is required when
enable_novajoinis enabled. - ipxe_enabled
-
Defines whether to use iPXE or standard PXE. The default is
true, which enables iPXE. Set tofalseto set to standard PXE. For more information, see Appendix D, Alternative Boot Modes. - scheduler_max_attempts
- Maximum number of times the scheduler attempts to deploy an instance. Keep this greater or equal to the number of bare metal nodes you expect to deploy at once to work around potential race condition when scheduling.
- clean_nodes
- Defines whether to wipe the hard drive between deployments and after introspection.
- enabled_drivers
- A list of bare metal drivers to enable for the undercloud. See Appendix B, Power Management Drivers for a list of supported drivers.
The [auth] section contains the following parameters:
- undercloud_db_password; undercloud_admin_token; undercloud_admin_password; undercloud_glance_password; etc
The remaining parameters are the access details for all of the director’s services. No change is required for the values. The director’s configuration script automatically generates these values if blank in
undercloud.conf. You can retrieve all values after the configuration script completes.ImportantThe configuration file examples for these parameters use
<None>as a placeholder value. Setting these values to<None>leads to a deployment error.
Modify the values for these parameters to suit your network. When complete, save the file and run the following command:
[stack@director ~]$ openstack undercloud install
This launches the director’s configuration script. The director installs additional packages and configures its services to suit the settings in the undercloud.conf. This script takes several minutes to complete.
The configuration script generates two files when complete:
-
undercloud-passwords.conf- A list of all passwords for the director’s services. -
stackrc- A set of initialization variables to help you access the director’s command line tools.
The configuration also starts all OpenStack Platform services automatically. Check the enabled services using the following command:
[stack@director ~]$ sudo systemctl list-units openstack-*
The installation also adds the stack user to the docker group so the stack user has access to container management commands. Refresh the stack user’s permissions with the following command:
[stack@director ~]$ exec su -l stack
The command prompts you to log in again. Enter the stack user’s password.
To initialize the stack user to use the command line tools, run the following command:
[stack@director ~]$ source ~/stackrc
The prompt now indicates OpenStack commands authenticate and execute against the undercloud;
(undercloud) [stack@director ~]$
You can now use the director’s command line tools.
4.7. Obtaining Images for Overcloud Nodes
The director requires several disk images for provisioning overcloud nodes. This includes:
- An introspection kernel and ramdisk - Used for bare metal system introspection over PXE boot.
- A deployment kernel and ramdisk - Used for system provisioning and deployment.
- An overcloud kernel, ramdisk, and full image - A base overcloud system that is written to the node’s hard disk.
Obtain these images from the rhosp-director-images and rhosp-director-images-ipa packages:
(undercloud) [stack@director ~]$ sudo yum install rhosp-director-images rhosp-director-images-ipa
Extract the archives to the images directory on the stack user’s home (/home/stack/images):
(undercloud) [stack@director ~]$ cd ~/images
(undercloud) [stack@director images]$ for i in /usr/share/rhosp-director-images/overcloud-full-latest-12.0.tar /usr/share/rhosp-director-images/ironic-python-agent-latest-12.0.tar; do tar -xvf $i; done
Import these images into the director:
(undercloud) [stack@director images]$ openstack overcloud image upload --image-path /home/stack/images/
This uploads the following images into the director: bm-deploy-kernel, bm-deploy-ramdisk, overcloud-full, overcloud-full-initrd, overcloud-full-vmlinuz. These are the images for deployment and the overcloud. The script also installs the introspection images on the director’s PXE server.
View a list of the images in the CLI:
(undercloud) [stack@director images]$ openstack image list
+--------------------------------------+------------------------+
| ID                                   | Name                   |
+--------------------------------------+------------------------+
| 765a46af-4417-4592-91e5-a300ead3faf6 | bm-deploy-ramdisk      |
| 09b40e3d-0382-4925-a356-3a4b4f36b514 | bm-deploy-kernel       |
| ef793cd0-e65c-456a-a675-63cd57610bd5 | overcloud-full         |
| 9a51a6cb-4670-40de-b64b-b70f4dd44152 | overcloud-full-initrd  |
| 4f7e33f4-d617-47c1-b36f-cbe90f132e5d | overcloud-full-vmlinuz |
+--------------------------------------+------------------------+
This list will not show the introspection PXE images. The director copies these files to /httpboot.
(undercloud) [stack@director images]$ ls -l /httpboot
total 341460
-rwxr-xr-x. 1 root              root                5153184 Mar 31 06:58 agent.kernel
-rw-r--r--. 1 root              root              344491465 Mar 31 06:59 agent.ramdisk
-rw-r--r--. 1 ironic-inspector  ironic-inspector        337 Mar 31 06:23 inspector.ipxe
The default overcloud-full.qcow2 image is a flat partition image. However, you can also import and use whole disk images. See Appendix C, Whole Disk Images for more information.
4.8. Setting a Nameserver on the Undercloud’s Neutron Subnet
If you intend for the overcloud to resolve external hostnames, such as cdn.redhat.com, it is recommended to set a nameserver on the overcloud nodes. For a standard overcloud without network isolation, the nameserver is defined using the undercloud’s neutron subnet. Use the following commands to define nameservers for the environment:
(undercloud) [stack@director images]$ openstack subnet list
(undercloud) [stack@director images]$ openstack subnet set --dns-nameserver [nameserver1-ip] --dns-nameserver [nameserver2-ip] [subnet-uuid]
View the subnet to verify the nameserver:
(undercloud) [stack@director images]$ openstack subnet show [subnet-uuid]
+-------------------+-----------------------------------------------+
| Field             | Value                                         |
+-------------------+-----------------------------------------------+
| ...               |                                               |
| dns_nameservers   | 8.8.8.8                                       |
| ...               |                                               |
+-------------------+-----------------------------------------------+
If you aim to isolate service traffic onto separate networks, the overcloud nodes use the DnsServer parameter in your network environment files.
4.9. Backing Up the Undercloud
Red Hat provides a process to back up important data from the undercloud host and the Red Hat OpenStack Platform director. For more information about undercloud backups, see the "Back Up and Restore the Director Undercloud" guide.
4.10. Completing the Undercloud Configuration
This completes the undercloud configuration. The next chapter explores basic overcloud configuration, including registering nodes, inspecting them, and then tagging them into various node roles.
Chapter 5. Configuring Container Registry Details
A containerized overcloud requires access to a registry with the required container images. This chapter provides information on how to prepare the registry and your overcloud configuration to use container images for Red Hat OpenStack Platform.
This guide provides several use cases to configure your overcloud to use a registry. Before attempting one of these use cases, it is recommended to familiarize yourself with how to use the image preparation command. See Section 5.1, “Using the Container Image Preparation Command” for more information.
Selecting a Registry Method
Red Hat OpenStack Platform supports the following registry types:
- Remote Registry
-
The overcloud pulls container images directly from
registry.access.redhat.com. This method is the easiest for generating the initial configuration. However, each overcloud node pulls each image directly from the Red Hat Container Catalog, which can cause network congestion and slower deployment. In addition, all overcloud nodes require internet access to the Red Hat Container Catalog. - Local Registry
-
You create a local registry on the undercloud, synchronize the images from
registry.access.redhat.com, and the overcloud pulls the container images from the undercloud. This method allows you to store a registry internally, which can speed up the deployment and decrease network congestion. However, the undercloud only acts as a basic registry and provides limited life cycle management for container images. - Satellite Server
- Manage the complete application life cycle of your container images and publish them through a Red Hat Satellite 6 server. The overcloud pulls the images from the Satellite server. This method provides an enterprise grade solution to store, manage, and deploy Red Hat OpenStack Platform containers.
Select a method from the list and continue configuring your registry details.
5.1. Using the Container Image Preparation Command
This section provides an overview on how to use the openstack overcloud container image prepare command, including conceptual information on the command’s various options. You can find proper use cases and end-to-end procedures for using this command in Selecting a Registry Method.
Generating a Container Image Environment File for the Overcloud
One of the main uses of the openstack overcloud container image prepare command is to create an environment file that contains a list of images the overcloud uses. You include this file with your overcloud deployment commands, such as openstack overcloud deploy. The openstack overcloud container image prepare command uses the following options for this function:
--output-env-file- Defines the resulting environment file name.
The following snippet is an example of this file’s contents:
parameter_defaults:
  DockerAodhApiImage: registry.access.redhat.com/rhosp12/openstack-aodh-api:latest
  DockerAodhConfigImage: registry.access.redhat.com/rhosp12/openstack-aodh-api:latest
...
Generating a Container Image List for Import Methods
If you aim to import the OpenStack Platform container images to a different registry source, you can generate a list of images. The syntax of list is primarily used to import container images to the container registry on the undercloud, but you can modify the format of this list to suit other import methods, such as Red Hat Satellite 6.
The openstack overcloud container image prepare command uses the following options for this function:
--output-images-file- Defines the resulting file name for the import list.
The following is an example of this file’s contents:
container_images:
- imagename: registry.access.redhat.com/rhosp12/openstack-aodh-api:latest
- imagename: registry.access.redhat.com/rhosp12/openstack-aodh-evaluator:latest
...
Setting the Namespace for Container Images
Both the --output-env-file and --output-images-file options require a namespace to generate the resulting image locations. The openstack overcloud container image prepare command uses the following options to set the source location of the container images to pull:
--namespace- Defines the namespace for the container images. This is usually a hostname or IP address with a directory.
--prefix- Defines the prefix to add before the image names.
As a result, the director generates the image names using the following format:
-
[NAMESPACE]/[PREFIX][IMAGE NAME]
Setting Container Image Tags
The openstack overcloud container image prepare command uses the latest tag for each container image by default. However, you can select a specific tag for an image version using the following option:
--tag- Sets the tag for all images. All OpenStack Platform container images use the same tag to provide version synchronicity.
You can also discover the latest versioned tag for an image using the openstack overcloud container image tag discover command. For example:
$ sudo openstack overcloud container image tag discover \
  --image registry.access.redhat.com/rhosp12/openstack-base:latest \
  --tag-from-label version-release
This checks the tags available for the openstack-base image using the image’s version-release label as a basis and outputs the latest versioned tag.
You must run the tag discovery command with sudo access. This command uses docker as a sub-process, which requires sudo privileges.
5.2. Adding Container Images for Additional Services
The director only prepares container images for core OpenStack Platform Services [1]. Some additional features use services that require additional container images. You enable these services with environment files. The openstack overcloud container image prepare command uses the following option to include environment files and their respective container images:
-e- Include environment files to enable additional container images.
For more information on how to include environment files in a deployment, see Section 6.9, “Including Environment Files in Overcloud Creation”.
The following table provides a sample list of additional services that use container images and their respective environment file locations within the /usr/share/openstack-tripleo-heat-templates directory.
| Service | Environment File |
|---|---|
| Ceph Storage |
|
| Collectd |
|
| Congress |
|
| Fluentd |
|
| OpenStack Bare Metal (ironic) |
|
| OpenStack Data Processing (sahara) |
|
| OpenStack EC2-API |
|
| Sensu |
|
The next few sections provide examples of including additional services.
Ceph Storage
If deploying a Red Hat Ceph Storage cluster with your overcloud, you need to include the /usr/share/openstack-tripleo-heat-templates/environments/ceph-ansible/ceph-ansible.yaml environment file. This file enables the composable containerized services in your overcloud and the director needs to know these services are enabled to prepare their images.
In addition to this environment file, you also need to define the Ceph Storage container location, which is different from the OpenStack Platform services. Use the --set option to set the following parameters specific to Ceph Storage:
--set ceph_namespace-
Defines the namespace for the Ceph Storage container image. This functions similar to the
--namespaceoption. --set ceph_image-
Defines the name of the Ceph Storage container image. Usually,this is
rhceph-2-rhel7. --set ceph_tag-
Defines the tag to use for the Ceph Storage container image. This functions similar to the
--tagoption.
The following snippet is an example that includes Ceph Storage in your container image files:
$ openstack overcloud container image prepare \
  ...
  -e /usr/share/openstack-tripleo-heat-templates/environments/ceph-ansible/ceph-ansible.yaml \
  --set ceph_namespace=registry.access.redhat.com/rhceph \
  --set ceph_image=rhceph-2-rhel7 \
  --set ceph_tag=<CEPH_TAG> \
  ...
OpenStack Bare Metal (ironic)
If deploying OpenStack Bare Metal (ironic) in your overcloud, you need to include the /usr/share/openstack-tripleo-heat-templates/environments/services-docker/ironic.yaml environment file so the director can prepare the images. The following snippet is an example on how to include this environment file:
$ openstack overcloud container image prepare \
  ...
  -e /usr/share/openstack-tripleo-heat-templates/environments/services-docker/ironic.yaml \
  ...
OpenStack Data Processing (sahara)
If deploying OpenStack Data Processing (sahara) in your overcloud, you need to include the /usr/share/openstack-tripleo-heat-templates/environments/services-docker/sahara.yaml environment file so the director can prepare the images. The following snippet is an example on how to include this environment file:
$ openstack overcloud container image prepare \
  ...
  -e /usr/share/openstack-tripleo-heat-templates/environments/services-docker/sahara.yaml \
  ...
5.3. Configuring the Overcloud to Use a Remote Registry
Red Hat hosts the overcloud container images on registry.access.redhat.com. Pulling the images from a remote registry is the simplest method because the registry is already setup and all you require is the URL and namespace of the image you aim to pull. However, during overcloud creation, the overcloud nodes all pull images from the remote repository, which can congest your external connection. If that is a problem, you can either:
- Setup a local registry: Section 5.4, “Configuring the Overcloud to Use the Undercloud as a Local Registry”
- Host the images on Red Hat Satellite 6: Section 5.5, “Configuring a Satellite Server as an Image Registry”
To pull the images directly from registry.access.redhat.com in your overcloud deployment, an environment file is required to specify the image parameters. The following commands automatically create this environment file:
Discover the tag for the latest images:
$ source ~/stackrc
(undercloud) $ sudo openstack overcloud container image tag discover \
  --image registry.access.redhat.com/rhosp12/openstack-base:latest \
  --tag-from-label version-release
The result from this command is used below for the value of
<TAG>Create the environment file:
(undercloud) $ openstack overcloud container image prepare \
  --namespace=registry.access.redhat.com/rhosp12 \
  --prefix=openstack- \
  --tag=<TAG> \
  --output-env-file=/home/stack/templates/overcloud_images.yaml
Use the
-eoption to include any environment files for optional services. See Section 5.2, “Adding Container Images for Additional Services” in Section 5.1, “Using the Container Image Preparation Command”.If using Ceph Storage, include the additional parameters from Ceph Storage in Section 5.1, “Using the Container Image Preparation Command”.
-
This creates an
overcloud_images.yamlenvironment file, which contains image locations, on the undercloud. You include this file with your deployment.
The registry configuration is ready. Continue with the instructions in Chapter 6, Configuring a Basic Overcloud with the CLI Tools.
5.4. Configuring the Overcloud to Use the Undercloud as a Local Registry
You can configure a local registry on the undercloud to store overcloud container images. This method involves the following:
-
The director pulls each image from the
registry.access.redhat.com. - The director creates the overcloud.
- During the overcloud creation, the nodes pull the relevant images from the undercloud.
This keeps network traffic for container images within your internal network, which does not congest your external network connection and can speed the deployment process.
To pull the images from registry.access.redhat.com to our local registry, use the following process:
Discover the tag for the latest images:
$ source ~/stackrc
(undercloud) $ sudo openstack overcloud container image tag discover \
  --image registry.access.redhat.com/rhosp12/openstack-base:latest \
  --tag-from-label version-release
The result from this command is used below for the value of
<TAG>.Create a template to pull the images to the local registry:
(undercloud) $ openstack overcloud container image prepare \
  --namespace=registry.access.redhat.com/rhosp12 \
  --prefix=openstack- \
  --tag=<TAG> \
  --output-images-file /home/stack/local_registry_images.yaml
Use the
-eoption to include any environment files for optional services. See Section 5.2, “Adding Container Images for Additional Services” in Section 5.1, “Using the Container Image Preparation Command”.If using Ceph Storage, include the additional parameters from Ceph Storage in Section 5.1, “Using the Container Image Preparation Command”.
NoteThis version of the
openstack overcloud container image preparecommand targets the registry on theregistry.access.redhat.comto generate an image list to import into the undercloud. It uses different values than theopenstack overcloud container image preparecommand used in a later step.This creates a file called
local_registry_images.yamlwith your container image information. Pull the images using thelocal_registry_images.yamlfile:(undercloud) $ sudo openstack overcloud container image upload \ --config-file /home/stack/local_registry_images.yaml \ --verbose
Pulling the required images might take some time depending on the speed of your network and your undercloud disk.
NoteThe container images consume approximately 10 GB of disk space.
Find the namespace of the local images. The namespace uses the following pattern:
<REGISTRY IP ADDRESS>:8787/rhosp12
Use the IP address of your undercloud, which you previously set with the
local_ipparameter in yourundercloud.conffile. Alternatively, you can also obtain the full namespace with the following command:(undercloud) $ docker images | grep -v redhat.com | grep -o '^.*rhosp12' | sort -u
Create a template for using the images in our local registry on the undercloud. For example:
(undercloud) $ openstack overcloud container image prepare \
  --namespace=192.168.24.1:8787/rhosp12 \
  --prefix=openstack- \
  --tag=<TAG> \
  --output-env-file=/home/stack/templates/overcloud_images.yaml
Use the
-eoption to include any environment files for optional services. See Section 5.2, “Adding Container Images for Additional Services” in Section 5.1, “Using the Container Image Preparation Command”.If using Ceph Storage, include the additional parameters from Ceph Storage in Section 5.1, “Using the Container Image Preparation Command”.
NoteThis version of the
openstack overcloud container image preparecommand targets the registry on the undercloud and generates a list of images to use for the overcloud. It uses different values than theopenstack overcloud container image preparecommand used in a previous step.-
This creates an
overcloud_images.yamlenvironment file, which contains image locations on the undercloud. You include this file with your deployment.
The registry configuration is ready. Continue with the instructions in Chapter 6, Configuring a Basic Overcloud with the CLI Tools.
5.5. Configuring a Satellite Server as an Image Registry
A known issue exists in Red Hat Satellite 6 that prevents synchronizing container images with names longer than 30 characters. A fix for the issue will be available in an upcoming minor release of Satellite 6.2. A hotfix for this issue is currently available (see BZ#1424689 for more information).
Red Hat Satellite 6 offers registry synchronization capabilities. This provides a method to pull multiple images into a Satellite server and manage them as part of an application life cycle. The Satellite also acts as a registry for other container-enabled systems to use. For more details information on managing container images, see "Managing Container Images" in the Red Hat Satellite 6 Content Management Guide.
The examples in this procedure use the hammer command line tool for Red Hat Satellite 6 and an example organization called ACME. Substitute this organization for your own Satellite 6 organization.
To pull the images from registry.access.redhat.com to our local registry, use the following process:
Create a template to pull images to the local registry:
$ source ~/stackrc
(undercloud) $ openstack overcloud container image prepare \
  --namespace=rhosp12 \
  --prefix=openstack- \
  --output-images-file /home/stack/satellite_images
Use the
-eoption to include any environment files for optional services. See Section 5.2, “Adding Container Images for Additional Services” in Section 5.1, “Using the Container Image Preparation Command”.If using Ceph Storage, include the additional parameters from Ceph Storage in Section 5.1, “Using the Container Image Preparation Command”.
NoteThis version of the
openstack overcloud container image preparecommand targets the registry on theregistry.access.redhat.comto generate an image list. It uses different values than theopenstack overcloud container image preparecommand used in a later step.-
This creates a file called
satellite_imageswith your container image information. You will use this file to synchronize container images to your Satellite 6 server. Remove the YAML-specific information from the
satellite_imagesfile and convert it into a flat file containing only the list of images. The followingsedcommands accomplish this:(undercloud) $ sed -i "s/- imagename: //g" ~/satellite_images (undercloud) $ sed -i "s/:.*//g" ~/satellite_images (undercloud) $ sed -i "1d" ~/satellite_images
This provides a list of images that you pull into the Satellite server.
-
Copy the
satellite_imagesfile to a system that contains the Satellite 6hammertool. Alternatively, use the instructions in the Hammer CLI Guide to install thehammertool to the undercloud. Run the following
hammercommand to create a new product (OSP12 Containers) to your Satellite organization:$ hammer product create \ --organization "ACME" \ --name "OSP12 Containers"
This custom product will contain our images.
Add the base container image to the product:
$ hammer repository create \
  --organization "ACME" \
  --product "OSP12 Containers" \
  --content-type docker \
  --url https://registry.access.redhat.com \
  --docker-upstream-name rhosp12/openstack-base \
  --name base
Add the overcloud container images from the
satellite_imagesfile.$ while read IMAGE; do \ IMAGENAME=$(echo $IMAGE | cut -d"/" -f2 | sed "s/openstack-//g" | sed "s/:.*//g") ; \ hammer repository create \ --organization "ACME" \ --product "OSP12 Containers" \ --content-type docker \ --url https://registry.access.redhat.com \ --docker-upstream-name $IMAGE \ --name $IMAGENAME ; done < satellite_images
synchronize the container images:
$ hammer product synchronize \
  --organization "ACME" \
  --name "OSP12 Containers"
Wait for the Satellite server to complete synchronization.
NoteDepending on your configuration,
hammermight ask for your Satellite server username and password. You can configurehammerto automatically login using a configuration file. See the "Authentication" section in the Hammer CLI Guide.Check the tags available for the
baseimage:$ hammer docker tag list --repository "base" \ --organization "ACME" \ --product "OSP12 Containers"
This displays tags for the OpenStack Platform container images. Select a tag and note it for a later step.
Return to the undercloud and generate an environment file for the images on your Satellite server. This uses the following data:
-
--namespace- The URL and port of the registry on the Satellite server. The default registry port on Red Hat Satellite is 5000. For example,--namespace=satellite6.example.com:5000. -
--prefix=- The prefix is based on the Satellite 6 organization and product name that hosts the containers. For example, if your organization name isACME, the prefix would beacme-osp12_containers-. -
--tag=<TAG>- The OpenStack Platform container image tag you noted earlier. -e- Use this option to include each environment file for additional services for your overcloud. See Section 5.2, “Adding Container Images for Additional Services” in Section 5.1, “Using the Container Image Preparation Command” for more information.The following is an example command for generating the environment file:
(undercloud) $ openstack overcloud container image prepare \
  --namespace=satellite6.example.com:5000 \
  --prefix=acme-osp12_containers- \
  --tag=<TAG> \
  --output-env-file=/home/stack/templates/overcloud_images.yaml
Use the following additional parameters if using Ceph Storage:
-
--set ceph_namespace- The URL and port of the registry on the Satellite server for the Ceph Storage image. This should be the same as--namespace. -
--set ceph_image- The name of the Ceph Storage image on the Satellite server. This follows the same convention as the OpenStack Platform images. For example:acme-osp12_containers-rhceph-2-rhel7. --set ceph_tag- The Ceph Storage container image tag. Set tolatest.See Ceph Storage in Section 5.1, “Using the Container Image Preparation Command” for more information.
NoteThis version of the
openstack overcloud container image preparecommand targets the Satellite server. It uses different values than theopenstack overcloud container image preparecommand used in a previous step.
-
-
This creates an
overcloud_images.yamlenvironment file, which contains the image locations on the Satellite server. You include this file with your deployment.
The registry configuration is ready. Continue with the instructions in Chapter 6, Configuring a Basic Overcloud with the CLI Tools.
Chapter 6. Configuring a Basic Overcloud with the CLI Tools
This chapter provides the basic configuration steps for an OpenStack Platform environment using the CLI tools. An overcloud with a basic configuration contains no custom features. However, you can add advanced configuration options to this basic overcloud and customize it to your specifications using the instructions in the Advanced Overcloud Customization guide.
For the examples in this chapter, all nodes are bare metal systems using IPMI for power management. For more supported power management types and their options, see Appendix B, Power Management Drivers.
Workflow
- Create a node definition template and register blank nodes in the director.
- Inspect hardware of all nodes.
- Tag nodes into roles.
- Define additional node properties.
Requirements
- The director node created in Chapter 4, Installing the Undercloud
- A set of bare metal machines for your nodes. The number of node required depends on the type of overcloud you intend to create (see Section 3.1, “Planning Node Deployment Roles” for information on overcloud roles). These machines also must comply with the requirements set for each node type. For these requirements, see Section 2.4, “Overcloud Requirements”. These nodes do not require an operating system. The director copies a Red Hat Enterprise Linux 7 image to each node.
One network connection for the Provisioning network, which is configured as a native VLAN. All nodes must connect to this network and comply with the requirements set in Section 2.3, “Networking Requirements”. The examples in this chapter use 192.168.24.0/24 as the Provisioning subnet with the following IP address assignments:
Table 6.1. Provisioning Network IP Assignments
Node Name
IP Address
MAC Address
IPMI IP Address
Director
192.168.24.1
aa:aa:aa:aa:aa:aa
None required
Controller
DHCP defined
bb:bb:bb:bb:bb:bb
192.168.24.205
Compute
DHCP defined
cc:cc:cc:cc:cc:cc
192.168.24.206
- All other network types use the Provisioning network for OpenStack services. However, you can create additional networks for other network traffic types.
- A source for container images. See Chapter 5, Configuring Container Registry Details for instructions on how to generate an environment file containing your container image source.
6.1. Registering Nodes for the Overcloud
The director requires a node definition template, which you create manually. This file (instackenv.json) uses the JSON format file, and contains the hardware and power management details for your nodes. For example, a template for registering two nodes might look like this:
{
    "nodes":[
        {
            "mac":[
                "bb:bb:bb:bb:bb:bb"
            ],
            "name":"node01",
            "cpu":"4",
            "memory":"6144",
            "disk":"40",
            "arch":"x86_64",
            "pm_type":"pxe_ipmitool",
            "pm_user":"admin",
            "pm_password":"p@55w0rd!",
            "pm_addr":"192.168.24.205"
        },
        {
            "mac":[
                "cc:cc:cc:cc:cc:cc"
            ],
            "name":"node02",
            "cpu":"4",
            "memory":"6144",
            "disk":"40",
            "arch":"x86_64",
            "pm_type":"pxe_ipmitool",
            "pm_user":"admin",
            "pm_password":"p@55w0rd!",
            "pm_addr":"192.168.24.206"
        }
    ]
}
This template uses the following attributes:
- name
- The logical name for the node.
- pm_type
-
The power management driver to use. This example uses the IPMI driver (
pxe_ipmitool), which is the preferred driver for power management. - pm_user; pm_password
- The IPMI username and password.
- pm_addr
- The IP address of the IPMI device.
- mac
- (Optional) A list of MAC addresses for the network interfaces on the node. Use only the MAC address for the Provisioning NIC of each system.
- cpu
- (Optional) The number of CPUs on the node.
- memory
- (Optional) The amount of memory in MB.
- disk
- (Optional) The size of the hard disk in GB.
- arch
- (Optional) The system architecture.
IPMI is the preferred supported power management driver. For more supported power management types and their options, see Appendix B, Power Management Drivers. If these power management drivers do not work as expected, use IPMI for your power management.
After creating the template, save the file to the stack user’s home directory (/home/stack/instackenv.json), then import it into the director using the following commands:
$ source ~/stackrc
(undercloud) $ openstack overcloud node import ~/instackenv.json
This imports the template and registers each node from the template into the director.
After the node registration and configuration completes, view a list of these nodes in the CLI:
(undercloud) $ openstack baremetal node list
6.2. Inspecting the Hardware of Nodes
The director can run an introspection process on each node. This process causes each node to boot an introspection agent over PXE. This agent collects hardware data from the node and sends it back to the director. The director then stores this introspection data in the OpenStack Object Storage (swift) service running on the director. The director uses hardware information for various purposes such as profile tagging, benchmarking, and manual root disk assignment.
You can also create policy files to automatically tag nodes into profiles immediately after introspection. For more information on creating policy files and including them in the introspection process, see Appendix E, Automatic Profile Tagging. Alternatively, you can manually tag nodes into profiles as per the instructions in Section 6.4, “Tagging Nodes into Profiles”.
Run the following command to inspect the hardware attributes of each node:
(undercloud) $ openstack overcloud node introspect --all-manageable --provide
-
The
--all-manageableoption introspects only nodes in a managed state. In this example, it is all of them. -
The
--provideoption resets all nodes to anavailablestate after introspection.
Monitor the progress of the introspection using the following command in a separate terminal window:
(undercloud) $ sudo journalctl -l -u openstack-ironic-inspector -u openstack-ironic-inspector-dnsmasq -u openstack-ironic-conductor -f
Make sure this process runs to completion. This process usually takes 15 minutes for bare metal nodes.
After the introspection completes, all nodes change to an available state.
Performing Individual Node Introspection
To perform a single introspection on an available node, set the node to management mode and perform the introspection:
(undercloud) $ openstack baremetal node manage [NODE UUID]
(undercloud) $ openstack overcloud node introspect [NODE UUID] --provide
After the introspection completes, the nodes changes to an available state.
Performing Node Introspection after Initial Introspection
After an initial introspection, all nodes should enter an available state due to the --provide option. To perform introspection on all nodes after the initial introspection, set all nodes to a manageable state and run the bulk introspection command
(undercloud) $ for node in $(openstack baremetal node list --fields uuid -f value) ; do openstack baremetal node manage $node ; done
(undercloud) $ openstack overcloud node introspect --all-manageable --provide
After the introspection completes, all nodes change to an available state.
Performing Network Introspection for Interface Information
Network introspection retrieves link layer discovery protocol (LLDP) data from network switches. The following commands show a subset of LLDP information for all interfaces on a node, or full information for a particular node and interface. This can be useful for troubleshooting. The director enables LLDP data collection by default.
To get a list of interfaces on a node:
(undercloud) $ openstack baremetal introspection interface list [NODE UUID]
For example:
(undercloud) $ openstack baremetal introspection interface list c89397b7-a326-41a0-907d-79f8b86c7cd9
+-----------+-------------------+------------------------+-------------------+----------------+
| Interface | MAC Address       | Switch Port VLAN IDs   | Switch Chassis ID | Switch Port ID |
+-----------+-------------------+------------------------+-------------------+----------------+
| p2p2      | 00:0a:f7:79:93:19 | [103, 102, 18, 20, 42] | 64:64:9b:31:12:00 | 510            |
| p2p1      | 00:0a:f7:79:93:18 | [101]                  | 64:64:9b:31:12:00 | 507            |
| em1       | c8:1f:66:c7:e8:2f | [162]                  | 08:81:f4:a6:b3:80 | 515            |
| em2       | c8:1f:66:c7:e8:30 | [182, 183]             | 08:81:f4:a6:b3:80 | 559            |
+-----------+-------------------+------------------------+-------------------+----------------+
To see interface data and switch port information:
(undercloud) $ openstack baremetal introspection interface show [NODE UUID] [INTERFACE]
For example:
(undercloud) $ openstack baremetal introspection interface show c89397b7-a326-41a0-907d-79f8b86c7cd9 p2p1
+--------------------------------------+------------------------------------------------------------------------------------------------------------------------+
| Field                                | Value                                                                                                                  |
+--------------------------------------+------------------------------------------------------------------------------------------------------------------------+
| interface                            | p2p1                                                                                                                   |
| mac                                  | 00:0a:f7:79:93:18                                                                                                      |
| node_ident                           | c89397b7-a326-41a0-907d-79f8b86c7cd9                                                                                   |
| switch_capabilities_enabled          | [u'Bridge', u'Router']                                                                                                 |
| switch_capabilities_support          | [u'Bridge', u'Router']                                                                                                 |
| switch_chassis_id                    | 64:64:9b:31:12:00                                                                                                      |
| switch_port_autonegotiation_enabled  | True                                                                                                                   |
| switch_port_autonegotiation_support  | True                                                                                                                   |
| switch_port_description              | ge-0/0/2.0                                                                                                             |
| switch_port_id                       | 507                                                                                                                    |
| switch_port_link_aggregation_enabled | False                                                                                                                  |
| switch_port_link_aggregation_id      | 0                                                                                                                      |
| switch_port_link_aggregation_support | True                                                                                                                   |
| switch_port_management_vlan_id       | None                                                                                                                   |
| switch_port_mau_type                 | Unknown                                                                                                                |
| switch_port_mtu                      | 1514                                                                                                                   |
| switch_port_physical_capabilities    | [u'1000BASE-T fdx', u'100BASE-TX fdx', u'100BASE-TX hdx', u'10BASE-T fdx', u'10BASE-T hdx', u'Asym and Sym PAUSE fdx'] |
| switch_port_protocol_vlan_enabled    | None                                                                                                                   |
| switch_port_protocol_vlan_ids        | None                                                                                                                   |
| switch_port_protocol_vlan_support    | None                                                                                                                   |
| switch_port_untagged_vlan_id         | 101                                                                                                                    |
| switch_port_vlan_ids                 | [101]                                                                                                                  |
| switch_port_vlans                    | [{u'name': u'RHOS13-PXE', u'id': 101}]                                                                                 |
| switch_protocol_identities           | None                                                                                                                   |
| switch_system_name                   | rhos-compute-node-sw1                                                                                                  |
+--------------------------------------+------------------------------------------------------------------------------------------------------------------------+
Retrieving Hardware Introspection Details
The Bare Metal service hardware inspection extras (inspection_extras) is enabled by default to retrieve hardware details. You can use these hardware details to configure your overcloud. See Configuring the Director for details on the inspection_extras parameter in the undercloud.conf file.
For example, the numa_topology collector is part of these hardware inspection extras and includes the following information for each NUMA node:
- RAM (in kilobytes)
- Physical CPU cores and their sibling threads
- NICs associated with the NUMA node
Use the openstack baremetal introspection data save _UUID_ | jq .numa_topology command to retrieve this information, with the UUID of the bare-metal node.
The following example shows the retrieved NUMA information for a bare-metal node:
{
  "cpus": [
    {
      "cpu": 1,
      "thread_siblings": [
        1,
        17
      ],
      "numa_node": 0
    },
    {
      "cpu": 2,
      "thread_siblings": [
        10,
        26
      ],
      "numa_node": 1
    },
    {
      "cpu": 0,
      "thread_siblings": [
        0,
        16
      ],
      "numa_node": 0
    },
    {
      "cpu": 5,
      "thread_siblings": [
        13,
        29
      ],
      "numa_node": 1
    },
    {
      "cpu": 7,
      "thread_siblings": [
        15,
        31
      ],
      "numa_node": 1
    },
    {
      "cpu": 7,
      "thread_siblings": [
        7,
        23
      ],
      "numa_node": 0
    },
    {
      "cpu": 1,
      "thread_siblings": [
        9,
        25
      ],
      "numa_node": 1
    },
    {
      "cpu": 6,
      "thread_siblings": [
        6,
        22
      ],
      "numa_node": 0
    },
    {
      "cpu": 3,
      "thread_siblings": [
        11,
        27
      ],
      "numa_node": 1
    },
    {
      "cpu": 5,
      "thread_siblings": [
        5,
        21
      ],
      "numa_node": 0
    },
    {
      "cpu": 4,
      "thread_siblings": [
        12,
        28
      ],
      "numa_node": 1
    },
    {
      "cpu": 4,
      "thread_siblings": [
        4,
        20
      ],
      "numa_node": 0
    },
    {
      "cpu": 0,
      "thread_siblings": [
        8,
        24
      ],
      "numa_node": 1
    },
    {
      "cpu": 6,
      "thread_siblings": [
        14,
        30
      ],
      "numa_node": 1
    },
    {
      "cpu": 3,
      "thread_siblings": [
        3,
        19
      ],
      "numa_node": 0
    },
    {
      "cpu": 2,
      "thread_siblings": [
        2,
        18
      ],
      "numa_node": 0
    }
  ],
  "ram": [
    {
      "size_kb": 66980172,
      "numa_node": 0
    },
    {
      "size_kb": 67108864,
      "numa_node": 1
    }
  ],
  "nics": [
    {
      "name": "ens3f1",
      "numa_node": 1
    },
    {
      "name": "ens3f0",
      "numa_node": 1
    },
    {
      "name": "ens2f0",
      "numa_node": 0
    },
    {
      "name": "ens2f1",
      "numa_node": 0
    },
    {
      "name": "ens1f1",
      "numa_node": 0
    },
    {
      "name": "ens1f0",
      "numa_node": 0
    },
    {
      "name": "eno4",
      "numa_node": 0
    },
    {
      "name": "eno1",
      "numa_node": 0
    },
    {
      "name": "eno3",
      "numa_node": 0
    },
    {
      "name": "eno2",
      "numa_node": 0
    }
  ]
}
6.3. Automatically Discover Bare Metal Nodes
You can use auto-discovery to register undercloud nodes and generate their metadata, without first having to create an instackenv.json file. This improvement can help reduce the time spent initially collecting the node’s information, for example, removing the need to collate the IPMI IP addresses and subsequently create the instackenv.json.
Requirements
- All overcloud nodes must have their BMCs configured to be accessible to director through the IPMI.
- All overcloud nodes must be configured to PXE boot from the NIC connected to the undercloud control plane network.
Enable Auto-discovery
Bare Metal auto-discovery is enabled in
undercloud.conf:enable_node_discovery = True discovery_default_driver = pxe_ipmitool
-
enable_node_discovery- When enabled, any node that boots the introspection ramdisk using PXE will be enrolled in ironic. -
discovery_default_driver- Sets the driver to use for discovered nodes. For example,pxe_ipmitool.
-
Add your IPMI credentials to ironic:
Add your IPMI credentials to a file named
ipmi-credentials.json. You will need to replace the username and password values in this example to suit your environment:[ { "description": "Set default IPMI credentials", "conditions": [ {"op": "eq", "field": "data://auto_discovered", "value": true} ], "actions": [ {"action": "set-attribute", "path": "driver_info/ipmi_username", "value": "SampleUsername"}, {"action": "set-attribute", "path": "driver_info/ipmi_password", "value": "RedactedSecurePassword"}, {"action": "set-attribute", "path": "driver_info/ipmi_address", "value": "{data[inventory][bmc_address]}"} ] } ]
Import the IPMI credentials file into ironic:
$ openstack baremetal introspection rule import ipmi-credentials.json
Test Auto-discovery
- Power on the required nodes.
Run
openstack baremetal node list. You should see the new nodes listed in anenrolledstate:$ openstack baremetal node list +--------------------------------------+------+---------------+-------------+--------------------+-------------+ | UUID | Name | Instance UUID | Power State | Provisioning State | Maintenance | +--------------------------------------+------+---------------+-------------+--------------------+-------------+ | c6e63aec-e5ba-4d63-8d37-bd57628258e8 | None | None | power off | enroll | False | | 0362b7b2-5b9c-4113-92e1-0b34a2535d9b | None | None | power off | enroll | False | +--------------------------------------+------+---------------+-------------+--------------------+-------------+
Set the resource class for each node:
$ for NODE in `openstack baremetal node list -c UUID -f value` ; do openstack baremetal node set $NODE --resource-class baremetal ; done
Configure the kernel and ramdisk for each node:
$ for NODE in `openstack baremetal node list -c UUID -f value` ; do openstack baremetal node manage $NODE ; done
$ openstack overcloud node configure --all-manageable
Set all nodes to available:
$ for NODE in `openstack baremetal node list -c UUID -f value` ; do openstack baremetal node provide $NODE ; done
Use Rules to Discover Different Vendor Hardware
If you have a heterogeneous hardware environment, you can use introspection rules to assign credentials and remote management credentials. For example, you might want a separate discovery rule to handle your Dell nodes that use DRAC:
Create a file named
dell-drac-rules.json, with the following contents. You will need to replace the username and password values in this example to suit your environment:[ { "description": "Set default IPMI credentials", "conditions": [ {"op": "eq", "field": "data://auto_discovered", "value": true}, {"op": "ne", "field": "data://inventory.system_vendor.manufacturer", "value": "Dell Inc."} ], "actions": [ {"action": "set-attribute", "path": "driver_info/ipmi_username", "value": "SampleUsername"}, {"action": "set-attribute", "path": "driver_info/ipmi_password", "value": "RedactedSecurePassword"}, {"action": "set-attribute", "path": "driver_info/ipmi_address", "value": "{data[inventory][bmc_address]}"} ] }, { "description": "Set the vendor driver for Dell hardware", "conditions": [ {"op": "eq", "field": "data://auto_discovered", "value": true}, {"op": "eq", "field": "data://inventory.system_vendor.manufacturer", "value": "Dell Inc."} ], "actions": [ {"action": "set-attribute", "path": "driver", "value": "idrac"}, {"action": "set-attribute", "path": "driver_info/drac_username", "value": "SampleUsername"}, {"action": "set-attribute", "path": "driver_info/drac_password", "value": "RedactedSecurePassword"}, {"action": "set-attribute", "path": "driver_info/drac_address", "value": "{data[inventory][bmc_address]}"} ] } ]Import the rule into ironic:
$ openstack baremetal introspection rule import dell-drac-rules.json
6.4. Tagging Nodes into Profiles
After registering and inspecting the hardware of each node, you will tag them into specific profiles. These profile tags match your nodes to flavors, and in turn the flavors are assigned to a deployment role. The following example shows the relationship across roles, flavors, profiles, and nodes for Controller nodes:
| Type | Description |
|---|---|
| Role |
The |
| Flavor |
The |
| Profile |
The |
| Node |
You also apply the |
Default profile flavors compute, control, swift-storage, ceph-storage, and block-storage are created during undercloud installation and are usable without modification in most environments.
For a large number of nodes, use automatic profile tagging. See Appendix E, Automatic Profile Tagging for more details.
To tag a node into a specific profile, add a profile option to the properties/capabilities parameter for each node. For example, to tag your nodes to use Controller and Compute profiles respectively, use the following commands:
(undercloud) $ openstack baremetal node set --property capabilities='profile:compute,boot_option:local' 58c3d07e-24f2-48a7-bbb6-6843f0e8ee13
(undercloud) $ openstack baremetal node set --property capabilities='profile:control,boot_option:local' 1a4e30da-b6dc-499d-ba87-0bd8a3819bc0
The addition of the profile:compute and profile:control options tag the two nodes into each respective profiles.
These commands also set the boot_option:local parameter, which defines how each node boots. Depending on your hardware, you might also need to add the boot_mode parameter to uefi so that nodes boot using UEFI instead of the default BIOS mode. For more information, see Section D.2, “UEFI Boot Mode”.
After completing node tagging, check the assigned profiles or possible profiles:
(undercloud) $ openstack overcloud profiles list
Custom Role Profiles
If using custom roles, you might need to create additional flavors and profiles to accommodate these new roles. For example, to create a new flavor for a Networker role, run the following command:
(undercloud) $ openstack flavor create --id auto --ram 4096 --disk 40 --vcpus 1 networker
(undercloud) $ openstack flavor set --property "cpu_arch"="x86_64" --property "capabilities:boot_option"="local" --property "capabilities:profile"="networker" networker
Assign nodes with this new profile:
(undercloud) $ openstack baremetal node set --property capabilities='profile:networker,boot_option:local' dad05b82-0c74-40bf-9d12-193184bfc72d
6.5. Defining the Root Disk for Nodes
Some nodes might use multiple disks. This means the director needs to identify the disk to use for the root disk during provisioning.
There are several properties you can use to help the director identify the root disk:
-
model(String): Device identifier. -
vendor(String): Device vendor. -
serial(String): Disk serial number. -
hctl(String): Host:Channel:Target:Lun for SCSI. -
size(Integer): Size of the device in GB. -
wwn(String): Unique storage identifier. -
wwn_with_extension(String): Unique storage identifier with the vendor extension appended. -
wwn_vendor_extension(String): Unique vendor storage identifier. -
rotational(Boolean): True for a rotational device (HDD), otherwise false (SSD). -
name(String): The name of the device, for example: /dev/sdb1.
Only use name for devices with persistent names. Do not use name to set the root disk for other device because this value can change when the node boots.
In this example, you specify the drive to deploy the overcloud image using the serial number of the disk to determine the root device.
Check the disk information from each node’s hardware introspection. The following command displays the disk information from a node:
(undercloud) $ openstack baremetal introspection data save 1a4e30da-b6dc-499d-ba87-0bd8a3819bc0 | jq ".inventory.disks"
For example, the data for one node might show three disks:
[
  {
    "size": 299439751168,
    "rotational": true,
    "vendor": "DELL",
    "name": "/dev/sda",
    "wwn_vendor_extension": "0x1ea4dcc412a9632b",
    "wwn_with_extension": "0x61866da04f3807001ea4dcc412a9632b",
    "model": "PERC H330 Mini",
    "wwn": "0x61866da04f380700",
    "serial": "61866da04f3807001ea4dcc412a9632b"
  }
  {
    "size": 299439751168,
    "rotational": true,
    "vendor": "DELL",
    "name": "/dev/sdb",
    "wwn_vendor_extension": "0x1ea4e13c12e36ad6",
    "wwn_with_extension": "0x61866da04f380d001ea4e13c12e36ad6",
    "model": "PERC H330 Mini",
    "wwn": "0x61866da04f380d00",
    "serial": "61866da04f380d001ea4e13c12e36ad6"
  }
  {
    "size": 299439751168,
    "rotational": true,
    "vendor": "DELL",
    "name": "/dev/sdc",
    "wwn_vendor_extension": "0x1ea4e31e121cfb45",
    "wwn_with_extension": "0x61866da04f37fc001ea4e31e121cfb45",
    "model": "PERC H330 Mini",
    "wwn": "0x61866da04f37fc00",
    "serial": "61866da04f37fc001ea4e31e121cfb45"
  }
]
For this example, set the root device to disk 2, which has 61866da04f380d001ea4e13c12e36ad6 as the serial number. This requires a change to the root_device parameter for the node definition:
(undercloud) $ openstack baremetal node set --property root_device='{"serial": "61866da04f380d001ea4e13c12e36ad6"}' 1a4e30da-b6dc-499d-ba87-0bd8a3819bc0Make sure to configure the BIOS of each node to include booting from the chosen root disk. The recommended boot order is network boot, then root disk boot.
This helps the director identify the specific disk to use as the root disk. When we initiate our overcloud creation, the director provisions this node and writes the overcloud image to this disk.
6.6. Configure overcloud nodes to trust the undercloud CA
You will need to follow the following procedure if your undercloud uses TLS, and the CA is not publicly trusted. The undercloud operates its own Certificate Authority (CA) for SSL endpoint encryption; to make the undercloud endpoints accessible to the rest of your deployment, you will need to configure your overcloud nodes to trust the undercloud CA. This procedure is required for new Red Hat OpenStack Platform 12 deployments, and for upgrades from 11 to 12.
For this approach to work, your overcloud nodes need a network route to the undercloud’s public endpoint. It is likely that deployments that rely on spine-leaf networking will need to apply this configuration.
Understanding undercloud certificates
There are two types of custom certificates that can be used in the undercloud: user-provided certificates, and automatically generated certificates.
-
User-provided certificates - This definition applies when you have provided your own certificate. This could be from your own CA, or it might be self-signed. This is passed using the
undercloud_service_certificateoption. In this case, you will need to either trust the self-signed certificate, or the CA (depending on your deployment). -
Auto-generated certificates - This definition applies when you use
certmongerto generate the certificate using its own local CA. This is enabled using thegenerate_service_certificateoption. In this case, there will be a CA certificate (/etc/pki/ca-trust/source/anchors/cm-local-ca.pem), and there will be a server certificate used by the undercloud’s HAProxy instance. To present this certificate to OpenStack, you will need to add the CA certificate to theinject-trust-anchor-hiera.yamlfile.
Use a custom certificate in the undercloud
This example uses a self-signed certificate located in /home/stack/ca.crt.pem. If you use auto-generated certificates, you will need to use /etc/pki/ca-trust/source/anchors/cm-local-ca.pem instead.
Open the certificate file and copy only the certificate portion. Do not include the key:
$ vi /home/stack/ca.crt.pem
The certificate portion you need will look similar to this shortened example:
        -----BEGIN CERTIFICATE-----
        MIIDlTCCAn2gAwIBAgIJAOnPtx2hHEhrMA0GCSqGSIb3DQEBCwUAMGExCzAJBgNV
        BAYTAlVTMQswCQYDVQQIDAJOQzEQMA4GA1UEBwwHUmFsZWlnaDEQMA4GA1UECgwH
        UmVkIEhhdDELMAkGA1UECwwCUUUxFDASBgNVBAMMCzE5Mi4xNjguMC4yMB4XDTE3
        -----END CERTIFICATE-----
Create a new YAML file called
/home/stack/inject-trust-anchor-hiera.yamlwith the following contents, and include the certificate you copied from the PEM file:parameter_defaults: CAMap: overcloud-ca: content: | -----BEGIN CERTIFICATE----- MIIDlTCCAn2gAwIBAgIJAOnPtx2hHEhrMA0GCSqGSIb3DQEBCwUAMGExCzAJBgNV BAYTAlVTMQswCQYDVQQIDAJOQzEQMA4GA1UEBwwHUmFsZWlnaDEQMA4GA1UECgwH UmVkIEhhdDELMAkGA1UECwwCUUUxFDASBgNVBAMMCzE5Mi4xNjguMC4yMB4XDTE3 -----END CERTIFICATE----- undercloud-ca: content: | -----BEGIN CERTIFICATE----- MIIDlTCCAn2gAwIBAgIJAOnPtx2hHEhrMA0GCSqGSIb3DQEBCwUAMGExCzAJBgNV BAYTAlVTMQswCQYDVQQIDAJOQzEQMA4GA1UEBwwHUmFsZWlnaDEQMA4GA1UECgwH UmVkIEhhdDELMAkGA1UECwwCUUUxFDASBgNVBAMMCzE5Mi4xNjguMC4yMB4XDTE3 -----END CERTIFICATE-----NoteThe certificate string must follow the PEM format.
The CA certificate is copied to each overcloud node during the overcloud deployment, causing it to trust the encryption presented by the undercloud’s SSL endpoints. For more information on including environment files, see Section 6.9, “Including Environment Files in Overcloud Creation”.
6.7. Customizing the Overcloud with Environment Files
The undercloud includes a set of Heat templates that acts as a plan for your overcloud creation. You can customize aspects of the overcloud using environment files, which are YAML-formatted files that override parameters and resources in the core Heat template collection. You can include as many environment files as necessary. However, the order of the environment files is important as the parameters and resources defined in subsequent environment files take precedence. Use the following list as an example of the environment file order:
- The amount of nodes per each role and their flavors. It is vital to include this information for overcloud creation.
- The location of the container images for containerized OpenStack services. This is the file created from one of the options in Chapter 5, Configuring Container Registry Details.
-
Any network isolation files, starting with the initialization file (
environments/network-isolation.yaml) from the heat template collection, then your custom NIC configuration file, and finally any additional network configurations. - Any external load balancing environment files.
- Any storage environment files such as Ceph Storage, NFS, iSCSI, etc.
- Any environment files for Red Hat CDN or Satellite registration.
- Any other custom environment files.
It is recommended to keep your custom environment files organized in a separate directory, such as the templates directory.
You can customize advanced features for your overcloud using the Advanced Overcloud Customization guide.
A basic overcloud uses local LVM storage for block storage, which is not a supported configuration. It is recommended to use an external storage solution, such as Red Hat Ceph Storage, for block storage.
6.8. Creating the Overcloud with the CLI Tools
The final stage in creating your OpenStack environment is to run the openstack overcloud deploy command to create it. Before running this command, you should familiarize yourself with key options and how to include custom environment files.
Do not run openstack overcloud deploy as a background process. The overcloud creation might hang in mid-deployment if started as a background process.
Setting Overcloud Parameters
The following table lists the additional parameters when using the openstack overcloud deploy command.
Table 6.2. Deployment Parameters
| Parameter | Description |
|---|---|
|
|
The directory containing the Heat templates to deploy. If blank, the command uses the default template location at |
|
| The name of the stack to create or update |
|
| Deployment timeout in minutes |
|
| Virtualization type to use for hypervisors |
|
|
Network Time Protocol (NTP) server to use to synchronize time. You can also specify multiple NTP servers in a comma-separated list, for example: |
|
| Defines custom values for the environment variable no_proxy, which excludes certain hostnames from proxy communication. |
|
|
Defines the SSH user to access the overcloud nodes. Normally SSH access occurs through the |
|
|
Extra environment files to pass to the overcloud deployment. Can be specified more than once. Note that the order of environment files passed to the |
|
| The directory containing environment files to include in deployment. The command processes these environment files in numerical, then alphabetical order. |
|
| The overcloud creation process performs a set of pre-deployment checks. This option exits if any non-fatal errors occur from the pre-deployment checks. It is advisable to use this option as any errors can cause your deployment to fail. |
|
| The overcloud creation process performs a set of pre-deployment checks. This option exits if any non-critical warnings occur from the pre-deployment checks. |
|
| Performs validation check on the overcloud but does not actually create the overcloud. |
|
| Skip the overcloud post-deployment configuration. |
|
| Force the overcloud post-deployment configuration. |
|
|
Skip generation of a unique identifier for the |
|
| Path to a YAML file with arguments and parameters. |
|
| Register overcloud nodes to the Customer Portal or Satellite 6. |
|
|
Registration method to use for the overcloud nodes. |
|
| Organization to use for registration. |
|
| Register the system even if it is already registered. |
|
|
The base URL of the Satellite server to register overcloud nodes. Use the Satellite’s HTTP URL and not the HTTPS URL for this parameter. For example, use http://satellite.example.com and not https://satellite.example.com. The overcloud creation process uses this URL to determine whether the server is a Red Hat Satellite 5 or Red Hat Satellite 6 server. If a Red Hat Satellite 6 server, the overcloud obtains the |
|
| Activation key to use for registration. |
Some command line parameters are outdated or deprecated in favor of using Heat template parameters, which you include in the parameter_defaults section on an environment file. The following table maps deprecated parameters to their Heat Template equivalents.
Table 6.3. Mapping Deprecated CLI Parameters to Heat Template Parameters
| Parameter | Description | Heat Template Parameter |
|---|---|---|
|
| The number of Controller nodes to scale out |
|
|
| The number of Compute nodes to scale out |
|
|
| The number of Ceph Storage nodes to scale out |
|
|
| The number of Cinder nodes to scale out |
|
|
| The number of Swift nodes to scale out |
|
|
| The flavor to use for Controller nodes |
|
|
| The flavor to use for Compute nodes |
|
|
| The flavor to use for Ceph Storage nodes |
|
|
| The flavor to use for Cinder nodes |
|
|
| The flavor to use for Swift storage nodes |
|
|
| Defines the flat networks to configure in neutron plugins. Defaults to "datacentre" to permit external network creation |
|
|
| An Open vSwitch bridge to create on each hypervisor. This defaults to "br-ex". Typically, this should not need to be changed |
|
|
| The logical to physical bridge mappings to use. Defaults to mapping the external bridge on hosts (br-ex) to a physical name (datacentre). You would use this for the default floating network |
|
|
| Defines the interface to bridge onto br-ex for network nodes |
|
|
| The tenant network type for Neutron |
|
|
| The tunnel types for the Neutron tenant network. To specify multiple values, use a comma separated string |
|
|
| Ranges of GRE tunnel IDs to make available for tenant network allocation |
|
|
| Ranges of VXLAN VNI IDs to make available for tenant network allocation |
|
|
| The Neutron ML2 and Open vSwitch VLAN mapping range to support. Defaults to permitting any VLAN on the datacentre physical network |
|
|
| The mechanism drivers for the neutron tenant network. Defaults to "openvswitch". To specify multiple values, use a comma-separated string |
|
|
| Disables tunneling in case you aim to use a VLAN segmented network or flat network with Neutron | No parameter mapping. |
|
| The overcloud creation process performs a set of pre-deployment checks. This option exits if any fatal errors occur from the pre-deployment checks. It is advisable to use this option as any errors can cause your deployment to fail. | No parameter mapping |
These parameters are scheduled for removal in a future version of Red Hat OpenStack Platform.
Run the following command for a full list of options:
(undercloud) $ openstack help overcloud deploy
6.9. Including Environment Files in Overcloud Creation
The -e includes an environment file to customize your overcloud. You can include as many environment files as necessary. However, the order of the environment files is important as the parameters and resources defined in subsequent environment files take precedence. Use the following list as an example of the environment file order:
- The amount of nodes per each role and their flavors. It is vital to include this information for overcloud creation.
- The location of the container images for containerized OpenStack services. This is the file created from one of the options in Chapter 5, Configuring Container Registry Details.
-
Any network isolation files, starting with the initialization file (
environments/network-isolation.yaml) from the heat template collection, then your custom NIC configuration file, and finally any additional network configurations. - Any external load balancing environment files.
- Any storage environment files such as Ceph Storage, NFS, iSCSI, etc.
- Any environment files for Red Hat CDN or Satellite registration.
- Any other custom environment files.
Any environment files added to the overcloud using the -e option become part of your overcloud’s stack definition. The following command is an example of how to start the overcloud creation with custom environment files included:
(undercloud) $ openstack overcloud deploy --templates \
  -e /home/stack/templates/node-info.yaml\
  -e /home/stack/templates/overcloud_images.yaml \
  -e /usr/share/openstack-tripleo-heat-templates/environments/network-isolation.yaml \
  -e /home/stack/templates/network-environment.yaml \
  -e /usr/share/openstack-tripleo-heat-templates/environments/ceph-ansible/ceph-ansible.yaml \
  -e /home/stack/templates/ceph-custom-config.yaml \
  -e /home/stack/inject-trust-anchor-hiera.yaml \
  --ntp-server pool.ntp.org \
This command contains the following additional options:
- --templates
-
Creates the overcloud using the Heat template collection in
/usr/share/openstack-tripleo-heat-templatesas a foundation - -e /home/stack/templates/node-info.yaml
Adds an environment file to define how many nodes and which flavors to use for each role. For example:
parameter_defaults:
  OvercloudControllerFlavor: control
  OvercloudComputeFlavor: compute
  OvercloudCephStorageFlavor: ceph-storage
  ControllerCount: 3
  ComputeCount: 3
  CephStorageCount: 3
- -e /home/stack/templates/overcloud_images.yaml
- Adds an environment file containing the container image sources. See Chapter 5, Configuring Container Registry Details for more information.
- -e /usr/share/openstack-tripleo-heat-templates/environments/network-isolation.yaml
Adds an environment file to initialize network isolation in the overcloud deployment.
NoteThe
network-isolation.j2.yamlis the Jinja2 version of this template. Theopenstack overcloud deploycommand renders Jinja2 templates into a plain YAML files. This means you need to include the resulting rendered YAML file name (in this case,network-isolation.yaml) when you run theopenstack overcloud deploycommand.- -e /home/stack/templates/network-environment.yaml
- Adds an environment file to customize network isolation.
- -e /usr/share/openstack-tripleo-heat-templates/environments/ceph-ansible/ceph-ansible.yaml
- Adds an environment file to enable Ceph Storage services.
- -e /home/stack/templates/ceph-custom-config.yaml
- Adds an environment file to customize our Ceph Storage configuration.
- -e /home/stack/inject-trust-anchor-hiera.yaml
- Adds an environment file to install a custom certificate in the undercloud.
- --ntp-server pool.ntp.org
- Use an NTP server for time synchronization. This is required for keeping the Controller node cluster in synchronization.
The director requires these environment files for re-deployment and post-deployment functions in Chapter 9, Performing Tasks after Overcloud Creation. Failure to include these files can result in damage to your overcloud.
If you aim to later modify the overcloud configuration, you should:
- Modify parameters in the custom environment files and Heat templates
-
Run the
openstack overcloud deploycommand again with the same environment files
Do not edit the overcloud configuration directly as such manual configuration gets overridden by the director’s configuration when updating the overcloud stack with the director.
Including an Environment File Directory
You can add a whole directory containing environment files using the --environment-directory option. The deployment command processes the environment files in this directory in numerical, then alphabetical order. If using this method, it is recommended to use filenames with a numerical prefix to order how they are processed. For example:
(undercloud) $ ls -1 ~/templates
00-node-info.yaml
10-network-isolation.yaml
20-network-environment.yaml
30-storage-environment.yaml
40-rhel-registration.yaml
Run the following deployment command to include the directory:
(undercloud) $ openstack overcloud deploy --templates --environment-directory ~/templates
Using an Answers File
An answers file is a YAML format file that simplifies the inclusion of templates and environment files. The answers file uses the following parameters:
- templates
-
The core Heat template collection to use. This acts as a substitute for the
--templatescommand line option. - environments
-
A list of environment files to include. This acts as a substitute for the
--environment-file(-e) command line option.
For example, an answers file might contain the following:
templates: /usr/share/openstack-tripleo-heat-templates/
environments:
  - ~/templates/00-node-info.yaml
  - ~/templates/10-network-isolation.yaml
  - ~/templates/20-network-environment.yaml
  - ~/templates/30-storage-environment.yaml
  - ~/templates/40-rhel-registration.yaml
Run the following deployment command to include the answers file:
(undercloud) $ openstack overcloud deploy --answers-file ~/answers.yaml
6.10. Managing Overcloud Plans
As an alternative to using the openstack overcloud deploy command, the director can also manage imported plans.
To create a new plan, run the following command as the stack user:
(undercloud) $ openstack overcloud plan create --templates /usr/share/openstack-tripleo-heat-templates my-overcloud
This creates a plan from the core Heat template collection in /usr/share/openstack-tripleo-heat-templates. The director names the plan based on your input. In this example, it is my-overcloud. The director uses this name as a label for the object storage container, the workflow environment, and overcloud stack names.
Add parameters from environment files using the following command:
(undercloud) $ openstack overcloud parameters set my-overcloud ~/templates/my-environment.yaml
Deploy your plans using the following command:
(undercloud) $ openstack overcloud plan deploy my-overcloud
Delete existing plans using the following command:
(undercloud) $ openstack overcloud plan delete my-overcloud
The openstack overcloud deploy command essentially uses all of these commands to remove the existing plan, upload a new plan with environment files, and deploy the plan.
6.11. Validating Overcloud Templates and Plans
Before executing an overcloud creation or stack update, validate your Heat templates and environment files for any errors.
Creating a Rendered Template
The core Heat templates for the overcloud are in a Jinja2 format. To validate your templates, render a version without Jinja2 formatting using the following commands:
(undercloud) $ openstack overcloud plan create --templates /usr/share/openstack-tripleo-heat-templates overcloud-validation
(undercloud) $ mkdir ~/overcloud-validation
(undercloud) $ cd ~/overcloud-validation
(undercloud) $ openstack container save overcloud-validation
Use the rendered template in ~/overcloud-validation for the validation tests that follow.
Validating Template Syntax
Use the following command to validate the template syntax:
(undercloud) $ openstack orchestration template validate --show-nested --template ~/overcloud-validation/overcloud.yaml -e ~/overcloud-validation/overcloud-resource-registry-puppet.yaml -e [ENVIRONMENT FILE] -e [ENVIRONMENT FILE]
The validation requires the overcloud-resource-registry-puppet.yaml environment file to include overcloud-specific resources. Add any additional environment files to this command with -e option. Also include the --show-nested option to resolve parameters from nested templates.
This command identifies any syntax errors in the template. If the template syntax validates successfully, the output shows a preview of the resulting overcloud template.
6.12. Monitoring the Overcloud Creation
The overcloud creation process begins and the director provisions your nodes. This process takes some time to complete. To view the status of the overcloud creation, open a separate terminal as the stack user and run:
(undercloud) $ source ~/stackrc
(undercloud) $ openstack stack list --nested
The openstack stack list --nested command shows the current stage of the overcloud creation.
6.13. Accessing the Overcloud
The director generates a script to configure and help authenticate interactions with your overcloud from the director host. The director saves this file, overcloudrc, in your stack user’s home director. Run the following command to use this file:
(undercloud) $ source ~/overcloudrc
This loads the necessary environment variables to interact with your overcloud from the director host’s CLI. The command prompt changes to indicate this:
(overcloud) $
To return to interacting with the director’s host, run the following command:
(overcloud) $ source ~/stackrc
(undercloud) $
Each node in the overcloud also contains a user called heat-admin. The stack user has SSH access to this user on each node. To access a node over SSH, find the IP address of the desired node:
(undercloud) $ openstack server list
Then connect to the node using the heat-admin user and the node’s IP address:
(undercloud) $ ssh heat-admin@192.168.24.23
6.14. Completing the Overcloud Creation
This concludes the creation of the overcloud using the command line tools. For post-creation functions, see Chapter 9, Performing Tasks after Overcloud Creation.
Chapter 7. Configuring a Basic Overcloud with the Web UI
This chapter provides the basic configuration steps for an OpenStack Platform environment using the web UI. An overcloud with a basic configuration contains no custom features. However, you can add advanced configuration options to this basic overcloud and customize it to your specifications using the instructions in the Advanced Overcloud Customization guide.
For the examples in this chapter, all nodes are bare metal systems using IPMI for power management. For more supported power management types and their options, see Appendix B, Power Management Drivers.
Workflow
- Register blank nodes using a node definition template and manual registration.
- Inspect hardware of all nodes.
- Upload an overcloud plan to the director.
- Assign nodes into roles.
Requirements
- The director node created in Chapter 4, Installing the Undercloud with the UI enabled
- A set of bare metal machines for your nodes. The number of node required depends on the type of overcloud you intend to create (see Section 3.1, “Planning Node Deployment Roles” for information on overcloud roles). These machines also must comply with the requirements set for each node type. For these requirements, see Section 2.4, “Overcloud Requirements”. These nodes do not require an operating system. The director copies a Red Hat Enterprise Linux 7 image to each node.
- One network connection for our Provisioning network, which is configured as a native VLAN. All nodes must connect to this network and comply with the requirements set in Section 2.3, “Networking Requirements”.
- All other network types use the Provisioning network for OpenStack services. However, you can create additional networks for other network traffic types.
7.1. Accessing the Web UI
Users access the director’s web UI through SSL. For example, if the IP address of your undercloud is 192.168.24.1, then the address to access the UI is https://192.168.24.1. The web UI initially presents a login screen with fields for the following:
-
Username - The administration user for the director. The default is
admin. -
Password - The password for the administration user. Run
sudo hiera admin_passwordas thestackuser on the undercloud host terminal to find out the password.
When logging in to the UI, the UI accesses the OpenStack Identity Public API and obtains the endpoints for the other Public API services. These services include
| Component | UI Purpose |
|---|---|
|
OpenStack Identity ( | For authentication to the UI and for endpoint discovery of other services. |
|
OpenStack Orchestration ( | For the status of the deployment. |
|
OpenStack Bare Metal ( | For control of nodes. |
|
OpenStack Object Storage ( | For storage of the Heat template collection or plan used for the overcloud creation. |
|
OpenStack Workflow ( | To access and execute director tasks. |
|
OpenStack Messaging ( | A websocket-based service to find the status of certain tasks. |
The UI interacts directly with these Public APIs, which is why your client system requires access to their endpoints. The director exposes these endpoints through SSL/TLS encrypted paths on the Public VIP (undercloud_public_host in your undercloud.conf file). Each path corresponds to the service. For example, https://192.168.24.2:443/keystone maps to the OpenStack Identity Public API.
If you aim to change the endpoints or use a different IP for endpoint access, the director UI reads settings from the /var/www/openstack-tripleo-ui/dist/tripleo_ui_config.js file. This file uses the following parameters:
| Parameter | Description |
|---|---|
|
|
The Public API for the OpenStack Identity ( |
|
|
The Public API for the OpenStack Orchestration ( |
|
|
The Public API for the OpenStack Bare Metal ( |
|
|
The Public API for the OpenStack Object Storage ( |
|
|
The Public API for the OpenStack Workflow ( |
|
|
The websocket for the OpenStack Messaging ( |
|
|
The messaging queue to use for the OpenStack Messaging ( |
|
|
The UI has been translated in multiple languages, whcih you can select either from the login screen or within the UI. You can exclude certain languages based on the ITEF Language codes. The following language codes can be excluded: |
The following is an example tripleo_ui_config.js file where 192.168.24.2 is the Public VIP for the undercloud:
window.tripleOUiConfig = {
  'keystone': 'https://192.168.24.2:443/keystone/v2.0',
  'heat': 'https://192.168.24.2:443/heat/v1/%(tenant_id)s',
  'ironic': 'https://192.168.24.2:443/ironic',
  'mistral': 'https://192.168.24.2:443/mistral/v2',
  'swift': 'https://192.168.24.2:443/swift/v1/AUTH_%(tenant_id)s',
  'zaqar-websocket': 'wss://192.168.24.2:443/zaqar',
  "zaqar_default_queue": "tripleo",
  'excludedLanguages': [],
  'loggers': ["console","zaqar"]
};
7.2. Navigating the Web UI
The UI provides three main sections:
- Plans
A menu item at the top of the UI. This page acts as the main UI section and allows you to define the plan to use for your overcloud creation, the nodes to assign to each role, and the status of the current overcloud. This section also provides a deployment workflow to guide you through each step of the overcloud creation process, including setting deployment parameters and assigning your nodes to roles.

- Nodes
A menu item at the top of the UI. This page acts as a node configuration section and provides methods for registering new nodes and introspecting registered nodes. This section also shows information such as the power state, introspection status, provision state, and hardware information.

Clicking on the overflow menu item (the triple dots) on the right of each node displays the disk information for the chosen node.
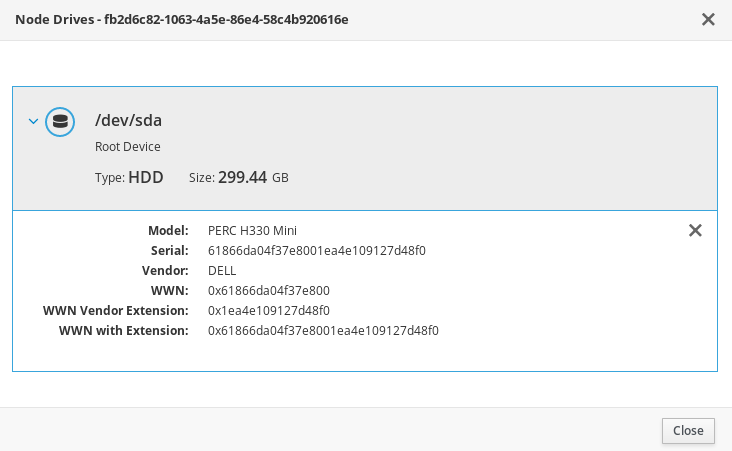
- Validations
A panel on the right side of the page. This section provides a set of system checks for:
- Pre-deployment
- Post-deployment
- Pre-Introspection
- Pre-Upgrade
- Post-Upgrade
These validation tasks run automatically at certain points in the deployment. However, you can also run them manually. Click the Play button for a validation task you want to run. Click the title of each validation task to run it, or click a validation title to view more information about it.
7.3. Importing an Overcloud Plan in the Web UI
The director UI requires a plan before configuring the overcloud. This plan is usually a Heat template collection, like the one on your undercloud at /usr/share/openstack-tripleo-heat-templates. In addition, you can customize the plan to suit your hardware and environment requirements. For more information about customizing the overcloud, see the Advanced Overcloud Customization guide.
The plan displays four main steps to configuring your overcloud:
- Prepare Hardware - Node registration and introspection.
- Specify Deployment Configuration - Configuring overcloud parameters and defining the environment files to include.
- Configure Roles and Assign Nodes - Assign nodes to roles and modify role-specific parameters.
- Deploy - Launch the creation of your overcloud.
The undercloud installation and configuration automatically uploads a plan. You can also import multiple plans in the web UI. Click on the All Plans breadcrumb on the Plan screen. This displays the current Plans listing. Change between multiple plans by clicking on a card.
Click Import Plan and a window appears asking you for the following information:
-
Plan Name - A plain text name for the plan. For example
overcloud. - Upload Type - Choose whether to upload a Tar Archive (tar.gz) or a full Local Folder (Google Chrome only).
- Plan Files - Click browser to choose the plan on your local file system.
If you need to copy the director’s Heat template collection to a client machine, archive the files and copy them:
$ cd /usr/share/openstack-tripleo-heat-templates/
$ tar -cf ~/overcloud.tar *
$ scp ~/overcloud.tar user@10.0.0.55:~/.
Once the director UI uploads the plan, the plan appears in the Plans listing and you can now configure it. Click on the plan card of your choice.

7.4. Registering Nodes in the Web UI
The first step in configuring the overcloud is to register your nodes. Start the node registration process either through:
- Clicking Register Nodes under 1 Prepare Hardware on the Plan screen.
- Clicking Register Nodes on the Nodes screen.
This displays the Register Nodes window.

The director requires a list of nodes for registration, which you can supply using one of two methods:
- Uploading a node definition template - This involves clicking the Upload from File button and selecting a file. See Section 6.1, “Registering Nodes for the Overcloud” for the syntax of the node definition template.
- Manually registering each node - This involves clicking Add New and providing a set of details for the node.
The details you need to provide for manual registration include the following:
- Name
- A plain text name for the node. Use only RFC3986 unreserved characters.
- Driver
-
The power management driver to use. This example uses the IPMI driver (
pxe_ipmitool) but other drivers are available. See Appendix B, Power Management Drivers for available drivers. - IPMI IP Address
- The IP address of the IPMI device.
- IPMI Port
- The port to access the IPMI device.
- IPMI Username; IPMI Password
- The IPMI username and password.
- Architecture
- (Optional) The system architecture.
- CPU count
- (Optional) The number of CPUs on the node.
- Memory (MB)
- (Optional) The amount of memory in MB.
- Disk (GB)
- (Optional) The size of the hard disk in GB.
- NIC MAC Addresses
- A list of MAC addresses for the network interfaces on the node. Use only the MAC address for the Provisioning NIC of each system.
The UI also allows for registration of nodes using Dell Remote Access Controller (DRAC) power management. These nodes use the pxe_drac driver. For more information, see Section B.1, “Dell Remote Access Controller (DRAC)”.
After entering your node information, click Register Nodes at the bottom of the window.
The director registers the nodes. Once complete, you can use the UI to perform introspection on the nodes.
7.5. Inspecting the Hardware of Nodes in the Web UI
The director UI can run an introspection process on each node. This process causes each node to boot an introspection agent over PXE. This agent collects hardware data from the node and sends it back to the director. The director then stores this introspection data in the OpenStack Object Storage (swift) service running on the director. The director uses hardware information for various purposes such as profile tagging, benchmarking, and manual root disk assignment.
You can also create policy files to automatically tag nodes into profiles immediately after introspection. For more information on creating policy files and including them in the introspection process, see Appendix E, Automatic Profile Tagging. Alternatively, you can tag nodes into profiles through the UI. See Section 7.8, “Assigning Nodes to Roles in the Web UI” for details on manually tagging nodes.
To start the introspection process:
- Navigate to the Nodes screen
- Select all nodes you aim to introspect.
- Click Introspect Nodes
Make sure this process runs to completion. This process usually takes 15 minutes for bare metal nodes.
Once the introspection process completes, select all nodes with the Provision State set to manageable then click the Provide Nodes button. Wait until the Provision State changes to available.
The nodes are now ready to tag and provision.
7.6. Tagging Nodes into Profiles in the Web UI
You can assign a set of profiles to each node. Each profile corresponds to a respective flavor and roles (see Section 6.4, “Tagging Nodes into Profiles” for more information).
The Nodes screen includes an additional menu toggle that provides extra node management actions, such as Tag Nodes.

To tag a set of nodes:
- Select the nodes you want to tag using the check boxes.
- Click the menu toggle.
- Click Tag Nodes.
Select an existing profile. To create a new profile, select Specify Custom Profile and enter the name in Custom Profile.
 Note
NoteIf you create a custom profile, you must also assign the profile tag to a new flavor. See Section 6.4, “Tagging Nodes into Profiles” for more information on creating new flavors.
- Click Confirm to tag the nodes.
7.7. Editing Overcloud Plan Parameters in the Web UI
The Plan screen provides a method to customize your uploaded plan. Under 2 Specify Deployment Configuration, click the Edit Configuration link to modify your base overcloud configuration.
A window appears with two main tabs:
- Overall Settings
This provides a method to include different features from your overcloud. These features are defined in the plan’s
capabilities-map.yamlfile with each feature using a different environment file. For example, under Storage you can select Storage Environment, which the plan maps to theenvironments/storage-environment.yamlfile and allows you to configure NFS, iSCSI, or Ceph settings for your overcloud. The Other tab contains any environment files detected in the plan but not listed in thecapabilities-map.yaml, which is useful for adding custom environment files included in the plan. Once you have selected the features to include, click Save Changes.
- Parameters
This includes various base-level and environment file parameters for your overcloud. Once you have modified your parameters, click Save Changes.

7.8. Assigning Nodes to Roles in the Web UI
After registering and inspecting the hardware of each node, you assign them into roles from your plan.
To assign nodes to a role, scroll to the 3 Configure Roles and Assign Nodes section on the Plan screen. Each role uses a spinner widget to assign the number of nodes to a role. The available nodes per roles are based on the tagged nodes in Section 7.6, “Tagging Nodes into Profiles in the Web UI”.
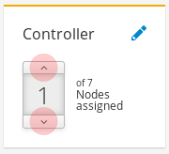
This changes the *Count parameter for each role. For example, if you change the number of nodes in the Controller role to 3, this sets the ControllerCount parameter to 3. You can also view and edit these count values in the Parameters tab of the deployment configuration. See Section 7.7, “Editing Overcloud Plan Parameters in the Web UI” for more information.
7.9. Editing Role Parameters in the Web UI
Each node role provides a method for configuring role-specific parameters. Scroll to 3 Configure Roles and Assign Nodes roles on the Plan screen. Click the Edit Role Parameters icon (pencil icon) next to the role name.
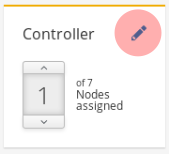
A window appears that shows two main tabs:
- Parameters
This includes various role specific parameters. For example, if you are editing the controller role, you can change the default flavor for the role using the
OvercloudControlFlavorparameter. Once you have modified your role specific parameters, click Save Changes.
- Services
This defines the service-specific parameters for the chosen role. The left panel shows a list of services that you select and modify. For example, to change the time zone, click the
OS::TripleO:Services:Timezoneservice and change theTimeZoneparameter to your desired time zone. Once you have modified your service-specific parameters, click Save Changes.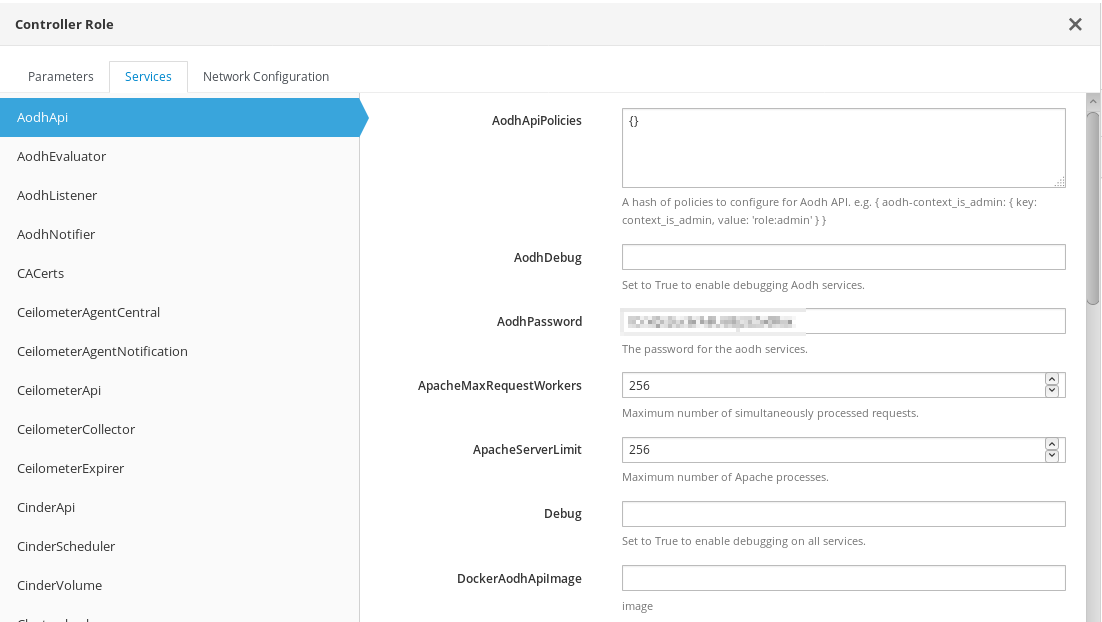
- Network Configuration
This allows you to define an IP address or subnet range for various networks in your overcloud.
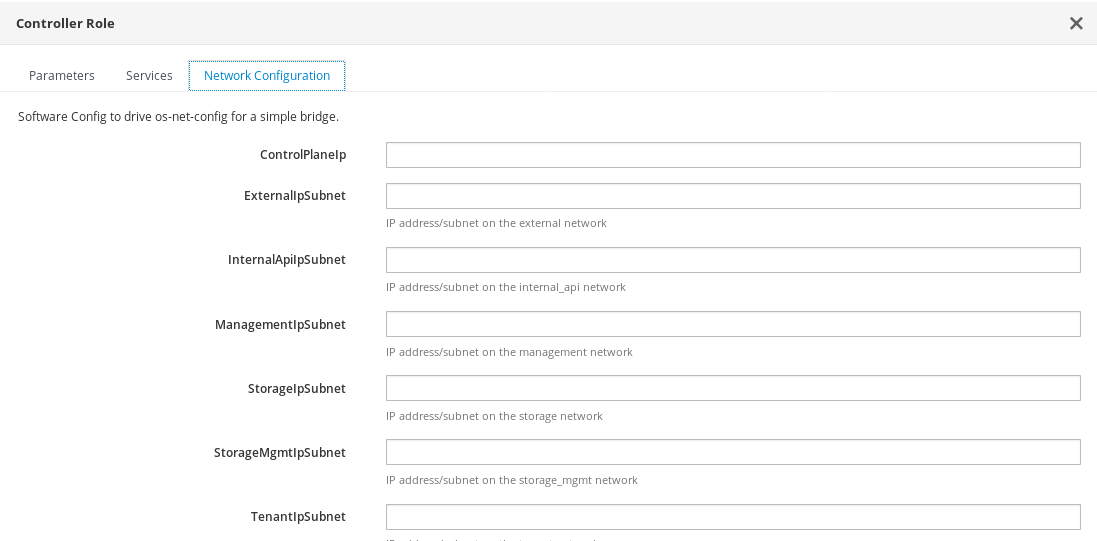
Although the role’s service parameters appear in the UI, some services might be disabled by default. You can enable these services through the instructions in Section 7.7, “Editing Overcloud Plan Parameters in the Web UI”. See also the Composable Roles section of the Advanced Overcloud Customization guide for information on enabling these services.
7.10. Starting the Overcloud Creation in the Web UI
Once the overcloud plan is configured, you can start the overcloud deployment. This involves scrolling to the 4 Deploy section and clicking Validate and Deploy.

If you have not run or passed all the validations for the undercloud, a warning message appears. Make sure that your undercloud host satisfies the requirements before running a deployment.

When you are ready to deploy, click Deploy.
The UI regularly monitors the progress of the overcloud’s creation and display a progress bar indicating the current percentage of progress. The View detailed information link displays a log of the current OpenStack Orchestration stacks in your overcloud.

Wait until the overcloud deployment completes.
After the overcloud creation process completes, the 4 Deploy section displays the current overcloud status and the following details:
- IP address - The IP address for accessing your overcloud.
-
Password - The password for the OpenStack
adminuser on the overcloud.
Use this information to access your overcloud.
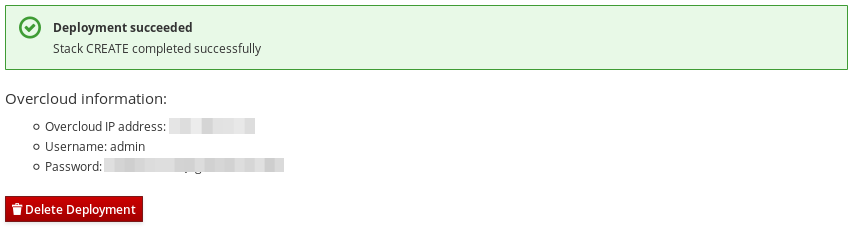
7.11. Completing the overcloud Creation
This concludes the creation of the overcloud through the director’s UI. For post-creation functions, see Chapter 9, Performing Tasks after Overcloud Creation.
Chapter 8. Configuring a Basic Overcloud using Pre-Provisioned Nodes
This chapter provides the basic configuration steps for using pre-provisioned nodes to configure an OpenStack Platform environment. This scenario differs from the standard overcloud creation scenarios in multiple ways:
- You can provision nodes using an external tool and let the director control the overcloud configuration only.
- You can use nodes without relying on the director’s provisioning methods. This is useful if creating an overcloud without power management control or using networks with DHCP/PXE boot restrictions.
- The director does not use OpenStack Compute (nova), OpenStack Bare Metal (ironic), or OpenStack Image (glance) for managing nodes.
- Pre-provisioned nodes use a custom partitioning layout.
This scenario provides basic configuration with no custom features. However, you can add advanced configuration options to this basic overcloud and customize it to your specifications using the instructions in the Advanced Overcloud Customization guide.
Mixing pre-provisioned nodes with director-provisioned nodes in an overcloud is not supported.
Requirements
- The director node created in Chapter 4, Installing the Undercloud.
- A set of bare metal machines for your nodes. The number of nodes required depends on the type of overcloud you intend to create (see Section 3.1, “Planning Node Deployment Roles” for information on overcloud roles). These machines also must comply with the requirements set for each node type. For these requirements, see Section 2.4, “Overcloud Requirements”. These nodes require a Red Hat Enterprise Linux 7.3 operating system.
- One network connection for managing the pre-provisioned nodes. This scenario requires uninterrupted SSH access to the nodes for orchestration agent configuration.
One network connection for the Control Plane network. There are two main scenarios for this network:
Using the Provisioning Network as the Control Plane, which is the default scenario. This network is usually a layer-3 (L3) routable network connection from the pre-provisioned nodes to the director. The examples for this scenario use following IP address assignments:
Table 8.1. Provisioning Network IP Assignments
Node Name IP Address Director
192.168.24.1
Controller
192.168.24.2
Compute
192.168.24.3
- Using a separate network. In situations where the director’s Provisioning network is a private non-routable network, you can define IP addresses for the nodes from any subnet and communicate with the director over the Public API endpoint. There are certain caveats to this scenario, which this chapter examines later in Section 8.6, “Using a Separate Network for Overcloud Nodes”.
- All other network types in this example also use the Control Plane network for OpenStack services. However, you can create additional networks for other network traffic types.
8.1. Creating a User for Configuring Nodes
At a later stage in this process, the director requires SSH access to the overcloud nodes as the stack user.
On each overcloud node, create the user named
stackand set a password on each node. For example, use the following on the Controller node:[root@controller ~]# useradd stack [root@controller ~]# passwd stack # specify a password
Disable password requirements for this user when using
sudo:[root@controller ~]# echo "stack ALL=(root) NOPASSWD:ALL" | tee -a /etc/sudoers.d/stack [root@controller ~]# chmod 0440 /etc/sudoers.d/stack
Once you have created and configured the
stackuser on all pre-provisioned nodes, copy thestackuser’s public SSH key from the director node to each overcloud node. For example, to copy the director’s public SSH key to the Controller node:[stack@director ~]$ ssh-copy-id stack@192.168.24.2
8.2. Registering the Operating System for Nodes
Each node requires access to a Red Hat subscription. The following procedure shows how to register each node to the Red Hat Content Delivery Network. Perform these steps on each node:
Run the registration command and enter your Customer Portal user name and password when prompted:
[root@controller ~]# sudo subscription-manager register
Find the entitlement pool for the Red Hat OpenStack Platform 12:
[root@controller ~]# sudo subscription-manager list --available --all --matches="Red Hat OpenStack"
Use the pool ID located in the previous step to attach the Red Hat OpenStack Platform 12 entitlements:
[root@controller ~]# sudo subscription-manager attach --pool=pool_id
Disable all default repositories:
[root@controller ~]# sudo subscription-manager repos --disable=*
Enable the required Red Hat Enterprise Linux repositories.
For x86_64 systems, run:
[root@controller ~]# sudo subscription-manager repos --enable=rhel-7-server-rpms --enable=rhel-7-server-extras-rpms --enable=rhel-7-server-rh-common-rpms --enable=rhel-ha-for-rhel-7-server-rpms --enable=rhel-7-server-openstack-12-rpms --enable=rhel-7-server-rhceph-2-osd-rpms --enable=rhel-7-server-rhceph-2-mon-rpms --enable=rhel-7-server-rhceph-2-tools-rpms
For POWER systems, run:
[root@controller ~]# sudo subscription-manager repos --enable=rhel-7-for-power-le-rpms --enable=rhel-7-server-openstack-12-for-power-le-rpms
ImportantOnly enable the repositories listed in Section 2.5, “Repository Requirements”. Additional repositories can cause package and software conflicts. Do not enable any additional repositories.
Update your system to ensure sure you have the latest base system packages:
[root@controller ~]# sudo yum update -y
[root@controller ~]# sudo reboot
The node is now ready to use for your overcloud.
8.3. Installing the User Agent on Nodes
Each pre-provisioned node uses the OpenStack Orchestration (heat) agent to communicate with the director. The agent on each node polls the director and obtains metadata tailored to each node. This metadata allows the agent to configure each node.
Install the initial packages for the orchestration agent on each node:
[root@controller ~]# sudo yum -y install python-heat-agent*
8.4. Configuring SSL/TLS Access to the Director
If the director uses SSL/TLS, the pre-provisioned nodes require the certificate authority file used to sign the director’s SSL/TLS certificates. If using your own certificate authority, perform the following on each overcloud node:
-
Copy the certificate authority file to the
/etc/pki/ca-trust/source/anchors/directory on each pre-provisioned node. Run the following command on each overcloud node:
[root@controller ~]# sudo update-ca-trust extract
This ensures the overcloud nodes can access the director’s Public API over SSL/TLS.
8.5. Configuring Networking for the Control Plane
The pre-provisioned overcloud nodes obtain metadata from the director using standard HTTP requests. This means all overcloud nodes require L3 access to either:
-
The director’s Control Plane network, which is the subnet defined with the
network_cidrparameter from yourundercloud.conffile. The nodes either requires direct access to this subnet or routable access to the subnet. -
The director’s Public API endpoint, specified as the
undercloud_public_hostparameter from yourundercloud.conffile. This option is available if either you do not have an L3 route to the Control Plane or you aim to use SSL/TLS communication when polling the director for metadata. See Section 8.6, “Using a Separate Network for Overcloud Nodes” for additional steps for configuring your overcloud nodes to use the Public API endpoint.
The director uses a Control Plane network to manage and configure a standard overcloud. For an overcloud with pre-provisioned nodes, your network configuration might require some modification to accommodate how the director communicates with the pre-provisioned nodes.
Using Network Isolation
Network isolation allows you to group services to use specific networks, including the Control Plane. There are multiple network isolation strategies contained in the The Advanced Overcloud Customization guide. In addition, you can also define specific IP addresses for nodes on the control plane. For more information on isolation networks and creating predictable node placement strategies, see the following sections in the Advanced Overcloud Customizations guide:
If using network isolation, make sure your NIC templates do not include the NIC used for undercloud access. These template can reconfigure the NIC, which can lead to connectivity and configuration problems during deployment.
Assigning IP Addresses
If not using network isolation, you can use a single Control Plane network to manage all services. This requires manual configuration of the Control Plane NIC on each node to use an IP address within the Control Plane network range. If using the director’s Provisioning network as the Control Plane, make sure the chosen overcloud IP addresses fall outside of the DHCP ranges for both provisioning (dhcp_start and dhcp_end) and introspection (inspection_iprange).
During standard overcloud creation, the director creates OpenStack Networking (neutron) ports to automatically assigns IP addresses to the overcloud nodes on the Provisioning / Control Plane network. However, this can cause the director to assign different IP addresses to the ones manually configured for each node. In this situation, use a predictable IP address strategy to force the director to use the pre-provisioned IP assignments on the Control Plane.
An example of a predictable IP strategy is to use an environment file (ctlplane-assignments.yaml) with the following IP assignments:
resource_registry:
  OS::TripleO::DeployedServer::ControlPlanePort: /usr/share/openstack-tripleo-heat-templates/deployed-server/deployed-neutron-port.yaml

parameter_defaults:
  DeployedServerPortMap:
    controller-ctlplane:
      fixed_ips:
        - ip_address: 192.168.24.2
      subnets:
        - cidr: 24
    compute-ctlplane:
      fixed_ips:
        - ip_address: 192.168.24.3
      subnets:
        - cidr: 24
In this example, the OS::TripleO::DeployedServer::ControlPlanePort resource passes a set of parameters to the director and defines the IP assignments of our pre-provisioned nodes. The DeployedServerPortMap parameter defines the IP addresses and subnet CIDRs that correspond to each overcloud node. The mapping defines:
-
The name of the assignment, which follows the format
<node_hostname>-<network>. For example:controller-ctlplaneandcompute-ctlplane. The IP assignments, which use the following parameter patterns:
-
fixed_ips/ip_address- Defines the fixed IP addresses for the control plane. Use multipleip_addressparameters in a list to define multiple IP addresses. -
subnets/cidr- Defines the CIDR value for the subnet.
-
A later step in this chapter uses the resulting environment file (ctlplane-assignments.yaml) as part of the openstack overcloud deploy command.
8.6. Using a Separate Network for Overcloud Nodes
By default, the director uses the Provisioning network as the overcloud Control Plane. However, if this network is isolated and non-routable, nodes cannot communicate with the director’s Internal API during configuration. In this situation, you might need to define a separate network for the nodes and configure them to communicate with the director over the Public API.
There are several requirements for this scenario:
- The overcloud nodes must accommodate the basic network configuration from Section 8.5, “Configuring Networking for the Control Plane”.
- You must enable SSL/TLS on the director for Public API endpoint usage. For more information, see Section 4.6, “Configuring the Director” and Appendix A, SSL/TLS Certificate Configuration.
-
You must define an accessible fully qualified domain name (FQDN) for director. This FQDN must resolve to a routable IP address for the director. Use the
undercloud_public_hostparameter in theundercloud.conffile to set this FQDN.
The examples in this section use IP address assignments that differ from the main scenario:
Table 8.2. Provisioning Network IP Assignments
| Node Name | IP Address or FQDN |
|---|---|
| Director (Internal API) | 192.168.24.1 (Provisioning Network and Control Plane) |
| Director (Public API) | 10.1.1.1 / director.example.com |
| Overcloud Virtual IP | 192.168.100.1 |
| Controller | 192.168.100.2 |
| Compute | 192.168.100.3 |
The following sections provide additional configuration for situations that require a separate network for overcloud nodes.
Orchestration Configuration
With SSL/TLS communication enabled on the undercloud, the director provides a Public API endpoint for most services. However, OpenStack Orchestration (heat) uses the internal endpoint as a default provider for metadata. This means the undercloud requires some modification so overcloud nodes can access OpenStack Orchestration on public endpoints. This modification involves changing some Puppet hieradata on the director.
The hieradata_override in your undercloud.conf allows you to specify additional Puppet hieradata for undercloud configuration. Use the following steps to modify hieradata relevant to OpenStack Orchestration:
-
If you are not using a
hieradata_overridefile already, create a new one. This example uses one located at/home/stack/hieradata.yaml. Include the following hieradata in
/home/stack/hieradata.yaml:heat_clients_endpoint_type: public heat::engine::default_deployment_signal_transport: TEMP_URL_SIGNAL
This changes the endpoint type from the default
internaltopublicand changes the signaling method to use TempURLs from OpenStack Object Storage (swift).In your
undercloud.conf, set thehieradata_overrideparameter to the path of the hieradata file:hieradata_override = /home/stack/hieradata.yaml
-
Rerun the
openstack overcloud installcommand to implement the new configuration options.
This switches the orchestration metadata server to use URLs on the director’s Public API.
IP Address Assignments
The method for IP assignments is similar to Section 8.5, “Configuring Networking for the Control Plane”. However, since the Control Plane is not routable from the deployed servers, you use the DeployedServerPortMap parameter to assign IP addresses from your chosen overcloud node subnet, including the virtual IP address to access the Control Plane. The following is a modified version of the ctlplane-assignments.yaml environment file from Section 8.5, “Configuring Networking for the Control Plane” that accommodates this network architecture:
resource_registry:
  OS::TripleO::DeployedServer::ControlPlanePort: /usr/share/openstack-tripleo-heat-templates/deployed-server/deployed-neutron-port.yaml
  OS::TripleO::Network::Ports::ControlPlaneVipPort: /usr/share/openstack-tripleo-heat-templates/deployed-server/deployed-neutron-port.yaml
  OS::TripleO::Network::Ports::RedisVipPort: /usr/share/openstack-tripleo-heat-templates/network/ports/noop.yaml 1

parameter_defaults:
  NeutronPublicInterface: eth1
  EC2MetadataIp: 192.168.100.1 2
  ControlPlaneDefaultRoute: 192.168.100.1
  DeployedServerPortMap:
    control_virtual_ip:
      fixed_ips:
        - ip_address: 192.168.100.1
      subnets:
        - cidr: 24
    controller0-ctlplane:
      fixed_ips:
        - ip_address: 192.168.100.2
      subnets:
        - cidr: 24
    compute0-ctlplane:
      fixed_ips:
        - ip_address: 192.168.100.3
      subnets:
        - cidr: 24
- 1
- The
RedisVipPortresource is mapped tonetwork/ports/noop.yaml. This mapping is because the default Redis VIP address comes from the Control Plane. In this situation, we use anoopto disable this Control Plane mapping. - 2
- The
EC2MetadataIpandControlPlaneDefaultRouteparameters are set to the value of the Control Plane virtual IP address. The default NIC configuration templates require these parameters and you must set them to use a pingable IP address to pass the validations performed during deployment. Alternatively, customize the NIC configuration so they do not require these parameters.
8.7. Creating the Overcloud with Pre-Provisioned Nodes
The overcloud deployment uses the standard CLI methods from Section 6.8, “Creating the Overcloud with the CLI Tools”. For pre-provisioned nodes, the deployment command requires some additional options and environment files from the core Heat template collection:
-
--disable-validations- Disables basic CLI validations for services not used with pre-provisioned infrastructure, otherwise the deployment will fail. -
environments/deployed-server-environment.yaml- Main environment file for creating and configuring pre-provisioned infrastructure. This environment file substitutes theOS::Nova::Serverresources withOS::Heat::DeployedServerresources. -
environments/deployed-server-bootstrap-environment-rhel.yaml- Environment file to execute a bootstrap script on the pre-provisioned servers. This script installs additional packages and provides basic configuration for overcloud nodes. -
environments/deployed-server-pacemaker-environment.yaml- Environment file for Pacemaker configuration on pre-provisioned Controller nodes. The namespace for the resources registered in this file use the Controller role name fromdeployed-server/deployed-server-roles-data.yaml, which isControllerDeployedServerby default. deployed-server/deployed-server-roles-data.yaml- An example custom roles file. This file replicates the defaultroles_data.yamlbut also includes thedisable_constraints: Trueparameter for each role. This parameter disables orchestration constraints in the generated role templates. These constraints are for services not used with pre-provisioned infrastructure.If using your own custom roles file, make sure to include the
disable_constraints: Trueparameter with each role. For example:- name: ControllerDeployedServer disable_constraints: True CountDefault: 1 ServicesDefault: - OS::TripleO::Services::CACerts - OS::TripleO::Services::CephMon - OS::TripleO::Services::CephExternal - OS::TripleO::Services::CephRgw ...
The following is an example overcloud deployment command with the environment files specific to the pre-provisioned architecture:
$ source ~/stackrc
(undercloud) $ openstack overcloud deploy \
  [other arguments] \
  --disable-validations \
  -e /usr/share/openstack-tripleo-heat-templates/environments/deployed-server-environment.yaml \
  -e /usr/share/openstack-tripleo-heat-templates/environments/deployed-server-bootstrap-environment-rhel.yaml \
  -e /usr/share/openstack-tripleo-heat-templates/environments/deployed-server-pacemaker-environment.yaml \
  -r /usr/share/openstack-tripleo-heat-templates/deployed-server/deployed-server-roles-data.yaml
This begins the overcloud configuration. However, the deployment stack pauses when the overcloud node resources enter the CREATE_IN_PROGRESS stage:
2017-01-14 13:25:13Z [overcloud.Compute.0.Compute]: CREATE_IN_PROGRESS  state changed
2017-01-14 13:25:14Z [overcloud.Controller.0.Controller]: CREATE_IN_PROGRESS  state changed
This pause is due to the director waiting for the orchestration agent on the overcloud nodes to poll the metadata server. The next section shows how to configure nodes to start polling the metadata server.
8.8. Polling the Metadata Server
The deployment is now in progress but paused at a CREATE_IN_PROGRESS stage. The next step is to configure the orchestration agent on the overcloud nodes to poll the metadata server on the director. There are two ways to accomplish this:
Only use automatic configuration for the initial deployment. Do not use automatic configuration if scaling up your nodes.
Automatic Configuration
The director’s core Heat template collection contains a script that performs automatic configuration of the Heat agent on the overcloud nodes. The script requires you to source the stackrc file as the stack user to authenticate with the director and query the orchestration service:
[stack@director ~]$ source ~/stackrc
In addition, the script also requires some additional environment variables to define the nodes roles and their IP addressess. These environment variables are:
- OVERCLOUD_ROLES
- A space-separated list of roles to configure. These roles correlate to roles defined in your roles data file.
- [ROLE]_hosts
- Each role requires an environment variable with a space-separated list of IP addresses for nodes in the role.
The following commands demonstrate how to set these environment variables:
(undercloud) $ export OVERCLOUD_ROLES="ControllerDeployedServer ComputeDeployedServer"
(undercloud) $ export ControllerDeployedServer_hosts="192.168.100.2"
(undercloud) $ export ComputeDeployedServer_hosts="192.168.100.3"
Run the script to configure the orchestration agent on each overcloud node:
(undercloud) $ /usr/share/openstack-tripleo-heat-templates/deployed-server/scripts/get-occ-config.sh
The script accesses the pre-provisioned nodes over SSH using the same user executing the script. In this case, the script authenticates with the stack user.
The script accomplishes the following:
- Queries the director’s orchestration services for the metadata URL for each node.
- Accesses the node and configures the agent on each node with its specific metadata URL.
- Restarts the orchestration agent service.
Once the script completes, the overcloud nodes start polling orchestration service on the director. The stack deployment continues.
Manual configuration
If you prefer to manually configure the orchestration agent on the pre-provisioned nodes, use the following command to query the orchestration service on the director for each node’s metadata URL:
[stack@director ~]$ source ~/stackrc
(undercloud) $ for STACK in $(openstack stack resource list -n5 --filter name=deployed-server -c stack_name -f value overcloud) ; do STACKID=$(echo $STACK | cut -d '-' -f2,4 --output-delimiter " ") ; echo "== Metadata URL for $STACKID ==" ; openstack stack resource metadata $STACK deployed-server | jq -r '.["os-collect-config"].request.metadata_url' ; echo ; done
This displays the stack name and metadata URL for each node:
== Metadata URL for ControllerDeployedServer 0 ==
http://192.168.24.1:8080/v1/AUTH_6fce4e6019264a5b8283e7125f05b764/ov-edServer-ts6lr4tm5p44-deployed-server-td42md2tap4g/43d302fa-d4c2-40df-b3ac-624d6075ef27?temp_url_sig=58313e577a93de8f8d2367f8ce92dd7be7aac3a1&temp_url_expires=2147483586

== Metadata URL for ComputeDeployedServer 0 ==
http://192.168.24.1:8080/v1/AUTH_6fce4e6019264a5b8283e7125f05b764/ov-edServer-wdpk7upmz3eh-deployed-server-ghv7ptfikz2j/0a43e94b-fe02-427b-9bfe-71d2b7bb3126?temp_url_sig=8a50d8ed6502969f0063e79bb32592f4203a136e&temp_url_expires=2147483586
On each overcloud node:
Remove the existing
os-collect-config.conftemplate. This ensures the agent does not override our manual changes:$ sudo /bin/rm -f /usr/libexec/os-apply-config/templates/etc/os-collect-config.conf
Configure the
/etc/os-collect-config.conffile to use the corresponding metadata URL. For example, the Controller node uses the following:[DEFAULT] collectors=request command=os-refresh-config polling_interval=30 [request] metadata_url=http://192.168.24.1:8080/v1/AUTH_6fce4e6019264a5b8283e7125f05b764/ov-edServer-ts6lr4tm5p44-deployed-server-td42md2tap4g/43d302fa-d4c2-40df-b3ac-624d6075ef27?temp_url_sig=58313e577a93de8f8d2367f8ce92dd7be7aac3a1&temp_url_expires=2147483586
- Save the file.
Restart the
os-collect-configservice:[stack@controller ~]$ sudo systemctl restart os-collect-config
After you have configured and restarted them, the orchestration agents poll the director’s orchestration service for overcloud configuration. The deployment stack continues its creation and the stack for each node eventually changes to CREATE_COMPLETE.
8.9. Monitoring the Overcloud Creation
The overcloud configuration process begins. This process takes some time to complete. To view the status of the overcloud creation, open a separate terminal as the stack user and run:
[stack@director ~]$ source ~/stackrc
(undercloud) $ heat stack-list --show-nested
The heat stack-list --show-nested command shows the current stage of the overcloud creation.
8.10. Accessing the Overcloud
The director generates a script to configure and help authenticate interactions with your overcloud from the director host. The director saves this file, overcloudrc, in your stack user’s home director. Run the following command to use this file:
(undercloud) $ source ~/overcloudrc
This loads the necessary environment variables to interact with your overcloud from the director host’s CLI. The command prompt changes to indicate this:
(overcloud) $
To return to interacting with the director’s host, run the following command:
(overcloud) $ source ~/stackrc
(undercloud) $
8.11. Scaling Pre-Provisioned Nodes
The process for scaling pre-provisioned nodes is similar to the standard scaling procedures in Chapter 10, Scaling the Overcloud. However, the process for adding new pre-provisioned nodes differs since pre-provisioned nodes do not use the standard registration and management process from OpenStack Bare Metal (ironic) and OpenStack Compute (nova).
Scaling Up Pre-Provisioned Nodes
When scaling up the overcloud with pre-provisioned nodes, you need to configure the orchestration agent on each node to correspond to the director’s node count.
The general process for scaling up the nodes is:
- Prepare the new pre-provisioned nodes as per the Requirements.
- Scale up the nodes. See Chapter 10, Scaling the Overcloud for these instructions.
- After executing the deployment command, wait until the director creates the new node resources. Manually configure the pre-provisioned nodes to poll the director’s orchestration server metadata URL as per the instructions in Section 8.8, “Polling the Metadata Server”.
Scaling Down Pre-Provisioned Nodes
When scaling down the overcloud with pre-provisioned nodes, follow the scale down instructions as normal as shown in Chapter 10, Scaling the Overcloud.
In most scaling operations, you need to obtain the UUID value of the node to pass to openstack overcloud node delete. To obtain this UUID, list the resources for the specific role:
$ openstack stack resource list overcloud -c physical_resource_id -c stack_name -n5 --filter type=OS::TripleO::<RoleName>Server
Replace <RoleName> in the above command with the actual name of the role that you are scaling down. For example, for the ComputeDeployedServer role:
$ openstack stack resource list overcloud -c physical_resource_id -c stack_name -n5 --filter type=OS::TripleO::ComputeDeployedServerServer
Use the stack_name column in the command output to identify the UUID associated with each node. The stack_name includes the integer value of the index of the node in the Heat resource group. For example, in the following sample output:
+------------------------------------+----------------------------------+
| physical_resource_id               | stack_name                       |
+------------------------------------+----------------------------------+
| 294d4e4d-66a6-4e4e-9a8b-           | overcloud-ComputeDeployedServer- |
| 03ec80beda41                       | no7yfgnh3z7e-1-ytfqdeclwvcg      |
| d8de016d-                          | overcloud-ComputeDeployedServer- |
| 8ff9-4f29-bc63-21884619abe5        | no7yfgnh3z7e-0-p4vb3meacxwn      |
| 8c59f7b1-2675-42a9-ae2c-           | overcloud-ComputeDeployedServer- |
| 2de4a066f2a9                       | no7yfgnh3z7e-2-mmmaayxqnf3o      |
+------------------------------------+----------------------------------+
The indices 0, 1, or 2 in the stack_name column correspond to the node order in the Heat resource group. Pass the corresponding UUID value from the physical_resource_id column to openstack overcloud node delete command.
Once you have removed overcloud nodes from the stack, power off these nodes. Under a standard deployment, the bare metal services on the director control this function. However, with pre-provisioned nodes, you should either manually shutdown these nodes or use the power management control for each physical system. If you do not power off the nodes after removing them from the stack, they might remain operational and reconnect as part of the overcloud environment.
After powering down the removed nodes, reprovision them back to a base operating system configuration so that they do not unintentionally join the overcloud in the future
Do not attempt to reuse nodes previously removed from the overcloud without first reprovisioning them with a fresh base operating system. The scale down process only removes the node from the overcloud stack and does not uninstall any packages.
8.12. Removing a Pre-Provisioned Overcloud
Removing an entire overcloud that uses pre-provisioned nodes uses the same procedure as a standard overcloud. See Section 9.13, “Removing the Overcloud” for more details.
After removing the overcloud, power off all nodes and reprovision them back to a base operating system configuration.
Do not attempt to reuse nodes previously removed from the overcloud without first reprovisioning them with a fresh base operating system. The removal process only deletes the overcloud stack and does not uninstall any packages.
8.13. Completing the Overcloud Creation
This concludes the creation of the overcloud using pre-provisioned nodes. For post-creation functions, see Chapter 9, Performing Tasks after Overcloud Creation.
Chapter 9. Performing Tasks after Overcloud Creation
This chapter explores some of the functions you perform after creating your overcloud of choice.
9.1. Managing Containerized Services
The overcloud runs most OpenStack Platform services in containers. In certain situations, you might need to control the individual services on a host. This section provides some common docker commands you can run on an overcloud node to manage containerized services. For more comprehensive information on using docker to manage containers, see "Working with Docker formatted containers" in the Getting Started with Containers guide.
Before running these commands, check that you are logged into an overcloud node and not running these commands on the undercloud.
Listing containers and images
To list running containers:
$ sudo docker ps
To also list stopped or failed containers, add the --all option:
$ sudo docker ps --all
To list container images:
$ sudo docker images
Inspecting container properties
To view the properties of a container or container images, use the docker inspect command. For example, to inspect the keystone container:
$ sudo docker inspect keystone
Managing basic container operations
To restart a containerized service, use the docker restart command. For example, to restart the keystone container:
$ sudo docker restart keystone
To stop a containerized service, use the docker stop command. For example, to stop the keystone container:
$ sudo docker stop keystone
To start a stopped containerized service, use the docker start command. For example, to start the keystone container:
$ sudo docker start keystone
Any changes to the service configuration files within the container revert after restarting the container. This is because the container regenerates the service configuration based upon files on the node’s local file system in /var/lib/config-data/puppet-generated/. For example, if you edit /etc/keystone/keystone.conf within the keystone container and restart the container, the container regenerates the configuration using /var/lib/config-data/puppet-generated/keystone/etc/keystone/keystone.conf on the node’s local file system, which overwrites any the changes made within the container before the restart.
Monitoring containers
To check the logs for a containerized service, use the docker logs command. For example, to view the logs for the keystone container:
$ sudo docker logs keystone
Accessing containers
To enter the shell for a containerized service, use the docker exec command to launch /bin/bash. For example, to enter the shell for the keystone container:
$ sudo docker exec -it keystone /bin/bash
To enter the shell for the keystone container as the root user:
$ sudo docker exec --user 0 -it <NAME OR ID> /bin/bash
To exit from the container:
# exit
For information about troubleshooting OpenStack Platform containerized services, see Section 12.7.3, “Containerized Service Failures”.
9.2. Creating the Overcloud Tenant Network
The overcloud requires a Tenant network for instances. Source the overcloud and create an initial Tenant network in Neutron. For example:
$ source ~/overcloudrc
(overcloud) $ openstack network create default
(overcloud) $ openstack subnet create default --network default --gateway 172.20.1.1 --subnet-range 172.20.0.0/16
This creates a basic Neutron network called default. The overcloud automatically assigns IP addresses from this network using an internal DHCP mechanism.
Confirm the created network:
(overcloud) $ openstack network list
+-----------------------+-------------+--------------------------------------+
| id                    | name        | subnets                              |
+-----------------------+-------------+--------------------------------------+
| 95fadaa1-5dda-4777... | default     | 7e060813-35c5-462c-a56a-1c6f8f4f332f |
+-----------------------+-------------+--------------------------------------+
9.3. Creating the Overcloud External Network
You need to create the External network on the overcloud so that you can assign floating IP addresses to instances.
Using a Native VLAN
This procedure assumes a dedicated interface or native VLAN for the External network.
Source the overcloud and create an External network in Neutron. For example:
$ source ~/overcloudrc
(overcloud) $ openstack network create public --external --provider-network-type flat --provider-physical-network datacentre
(overcloud) $ openstack subnet create public --network public --dhcp --allocation-pool start=10.1.1.51,end=10.1.1.250 --gateway 10.1.1.1 --subnet-range 10.1.1.0/24
In this example, you create a network with the name public. The overcloud requires this specific name for the default floating IP pool. This is also important for the validation tests in Section 9.7, “Validating the Overcloud”.
This command also maps the network to the datacentre physical network. As a default, datacentre maps to the br-ex bridge. Leave this option as the default unless you have used custom neutron settings during the overcloud creation.
Using a Non-Native VLAN
If not using the native VLAN, assign the network to a VLAN using the following commands:
$ source ~/overcloudrc
(overcloud) $ openstack network create public --external --provider-network-type vlan --provider-physical-network datacentre --provider-segment 104
(overcloud) $ openstack subnet create public --network public --dhcp --allocation-pool start=10.1.1.51,end=10.1.1.250 --gateway 10.1.1.1 --subnet-range 10.1.1.0/24
The provider:segmentation_id value defines the VLAN to use. In this case, you can use 104.
Confirm the created network:
(overcloud) $ openstack network list
+-----------------------+-------------+--------------------------------------+
| id                    | name        | subnets                              |
+-----------------------+-------------+--------------------------------------+
| d474fe1f-222d-4e32... | public      | 01c5f621-1e0f-4b9d-9c30-7dc59592a52f |
+-----------------------+-------------+--------------------------------------+
9.4. Creating Additional Floating IP Networks
Floating IP networks can use any bridge, not just br-ex, as long as you meet the following conditions:
-
NeutronExternalNetworkBridgeis set to"''"in your network environment file. You have mapped the additional bridge during deployment. For example, to map a new bridge called
br-floatingto thefloatingphysical network, use the following in an environment file:parameter_defaults: NeutronBridgeMappings: "datacentre:br-ex,floating:br-floating"
Create the Floating IP network after creating the overcloud:
$ source ~/overcloudrc
(overcloud) $ openstack network create ext-net --external --provider-physical-network floating --provider-network-type vlan --provider-segment 105
(overcloud) $ openstack subnet create ext-subnet --network ext-net --dhcp --allocation-pool start=10.1.2.51,end=10.1.2.250 --gateway 10.1.2.1 --subnet-range 10.1.2.0/24
9.5. Creating the Overcloud Provider Network
A provider network is a network attached physically to a network existing outside of the deployed overcloud. This can be an existing infrastructure network or a network that provides external access directly to instances through routing instead of floating IPs.
When creating a provider network, you associate it with a physical network, which uses a bridge mapping. This is similar to floating IP network creation. You add the provider network to both the Controller and the Compute nodes because the Compute nodes attach VM virtual network interfaces directly to the attached network interface.
For example, if the desired provider network is a VLAN on the br-ex bridge, use the following command to add a provider network on VLAN 201:
$ source ~/overcloudrc
(overcloud) $ openstack network create provider_network --provider-physical-network datacentre --provider-network-type vlan --provider-segment 201 --share
This command creates a shared network. It is also possible to specify a tenant instead of specifying --share. That network will only be available to the specified tenant. If you mark a provider network as external, only the operator may create ports on that network.
Add a subnet to a provider network if you want neutron to provide DHCP services to the tenant instances:
(overcloud) $ openstack subnet create provider-subnet --network provider_network --dhcp --allocation-pool start=10.9.101.50,end=10.9.101.100 --gateway 10.9.101.254 --subnet-range 10.9.101.0/24
Other networks might require access externally through the provider network. In this situation, create a new router so that other networks can route traffic through the provider network:
(overcloud) $ openstack router create external
(overcloud) $ openstack router set --external-gateway provider_network external
Attach other networks to this router. For example, if you had a subnet called subnet1, you can attach it to the router with the following commands:
(overcloud) $ openstack router add subnet external subnet1
This adds subnet1 to the routing table and allows traffic using subnet1 to route to the provider network.
9.6. Creating a basic Overcloud flavor
Validation steps in this guide assume that your installation contains flavors. If you have not already created at least one flavor, use the following commands to create a basic set of default flavors that have a range of storage and processing capability:
$ openstack flavor create m1.tiny --ram 512 --disk 0 --vcpus 1
$ openstack flavor create m1.smaller --ram 1024 --disk 0 --vcpus 1
$ openstack flavor create m1.small --ram 2048 --disk 10 --vcpus 1
$ openstack flavor create m1.medium --ram 3072 --disk 10 --vcpus 2
$ openstack flavor create m1.large --ram 8192 --disk 10 --vcpus 4
$ openstack flavor create m1.xlarge --ram 8192 --disk 10 --vcpus 8
Command options
- ram
-
Use the
ramoption to define the maximum RAM for the flavor. - disk
-
Use the
diskoption to define the hard disk space for the flavor. - vcpus
-
Use the
vcpusoption to define the quantity of virtual CPUs for the flavor.
Use $ openstack flavor create --help to learn more about the openstack flavor create command.
9.7. Validating the Overcloud
The overcloud uses the OpenStack Integration Test Suite (tempest) tool set to conduct a series of integration tests. This section provides information on preparations for running the integration tests. For full instruction on using the OpenStack Integration Test Suite, see the OpenStack Integration Test Suite Guide.
Before Running the Integration Test Suite
If running this test from the undercloud, ensure that the undercloud host has access to the overcloud’s Internal API network. For example, add a temporary VLAN on the undercloud host to access the Internal API network (ID: 201) using the 172.16.0.201/24 address:
$ source ~/stackrc
(undercloud) $ sudo ovs-vsctl add-port br-ctlplane vlan201 tag=201 -- set interface vlan201 type=internal
(undercloud) $ sudo ip l set dev vlan201 up; sudo ip addr add 172.16.0.201/24 dev vlan201
Before running the OpenStack Integration Test Suite, check that the heat_stack_owner role exists in your overcloud:
$ source ~/overcloudrc
(overcloud) $ openstack role list
+----------------------------------+------------------+
| ID                               | Name             |
+----------------------------------+------------------+
| 6226a517204846d1a26d15aae1af208f | swiftoperator    |
| 7c7eb03955e545dd86bbfeb73692738b | heat_stack_owner |
+----------------------------------+------------------+
If the role does not exist, create it:
(overcloud) $ openstack role create heat_stack_owner
After Running the Integration Test Suite
After completing the validation, remove any temporary connections to the overcloud’s Internal API. In this example, use the following commands to remove the previously created VLAN on the undercloud:
$ source ~/stackrc
(undercloud) $ sudo ovs-vsctl del-port vlan201
9.8. Modifying the Overcloud Environment
Sometimes you might intend to modify the overcloud to add additional features, or change the way it operates. To modify the overcloud, make modifications to your custom environment files and Heat templates, then rerun the openstack overcloud deploy command from your initial overcloud creation. For example, if you created an overcloud using Section 6.8, “Creating the Overcloud with the CLI Tools”, you would rerun the following command:
$ source ~/stackrc
(undercloud) $ openstack overcloud deploy --templates \
  -e ~/templates/node-info.yaml \
  -e /usr/share/openstack-tripleo-heat-templates/environments/network-isolation.yaml \
  -e ~/templates/network-environment.yaml \
  -e ~/templates/storage-environment.yaml \
  --ntp-server pool.ntp.org
The director checks the overcloud stack in heat, and then updates each item in the stack with the environment files and heat templates. It does not recreate the overcloud, but rather changes the existing overcloud.
If you aim to include a new environment file, add it to the openstack overcloud deploy command with a -e option. For example:
$ source ~/stackrc
(undercloud) $ openstack overcloud deploy --templates \
  -e ~/templates/new-environment.yaml \
  -e /usr/share/openstack-tripleo-heat-templates/environments/network-isolation.yaml \
  -e ~/templates/network-environment.yaml \
  -e ~/templates/storage-environment.yaml \
  -e ~/templates/node-info.yaml \
  --ntp-server pool.ntp.org
This includes the new parameters and resources from the environment file into the stack.
It is advisable not to make manual modifications to the overcloud’s configuration as the director might overwrite these modifications later.
9.9. Importing Virtual Machines into the Overcloud
Use the following procedure if you have an existing OpenStack environment and aim to migrate its virtual machines to your Red Hat OpenStack Platform environment.
Create a new image by taking a snapshot of a running server and download the image.
$ source ~/overcloudrc
(overcloud) $ openstack server image create instance_name --name image_name
(overcloud) $ openstack image save image_name --file exported_vm.qcow2
Upload the exported image into the overcloud and launch a new instance.
(overcloud) $ openstack image create imported_image --file exported_vm.qcow2 --disk-format qcow2 --container-format bare
(overcloud) $ openstack server create  imported_instance --key-name default --flavor m1.demo --image imported_image --nic net-id=net_id
Each VM disk has to be copied from the existing OpenStack environment and into the new Red Hat OpenStack Platform. Snapshots using QCOW will lose their original layering system.
9.10. Migrating VMs from an Overcloud Compute Node
In some situations, you might perform maintenance on an overcloud Compute node. To prevent downtime, migrate the VMs on the Compute node to another Compute node in the overcloud.
The director configures all Compute nodes to provide secure migration. All Compute nodes also require a shared SSH key to provide each host’s nova user with access to other Compute nodes during the migration process. The director creates this key using the OS::TripleO::Services::NovaCompute composable service. This composable service is one of the main services included on all Compute roles by default (see "Composable Services and Custom Roles" in Advanced Overcloud Customization).
To migrate an instance:
From the undercloud, select a Compute Node to reboot and disable it:
$ source ~/overcloudrc
(overcloud) $ openstack compute service list
(overcloud) $ openstack compute service set [hostname] nova-compute --disable
List all instances on the Compute node:
(overcloud) $ openstack server list --host [hostname] --all-projects
Use one of the following commands to migrate your instances:
Migrate the instance to a specific host of your choice:
(overcloud) $ openstack server migrate [instance-id] --live [target-host]--wait
Let
nova-schedulerautomatically select the target host:(overcloud) $ nova live-migration [instance-id]
Live migrate all instances at once:
$ nova host-evacuate-live [hostname]
NoteThe
novacommand might cause some deprecation warnings, which are safe to ignore.
- Wait until migration completes.
Confirm the migration was successful:
(overcloud) $ openstack server list --host [hostname] --all-projects
- Continue migrating instances until none remain on the chosen Compute Node.
This migrates all instances from a Compute node. You can now perform maintenance on the node without any instance downtime. To return the Compute node to an enabled state, run the following command:
$ source ~/overcloudrc
(overcloud) $ openstack compute service set [hostname] nova-compute --enable
9.11. Running Ansible Automation
The director provides the ability to run Ansible-based automation on your OpenStack Platform environment. The director uses the tripleo-ansible-inventory command to generate a dynamic inventory of nodes in your environment.
The dynamic inventory tool only includes the undercloud and the default controller and compute overcloud nodes. Other roles are not supported.
To view a dynamic inventory of nodes, run the tripleo-ansible-inventory command after sourcing stackrc:
$ source ~/stackrc
(undercloud) $ tripleo-ansible-inventory --list
The --list option provides details on all hosts.
This outputs the dynamic inventory in a JSON format:
{"overcloud": {"children": ["controller", "compute"], "vars": {"ansible_ssh_user": "heat-admin"}}, "controller": ["192.168.24.2"], "undercloud": {"hosts": ["localhost"], "vars": {"overcloud_horizon_url": "http://192.168.24.4:80/dashboard", "overcloud_admin_password": "abcdefghijklm12345678", "ansible_connection": "local"}}, "compute": ["192.168.24.3"]}
To execute Ansible playbooks on your environment, run the ansible command and include the full path of the dynamic inventory tool using the -i option. For example:
(undercloud) $ ansible [HOSTS] -i /bin/tripleo-ansible-inventory [OTHER OPTIONS]
Exchange
[HOSTS]for the type of hosts to use. For example:-
controllerfor all Controller nodes -
computefor all Compute nodes -
overcloudfor all overcloud child nodes i.e.controllerandcompute -
undercloudfor the undercloud -
"*"for all nodes
-
Exchange
[OTHER OPTIONS]for the additional Ansible options. Some useful options include:-
--ssh-extra-args='-o StrictHostKeyChecking=no'to bypasses confirmation on host key checking. -
-u [USER]to change the SSH user that executes the Ansible automation. The default SSH user for the overcloud is automatically defined using theansible_ssh_userparameter in the dynamic inventory. The-uoption overrides this parameter. -
-m [MODULE]to use a specific Ansible module. The default iscommand, which executes Linux commands. -
-a [MODULE_ARGS]to define arguments for the chosen module.
-
Ansible automation on the overcloud falls outside the standard overcloud stack. This means subsequent execution of the openstack overcloud deploy command might override Ansible-based configuration for OpenStack Platform services on overcloud nodes.
9.12. Protecting the Overcloud from Removal
To avoid accidental removal of the overcloud with the heat stack-delete overcloud command, Heat contains a set of policies to restrict certain actions. Edit the /etc/heat/policy.json and find the following parameter:
"stacks:delete": "rule:deny_stack_user"
Change it to:
"stacks:delete": "rule:deny_everybody"
Save the file.
This prevents removal of the overcloud with the heat client. To allow removal of the overcloud, revert the policy to the original value.
9.13. Removing the Overcloud
The whole overcloud can be removed when desired.
Delete any existing overcloud:
$ source ~/stackrc
(undercloud) $ openstack overcloud delete overcloud
Confirm the deletion of the overcloud:
(undercloud) $ openstack stack list
Deletion takes a few minutes.
Once the removal completes, follow the standard steps in the deployment scenarios to recreate your overcloud.
9.14. Review the Token Flush Interval
The Identity Service (keystone) uses a token-based system for access control against the other OpenStack services. After a certain period, the database will accumulate a large number of unused tokens; a default cron job flushes the token table every day. It is recommended that you monitor your environment and adjust the token flush interval as needed.
For the overcloud, you can adjust the interval using the KeystoneCronToken values. For more information, see the Overcloud Parameters guide.
Chapter 10. Scaling the Overcloud
Do not use openstack server delete to remove nodes from the overcloud. Read the procedures defined in this section to properly remove and replace nodes.
There might be situations where you need to add or remove nodes after the creation of the overcloud. For example, you might need to add more Compute nodes to the overcloud. This situation requires updating the overcloud.
Use the following table to determine support for scaling each node type:
Table 10.1. Scale Support for Each Node Type
| Node Type | Scale Up? | Scale Down? | Notes |
| Controller | N | N | |
| Compute | Y | Y | |
| Ceph Storage Nodes | Y | N | You must have at least 1 Ceph Storage node from the initial overcloud creation. |
| Block Storage Nodes | N | N | |
| Object Storage Nodes | Y | Y | Requires manual ring management, which is described in Section 10.6, “Replacing Object Storage Nodes”. |
Make sure to leave at least 10 GB free space before scaling the overcloud. This free space accommodates image conversion and caching during the node provisioning process.
10.1. Adding Additional Nodes
To add more nodes to the director’s node pool, create a new JSON file (for example, newnodes.json) containing the new node details to register:
{
  "nodes":[
    {
        "mac":[
            "dd:dd:dd:dd:dd:dd"
        ],
        "cpu":"4",
        "memory":"6144",
        "disk":"40",
        "arch":"x86_64",
        "pm_type":"pxe_ipmitool",
        "pm_user":"admin",
        "pm_password":"p@55w0rd!",
        "pm_addr":"192.168.24.207"
    },
    {
        "mac":[
            "ee:ee:ee:ee:ee:ee"
        ],
        "cpu":"4",
        "memory":"6144",
        "disk":"40",
        "arch":"x86_64",
        "pm_type":"pxe_ipmitool",
        "pm_user":"admin",
        "pm_password":"p@55w0rd!",
        "pm_addr":"192.168.24.208"
    }
  ]
}
See Section 6.1, “Registering Nodes for the Overcloud” for an explanation of these parameters.
Run the following command to register these nodes:
$ source ~/stackrc
(undercloud) $ openstack overcloud node import newnodes.json
After registering the new nodes, launch the introspection process for them. Use the following commands for each new node:
(undercloud) $ openstack baremetal node manage [NODE UUID]
(undercloud) $ openstack overcloud node introspect [NODE UUID] --provide
This detects and benchmarks the hardware properties of the nodes.
After the introspection process completes, tag each new node for its desired role. For example, for a Compute node, use the following command:
(undercloud) $ openstack baremetal node set --property capabilities='profile:compute,boot_option:local' [NODE UUID]
Scaling the overcloud requires running the openstack overcloud deploy again with the desired number of nodes for a role. For example, to scale to 5 Compute nodes:
(undercloud) $ openstack overcloud deploy --templates --compute-scale 5 [OTHER_OPTIONS]
This updates the entire overcloud stack. Note that this only updates the stack. It does not delete the overcloud and replace the stack.
Make sure to include all environment files and options from your initial overcloud creation. This includes the same scale parameters for non-Compute nodes.
10.2. Removing Compute Nodes
There might be situations where you need to remove Compute nodes from the overcloud. For example, you might need to replace a problematic Compute node.
Before removing a Compute node from the overcloud, migrate the workload from the node to other Compute nodes. See Section 9.10, “Migrating VMs from an Overcloud Compute Node” for more details.
Next, disable the node’s Compute service on the overcloud. This stops the node from scheduling new instances.
$ source ~/overcloudrc
(overcloud) $ openstack compute service list
(overcloud) $ openstack compute service set [hostname] nova-compute --disable
Switch back to the undercloud:
(overcloud) $ source ~/stackrc
Removing overcloud nodes requires an update to the overcloud stack in the director using the local template files. First identify the UUID of the overcloud stack:
(undercloud) $ openstack stack list
Identify the UUIDs of the nodes to delete:
(undercloud) $ openstack server list
Run the following command to delete the nodes from the stack and update the plan accordingly:
(undercloud) $ openstack overcloud node delete --stack [STACK_UUID] --templates -e [ENVIRONMENT_FILE] [NODE1_UUID] [NODE2_UUID] [NODE3_UUID]
If you passed any extra environment files when you created the overcloud, pass them here again using the -e or --environment-file option to avoid making undesired manual changes to the overcloud.
Make sure the openstack overcloud node delete command runs to completion before you continue. Use the openstack stack list command and check the overcloud stack has reached an UPDATE_COMPLETE status.
Finally, remove the node’s Compute service:
(undercloud) $ source ~/overcloudrc
(overcloud) $ openstack compute service list
(overcloud) $ openstack compute service delete [service-id]
And remove the node’s Open vSwitch agent:
(overcloud) $ openstack network agent list
(overcloud) $ openstack network agent delete [openvswitch-agent-id]
You are now free to remove the node from the overcloud and re-provision it for other purposes.
10.3. Replacing Compute Nodes
If a Compute node fails, you can replace the node with a working one. Replacing a Compute node uses the following process:
- Migrate workload off the existing Compute node and shutdown the node. See Section 9.10, “Migrating VMs from an Overcloud Compute Node” for this process.
- Remove the Compute node from the overcloud. See Section 10.2, “Removing Compute Nodes” for this process.
- Scale out the overcloud with a new Compute node. See Section 10.1, “Adding Additional Nodes” for this process.
This process ensures that a node can be replaced without affecting the availability of any instances.
10.4. Replacing Controller Nodes
In certain circumstances a Controller node in a high availability cluster might fail. In these situations, you must remove the node from the cluster and replace it with a new Controller node. This also includes ensuring the node connects to the other nodes in the cluster.
This section provides instructions on how to replace a Controller node. The process involves running the openstack overcloud deploy command to update the overcloud with a request to replace a controller node. Note that this process is not completely automatic; during the overcloud stack update process, the openstack overcloud deploy command will at some point report a failure and halt the overcloud stack update. At this point, the process requires some manual intervention. Then the openstack overcloud deploy process can continue.
The following procedure only applies to high availability environments. Do not use this procedure if only using one Controller node.
10.4.1. Preliminary Checks
Before attempting to replace an overcloud Controller node, it is important to check the current state of your Red Hat OpenStack Platform environment. Checking the current state can help avoid complications during the Controller replacement process. Use the following list of preliminary checks to determine if it is safe to perform a Controller node replacement. Run all commands for these checks on the undercloud.
Check the current status of the
overcloudstack on the undercloud:$ source stackrc (undercloud) $ openstack stack list --nested
The
overcloudstack and its subsequent child stacks should have either aCREATE_COMPLETEorUPDATE_COMPLETE.Perform a backup of the undercloud databases:
(undercloud) $ mkdir /home/stack/backup
(undercloud) $ sudo mysqldump --all-databases --quick --single-transaction | gzip > /home/stack/backup/dump_db_undercloud.sql.gz
- Check your undercloud contains 10 GB free storage to accommodate for image caching and conversion when provisioning the new node.
Check the status of Pacemaker on the running Controller nodes. For example, if 192.168.0.47 is the IP address of a running Controller node, use the following command to get the Pacemaker status:
(undercloud) $ ssh heat-admin@192.168.0.47 'sudo pcs status'
The output should show all services running on the existing nodes and stopped on the failed node.
Check the following parameters on each node of the overcloud’s MariaDB cluster:
-
wsrep_local_state_comment: Synced wsrep_cluster_size: 2Use the following command to check these parameters on each running Controller node (respectively using 192.168.0.47 and 192.168.0.46 for IP addresses):
(undercloud) $ for i in 192.168.0.47 192.168.0.46 ; do echo "*** $i ***" ; ssh heat-admin@$i "sudo mysql -p\$(sudo hiera -c /etc/puppet/hiera.yaml mysql::server::root_password) --execute=\"SHOW STATUS LIKE 'wsrep_local_state_comment'; SHOW STATUS LIKE 'wsrep_cluster_size';\""; done
-
Check the RabbitMQ status. For example, if 192.168.0.47 is the IP address of a running Controller node, use the following command to get the status
(undercloud) $ ssh heat-admin@192.168.0.47 "sudo docker exec \$(sudo docker ps -f name=rabbitmq-bundle -q) rabbitmqctl cluster_status"
The
running_nodeskey should only show the two available nodes and not the failed node.Disable fencing, if enabled. For example, if 192.168.0.47 is the IP address of a running Controller node, use the following command to disable fencing:
(undercloud) $ ssh heat-admin@192.168.0.47 "sudo pcs property set stonith-enabled=false"
Check the fencing status with the following command:
(undercloud) $ ssh heat-admin@192.168.0.47 "sudo pcs property show stonith-enabled"
Check the
nova-computeservice on the director node:(undercloud) $ sudo systemctl status openstack-nova-compute (undercloud) $ openstack hypervisor list
The output should show all non-maintenance mode nodes as
up.Make sure all undercloud services are running:
(undercloud) $ sudo systemctl -t service
10.4.2. Removing a Ceph Monitor Daemon
This procedure removes a ceph-mon daemon from the storage cluster. If your Controller node is running a Ceph monitor service, complete the following steps to remove the ceph-mon daemon. This procedure assumes the Controller is reachable.
A new Ceph monitor daemon will be added after a new Controller is added to the cluster.
Connect to the controller to be replaced and become root:
# ssh heat-admin@192.168.0.47
# sudo su -
NoteIf the controller is unreachable, skip steps 1 and 2 and continue the procedure at step 3 on any working controller node.
As root, stop the monitor:
# systemctl stop ceph-mon@<monitor_hostname>
For example:
# systemctl stop ceph-mon@overcloud-controller-2
Remove the monitor from the cluster:
# ceph mon remove <mon_id>
On the Ceph monitor node, remove the monitor entry from
/etc/ceph/ceph.conf. For example, if you remove controller-2, then remove the IP and hostname for controller-2.Before:
mon host = 172.18.0.21,172.18.0.22,172.18.0.24
mon initial members = overcloud-controller-2,overcloud-controller-1,overcloud-controller-0
After:
mon host = 172.18.0.22,172.18.0.24
mon initial members = overcloud-controller-1,overcloud-controller-0
Apply the same change to
/etc/ceph/ceph.confon the other overcloud nodes.NoteThe
ceph.conffile is updated on the relevant overcloud nodes by director when the replacement controller node is added. Normally, this configuration file is managed only by director and should not be manually edited, but it is edited in this step to ensure consistency in case the other nodes restart before the new node is added.Optionally, archive the monitor data and save it on another server:
# mv /var/lib/ceph/mon/<cluster>-<daemon_id> /var/lib/ceph/mon/removed-<cluster>-<daemon_id>
10.4.3. Node Replacement
Identify the index of the node to remove. The node index is the suffix on the instance name from nova list output.
(undercloud) $ openstack server list
+--------------------------------------+------------------------+
| ID                                   | Name                   |
+--------------------------------------+------------------------+
| 861408be-4027-4f53-87a6-cd3cf206ba7a | overcloud-compute-0    |
| 0966e9ae-f553-447a-9929-c4232432f718 | overcloud-compute-1    |
| 9c08fa65-b38c-4b2e-bd47-33870bff06c7 | overcloud-compute-2    |
| a7f0f5e1-e7ce-4513-ad2b-81146bc8c5af | overcloud-controller-0 |
| cfefaf60-8311-4bc3-9416-6a824a40a9ae | overcloud-controller-1 |
| 97a055d4-aefd-481c-82b7-4a5f384036d2 | overcloud-controller-2 |
+--------------------------------------+------------------------+
In this example, the aim is to remove the overcloud-controller-1 node and replace it with overcloud-controller-3. First, set the node into maintenance mode so the director does not reprovision the failed node. Correlate the instance ID from nova list with the node ID from openstack baremetal node list
(undercloud) $ openstack baremetal node list
+--------------------------------------+------+--------------------------------------+
| UUID                                 | Name | Instance UUID                        |
+--------------------------------------+------+--------------------------------------+
| 36404147-7c8a-41e6-8c72-a6e90afc7584 | None | 7bee57cf-4a58-4eaf-b851-2a8bf6620e48 |
| 91eb9ac5-7d52-453c-a017-c0e3d823efd0 | None | None                                 |
| 75b25e9a-948d-424a-9b3b-f0ef70a6eacf | None | None                                 |
| 038727da-6a5c-425f-bd45-fda2f4bd145b | None | 763bfec2-9354-466a-ae65-2401c13e07e5 |
| dc2292e6-4056-46e0-8848-d6e96df1f55d | None | 2017b481-706f-44e1-852a-2ee857c303c4 |
| c7eadcea-e377-4392-9fc3-cf2b02b7ec29 | None | 5f73c7d7-4826-49a5-b6be-8bfd558f3b41 |
| da3a8d19-8a59-4e9d-923a-6a336fe10284 | None | cfefaf60-8311-4bc3-9416-6a824a40a9ae |
| 807cb6ce-6b94-4cd1-9969-5c47560c2eee | None | c07c13e6-a845-4791-9628-260110829c3a |
+--------------------------------------+------+--------------------------------------+
Set the node into maintenance mode:
(undercloud) $ openstack baremetal node maintenance set da3a8d19-8a59-4e9d-923a-6a336fe10284
Tag the new node with the control profile.
(undercloud) $ openstack baremetal node set --property capabilities='profile:control,boot_option:local' 75b25e9a-948d-424a-9b3b-f0ef70a6eacf
The overcloud’s database must continue running during the replacement procedure. To ensure Pacemaker does not stop Galera during this procedure, select a running Controller node and run the following command on the undercloud using the Controller node’s IP address:
(undercloud) $ ssh heat-admin@192.168.0.47 "sudo pcs resource unmanage galera"
Create a YAML file (~/templates/remove-controller.yaml) that defines the node index to remove:
parameters:
  ControllerRemovalPolicies:
    [{'resource_list': ['1']}]
You can speed up the replacement process by reducing the number for tries for settle in Corosync. Include the CorosyncSettleTries parameter in the ~/templates/remove-controller.yaml environment file:
parameter_defaults:
  CorosyncSettleTries: 5
After identifying the node index, redeploy the overcloud and include the remove-controller.yaml environment file:
(undercloud) $ openstack overcloud deploy --templates --control-scale 3 -e ~/templates/remove-controller.yaml [OTHER OPTIONS]
If you passed any extra environment files or options when you created the overcloud, pass them again here to avoid making undesired changes to the overcloud.
However, note that the -e ~/templates/remove-controller.yaml is only required once in this instance.
The director removes the old node, creates a new one, and updates the overcloud stack. You can check the status of the overcloud stack with the following command:
(undercloud) $ openstack stack list --nested
10.4.4. Manual Intervention
During the ControllerNodesPostDeployment stage, the overcloud stack update halts with an UPDATE_FAILED error at ControllerDeployment_Step1. This is because some Puppet modules do not support nodes replacement. This point in the process requires some manual intervention. Follow these configuration steps:
Get a list of IP addresses for the Controller nodes. For example:
(undercloud) $ openstack server list -c Name -c Networks
+------------------------+-----------------------+
| Name                   | Networks              |
+------------------------+-----------------------+
| overcloud-compute-0    | ctlplane=192.168.0.44 |
| overcloud-controller-0 | ctlplane=192.168.0.47 |
| overcloud-controller-2 | ctlplane=192.168.0.46 |
| overcloud-controller-3 | ctlplane=192.168.0.48 |
+------------------------+-----------------------+
Delete the failed node from the Corosync configuration on each node and restart Corosync. For this example, log into
overcloud-controller-0andovercloud-controller-2and run the following commands:(undercloud) $ for NAME in overcloud-controller-0 overcloud-controller-2; do IP=$(openstack server list -c Networks -f value --name $NAME | cut -d "=" -f 2) ; ssh heat-admin@$IP "sudo pcs cluster localnode remove overcloud-controller-1; sudo pcs cluster reload corosync"; done
Log into one of the remaining nodes and delete the node from the cluster with the
crm_nodecommand:(undercloud) $ ssh heat-admin@192.168.0.47 [heat-admin@overcloud-controller-0 ~]$ sudo crm_node -R overcloud-controller-1 --force
Stay logged into this node.
Delete the failed node from the RabbitMQ cluster:
[heat-admin@overcloud-controller-0 ~]$ sudo docker exec -it $(sudo docker ps -f name=rabbitmq-bundle -q) rabbitmqctl forget_cluster_node rabbit@overcloud-controller-1
Update list of nodes in the Galera cluster and refresh the cluster:
[heat-admin@overcloud-controller-0 ~]$ sudo pcs resource update galera cluster_host_map="overcloud-controller-0:overcloud-controller-0.internalapi.localdomain;overcloud-controller-3:overcloud-controller-3.internalapi.localdomain;overcloud-controller-2:overcloud-controller-2.internalapi.localdomain" wsrep_cluster_address="gcomm://overcloud-controller-0.internalapi.localdomain,overcloud-controller-3.internalapi.localdomain,overcloud-controller-2.internalapi.localdomain"
[heat-admin@overcloud-controller-0 ~]$ sudo pcs resource cleanup galera
[heat-admin@overcloud-controller-0 ~]$ sudo pcs resource manage galera
Add the new node to the cluster:
[heat-admin@overcloud-controller-0 ~]$ sudo pcs cluster node add overcloud-controller-3
Start the new Controller node:
[heat-admin@overcloud-controller-0 ~]$ sudo pcs cluster start overcloud-controller-3
The manual configuration is complete. Stay logged into the Controller.
Open a new terminal and re-run the overcloud deployment command to continue the stack update:
$ source ~/stackrc
(undercloud) $ openstack overcloud deploy --templates --control-scale 3 [OTHER OPTIONS]
If you passed any extra environment files or options when you created the overcloud, pass them again here to avoid making undesired changes to the overcloud. However, note that the remove-controller.yaml file is no longer needed.
10.4.5. Finalizing Overcloud Services
After the overcloud stack update completes, set the appropriate cluster node properties to allow pacemaker to run controller services on the newly added controller node. On one of the existing controller nodes (For example, overcloud-controller-0) run the following:
[heat-admin@overcloud-controller-0 ~]$ for i in $(sudo pcs property | grep overcloud-controller-0: | cut -d' ' -f 3- | tr ' ' '\n' | grep role); do sudo pcs property set --node overcloud-controller-3 $i; done
From that point onward, the services managed by pacemaker start on the newly added controller node.
Perform a final status check to make sure services are running correctly:
[heat-admin@overcloud-controller-0 ~]$ sudo pcs status
If any services have failed, use the pcs resource cleanup command to restart them after resolving them.
Exit to the director
[heat-admin@overcloud-controller-0 ~]$ exit
10.4.6. Finalizing L3 Agent Router Hosting
Source the overcloudrc file so that you can interact with the overcloud. Check your routers to make sure the L3 agents are properly hosting the routers in your overcloud environment. In this example, we use a router with the name r1:
$ source ~/overcloudrc
(overcloud) $ neutron l3-agent-list-hosting-router r1
This list might still show the old node instead of the new node. To replace it, list the L3 network agents in your environment:
(overcloud) $ neutron agent-list | grep "neutron-l3-agent"
Identify the UUID for the agents on the new node and the old node. Add the router to the agent on the new node and remove the router from old node. For example:
(overcloud) $ neutron l3-agent-router-add fd6b3d6e-7d8c-4e1a-831a-4ec1c9ebb965 r1
(overcloud) $ neutron l3-agent-router-remove b40020af-c6dd-4f7a-b426-eba7bac9dbc2 r1
Perform a final check on the router and make all are active:
(overcloud) $ neutron l3-agent-list-hosting-router r1
Delete the existing Neutron agents that point to old Controller node. For example:
(overcloud) $ neutron agent-list -F id -F host | grep overcloud-controller-1
| ddae8e46-3e8e-4a1b-a8b3-c87f13c294eb | overcloud-controller-1.localdomain |
(overcloud) $ neutron agent-delete ddae8e46-3e8e-4a1b-a8b3-c87f13c294eb
10.4.7. Finalizing Compute Services
Compute services for the removed node still exist in the overcloud and require removal. Source the overcloudrc file so that you can interact with the overcloud. Check the compute services for the removed node:
[stack@director ~]$ source ~/overcloudrc
(overcloud) $ openstack compute service list --host overcloud-controller-1.localdomain
Remove the compute services for the removed node:
(overcloud) $ for SERVICE in $(openstack compute service list --host overcloud-controller-1.localdomain -f value -c ID) ; do openstack compute service delete $SERVICE ; done
10.4.8. Conclusion
The failed Controller node and its related services are now replaced with a new node.
If you disabled automatic ring building for Object Storage, like in Section 10.6, “Replacing Object Storage Nodes”, you need to manually build the Object Storage ring files for the new node. See Section 10.6, “Replacing Object Storage Nodes” for more information on manually building ring files.
10.5. Replacing Ceph Storage Nodes
The director provides a method to replace Ceph Storage nodes in a director-created cluster. You can find these instructions in the Deploying an Overcloud with Containerized Red Hat Ceph guide.
10.6. Replacing Object Storage Nodes
This section describes how to replace Object Storage nodes while maintaining the integrity of the cluster. In this example, we have a two-node Object Storage cluster where the node overcloud-objectstorage-1 needs to be replaced. Our aim is to add one more node, then remove overcloud-objectstorage-1 (effectively replacing it).
Create an environment file called ~/templates/swift-upscale.yaml with the following content:
parameter_defaults:
  ObjectStorageCount: 3
The
ObjectStorageCountdefines how many Object Storage nodes in our environment. In this situation, we scale from 2 to 3 nodes.Include the
swift-upscale.yamlfile with the rest of your overcloud’s environment files (ENVIRONMENT_FILES) as part of theopenstack overcloud deploy:$ source ~/stackrc (undercloud) $ openstack overcloud deploy --templates ENVIRONMENT_FILES -e swift-upscale.yamlNoteAdd
swift-upscale.yamlto the end of the environment file list so its parameters supersede previous environment file parameters.After redeployment completes, the overcloud now contains an additional Object Storage node.
Data now needs to be replicated to the new node. Before removing a node (in this case,
overcloud-objectstorage-1) you should wait for a replication pass to finish on the new node. You can check the replication pass progress in/var/log/swift/swift.log. When the pass finishes, the Object Storage service should log entries similar to the following:Mar 29 08:49:05 localhost object-server: Object replication complete. Mar 29 08:49:11 localhost container-server: Replication run OVER Mar 29 08:49:13 localhost account-server: Replication run OVER
To remove the old node from the ring, reduce the
ObjectStorageCountinswift-upscale.yamlto the omit the old ring. In this case, we reduce it to 2:parameter_defaults: ObjectStorageCount: 2
Create a new environment file named
remove-object-node.yaml. This file will identify and remove the specified Object Storage node. The following content specifies the removal ofovercloud-objectstorage-1:parameter_defaults: ObjectStorageRemovalPolicies: [{'resource_list': ['1']}]Include both environment files with the deployment command:
(undercloud) $ openstack overcloud deploy --templates ENVIRONMENT_FILES -e swift-upscale.yaml -e remove-object-node.yaml ...
The director deletes the Object Storage node from the overcloud and updates the rest of the nodes on the overcloud to accommodate the node removal.
10.7. Blacklisting Nodes
You can exclude overcloud nodes from receiving an updated deployment. This is useful in scenarios where you aim to scale new node while excluding existing nodes from receiving an updated set of parameters and resources from the core Heat template collection. In other words, the blacklisted nodes are isolated from the effects of the stack operation.
Use the DeploymentServerBlacklist parameter in an environment file to create a blacklist.
Setting the Blacklist
The DeploymentServerBlacklist parameter is a list of server names. Write a new environment file, or add the parameter value to an existing custom environment file and pass the file to the deployment command:
parameter_defaults:
  DeploymentServerBlacklist:
    - overcloud-compute-0
    - overcloud-compute-1
- overcloud-compute-2The server names in the parameter value are the names according to OpenStack Orchestration (heat), not the actual server hostnames.
Include this environment file with your openstack overcloud deploy command. For example:
$ source ~/stackrc
(undercloud) $ openstack overcloud deploy --templates \
  -e server-blacklist.yaml \
  [OTHER OPTIONS]
Heat blacklists any servers in the list from receiving updated Heat deployments. After the stack operation completes, any blacklisted servers remain unchanged. You can also power off or stop the os-collect-config agents during the operation.
- Exercise caution when blacklisting nodes. Only use a blacklist if you fully understand how to apply the requested change with a blacklist in effect. It is possible create a hung stack or configure the overcloud incorrectly using the blacklist feature. For example, if a cluster configuration changes applies to all members of a Pacemaker cluster, blacklisting a Pacemaker cluster member during this change can cause the cluster to fail.
- Do not use the blacklist during update or upgrade procedures. Those procedures have their own methods for isolating changes to particular servers. See the Upgrading Red Hat OpenStack Platform documentation for more information.
- When adding servers to the blacklist, further changes to those nodes are not supported until the server is removed from the blacklist. This includes updates, upgrades, scale up, scale down, and node replacement.
Clearing the Blacklist
To clear the blacklist for subsequent stack operations, edit the DeploymentServerBlacklist to use an empty array:
parameter_defaults:
  DeploymentServerBlacklist: []
Do not just omit the DeploymentServerBlacklist parameter. If you omit the parameter, the overcloud deployment uses the previously saved value.
Chapter 11. Rebooting Nodes
Some situations require a reboot of nodes in the undercloud and overcloud. The following procedures show how to reboot different node types. Be aware of the following notes:
- If rebooting all nodes in one role, it is advisable to reboot each node individually. This helps retain services for that role during the reboot.
- If rebooting all nodes in your OpenStack Platform environment, use the following list to guide the reboot order:
Recommended Node Reboot Order
- Reboot the director
- Reboot Controller nodes
- Reboot Ceph Storage nodes
- Reboot Compute nodes
- Reboot object Storage nodes
11.1. Rebooting the Director
To reboot the director node, follow this process:
Reboot the node:
$ sudo reboot
- Wait until the node boots.
Check the status of all services:
$ sudo systemctl list-units "openstack*" "neutron*" "openvswitch*"
NoteIt might take approximately 10 minutes for the
openstack-nova-computeto become active after a reboot.Verify the existence of your overcloud and its nodes:
$ source ~/stackrc
$ openstack server list
$ openstack baremetal node list
$ openstack stack list
11.2. Rebooting Controller Nodes
To reboot the Controller nodes, follow this process:
Select a node to reboot. Log into it and stop the cluster before rebooting:
[heat-admin@overcloud-controller-0 ~]$ sudo pcs cluster stop
Reboot the cluster:
[heat-admin@overcloud-controller-0 ~]$ sudo reboot
The remaining Controller Nodes in the cluster retain the high availability services during the reboot.
- Wait until the node boots.
Re-enable the cluster for the node:
[heat-admin@overcloud-controller-0 ~]$ sudo pcs cluster start
Log into the node and check the cluster status:
[heat-admin@overcloud-controller-0 ~]$ sudo pcs status
The node rejoins the cluster.
If any services fail after the reboot, run sudo pcs resource cleanup, which cleans the errors and sets the state of each resource to Started. If any errors persist, contact Red Hat and request guidance and assistance.
Check all containers on the Controller Node are active:
[heat-admin@overcloud-controller-0 ~]$ sudo docker ps
- Log out of the node, select the next Controller Node to reboot, and repeat this procedure until you have rebooted all Controller Nodes.
11.3. Rebooting Ceph Storage Nodes
To reboot the Ceph Storage nodes, follow this process:
Log into a Ceph MON or Controller node and disable Ceph Storage cluster rebalancing temporarily:
$ sudo ceph osd set noout
$ sudo ceph osd set norebalance
- Select the first Ceph Storage node to reboot and log into it.
Reboot the node:
$ sudo reboot
- Wait until the node boots.
Log into the node and check the cluster status:
$ sudo ceph -s
Check that the
pgmapreports allpgsas normal (active+clean).- Log out of the node, reboot the next node, and check its status. Repeat this process until you have rebooted all Ceph storage nodes.
When complete, log into a Ceph MON or Controller node and enable cluster rebalancing again:
$ sudo ceph osd unset noout
$ sudo ceph osd unset norebalance
Perform a final status check to verify the cluster reports
HEALTH_OK:$ sudo ceph status
11.4. Rebooting Compute Nodes
Reboot each Compute node individually and ensure zero downtime of instances in your OpenStack Platform environment. This involves the following workflow:
- Select a Compute node to reboot
- Migrate its instances to another Compute node
- Reboot the empty Compute node
List all Compute nodes and their UUIDs:
$ source ~/stackrc
(undercloud) $ openstack server list --name compute
Select a Compute node to reboot and first migrate its instances using the following process:
From the undercloud, select a Compute Node to reboot and disable it:
$ source ~/overcloudrc
(overcloud) $ openstack compute service list
(overcloud) $ openstack compute service set [hostname] nova-compute --disable
List all instances on the Compute node:
(overcloud) $ openstack server list --host [hostname] --all-projects
Use one of the following commands to migrate your instances:
Migrate the instance to a specific host of your choice:
(overcloud) $ openstack server migrate [instance-id] --live [target-host]--wait
Let
nova-schedulerautomatically select the target host:(overcloud) $ nova live-migration [instance-id]
Live migrate all instances at once:
$ nova host-evacuate-live [hostname]
NoteThe
novacommand might cause some deprecation warnings, which are safe to ignore.
- Wait until migration completes.
Confirm the migration was successful:
(overcloud) $ openstack server list --host [hostname] --all-projects
- Continue migrating instances until none remain on the chosen Compute Node.
For full instructions on configuring and migrating instances, see Section 9.10, “Migrating VMs from an Overcloud Compute Node”.
Reboot the Compute node using the following process
Log into the Compute Node and reboot it:
[heat-admin@overcloud-compute-0 ~]$ sudo reboot
- Wait until the node boots.
Enable the Compute Node again:
$ source ~/overcloudrc
(overcloud) $ openstack compute service set [hostname] nova-compute --enable
Check whether the Compute node is enabled:
(overcloud) $ openstack compute service list
11.5. Rebooting Object Storage Nodes
To reboot the Object Storage nodes, follow this process:
Select a Object Storage node to reboot. Log into it and reboot it:
[heat-admin@overcloud-objectstorage-0 ~]$ sudo reboot
- Wait until the node boots.
Log into the node and check the status of the containers:
[heat-admin@overcloud-objectstorage-0 ~]$ sudo docker ps
- Log out of the node and repeat this process on the next Object Storage node.
Chapter 12. Troubleshooting Director Issues
An error can occur at certain stages of the director’s processes. This section provides some information for diagnosing common problems.
Note the common logs for the director’s components:
-
The
/var/logdirectory contains logs for many common OpenStack Platform components as well as logs for standard Red Hat Enterprise Linux applications. The
journaldservice provides logs for various components. Note that ironic uses two units:openstack-ironic-apiandopenstack-ironic-conductor. Likewise,ironic-inspectoruses two units as well:openstack-ironic-inspectorandopenstack-ironic-inspector-dnsmasq. Use both units for each respective component. For example:$ source ~/stackrc (undercloud) $ sudo journalctl -u openstack-ironic-inspector -u openstack-ironic-inspector-dnsmasq
-
ironic-inspectoralso stores the ramdisk logs in/var/log/ironic-inspector/ramdisk/as gz-compressed tar files. Filenames contain date, time, and the IPMI address of the node. Use these logs for diagnosing introspection issues.
12.1. Troubleshooting Node Registration
Issues with node registration usually arise from issues with incorrect node details. In this case, use ironic to fix problems with node data registered. Here are a few examples:
Find out the assigned port UUID:
$ source ~/stackrc
(undercloud) $ openstack baremetal port list --node [NODE UUID]
Update the MAC address:
(undercloud) $ openstack baremetal port set --address=[NEW MAC] [PORT UUID]
Run the following command:
(undercloud) $ openstack baremetal node set --driver-info ipmi_address=[NEW IPMI ADDRESS] [NODE UUID]
12.2. Troubleshooting Hardware Introspection
The introspection process must run to completion. However, ironic’s Discovery daemon (ironic-inspector) times out after a default 1 hour period if the discovery ramdisk provides no response. Sometimes this might indicate a bug in the discovery ramdisk but usually it happens due to an environment misconfiguration, particularly BIOS boot settings.
Here are some common scenarios where environment misconfiguration occurs and advice on how to diagnose and resolve them.
Errors with Starting Node Introspection
Normally the introspection process uses the openstack overcloud node introspect command. However, if running the introspection directly with ironic-inspector, it might fail to discover nodes in the AVAILABLE state, which is meant for deployment and not for discovery. Change the node status to the MANAGEABLE state before discovery:
$ source ~/stackrc
(undercloud) $ openstack baremetal node manage [NODE UUID]
Then, when discovery completes, change back to AVAILABLE before provisioning:
(undercloud) $ openstack baremetal node provide [NODE UUID]
Stopping the Discovery Process
Stop the introspection process:
$ source ~/stackrc
(undercloud) $ openstack baremetal introspection abort [NODE UUID]
You can also wait until the process times out. If necessary, change the timeout setting in /etc/ironic-inspector/inspector.conf to another period in minutes.
Accessing the Introspection Ramdisk
The introspection ramdisk uses a dynamic login element. This means you can provide either a temporary password or an SSH key to access the node during introspection debugging. Use the following process to set up ramdisk access:
Provide a temporary password to the
openssl passwd -1command to generate an MD5 hash. For example:$ openssl passwd -1 mytestpassword $1$enjRSyIw$/fYUpJwr6abFy/d.koRgQ/
Edit the
/httpboot/inspector.ipxefile, find the line starting withkernel, and append therootpwdparameter and the MD5 hash. For example:kernel http://192.2.0.1:8088/agent.kernel ipa-inspection-callback-url=http://192.168.0.1:5050/v1/continue ipa-inspection-collectors=default,extra-hardware,logs systemd.journald.forward_to_console=yes BOOTIF=${mac} ipa-debug=1 ipa-inspection-benchmarks=cpu,mem,disk rootpwd="$1$enjRSyIw$/fYUpJwr6abFy/d.koRgQ/" selinux=0Alternatively, you can append the
sshkeyparameter with your public SSH key.NoteQuotation marks are required for both the
rootpwdandsshkeyparameters.Start the introspection and find the IP address from either the
arpcommand or the DHCP logs:$ arp $ sudo journalctl -u openstack-ironic-inspector-dnsmasq
SSH as a root user with the temporary password or the SSH key.
$ ssh root@192.168.24.105
Checking Introspection Storage
The director uses OpenStack Object Storage (swift) to save the hardware data obtained during the introspection process. If this service is not running, the introspection can fail. Check all services related to OpenStack Object Storage to ensure the service is running:
$ sudo systemctl list-units openstack-swift*
12.3. Troubleshooting Workflows and Executions
The OpenStack Workflow (mistral) service groups multiple OpenStack tasks into workflows. Red Hat OpenStack Platform uses a set of these workflow to perform common functions across the CLI and web UI. This includes bare metal node control, validations, plan management, and overcloud deployment.
For example, when running the openstack overcloud deploy command, the OpenStack Workflow service executes two workflows. The first one uploads the deployment plan:
Removing the current plan files
Uploading new plan files
Started Mistral Workflow. Execution ID: aef1e8c6-a862-42de-8bce-073744ed5e6b
Plan updated
The second one starts the overcloud deployment:
Deploying templates in the directory /tmp/tripleoclient-LhRlHX/tripleo-heat-templates
Started Mistral Workflow. Execution ID: 97b64abe-d8fc-414a-837a-1380631c764d
2016-11-28 06:29:26Z [overcloud]: CREATE_IN_PROGRESS  Stack CREATE started
2016-11-28 06:29:26Z [overcloud.Networks]: CREATE_IN_PROGRESS  state changed
2016-11-28 06:29:26Z [overcloud.HeatAuthEncryptionKey]: CREATE_IN_PROGRESS  state changed
2016-11-28 06:29:26Z [overcloud.ServiceNetMap]: CREATE_IN_PROGRESS  state changed
...
Workflow Objects
OpenStack Workflow uses the following objects to keep track of the workflow:
- Actions
- A particular instruction that OpenStack performs once an associated task runs. Examples include running shell scripts or performing HTTP requests. Some OpenStack components have in-built actions that OpenStack Workflow uses.
- Tasks
- Defines the action to run and the result of running the action. These tasks usually have actions or other workflows associated with them. Once a task completes, the workflow directs to another task, usually depending on whether the task succeeded or failed.
- Workflows
- A set of tasks grouped together and executed in a specific order.
- Executions
- Defines a particular action, task, or workflow running.
Workflow Error Diagnosis
OpenStack Workflow also provides robust logging of executions, which help you identify issues with certain command failures. For example, if a workflow execution fails, you can identify the point of failure. List the workflow executions that have the failed state ERROR:
$ source ~/stackrc
(undercloud) $ openstack workflow execution list | grep "ERROR"
Get the UUID of the failed workflow execution (for example, dffa96b0-f679-4cd2-a490-4769a3825262) and view the execution and its output:
(undercloud) $ openstack workflow execution show dffa96b0-f679-4cd2-a490-4769a3825262
(undercloud) $ openstack workflow execution output show dffa96b0-f679-4cd2-a490-4769a3825262
This provides information about the failed task in the execution. The openstack workflow execution show also displays the workflow used for the execution (for example, tripleo.plan_management.v1.publish_ui_logs_to_swift). You can view the full workflow definition using the following command:
(undercloud) $ openstack workflow definition show tripleo.plan_management.v1.publish_ui_logs_to_swift
This is useful for identifying where in the workflow a particular task occurs.
You can also view action executions and their results using a similar command syntax:
(undercloud) $ openstack action execution list
(undercloud) $ openstack action execution show 8a68eba3-0fec-4b2a-adc9-5561b007e886
(undercloud) $ openstack action execution output show 8a68eba3-0fec-4b2a-adc9-5561b007e886
This is useful for identifying a specific action causing issues.
12.4. Troubleshooting Overcloud Creation
There are three layers where the deployment can fail:
- Orchestration (heat and nova services)
- Bare Metal Provisioning (ironic service)
- Post-Deployment Configuration (Puppet)
If an overcloud deployment has failed at any of these levels, use the OpenStack clients and service log files to diagnose the failed deployment.
12.4.1. Orchestration
In most cases, Heat shows the failed overcloud stack after the overcloud creation fails:
$ source ~/stackrc
(undercloud) $ openstack stack list --nested --property status=FAILED
+-----------------------+------------+--------------------+----------------------+
| id                    | stack_name | stack_status       | creation_time        |
+-----------------------+------------+--------------------+----------------------+
| 7e88af95-535c-4a55... | overcloud  | CREATE_FAILED      | 2015-04-06T17:57:16Z |
+-----------------------+------------+--------------------+----------------------+
If the stack list is empty, this indicates an issue with the initial Heat setup. Check your Heat templates and configuration options, and check for any error messages that presented after running openstack overcloud deploy.
12.4.2. Bare Metal Provisioning
Check ironic to see all registered nodes and their current status:
$ source ~/stackrc
(undercloud) $ openstack baremetal node list

+----------+------+---------------+-------------+-----------------+-------------+
| UUID     | Name | Instance UUID | Power State | Provision State | Maintenance |
+----------+------+---------------+-------------+-----------------+-------------+
| f1e261...| None | None          | power off   | available       | False       |
| f0b8c1...| None | None          | power off   | available       | False       |
+----------+------+---------------+-------------+-----------------+-------------+
Here are some common issues that arise from the provisioning process.
Review the Provision State and Maintenance columns in the resulting table. Check for the following:
- An empty table, or fewer nodes than you expect
- Maintenance is set to True
-
Provision State is set to
manageable. This usually indicates an issue with the registration or discovery processes. For example, if Maintenance sets itself to True automatically, the nodes are usually using the wrong power management credentials.
-
If Provision State is
available, then the problem occurred before bare metal deployment has even started. -
If Provision State is
activeand Power State ispower on, the bare metal deployment has finished successfully. This means that the problem occurred during the post-deployment configuration step. -
If Provision State is
wait call-backfor a node, the bare metal provisioning process has not yet finished for this node. Wait until this status changes, otherwise, connect to the virtual console of the failed node and check the output. If Provision State is
errorordeploy failed, then bare metal provisioning has failed for this node. Check the bare metal node’s details:(undercloud) $ openstack baremetal node show [NODE UUID]
Look for
last_errorfield, which contains error description. If the error message is vague, you can use logs to clarify it:(undercloud) $ sudo journalctl -u openstack-ironic-conductor -u openstack-ironic-api
-
If you see
wait timeout errorand the node Power State ispower on, connect to the virtual console of the failed node and check the output.
12.4.3. Post-Deployment Configuration
Many things can occur during the configuration stage. For example, a particular Puppet module could fail to complete due to an issue with the setup. This section provides a process to diagnose such issues.
List all the resources from the overcloud stack to see which one failed:
$ source ~/stackrc
(undercloud) $ openstack stack resource list overcloud --filter status=FAILED
This shows a table of all failed resources.
Show the failed resource:
(undercloud) $ openstack stack resource show overcloud [FAILED RESOURCE]
Check for any information in the resource_status_reason field that can help your diagnosis.
Use the nova command to see the IP addresses of the overcloud nodes.
(undercloud) $ openstack server list
Log in as the heat-admin user to one of the deployed nodes. For example, if the stack’s resource list shows the error occurred on a Controller node, log in to a Controller node. The heat-admin user has sudo access.
(undercloud) $ ssh heat-admin@192.168.24.14
Check the os-collect-config log for a possible reason for the failure.
[heat-admin@overcloud-controller-0 ~]$ sudo journalctl -u os-collect-config
In some cases, nova fails deploying the node in entirety. This situation would be indicated by a failed OS::Heat::ResourceGroup for one of the overcloud role types. Use nova to see the failure in this case.
(undercloud) $ openstack server list
(undercloud) $ openstack server show [SERVER ID]
The most common error shown will reference the error message No valid host was found. See Section 12.6, “Troubleshooting "No Valid Host Found" Errors” for details on troubleshooting this error. In other cases, look at the following log files for further troubleshooting:
-
/var/log/nova/* -
/var/log/heat/* -
/var/log/ironic/*
The post-deployment process for Controller nodes uses five main steps for the deployment. This includes:
Table 12.1. Controller Node Configuration Steps
| Step | Description |
|
| Initial load balancing software configuration, including Pacemaker, RabbitMQ, Memcached, Redis, and Galera. |
|
| Initial cluster configuration, including Pacemaker configuration, HAProxy, MongoDB, Galera, Ceph Monitor, and database initialization for OpenStack Platform services. |
|
|
Initial ring build for OpenStack Object Storage ( |
|
| Configure service start up settings in Pacemaker, including constraints to determine service start up order and service start up parameters. |
|
|
Initial configuration of projects, roles, and users in OpenStack Identity ( |
12.5. Troubleshooting IP Address Conflicts on the Provisioning Network
Discovery and deployment tasks will fail if the destination hosts are allocated an IP address which is already in use. To avoid this issue, you can perform a port scan of the Provisioning network to determine whether the discovery IP range and host IP range are free.
Perform the following steps from the undercloud host:
Install nmap:
$ sudo yum install nmap
Use nmap to scan the IP address range for active addresses. This example scans the 192.168.24.0/24 range, replace this with the IP subnet of the Provisioning network (using CIDR bitmask notation):
$ sudo nmap -sn 192.168.24.0/24
Review the output of the nmap scan:
For example, you should see the IP address(es) of the undercloud, and any other hosts that are present on the subnet. If any of the active IP addresses conflict with the IP ranges in undercloud.conf, you will need to either change the IP address ranges or free up the IP addresses before introspecting or deploying the overcloud nodes.
$ sudo nmap -sn 192.168.24.0/24

Starting Nmap 6.40 ( http://nmap.org ) at 2015-10-02 15:14 EDT
Nmap scan report for 192.168.24.1
Host is up (0.00057s latency).
Nmap scan report for 192.168.24.2
Host is up (0.00048s latency).
Nmap scan report for 192.168.24.3
Host is up (0.00045s latency).
Nmap scan report for 192.168.24.5
Host is up (0.00040s latency).
Nmap scan report for 192.168.24.9
Host is up (0.00019s latency).
Nmap done: 256 IP addresses (5 hosts up) scanned in 2.45 seconds
12.6. Troubleshooting "No Valid Host Found" Errors
Sometimes the /var/log/nova/nova-conductor.log contains the following error:
NoValidHost: No valid host was found. There are not enough hosts available.
This means the nova Scheduler could not find a bare metal node suitable for booting the new instance. This in turn usually means a mismatch between resources that nova expects to find and resources that ironic advertised to nova. Check the following in this case:
Make sure introspection succeeds for you. Otherwise check that each node contains the required ironic node properties. For each node:
$ source ~/stackrc
(undercloud) $ openstack baremetal node show [NODE UUID]
Check the
propertiesJSON field has valid values for keyscpus,cpu_arch,memory_mbandlocal_gb.Check that the nova flavor used does not exceed the ironic node properties above for a required number of nodes:
(undercloud) $ openstack flavor show [FLAVOR NAME]
-
Check that sufficient nodes are in the
availablestate according toopenstack baremetal node list. Nodes inmanageablestate usually mean a failed introspection. Check the nodes are not in maintenance mode. Use
openstack baremetal node listto check. A node automatically changing to maintenance mode usually means incorrect power credentials. Check them and then remove maintenance mode:(undercloud) $ openstack baremetal node maintenance unset [NODE UUID]
-
If you’re using the Automated Health Check (AHC) tools to perform automatic node tagging, check that you have enough nodes corresponding to each flavor/profile. Check the
capabilitieskey inpropertiesfield foropenstack baremetal node show. For example, a node tagged for the Compute role should containprofile:compute. It takes some time for node information to propagate from ironic to nova after introspection. The director’s tool usually accounts for it. However, if you performed some steps manually, there might be a short period of time when nodes are not available to nova. Use the following command to check the total resources in your system:
(undercloud) $ openstack hypervisor stats show
12.7. Troubleshooting the Overcloud after Creation
After creating your overcloud, you might want to perform certain overcloud operations in the future. For example, you might aim to scale your available nodes, or replace faulty nodes. Certain issues might arise when performing these operations. This section provides some advice to diagnose and troubleshoot failed post-creation operations.
12.7.1. Overcloud Stack Modifications
Problems can occur when modifying the overcloud stack through the director. Example of stack modifications include:
- Scaling Nodes
- Removing Nodes
- Replacing Nodes
Modifying the stack is similar to the process of creating the stack, in that the director checks the availability of the requested number of nodes, provisions additional or removes existing nodes, and then applies the Puppet configuration. Here are some guidelines to follow in situations when modifying the overcloud stack.
As an initial step, follow the advice set in Section 12.4.3, “Post-Deployment Configuration”. These same steps can help diagnose problems with updating the overcloud heat stack. In particular, use the following command to help identify problematic resources:
openstack stack list --show-nested-
List all stacks. The
--show-nesteddisplays all child stacks and their respective parent stacks. This command helps identify the point where a stack failed. openstack stack resource list overcloud-
List all resources in the
overcloudstack and their current states. This helps identify which resource is causing failures in the stack. You can trace this resource failure to its respective parameters and configuration in the heat template collection and the Puppet modules. openstack stack event list overcloud-
List all events related to the
overcloudstack in chronological order. This includes the initiation, completion, and failure of all resources in the stack. This helps identify points of resource failure.
The next few sections provide advice to diagnose issues on specific node types.
12.7.2. Controller Service Failures
The overcloud Controller nodes contain the bulk of Red Hat OpenStack Platform services. Likewise, you might use multiple Controller nodes in a high availability cluster. If a certain service on a node is faulty, the high availability cluster provides a certain level of failover. However, it then becomes necessary to diagnose the faulty service to ensure your overcloud operates at full capacity.
The Controller nodes use Pacemaker to manage the resources and services in the high availability cluster. The Pacemaker Configuration System (pcs) command is a tool that manages a Pacemaker cluster. Run this command on a Controller node in the cluster to perform configuration and monitoring functions. Here are few commands to help troubleshoot overcloud services on a high availability cluster:
pcs status- Provides a status overview of the entire cluster including enabled resources, failed resources, and online nodes.
pcs resource show- Shows a list of resources, and their respective nodes.
pcs resource disable [resource]- Stop a particular resource.
pcs resource enable [resource]- Start a particular resource.
pcs cluster standby [node]- Place a node in standby mode. The node is no longer available in the cluster. This is useful for performing maintenance on a specific node without affecting the cluster.
pcs cluster unstandby [node]- Remove a node from standby mode. The node becomes available in the cluster again.
Use these Pacemaker commands to identify the faulty component and/or node. After identifying the component, view the respective component log file in /var/log/.
12.7.3. Containerized Service Failures
If a containerized service fails during or after overcloud deployment, use the following recommendations to determine the root cause for the failure:
Before running these commands, check that you are logged into an overcloud node and not running these commands on the undercloud.
Checking the container logs
Each container retains standard output from its main process. This output acts as a log to help determine what actually occurs during a container run. For example, to view the log for the keystone container, use the following command:
$ sudo docker logs keystone
In most cases, this log provides the cause of a container’s failure.
Inspecting the container
In some situations, you might need to verify information about a container. For example, use the following command to view keystone container data:
$ sudo docker inspect keystone
This provides a JSON object containing low-level configuration data. You can pipe the output to the jq command to parse specific data. For example, to view the container mounts for the keystone container, run the following command:
$ sudo docker inspect keystone | jq .[0].Mounts
You can also use the --format option to parse data to a single line, which is useful for running commands against sets of container data. For example, to recreate the options used to run the keystone container, use the following inspect command with the --format option:
$ sudo docker inspect --format='{{range .Config.Env}} -e "{{.}}" {{end}} {{range .Mounts}} -v {{.Source}}:{{.Destination}}{{if .Mode}}:{{.Mode}}{{end}}{{end}} -ti {{.Config.Image}}' keystone
The --format option uses Go syntax to create queries.
Use these options in conjunction with the docker run command to recreate the container for troubleshooting purposes:
$ OPTIONS=$( sudo docker inspect --format='{{range .Config.Env}} -e "{{.}}" {{end}} {{range .Mounts}} -v {{.Source}}:{{.Destination}}{{if .Mode}}:{{.Mode}}{{end}}{{end}} -ti {{.Config.Image}}' keystone )
$ sudo docker run --rm $OPTIONS /bin/bash
Running commands in the container
In some cases, you might need to obtain information from within a container through a specific Bash command. In this situation, use the following docker command to execute commands within a running container. For example, to run a command in the keystone container:
$ sudo docker exec -ti keystone <COMMAND>
The -ti options run the command through an interactive pseudoterminal.
Replace <COMMAND> with your desired command. For example, each container has a health check script to verify the service connection. You can run the health check script for keystone with the following command:
$ sudo docker exec -ti keystone /openstack/healthcheck
To access the container’s shell, run docker exec using /bin/bash as the command:
$ sudo docker exec -ti keystone /bin/bash
Exporting a container
When a container fails, you might need to investigate the full contents of the file. In this case, you can export the full file system of a container as a tar archive. For example, to export the keystone container’s file system, run the following command:
$ sudo docker export keystone -o keystone.tar
This command create the keystone.tar archive, which you can extract and explore.
12.7.4. Compute Service Failures
Compute nodes use the Compute service to perform hypervisor-based operations. This means the main diagnosis for Compute nodes revolves around this service. For example:
View the status of the container:
$ sudo docker ps -f name=nova_compute
-
The primary log file for Compute nodes is
/var/log/containers/nova/nova-compute.log. If issues occur with Compute node communication, this log file is usually a good place to start a diagnosis. - If performing maintenance on the Compute node, migrate the existing instances from the host to an operational Compute node, then disable the node. See Section 9.10, “Migrating VMs from an Overcloud Compute Node” for more information on node migrations.
12.7.5. Ceph Storage Service Failures
For any issues that occur with Red Hat Ceph Storage clusters, see "Logging Configuration Reference" in the Red Hat Ceph Storage Configuration Guide. This section provides information on diagnosing logs for all Ceph storage services.
12.8. Tuning the Undercloud
The advice in this section aims to help increase the performance of your undercloud. Implement the recommendations as necessary.
-
The Identity Service (keystone) uses a token-based system for access control against the other OpenStack services. After a certain period, the database will accumulate a large number of unused tokens; a default cronjob flushes the token table every day. It is recommended that you monitor your environment and adjust the token flush interval as needed. For the undercloud, you can adjust the interval using
crontab -u keystone -e. Note that this is a temporary change and thatopenstack undercloud updatewill reset this cronjob back to its default. Heat stores a copy of all template files in its database’s
raw_templatetable each time you runopenstack overcloud deploy. Theraw_templatetable retains all past templates and grows in size. To remove unused templates in theraw_templatestable, create a daily cronjob that clears unused templates that exist in the database for longer than a day:0 04 * * * /bin/heat-manage purge_deleted -g days 1
The
openstack-heat-engineandopenstack-heat-apiservices might consume too many resources at times. If so, setmax_resources_per_stack=-1in/etc/heat/heat.confand restart the heat services:$ sudo systemctl restart openstack-heat-engine openstack-heat-api
Sometimes the director might not have enough resources to perform concurrent node provisioning. The default is 10 nodes at the same time. To reduce the number of concurrent nodes, set the
max_concurrent_buildsparameter in/etc/nova/nova.confto a value less than 10 and restart the nova services:$ sudo systemctl restart openstack-nova-api openstack-nova-scheduler
Edit the
/etc/my.cnf.d/server.cnffile. Some recommended values to tune include:- max_connections
- Number of simultaneous connections to the database. The recommended value is 4096.
- innodb_additional_mem_pool_size
- The size in bytes of a memory pool the database uses to store data dictionary information and other internal data structures. The default is usually 8M and an ideal value is 20M for the undercloud.
- innodb_buffer_pool_size
- The size in bytes of the buffer pool, the memory area where the database caches table and index data. The default is usually 128M and an ideal value is 1000M for the undercloud.
- innodb_flush_log_at_trx_commit
- Controls the balance between strict ACID compliance for commit operations, and higher performance that is possible when commit-related I/O operations are rearranged and done in batches. Set to 1.
- innodb_lock_wait_timeout
- The length of time in seconds a database transaction waits for a row lock before giving up. Set to 50.
- innodb_max_purge_lag
- This variable controls how to delay INSERT, UPDATE, and DELETE operations when purge operations are lagging. Set to 10000.
- innodb_thread_concurrency
- The limit of concurrent operating system threads. Ideally, provide at least two threads for each CPU and disk resource. For example, if using a quad-core CPU and a single disk, use 10 threads.
Ensure that heat has enough workers to perform an overcloud creation. Usually, this depends on how many CPUs the undercloud has. To manually set the number of workers, edit the
/etc/heat/heat.conffile, set thenum_engine_workersparameter to the number of workers you need (ideally 4), and restart the heat engine:$ sudo systemctl restart openstack-heat-engine
12.9. Creating an sosreport
If you need to contact Red Hat for support on OpenStack Platform, you might need to generate an sosreport. See the following knowledgebase article for more information on how to create an sosreport:
12.10. Important Logs for Undercloud and Overcloud
Use the following logs to find out information about the undercloud and overcloud when troubleshooting.
Table 12.2. Important Logs for the Undercloud
| Information | Log Location |
|---|---|
| OpenStack Compute log |
|
| OpenStack Compute API interactions |
|
| OpenStack Compute Conductor log |
|
| OpenStack Orchestration log |
|
| OpenStack Orchestration API interactions |
|
| OpenStack Orchestration CloudFormations log |
|
| OpenStack Bare Metal Conductor log |
|
| OpenStack Bare Metal API interactions |
|
| Introspection |
|
| OpenStack Workflow Engine log |
|
| OpenStack Workflow Executor log |
|
| OpenStack Workflow API interactions |
|
Table 12.3. Important Logs for the Overcloud
| Information | Log Location |
|---|---|
| Cloud-Init Log |
|
| Overcloud Configuration (Summary of Last Puppet Run) |
|
| Overcloud Configuration (Report from Last Puppet Run) |
|
| Overcloud Configuration (All Puppet Reports) |
|
| Overcloud Configuration (stdout from each Puppet Run) |
|
| Overcloud Configuration (stderr from each Puppet Run) |
|
| High availability log |
|
Appendix A. SSL/TLS Certificate Configuration
You can configure the undercloud to use SSL/TLS for communication over public endpoints. However, if using a SSL certificate with your own certificate authority, the certificate requires the configuration steps in the following section.
For overcloud SSL/TLS certificate creation, see "Enabling SSL/TLS on Overcloud Public Endpoints" in the Advanced Overcloud Customization guide.
A.1. Initializing the Signing Host
The signing host is the host that generates new certificates and signs them with a certificate authority. If you have never created SSL certificates on the chosen signing host, you might need to initialize the host so that it can sign new certificates.
The /etc/pki/CA/index.txt file stores records of all signed certificates. Check if this file exists. If it does not exist, create an empty file:
$ sudo touch /etc/pki/CA/index.txt
The /etc/pki/CA/serial file identifies the next serial number to use for the next certificate to sign. Check if this file exists. If it does not exist, create a new file with a new starting value:
$ echo '1000' | sudo tee /etc/pki/CA/serial
A.2. Creating a Certificate Authority
Normally you sign your SSL/TLS certificates with an external certificate authority. In some situations, you might aim to use your own certificate authority. For example, you might aim to have an internal-only certificate authority.
For example, generate a key and certificate pair to act as the certificate authority:
$ openssl genrsa -out ca.key.pem 4096
$ openssl req  -key ca.key.pem -new -x509 -days 7300 -extensions v3_ca -out ca.crt.pem
The openssl req command asks for certain details about your authority. Enter these details.
This creates a certificate authority file called ca.crt.pem.
A.3. Adding the Certificate Authority to Clients
For any external clients aiming to communicate using SSL/TLS, copy the certificate authority file to each client that requires access your Red Hat OpenStack Platform environment. Once copied to the client, run the following command on the client to add it to the certificate authority trust bundle:
$ sudo cp ca.crt.pem /etc/pki/ca-trust/source/anchors/
$ sudo update-ca-trust extract
A.4. Creating an SSL/TLS Key
Run the following commands to generate the SSL/TLS key (server.key.pem), which we use at different points to generate our undercloud or overcloud certificates:
$ openssl genrsa -out server.key.pem 2048
A.5. Creating an SSL/TLS Certificate Signing Request
This next procedure creates a certificate signing request for either the undercloud or overcloud.
Copy the default OpenSSL configuration file for customization.
$ cp /etc/pki/tls/openssl.cnf .
Edit the custom openssl.cnf file and set SSL parameters to use for the director. An example of the types of parameters to modify include:
[req]
distinguished_name = req_distinguished_name
req_extensions = v3_req

[req_distinguished_name]
countryName = Country Name (2 letter code)
countryName_default = AU
stateOrProvinceName = State or Province Name (full name)
stateOrProvinceName_default = Queensland
localityName = Locality Name (eg, city)
localityName_default = Brisbane
organizationalUnitName = Organizational Unit Name (eg, section)
organizationalUnitName_default = Red Hat
commonName = Common Name
commonName_default = 192.168.0.1
commonName_max = 64

[ v3_req ]
# Extensions to add to a certificate request
basicConstraints = CA:FALSE
keyUsage = nonRepudiation, digitalSignature, keyEncipherment
subjectAltName = @alt_names

[alt_names]
IP.1 = 192.168.0.1
DNS.1 = instack.localdomain
DNS.2 = vip.localdomain
DNS.3 = 192.168.0.1
Set the commonName_default to one of the following:
-
If using an IP address to access over SSL/TLS, use the
undercloud_public_vipparameter inundercloud.conf. - If using a fully qualified domain name to access over SSL/TLS, use the domain name instead.
Edit the alt_names section to include the following entries:
-
IP- A list of IP addresses for clients to access the director over SSL. -
DNS- A list of domain names for clients to access the director over SSL. Also include the Public API IP address as a DNS entry at the end of thealt_namessection.
For more information about openssl.cnf, run man openssl.cnf.
Run the following command to generate certificate signing request (server.csr.pem):
$ openssl req -config openssl.cnf -key server.key.pem -new -out server.csr.pem
Make sure to include the SSL/TLS key you created in Section A.4, “Creating an SSL/TLS Key” for the -key option.
Use the server.csr.pem file to create the SSL/TLS certificate in the next section.
A.6. Creating the SSL/TLS Certificate
The following command creates a certificate for your undercloud or overcloud:
$ sudo openssl ca -config openssl.cnf -extensions v3_req -days 3650 -in server.csr.pem -out server.crt.pem -cert ca.crt.pem -keyfile ca.key.pem
This command uses:
-
The configuration file specifying the v3 extensions. Include this as the
-configoption. -
The certificate signing request from Section A.5, “Creating an SSL/TLS Certificate Signing Request” to generate the certificate and sign it throught a certificate authority. Include this as the
-inoption. -
The certificate authority you created in Section A.2, “Creating a Certificate Authority”, which signs the certificate. Include this as the
-certoption. -
The certificate authority private key you created in Section A.2, “Creating a Certificate Authority”. Include this as the
-keyfileoption.
This results in a certificate named server.crt.pem. Use this certificate in conjunction with the SSL/TLS key from Section A.4, “Creating an SSL/TLS Key” to enable SSL/TLS.
A.7. Using the Certificate with the Undercloud
Run the following command to combine the certificate and key together:
$ cat server.crt.pem server.key.pem > undercloud.pem
This creates a undercloud.pem file. You specify the location of this file for the undercloud_service_certificate option in your undercloud.conf file. This file also requires a special SELinux context so that the HAProxy tool can read it. Use the following example as a guide:
$ sudo mkdir /etc/pki/instack-certs
$ sudo cp ~/undercloud.pem /etc/pki/instack-certs/.
$ sudo semanage fcontext -a -t etc_t "/etc/pki/instack-certs(/.*)?"
$ sudo restorecon -R /etc/pki/instack-certs
Add the undercloud.pem file location to the undercloud_service_certificate option in the undercloud.conf file. For example:
undercloud_service_certificate = /etc/pki/instack-certs/undercloud.pem
In addition, make sure to add your certificate authority from Section A.2, “Creating a Certificate Authority” to the undercloud’s list of trusted Certificate Authorities so that different services within the undercloud have access to the certificate authority:
$ sudo cp ca.crt.pem /etc/pki/ca-trust/source/anchors/
$ sudo update-ca-trust extract
Continue installing the undercloud as per the instructions in Section 4.6, “Configuring the Director”.
Appendix B. Power Management Drivers
Although IPMI is the main method the director uses for power management control, the director also supports other power management types. This appendix provides a list of the supported power management features. Use these power management settings for Section 6.1, “Registering Nodes for the Overcloud”.
B.1. Dell Remote Access Controller (DRAC)
DRAC is an interface that provides out-of-band remote management features including power management and server monitoring.
- pm_type
-
Set this option to
pxe_drac. - pm_user; pm_password
- The DRAC username and password.
- pm_addr
The IP address of the DRAC host.
-
To enable this driver, add
pxe_dracto theenabled_driversoption in yourundercloud.conffile, then rerunopenstack undercloud installcommand.
-
To enable this driver, add
B.2. Integrated Lights-Out (iLO)
iLO from Hewlett-Packard is an interface that provides out-of-band remote management features including power management and server monitoring.
- pm_type
-
Set this option to
pxe_ilo. - pm_user; pm_password
- The iLO username and password.
- pm_addr
The IP address of the iLO interface.
-
To enable this driver, add
pxe_iloto theenabled_driversoption in yourundercloud.conffile, then rerunopenstack undercloud installcommand. The director also requires an additional set of utilities for iLo. Install the
python-proliantutilspackage and restart theopenstack-ironic-conductorservice:$ sudo yum install python-proliantutils $ sudo systemctl restart openstack-ironic-conductor.service
- HP nodes must a 2015 firmware version for successful introspection. The director has been successfully tested with nodes using firmware version 1.85 (May 13 2015).
- Using a shared iLO port is not supported.
-
To enable this driver, add
B.3. Cisco Unified Computing System (UCS)
UCS from Cisco is a data center platform that unites compute, network, storage access, and virtualization resources. This driver focuses on the power management for bare metal systems connected to the UCS.
- pm_type
-
Set this option to
pxe_ucs. - pm_user; pm_password
- The UCS username and password.
- pm_addr
- The IP address of the UCS interface.
- pm_service_profile
The UCS service profile to use. Usually takes the format of
org-root/ls-[service_profile_name]. For example:"pm_service_profile": "org-root/ls-Nova-1"
-
To enable this driver, add
pxe_ucsto theenabled_driversoption in yourundercloud.conffile, then rerunopenstack undercloud installcommand. The director also requires an additional set of utilities for UCS. Install the
python-UcsSdkpackage and restart theopenstack-ironic-conductorservice:$ sudo yum install python-UcsSdk $ sudo systemctl restart openstack-ironic-conductor.service
-
To enable this driver, add
B.4. Fujitsu Integrated Remote Management Controller (iRMC)
Fujitsu’s iRMC is a Baseboard Management Controller (BMC) with integrated LAN connection and extended functionality. This driver focuses on the power management for bare metal systems connected to the iRMC.
iRMC S4 or higher is required.
- pm_type
-
Set this option to
pxe_irmc. - pm_user; pm_password
- The username and password for the iRMC interface.
- pm_addr
- The IP address of the iRMC interface.
- pm_port (Optional)
- The port to use for iRMC operations. The default is 443.
- pm_auth_method (Optional)
-
The authentication method for iRMC operations. Use either
basicordigest. The default isbasic - pm_client_timeout (Optional)
- Timeout (in seconds) for iRMC operations. The default is 60 seconds.
- pm_sensor_method (Optional)
Sensor data retrieval method. Use either
ipmitoolorscci. The default isipmitool.-
To enable this driver, add
pxe_irmcto theenabled_driversoption in yourundercloud.conffile, then rerunopenstack undercloud installcommand. The director also requires an additional set of utilities if you enabled SCCI as the sensor method. Install the
python-scciclientpackage and restart theopenstack-ironic-conductorservice:$ yum install python-scciclient $ sudo systemctl restart openstack-ironic-conductor.service
-
To enable this driver, add
B.5. Virtual Baseboard Management Controller (VBMC)
The director can use virtual machines as nodes on a KVM host. It controls their power management through emulated IPMI devices. This allows you to use the standard IPMI parameters from Section 6.1, “Registering Nodes for the Overcloud” but for virtual nodes.
This option uses virtual machines instead of bare metal nodes. This means it is available for testing and evaluation purposes only. It is not recommended for Red Hat OpenStack Platform enterprise environments.
Configuring the KVM Host
On the KVM host, enable the OpenStack Platform repository and install the python-virtualbmc package:
$ sudo subscription-manager repos --enable=rhel-7-server-openstack-12-rpms
$ sudo yum install -y python-virtualbmc
Create a virtual baseboard management controller (BMC) for each virtual machine using the vbmc command. For example, if you aim to create a BMC for virtual machines named Node01 and Node02, run the following commands:
$ vbmc add Node01 --port 6230 --username admin --password p455w0rd!
$ vbmc add Node02 --port 6231 --username admin --password p455w0rd!
This defines the port to access each BMC and sets each BMC’s authentication details.
Use a different port for each virtual machine. Port numbers lower than 1025 require root privileges in the system.
Start each BMC with the following commands:
$ vbmc start Node01
$ vbmc start Node02
You must repeat this step after rebooting the KVM host.
Registering Nodes
Use the following parameters in your node registration file (/home/stack/instackenv.json):
- pm_type
-
Set this option to
pxe_ipmitool. - pm_user; pm_password
- The IPMI username and password for the node’s virtual BMC device.
- pm_addr
- The IP address of the KVM host that contains the node.
- pm_port
- The port to access the specific node on the KVM host.
- mac
- A list of MAC addresses for the network interfaces on the node. Use only the MAC address for the Provisioning NIC of each system.
For example:
{
  "nodes": [
    {
      "pm_type": "pxe_ipmitool",
      "mac": [
        "aa:aa:aa:aa:aa:aa"
      ],
      "pm_user": "admin",
      "pm_password": "p455w0rd!",
      "pm_addr": "192.168.0.1",
      "pm_port": "6230",
      "name": "Node01"
    },
    {
      "pm_type": "pxe_ipmitool",
      "mac": [
        "bb:bb:bb:bb:bb:bb"
      ],
      "pm_user": "admin",
      "pm_password": "p455w0rd!",
      "pm_addr": "192.168.0.1",
      "pm_port": "6231",
      "name": "Node02"
    }
  ]
}
Migrating Existing Nodes
You can migrate existing nodes from using the deprecated pxe_ssh driver to using the new virtual BMC method. The following command is an example that sets a node to use the pxe_ipmitool driver and its parameters:
openstack baremetal node set Node01 \
    --driver pxe_ipmitool \
    --driver-info ipmi_address=192.168.0.1 \
    --driver-info ipmi_port=6230 \
    --driver-info ipmi_username="admin" \
    --driver-info ipmi_password="p455w0rd!"
B.6. Fake PXE Driver
This driver provides a method to use bare metal devices without power management. This means the director does not control the registered bare metal devices and as such require manual control of power at certain points in the introspect and deployment processes.
This option is available for testing and evaluation purposes only. It is not recommended for Red Hat OpenStack Platform enterprise environments.
- pm_type
Set this option to
fake_pxe.- This driver does not use any authentication details because it does not control power management.
-
To enable this driver, add
fake_pxeto theenabled_driversoption in yourundercloud.conffile, then rerunopenstack undercloud installcommand. -
When performing introspection on nodes, manually power the nodes after running the
openstack overcloud node introspectcommand. -
When performing overcloud deployment, check the node status with the
ironic node-listcommand. Wait until the node status changes fromdeployingtodeploy wait-callbackand then manually power the nodes. -
After the overcloud provisioning process completes, reboot the nodes. To check the completion of provisioning, check the node status with the
ironic node-listcommand, wait until the node status changes toactive, then manually reboot all overcloud nodes.
Appendix C. Whole Disk Images
The main overcloud image is a flat partition image. This means it contains no partitioning information or bootloader on the images itself. The director uses a separate kernel and ramdisk when booting and creates a basic partitioning layout when writing the overcloud image to disk. However, you can create a whole disk image, which includes a partitioning layout, bootloader, and hardened security.
The following process uses the director’s image building feature. Red Hat only supports images built using the guidelines contained in this section. Custom images built outside of these specifications are not supported.
A security hardened image includes extra security measures necessary for Red Hat OpenStack Platform deployments where security is an important feature. Some of the recommendations for a secure image are as follows:
-
The
/tmpdirectory is mounted on a separate volume or partition and has therw,nosuid,nodev,noexec, andrelatimeflags -
The
/var,/var/logand the/var/log/auditdirectories are mounted on separate volumes or partitions, with therw,relatimeflags -
The
/homedirectory is mounted on a separate partition or volume and has therw,nodev,relatimeflags Include the following changes to the
GRUB_CMDLINE_LINUXsetting:-
To enable auditing, include an extra kernel boot flag by adding
audit=1 -
To disable the kernel support for USB using boot loader configuration by adding
nousb -
To remove the insecure boot flags by setting
crashkernel=auto
-
To enable auditing, include an extra kernel boot flag by adding
-
Blacklist insecure modules (
usb-storage,cramfs,freevxfs,jffs2,hfs,hfsplus,squashfs,udf,vfat) and prevent them from being loaded. -
Remove any insecure packages (
kdumpinstalled bykexec-toolsandtelnet) from the image as they are installed by default -
Add the new
screenpackage necessary for security
To build a security hardened image, you need to:
- Download a base Red Hat Enterprise Linux 7 image
- Set the environment variables specific to registration
- Customize the image by modifying the partition schema and the size
- Create the image
- Upload it to your deployment
The following sections detail the procedures to achieve these tasks.
C.1. Downloading the Base Cloud Image
Before building a whole disk image, you need to download an existing cloud image of Red Hat Enterprise Linux to use as a basis. Navigate to the Red Hat Customer Portal and select the KVM Guest Image to download. For example, the KVM Guest Image for Red Hat Enterprise Linux 7.4 is available on the following page:
C.2. Setting the Environment Variables
As a part of the whole disk image building process, the director requires a base image and registration details to obtain packages for the new overcloud image. You define these aspects using Linux environment variables.
The image building process temporarily registers the image with a Red Hat subscription and unregisters the system once the image building process completes.
To build a security hardened whole disk image, set Linux environment variables that suit your environment and requirements:
- DIB_LOCAL_IMAGE
- Sets the local image to use as your basis.
- REG_ACTIVATION_KEY
- Use an activation key instead as part of the registration process.
- REG_AUTO_ATTACH
- Defines whether or not to automatically attach the most compatible subscription.
- REG_BASE_URL
-
The base URL of the content delivery server to pull packages. The default Customer Portal Subscription Management process uses
https://cdn.redhat.com. If using a Red Hat Satellite 6 server, this parameter should use the base URL of your Satellite server. - REG_ENVIRONMENT
- Registers to an environment within an organization.
- REG_METHOD
-
Sets the method of registration. Use
portalto register a system to the Red Hat Customer Portal. Usesatelliteto register a system with Red Hat Satellite 6. - REG_ORG
- The organization to register the images.
- REG_POOL_ID
- The pool ID of the product subscription information.
- REG_PASSWORD
- Gives the password for the user account registering the image.
- REG_REPOS
A string of repository names separated with commas (no spaces). Each repository in this string is enabled through
subscription-manager. Use the following repositories for a security hardened whole disk image:-
rhel-7-server-rpms -
rhel-7-server-extras-rpms -
rhel-ha-for-rhel-7-server-rpms -
rhel-7-server-optional-rpms -
rhel-7-server-openstack-12-rpms
-
- REG_SERVER_URL
-
Gives the hostname of the subscription service to use. The default is for the Red Hat Customer Portal at
subscription.rhn.redhat.com. If using a Red Hat Satellite 6 server, this parameter should use the hostname of your Satellite server. - REG_USER
- Gives the user name for the account registering the image.
The following is an example set of commands to export a set of environment variables to temporarily register a local QCOW2 image to the Red Hat Customer Portal:
$ export DIB_LOCAL_IMAGE=./rhel-server-7.4-x86_64-kvm.qcow2
$ export REG_METHOD=portal
$ export REG_USER="[your username]"
$ export REG_PASSWORD="[your password]"
$ export REG_REPOS="rhel-7-server-rpms \
    rhel-7-server-extras-rpms \
    rhel-ha-for-rhel-7-server-rpms \
    rhel-7-server-optional-rpms \
    rhel-7-server-openstack-12-rpms"
C.3. Customizing the Disk Layout
The default security hardened image size is 20G and uses predefined partitioning sizes. However, some modifications to the partitioning layout are required to accommodate overcloud container images:
| Partition | Old Size | new Size |
|---|---|---|
|
| 6G | 8G |
|
| 1G | 1G |
|
| 7G | 10G |
|
| 5G | 5G |
|
| 900M | 900M |
|
| 100M | 100M |
| Total | 20G | 25G |
This increases the image size to 25G. You can also provide further modification to the partitioning layout and disk size to suit your needs.
To modify the partitioning layout and disk size, perform the following steps:
-
Modify the partitioning schema using the
DIB_BLOCK_DEVICE_CONFIGenvironment variable. -
Modify the global size of the image by updating the
DIB_IMAGE_SIZEenvironment variable.
C.3.1. Modifying the Partitioning Schema
You can modify the partitioning schema to alter the partitioning size, create new partitions, or remove existing ones. You can define a new partitioning schema with the following environment variable:
$ export DIB_BLOCK_DEVICE_CONFIG='<yaml_schema_with_partitions>'
The following YAML structure represents the modified partitioning layout to accommodate enough space to pull overcloud container images:
export DIB_BLOCK_DEVICE_CONFIG='''
- local_loop:
    name: image0
- partitioning:
    base: image0
    label: mbr
    partitions:
      - name: root
        flags: [ boot,primary ]
        size: 8G
        mkfs:
            type: xfs
            label: "img-rootfs"
            mount:
                mount_point: /
                fstab:
                    options: "rw,relatime"
                    fck-passno: 1
      - name: tmp
        size: 1G
        mkfs:
            type: xfs
            mount:
                mount_point: /tmp
                fstab:
                    options: "rw,nosuid,nodev,noexec,relatime"
      - name: var
        size: 10G
        mkfs:
            type: xfs
            mount:
                mount_point: /var
                fstab:
                    options: "rw,relatime"
      - name: log
        size: 5G
        mkfs:
            type: xfs
            mount:
                mount_point: /var/log
                fstab:
                    options: "rw,relatime"
      - name: audit
        size: 900M
        mkfs:
            type: xfs
            mount:
                mount_point: /var/log/audit
                fstab:
                    options: "rw,relatime"
      - name: home
        size: 100M
        mkfs:
            type: xfs
            mount:
                mount_point: /home
                fstab:
                    options: "rw,nodev,relatime"
'''
Use this sample YAML content as a basis for your image’s partition schema. Modify the partition sizes and layout to suit your needs.
Define the right partition sizes for the image as you will not be able to resize them after the deployment.
C.3.2. Modifying the Image Size
The global sum of the modified partitioning schema might exceed the default disk size (20G). In this situation, you might need to modify the image size. To modify the image size, edit the configuration files used to create the image.
Create a copy of the /usr/share/openstack-tripleo-common/image-yaml/overcloud-hardened-images.yaml:
# cp /usr/share/openstack-tripleo-common/image-yaml/overcloud-hardened-images.yaml \
/home/stack/overcloud-hardened-images-custom.yaml
Edit the DIB_IMAGE_SIZE in the configuration file to adjust the values as necessary:
...

environment:
DIB_PYTHON_VERSION: '2'
DIB_MODPROBE_BLACKLIST: 'usb-storage cramfs freevxfs jffs2 hfs hfsplus squashfs udf vfat bluetooth'
DIB_BOOTLOADER_DEFAULT_CMDLINE: 'nofb nomodeset vga=normal console=tty0 console=ttyS0,115200 audit=1 nousb'
DIB_IMAGE_SIZE: '25' 1
COMPRESS_IMAGE: '1'- 1
- Adjust this value to the new total disk size.
Save this file.
When the director deploys the overcloud, it creates a RAW version of the overcloud image. This means your undercloud must have necessary free space to accommodate the RAW image. For example, if you increase the security hardened image size to 40G, you must have 40G of space available on the undercloud’s hard disk.
When the director eventually writes the image to the physical disk, the director creates a 64MB configuration drive primary partition at the end of the disk. When creating your whole disk image, ensure it is less than the size of the physical disk to accommodate this extra partition.
C.4. Creating a Security Hardened Whole Disk Image
After you have set the environment variables and customized the image, create the image using the openstack overcloud image build command:
# openstack overcloud image build \
--image-name overcloud-hardened-full \
--config-file /home/stack/overcloud-hardened-images-custom.yaml \ 1
--config-file /usr/share/openstack-tripleo-common/image-yaml/overcloud-hardened-images-rhel7.yaml- 1
- This is the custom configuration file containing the new disk size from Section C.3.2, “Modifying the Image Size”. If you are not using a different custom disk size, use the original
/usr/share/openstack-tripleo-common/image-yaml/overcloud-hardened-images.yamlfile instead.
This creates an image called overcloud-hardened-full.qcow2, which contains all the necessary security features.
C.5. Uploading a Security Hardened Whole Disk Image
Upload the image to the OpenStack Image (glance) service and start using it from the Red Hat OpenStack Platform director. To upload a security hardened image, execute the following steps:
Rename the newly generated image and move it to your images directory:
# mv overcloud-hardened-full.qcow2 ~/images/overcloud-full.qcow2
Remove all the old overcloud images:
# openstack image delete overcloud-full
# openstack image delete overcloud-full-initrd
# openstack image delete overcloud-full-vmlinuz
Upload the new overcloud image:
# openstack overcloud image upload --image-path /home/stack/images --whole-disk
If you want to replace an existing image with the security hardened image, use the --update-existing flag. This will overwrite the original overcloud-full image with a new security hardened image you generated.
Appendix D. Alternative Boot Modes
The default boot mode for nodes is BIOS over iPXE. The following sections outline some alternative boot modes for the director to use when provisioning and inspecting nodes.
D.1. Standard PXE
The iPXE boot process uses HTTP to boot the introspection and deployment images. Older systems might only support a standard PXE boot, which boots over TFTP.
To change from iPXE to PXE, edit the undercloud.conf file on the director host and set ipxe_enabled to False:
ipxe_enabled = False
Save this file and run the undercloud installation:
$ openstack undercloud install
For more information on this process, see the article "Changing from iPXE to PXE in Red Hat OpenStack Platform director".
D.2. UEFI Boot Mode
The default boot mode is the legacy BIOS mode. Newer systems might require UEFI boot mode instead of the legacy BIOS mode. In this situation, set the following in your undercloud.conf file:
ipxe_enabled = True
inspection_enable_uefi = True
Save this file and run the undercloud installation:
$ openstack undercloud install
Set the boot mode to uefi for each registered node. For example, to add or replace the existing boot_mode parameters in the capabilities property:
$ NODE=<NODE NAME OR ID> ; openstack baremetal node set --property capabilities="boot_mode:uefi,$(openstack baremetal node show $NODE -f json -c properties | jq -r .properties.capabilities | sed "s/boot_mode:[^,]*,//g")" $NODE
Check that you have retained the profile and boot_option capabilities with this command.
In addition, set the boot mode to uefi for each flavor. For example:
$ openstack flavor set --property capabilities:boot_mode='uefi' control
Appendix E. Automatic Profile Tagging
The introspection process performs a series of benchmark tests. The director saves the data from these tests. You can create a set of policies that use this data in various ways. For example:
- The policies can identify and isolate underperforming or unstable nodes from use in the overcloud.
- The policies can define whether to automatically tag nodes into specific profiles.
E.1. Policy File Syntax
Policy files use a JSON format that contains a set of rules. Each rule defines a description, a condition, and an action.
Description
This is a plain text description of the rule.
Example:
"description": "A new rule for my node tagging policy"
Conditions
A condition defines an evaluation using the following key-value pattern:
- field
- Defines the field to evaluate. For field types, see Section E.4, “Automatic Profile Tagging Properties”
- op
Defines the operation to use for the evaluation. This includes the following:
-
eq- Equal to -
ne- Not equal to -
lt- Less than -
gt- Greater than -
le- Less than or equal to -
ge- Greater than or equal to -
in-net- Checks that an IP address is in a given network -
matches- Requires a full match against a given regular expression -
contains- Requires a value to contain a given regular expression; -
is-empty- Checks that field is empty.
-
- invert
- Boolean value to define whether to invert the result of the evaluation.
- multiple
Defines the evaluation to use if multiple results exist. This includes:
-
any- Requires any result to match -
all- Requires all results to match -
first- Requires the first result to match
-
- value
- Defines the value in the evaluation. If the field and operation result in the value, the condition return a true result. If not, the condition returns false.
Example:
"conditions": [
  {
    "field": "local_gb",
    "op": "ge",
    "value": 1024
  }
],
Actions
An action is performed if the condition returns as true. It uses the action key and additional keys depending on the value of action:
-
fail- Fails the introspection. Requires amessageparameter for the failure message. -
set-attribute- Sets an attribute on an Ironic node. Requires apathfield, which is the path to an Ironic attribute (e.g./driver_info/ipmi_address), and avalueto set. -
set-capability- Sets a capability on an Ironic node. Requiresnameandvaluefields, which are the name and the value for a new capability accordingly. The existing value for this same capability is replaced. For example, use this to define node profiles. -
extend-attribute- The same asset-attributebut treats the existing value as a list and appends value to it. If the optionaluniqueparameter is set to True, nothing is added if the given value is already in a list.
Example:
"actions": [
  {
    "action": "set-capability",
    "name": "profile",
    "value": "swift-storage"
  }
]
E.2. Policy File Example
The following is an example JSON file (rules.json) with the introspection rules to apply:
[
  {
    "description": "Fail introspection for unexpected nodes",
    "conditions": [
      {
        "op": "lt",
        "field": "memory_mb",
        "value": 4096
      }
    ],
    "actions": [
      {
        "action": "fail",
        "message": "Memory too low, expected at least 4 GiB"
      }
    ]
  },
  {
    "description": "Assign profile for object storage",
    "conditions": [
      {
        "op": "ge",
        "field": "local_gb",
        "value": 1024
      }
    ],
    "actions": [
      {
        "action": "set-capability",
        "name": "profile",
        "value": "swift-storage"
      }
    ]
  },
  {
    "description": "Assign possible profiles for compute and controller",
    "conditions": [
      {
        "op": "lt",
        "field": "local_gb",
        "value": 1024
      },
      {
        "op": "ge",
        "field": "local_gb",
        "value": 40
      }
    ],
    "actions": [
      {
        "action": "set-capability",
        "name": "compute_profile",
        "value": "1"
      },
      {
        "action": "set-capability",
        "name": "control_profile",
        "value": "1"
      },
      {
        "action": "set-capability",
        "name": "profile",
        "value": null
      }
    ]
  }
]
This example consists of three rules:
- Fail introspection if memory is lower than 4096 MiB. Such rules can be applied to exclude nodes that should not become part of your cloud.
- Nodes with a hard drive size 1 TiB and bigger are assigned the swift-storage profile unconditionally.
-
Nodes with a hard drive less than 1 TiB but more than 40 GiB can be either Compute or Controller nodes. We assign two capabilities (
compute_profileandcontrol_profile) so that theopenstack overcloud profiles matchcommand can later make the final choice. For that to work, we remove the existing profile capability, otherwise it will have priority.
Other nodes are not changed.
Using introspection rules to assign the profile capability always overrides the existing value. However, [PROFILE]_profile capabilities are ignored for nodes with an existing profile capability.
E.3. Importing Policy Files
Import the policy file into the director with the following command:
$ openstack baremetal introspection rule import rules.json
Then run the introspection process.
$ openstack overcloud node introspect --all-manageable
After introspection completes, check the nodes and their assigned profiles:
$ openstack overcloud profiles list
If you made a mistake in introspection rules, you can delete them all:
$ openstack baremetal introspection rule purge
E.4. Automatic Profile Tagging Properties
Automatic Profile Tagging evaluates the following node properties for the field attribute for each condition:
| Property | Description |
|---|---|
| memory_mb | The amount of memory for the node in MB. |
| cpus | The total number of cores for the node’s CPUs. |
| cpu_arch | The architecture of the node’s CPUs. |
| local_gb | The total storage space of the node’s root disk. See Section 6.5, “Defining the Root Disk for Nodes” for more information about setting the root disk for a node. |
Appendix F. Security Enhancements
The following sections provide some suggestions to harden the security of your undercloud.
F.1. Changing the SSL/TLS Cipher and Rules for HAProxy
If you enabled SSL/TLS in the undercloud (see Section 4.6, “Configuring the Director”), you might want to harden the SSL/TLS ciphers and rules used with the HAProxy configuration. This helps avoid SSL/TLS vulnerabilities, such as the POODLE vulnerability.
Set the following hieradata using the hieradata_override undercloud configuration option:
- tripleo::haproxy::ssl_cipher_suite
- The cipher suite to use in HAProxy.
- tripleo::haproxy::ssl_options
- The SSL/TLS rules to use in HAProxy.
For example, you might aim to use the following cipher and rules:
-
Cipher:
ECDHE-ECDSA-CHACHA20-POLY1305:ECDHE-RSA-CHACHA20-POLY1305:ECDHE-ECDSA-AES128-GCM-SHA256:ECDHE-RSA-AES128-GCM-SHA256:ECDHE-ECDSA-AES256-GCM-SHA384:ECDHE-RSA-AES256-GCM-SHA384:DHE-RSA-AES128-GCM-SHA256:DHE-RSA-AES256-GCM-SHA384:ECDHE-ECDSA-AES128-SHA256:ECDHE-RSA-AES128-SHA256:ECDHE-ECDSA-AES128-SHA:ECDHE-RSA-AES256-SHA384:ECDHE-RSA-AES128-SHA:ECDHE-ECDSA-AES256-SHA384:ECDHE-ECDSA-AES256-SHA:ECDHE-RSA-AES256-SHA:DHE-RSA-AES128-SHA256:DHE-RSA-AES128-SHA:DHE-RSA-AES256-SHA256:DHE-RSA-AES256-SHA:ECDHE-ECDSA-DES-CBC3-SHA:ECDHE-RSA-DES-CBC3-SHA:EDH-RSA-DES-CBC3-SHA:AES128-GCM-SHA256:AES256-GCM-SHA384:AES128-SHA256:AES256-SHA256:AES128-SHA:AES256-SHA:DES-CBC3-SHA:!DSS -
Rules:
no-sslv3 no-tls-tickets
Create a hieradata override file (haproxy-hiera-overrides.yaml) with the following content:
tripleo::haproxy::ssl_cipher_suite: ECDHE-ECDSA-CHACHA20-POLY1305:ECDHE-RSA-CHACHA20-POLY1305:ECDHE-ECDSA-AES128-GCM-SHA256:ECDHE-RSA-AES128-GCM-SHA256:ECDHE-ECDSA-AES256-GCM-SHA384:ECDHE-RSA-AES256-GCM-SHA384:DHE-RSA-AES128-GCM-SHA256:DHE-RSA-AES256-GCM-SHA384:ECDHE-ECDSA-AES128-SHA256:ECDHE-RSA-AES128-SHA256:ECDHE-ECDSA-AES128-SHA:ECDHE-RSA-AES256-SHA384:ECDHE-RSA-AES128-SHA:ECDHE-ECDSA-AES256-SHA384:ECDHE-ECDSA-AES256-SHA:ECDHE-RSA-AES256-SHA:DHE-RSA-AES128-SHA256:DHE-RSA-AES128-SHA:DHE-RSA-AES256-SHA256:DHE-RSA-AES256-SHA:ECDHE-ECDSA-DES-CBC3-SHA:ECDHE-RSA-DES-CBC3-SHA:EDH-RSA-DES-CBC3-SHA:AES128-GCM-SHA256:AES256-GCM-SHA384:AES128-SHA256:AES256-SHA256:AES128-SHA:AES256-SHA:DES-CBC3-SHA:!DSS
tripleo::haproxy::ssl_options: no-sslv3 no-tls-tickets
The cipher collection is one continuous line.
Set the hieradata_override parameter in the undercloud.conf file to use the hieradata override file you created before running openstack undercloud install:
[DEFAULT]
...
hieradata_override = haproxy-hiera-overrides.yaml
...
Appendix G. Red Hat OpenStack Platform for POWER (Technology Preview)
This feature is available in this release as a Technology Preview, and therefore is not fully supported by Red Hat. It should only be used for testing, and should not be deployed in a production environment. For more information about Technology Preview features, see Scope of Coverage Details.
For a fresh Red Hat OpenStack Platform installation, you can now deploy overcloud Compute nodes on POWER (ppc64le) hardware. For the Compute node cluster, you can choose to use the same architecture or have a mix of x86_64 and ppc64le systems. The undercloud, Controller nodes, Ceph Storage nodes, and all other systems are supported only on x86_64 hardware.
Overview:
- Deploy an undercloud on an x86_64 node.
- Prepare x86_64 nodes to be used as overcloud Controller nodes and get the nodes ready for provisioning.
- Prepare pre-provisioned ppc64le nodes to be used as overcloud Compute nodes.
-
Generate a custom
roles_data.yamlfile to include theComputeAltrole for ppc64le nodes. - Deploy the overcloud.
- Poll the metadata server on the undercloud.
- Verify that the overcloud deployment has successfully completed.
Deploying Red Hat OpenStack Platform with Compute nodes on IBM POWER:
- Deploy an undercloud on an x86_64 node. Follow the instructions from Chapter 1, Introduction to Chapter 5, Configuring Container Registry Details.
- Prepare x86_64 nodes to be used as overcloud Controller nodes and get the nodes ready for provisioning. A minimum of one node is required for the Controller node. Prepare additional Controller nodes for high availability and additional x86_64 Compute nodes if required. Follow the instructions from Chapter 6, Configuring a Basic Overcloud with the CLI Tools to Section 6.7, “Customizing the Overcloud with Environment Files”.
- Prepare pre-provisioned ppc64le nodes to be used as overcloud Compute nodes. A minimum of one node is required for the Compute node. Prepare additional Compute nodes for high availability if required. Follow the instructions from Chapter 8, Configuring a Basic Overcloud using Pre-Provisioned Nodes to Section 8.5, “Configuring Networking for the Control Plane”.
On the director node, generate a custom
roles_data.yamlfile to include theComputeAltrole for ppc64le nodes. For example:(undercloud) [stack@director ~]$ openstack overcloud roles generate \ --roles-path /usr/share/openstack-tripleo-heat-templates/roles/ \ -o /home/stack/roles_data.yaml \ Controller Compute ComputeAlt BlockStorage ObjectStorage CephStorage
Deploy the overcloud. In addition to the standard environment files your environment requires, specify the custom
roles_data.yamlfile, and thecomputealt.yamlenvironment file. For example:(undercloud) [stack@director ~]$ openstack overcloud deploy \ --templates /usr/share/openstack-tripleo-heat-templates \ -r /home/stack/roles_data.yaml \ --disable-validations \ --ntp-server pool.ntp.org \ -e /home/stack/templates/ctlplane-assignments.yaml \ -e /home/stack/templates/node-info.yaml \ -e /home/stack/templates/overcloud_images.yaml \ -e /usr/share/openstack-tripleo-heat-templates/environments/computealt.yaml \ -e /usr/share/openstack-tripleo-heat-templates/environments/deployed-server-bootstrap-environment-rhel.yaml \ -e /usr/share/openstack-tripleo-heat-templates/environments/network-isolation.yaml \ -e /home/stack/templates/network-environment.yaml \ -e /home/stack/templates/storage-environment.yaml
This command contains the following options:
- --templates
-
Creates the overcloud using the Heat template collection in
/usr/share/openstack-tripleo-heat-templatesas a foundation - -r /home/stack/roles_data.yaml
-
Use the custom
roles_data.yamlfile for the role mapping information required for the deployment. - --disable-validations
- Disables basic CLI validations for services not used with pre-provisioned infrastructure, otherwise the deployment will fail.
- --ntp-server pool.ntp.org
- Use an NTP server for time synchronization. This is required for keeping the overcloud node cluster in synchronization.
- -e /home/stack/templates/ctlplane-assignments.yaml
- Adds an environment file configuring networking for the control plane. See Section 8.5, “Configuring Networking for the Control Plane” for more information.
- -e /home/stack/templates/node-info.yaml
- Adds an environment file to define how many nodes and which flavors to use for each role.
- -e /home/stack/templates/overcloud_images.yaml
- Adds an environment file containing the container image sources. See Chapter 5, Configuring Container Registry Details for more information.
- -e /usr/share/openstack-tripleo-heat-templates/environments/computealt.yaml
- Adds an environment file to define the ppc64le node.
- -e /usr/share/openstack-tripleo-heat-templates/environments/deployed-server-bootstrap-environment-rhel.yaml
- Adds an environment file to execute a bootstrap script on the pre-provisioned servers. This script installs additional packages and provides basic configuration for overcloud nodes.
- -e /usr/share/openstack-tripleo-heat-templates/environments/network-isolation.yaml
- Adds an environment file to initialize network isolation in the overcloud deployment.
- -e /home/stack/templates/network-environment.yaml
- Adds an environment file to customize network isolation.
- -e /home/stack/templates/storage-environment.yaml
Adds an environment file to initialize our storage configuration.
NoteThe deployment stack pauses when the overcloud node resources enter the
CREATE_IN_PROGRESSstage. This pause is due to the director waiting for the orchestration agent on the overcloud nodes to poll the metadata server. Proceed to the next step to start polling the metadata server.
- Poll the metadata server on the undercloud. See Section 8.8, “Polling the Metadata Server”.
-
Verify that the overcloud deployment has successfully completed. See Section 8.9, “Monitoring the Overcloud Creation” and Section 8.10, “Accessing the Overcloud”. To list all Compute nodes including the pre-provisioned ppc64le nodes and the director-provisioned x86_64 nodes, run
openstack hypervisor list.