
Red Hat Training
A Red Hat training course is available for Red Hat Virtualization
Self-Hosted Engine Guide
Installing and Maintaining the Red Hat Virtualization Self-Hosted Engine
Abstract
Chapter 1. Introduction
Table 1.1. Supported OS versions to Deploy Self-Hosted Engine
|
System Type
|
Supported Versions
|
|---|---|
|
Red Hat Enterprise Linux host
|
7.4
|
|
Red Hat Virtualization Host
|
7.4
|
|
HostedEngine-VM (Manager)
|
7.4
|
Important
hosted-engine --deploy can be used to deploy the self-hosted engine. On Red Hat Virtualization Host (RHVH), self-hosted engine deployment is performed through the Cockpit user interface. The Cockpit user interface is a UI version of the hosted-engine script that assists with configuring the host and Manager virtual machine.
Note
Chapter 2. Deploying Self-Hosted Engine
Important
2.1. Initiating Self-Hosted Engine Deployment on Red Hat Enterprise Linux Hosts
2.1.1. Installing the Self-Hosted Engine Packages
hosted-engine --deploy, or through the Cockpit user interface. Different packages are required depending on the method you choose.
Procedure 2.1. Installing the Self-Hosted Engine
- Install the packages required to install the self-hosted engine.
- To install self-hosted engine using
hosted-engine --deploy:# yum install ovirt-hosted-engine-setup
- To install self-hosted engine using the Cockpit user interface:
yum install cockpit-ovirt-dashboard
- Optionally install the RHV-M Virtual Appliance package for the Manager virtual machine installation. Alternatively, the script will prompt you to download it during deployment.
# yum install rhvm-appliance
2.1.2. Initiating Self-Hosted Engine Deployment
hosted-engine script or Cockpit user interface is provided to assist with configuring the host, and the Manager virtual machine. Both methods ask you a series of questions, and configures your environment based on your answers.
Note
hosted-engine --check-deployed command to check whether a self-hosted engine has already been deployed. An error will only be displayed if no self-hosted engine has been deployed. If a self-hosted engine has already been deployed, subsequent deployments will fail. See Chapter 3, Troubleshooting a Self-Hosted Engine Deployment if you need to troubleshoot an existing deployement, or clean up a failed deployment in order to redeploy the self-hosted engine.
Prerequisites
- You must have a freshly installed Red Hat Enterprise Linux 7 system with the ovirt-hosted-engine-setup or cockpit-ovirt-dashboard package installed.
- You must have prepared storage for your self-hosted engine environment. At least two storage domains are required:For more information on preparing storage for your deployment, see the Storage chapter of the Administration Guide.
- A shared storage domain dedicated to the Manager virtual machine. This domain is created during the self-hosted engine deployment, and must be at least 68 GB.
- A data storage domain for regular virtual machine data. This domain must be added to the self-hosted engine environment after the deployment is complete.
Warning
Red Hat strongly recommends that you have additional active data storage domains available in the same data center as the self-hosted engine environment.If you deploy the self-hosted engine in a data center with only one active data storage domain, and if that data storage domain is corrupted, you will be unable to add new data storage domains or to remove the corrupted data storage domain. You will have to redeploy the self-hosted engine.
Important
If you are using iSCSI storage, do not use the same iSCSI target for the shared storage domain and data storage domain. - You must have a fully qualified domain name prepared for your Manager and the host. Forward and reverse lookup records must both be set in the DNS.
- You must have the RHV-M Virtual Appliance for the Manager installation. If you have not manually installed the rhvm-appliance package package, it will be downloaded and installed automatically.
- To use the RHV-M Virtual Appliance for the Manager installation, one directory must be at least 5 GB. The deployment process will check if
/var/tmphas enough space to extract the appliance files. If not, you can specify a different directory or mount external storage. The VDSM user and KVM group must have read, write, and execute permissions on the directory.
Procedure 2.2. Initiating a RHEL-based Self-Hosted Engine Deployment
Initiating Hosted Engine Deployment
The deployment is initiated differently depending whether you are using thehosted-engine --deploycommand or Cockpit user interface.- To deploy the self-hosted engine using
hosted-engine --deploy, it is recommended to use thescreenwindow manager to run the script to avoid losing the session in case of network or terminal disruption. If not already installed, install the screen package, which is available in the standard Red Hat Enterprise Linux repository.# yum install screen
# screen
# hosted-engine --deploy
Note
To escape the script at any time, use the CTRL+D keyboard combination to abort deployment. In the event of session timeout or connection disruption, runscreen -d -rto recover thehosted-enginedeployment session. - To deploy the self-hosted engine using the Cockpit user interface, log in to the UI at https://HostIPorFQDN:9090 and navigate to Virtualization > Hosted Engine.Select Standard to perform a standard self-hosted engine installation, and click .

2.2. Initiating Self-Hosted Engine Deployment on Red Hat Virtualization Host
hosted-engine script assists with configuring the host and Manager virtual machine. The script asks you a series of questions, and configures your environment based on your answers.
Prerequisites
- You must have a freshly installed Red Hat Virtualization Host system. The Performance Profile in the System sub-tab of the Cockpit user interface must be set to
virtual-host. - You must have prepared storage for your self-hosted engine environment. At least two storage domains are required:For more information on preparing storage for your deployment, see the Storage chapter of the Administration Guide.
- A shared storage domain dedicated to the Manager virtual machine. This domain is created during the self-hosted engine deployment, and must be at least 68 GB.
- A data storage domain for regular virtual machine data. This domain must be added to the self-hosted engine environment after the deployment is complete.
Warning
Red Hat strongly recommends that you have additional active data storage domains available in the same data center as the self-hosted engine environment.If you deploy the self-hosted engine in a data center with only one active data storage domain, and if that data storage domain is corrupted, you will be unable to add new data storage domains or to remove the corrupted data storage domain. You will have to redeploy the self-hosted engine.
Important
If you are using iSCSI storage, do not use the same iSCSI target for the shared storage domain and data storage domain. - You must have a fully qualified domain name prepared for your Manager and the host. Forward and reverse lookup records must both be set in the DNS.
- To use the RHV-M Virtual Appliance for the Manager installation, one directory must be at least 5 GB. The
hosted-enginescript first checks if/var/tmphas enough space to extract the appliance files. If not, you can specify a different directory or mount external storage. The VDSM user and KVM group must have read, write, and execute permissions on the directory.
Procedure 2.3. Initiating a RHVH-based Self-Hosted Engine
Initiating Self-Hosted Engine Deployment
Log in to the Cockpit user interface at https://HostIPorFQDN:9090 and navigate to Virtualization > Hosted Engine. Click .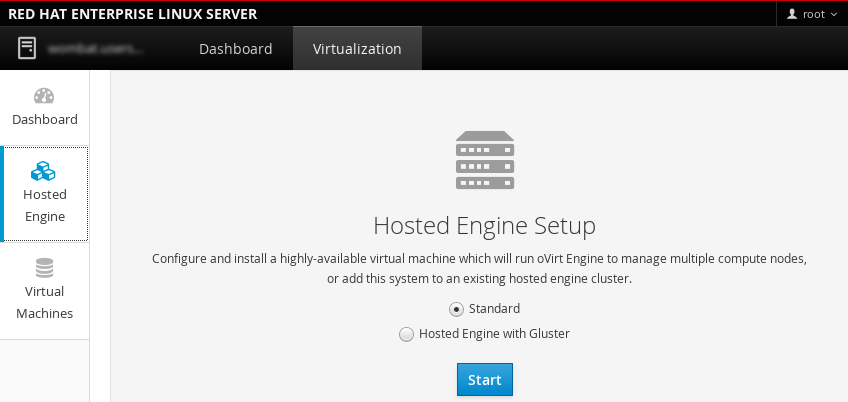
2.3. Deploying the Self-Hosted Engine
hosted-engine --deploy or the Cockpit user interface, you are asked a series of questions to configure the host and Manager virtual machine. The fields in the deployment script are pre-populated with a default answer if one is available; change or enter your answers as necessary.
Procedure 2.4. Deloying the Self-hosted Engine
Beginning Deployment
Select to begin the deployment.During customization use CTRL-D to abort. Continuing will configure this host for serving as hypervisor and create a VM where you have to install the engine afterwards. Are you sure you want to continue? (Yes, No)[Yes]:
Downloading the RHV-M Virtual Appliance
If you have not manually downloaded the RHV-M Virtual Appliance, you can download and install it during deployment. Select to download the appliance.The oVirt engine appliance is now required to deploy hosted-engine. You could get oVirt engine appliance installing ovirt-engine-appliance rpm. Do you want to install ovirt-engine-appliance rpm? (Yes, No) [Yes]:
Configuring Storage
Select the type of storage to use.Please specify the storage you would like to use (glusterfs, iscsi, fc, nfs3, nfs4)[nfs3]:
- For NFS storage types, specify the full address, using either the FQDN or IP address, and path name of the shared storage domain.
Please specify the full shared storage connection path to use (example: host:/path): storage.example.com:/hosted_engine/nfs
- For iSCSI, specify the iSCSI portal IP address, port, user name and password, and select a target name from the auto-detected list. You can only select one iSCSI target during the deployment.
Please specify the iSCSI portal IP address:
Please specify the iSCSI portal port [3260]:
Please specify the iSCSI portal user:
Please specify the iSCSI portal password:
Please specify the target name (auto-detected values) [default]:
- For Gluster storage, specify the full address, using either the FQDN or IP address, and path name of the shared storage domain.
Important
Only replica 3 Gluster storage is supported. Ensure the following configuration has been made:- In the
/etc/glusterfs/glusterd.volfile on all three Gluster servers, setrpc-auth-allow-insecuretoon.option rpc-auth-allow-insecure on
- Configure the volume as follows:
gluster volume set volume cluster.quorum-type auto
gluster volume set volume network.ping-timeout 10
gluster volume set volume auth.allow \*
gluster volume set volume group virt
gluster volume set volume storage.owner-uid 36
gluster volume set volume storage.owner-gid 36
gluster volume set volume server.allow-insecure on
Please specify the full shared storage connection path to use (example: host:/path): storage.example.com:/hosted_engine/gluster_volume
- For Fibre Channel, the host bus adapters must be configured and connected, and the
hosted-enginescript will auto-detect the LUNs available. The LUNs must not contain any existing data.The following luns have been found on the requested target: [1] 3514f0c5447600351 30GiB XtremIO XtremApp status: used, paths: 2 active [2] 3514f0c5447600352 30GiB XtremIO XtremApp status: used, paths: 2 active Please select the destination LUN (1, 2) [1]:
Configuring the Network
The deployment detects possible network interface controllers (NICs) to use as a management bridge for the environment.iptables was detected on your computer, do you wish setup to configure it? (Yes, No)[Yes]:
Please indicate a nic to set ovirtmgmt bridge on: (eth1, eth0) [eth1]:
Please indicate a pingable gateway IP address [X.X.X.X]:
Configuring the Virtual Machine
The script will automatically detect the RHV-M Virtual Appliances available; select the appropriate appliance.The following appliance have been found on your system: [1] - The oVirt Engine Appliance image (OVA) [2] - Directly select an OVA file Please select an appliance (1, 2) [1]:
Select the or console type to connect to the virtual machine.Please specify the console type you would like to use to connect to the VM (vnc, spice) [vnc]:
SpecifyYesif you want cloud-init to perform the initial configuration of the Manager virtual machine. Specify for cloud-init to performs tasks like setting the root password, configuring networking, configuring the host name, injecting an answers file forengine-setupto use, and runningengine-setupon boot. Optionally, select if you have an existing cloud-init script to take care of more sophisticated functions of cloud-init.Would you like to use cloud-init to customize the appliance on the first boot (Yes, No)[Yes]?
Would you like to generate on-fly a cloud-init ISO image (of no-cloud type)
or do you have an existing one (Generate, Existing)[Generate]?
Note
For more information on cloud-init, see https://cloudinit.readthedocs.org/en/latest/.Specify the FQDN for the Manager virtual machine.Please provide the FQDN you would like to use for the engine appliance. Note: This will be the FQDN of the engine VM you are now going to launch. It should not point to the base host or to any other existing machine. Engine VM FQDN: (leave it empty to skip): manager.example.com
Specify the domain name to use for the Manager if different from the default.Please provide the domain name you would like to use for the engine appliance. Engine VM domain: [domain.example.com]
Specify whether to automatically executeengine-setupwhen the Manager first boots, and to restart the Manager virtual machine as a monitored service.Important
If you select No you still have the option of runningengine-setup --accept-defaultsto automatically accept all questions that have default answers. This option should be used with caution and only if you are familiar with engine-setup.Automatically execute engine-setup on the engine appliance on first boot (Yes, No)[Yes]?
Automatically restart the engine VM as a monitored service after engine-setup (Yes, No)[Yes]?
Enter the root password for the Manager.Enter root password that will be used for the engine appliance (leave it empty to skip): p@ssw0rd
Confirm appliance root password: p@ssw0rd
Enter an SSH public key that will allow you to later log in to the Manager as the root user, and specify whether to enable SSH access for the root user.Enter ssh public key for the root user that will be used for the engine appliance (leave it empty to skip): ssh-rsa AAAAB3NzaBlyc2EAAAADAQABAAABAQDN79V0/3Y3R0iyoCvu7fbw0Mtggm7tHb76yMA4asmU2DBk7ql3AguTNAK9p7Hkc1FANjXGvAZh2vBk+OFN51F/mqe4mgWM1CrpJcsM5ouReT+HkJpMb2f8tU14ZGVRuB/JYfwzsXhs6Jx6Nhh810yqlduTODRDhR9tOtvmtv4cb5VoJhlpppsQOkVxGfB7fPRVucw5PMAUJDwFsOqvtqjuvbGniMYvSZwhv7Nw5Su8WOpMnyr3WfUfDdIAWli5rk4hBHWRZC4zbRsZK03V8wua3PZE0sX3iNvJy4g/s5ynwLytTz7zPXjdyTsYm7BMX8IDhariXY10cYso+fIfjyjf example@redhat.com
Do you want to enable ssh access for the root user (yes, no, without-password) [yes]:
Specify the Manager disk size and memory size.Please specify the size of the VM disk in GB: [50]:
Please specify the memory size of the VM in MB (Defaults to appliance OVF value): [4096]:
Specify the CPU type to be used by the Manager and the number of virtual CPUs to use.The following CPU types are supported by this host: - model_SandyBridge: Intel SandyBridge Family - model_Westmere: Intel Westmere Family - model_Nehalem: Intel Nehalem Family - model_Penryn: Intel Penryn Family - model_Conroe: Intel Conroe Family Please specify the CPU type to be used by the VM [model_SandyBridge]:
Please specify the number of virtual CPUs for the VM [Defaults to appliance OVF value: 4]:
Specify a MAC address for the Manager virtual machine, or accept a randomly generated one. The MAC address can be used to update your DHCP and DNS server before installing the operating system on the virtual machine. If you want to provide the Manager virtual machine with an IP address via DHCP, ensure that you have a valid DHCP reservation for that MAC address. The deployment script will not configure the DHCP server for you.You may specify a MAC address for the VM or accept a randomly generated default [00:16:3e:77:b2:a4]:
Specify the networking details of the virtual machine.How should the engine VM network be configured (DHCP, Static)[DHCP]?
If you specified Static, enter the IP address of the Manager.Important
The static IP address must belong to the same subnet as the host. For example, if the host is in 10.1.1.0/24, the Manager virtual machine's IP must be in the same subnet (10.1.1.1-254/24).Please enter the IP address to be used for the engine VM [10.x.x.x]:
Please provide a comma-separated list (max3) of IP addresses of domain name servers for the engine VM
Engine VM DNS (leave it empty to skip):
Add lines for the appliance itself and for this host to /etc/hosts on the engine VM?
Note: ensuring that this host could resolve the engine VM hostname is still up to you (Yes, No)[No]
Configuring the Self-hosted Engine
Specify a password for theadmin@internaluser to access the Administration Portal. Provide the name and TCP port number of the SMTP server, the email address used to send email notifications, and a comma-separated list of email addresses to receive these notifications.Enter engine admin password: p@ssw0rd
Confirm engine admin password: p@ssw0rd
Please provide the name of the SMTP server through which we will send notifications [localhost]:
Please provide the TCP port number of the SMTP server [25]:
Please provide the email address from which notifications will be sent [root@localhost]:
Please provide a comma-separated list of email addresses which will get notifications [root@localhost]:
Configuration Preview
Before proceeding, the configuration values entered are displayed, and prompts for confirmation to proceed with these values.Please confirm installation settings (Yes, No)[Yes]: Yes
The deployment creates the Manager virtual machine, starts theovirt-engineand high availability services, and connects the host and shared storage domain to the Manager virtual machine.When thehosted-enginedeployment completes successfully, the Red Hat Virtualization Manager is configured and running on your host. The Manager has already configured the data center, cluster, host, the Manager virtual machine, and a shared storage domain dedicated to the Manager virtual machine.Important
Log in as the admin@internal user to continue configuring the Manager and add further resources. You must create another data domain for the data center to be initialized to host regular virtual machine data, and for the Manager virtual machine to be visible. See Storage in the Administration Guide for different storage options and on how to add a data storage domain.Link your Red Hat Virtualization Manager to a directory server so you can add additional users to the environment. Red Hat Virtualization supports many directory server types; for example, Red Hat Directory Server (RHDS), Red Hat Identity Management (IdM), Active Directory, and many other types. Add a directory server to your environment using theovirt-engine-extension-aaa-ldap-setupinteractive setup script. For more information, see Configuring an External LDAP Provider in the Administration Guide.The answers you gave during configuration are saved to a file to help with disaster recovery. If a destination is not specified using the--generate-answer=<file>argument, the answer file is generated at/etc/ovirt-hosted-engine/answers.conf.Subscribing to the Required Entitlements
Subscribe the Manager virtual machine to the required entitlements. See Subscribing to the Required Entitlements in the Installation Guide for more information.
2.4. Administering the Manager Virtual Machine
hosted-engine utility is provided to assist with administering the Manager virtual machine. It can be run on any self-hosted engine nodes in the environment. For all the options, run hosted-engine --help. For additional information on a specific command, run hosted-engine --command --help. See Section 3.1, “Troubleshooting the Manager Virtual Machine” for more information.
Procedure 2.5. Updating the Self-Hosted Engine Configuration on the Shared Storage Domain
/var/lib/ovirt-hosted-engine-ha/broker.conf) on the shared storage domain after the initial deployment. Currently, you can configure email notifications using SMTP for any HA state transitions on the self-hosted engine nodes. The keys that can be updated include: smtp-server, smtp-port, source-email, destination-emails, and state_transition.
- On a self-hosted engine node, set the
smtp-serverkey to the desired SMTP server address:# hosted-engine --set-shared-config smtp-server smtp.example.com --type=broker
Note
To verify that the self-hosted engine configuration file has been updated, run:# hosted-engine --get-shared-config smtp-server --type=broker broker : smtp.example.com, type : broker
- Check that the default SMTP port (port 25) has been configured:
# hosted-engine --get-shared-config smtp-port --type=broker
broker : 25, type : broker
- Specify an email address you want the SMTP server to use to send out email notifications. Only one address can be specified.
# hosted-engine --set-shared-config source-email source@example.com --type=broker
- Specify the destination email address to receive email notifications. To specify multiple email addresses, separate each address by a comma.
# hosted-engine --set-shared-config destination-emails destination1@example.com,destination2@example.com --type=broker
2.5. Configuring Memory Slots Reserved for the Self-Hosted Engine on Additional Hosts
Procedure 2.6. Configuring Memory Slots Reserved for the Self-Hosted Engine on Additional Hosts
- Click the tab and select the cluster containing the self-hosted engine nodes.
- Click .
- Click the Scheduling Policy tab.
- Click and select HeSparesCount.
- Enter the number of additional self-hosted engine nodes that will reserve enough free memory to start the Manager virtual machine.
- Click .
Chapter 3. Troubleshooting a Self-Hosted Engine Deployment
hosted-engine --check-deployed. An error will only be displayed if the self-hosted engine has not been deployed.
3.1. Troubleshooting the Manager Virtual Machine
hosted-engine --vm-status.
Note
Engine status: "health": "good", "vm": "up" "detail": "up"
- If the Manager virtual machine is up and running as normal, you will see the following output:
--== Host 1 status ==-- Status up-to-date : True Hostname : hypervisor.example.com Host ID : 1 Engine status : {"health": "good", "vm": "up", "detail": "up"} Score : 3400 stopped : False Local maintenance : False crc32 : 99e57eba Host timestamp : 248542 - If the output is normal but you cannot connect to the Manager, check the network connection.
Engine status: "reason": "failed liveliness check", "health": "bad", "vm": "up", "detail": "up"
- If the
healthisbadand thevmisup, the HA services will try to restart the Manager virtual machine to get the Manager back. If it does not succeed within a few minutes, enable the global maintenance mode from the command line so that the hosts are no longer managed by the HA services.# hosted-engine --set-maintenance --mode=global
- Connect to the console. When prompted, enter the operating system's root password. For more console options, see https://access.redhat.com/solutions/2221461.
# hosted-engine --console
- Ensure that the Manager virtual machine's operating system is running by logging in.
- Check the status of the
ovirt-engineservice:# systemctl status -l ovirt-engine
# journalctl -u ovirt-engine
- Check the following logs:
/var/log/messages,/var/log/ovirt-engine/engine.logand/var/log/ovirt-engine/server.log. - After fixing the issue, reboot the Manager virtual machine manually from one of the self-hosted engine nodes:
# hosted-engine --vm-shutdown
# hosted-engine --vm-start
Note
When the self-hosted engine nodes are in global maintenance mode, the Manager virtual machine must be rebooted manually. If you try to reboot the Manager virtual machine by sending arebootcommand from the command line, the Manager virtual machine will remain powered off. This is by design. - On the Manager virtual machine, verify that the
ovirt-engineservice is up and running:# systemctl status ovirt-engine.service
- After ensuring the Manager virtual machine is up and running, close the console session and disable the maintenance mode to enable the HA services again:
# hosted-engine --set-maintenance --mode=none
Engine status: "vm": "down", "health": "bad", "detail": "unknown", "reason": "vm not running on this host"
- If you have more than one host in your environment, ensure that another host is not currently trying to restart the Manager virtual machine.
- Ensure that you are not in global maintenance mode.
- Check the
ovirt-ha-agentlogs in/var/log/ovirt-hosted-engine-ha/agent.log. - Try to reboot the Manager virtual machine manually from one of the self-hosted engine nodes:
# hosted-engine --vm-shutdown
# hosted-engine --vm-start
Engine status: "vm": "unknown", "health": "unknown", "detail": "unknown", "reason": "failed to getVmStats"
ovirt-ha-agent failed to get the virtual machine's details from VDSM.
- Check the VDSM logs in
/var/log/vdsm/vdsm.log. - Check the
ovirt-ha-agentlogs in/var/log/ovirt-hosted-engine-ha/agent.log.
Engine status: The self-hosted engine's configuration has not been retrieved from shared storage
ovirt-ha-agent service, or with the storage, or both.
- Check the status of
ovirt-ha-agenton the host:# systemctl status -l ovirt-ha-agent
# journalctl -u ovirt-ha-agent
- If the
ovirt-ha-agentis down, restart it:# systemctl start ovirt-ha-agent
- Check the
ovirt-ha-agentlogs in/var/log/ovirt-hosted-engine-ha/agent.log. - Check that you can ping the shared storage.
- Check whether the shared storage is mounted.
Additional Troubleshooting Commands:
Important
hosted-engine --reinitialize-lockspace: This command is used when the sanlock lockspace is broken. Ensure that the global maintenance mode is enabled and that the Manager virtual machine is stopped before reinitializing the sanlock lockspaces.hosted-engine --clean-metadata: Remove the metadata for a host's agent from the global status database. This makes all other hosts forget about this host. Ensure that the target host is down and that the global maintenance mode is enabled.hosted-engine --check-liveliness: This command checks the liveliness page of the ovirt-engine service. You can also check by connecting tohttps://engine-fqdn/ovirt-engine/services/health/in a web browser.hosted-engine --connect-storage: This command instructs VDSM to prepare all storage connections needed for the host and and the Manager virtual machine. This is normally run in the back-end during the self-hosted engine deployment. Ensure that the global maintenance mode is enabled if you need to run this command to troubleshoot storage issues.
3.2. Cleaning Up a Failed Self-hosted Engine Deployment
Procedure 3.1. Running the Cleanup Script
- Run
/usr/sbin/ovirt-hosted-engine-cleanupand selectyto remove anything left over from the failed self-hosted engine deployment.# /usr/sbin/ovirt-hosted-engine-cleanup This will de-configure the host to run ovirt-hosted-engine-setup from scratch. Caution, this operation should be used with care. Are you sure you want to proceed? [y/n]
- Define whether to reinstall on the same shared storage device or select a different shared storage device.
- To deploy the installation on the same storage domain, clean up the storage domain by running the following command on the for NFS, Gluster, PosixFS or local storage domains:
# rm -rf
storage location/* - For iSCSI or Fibre Channel Protocol (FCP) storage, see https://access.redhat.com/solutions/2121581 for information on how to clean up the storage.
- Alternatively, select a different shared storage device.
- Redeploy the self-hosted engine.
Chapter 4. Migrating from Bare Metal to a RHEL-Based Self-Hosted Environment
4.1. Migrating to a Self-Hosted Environment
hosted-engine script to assist with the task. The script asks you a series of questions, and configures your environment based on your answers. The Manager from the standard Red Hat Virtualization environment is referred to as the BareMetal-Manager in the following procedure.
engine-setup in a standard installation, in the migration process engine-setup must be run manually so that you can restore the BareMetal-Manager backup file on the new Manager virtual machine beforehand.
- Run the
hosted-enginescript to configure the host to be used as a self-hosted engine node and to create a new Red Hat Virtualization virtual machine. - Back up the the engine database and configuration files using the
engine-backuptool, copy the backup to the new Manager virtual machine, and restore the backup using the--mode=restoreparameter ofengine-backup. Runengine-setupto complete the Manager virtual machine configuration. - Follow the
hosted-enginescript to complete the setup.
Prerequisites
- Prepare a new host with the ovirt-hosted-engine-setup package installed. See Section 2.1, “Initiating Self-Hosted Engine Deployment on Red Hat Enterprise Linux Hosts” for more information on subscriptions and package installation. The host must be a supported version of the current Red Hat Virtualization environment.
Note
If you intend to use an existing host, place the host in maintenance and remove it from the existing environment. See Removing a Host in the Administration Guide for more information. - Prepare storage for your self-hosted engine environment. The self-hosted engine requires a shared storage domain dedicated to the Manager virtual machine. This domain is created during deployment, and must be at least 68 GB. For more information on preparing storage for your deployment, see the Storage chapter of the Administration Guide.
Important
If you are using iSCSI storage, do not use the same iSCSI target for the shared storage domain and data storage domain. - Obtain the RHV-M Virtual Appliance by installing the rhvm-appliance package. The RHV-M Virtual Appliance is always based on the latest supported Manager version. Ensure the Manager version in your current environment is updated to the latest supported Y-stream version as the Manager version needs to be the same for the migration.
- To use the RHV-M Virtual Appliance for the Manager installation, ensure one directory is at least 5 GB. The
hosted-enginescript first checks if/var/tmphas enough space to extract the appliance files. If not, you can specify a different directory or mount external storage. The VDSM user and KVM group must have read, write, and execute permissions on the directory. - The fully qualified domain name of the new Manager must be the same fully qualified domain name as that of the BareMetal-Manager. Forward and reverse lookup records must both be set in DNS.
- You must have access and can make changes to the BareMetal-Manager.
- The virtual machine to which the BareMetal-Manager is being migrated must have the same amount of RAM as the physical machine from which the BareMetal-Manager is being migrated. If you must migrate to a virtual machine that has less RAM than the physical machine from which the BareMetal-Manager is migrated, see the following Red Hat Knowledgebase article: https://access.redhat.com/articles/2705841.
Procedure 4.1. Migrating to a Self-Hosted Environment
Initiating a Self-Hosted Engine Deployment
Note
If your original installation was version 3.5 or earlier, and the name of the management network is rhevm, you must modify the answer file before runninghosted-engine --deploy. For more information, see https://access.redhat.com/solutions/2292861.Run thehosted-enginescript. To escape the script at any time, use the CTRL+D keyboard combination to abort deployment. It is recommended to use thescreenwindow manager to run the script to avoid losing the session in case of network or terminal disruption. If not already installed, install the screen package, which is available in the standard Red Hat Enterprise Linux repository.# yum install screen
# screen
# hosted-engine --deploy
Note
In the event of session timeout or connection disruption, runscreen -d -rto recover thehosted-enginedeployment session.Configuring Storage
Select the type of storage to use.During customization use CTRL-D to abort. Please specify the storage you would like to use (glusterfs, iscsi, fc, nfs3, nfs4)[nfs3]:
- For NFS storage types, specify the full address, using either the FQDN or IP address, and path name of the shared storage domain.
Please specify the full shared storage connection path to use (example: host:/path): storage.example.com:/hosted_engine/nfs
- For iSCSI, specify the iSCSI portal IP address, port, user name and password, and select a target name from the auto-detected list. You can only select one iSCSI target during the deployment.
Please specify the iSCSI portal IP address:
Please specify the iSCSI portal port [3260]:
Please specify the iSCSI portal user:
Please specify the iSCSI portal password:
Please specify the target name (auto-detected values) [default]:
- For Gluster storage, specify the full address, using either the FQDN or IP address, and path name of the shared storage domain.
Important
Only replica 3 Gluster storage is supported. Ensure the following configuration has been made:- In the
/etc/glusterfs/glusterd.volfile on all three Gluster servers, setrpc-auth-allow-insecuretoon.option rpc-auth-allow-insecure on
- Configure the volume as follows:
gluster volume set volume cluster.quorum-type auto
gluster volume set volume network.ping-timeout 10
gluster volume set volume auth.allow \*
gluster volume set volume group virt
gluster volume set volume storage.owner-uid 36
gluster volume set volume storage.owner-gid 36
gluster volume set volume server.allow-insecure on
Please specify the full shared storage connection path to use (example: host:/path): storage.example.com:/hosted_engine/gluster_volume
- For Fibre Channel, the host bus adapters must be configured and connected, and the
hosted-enginescript will auto-detect the LUNs available. The LUNs must not contain any existing data.The following luns have been found on the requested target: [1] 3514f0c5447600351 30GiB XtremIO XtremApp status: used, paths: 2 active [2] 3514f0c5447600352 30GiB XtremIO XtremApp status: used, paths: 2 active Please select the destination LUN (1, 2) [1]:
Configuring the Network
The script detects possible network interface controllers (NICs) to use as a management bridge for the environment. It then checks your firewall configuration and offers to modify it for console (SPICE or VNC) access HostedEngine-VM. Provide a pingable gateway IP address, to be used by theovirt-ha-agentto help determine a host's suitability for running HostedEngine-VM.Please indicate a nic to set rhvm bridge on: (eth1, eth0) [eth1]: iptables was detected on your computer, do you wish setup to configure it? (Yes, No)[Yes]: Please indicate a pingable gateway IP address [X.X.X.X]:
Configuring the Virtual Machine
The script creates a virtual machine to be configured as the Red Hat Virtualization Manager, referred to in this procedure as HostedEngine-VM. Select for the boot device type, and the script will automatically detect the RHV-M Appliances available. Select an appliance.Please specify the device to boot the VM from (choose disk for the oVirt engine appliance) (cdrom, disk, pxe) [disk]: Please specify the console type you would like to use to connect to the VM (vnc, spice) [vnc]: vnc [ INFO ] Detecting available oVirt engine appliances The following appliance have been found on your system: [1] - The oVirt Engine Appliance image (OVA) [2] - Directly select an OVA file Please select an appliance (1, 2) [1]: [ INFO ] Checking OVF archive content (could take a few minutes depending on archive size)SpecifyYesif you want cloud-init to take care of the initial configuration of the Manager virtual machine. Specify for cloud-init to take care of tasks like setting the root password, configuring networking, and configuring the host name. Optionally, select if you have an existing cloud-init script to take care of more sophisticated functions of cloud-init. Specify the FQDN for the Manager virtual machine. This must be the same FQDN provided for the BareMetal-Manager.Note
For more information on cloud-init, see https://cloudinit.readthedocs.org/en/latest/.Would you like to use cloud-init to customize the appliance on the first boot (Yes, No)[Yes]? Yes Would you like to generate on-fly a cloud-init no-cloud ISO image or do you have an existing one(Generate, Existing)[Generate]? Generate Please provide the FQDN you would like to use for the engine appliance. Note: This will be the FQDN of the engine VM you are now going to launch. It should not point to the base host or to any other existing machine. Engine VM FQDN: (leave it empty to skip): manager.example.com
You must answerNoto the following question so that you can restore the BareMetal-Manager backup file on HostedEngine-VM before runningengine-setup.Automatically execute engine-setup on the engine appliance on first boot (Yes, No)[Yes]? No
Configure the Manager domain name, root password, networking, hardware, and console access details.Enter root password that will be used for the engine appliance (leave it empty to skip): p@ssw0rd Confirm appliance root password: p@ssw0rd The following CPU types are supported by this host: - model_Penryn: Intel Penryn Family - model_Conroe: Intel Conroe Family Please specify the CPU type to be used by the VM [model_Penryn]: Please specify the number of virtual CPUs for the VM [Defaults to appliance OVF value: 4]: You may specify a MAC address for the VM or accept a randomly generated default [00:16:3e:77:b2:a4]: How should the engine VM network be configured (DHCP, Static)[DHCP]? Static Please enter the IP address to be used for the engine VM: 192.168.x.x Please provide a comma-separated list (max3) of IP addresses of domain name servers for the engine VM Engine VM DNS (leave it empty to skip): Add lines for the appliance itself and for this host to /etc/hosts on the engine VM? Note: ensuring that this host could resolve the engine VM hostname is still up to you (Yes, No)[No] YesConfiguring the Self-Hosted Engine
Specify the name for Host-HE1 to be identified in the Red Hat Virtualization environment, and the password for theadmin@internaluser to access the Administration Portal. Finally, provide the name and TCP port number of the SMTP server, the email address used to send email notifications, and a comma-separated list of email addresses to receive these notifications.Enter engine admin password: p@ssw0rd Confirm engine admin password: p@ssw0rd Enter the name which will be used to identify this host inside the Administrator Portal [hosted_engine_1]: Please provide the FQDN for the engine you would like to use. This needs to match the FQDN that you will use for the engine installation within the VM. Note: This will be the FQDN of the VM you are now going to create, it should not point to the base host or to any other existing machine. Engine FQDN: []: manager.example.com Please provide the name of the SMTP server through which we will send notifications [localhost]: Please provide the TCP port number of the SMTP server [25]: Please provide the email address from which notifications will be sent [root@localhost]: Please provide a comma-separated list of email addresses which will get notifications [root@localhost]:Configuration Preview
Before proceeding, thehosted-enginescript displays the configuration values you have entered, and prompts for confirmation to proceed with these values.Bridge interface : eth1 Engine FQDN : manager.example.com Bridge name : ovirtmgmt Host address : host.example.com SSH daemon port : 22 Firewall manager : iptables Gateway address : X.X.X.X Host name for web application : Host-HE1 Host ID : 1 Image size GB : 50 Storage connection : storage.example.com:/hosted_engine/nfs Console type : vnc Memory size MB : 4096 MAC address : 00:16:3e:77:b2:a4 Boot type : pxe Number of CPUs : 2 CPU Type : model_Penryn Please confirm installation settings (Yes, No)[Yes]:
Creating HostedEngine-VM
The script creates the virtual machine to be configured as HostedEngine-VM and provides connection details. You must manually runengine-setupafter restoring the backup file on HostedEngine-VM before thehosted-enginescript can proceed on Host-HE1.[ INFO ] Stage: Transaction setup ... [ INFO ] Creating VM You can now connect to the VM with the following command: /bin/remote-viewer vnc://localhost:5900 Use temporary password "3463VnKn" to connect to vnc console. Please note that in order to use remote-viewer you need to be able to run graphical applications. This means that if you are using ssh you have to supply the -Y flag (enables trusted X11 forwarding). Otherwise you can run the command from a terminal in your preferred desktop environment. If you cannot run graphical applications you can connect to the graphic console from another host or connect to the serial console using the following command: socat UNIX-CONNECT:/var/run/ovirt-vmconsole-console/8f74b589-8c6f-4a32-9adf-6e615b69de07.sock,user=ovirt-vmconsole STDIO,raw,echo=0,escape=1 Please ensure that your Guest OS is properly configured to support serial console according to your distro documentation. Follow http://www.ovirt.org/Serial_Console_Setup#I_need_to_access_the_console_the_old_way for more info. If you need to reboot the VM you will need to start it manually using the command: hosted-engine --vm-start You can then set a temporary password using the command: hosted-engine --add-console-password Please install and setup the engine in the VM. You may also be interested in subscribing to "agent" RHN/Satellite channel and installing rhevm-guest-agent-common package in the VM. The VM has been rebooted. To continue please install oVirt-Engine in the VM (Follow http://www.ovirt.org/Quick_Start_Guide for more info). Make a selection from the options below: (1) Continue setup - oVirt-Engine installation is ready and ovirt-engine service is up (2) Abort setup (3) Power off and restart the VM (4) Destroy VM and abort setup (1, 2, 3, 4)[1]:Connect to the virtual machine using the VNC protocol with the following command. Replace FQDN with the fully qualified domain name or the IP address of the self-hosted engine node.# /bin/remote-viewer vnc://FQDN:5900
Enabling SSH on HostedEngine-VM
SSH password authentication is not enabled by default on the RHV-M Virtual Appliance. Connect to HostedEngine-VM via VNC and enable SSH password authentication so that you can access the virtual machine via SSH later to restore the BareMetal-Manager backup file and configure the new Manager. Verify that thesshdservice is running. Edit/etc/ssh/sshd_configand change the following two options toyes:[...] PermitRootLogin yes [...] PasswordAuthentication yes
Restart thesshdservice for the changes to take effect.# systemctl restart sshd.service
Disabling BareMetal-Manager
Connect to BareMetal-Manager, the Manager of your established Red Hat Virtualization environment, and stop theovirt-engineservice and prevent it from running.# systemctl stop ovirt-engine.service # systemctl disable ovirt-engine.service
Note
Though stopping BareMetal-Manager from running is not obligatory, it is recommended as it ensures no changes are made to the environment after the backup is created. Additionally, it prevents BareMetal-Manager and HostedEngine-VM from simultaneously managing existing resources.Updating DNS
Update your DNS so that the FQDN of the Red Hat Virtualization environment correlates to the IP address of HostedEngine-VM and the FQDN previously provided when configuring thehosted-enginedeployment script on Host-HE1. In this procedure, FQDN was set as manager.example.com because in a migrated hosted-engine setup, the FQDN provided for the engine must be identical to that given in the engine setup of the original engine.Creating a Backup of BareMetal-Manager
- Ensure the management network (ovirtmgmt)is configured as a VM network before performing the backup. For more information, see Explanation of Settings and Controls in the New Logical Network and Edit Logical Network Windows in the Administration Guide.
Connect to BareMetal-Manager and run theengine-backupcommand with the--mode=backup,--file=FILE, and--log=LogFILEparameters to specify the backup mode, the name of the backup file created and used for the backup, and the name of the log file to be created to store the backup log.# engine-backup --mode=backup --file=FILE --log=LogFILE
Copying the Backup File to HostedEngine-VM
On BareMetal-Manager, secure copy the backup file to HostedEngine-VM. In the following example, manager.example.com is the FQDN for HostedEngine-VM, and /backup/ is any designated folder or path. If the designated folder or path does not exist, you must connect to HostedEngine-VM and create it before secure copying the backup from BareMetal-Manager.# scp -p FILE LogFILE manager.example.com:/backup/
Registering HostedEngine-VM
Register HostedEngine-VM with Red Hat Subscription Management and enable the required repositories. See Subscribing to the Required Entitlements in the Installation Guide.Restoring the Backup File on HostedEngine-VM
Use theengine-backuptool to restore a complete backup. If you configured the BareMetal-Manager database(s) manually duringengine-setup, follow the instructions at Section 6.2.3, “Restoring the Self-Hosted Engine Manager Manually” to restore the backup environment manually.- If you are only restoring the Manager, run:
# engine-backup --mode=restore --file=file_name --log=log_file_name --provision-db --restore-permissions
- If you are restoring the Manager and Data Warehouse, run:
# engine-backup --mode=restore --file=file_name --log=log_file_name --provision-db --provision-dwh-db --restore-permissions
If successful, the following output displays:You should now run engine-setup. Done.
Configuring HostedEngine-VM
Configure the restored Manager virtual machine. This process identifies the existing configuration settings and database content. Confirm the settings. Upon completion, the setup provides an SSH fingerprint and an internal Certificate Authority hash.# engine-setup
[ INFO  ] Stage: Initializing
[ INFO  ] Stage: Environment setup
Configuration files: ['/etc/ovirt-engine-setup.conf.d/10-packaging.conf', '/etc/ovirt-engine-setup.conf.d/20-setup-ovirt-post.conf']
Log file: /var/log/ovirt-engine/setup/ovirt-engine-setup-20140304075238.log
Version: otopi-1.1.2 (otopi-1.1.2-1.el6ev)
[ INFO  ] Stage: Environment packages setup
[ INFO  ] Yum Downloading: rhel-65-zstream/primary_db 2.8 M(70%)
[ INFO  ] Stage: Programs detection
[ INFO  ] Stage: Environment setup
[ INFO  ] Stage: Environment customization

          --== PACKAGES ==--

[ INFO  ] Checking for product updates...
[ INFO  ] No product updates found

          --== NETWORK CONFIGURATION ==--

Setup can automatically configure the firewall on this system.
Note: automatic configuration of the firewall may overwrite current settings.
Do you want Setup to configure the firewall? (Yes, No) [Yes]:
[ INFO  ] iptables will be configured as firewall manager.

          --== DATABASE CONFIGURATION ==--


          --== OVIRT ENGINE CONFIGURATION ==--


          --== PKI CONFIGURATION ==--


          --== APACHE CONFIGURATION ==--


          --== SYSTEM CONFIGURATION ==--


          --== END OF CONFIGURATION ==--

[ INFO  ] Stage: Setup validation
[ INFO  ] Cleaning stale zombie tasks

          --== CONFIGURATION PREVIEW ==--

          Default SAN wipe after delete           : False
          Firewall manager                        : iptables
          Update Firewall                         : True
          Host FQDN                               : manager.example.com
          Engine database secured connection      : False
          Engine database host                    : X.X.X.X
          Engine database user name               : engine
          Engine database name                    : engine
          Engine database port                    : 5432
          Engine database host name validation    : False
          Engine installation                     : True
          PKI organization                        : example.com
          NFS mount point                         : /var/lib/exports/iso
          Configure VMConsole Proxy               : True
          Engine Host FQDN                        : manager.example.com
          Configure WebSocket Proxy               : True

          Please confirm installation settings (OK, Cancel) [OK]:
Synchronizing the Host and the Manager
Return to Host-HE1 and continue thehosted-enginedeployment script by selecting option 1:(1) Continue setup - oVirt-Engine installation is ready and ovirt-engine service is up
The script displays the internal Certificate Authority hash, and prompts you to select the cluster to which to add Host-HE1.[ INFO ] Engine replied: DB Up!Welcome to Health Status! [ INFO ] Acquiring internal CA cert from the engine [ INFO ] The following CA certificate is going to be used, please immediately interrupt if not correct: [ INFO ] Issuer: C=US, O=example.com, CN=manager.example.com.23240, Subject: C=US, O=example.com, CN=manager.example.com.23240, Fingerprint (SHA-1): XXXXXXXXXXXXXXXXXXXXXXXXXXXXXXXXXXXXXXXX [ INFO ] Connecting to the Engine Enter the name of the cluster to which you want to add the host (DB1, DB2, Default) [Default]: [ INFO ] Waiting for the host to become operational in the engine. This may take several minutes... [ INFO ] The VDSM Host is now operational [ INFO ] Saving hosted-engine configuration on the shared storage domain Please shutdown the VM allowing the system to launch it as a monitored service. The system will wait until the VM is down.Shutting Down HostedEngine-VM
Shut down HostedEngine-VM.# shutdown -h now
Setup Confirmation
Return to Host-HE1 to confirm it has detected that HostedEngine-VM is down.[ INFO ] Enabling and starting HA services [ INFO ] Stage: Clean up [ INFO ] Generating answer file '/var/lib/ovirt-hosted-engine-setup/answers/answers-20160509162843.conf' [ INFO ] Generating answer file '/etc/ovirt-hosted-engine/answers.conf' [ INFO ] Stage: Pre-termination [ INFO ] Stage: Termination [ INFO ] Hosted Engine successfully set up
Chapter 5. Maintenance and Upgrading Resources
5.1. Maintaining the Self-Hosted Engine
global- All high-availability agents in the cluster are disabled from monitoring the state of the Manager virtual machine. The global maintenance mode must be applied for any setup or upgrade operations that require theovirt-engineservice to be stopped, such as upgrading to a later version of Red Hat Virtualization.local- The high-availability agent on the node issuing the command is disabled from monitoring the state of the Manager virtual machine. The node is exempt from hosting the Manager virtual machine while in local maintenance mode; if hosting the Manager virtual machine when placed into this mode, the Manager will migrate to another node, provided there is one available. The local maintenance mode is recommended when applying system changes or updates to a self-hosted engine node.none- Disables maintenance mode, ensuring that the high-availability agents are operating.
Procedure 5.1. Maintaining a RHEL-Based Self-Hosted Engine (Local Maintenance)
- Place a self-hosted engine node into the local maintenance mode:
- In the Administration Portal, select a self-hosted engine node and click → . The local maintenance mode is automatically triggered for that node.
- You can also set the maintenance mode from the command line:
# hosted-engine --set-maintenance --mode=local
- After you have completed any maintenance tasks, disable the maintenance mode:
# hosted-engine --set-maintenance --mode=none
Procedure 5.2. Maintaining a RHEL-Based Self-Hosted Engine (Global Maintenance)
- Place self-hosted engine nodes into global maintenance mode:
- In the Administration Portal, right-click any self-hosted engine node, and select Enable Global HA Maintenance.
- You can also set the maintenance mode from the command line:
# hosted-engine --set-maintenance --mode=global
- After you have completed any maintenance tasks, disable the maintenance mode:
# hosted-engine --set-maintenance --mode=none
5.2. Removing a Host from a Self-Hosted Engine Environment
Procedure 5.3. Removing a Host from a Self-Hosted Engine Environment
- In the Administration Portal, click the Hosts tab. Select the self-hosted engine node and click → to set it to the local maintenance mode.
- Click → .
- Click the tab and select UNDEPLOY. This action stops the
ovirt-ha-agentandovirt-ha-brokerservices and removes the self-hosted engine configuration file. - Click .
- Optionally, click Remove to open the Remove Host(s) confirmation window, and click .
5.3. Upgrading a Self-Hosted Engine Environment
/var/tmp directory contains 5 GB free space to extract the appliance files. If it does not, you can specify a different directory or mount alternate storage that does have the required space. The VDSM user and KVM group must have read, write, and execute permissions on the directory.
- Place the high-availability agents that manage the Manager virtual machine into global maintenance mode.
- Upgrade the Manager virtual machine.
- Place a self-hosted engine node into maintenance. The Manager virtual machine and other virtual machines will be migrated to another host in the cluster if necessary.
- Update the self-hosted engine node. Repeat for all hosts. Red Hat recommends updating all hosts in the environment, including standard hosts.
- After all hosts in the cluster and the Manager virtual machine have been upgraded, change the cluster compatibility version to 4.1.
Procedure 5.4. Upgrading a Self-Hosted Engine Environment
- Disable the high-availability agents on all the self-hosted engine nodes. In the Hosts tab, right-click a self-hosted engine node and select Enable Global HA Maintenance.After a few minutes, check that the General tab in the details pane reports Hosted Engine HA: Global Maintenance Enabled to confirm that the environment is in maintenance mode.
- Log in to the Manager virtual machine to upgrade the Red Hat Virtualization Manager.
- Enable the Red Hat Virtualization Manager 4.1 and Red Hat Virtualization Tools repositories:
# subscription-manager repos --enable=rhel-7-server-rhv-4.1-rpms
# subscription-manager repos --enable=rhel-7-server-rhv-4-tools-rpms
- Update the setup packages:
# yum update ovirt\*setup\*
- Run
engine-setupand follow the prompts to upgrade the Red Hat Virtualization Manager:# engine-setup
- Remove or disable the Red Hat Virtualization Manager 4.0 repository to ensure the system does not use any Red Hat Virtualization Manager 4.0 packages:
# subscription-manager repos --disable=rhel-7-server-rhv-4.0-rpms
- Update the base operating system:
# yum update
Important
If any kernel packages were updated, reboot the Manager virtual machine manually to complete the update. See Troubleshooting the Manager Virtual Machine. - Disable global maintenance. In the Administration Portal, click the Hosts tab. Right-click a self-hosted engine node and select Disable Global HA Maintenance.
- Update the self-hosted engine nodes, then any standard hosts in the environment:
- In the Administration Portal, click the Hosts tab. Right-click a host and select → to place the host into local maintenance. If the host is hosting the Manager virtual machine, the virtual machine will be migrated to another host. Any other virtual machines will be migrated according to your virtual machine migration policy. The high-availability agents are automatically placed into local maintenance.
- Ensure the correct repository is enabled:
# subscription-manager repos --enable=rhel-7-server-rhv-4-mgmt-agent-rpms
# subscription-manager repos --enable=rhel-7-server-ansible-2-rpms
- Update the host:
- On a Red Hat Enterprise Linux host, log in to the host machine and run the following command:
# yum update
- On a Red Hat Virtualization Host (RHVH), log in to the Cockpit user interface, click Terminal, and run the following command:
# yum update
Important
If any kernel packages were updated, reboot the host to complete the update. - Select the same host and click → .
- Repeat these steps to update all hosts.
- Update the cluster and data center compatibility version to 4.1. See Post-Upgrade Tasks in the Upgrade Guide for more information.
Important
Only update the compatibility version if all hosts have been updated for Red Hat Virtualization 4.1 to avoid some hosts becoming non-operational.
5.4. Updating the Self-Hosted Engine Manager Between Minor Releases
- Ensure you have subscribed the Manager virtual machine to the required entitlements. See Subscribing to the Required Entitlements in the Installation Guide for more information.
- Place the system in global maintenance mode. See Section 5.1, “Maintaining the Self-Hosted Engine” for details.
- Follow the procedures for updating between minor versions using
engine-setup. See Updates Between Minor Releases in the Upgrade Guide for details. - Disable global maintenance mode. See Section 5.1, “Maintaining the Self-Hosted Engine” for details.
5.5. Upgrading a RHEV-H 3.6 Self-Hosted Engine to a RHVH 4.1 Self-Hosted Engine
hosted-engine --deploy command, which is not available on RHVH 4.1 for adding more nodes, and self-hosted engine nodes in Red Hat Virtualization 4.1 are added using the UI, which is not available in Red Hat Enterprise Virtualization 3.6. Therefore, to upgrade the environment from 3.6 to 4.1, you must first install a self-hosted engine node running RHVH 4.0, on which the hosted-engine --deploy command is deprecated but still available.
Note
- Install a new RHVH 4.0 host and add it to the 3.6 self-hosted engine environment. The new host can be an existing RHEV-H 3.6 host removed from the environment and reinstalled with RHVH 4.0.
- Upgrade the Manager from 3.6 to 4.0.
- Remove the rest of the RHEV-H 3.6 hosts and reinstall them with RHVH 4.1.
- Add the RHVH 4.1 hosts to the 4.0 environment.
- Upgrade the Manager from 4.0 to 4.1.
- Update the remaining RHVH 4.0 host to RHVH 4.1.
Procedure 5.5. Upgrading a RHEV-H 3.6 Self-Hosted Engine to a RHVH 4.1 Self-Hosted Engine
- If you are removing a RHEV-H 3.6 host from the environment to reinstall with RHVH 4.0, see Section 5.2, “Removing a Host from a Self-Hosted Engine Environment”.
- Upgrade the environment from 3.6 to 4.0 using the instructions in Upgrading a RHEV-H-Based Self-Hosted Engine Environment in the Red Hat Virtualization 4.0 Self-Hosted Engine Guide.
- Upgrade each RHEV-H 3.6 host directly to RHVH 4.1:
- Remove the host from the self-hosted engine environment. See Section 5.2, “Removing a Host from a Self-Hosted Engine Environment”.
- Reinstall the host with RHVH 4.1. See Installing Red Hat Virtualization Host in the Installation Guide.
- Add the host to the 4.0 environment. See Installing Additional Hosts to a Self-Hosted Environment in the Red Hat Virtualization 4.0 Self-Hosted Engine Guide.
- Upgrade the Manager and the remaining RHVH 4.0 host to 4.1 using the instructions in Section 5.3, “Upgrading a Self-Hosted Engine Environment”.
Chapter 6. Backing up and Restoring a RHEL-Based Self-Hosted Environment
Note
Procedure 6.1. Workflow for Backing Up the Self-Hosted Engine Environment
- The Manager virtual machine is running on
Host 2and the six regular virtual machines in the environment are balanced across the three hosts. Place
PlaceHost 1into maintenance mode. This will migrate the virtual machines onHost 1to the other hosts, freeing it of any virtual load and enabling it to be used as a failover host for the backup. Host 1is in maintenance mode. The two virtual machines it previously hosted have been migrated to Host 3. Use
Useengine-backupto create backups of the environment. After the backup has been taken,Host 1can be activated again to host virtual machines, including the Manager virtual machine.
Procedure 6.2. Workflow for Restoring the Self-Hosted Engine Environment
Host 1has been used to deploy a new self-hosted engine and has restored the backup taken in the previous example procedure. Deploying the restored environment involves additional steps to that of a regular self-hosted engine deployment:- After Red Hat Virtualization Manager has been installed on the Manager virtual machine, but before
engine-setupis first run, restore the backup using theengine-backuptool. - After
engine-setuphas configured and restored the Manager, log in to the Administration Portal and removeHost 1, which will be present from the backup. If oldHost 1is not removed, and is still present in the Manager when finalizing deployment on newHost 1, the Manager virtual machine will not be able to synchronize with newHost 1and the deployment will fail.
 After
AfterHost 1and the Manager virtual machine have synchronized and the deployment has been finalized, the environment can be considered operational on a basic level. With only one self-hosted engine node, the Manager virtual machine is not highly available. However, if necessary, high-priority virtual machines can be started onHost 1.Any standard RHEL-based hosts - hosts that are present in the environment but are not self-hosted engine nodes - that are operational will become active, and the virtual machines that were active at the time of backup will now be running on these hosts and available in the Manager.Host 2andHost 3are not recoverable in their current state. These hosts need to be removed from the environment, and then added again to the environment using thehosted-enginedeployment script. For more information on these actions, see Section 6.2.4, “Removing Non-Operational Hosts from a Restored Self-Hosted Engine Environment” and Chapter 7, Installing Additional Hosts to a Self-Hosted Environment.
Host 2andHost 3have been re-deployed into the restored environment. The environment is now as it was in the first image, before the backup was taken, with the exception that the Manager virtual machine is hosted onHost 1.
6.1. Backing up the Self-Hosted Engine Manager Virtual Machine
engine-backup tool and can be performed without interrupting the ovirt-engine service. The engine-backup tool only allows you to back up the Red Hat Virtualization Manager virtual machine, but not the self-hosted engine node that runs the Manager virtual machine or other virtual machines hosted in the environment.
Warning
engine-backup tool must be used for backup and restoration. If a third-party tool is used, it must back up the tar file produced by the engine-backup tool.
Procedure 6.3. Backing up the Original Red Hat Virtualization Manager
Preparing the Failover Host
A failover host, one of the self-hosted engine nodes in the environment, must be placed into maintenance mode so that it has no virtual load at the time of the backup. This host can then later be used to deploy the restored self-hosted engine environment. Any of the self-hosted engine nodes can be used as the failover host for this backup scenario, however the restore process is more straightforward ifHost 1is used. The default name for theHost 1host ishosted_engine_1; this was set when thehosted-enginedeployment script was initially run.- Log in to one of the self-hosted engine nodes.
- Confirm that the
hosted_engine_1host isHost 1:# hosted-engine --vm-status
- Log in to the Administration Portal.
- Click the Hosts tab.
- Select the
hosted_engine_1host in the results list, and click → . - Click .
Depending on the virtual load of the host, it may take some time for all the virtual machines to be migrated. Proceed to the next step after the host status has changed toMaintenance.Creating a Backup of the Manager
On the Manager virtual machine, back up the configuration settings and database content, replacing [EngineBackupFile] with the file name for the backup file, and [LogFILE] with the file name for the backup log.# engine-backup --mode=backup --file=[EngineBackupFile] --log=[LogFILE]
Backing up the Files to an External Server
Back up the files to an external server. In the following example, [Storage.example.com] is the fully qualified domain name of a network storage server that will store the backup until it is needed, and /backup/ is any designated folder or path. The backup files must be accessible to restore the configuration settings and database content.# scp -p [EngineBackupFiles] [Storage.example.com:/backup/EngineBackupFiles]
Activating the Failover Host
Bring thehosted_engine_1host out of maintenance mode.- Log in to the Administration Portal.
- Click the Hosts tab.
- Select
hosted_engine_1from the results list. - Click → .
6.2. Restoring the Self-Hosted Engine Environment
engine-backup tool.
Warning
tar backup file produced by the engine-backup tool. If a third-party tool is used, it must create a backup of the tar file.
- Create a newly installed Red Hat Enterprise Linux host and run the
hosted-enginedeployment script. - Restore the Red Hat Virtualization Manager configuration settings and database content in the new Manager virtual machine.
- Remove self-hosted engine nodes in a Non Operational state and re-install them into the restored self-hosted engine environment.
Prerequisites
- To restore a self-hosted engine environment, you must prepare a newly installed Red Hat Enterprise Linux system on a physical host.
- The operating system version of the new host and Manager must be the same as that of the original host and Manager.
- You must have Red Hat Subscription Manager entitlements for your new environment. For a list of the required repositories, see Subscribing to the Required Entitlements in the Installation Guide.
- The fully qualified domain name of the new Manager must be the same fully qualified domain name as that of the original Manager. Forward and reverse lookup records must both be set in DNS.
- You must prepare storage for the new self-hosted engine environment to use as the Manager virtual machine's shared storage domain. This domain must be at least 68 GB. For more information on preparing storage for your deployment, see the Storage chapter of the Administration Guide.
6.2.1. Creating a New Self-Hosted Engine Environment to be Used as the Restored Environment
Host 1, used in Section 6.1, “Backing up the Self-Hosted Engine Manager Virtual Machine” uses the default hostname of hosted_engine_1 which is also used in this procedure. Due to the nature of the restore process for the self-hosted engine, before the final synchronization of the restored engine can take place, this failover host will need to be removed, and this can only be achieved if the host had no virtual load when the backup was taken. You can also restore the backup on a separate hardware which was not used in the backed up environment and this is not a concern.
Important
Procedure 6.4. Creating a New Self-Hosted Environment to be Used as the Restored Environment
Updating DNS
Update your DNS so that the fully qualified domain name of the Red Hat Virtualization environment correlates to the IP address of the new Manager. In this procedure, fully qualified domain name was set as Manager.example.com. The fully qualified domain name provided for the engine must be identical to that given in the engine setup of the original engine that was backed up.Initiating Hosted Engine Deployment
On the newly installed Red Hat Enterprise Linux host, run thehosted-enginedeployment script. To escape the script at any time, use the CTRL+D keyboard combination to abort deployment. If running thehosted-enginedeployment script over a network, it is recommended to use thescreenwindow manager to avoid losing the session in case of network or terminal disruption. Install the screen package first if not installed.# screen
# hosted-engine --deploy
Preparing for Initialization
The script begins by requesting confirmation to use the host as a hypervisor for use in a self-hosted engine environment.Continuing will configure this host for serving as hypervisor and create a VM where you have to install oVirt Engine afterwards. Are you sure you want to continue? (Yes, No)[Yes]:
Configuring Storage
Select the type of storage to use.During customization use CTRL-D to abort. Please specify the storage you would like to use (glusterfs, iscsi, fc, nfs3, nfs4)[nfs3]:
- For NFS storage types, specify the full address, using either the FQDN or IP address, and path name of the shared storage domain.
Please specify the full shared storage connection path to use (example: host:/path): storage.example.com:/hosted_engine/nfs
- For iSCSI, specify the iSCSI portal IP address, port, user name and password, and select a target name from the auto-detected list. You can only select one iSCSI target during the deployment.
Please specify the iSCSI portal IP address:
Please specify the iSCSI portal port [3260]:
Please specify the iSCSI portal user:
Please specify the iSCSI portal password:
Please specify the target name (auto-detected values) [default]:
- For Gluster storage, specify the full address, using either the FQDN or IP address, and path name of the shared storage domain.
Important
Only replica 3 Gluster storage is supported. Ensure the following configuration has been made:- In the
/etc/glusterfs/glusterd.volfile on all three Gluster servers, setrpc-auth-allow-insecuretoon.option rpc-auth-allow-insecure on
- Configure the volume as follows:
gluster volume set volume cluster.quorum-type auto
gluster volume set volume network.ping-timeout 10
gluster volume set volume auth.allow \*
gluster volume set volume group virt
gluster volume set volume storage.owner-uid 36
gluster volume set volume storage.owner-gid 36
gluster volume set volume server.allow-insecure on
Please specify the full shared storage connection path to use (example: host:/path): storage.example.com:/hosted_engine/gluster_volume
- For Fibre Channel, the host bus adapters must be configured and connected, and the
hosted-enginescript will auto-detect the LUNs available. The LUNs must not contain any existing data.The following luns have been found on the requested target: [1] 3514f0c5447600351 30GiB XtremIO XtremApp status: used, paths: 2 active [2] 3514f0c5447600352 30GiB XtremIO XtremApp status: used, paths: 2 active Please select the destination LUN (1, 2) [1]:
Configuring the Network
The script detects possible network interface controllers (NICs) to use as a management bridge for the environment. It then checks your firewall configuration and offers to modify it for console (SPICE or VNC) access the Manager virtual machine. Provide a pingable gateway IP address, to be used by theovirt-ha-agent, to help determine a host's suitability for running a Manager virtual machine.Please indicate a nic to set ovirtmgmt bridge on: (eth1, eth0) [eth1]: iptables was detected on your computer, do you wish setup to configure it? (Yes, No)[Yes]: Please indicate a pingable gateway IP address [X.X.X.X]:
Configuring the New Manager Virtual Machine
The script creates a virtual machine to be configured as the new Manager virtual machine. Specify the boot device and, if applicable, the path name of the installation media, the image alias, the CPU type, the number of virtual CPUs, and the disk size. Specify a MAC address for the Manager virtual machine, or accept a randomly generated one. The MAC address can be used to update your DHCP server prior to installing the operating system on the Manager virtual machine. Specify memory size and console connection type for the creation of Manager virtual machine.Please specify the device to boot the VM from (cdrom, disk, pxe) [cdrom]: Please specify an alias for the Hosted Engine image [hosted_engine]: The following CPU types are supported by this host: - model_Penryn: Intel Penryn Family - model_Conroe: Intel Conroe Family Please specify the CPU type to be used by the VM [model_Penryn]: Please specify the number of virtual CPUs for the VM [Defaults to minimum requirement: 2]: Please specify the disk size of the VM in GB [Defaults to minimum requirement: 25]: You may specify a MAC address for the VM or accept a randomly generated default [00:16:3e:77:b2:a4]: Please specify the memory size of the VM in MB [Defaults to minimum requirement: 4096]: Please specify the console type you want to use to connect to the VM (vnc, spice) [vnc]:Identifying the Name of the Host
Specify the password for theadmin@internaluser to access the Administration Portal.A unique name must be provided for the name of the host, to ensure that it does not conflict with other resources that will be present when the engine has been restored from the backup. The namehosted_engine_1can be used in this procedure because this host was placed into maintenance mode before the environment was backed up, enabling removal of this host between the restoring of the engine and the final synchronization of the host and the engine.Enter engine admin password: Confirm engine admin password: Enter the name which will be used to identify this host inside the Administration Portal [hosted_engine_1]:
Configuring the Hosted Engine
Provide the fully qualified domain name for the new Manager virtual machine. This procedure uses the fully qualified domain name Manager.example.com. Provide the name and TCP port number of the SMTP server, the email address used to send email notifications, and a comma-separated list of email addresses to receive these notifications.Important
The fully qualified domain name provided for the engine (Manager.example.com) must be the same fully qualified domain name provided when original Manager was initially set up.Please provide the FQDN for the engine you would like to use. This needs to match the FQDN that you will use for the engine installation within the VM. Note: This will be the FQDN of the VM you are now going to create, it should not point to the base host or to any other existing machine. Engine FQDN: Manager.example.com Please provide the name of the SMTP server through which we will send notifications [localhost]: Please provide the TCP port number of the SMTP server [25]: Please provide the email address from which notifications will be sent [root@localhost]: Please provide a comma-separated list of email addresses which will get notifications [root@localhost]:
Configuration Preview
Before proceeding, thehosted-enginedeployment script displays the configuration values you have entered, and prompts for confirmation to proceed with these values.Bridge interface : eth1 Engine FQDN : Manager.example.com Bridge name : ovirtmgmt SSH daemon port : 22 Firewall manager : iptables Gateway address : X.X.X.X Host name for web application : hosted_engine_1 Host ID : 1 Image alias : hosted_engine Image size GB : 25 Storage connection : storage.example.com:/hosted_engine/nfs Console type : vnc Memory size MB : 4096 MAC address : 00:16:3e:77:b2:a4 Boot type : pxe Number of CPUs : 2 CPU Type : model_Penryn Please confirm installation settings (Yes, No)[Yes]:
Creating the New Manager Virtual Machine
The script creates the virtual machine to be configured as the Manager virtual machine and provides connection details. You must install an operating system on it before thehosted-enginedeployment script can proceed on Hosted Engine configuration.[ INFO ] Stage: Transaction setup [ INFO ] Stage: Misc configuration [ INFO ] Stage: Package installation [ INFO ] Stage: Misc configuration [ INFO ] Configuring libvirt [ INFO ] Configuring VDSM [ INFO ] Starting vdsmd [ INFO ] Waiting for VDSM hardware info [ INFO ] Waiting for VDSM hardware info [ INFO ] Configuring the management bridge [ INFO ] Creating Storage Domain [ INFO ] Creating Storage Pool [ INFO ] Connecting Storage Pool [ INFO ] Verifying sanlock lockspace initialization [ INFO ] Creating VM Image [ INFO ] Disconnecting Storage Pool [ INFO ] Start monitoring domain [ INFO ] Configuring VM [ INFO ] Updating hosted-engine configuration [ INFO ] Stage: Transaction commit [ INFO ] Stage: Closing up [ INFO ] Creating VM You can now connect to the VM with the following command: /usr/bin/remote-viewer vnc://localhost:5900 Use temporary password "3477XXAM" to connect to vnc console. Please note that in order to use remote-viewer you need to be able to run graphical applications. This means that if you are using ssh you have to supply the -Y flag (enables trusted X11 forwarding). Otherwise you can run the command from a terminal in your preferred desktop environment. If you cannot run graphical applications you can connect to the graphic console from another host or connect to the console using the following command: virsh -c qemu+tls://Test/system console HostedEngine If you need to reboot the VM you will need to start it manually using the command: hosted-engine --vm-start You can then set a temporary password using the command: hosted-engine --add-console-password The VM has been started. Install the OS and shut down or reboot it. To continue please make a selection: (1) Continue setup - VM installation is complete (2) Reboot the VM and restart installation (3) Abort setup (4) Destroy VM and abort setup (1, 2, 3, 4)[1]:Using the naming convention of this procedure, connect to the virtual machine using VNC with the following command:/usr/bin/remote-viewer vnc://hosted_engine_1.example.com:5900
Installing the Virtual Machine Operating System
Connect to Manager virtual machine and install a Red Hat Enterprise Linux 7 operating system.Synchronizing the Host and the Manager
Return to the host and continue thehosted-enginedeployment script by selecting option 1:(1) Continue setup - VM installation is complete
Waiting for VM to shut down...
[ INFO  ] Creating VM
You can now connect to the VM with the following command:
      /usr/bin/remote-viewer vnc://localhost:5900
Use temporary password "3477XXAM" to connect to vnc console.
Please note that in order to use remote-viewer you need to be able to run graphical applications.
This means that if you are using ssh you have to supply the -Y flag (enables trusted X11 forwarding).
Otherwise you can run the command from a terminal in your preferred desktop environment.
If you cannot run graphical applications you can connect to the graphic console from another host or connect to the console using the following command:
virsh -c qemu+tls://Test/system console HostedEngine
If you need to reboot the VM you will need to start it manually using the command:
hosted-engine --vm-start
You can then set a temporary password using the command:
hosted-engine --add-console-password
Please install and setup the engine in the VM.
You may also be interested in subscribing to "agent" RHN/Satellite channel and installing rhevm-guest-agent-common package in the VM.
To continue make a selection from the options below:
  (1) Continue setup - engine installation is complete
  (2) Power off and restart the VM
  (3) Abort setup
  (4) Destroy VM and abort setup

  (1, 2, 3, 4)[1]:
Installing the Manager
Connect to the new Manager virtual machine, register it with Red Hat Subscription Management, and enable the required repositories. See Subscribing to the Required Entitlements in the Installation Guide.Ensure the latest versions of all installed packages are in use, and install the rhevm packages.# yum update
Note
Reboot the machine if any kernel related packages have been updated.# yum install rhevm
6.2.2. Restoring the Self-Hosted Engine Manager
engine-backup tool to automate the restore of the configuration settings and database content for a backed-up self-hosted engine Manager virtual machine and Data Warehouse. The procedure only applies to components that were configured automatically during the initial engine-setup. If you configured the database(s) manually during engine-setup, follow the instructions at Section 6.2.3, “Restoring the Self-Hosted Engine Manager Manually” to restore the back-up environment manually.
Procedure 6.5. Restoring the Self-Hosted Engine Manager
- Secure copy the backup files to the new Manager virtual machine. This example copies the files from a network storage server to which the files were copied in Section 6.1, “Backing up the Self-Hosted Engine Manager Virtual Machine”. In this example, Storage.example.com is the fully qualified domain name of the storage server, /backup/EngineBackupFiles is the designated file path for the backup files on the storage server, and /backup/ is the path to which the files will be copied on the new Manager.
# scp -p Storage.example.com:/backup/EngineBackupFiles /backup/
- Use the
engine-backuptool to restore a complete backup.- If you are only restoring the Manager, run:
# engine-backup --mode=restore --file=file_name --log=log_file_name --provision-db --restore-permissions
- If you are restoring the Manager and Data Warehouse, run:
# engine-backup --mode=restore --file=file_name --log=log_file_name --provision-db --provision-dwh-db --restore-permissions
If successful, the following output displays:You should now run engine-setup. Done.
- Configure the restored Manager virtual machine. This process identifies the existing configuration settings and database content. Confirm the settings. Upon completion, the setup provides an SSH fingerprint and an internal Certificate Authority hash.
# engine-setup
[ INFO  ] Stage: Initializing
[ INFO  ] Stage: Environment setup
Configuration files: ['/etc/ovirt-engine-setup.conf.d/10-packaging.conf', '/etc/ovirt-engine-setup.conf.d/20-setup-ovirt-post.conf']
Log file: /var/log/ovirt-engine/setup/ovirt-engine-setup-20140304075238.log
Version: otopi-1.1.2 (otopi-1.1.2-1.el6ev)
[ INFO  ] Stage: Environment packages setup
[ INFO  ] Yum Downloading: rhel-65-zstream/primary_db 2.8 M(70%)
[ INFO  ] Stage: Programs detection
[ INFO  ] Stage: Environment setup
[ INFO  ] Stage: Environment customization

          --== PACKAGES ==--

[ INFO  ] Checking for product updates...
[ INFO  ] No product updates found

          --== NETWORK CONFIGURATION ==--

Setup can automatically configure the firewall on this system.
Note: automatic configuration of the firewall may overwrite current settings.
Do you want Setup to configure the firewall? (Yes, No) [Yes]:
[ INFO  ] iptables will be configured as firewall manager.

          --== DATABASE CONFIGURATION ==--


          --== OVIRT ENGINE CONFIGURATION ==--

          Skipping storing options as database already prepared

          --== PKI CONFIGURATION ==--

          PKI is already configured

          --== APACHE CONFIGURATION ==--


          --== SYSTEM CONFIGURATION ==--


          --== END OF CONFIGURATION ==--

[ INFO  ] Stage: Setup validation
[ INFO  ] Cleaning stale zombie tasks

          --== CONFIGURATION PREVIEW ==--

          Database name                      : engine
          Database secured connection        : False
          Database host                      : X.X.X.X
          Database user name                 : engine
          Database host name validation      : False
          Database port                      : 5432
          NFS setup                          : True
          Firewall manager                   : iptables
          Update Firewall                    : True
          Configure WebSocket Proxy          : True
          Host FQDN                          : Manager.example.com
          NFS mount point                    : /var/lib/exports/iso
          Set application as default page    : True
          Configure Apache SSL               : True

          Please confirm installation settings (OK, Cancel) [OK]:
Removing the Host from the Restored Environment
If the deployment of the restored self-hosted engine is on new hardware that has a unique name not present in the backed-up engine, skip this step. This step is only applicable to deployments occurring on the failover host,hosted_engine_1. Because this host was present in the environment at time the backup was created, it maintains a presence in the restored engine and must first be removed from the environment before final synchronization can take place.- Log in to the Administration Portal.
- Click the Hosts tab. The failover host,
hosted_engine_1, will be in maintenance mode and without a virtual load, as this was how it was prepared for the backup. - Click .
- Click .
Note
If the host you are trying to remove becomes non-operational, see Section 6.2.4, “Removing Non-Operational Hosts from a Restored Self-Hosted Engine Environment” for instructions on how to force the removal of a host.Synchronizing the Host and the Manager
Return to the host and continue thehosted-enginedeployment script by selecting option 1:(1) Continue setup - engine installation is complete
[ INFO  ] Engine replied: DB Up!Welcome to Health Status!
[ INFO  ] Waiting for the host to become operational in the engine. This may take several minutes...
[ INFO  ] Still waiting for VDSM host to become operational...
At this point,hosted_engine_1will become visible in the Administration Portal with Installing and Initializing states before entering a Non Operational state. The host will continue to wait for the VDSM host to become operational until it eventually times out. This happens because another host in the environment maintains the Storage Pool Manager (SPM) role andhosted_engine_1cannot interact with the storage domain because the SPM host is in a Non Responsive state. When this process times out, you are prompted to shut down the virtual machine to complete the deployment. When deployment is complete, the host can be manually placed into maintenance mode and activated through the Administration Portal.[ INFO ] Still waiting for VDSM host to become operational... [ ERROR ] Timed out while waiting for host to start. Please check the logs. [ ERROR ] Unable to add hosted_engine_2 to the manager Please shutdown the VM allowing the system to launch it as a monitored service. The system will wait until the VM is down.- Shut down the new Manager virtual machine.
# shutdown -h now
- Return to the host to confirm it has detected that the Manager virtual machine is down.
[ INFO ] Enabling and starting HA services Hosted Engine successfully set up [ INFO ] Stage: Clean up [ INFO ] Stage: Pre-termination [ INFO ] Stage: Termination - Activate the host.
- Log in to the Administration Portal.
- Click the Hosts tab.
- Select
hosted_engine_1and click → . The host may take several minutes before it enters maintenance mode. - Click → .
Once active,hosted_engine_1immediately contends for SPM, and the storage domain and data center become active. - Migrate virtual machines to the active host by manually fencing the Non Responsive hosts. In the Administration Portal, right-click the hosts and select Confirm 'Host has been Rebooted'.Any virtual machines that were running on that host at the time of the backup will now be removed from that host, and move from an Unknown state to a Down state. These virtual machines can now be run on
hosted_engine_1. The host that was fenced can now be forcefully removed using the REST API.
hosted_engine_1 is active and is able to run virtual machines in the restored environment. The remaining self-hosted engine nodes in Non Operational state can now be removed by following the steps in Section 6.2.4, “Removing Non-Operational Hosts from a Restored Self-Hosted Engine Environment” and then re-installed into the environment by following the steps in Chapter 7, Installing Additional Hosts to a Self-Hosted Environment.
Note
6.2.3. Restoring the Self-Hosted Engine Manager Manually
Procedure 6.6. Restoring the Self-Hosted Engine Manager
- Manually create an empty database to which the database content in the backup can be restored. The following steps must be performed on the machine where the database is to be hosted.
- If the database is to be hosted on a machine other than the Manager virtual machine, install the postgresql-server package. This step is not required if the database is to be hosted on the Manager virtual machine because this package is included with the rhevm package.
# yum install postgresql-server
- Initialize the
postgresqldatabase, start thepostgresqlservice, and ensure this service starts on boot:# postgresql-setup initdb # systemctl start postgresql.service # systemctl enable postgresql.service
- Enter the postgresql command line:
# su postgres
$ psql
- Create the
engineuser:postgres=# create role engine with login encrypted password 'password';
If you are also restoring Data Warehouse, create theovirt_engine_historyuser on the relevant host:postgres=# create role ovirt_engine_history with login encrypted password 'password';
- Create the new database:
postgres=# create database database_name owner engine template template0 encoding 'UTF8' lc_collate 'en_US.UTF-8' lc_ctype 'en_US.UTF-8';
If you are also restoring the Data Warehouse, create the database on the relevant host:postgres=# create database database_name owner ovirt_engine_history template template0 encoding 'UTF8' lc_collate 'en_US.UTF-8' lc_ctype 'en_US.UTF-8';
- Exit the postgresql command line and log out of the postgres user:
postgres=# \q
$ exit
- Edit the
/var/lib/pgsql/data/pg_hba.conffile as follows:- For each local database, replace the existing directives in the section starting with
localat the bottom of the file with the following directives:host database_name user_name 0.0.0.0/0 md5 host database_name user_name ::0/0 md5
- For each remote database:
- Add the following line immediately underneath the line starting with
Localat the bottom of the file, replacing X.X.X.X with the IP address of the Manager:host database_name user_name X.X.X.X/32 md5
- Allow TCP/IP connections to the database. Edit the
/var/lib/pgsql/data/postgresql.conffile and add the following line:listen_addresses='*'
This example configures thepostgresqlservice to listen for connections on all interfaces. You can specify an interface by giving its IP address. - Open the default port used for PostgreSQL database connections, and save the updated firewall rules:
# iptables -I INPUT 5 -p tcp -s Manager_IP_Address --dport 5432 -j ACCEPT
# service iptables save
- Restart the
postgresqlservice:# systemctl restart postgresql.service
- Secure copy the backup files to the new Manager virtual machine. This example copies the files from a network storage server to which the files were copied in Section 6.1, “Backing up the Self-Hosted Engine Manager Virtual Machine”. In this example, Storage.example.com is the fully qualified domain name of the storage server, /backup/EngineBackupFiles is the designated file path for the backup files on the storage server, and /backup/ is the path to which the files will be copied on the new Manager.
# scp -p Storage.example.com:/backup/EngineBackupFiles /backup/
- Restore a complete backup or a database-only backup with the
--change-db-credentialsparameter to pass the credentials of the new database. The database_location for a database local to the Manager islocalhost.Note
The following examples use a--*passwordoption for each database without specifying a password, which will prompt for a password for each database. Passwords can be supplied for these options in the command itself, however this is not recommended as the password will then be stored in the shell history. Alternatively,--*passfile=password_file options can be used for each database to securely pass the passwords to theengine-backuptool without the need for interactive prompts.- Restore a complete backup:
# engine-backup --mode=restore --file=file_name --log=log_file_name --change-db-credentials --db-host=database_location --db-name=database_name --db-user=engine --db-password
If Data Warehouse is also being restored as part of the complete backup, include the revised credentials for the additional database:engine-backup --mode=restore --file=file_name --log=log_file_name --change-db-credentials --db-host=database_location --db-name=database_name --db-user=engine --db-password --change-dwh-db-credentials --dwh-db-host=database_location --dwh-db-name=database_name --dwh-db-user=ovirt_engine_history --dwh-db-password
- Restore a database-only backup restoring the configuration files and the database backup:
# engine-backup --mode=restore --scope=files --scope=db --file=file_name --log=file_name --change-db-credentials --db-host=database_location --db-name=database_name --db-user=engine --db-password
The example above restores a backup of the Manager database.# engine-backup --mode=restore --scope=files --scope=dwhdb --file=file_name --log=file_name --change-dwh-db-credentials --dwh-db-host=database_location --dwh-db-name=database_name --dwh-db-user=ovirt_engine_history --dwh-db-password
The example above restores a backup of the Data Warehouse database.
If successful, the following output displays:You should now run engine-setup. Done.
- Configure the restored Manager virtual machine. This process identifies the existing configuration settings and database content. Confirm the settings. Upon completion, the setup provides an SSH fingerprint and an internal Certificate Authority hash.
# engine-setup
[ INFO  ] Stage: Initializing
[ INFO  ] Stage: Environment setup
Configuration files: ['/etc/ovirt-engine-setup.conf.d/10-packaging.conf', '/etc/ovirt-engine-setup.conf.d/20-setup-ovirt-post.conf']
Log file: /var/log/ovirt-engine/setup/ovirt-engine-setup-20140304075238.log
Version: otopi-1.1.2 (otopi-1.1.2-1.el6ev)
[ INFO  ] Stage: Environment packages setup
[ INFO  ] Yum Downloading: rhel-65-zstream/primary_db 2.8 M(70%)
[ INFO  ] Stage: Programs detection
[ INFO  ] Stage: Environment setup
[ INFO  ] Stage: Environment customization

          --== PACKAGES ==--

[ INFO  ] Checking for product updates...
[ INFO  ] No product updates found

          --== NETWORK CONFIGURATION ==--

Setup can automatically configure the firewall on this system.
Note: automatic configuration of the firewall may overwrite current settings.
Do you want Setup to configure the firewall? (Yes, No) [Yes]:
[ INFO  ] iptables will be configured as firewall manager.

          --== DATABASE CONFIGURATION ==--


          --== OVIRT ENGINE CONFIGURATION ==--

          Skipping storing options as database already prepared

          --== PKI CONFIGURATION ==--

          PKI is already configured

          --== APACHE CONFIGURATION ==--


          --== SYSTEM CONFIGURATION ==--


          --== END OF CONFIGURATION ==--

[ INFO  ] Stage: Setup validation
[ INFO  ] Cleaning stale zombie tasks

          --== CONFIGURATION PREVIEW ==--

          Database name                      : engine
          Database secured connection        : False
          Database host                      : X.X.X.X
          Database user name                 : engine
          Database host name validation      : False
          Database port                      : 5432
          NFS setup                          : True
          Firewall manager                   : iptables
          Update Firewall                    : True
          Configure WebSocket Proxy          : True
          Host FQDN                          : Manager.example.com
          NFS mount point                    : /var/lib/exports/iso
          Set application as default page    : True
          Configure Apache SSL               : True

          Please confirm installation settings (OK, Cancel) [OK]:
Removing the Host from the Restored Environment
If the deployment of the restored self-hosted engine is on new hardware that has a unique name not present in the backed-up engine, skip this step. This step is only applicable to deployments occurring on the failover host,hosted_engine_1. Because this host was present in the environment at time the backup was created, it maintains a presence in the restored engine and must first be removed from the environment before final synchronization can take place.- Log in to the Administration Portal.
- Click the Hosts tab. The failover host,
hosted_engine_1, will be in maintenance mode and without a virtual load, as this was how it was prepared for the backup. - Click .
- Click .
Synchronizing the Host and the Manager
Return to the host and continue thehosted-enginedeployment script by selecting option 1:(1) Continue setup - engine installation is complete
[ INFO  ] Engine replied: DB Up!Welcome to Health Status!
[ INFO  ] Waiting for the host to become operational in the engine. This may take several minutes...
[ INFO  ] Still waiting for VDSM host to become operational...
At this point,hosted_engine_1will become visible in the Administration Portal with Installing and Initializing states before entering a Non Operational state. The host will continue to wait for the VDSM host to become operational until it eventually times out. This happens because another host in the environment maintains the Storage Pool Manager (SPM) role andhosted_engine_1cannot interact with the storage domain because the SPM host is in a Non Responsive state. When this process times out, you are prompted to shut down the virtual machine to complete the deployment. When deployment is complete, the host can be manually placed into maintenance mode and activated through the Administration Portal.[ INFO ] Still waiting for VDSM host to become operational... [ ERROR ] Timed out while waiting for host to start. Please check the logs. [ ERROR ] Unable to add hosted_engine_2 to the manager Please shutdown the VM allowing the system to launch it as a monitored service. The system will wait until the VM is down.- Shut down the new Manager virtual machine.
# shutdown -h now
- Return to the host to confirm it has detected that the Manager virtual machine is down.
[ INFO ] Enabling and starting HA services Hosted Engine successfully set up [ INFO ] Stage: Clean up [ INFO ] Stage: Pre-termination [ INFO ] Stage: Termination - Activate the host.
- Log in to the Administration Portal.
- Click the Hosts tab.
- Select
hosted_engine_1and click → . The host may take several minutes before it enters maintenance mode. - Click → .
Once active,hosted_engine_1immediately contends for SPM, and the storage domain and data center become active. - Migrate virtual machines to the active host by manually fencing the Non Responsive hosts. In the Administration Portal, right-click the hosts and select Confirm 'Host has been Rebooted'.Any virtual machines that were running on that host at the time of the backup will now be removed from that host, and move from an Unknown state to a Down state. These virtual machines can now be run on
hosted_engine_1. The host that was fenced can now be forcefully removed using the REST API.
hosted_engine_1 is active and is able to run virtual machines in the restored environment. The remaining self-hosted engine nodes in Non Operational state can now be removed by following the steps in Section 6.2.4, “Removing Non-Operational Hosts from a Restored Self-Hosted Engine Environment” and then re-installed into the environment by following the steps in Chapter 7, Installing Additional Hosts to a Self-Hosted Environment.
Note
6.2.4. Removing Non-Operational Hosts from a Restored Self-Hosted Engine Environment
Fencing the Non-Operational Host
In the Administration Portal, right-click the hosts and select Confirm 'Host has been Rebooted'.Any virtual machines that were running on that host at the time of the backup will now be removed from that host, and move from an Unknown state to a Down state. The host that was fenced can now be forcefully removed using the REST API.Retrieving the Manager Certificate Authority
Connect to the Manager virtual machine and use the command line to perform the following requests with cURL.Use aGETrequest to retrieve the Manager Certificate Authority (CA) certificate for use in all future API requests. In the following example, the--outputoption is used to designate the file hosted-engine.ca as the output for the Manager CA certificate. The--insecureoption means that this initial request will be without a certificate.# curl --output hosted-engine.ca --insecure https://[Manager.example.com]/ca.crt
Retrieving the GUID of the Host to be Removed
Use aGETrequest on the hosts collection to retrieve the Global Unique Identifier (GUID) for the host to be removed. The following example includes the Manager CA certificate file, and uses theadmin@internaluser for authentication, the password for which will be prompted once the command is executed.# curl --request GET --cacert hosted-engine.ca --user admin@internal https://[Manager.example.com]/api/hosts
This request returns the details of all of the hosts in the environment. The host GUID is a hexadecimal string associated with the host name. For more information on the Red Hat Virtualization REST API, see the Red Hat Virtualization REST API Guide.Removing the Fenced Host
Use aDELETErequest using the GUID of the fenced host to remove the host from the environment. In addition to the previously used options this example specifies headers to specify that the request is to be sent and returned using eXtensible Markup Language (XML), and the body in XML that sets theforceaction to betrue.curl --request DELETE --cacert hosted-engine.ca --user admin@internal --header "Content-Type: application/xml" --header "Accept: application/xml" --data "<action><force>true</force></action>" https://[Manager.example.com]/api/hosts/ecde42b0-de2f-48fe-aa23-1ebd5196b4a5
ThisDELETErequest can be used to remove every fenced host in the self-hosted engine environment, as long as the appropriate GUID is specified.Removing the Self-Hosted Engine Configuration from the Host
Remove the host's self-hosted engine configuration so it can be reconfigured when the host is re-installed to a self-hosted engine environment.Log in to the host and remove the configuration file:# rm /etc/ovirt-hosted-engine/hosted-engine.conf
Chapter 7. Installing Additional Hosts to a Self-Hosted Environment
Prerequisites
- For a RHEL-based self-hosted engine environment, you must have prepared a freshly installed Red Hat Enterprise Linux system on a physical host, and subscribed the host to the required entitlements. See Subscribing to the Required Entitlements in the Installation Guide for more information on subscriptions.
- For a RHVH-based self-hosted engine environment, you must have prepared a freshly installed Red Hat Virtualization Host system on a physical host. See Red Hat Virtualization Hosts in the Installation Guide.
- If you are reusing a self-hosted engine node, remove its existing self-hosted engine configuration. See Section 5.2, “Removing a Host from a Self-Hosted Engine Environment”.
Procedure 7.1. Adding an Additional Self-Hosted Engine Node
- In the Administration Portal, click the Hosts resource tab.
- Click .For information on additional host settings, see Explanation of Settings and Controls in the New Host and Edit Host Windows in the Administration Guide.
- Use the drop-down list to select the Data Center and Host Cluster for the new host.
- Enter the Name and the Address of the new host. The standard SSH port, port 22, is auto-filled in the SSH Port field.
- Select an authentication method to use for the Manager to access the host.
- Enter the root user's password to use password authentication.
- Alternatively, copy the key displayed in the SSH PublicKey field to
/root/.ssh/authorized_keyson the host to use public key authentication.
- Optionally, configure power management, where the host has a supported power management card. For information on power management configuration, see Host Power Management Settings Explained in the Administration Guide.
- Click the Hosted Engine sub-tab.
- Select the Deploy radio button.
- Click .
Chapter 8. Migrating the Self-Hosted Engine Database to a Remote Server Database
engine database of a self-hosted engine to a remote database server after the Red Hat Virtualization Manager has been initially configured. Use engine-backup to create a database backup and restore it on the new database server. This procedure assumes that the new database server has Red Hat Enterprise Linux 7 installed and the appropriate subscriptions configured. See Subscribing to the Required Entitlements in the Installation Guide.
Procedure 8.1. Migrating the Database
- Log in to a self-hosted engine node and place the environment into
globalmaintenance mode. This disables the High Availability agents and prevents the Manager virtual machine from being migrated during the procedure:# hosted-engine --set-maintenance --mode=global
- Log in to the Red Hat Virtualization Manager machine and stop the
ovirt-engineservice so that it does not interfere with the engine backup:# systemctl stop ovirt-engine.service
- Create the
enginedatabase backup:# engine-backup --scope=files --scope=db --mode=backup --file=file_name --log=backup_log_name
- Copy the backup file to the new database server:
# scp /tmp/engine.dump root@new.database.server.com:/tmp
- Log in to the new database server and install
engine-backup:# yum install ovirt-engine-tools-backup
- Restore the database on the new database server. file_name is the backup file copied from the Manager.
# engine-backup --mode=restore --scope=files --scope=db --file=file_name --log=restore_log_name --provision-db --no-restore-permissions
- Now that the database has been migrated, start the
ovirt-engineservice:# systemctl start ovirt-engine.service
- Log in to a self-hosted engine node and turn off maintenance mode, enabling the High Availability agents:
# hosted-engine --set-maintenance --mode=none