
Chapter 24. Setting up Stratis file systems using the web console
Stratis runs as a service to manage pools of physical storage devices, simplifying local storage management with ease of use while helping you set up and manage complex storage configurations.
24.1. Creating an unencrypted Stratis pool using the web console
You can use the web console to create an unencrypted Stratis pool from one or more block devices.
Prerequisites
- The RHEL 9 web console is installed and enabled. For details, see Installing the web console.
Stratis is installed.
The web console detects and installs Stratis by default. However, for manually installing Stratis, see Installing Stratis.
-
The
stratisdservice is running. - The block devices on which you are creating a Stratis pool are not in use and are not mounted.
- Each block device on which you are creating a Stratis pool is at least 1 GB.
You cannot encrypt an unencrypted Stratis pool after it is created.
Procedure
- Log in to the RHEL 9 web console.
- Click .
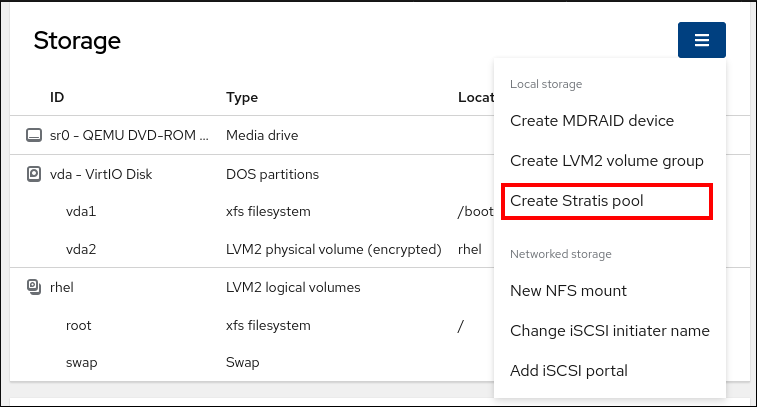
- In the Storage table, click the menu button.
From the drop-down menu, select Create Stratis pool.
In the Create Stratis pool dialog box, enter a name for the Stratis pool.
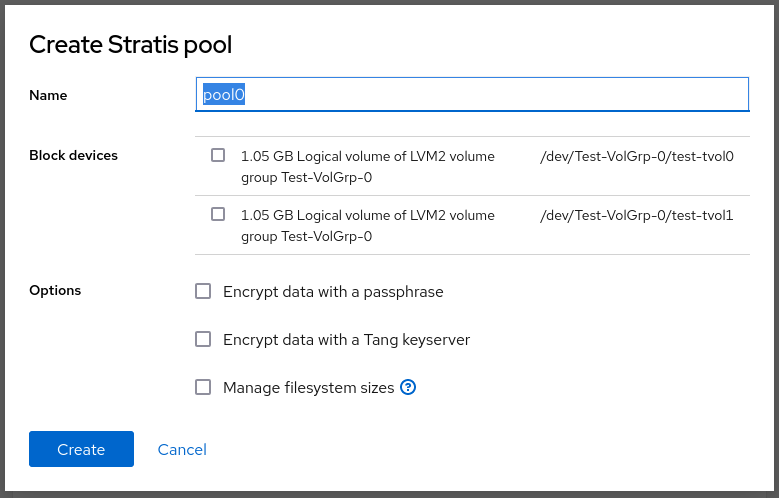
- Select the Block devices from which you want to create the Stratis pool.
- Optional: If you want to specify the maximum size for each file system that is created in pool, select Manage filesystem sizes.
- Click .
Verification
- Go to the Storage section and verify that you can see the new Stratis pool in the Devices table.
24.2. Creating an encrypted Stratis pool using the web console
To secure your data, you can use the web console to create an encrypted Stratis pool from one or more block devices.
When creating an encrypted Stratis pool from one or more block devices, note the following:
- Each block device is encrypted using the cryptsetup library and implements the LUKS2 format.
- Each Stratis pool can either have a unique key or share the same key with other pools. These keys are stored in the kernel keyring.
- The block devices that comprise a Stratis pool must be either all encrypted or all unencrypted. It is not possible to have both encrypted and unencrypted block devices in the same Stratis pool.
- Block devices added to the data tier of an encrypted Stratis pool are automatically encrypted.
Prerequisites
- The RHEL 9 web console is installed and enabled. For details, see Installing the web console.
Stratis v2.1.0 or later is installed.
The web console detects and installs Stratis by default. However, for manually installing Stratis, see Installing Stratis.
-
The
stratisdservice is running. - The block devices on which you are creating a Stratis pool are not in use and are not mounted.
- Each block device on which you are creating a Stratis pool is at least 1 GB.
Procedure
- Log in to the RHEL 9 web console.
- Click .
- In the Storage table, click the menu button.
-
From the drop-down menu, select Create Stratis pool.
In the Create Stratis pool dialog box, enter a name for the Stratis pool.
- Select the Block devices from which you want to create the Stratis pool.
Select the type of encryption, you can use a passphrase, a Tang keyserver, or both:
Passphrase:
- Enter a passphrase.
- Confirm the passphrase
Tang keyserver:
- Enter the keyserver address. For more information, see Deploying a Tang server with SELinux in enforcing mode.
- Optional: If you want to specify the maximum size for each file system that is created in pool, select Manage filesystem sizes.
- Click .
Verification
- Go to the Storage section and verify that you can see the new Stratis pool in the Devices table.
24.3. Viewing a Stratis pool using the web console
You can use the web console to view an existing Stratis pool and the file systems it contains.
Prerequisites
- The RHEL 9 web console is installed and enabled. For details, see Installing the web console.
Stratis is installed.
The web console detects and installs Stratis by default. However, for manually installing Stratis, see Installing Stratis.
-
The
stratisdservice is running. - You have an existing Stratis pool. See Creating an unencrypted Stratis pool or Creating an encrypted Stratis pool.
Procedure
- Log in to the RHEL 9 web console.
- Click .
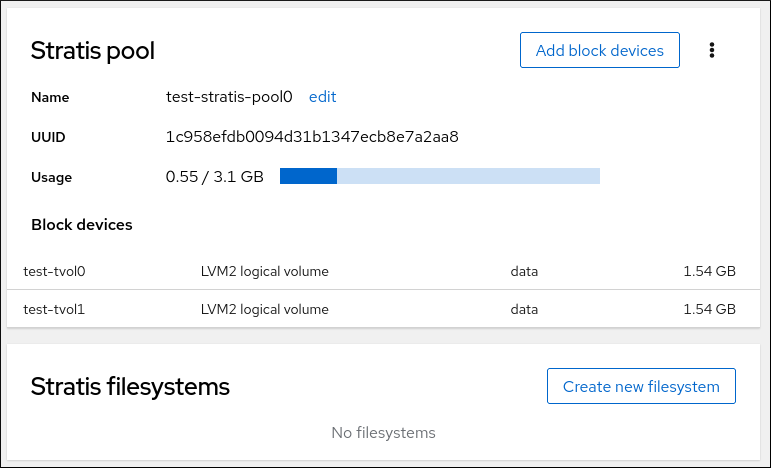
In the Storage table, click the Stratis pool you want to view.
The Stratis pool page displays all the information about the pool and the file systems that you created in the pool.
24.4. Creating a file system on a Stratis pool using the web console
You can use the web console to create a file system on an existing Stratis pool.
Prerequisites
- The RHEL 9 web console is installed and enabled. For details, see Installing the web console.
Stratis is installed.
The web console detects and installs Stratis by default. However, for manually installing Stratis, see Installing Stratis.
-
The
stratisdservice is running. - A Stratis pool is created. See Creating an unencrypted Stratis pool or Creating an encrypted Stratis pool.
Procedure
- Log in to the RHEL 9 web console.
- Click .
- Click the Stratis pool on which you want to create a file system.
On the Stratis pool page, scroll to the Stratis filesystems section and click .
In the Create filesystem dialog box, enter a Name for the file system.
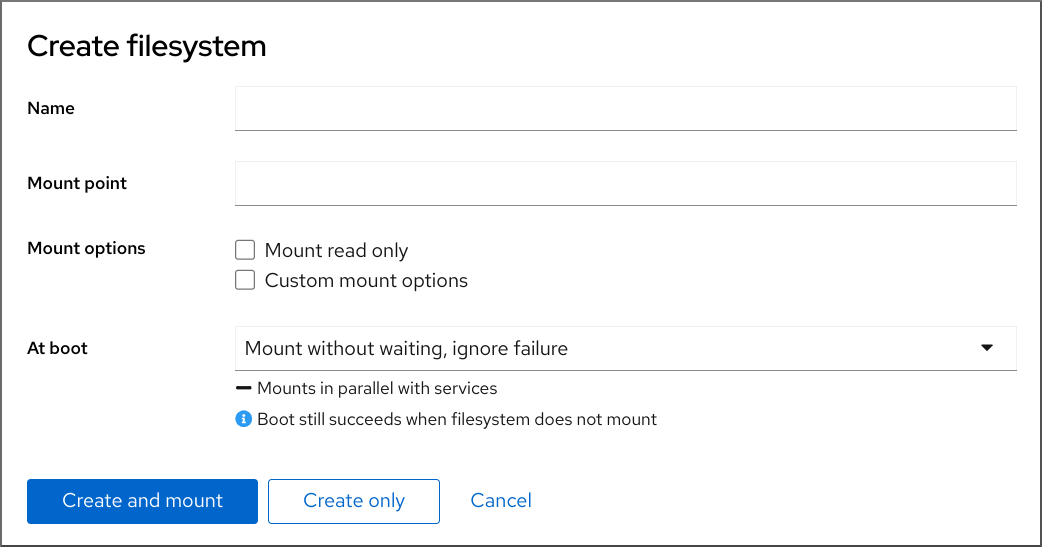
- Enter the Mount point for the file system.
- Select the Mount option.
- In the At boot drop-down menu, select when you want to mount your file system.
Create the file system:
- If you want to create and mount the file system, click .
- If you want to only create the file system, click .
Verification
- The new file system is visible on the Stratis pool page under the Stratis filesystems tab.
24.5. Deleting a file system from a Stratis pool using the web console
You can use the web console to delete a file system from an existing Stratis pool.
Deleting a Stratis pool file system erases all the data it contains.
Prerequisites
- The RHEL 9 web console is installed and enabled. For details, see Installing the web console.
Stratis is installed.
The web console detects and installs Stratis by default. However, for manually installing Stratis, see Installing Stratis.
-
The
stratisdservice is running. - You have an existing Stratis pool. See Creating an unencrypted Stratis pool or Creating an encrypted Stratis pool.
- You have created a file system on the Stratis pool. See Creating a file system on a Stratis pool.
Procedure
- Log in to the RHEL 9 web console.
- Click .
- In the Storage table, click the Stratis pool from which you want to delete a file system.
On the Stratis pool page, scroll to the Stratis filesystems section and click the menu button next to the file system you want to delete.
From the drop-down menu, select .
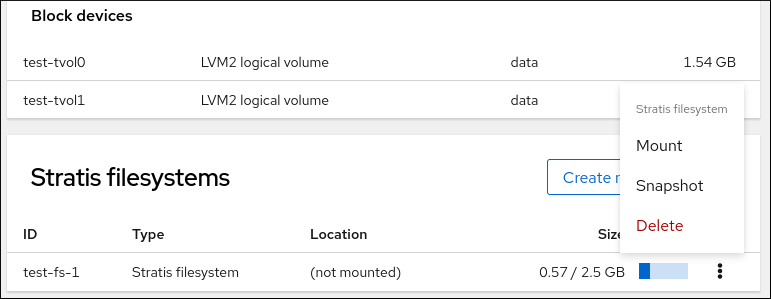
- In the Confirm deletion dialog box, click .
24.6. Renaming a Stratis pool using the web console
You can use the web console to rename an existing Stratis pool.
Prerequisites
- The RHEL 9 web console is installed and enabled. For details, see Installing the web console.
Stratis is installed.
The web console detects and installs Stratis by default. However, for manually installing Stratis, see Installing Stratis.
-
The
stratisdservice is running. - A Stratis pool is created. See Creating an unencrypted Stratis pool or Creating an encrypted Stratis pool.
Procedure
- Log in to the RHEL 9 web console.
- Click .
- In the Storage table, click the Stratis pool you want to rename.
On the Stratis pool page, click next to the Name field.
- In the Rename Stratis pool dialog box, enter a new name.
- Click .
24.7. Adding a block device to a Stratis pool using the web console
You can use the web console to add a block device to an existing Stratis pool. You can also add caches as a block device.
Prerequisites
- The RHEL 9 web console is installed and enabled. For details, see Installing the web console.
Stratis is installed.
The web console detects and installs Stratis by default. However, for manually installing Stratis, see Installing Stratis.
-
The
stratisdservice is running. - A Stratis pool is created. See Creating an unencrypted Stratis pool or Creating an encrypted Stratis pool.
- The block devices on which you are creating a Stratis pool are not in use and are not mounted.
- Each block device on which you are creating a Stratis pool is at least 1 GB.
Procedure
- Log in to the RHEL 9 web console.
- Click .
- In the Storage table, click the Stratis pool to which you want to add a block device.
On the Stratis pool page, click .
In the Add block devices dialog box, select the Tier, whether you want to add a block device as data or cache.
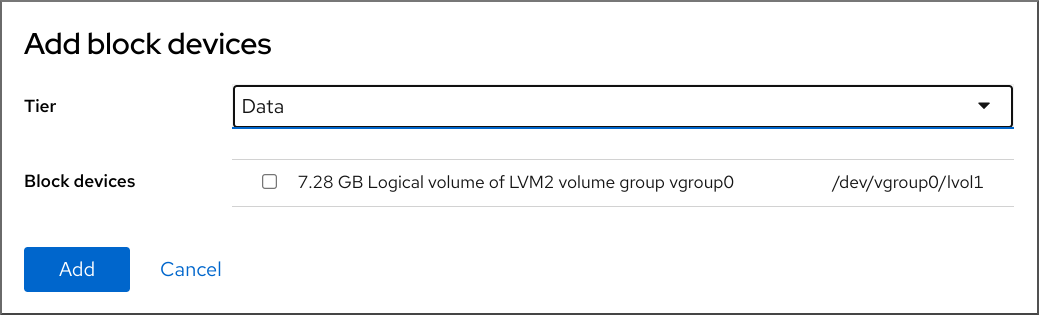
- Optional: If you are adding the block device to a Stratis pool that is encrypted with a passphrase, then you must enter the passphrase.
- Under Block devices, select the devices you want to add to the pool.
- Click .
24.8. Deleting a Stratis pool using the web console
You can use the web console to delete an existing Stratis pool.
Deleting a Stratis pool erases all the data it contains.
Prerequisites
- The RHEL 9 web console is installed and enabled. For details, see Installing the web console.
Stratis is installed.
The web console detects and installs Stratis by default. However, for manually installing Stratis, see Installing Stratis.
-
The
stratisdservice is running. - You have an existing Stratis pool. See Creating an unencrypted Stratis pool or Creating an encrypted Stratis pool.
Procedure
- Log in to the RHEL 9 web console.
- Click .
- In the Storage table, click the menu button, , next to the Stratis pool you want to delete.
- From the drop-down menu, select .
- In the Permanently delete pool dialog box, click .