
Chapter 6. Configure Red Hat Gluster Storage for Hosted Engine using the Web Console
Ensure that disks specified as part of this deployment process do not have any partitions or labels.
Log into the Web Console
Browse to the the Web Console management interface of the first hyperconverged host, for example, https://node1.example.com:9090/, and log in with the credentials you created in Section 4.1, “Install host physical machines”.
Start the deployment wizard
Click Virtualization → Hosted Engine and click Start underneath Hyperconverged.

The Gluster Configuration window opens.
Click the Run Gluster Wizard button.
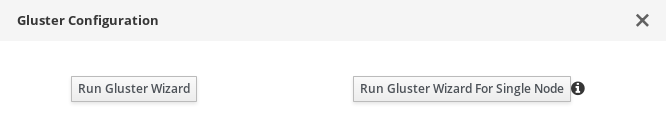
The Gluster Deployment window opens in 3 node mode.
Specify hyperconverged hosts
Specify the back-end FQDN on the storage network (not the management network) of the three hyperconverged hosts. The hyperconverged host that can SSH using key pairs should be listed first, as it is the host that will run deployment tasks and the hosted engine.
NoteIf you plan to create an arbitrated replicated volume, ensure that you specify the host with the arbiter brick as Host3 on this screen.
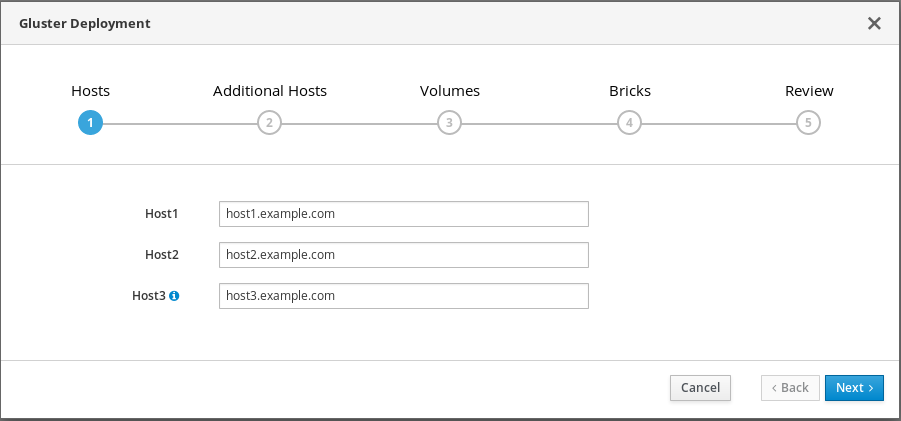
Click Next.
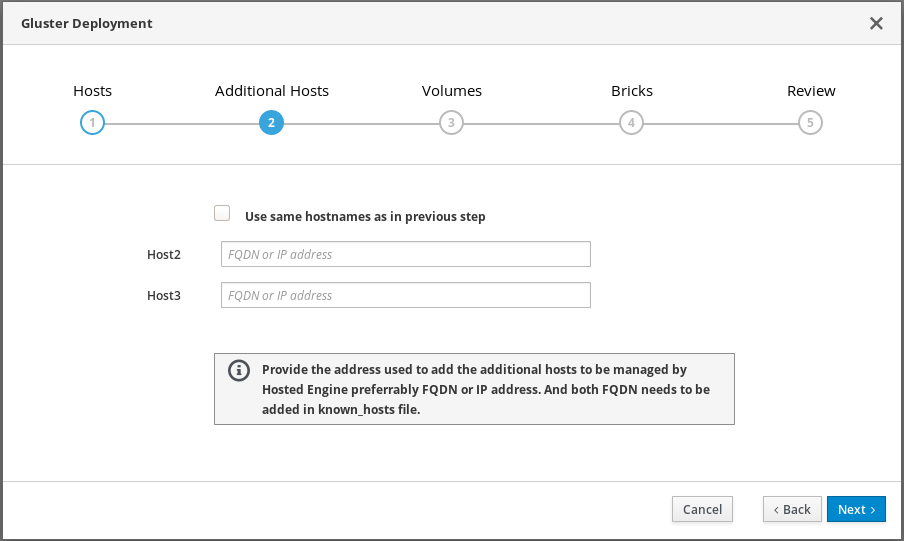
Specify additional hosts
For multi-node deployments, add the front-end Additional Hosts or IP addresses of the other two hyperconverged hosts to have them automatically added to Red Hat Virtualization Manager when deployment is complete.
 Important
Bug 1688269 means that hosts with IPv6 addresses are not automatically added to Red Hat Virtualization Manager when deployment is complete. You can add them after deployment by following Add additional hyperconverged hosts to the hosted engine.
Specify volumes
Specify the volumes to create.
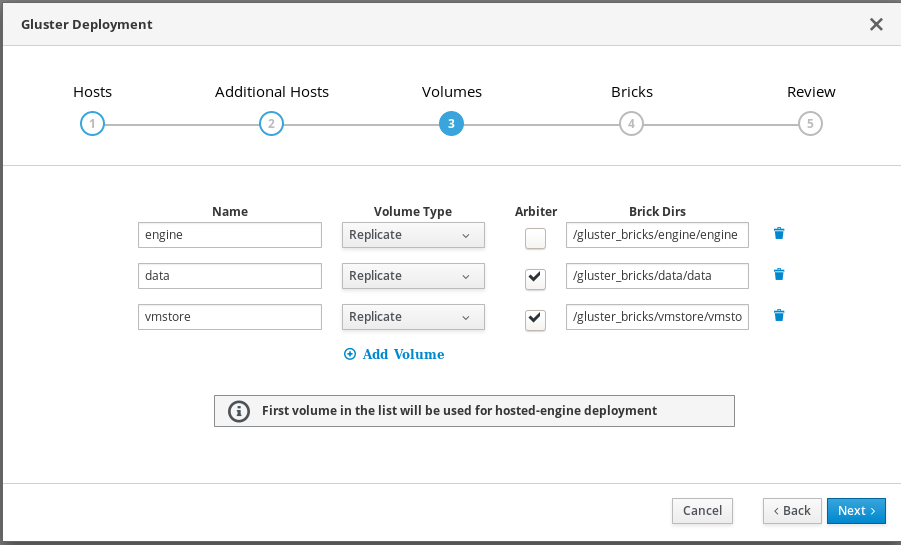
- Name
- Specify the name of the volume to be created.
- Volume Type
- Specify a Replicate volume type. Only replicated volumes are supported for this release.
- Arbiter
- Specify whether to create the volume with an arbiter brick. If this box is checked, the third disk stores only metadata.
- Brick Dirs
- The directory that contains this volume’s bricks.
- Add Volume
-
To add more volumes, click the Add Volume option and it will create a blank entry. Specify the name of the volume to be added and if arbiter volume is required, check the arbiter check box. It is recommended to use the brick path as
/gluster_bricks/<volname>/<volname>.
The default values are correct for most installations.
Specify bricks
Enter details of the bricks to be created. Use the Select host drop-down menu to change the host being configured.
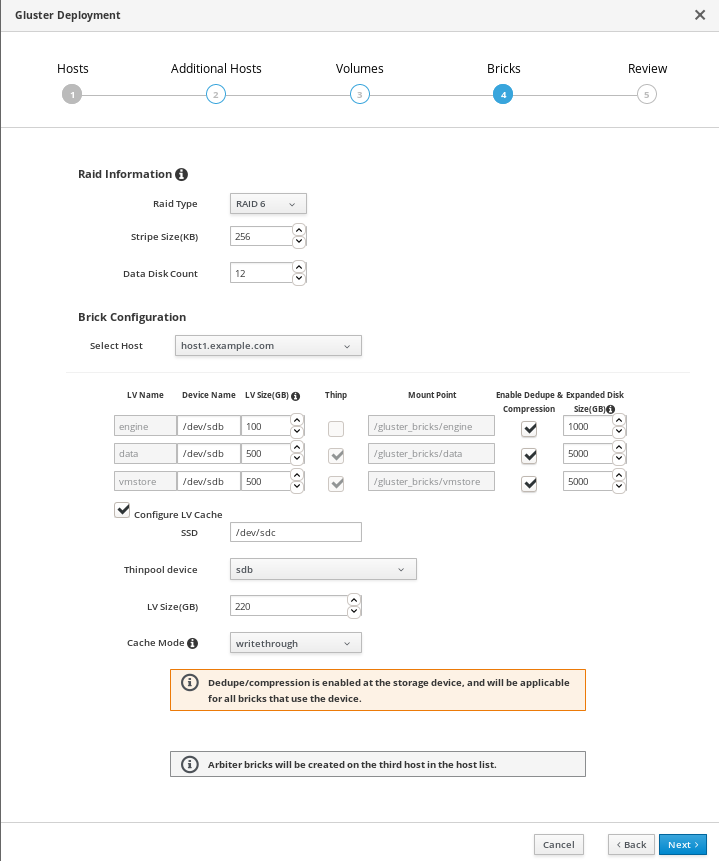
- RAID
- Specify the RAID configuration to use. This should match the RAID configuration of your host. Supported values are raid5, raid6, and jbod. Setting this option ensures that your storage is correctly tuned for your RAID configuration.
- Stripe Size
- Specify the RAID stripe size in KB. Do not enter units, only the number. This can be ignored for jbod configurations.
- Disk Count
- Specify the number of data disks in a RAID volume. This can be ignored for jbod configurations.
- LV Name
- The name of the logical volume to be created. This is pre-filled with the name that you specified on the previous page of the wizard.
- Device
- Specify the raw device you want to use. Red Hat recommends an unpartitioned device.
- Size
- Specify the size of the logical volume to create in GB. Do not enter units, only the number. This number should be the same for all bricks in a replicated set. Arbiter bricks can be smaller than other bricks in their replication set.
- Mount Point
- The mount point for the logical volume. This is pre-filled with the brick directory that you specified on the previous page of the wizard.
- Thinp
-
This option is enabled and volumes are thinly provisioned by default, except for the
enginevolume, which must be thickly provisioned. - Enable Dedupe & Compression
- Specify whether to provision the volume using VDO for compression and deduplication at deployment time.
- Logical Size (GB)
- Specify the logical size of the VDO volume. This can be up to 10 times the size of the physical volume, with an absolute maximum logical size of 4 PB.
- Configure LV Cache
- Optionally, check this checkbox to configure a small, fast SSD device as a logical volume cache for a larger, slower logical volume. Add the device path to the SSD field, the size to the LV Size (GB) field, and set the Cache Mode used by the device.
WarningTo avoid data loss when using write-back mode, Red Hat recommends using two separate SSD/NVMe devices. Configuring the two devices in a RAID-1 configuration (via software or hardware), significantly reduces the potential of data loss from lost writes.
For further information about lvmcache configuration, see Red Hat Enterprise Linux 7 LVM Administration.
(Optional) If your system has multipath devices, additional configuration is required.
To use multipath devices
If you want to use multipath devices in your RHHI for Virtualization deployment, use multipath WWIDs to specify the device. For example, use
/dev/mapper/3600508b1001caab032303683327a6a2einstead of/dev/sdb.To disable multipath device use
If multipath devices exist in your environment, but you do not want to use them for your RHHI for Virtualization deployment, blacklist the devices.
Create a custom multipath configuration file.
# mkdir /etc/multipath/conf.d
# touch /etc/multipath/conf.d/99-custom-multipath.conf
Add the following content to the file, replacing
<device>with the name of the device to blacklist:blacklist { devnode "<device>" }For example, to blacklist the
/dev/sdbdevice, add the following:blacklist { devnode "sdb" }Restart multipathd.
# systemctl restart multipathd
Verify that your disks no longer have multipath names by using the
lsblkcommand.If multipath names are still present, reboot hosts.
Review and edit configuration
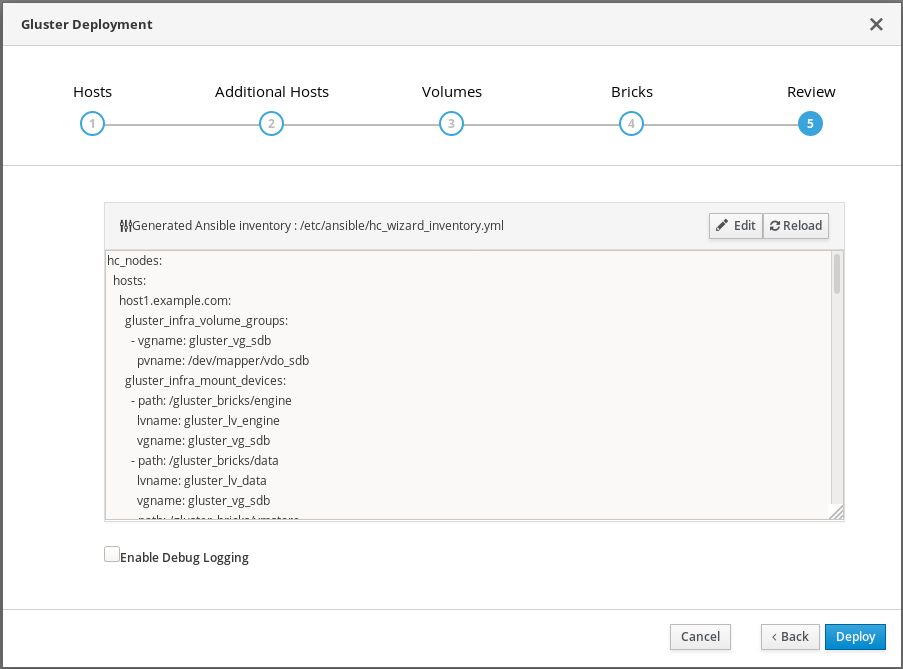
Click Edit to begin editing the generated deployment configuration file.
Make any changes required and click Save.
Review the configuration file
If all configuration details are correct, click Deploy.
Wait for deployment to complete
You can watch the progress of the deployment in the text field.
The window displays Successfully deployed gluster when complete.
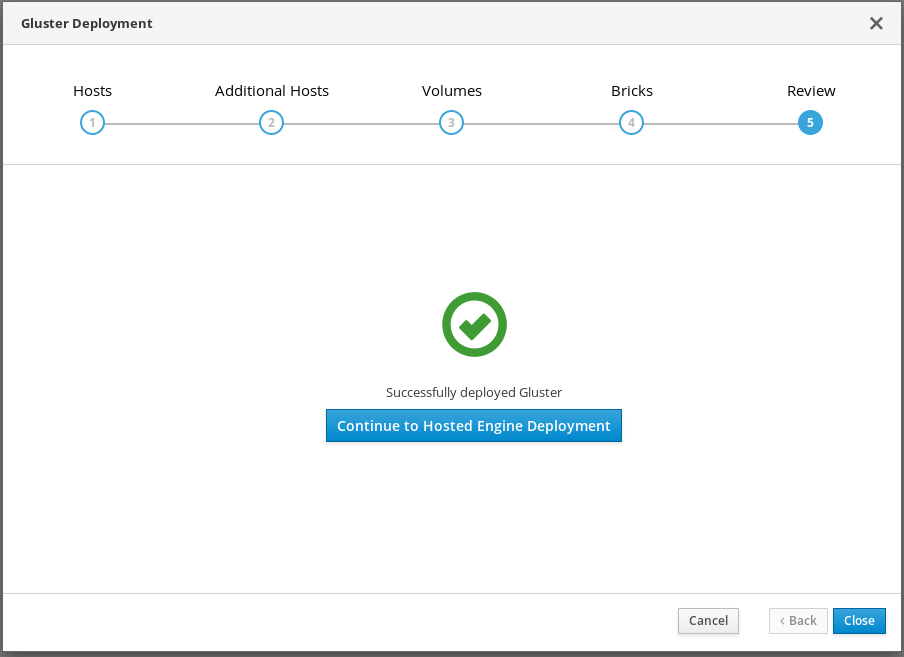
Click Continue to Hosted Engine Deployment and continue the deployment process with the instructions in Chapter 7, Deploy the Hosted Engine using the Web Console.
If deployment fails, click Clean up to remove any potentially incorrect changes to the system.
When cleanup is complete, click Redeploy. This returns you to the Review and edit configuration tab so that you can correct any issues in the generated configuration file before reattempting deployment.