
Chapter 13. Deploying and Managing Projects
Once you have created a project with your process definition and relevant resources, you need to build it and deploy it to the process engine. Once deployed, you can create process instances based on the deployed resources.
13.1. Deploying a Project
To deploy your project from Business Central, do the following:
- Open the Project Editor in your project (navigate to your project using Project Explorer and click Open Project Editor).
- You can define the Kie Base and Kie Session properties. If not, the default kbase and ksession will be used.
- On the title bar, click Build → Build & Deploy.
From the 6.1 version of Red Hat JBoss BPM Suite, deployment units are stored inside the database instead of the GIT repository. To override this behavior, set the org.kie.git.deployments.enabled property to true.
13.1.1. Duplicate GAV Detection
Every time you perform any of the operations listed below, all Maven repositories are checked for duplicate GroupId, ArtifactId, and Version. If a duplicate exists, the performed operation is cancelled.
The duplicate GAV detection is executed every time you:
- Create a new managed repository.
- Save a project definition in the Project Editor.
- Add new modules to a managed multi-module repository.
-
Save the
pom.xmlfile. - Install, build, or deploy a project.
The following Maven repositories are checked for duplicates:
-
Repositories specified in the
<repositories>and<distributionManagement>elements of thepom.xmlfile. -
Repositories specified in the Maven’s
settings.xmlconfiguration file.
Users with the admin role can modify the list of affected repositories. To do so, open your project in the Project Editor and click Project Settings: Project General Settings → Validation.
Figure 13.1. List of Repositories to Be Checked
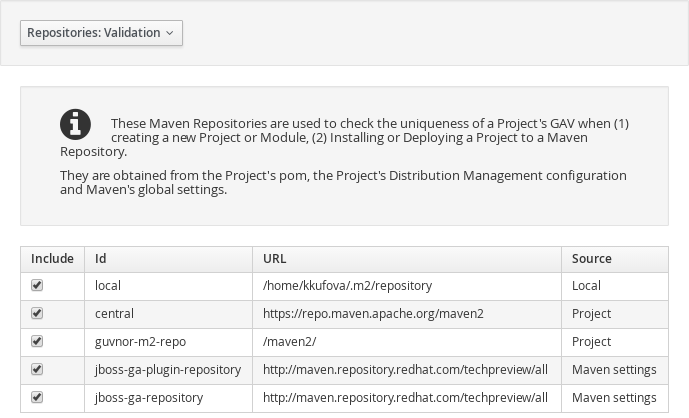
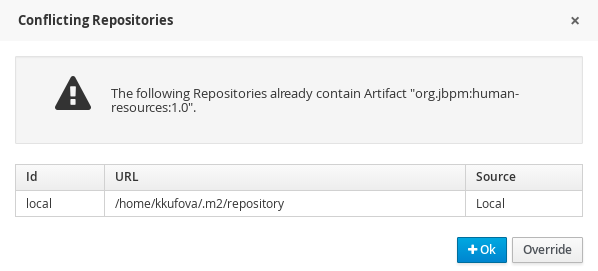
Figure 13.2. Duplicate GAV Detected
To disable this feature, set the org.guvnor.project.gav.check.disabled system property to true.
13.2. Process Management
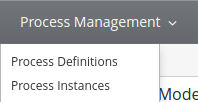
The following sections describe the features provided by the options available under the Process Management menu in Business Central.
Figure 13.3. Process Management
13.2.1. Process Definitions
Once you have created, configured, and deployed your project comprising your business processes, you can view the list of all the process definitions in the Process Definition List under Process Management → Process Definitions. The process definition view comprises two main sections:
- Process Definition Lists
- Process Definition Details
The process definition list shows all the available process definitions that are deployed into the platform. If you click on any of the process definition listed in the Process Definitions List, the corresponding Process Definition details displays information about the process definition such as if there is a sub-process associated with it, or how many users and groups exist in the process definition. In the Process Definition details section, you can navigate to Options → View Process Instances to view associated process instances.
13.2.2. Process Instances
You can create new process instances from the Process Definition List , from the Process Definition Detail view or from the Process Instance view. When you create a new Process Instance, a new window opens that requires you to provide information required by the process to be started. Once you provide the required information and click on the Submit button, the instance is created and the details of the process instance is displayed in the Process Instance Details on the right.
You can further manage the instance during runtime, monitor its execution, and work with the tasks the instance produces for users with the proper roles assigned.
Additionally, Business Central allows you to easily sort and filter a list of tasks for any given process. You can create custom filters that allow you to define queries by user, business attributes (such as amount, customer segmentation), Process ID, correlation key and so on.
You can view the list of all the running process instances in the Process Instance List under Process Management → Process Instances. The process instances view comprises two main sections:
- Process Instance Lists
- Process Instance Details
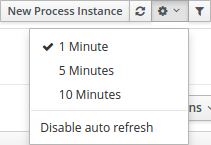
The process instance list displays the process instances and this view is customizable. The customizable elements comprise columns that are displayed, number of rows displayed per page, name of the tabs, and title description. The views are available as tabs. When you click on a tab, the related parameters are applied to the data grid and the corresponding process instances are listed. You can remove the default tabs and add your own with the required filter criteria. The Process Instances view also has features like auto refresh and restore default views. Auto refresh allows you to define how frequently the data grid refreshes. You can select one of the different values (1, 5 or 10 minutes), or disable this feature by clicking the Disable button:
Figure 13.4. Features in the Process Instances List View
Each row in the process instance list represents a running process instance from a particular process definition. Each execution is differentiated from all the others by the internal state of the information that the process is manipulating. In order to view this information, you can click on any one of the process instances and view the corresponding details in the Process Instance Details section. The Process Instance Details provides several tabs with the runtime information related to the process.
- The Instance Details tab: This gives you a quick overview about what is going on inside the process. It displays the current state of the instance and the current activity that is being executed.
- The Process Variables tab: This displays all the process variables that are being manipulated by the instance, with the exception of the variables that contain documents. You can move the mouse pointer over the Value field to view a full value of the process variable. Additionally, you can edit the process variable value and view its history.
- The Documents tab: This displays process documents if the process contains a variable of the type org.jbpm.Document. This enables easy access, download, and manipulation of the attached documents. You can not attach a new document to currently running instances using this view, but it can be achieved by Human task form in the tasks perspective.
- The Logs tab: This displays business and technical logs for the respective end users. In order to track a process through the logs, you can also open the Process Model that shows the completed activies in grey and the current activities highlighted in red.
13.2.2.1. Searching Process Instances by Partial Correlation Key
To create a filter to search by correlation key or partial correlation key, do the following:
- On the top menu of the Business Central, go to Process Management → Process Instances.
In the list on the Process Instances tab, click
 .
.
The New Process Instance List dialog box opens.
In the New Process Instance List dialog box:
- Provide the name and description for your search process instance list in the Labels tab.
Click the Filter tab to create new query filter.
- Click Add New.
-
From the list of filter values, select CORRELATIONKEY. If you want to create a search filter using partial correlationKey, select the like query operator and provide the value as
partial-correlation-key%wherepartial-correlation-keyis the value you are searching for. - Click Ok.
A new tab is created that displays your custom process instance list.
13.2.2.2. Searching Process Instances Based on Business Data
You can add process variables as columns in the process instance list in order to enable flexible filtering of definitions based on business data. To achieve this, do the following:
- On the top menu of the Business Central, go to Process Management → Process Instances.
-
In the list on the Process Instances tab, click
. The New Process Instance List dialog box opens.
In the New Process Instance List dialog box, perform the following:
- Provide the name and description for your search process instance list in the Labels tab.
Add a new query filter in the Filter tab:
- Click Add New.
- From the list of filter values, select processId and equalsTo.
-
Provide a valid
processIdvalue and click Ok.
A new tab is created that displays your custom process instance list in a tabular form. This new tab provides process instance variables (business data) as selectable columns. You can view the variables corresponding to each process instance in the table by enabling these columns, which are disabled by default.
13.2.3. Creating a New Process Instance List
To create a custom process instance list, do the following:
- On the top menu of the Business Central, go to Process Management → Process Instances.
In the list on the Process Instances tab, click the
button.
The following New Process Instance List dialog box opens:
Figure 13.5. New Process Instance List

In the New Process Instance List dialog box:
- Provide the name and description for your process instance list in the Labels tab.
Click the Filter tab to create new query filter.
- Click Add New.
- From the list of filter values, select the appropriate filter condition and its value. You can add more filters by clicking Add New.
- Once you have specified all your filter conditions, click Ok.
A new tab is created that displays your custom process instance list.
13.2.4. Aborting a Process instance
You can abort a running Process instance either using the provided API or from the Business Central.
Aborting a Process instance using API
To abort a Process instance using the Kie Session API, use the void abortProcessInstance(long processInstanceId) call on the parent Kie Session.
Aborting a Process instance from the Business Central
To abort a Process instance from the Business Central, do the following:
- On the top menu of the Business Central, go to Process Management → Process Instances.
- In the list on the Process Instances tab, locate the required Process instance and click the Abort button in the instance row.
13.3. Signaling Process Instance
You can signal a running process instance using either API or Business Central. For further information about signals, signalling external deployment, catching and processing signals, and more, see Chapter 22, Collaboration mechanisms.
Signaling Process Instance Using API
To signal a process instance using the KIE Session API, use the void signalEvent(String type, Object event) call on the parent Kie Session. The call triggers all active signal event nodes waiting for that event type in the KIE Session. The runtime strategy determines the number of processes which receive the signal.
If you need to signal a specific process instance, use void signalEvent(String type, Object event, long processInstanceId).
If you use the Throwing Intermediate event of type Signal, the execution engine calls void signalEvent(String type, Object event).
If you do not want the signal to be delivered to all the listening processes, replace the Throwing Intermediate event with a Script Task:
kcontext.getKieRuntime().signalEvent("signalRefId", data, processInstanceId);Signaling Process Instance from Business Central
To signal a process instance from Business Central, do the following:
- Log into Business Central.
- Click Process Management → Process Instances.
- Locate the required process instance and click Signal in the instance row.
Fill the following fields:
Signal Name: corresponds to the
SignalReforMessageRefattributes of the signal. This field is required.NoteYou can also send a
Messageevent to the process. To do so, add theMessage-prefix in front of theMessageRefvalue.- Signal Data: corresponds to data accompanying the signal. This field is optional.
When using the Business Central user interface, you may signal only Signal intermediate catch events.
13.4. Task Management
The following sections describe the features provided by the options available under the Tasks menu in Business Central.
Figure 13.6. Task Management

13.4.1. Tasks List
A User Task represents a piece of work the given user can claim and perform. User Tasks can be handled within the Tasks perspective of the Business Central: the view displays the Task List for the given user. You can think about it as a to-do item. The User Task appears in your list either because the User Task element generated the User Task as part of Process execution or because someone has created the User Task directly in the Business Central console.
A User Task can be assigned to a particular actor, multiple actors, or to a group of actors. If assigned to multiple actors or a group of actors, it is visible in the Task Lists of all the actors and any of the possible actors can claim the task and execute it. The moment the Task is claimed by one actor, it disappears from the Task List of other actors.
Task Client
User Tasks are displayed in the Tasks perspective, that are an implementation of a Task client, in the Business Central console: to display the Tasks perspective, click Tasks . You can filter out the Tasks based on their status using the following tabs:
Figure 13.7. Task Lists Tabs

- Active: Displays all the active tasks that you can work on. This includes personal and group tasks.
- Personal: Displays all your personal tasks.
- Group: Displays all the group tasks that need to be claimed by you in order to start working on them.
- All: Displays all the tasks. This also includes completed tasks but not the ones that belongs to a process that is already finished.
- Admin: Displays all the tasks for which you are the business administrator.
In addition to these, you can create custom filters to filter tasks based on the query parameters you define. For further information about custom tasks filters, see Section 13.4.2, “Creating Custom Tasks Filters”.
The Tasks List view is divided into two sections, Task List and Task Details. You can access the Task Details by clicking on a task row. You can modify the details (such the Due Date, the Priority or the task description) associated with a task. The Task Details section comprises the following tabs:
- Work: Displays basic details about the task and the task owner. You can click the Claim button to claim the task. To undo the claim process, click the Release button.
- Details: Displays information such as task description, status, and due date.
- Process Context: If the task is associated with a process, the information about it is shown here. You can also navigate to process instance details from here.
- Assigments: Displays the current owner of the task and allows you to delegate the task to another person or group.
- Comments: Displays comments added by task user(s). It allows you to delete an existing comment and add a new comment.
- Logs: Displays task logs containing task lifecycle events (such as task started, claimed, completed), updates made to task fields (such as task due date and priority).
13.4.2. Creating Custom Tasks Filters
It is possible to create a custom task filter based on a provided query. The newly created filter is then added as a tab to the Tasks List.
The following procedure shows how to create a custom filter which allows you to view a list of tasks with a specified name.
Procedure: Filtering Tasks by Name
- In the main menu of Business Central, click Tasks.
Click the
 button on the right side of the Tasks Lists tabs.
The New filtered list pop-up window is displayed.
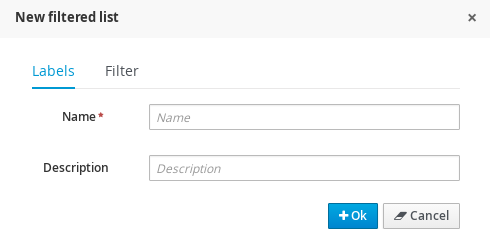
- Fill in the Name (this is the label of the new Tasks Lists tab) and click Filter.
- Click Add New.
In the Select column drop-down menu, choose NAME.
The content of the drop-down menu changes to
NAME != value1.Click on the drop-down menu again and choose equals to.
The content of the drop-down menu changes to
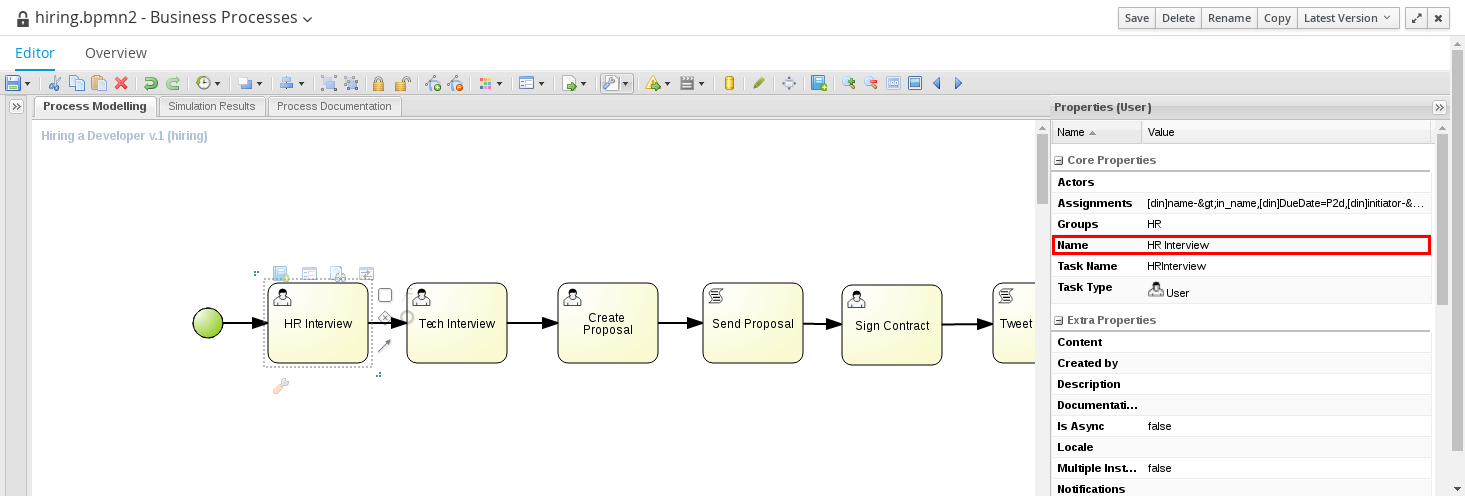
NAME = value1.Rewrite the value of the text field to the name of the task you want to filter. Note that the name must match the value defined in the Process Modelling view of a business process. See the following screenshot:
Click Ok.

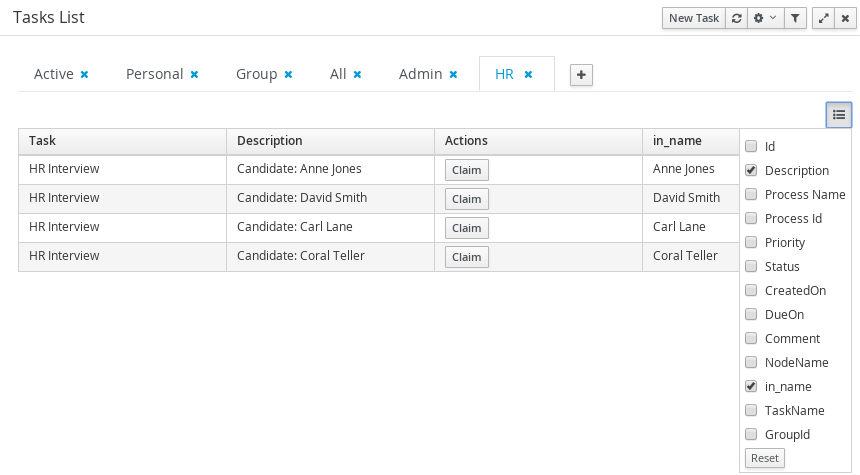
After the filter with a specified restriction is applied, variables associated with the task appear in the list of selectable columns.
13.4.3. Creating a User Task
A user task can be created either by a User Task element executed as part of a process instance or directly in Business Central. To create a user task in Business Central, do the following:
- On the top menu of the Business Central, click Tasks.
On the Tasks List tab, click New Task and define the task parameters.
This opens a New Task window with the following tabs:
Figure 13.8. New Task Window
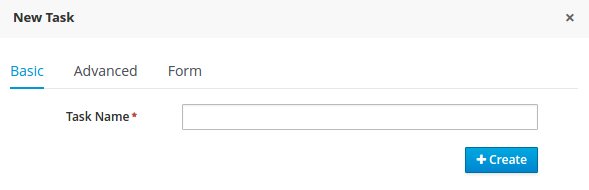
Basic tab
- Task Name: The task display name.
Advanced tab
- Due On: Add due date of the task.
- Priority: Select task priority.
- Add User button: Click to add more users. Note that a task cannot be created without a user or a group.
- Add Group button: Click to add more groups.
- User: Add the name of the person who executes the task.
- Remove User button: Click to remove the existing user.
Form tab
- Task form deploymentId: Select the deployment Id of the form from the list of available deployment Ids.
Task form name: Select the name of the associated task form from the list of available forms.
If tasks are part of a Business Process, they have an associated form that collects data from you and propagates that to the business process for further usage. You can create forms for specific tasks using the Form Modeler. If there is no form provided for a task, a dynamic form is created based on the information that the task needs to handle. If you create a task as an ad-hoc task, which is not related with any process, there will be no such information to generate a form and only basic actions will be provided.
- Click the Create button.
13.4.4. Task Variables as Expressions
You can refer and use the task variables in task properties as soon as you create a task. For example, once your task has been created, you can define a task name that refers to a taskId. Task variables are resolved at both task creation time and notification time, unlike process variables, which are resolved only at task creation time. The ability of using task variables while creating tasks minimizes your Java code, such as calling Red Hat JBoss BPM Suite APIs.
Task variables are available as task instances and you can get access to task information using the following expression:
${task.id}You can use this expression in data input of user task from within the process definition.
For example, the following expression can be used for accessing the processInstanceId variable:
${task.taskData.processInstanceId}