
Server fails to boot with Out Of Memory messages on the console
Red Hat Lightspeed can detect this issue
Environment
- Red Hat Enterprise Linux
Issue
- Red Hat Enterprise Linux system hangs on boot where the console says "
Welcome to Red Hat Enterprise Linux Server" - Updates or changes before the boot were minimal, if any at all, and include only a change to hugepage configurations.
- Removed "
rhgb quiet" from the command line but we still do not see any errors - For Red Hat Enterprise Linux 6 and under, an older kernel and single user mode hang in the same location:
- For Red Hat Enterprise Linux 7 and above, the current kernel boots with the noted failures, but a prior installed kernel boots fine.
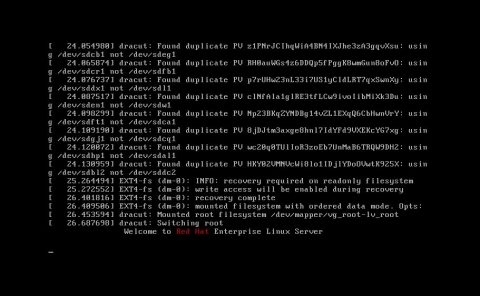
- After reducing or changing DIMM sticks or changing hugepage configurations, system will not boot, and the console shows messages with
Out of memoryandKilled processmessages similar to the following image:

Resolution
-
To avoid booting into rescue mode and to save time, one can use
systemd.mask=Xas a kernel command line parameter where X is the systemd service name which is responsible for making hugepages reservation. Generally, following services are responsible:systemd-sysctl.serviceortuned.service. This is applicable to RHEL 7 and above.
NOTE: This approach requires another reboot in order to bring up the masked service. Make sure to follow the rest of the steps in order to make correction invm.nr_hugepagesvalue before rebooting. -
Temporarily remove any hugepage configurations,
vm.nr_hugepages, from/etc/sysctl.confor drop files under/etc/sysctl.d/*to allow the system to boot. - If hugepages are set via the kernel boot parameter
hugepages=###, remove the parameter from the kernel parameters on boot temporarily to allow the system to boot. -
Once the system boots, ensure the calculations for the hugepage reservation are correct and reset them via either the
sysctlconfiguration files noted above or the kernel boot parameters.- Hugepage memory are each 2 MiB in size by default
- To convert from hugepage size to megabytes, multiply the hugepage count by 2; e.g. 100 hugepages is 200 MiB in size.
- The reservation will need to still be sized to allow regular memory to be available to the rest of the system. An application needs to be written to use hugepages and many default services on Red Hat Enterprise Linux (like SSHD and audit) do not use hugepages.
-
When using
sysctlconfigurations to set the hugepage reservation on Red Hat Enterprise Linux 7 and above, backup and rebuild the initramfs to have the new configurations take effect. - In some instances, a system with hugepage reservations failed to boot because of gaps or memory holes in CPU/DIMM stick setup, and the gaps needed to be filled in with DIMM sticks.
Root Cause
-
The hugepage reservation size was set to a value larger than total RAM
# grep vm.nr_hugepages /etc/sysctl.conf vm.nr_hugepages = 79252380 <--- ~154,789 GiB hugepage reservation size # grep MemTotal /proc/meminfo MemTotal: 137995282 kB <--- ~132 GiB of memory installed on the system -
For instances where the system has gaps in CPU/DIMM sticks, the DIMM banks connected to CPU were not fully filled.
Diagnostic Steps
Changing the hugepage reservation size
For Red Hat Enterprise Linux 6 and below:
- Add
init=/bin/bashto the kernel command line on boot. This will allow you to access the system during early boot. -
Remount the root filesystem read-write.
bash-4.1# mount -o remount rw / -
Edit the configuration.
-
If the parameter is set via
sysctlconfigurations, edit/etc/sysctl.confor one of the dropfiles/etc/sysctl.d/*to comment out the hugepage reservation:bash-4.1# vi /etc/sysctl.conf [...] # vm.nr_hugepages = 79252380 <--- add '#' before the vm.nr_hugepages line [...] -
If the parameter is set via the
hugepages=###kernel boot parameters, edit/etc/grub.conffile and remove thehugepages=### parameter from thekernel` line. - Alternatively for either situation above, the hugepage reservation can simply be updated with the correct value rather than removed.
-
-
If SELinux is enabled on the system, restore the SELinux contexts of the updated files from step 3 above. Replace
<FILE>in the below command with the file that was updated in step 3:bash-4.1# restorecon -Rv <FILE> -
Reboot the system to have the changes take effect.
- If the configurations were removed in step 3 rather than updated, double check the calculations for the hugepage reservation and ensure enough regular memory exists for the rest of the system and workload that can not use hugepages. Once the calculations are corrected, redo the configurations removed in step 3 and reboot the system to have the hugepage reservation take effect.
For Red Hat Enterprise Linux 7 and above
- Temporarily boot to a prior kernel. If a prior kernel is not available, then boot the system into rescue mode.
-
Edit the configuration.
-
If the parameter is set via
sysctlconfigurations, edit the/etc/sysctl.confor/etc/sysctl.d/*file with the corrected hugepage reservation.bash-4.1# vi /etc/sysctl.conf [...] vm.nr_hugepages = 5000 <--- reset reservation to 10 MiB here [...] -
If the parameter is set via the
hugepages=###kernel parameter, set the correct hugepage parameter in the grub boot configuration file if running on Red Hat Enterprise linux 7 or correct the hugepage parameter in the grub kernelopt variables if running Red Hat Enterprise Linux 8.
-
-
If the configurations were set via
sysctlconfiguration files, rebuild the initramfs for the kernel you need to boot to. - Reboot into the desired kernel.
Checking the DIMM banks
-
Once booted via one of the noted methods above, check the output of
dmidecode;$ sed -n '/^Memory Device/,/^$/p' dmidecode \ | grep -e Size: -e '^[[:space:]]*Locator:' \ | sed -e 's/\t//g' -e 's/No Module Installed/N\/A MB/g' \ | paste -d '\t\n' -s - \ | sort -n -k 6.1,2 -k 8.1,2 \ | grep -v 'Board [2468]' Size: 8192 MB Locator: Board 1, DIMM 1A Size: 8192 MB Locator: Board 1, DIMM 2C Size: 8192 MB Locator: Board 1, DIMM 3B Size: N/A MB Locator: Board 1, DIMM 4D <--- hole for CPU #1 Size: N/A MB Locator: Board 1, DIMM 5D <--- hole for CPU #1 Size: 8192 MB Locator: Board 1, DIMM 6B Size: 8192 MB Locator: Board 1, DIMM 7C Size: 8192 MB Locator: Board 1, DIMM 8A Size: 8192 MB Locator: Board 3, DIMM 1A Size: 8192 MB Locator: Board 3, DIMM 2C Size: 8192 MB Locator: Board 3, DIMM 3B Size: N/A MB Locator: Board 3, DIMM 4D <--- hole for CPU #2 Size: N/A MB Locator: Board 3, DIMM 5D <--- hole for CPU #2 Size: 8192 MB Locator: Board 3, DIMM 6B Size: 8192 MB Locator: Board 3, DIMM 7C Size: 8192 MB Locator: Board 3, DIMM 8A Size: 4096 MB Locator: Board 5, DIMM 1A Size: 4096 MB Locator: Board 5, DIMM 2C Size: 4096 MB Locator: Board 5, DIMM 3B Size: N/A MB Locator: Board 5, DIMM 4D <--- hole for CPU #3 Size: N/A MB Locator: Board 5, DIMM 5D <--- hole for CPU #3 Size: 4096 MB Locator: Board 5, DIMM 6B Size: 4096 MB Locator: Board 5, DIMM 7C Size: 4096 MB Locator: Board 5, DIMM 8A Size: 4096 MB Locator: Board 7, DIMM 1A Size: 4096 MB Locator: Board 7, DIMM 2C Size: 4096 MB Locator: Board 7, DIMM 3B Size: N/A MB Locator: Board 7, DIMM 4D <--- hole for CPU #4 Size: N/A MB Locator: Board 7, DIMM 5D <--- hole for CPU #4 Size: 4096 MB Locator: Board 7, DIMM 6B Size: 4096 MB Locator: Board 7, DIMM 7C Size: 4096 MB Locator: Board 7, DIMM 8A
This solution is part of Red Hat’s fast-track publication program, providing a huge library of solutions that Red Hat engineers have created while supporting our customers. To give you the knowledge you need the instant it becomes available, these articles may be presented in a raw and unedited form.
Comments