
Introduction to the Self Service User Interface
An overview of the Red Hat CloudForms Self Service user interface
Abstract
Chapter 1. Red Hat CloudForms Self Service
Red Hat CloudForms Self Service is a web-based graphical user interface for ordering and managing IT service requests. You can enable self-service tenant end users, who can easily access their services, track requests, and manage their accounts using the Self Service user interface (SSUI), which has widgets, dashboard controls and feedback. The Self Service user interface supports role-based access control (RBAC) of menus and features, similar to in the full administrative user interface.
All catalog items, dialogs, buttons, icons among other items in the Self Service user interface must be configured in the full administrative user interface before they are available to users in the Self Service user interface.
1.1. Accessing the Self Service User Interface
The Self Service user interface is running by default and does not need to be started or configured. To access the Self Service user interface, you must know the host name (or IP address) of the appliance, and the login credentials.
Self Service URL:
https://HOSTNAME/self_service/The Self Service user interface login page has the Administrator user by default.
Chapter 2. The Dashboard Tab
Once you log in to the Self Service user interface, you will see the dashboard screen by default. The Dashboard tab provides a quick summary of the services available, requests made, and their statuses as below:
- Total Services
- Current (Active) Services
- Services Retiring Soon
- Retired Services
- Total Requests
- Pending Requests
- Approved Requests
- Denied Requests
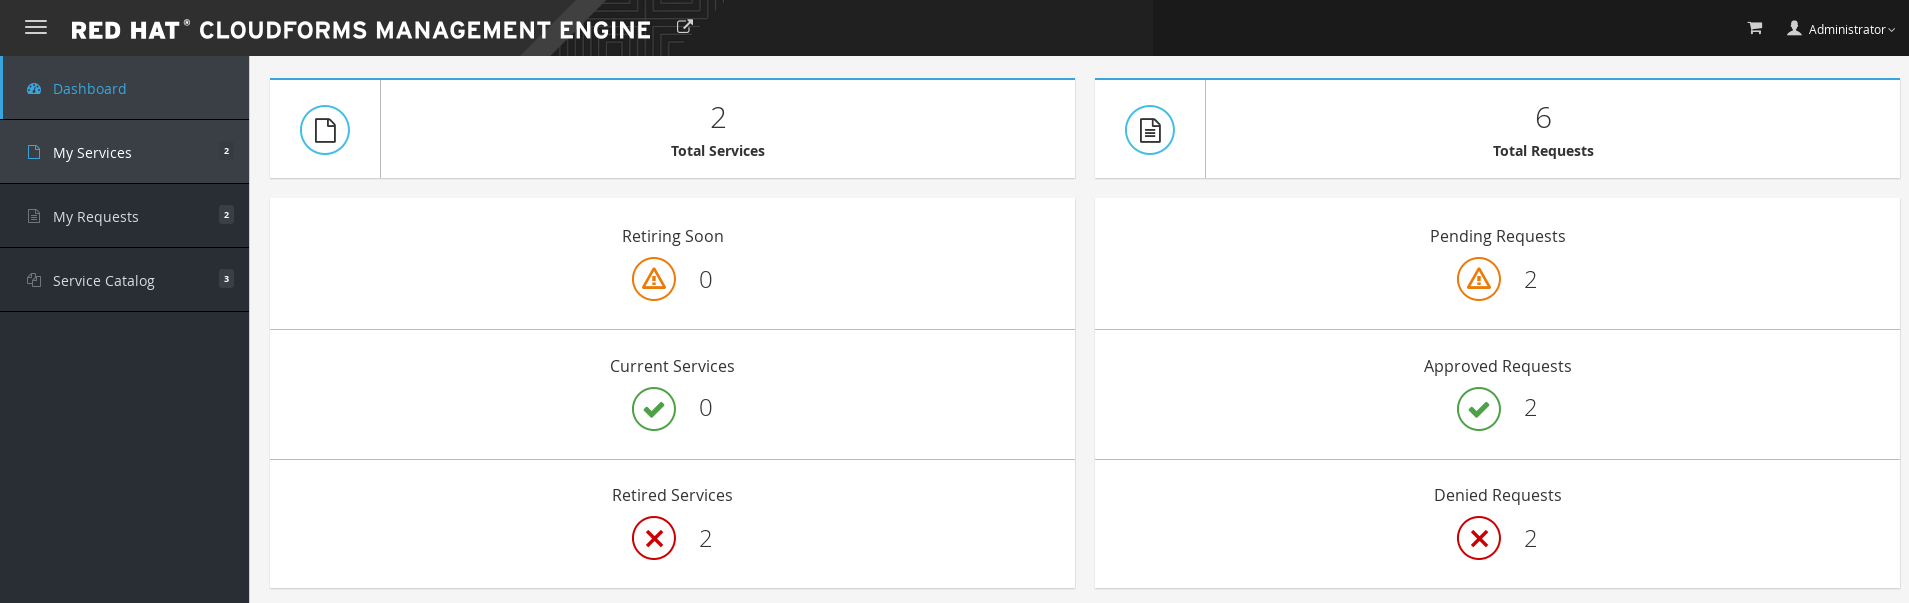
The slideout navigation menu on the left can be minimized by clicking on the menu icon (≡) on top, like in the full administrative user interface. The My Services, My Requests, and Service Catalog tabs on the navigation menu show counts of respective items.
As the Self Service user interface supports role-based access control of menus and features, if you are a member of multiple user groups, you can change the acting group by clicking on the current LDAP user group at the top-right corner of the user interface, Administrator > Change Group, then select the new group from the available options.

Clicking on the arrow icon (
![]() ) at the top of the user interface will take you to the full administrative user interface login page, in a new browser window/tab.
) at the top of the user interface will take you to the full administrative user interface login page, in a new browser window/tab.
Chapter 3. The My Services Tab
The My Services tab lists all available services with a summary of information associated with each service, including Service Name, Retirement Date, Number of VMs, Owner and the date it was Created On. You can filter or sort the services listed by those values.

Click on a service to view further details including information on the virtual machines associated with it. You can also get HTML 5 console access to the virtual machine by clicking the button, as highlighted on the screen capture. On the same screen, you also have options to retire the service now or at a later date, edit or remove the service. Additionally, you can now change the ownership and group of the service using the Set Ownership button, and also Reconfigure a service, similar to in the full administrative user interface.

Moreover, you can now add custom buttons and custom button groups that can have dialogs associated with them. For example:

Chapter 4. The My Requests Tab
The My Requests tab lists all requests made with a summary of items associated with each request, including the Request ID, Request Date and Request Status. You can filter or sort the request listings by those values using the respective buttons at the top.

Click on a particular request to view more details as shown in the following screen capture.

Chapter 5. The Service Catalog Tab
The Service Catalog tab lists all service catalog items, displayed as tiles. These items must be configured on the administrative user interface before they will be accessible to the user here. You can filter or sort the service catalog items by Name, Description and Catalog Name.

Click on a service to open up the page where you will enter the requested information in the dialog fields associated with the service, as previously configured in the administrative user interface. Note that there is now an ability to add dynamic dialog elements within the Self Service user interface, meaning you can include a particular dialog field where Red Hat CloudForms will communicate to the instance and method, obtain the required information, and enter the value in the field dynamically. After you have all information in the requested dialog parameters, click Add to Shopping Cart.
Shopping Cart Model:
The Self Service user interface has adopted a shopping cart model for ordering services, instead of ordering them immediately. Click on the shopping cart icon at the top to view all services added to the shopping cart that are available to order. You can delete a particular service from the cart if required, and order the services in the cart all at one time. Or, you can even choose to clear all the services in the cart and exit.

Comments