Chapter 6. Using custom rule categories
You can create custom rule categories and assign MTA rules to them.
Although MTA processes rules with the legacy severity field, you must update your custom rules to use the new category-id field.
Adding a custom category
You can add a custom category to the rule category file.
Procedure
-
Edit the rule category file, which is located at
<MTA_HOME>/rules/migration-core/core.windup.categories.xml. Add a new
<category>element and fill in the following parameters:-
id: The ID that MTA rules use to reference the category. -
priority: The sorting priority relative to other categories. The category with the lowest value is displayed first. -
name: The display name of the category. description: The description of the category.Custom rule category example
<?xml version="1.0"?>
<categories>
    ...
    <category id="custom-category" priority="20000">
        <name>Custom Category</name>
        <description>This is a custom category.</description>
    </category>
</categories>
This category is ready to be referenced by MTA rules.
-
Assigning a rule to a custom category
You can assign a rule to your new custom category.
Procedure
In your MTA rule, update the category-id field as in the following example.
<rule id="rule-id">
<when>
...
</when>
<perform>
<hint title="Rule Title" effort="1" category-id="custom-category">
<message>Hint message.</message>
</hint>
</perform>
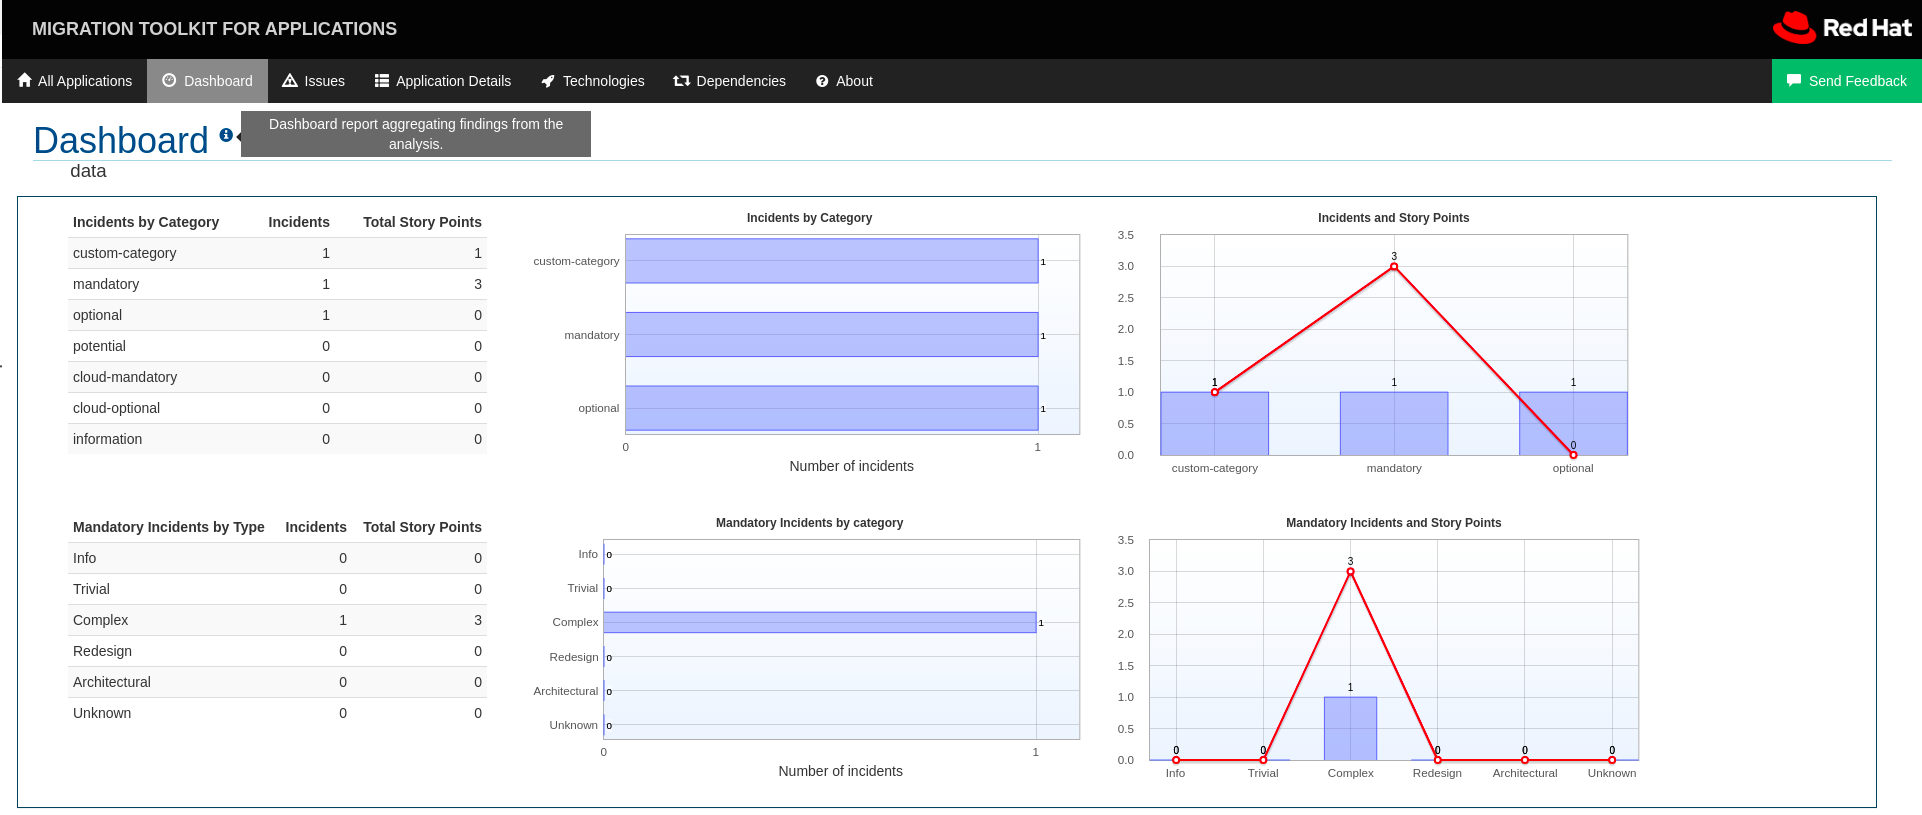
</rule>If this rule condition is met, incidents identified by this rule use your custom category. The custom category is displayed on the dashboard and in the Issues report.
Figure 6.1. Custom category on the dashboard