
Chapter 3. Project
A project is a container for asset packages (business processes, rules, work definitions, decision tables, fact models, data models, and DSLs) that lives in the Knowledge Repository. It is this container that defines the properties of the KIE Base and KIE Session that are applied to its content. In the GUI, you can edit these entities in the Project Editor.
As a project is a Maven project, it contains the Project Object Model file (pom.xml) with information on how to build the output artifact. It also contains the Module Descriptor file, kmodule.xml, that contains the KIE Base and KIE Session configuration for the assets in the project.
3.1. Creating an Organizational Unit
It is possible to create an organizational unit in the Administration perspective of Business Central, using the kie-config-cli tool, or the REST API calls.
Creating an Organizational Unit in Business Central
Note that only users with the admin role in Business Central can create organizational units.
Procedure: Using Business Central to Create an Organizational Unit
- In Business Central, go to Authoring → Administration.
- On the perspective menu, click Organizational Units → Manage Organizational Units.
In the Organization Unit Manager view, click Add.
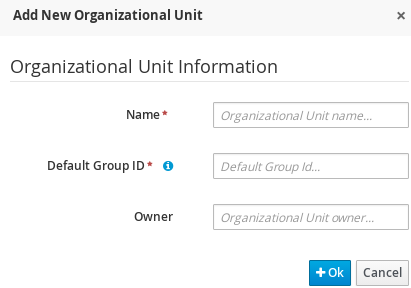
The Add New Organizational Unit dialog window opens.
Figure 3.1. Add New Organizational Unit Dialog Window
-
Enter the two mandatory parameters (
nameanddefault group ID) and click Ok.
Creating an Organizational Unit Using the kie-config-cli Tool
Organizational units can be created using the kie-config-cli tool as well. To do so, run the create-org-unit command. The tool then guides you through the entire process of creating an organizational unit by asking for other required parameters. Type help for a list of all commands.
For more information about the kie-config-cli tool, see Red Hat JBoss BPM Suite Administration and Configuration Guide, chapter Command Line Configuration.
Creating an Organizational Unit Using the REST API
Note that only users with the rest-all role can create organizational units.
To create an organizational unit in Knowledge Store, issue the POST REST API call. Details of the organizational unit are defined by the JSON entity.
Input parameter of the call is an OrganizationalUnit instance. The call returns a CreateOrganizationalUnitRequest instance.
Example 3.1. Creating an Organizational Unit Using the Curl Utility
Example JSON entity containing details of an organizational unit to be created:
{
	"name"         : "helloWorldUnit",
	"owner"        : "tester",
	"description"  :  null,
	"repositories" :  []
}
Execute the following command:
curl -X POST 'localhost:8080/business-central/rest/organizationalunits/' -u USERNAME:PASSWORD -H 'Accept: application/json' -H 'Content-Type: application/json' -d '{"name":"helloWorldUnit","owner":"tester","description":null,"repositories":[]}'For further information, see the Red Hat JBoss BPM Suite Development Guide, chapter Knowledge Store REST API, section Organizational Unit Calls.
3.2. Creating a Repository
There are three ways to create a repository: using the Administration perspective of Business Central, the kie-config-cli tool, or the REST API calls.
Creating a Repository in Business Central
Note that only users with the admin role in Business Central can create repositories.
Procedure: Using Business Central to Create a Repository
- In Business Central, go to Authoring → Administration.
On the perspective menu, click Repositories → New repository.
The New Repository pop-up window is displayed.
Figure 3.2. *New Repository*Dialog Window
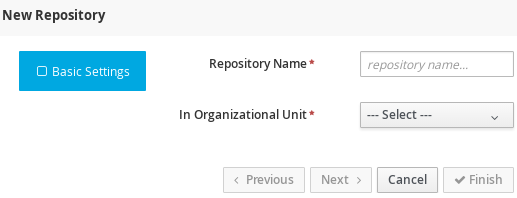
Specify the two mandatory parameters:
repository name
NoteMake sure that the repository name is a valid file name. Avoid using a space or any special character that might lead to an invalid name.
- organizational unit: specifies the location of the newly created repository.
- Click Finish.
You can view the newly created repository either in the File Explorer or the Project Explorer.
Creating a Repository Using the kie-config-cli Tool
To create a new Git repository using the kie-config-cli tool, run the create-repo command. The tool then guides you through the entire process of creating a repository by asking for other required parameters. Type help for a list of all commands.
For more information about the kie-config-cli tool, see Red Hat JBoss BPM Suite Administration and Configuration Guide .
Creating a Repository Using the REST API
Note that only users with the rest-all role can create repositories.
To create a repository in the Knowledge Store, issue the POST REST API call. Details of the repository are defined by the JSON entity. Make sure you established an authenticated HTTP session before executing this call.
Input parameter of the call is a RepositoryRequest instance. The call returns a CreateOrCloneRepositoryRequest instance.
Example 3.2. Creating a Repository Using the Curl Utility
Example JSON entity containing details of a repository to be created:
{
	"name"                   : "newRepository",
	"description"            :  null,
	"gitURL"                 :  null,
	"requestType"            : "new",
	"organizationalUnitName" : "helloWorldUnit"
}
Execute the following command:
curl -X POST 'localhost:8080/business-central/rest/repositories/' -u USERNAME:PASSWORD -H 'Accept: application/json' -H 'Content-Type: application/json' -d '{"name":"newRepository","description":null,"requestType":"new","gitURL":null,"organizationalUnitName":"helloWorldUnit"}'For further information, see the Red Hat JBoss BPM Suite Development Guide, chapter Knowledge Store REST API, section Repository Calls.
3.3. Cloning a Repository
It is possible to clone a repository either in Business Central or using the REST API calls. The kie-config-cli tool cannot be used to clone arbitrary repositories - run git clone or use one of the following options instead.
Cloning a Repository in Business Central
Note that only users with the admin role in Business Central can clone repositories.
Procedure: Using Business Central to Clone a Repository
- In Business Central, go to Authoring → Administration.
On the perspective menu, choose Repositories → Clone repository.
The Clone Repository pop-up window is displayed.
Figure 3.3. *Clone Repository*Dialog Window

In the Clone Repository dialog window, enter the repository details:
- Enter the Repository Name to be used as the repository identifier in the Asset repository and select the Organizational Unit it should be added to.
Enter the URL of the Git repository:
for a local repository, use
file:///PATH_TO_REPOSITORY/REPOSITORY_NAME;NoteThe file protocol is only supported for READ operations. WRITE operations are not supported.
for a remote or preexisting repository, use
https://github.com/USERNAME/REPOSITORY_NAME.gitorgit://HOST_NAME/REPOSITORY_NAME.ImportantIt is important to use the HTTPS or Git protocol instead of a SCP-style SSH URL. Business Central does not support the basic SSH URL and fails with Invalid URL format.
- If applicable, enter the User Name and Password of your Git account to be used for authentication.
Click Clone.
A confirmation prompt with the notification that the repository was created successfully is displayed.
Click Ok.
The repository is now being indexed. Some workbench features may be unavailable until the indexing has completed.
You can view the cloned repository either in the File Explorer or the Project Explorer.
Cloning a Repository Using the REST API
Note that only users with the rest-all role can clone repositories.
To clone a repository, issue the POST REST API call. This call creates or clones (according to the value of the requestType parameter) the repository defined by the JSON entity.
Input parameter of the call is a RepositoryRequest instance. The call returns a CreateOrCloneRepositoryRequest instance.
Example 3.3. Cloning a Repository Using the Curl Utility
Example JSON entity containing details of a repository to be cloned:
{
	"name"                   : "clonedRepository",
	"description"            :  null,
	"requestType"            : "clone",
	"gitURL"                 : "git://localhost:9418/newRepository",
	"organizationalUnitName" : "helloWorldUnit"
}
Execute the following command:
curl -X POST 'localhost:8080/business-central/rest/repositories/' -u USERNAME:PASSWORD -H 'Accept: application/json' -H 'Content-Type: application/json' -d '{"name":"clonedRepository","description":null,"requestType":"clone","gitURL":"git://localhost:9418/newRepository","organizationalUnitName":"helloWorldUnit"}'For further information, see the Red Hat JBoss BPM Suite Development Guide, chapter Knowledge Store REST API, section Repository Calls.
3.4. Creating a Project
It is possible to create a project either in the Project Authoring perspective of Business Central or using the REST API calls.
Creating a Project in Business Central
Note that only users with the admin role in Business Central can create projects.
Procedure: Using Business Central to Create a Project
- In Business Central, go to Authoring → Project Authoring.
- In the Project Explorer, select the organizational unit and the repository in which you want to create the project.
On the perspective menu, click New Item → Project.
The New Project dialog window opens.
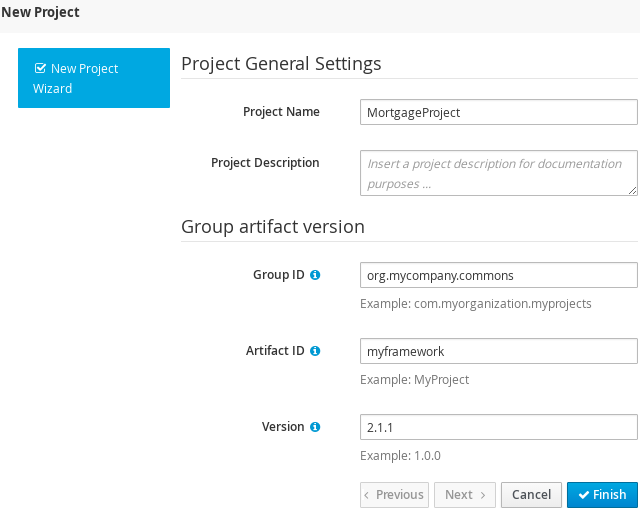
Define the Project General Settings and Group artifact version details of the new project. These parameters are stored in the
pom.xmlMaven configuration file.See the detailed description of the parameters:
-
Project Name: name of the project (for example
MortgageProject). - Project Description: description of the project, which may be useful for the project documentation purposes.
-
Group ID: group ID of the project (for example
org.mycompany.commons). -
Artifact ID: artifact ID unique in the group (for example
myframework). Avoid using a space or any other special character that might lead to an invalid name. -
Version: version of the project (for example
2.1.1).
-
Project Name: name of the project (for example
Click Finish.
The project screen view is updated with the new project details as defined in the
pom.xmlfile. You can switch between project descriptor files and edit their content by clicking the Project Settings: Project General Settings button at the top of the project screen view.
Creating a Project Using the REST API
Note that only users with the rest-all or rest-project role can create projects.
To create a project in the repository, issue the POST REST API call. Details of the project are defined by the corresponding JSON entity.
Input parameter of the call is an Entity instance. The call returns a CreateProjectRequest instance.
Example 3.4. Creating a Project Using the Curl Utility
Example JSON entity containing details of a project to be created:
{
	"name"        : "MortgageProject",
	"description" :  null,
	"groupId"     : "org.mycompany.commons",
	"version"     : "2.1.1"
}
Execute the following command:
curl -X POST 'localhost:8080/business-central/rest/repositories/REPOSITORY_NAME/projects/' -u USERNAME:PASSWORD -H 'Accept: application/json' -H 'Content-Type: application/json' -d '{"name":"MortgageProject","description":null,"groupId":"org.mycompany.commons","version":"2.1.1"}'For further information, see the Repository Calls section of the Knowledge Store REST API chapter in the Red Hat JBoss BPM Suite Development Guide.
3.5. Adding Dependencies
To add dependencies to your project, do the following:
Open the Project Editor for the given project:
- In the Project Explorer view of the Project Authoring perspective, open the project directory.
- Click Open Project Editor to open the project view.
- In the Project Screen view, select in the Project Settings drop-down box the Dependencies item.
On the updated Project Screen, click the Add button to add a maven dependency or click the Add from repository button to add a dependency from the Knowledge Store (Artifact repository):
- When adding a maven dependency, a user has to define the Group ID, Artifact ID, and the Version ID in the Dependency dialogue window.
- When adding a dependency from the Knowledge Store, select the dependency in the displayed dialog box: the dependency will be added to the dependency table.
- To apply the various changes, the dependencies must be saved.
Additionally, you can use the Package white list when working with dependencies. When you add a repository, you can click the gear icon and select Add all or Add none, which results in including all or none of the packages from the added dependency.
If working with modified artifacts, do not re-upload modified non-snapshot artifacts as Maven will not know these artifacts have been updated, and it will not work if it is deployed in this manner.
3.6. Defining KIE Bases and Sessions
A KIE base is a repository of the application’s knowledge definitions. It contains rules, processes, functions, and type models. A KIE base does not contain runtime data, instead sessions are created from the KIE base into which data can be inserted and process instances started.
A KIE session stores runtime data created from a KIE base. See the KIE Sessions chapter of the Red Hat JBoss BPM Suite Development Guide for more information.
You can create KIE bases and sessions by editing the kmodule.xml project descriptor file of your project. You can do so through Business Central or by editing kmodule.xml in the src/main/resources/META-INF/ folder by navigating through the Repository view.
Defining KIE Bases and Sessions in the Project Editor
To define a KIE base or session in Business Central, do the following:
- Click Authoring → Project Authoring and navigate to your project.
- In the Project Explorer window, click Open Project Editor.
-
Click Project Settings: Project General Settings → Knowledge bases and sessions. This view provides a user interface for changing
kmodule.xml. Click Add to define and add your bases.
-
After you enter a name for your Knowledge Base, add Packages. For including all packages, click Add below Packages and enter asterisk
*.
-
After you enter a name for your Knowledge Base, add Packages. For including all packages, click Add below Packages and enter asterisk
- Below Knowledge Sessions, click Add and enter the name of your session.
-
Mark it
Defaultand select appropriate state. For Red Hat JBoss BPM Suite, usestatefulsessions. - Click Save in the top right corner once you are done.
Defining KIE Bases and Sessions in kmodule.xml
To define a KIE base or session by editing kmodule.xml, do the following:
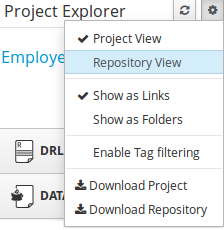
Open the repository view for your project.
Figure 3.4. Changing to Repository View
-
Navigate to
/src/main/resources/META-INF. Click onkmodule.xmlto edit the file directly. Define your
kbasesandksessions. For example:<kmodule xmlns="http://www.drools.org/xsd/kmodule" xmlns:xsi="http://www.w3.org/2001/XMLSchema-instance"> <kbase name="myBase" default="true" eventProcessingMode="stream" equalsBehavior="identity" packages="*"> <ksession name="mySession" type="stateless" default="true" clockType="realtime"/> </kbase> </kmodule>- Click Save in the top right corner.
You can switch between the Project Editor view and the Repository view to look at the changes you make in each view. To do so, close and reopen the view each time a change is made.
If you have more than one knowledge base, one of them must be marked default. You also must define one default stateful knowledge session amongst all the bases and sessions. Alternatively, you can define no knowledge bases.
3.7. Creating a Resource
A Project may contain an arbitrary number of packages, which contain files with resources, such as Process definition, Work Item definition, Form definition, Business Rule definition, etc.
To create a resource, select the Project and the package in the Project Explorer and click on the perspective menu and select the resource you want to create.
It is recommended to create your resources, such as Process definitions, Work Item definitions, Data Models, etc., inside a package of a Project to allow importing of resources and referencing their content.
To create a package, do the following:
-
In the Repository view of the Project Explorer, navigate to the
REPOSITORY/PROJECT/src/main/resources/directory. - Go to New Item → Package.
- In the New resource dialog, define the package name and check the location of the package in the repository.
3.8. Asset Metadata and Versioning
Most assets within Business Central have some metadata and versioning information associated with them. In this section, we will go through the metadata screens and version management for one such asset (a DRL asset). Similar steps can be used to view and edit metadata and versions for other assets.
Metadata Management
To open up the metadata screen for a DRL asset, click on the Overview tab. If an asset does not have an Overview tab, it means that there is no metadata associated with that asset.
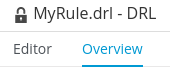
The Overview section opens up in the Version history tab, and you can switch to the actual metadata by clicking on the Metadata tab.
The metadata section allows you to view or edit the Categories, Subject, Type, External Link and Source metadata for that asset. However, the most interesting metadata is the description of the asset that you can view/edit in the description field and the comments that you and other people with access to this asset can enter and view.
Comments can be entered in the text box provided in the comments section. Once you have finished entering a comment, press enter for it to appear in the comments section.
You must hit the Save button for all metadata changes to be persisted, including the comments.
Version Management
Every time you make a change in an asset and save it, a new version of the asset is created. You can switch between different versions of an asset in one of two ways:
Click the Latest Version button in the asset toolbar and select the version that you are interested in. Business Central will load this version of the asset.
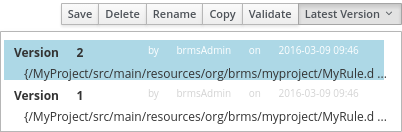
- Alternatively, open up the Overview section. The Version history section shows you all the available versions. Select the version that you want to restore.
In both cases, the Save button will change to Restore . Click this button to persist changes.
3.9. Filtering Assets by Tag
It is possible to group assets of similar categories in the project explorer. This feature helps you search through assets of a specific category quickly. To enable this, the metadata management feature provides creating tags to filter assets by category.
Procedure: Create tags and filter assets by tags
- Open the Overview tab of an asset and click the Metadata screen.
In the Tags field, enter a name of your new tag and click Add a new tag(s) button. You can assign multiple tags to an asset at once by separating tag names by space.
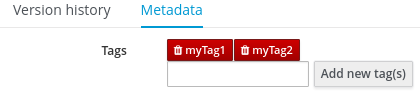
Figure 3.5. Creating Tags

The assigned tags are displayed as buttons next to the Tags field:
Figure 3.6. Tags in Metadata View
In order to delete any tag, click the respective tag button.
- Click Save button to save your metadata changes.
Once you are done assigning tags to your assets, click the
 (Customize View) button in the Project Explorer and select the Enable Tag filtering option:
Figure 3.7. Enable Tag Filtering
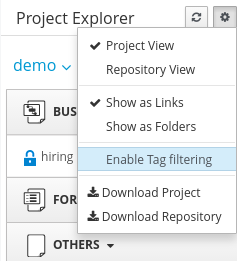
This displays a Filter by Tag drop-down list in the Project Explorer.
Figure 3.8. Filter by Tag

You can sort your assets through this filter to display all service tasks that include the selected metadata tag.
3.10. Asset Locking Support
The default locking mechanism for locking a BPM and BRMS asset while updating it in Business Central is pessimistic. Whenever you open and modify an asset in Business Central, it automatically locks the asset for your exclusive use, in order to avoid conflicts in a multi-user setup. The pessimistic lock is automatically released when your session ends or when you save or close the asset.
The pessimistic lock feature is provided in order to help prevent users from overwriting each other’s changes. However, there may be cases when you may want to edit a file locked by another user. Business Central allows you to force unlock a locked asset. To do this:
Procedure: Unlocking assets
- Open the asset.
Click on the Overview tab and open up the Metadata screen.
If the asset is already being edited by another user, the following will be displayed in the Lock status field: Locked by <user_name>.
To edit the asset locked by another user, click Force unclock asset button.
The following confirmation popup message is displayed:
Are you sure you want to release the lock of this asset? This might cause <user_name> to lose unsaved changes!Click Yes to confirm.
The asset goes back to unlocked state.
3.11. Process Definition
A Process definition is a BPMN 2.0-compliant file that serves as container for a Process and its BPMN Diagram. A Process definition itself defines the import entry, imported Processes, which can be used by the Process in the Process definition, and relationship entries. We refer to a Process definition as a business process.
Example 3.5. BPMN2 source of a Process definition
<definitions id="Definition"
               targetNamespace="http://www.jboss.org/drools"
               typeLanguage="http://www.java.com/javaTypes"
               expressionLanguage="http://www.mvel.org/2.0"
               xmlns="http://www.omg.org/spec/BPMN/20100524/MODEL"Rule Task
               xmlns:xsi="http://www.w3.org/2001/XMLSchema-instance"
               xsi:schemaLocation="http://www.omg.org/spec/BPMN/20100524/MODEL BPMN20.xsd"
               xmlns:g="http://www.jboss.org/drools/flow/gpd"
               xmlns:bpmndi="http://www.omg.org/spec/BPMN/20100524/DI"
               xmlns:dc="http://www.omg.org/spec/DD/20100524/DC"
               xmlns:di="http://www.omg.org/spec/DD/20100524/DI"
               xmlns:tns="http://www.jboss.org/drools">

    <process>
      PROCESS
    </process>

    <bpmndi:BPMNDiagram>
     BPMN DIAGRAM DEFINITION
    </bpmndi:BPMNDiagram>

    </definitions>
3.11.1. Creating a Process Definition
Make sure you have logged in to JBoss BPM Suite or you are in JBoss Developer Studio with the repository connected.
To create a Process, do the following:
- Open the Project Authoring perspective (Authoring → Project Authoring).
In Project Explorer (Project Authoring → Project Explorer), navigate to the project where you want to create the Process definition (in the Project view, select the respective repository and project in the drop-down lists; in the Repository view, navigate to
REPOSITORY/PROJECT/src/main/resources/directory).Creating packagesIt is recommended to create your resources, including your Process definitions, in a package of a Project to allow importing of resources and their referencing. To create a package, do the following:
-
In the Repository view of the Project Explorer, navigate to the
REPOSITORY/PROJECT/src/main/resources/directory. - Go to New Item → Package.
- In the New resource dialog, define the package name and check the location of the package in the repository.
-
In the Repository view of the Project Explorer, navigate to the
- From the perspective menu, go to New Item → Business Process.
- In the New Processes dialog box, enter the Process name and click OK. Wait until the Process Editor with the Process diagram appears.
3.11.2. Importing a Process Definition
To import an existing BPMN2 or JSON definition, do the following:
- In the Project Explorer, select a Project and the respective package to which you want to import the Process definition.
- Create a new Business Process to work in by going to New Item → Business Process.
-
In the Process Designer toolbar, click the Import
 icon in the editor toolbar and pick the format of the imported process definition. Note that you have to choose to overwrite the existing process definition in order to import.
From the Import window, locate the Process file and click Import.
Figure 3.9. Import Window

Whenever a process definition is imported, the existing imported definition is overwritten. Make sure you are not overwriting a process definition you have edited so as not to lose any changes.
A process can also be imported to the git repository in the filesystem by cloning the repository, adding the process files, and pushing the changes back to git. In addition to alternative import methods, you can copy and paste a process or just open a file in the import dialog.
When importing processes, the Process Designer provides visual support for Process elements and therefore requires information on element positions on the canvas. If the information is not provided in the imported Process, you need to add it manually.
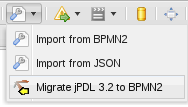
3.11.3. Importing jPDL 3.2 to BPMN2
To migrate and import a jPDL definition to BPMN2, in the Process Designer, click on the import button then scroll down and select Migrate jPDL 3.2 to BPMN2.
Figure 3.10. Migrate jPDL 3.2 to BPMN2
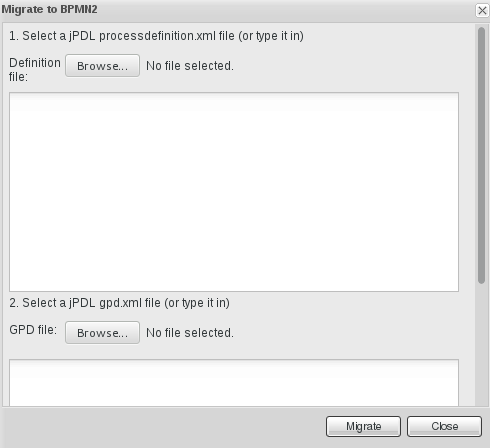
In the Migrate to BPMN2 dialog box, select the process definition file and the name of the gpd file. Confirm by clicking the Migrate button.
Figure 3.11. Migrate to BPMN2 dialog box
The migration tool for jPDL 3.2 to BPMN2 is a technical preview feature, and therefore not currently supported in Red Hat JBoss BPM Suite.