
19.5. LevelDB Cache Store
LevelDB is a key-value storage engine that provides an ordered mapping from string keys to string values.
The LevelDB Cache Store uses two filesystem directories. Each directory is configured for a LevelDB database. One directory stores the non-expired data and the second directory stores the keys pending to be purged permanently.
19.5.1. Configuring LevelDB Cache Store (Remote Client-Server Mode)
Procedure 19.1. To configure LevelDB Cache Store:
- Add the following elements to a cache definition in
standalone.xmlto configure the database:<leveldb-store path="/path/to/leveldb/data" passivation="false" purge="false" > <leveldb-expiration path="/path/to/leveldb/expires/data" /> <implementation type="JNI" /> </leveldb-store>Note
Directories will be automatically created if they do not exist.
For details about the elements and parameters used in this sample configuration, see Section 19.3, “Cache Store Configuration Details (Remote Client-Server Mode)”.
19.5.2. LevelDB Cache Store Sample XML Configuration (Library Mode)
The following is a sample XML configuration of LevelDB Cache Store:
<local-cache name="vehicleCache">
      <persistence passivation="false">
          <leveldb-store xmlns="urn:infinispan:config:store:leveldb:8.0
                        relative-to="/path/to/leveldb/data"
                        shared="false"
                        preload="true"/>
      </persistence>
   </local-cache>
For details about the elements and parameters used in this sample configuration, see Section 19.2, “Cache Store Configuration Details (Library Mode)”.
19.5.3. Configure a LevelDB Cache Store Using JBoss Operations Network
Use the following procedure to set up a new LevelDB cache store using the JBoss Operations Network.
Procedure 19.2.
- Ensure that Red Hat JBoss Operations Network 3.2 or higher is installed and started.
- Install the Red Hat JBoss Data Grid Plugin Pack for JBoss Operations Network 3.2.0.
- Ensure that JBoss Data Grid is installed and started.
- Import JBoss Data Grid server into the inventory.
- Configure the JBoss Data Grid connection settings.
- Create a new LevelDB cache store as follows:
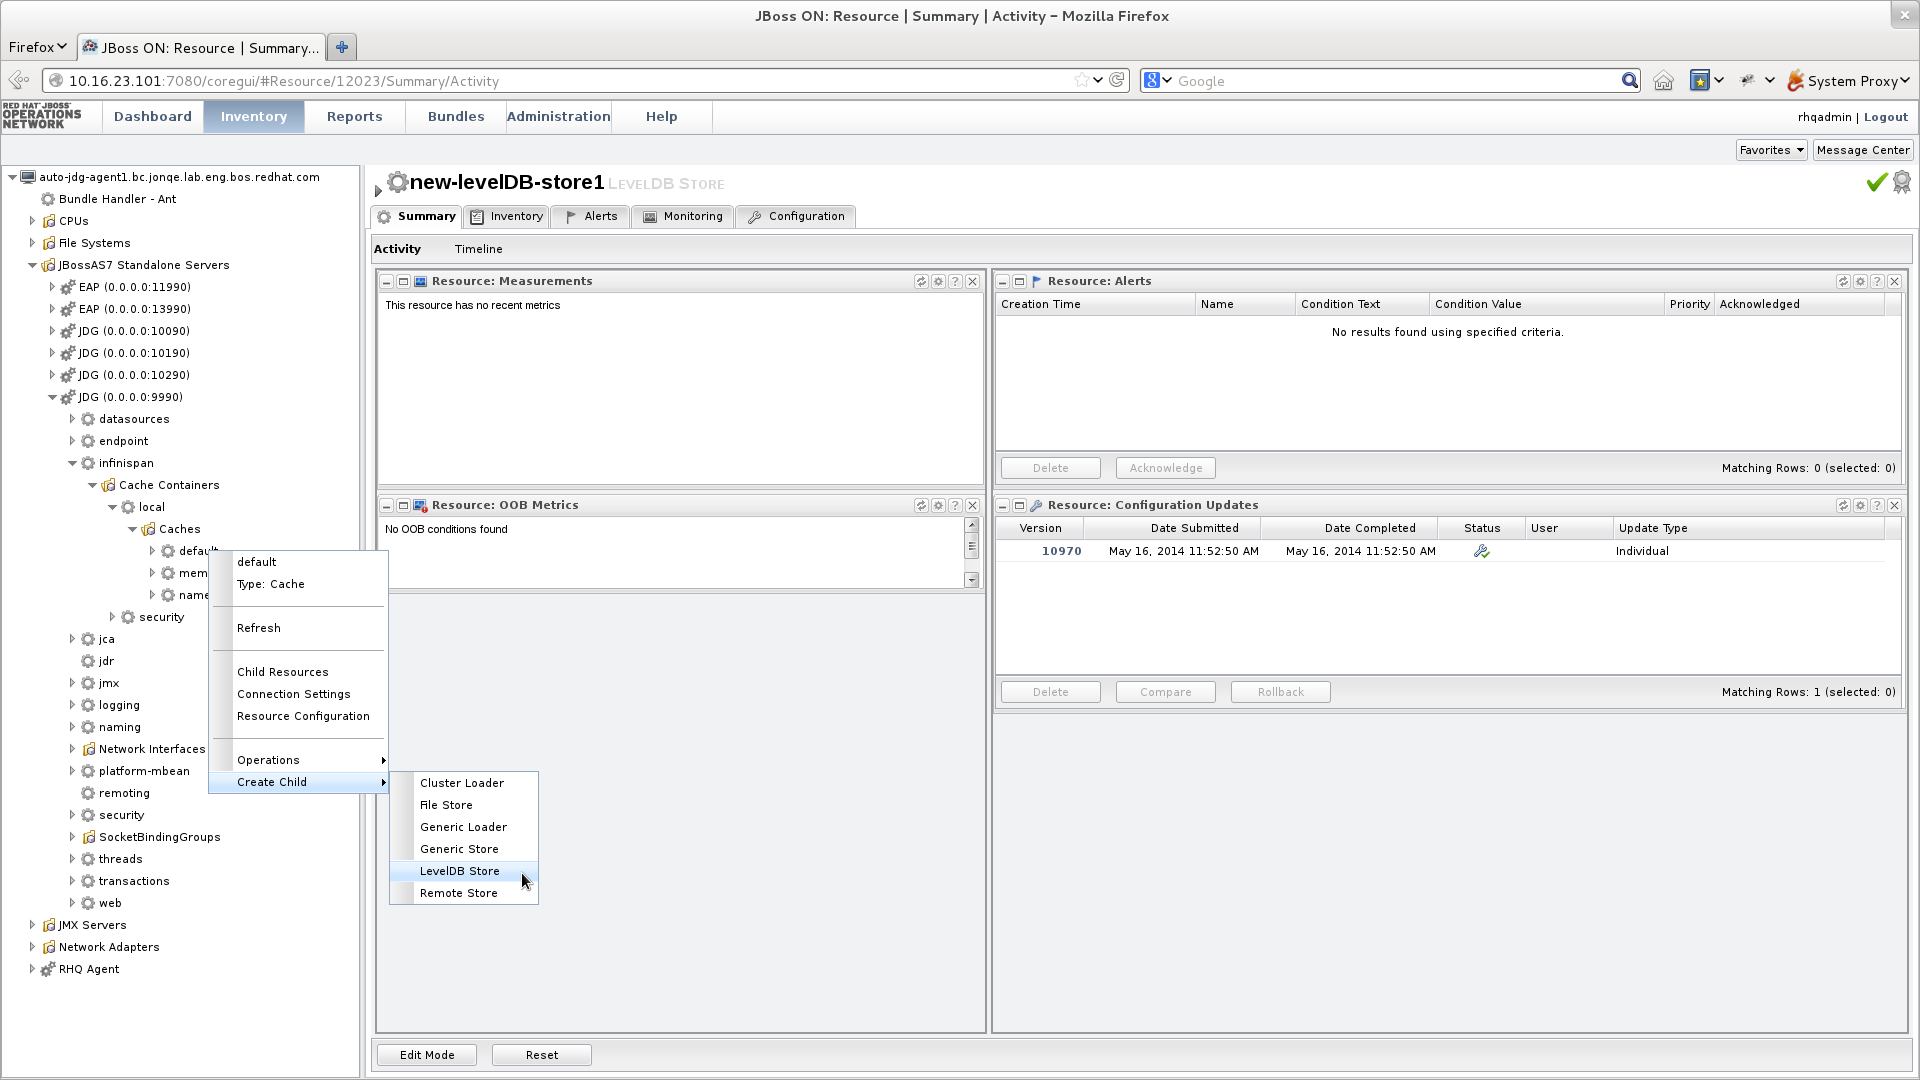
Figure 19.1. Create a new LevelDB Cache Store
- Right-click the
defaultcache. - In the menu, mouse over the option.
- In the submenu, click .
- Name the new LevelDB cache store as follows:
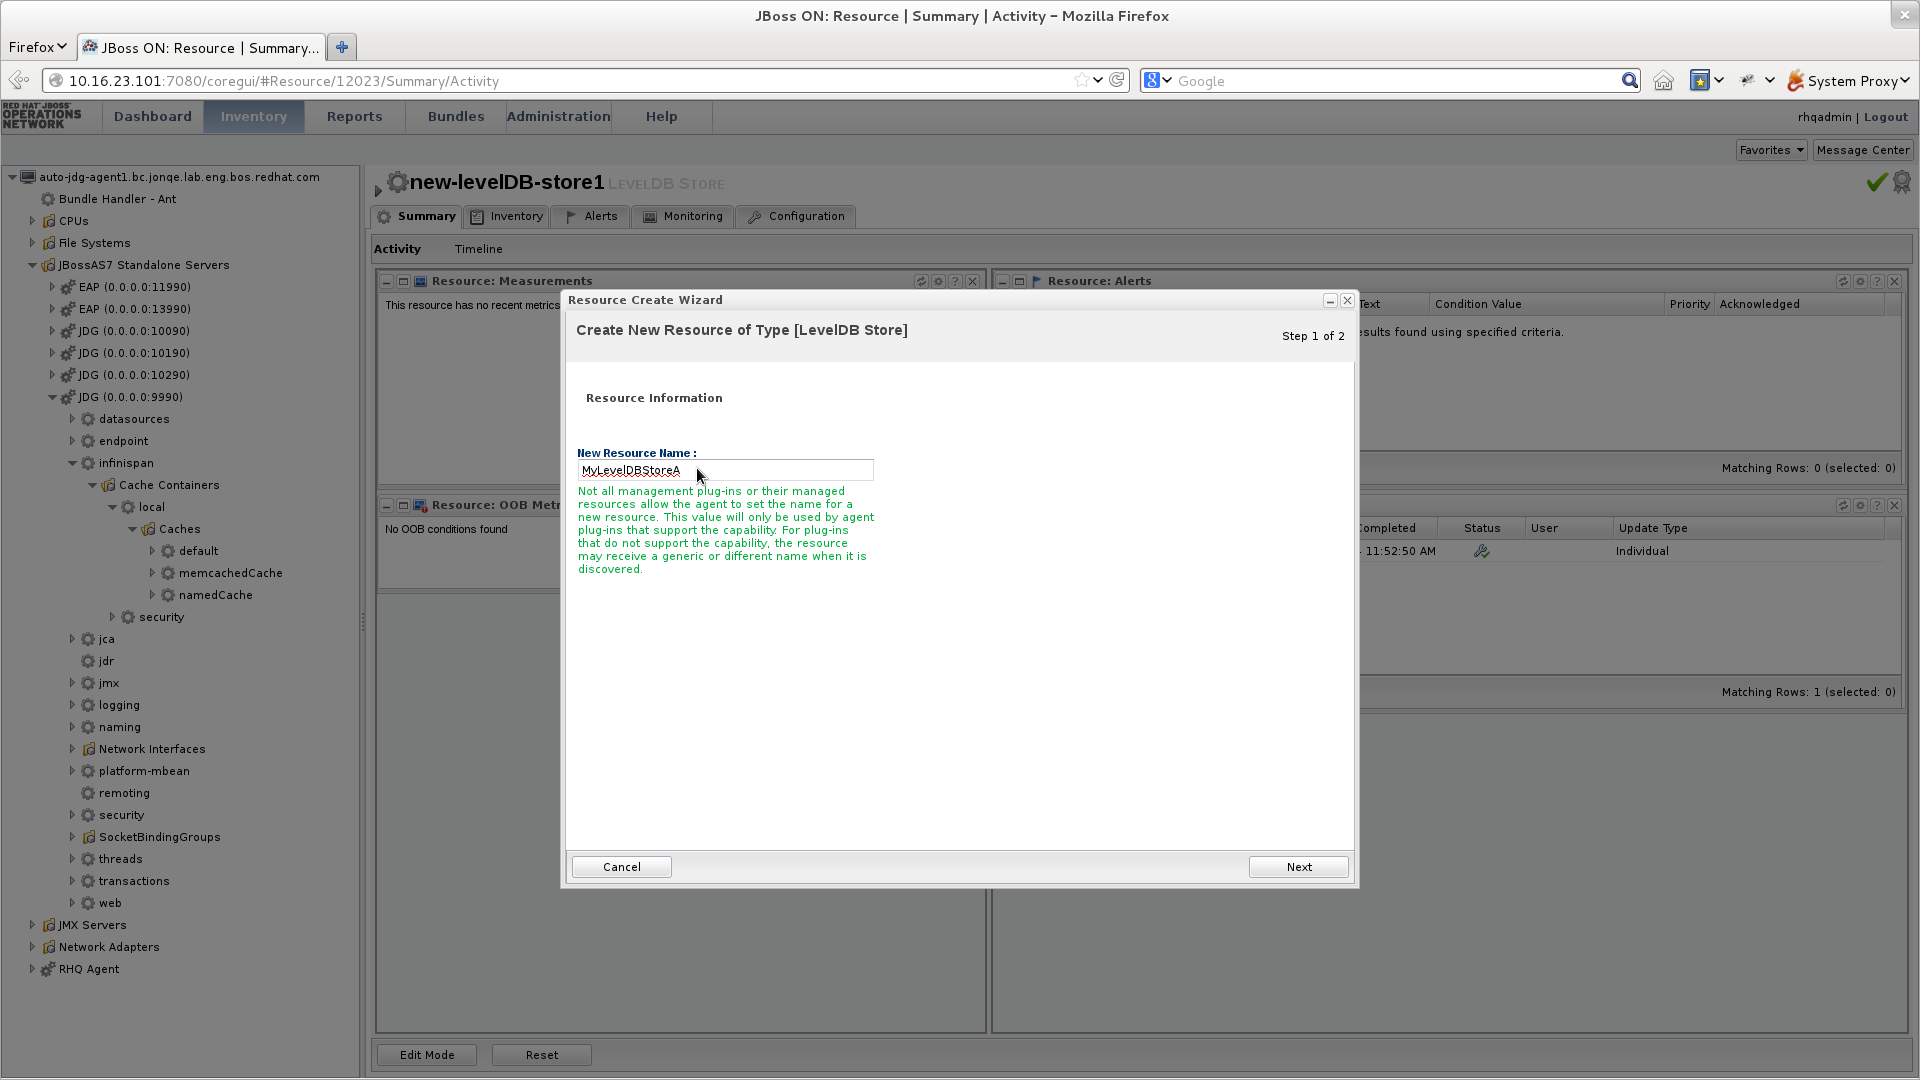
Figure 19.2. Name the new LevelDB Cache Store
- In the Resource Create Wizard that appears, add a name for the new LevelDB Cache Store.
- Click to continue.
- Configure the LevelDB Cache Store settings as follows:
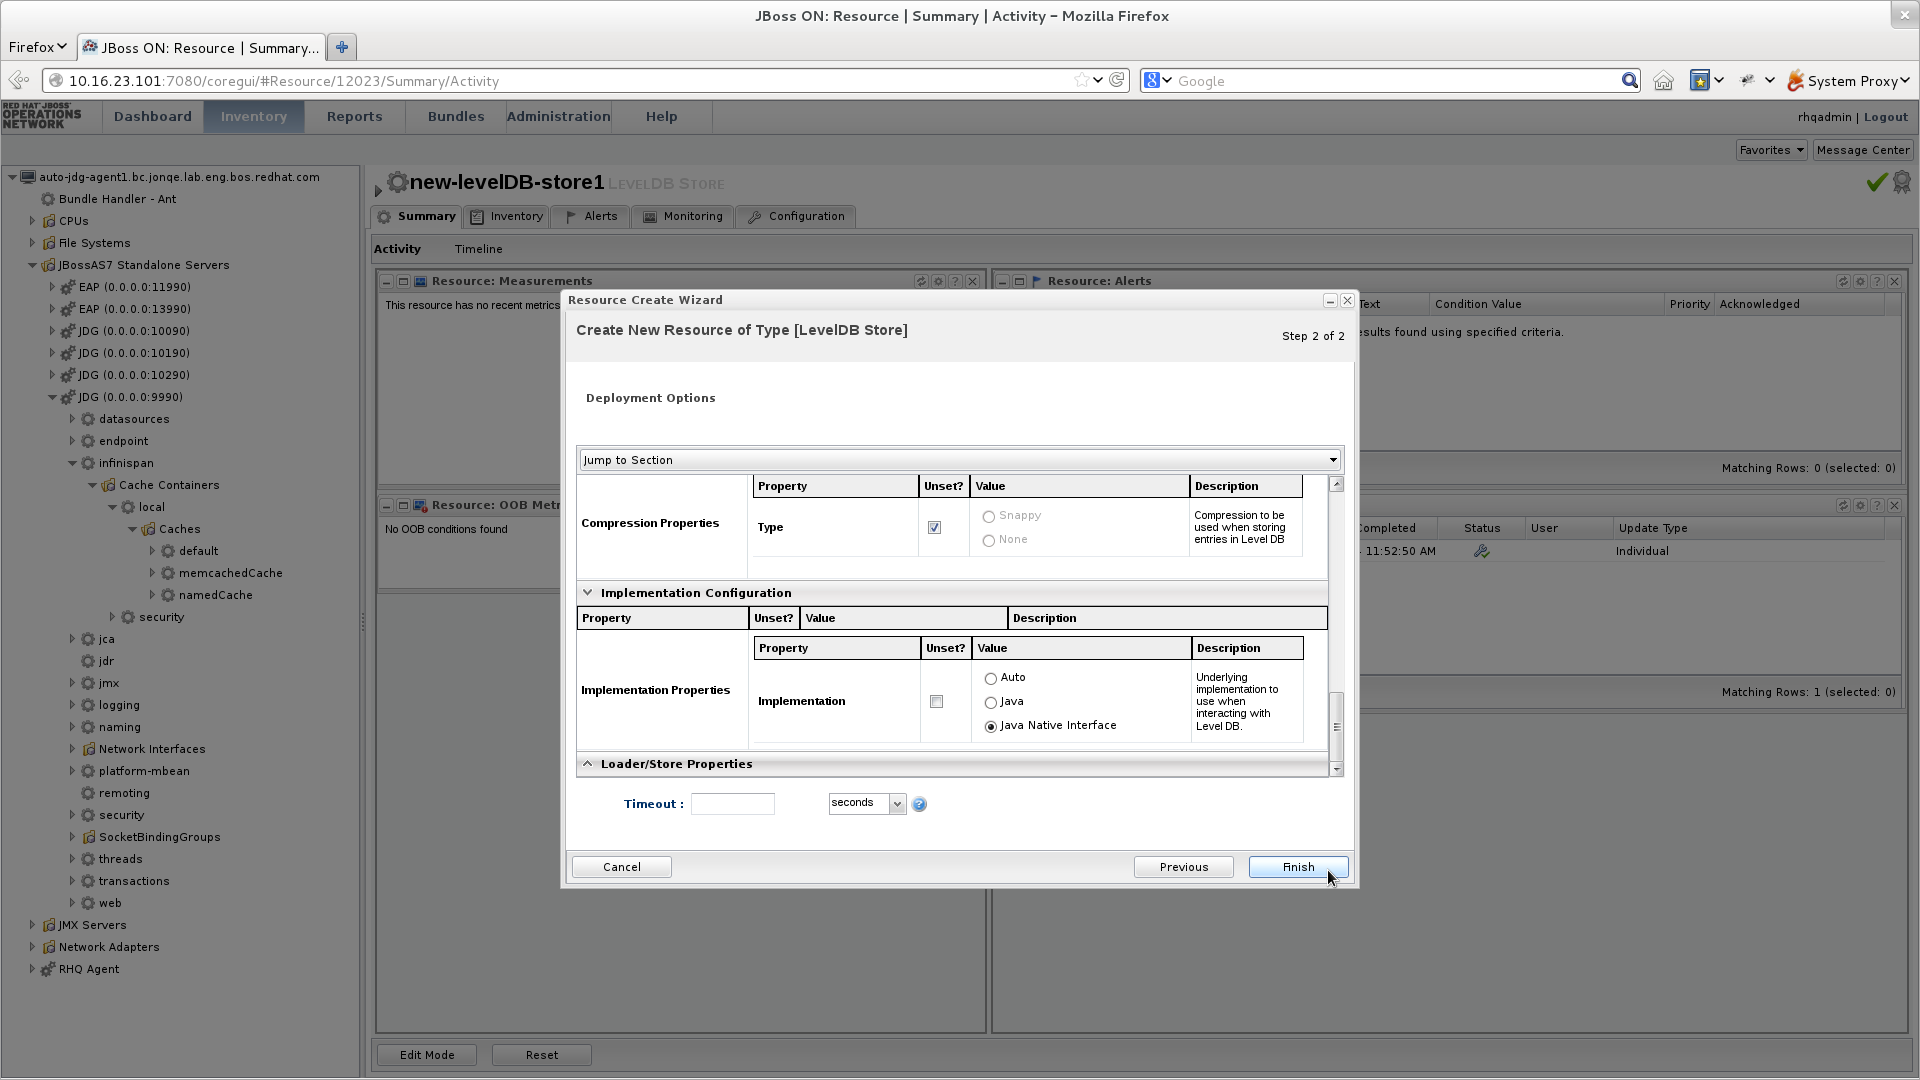
Figure 19.3. Configure the LevelDB Cache Store Settings
- Use the options in the configuration window to configure a new LevelDB cache store.
- Click to complete the configuration.
- Schedule a restart operation as follows:
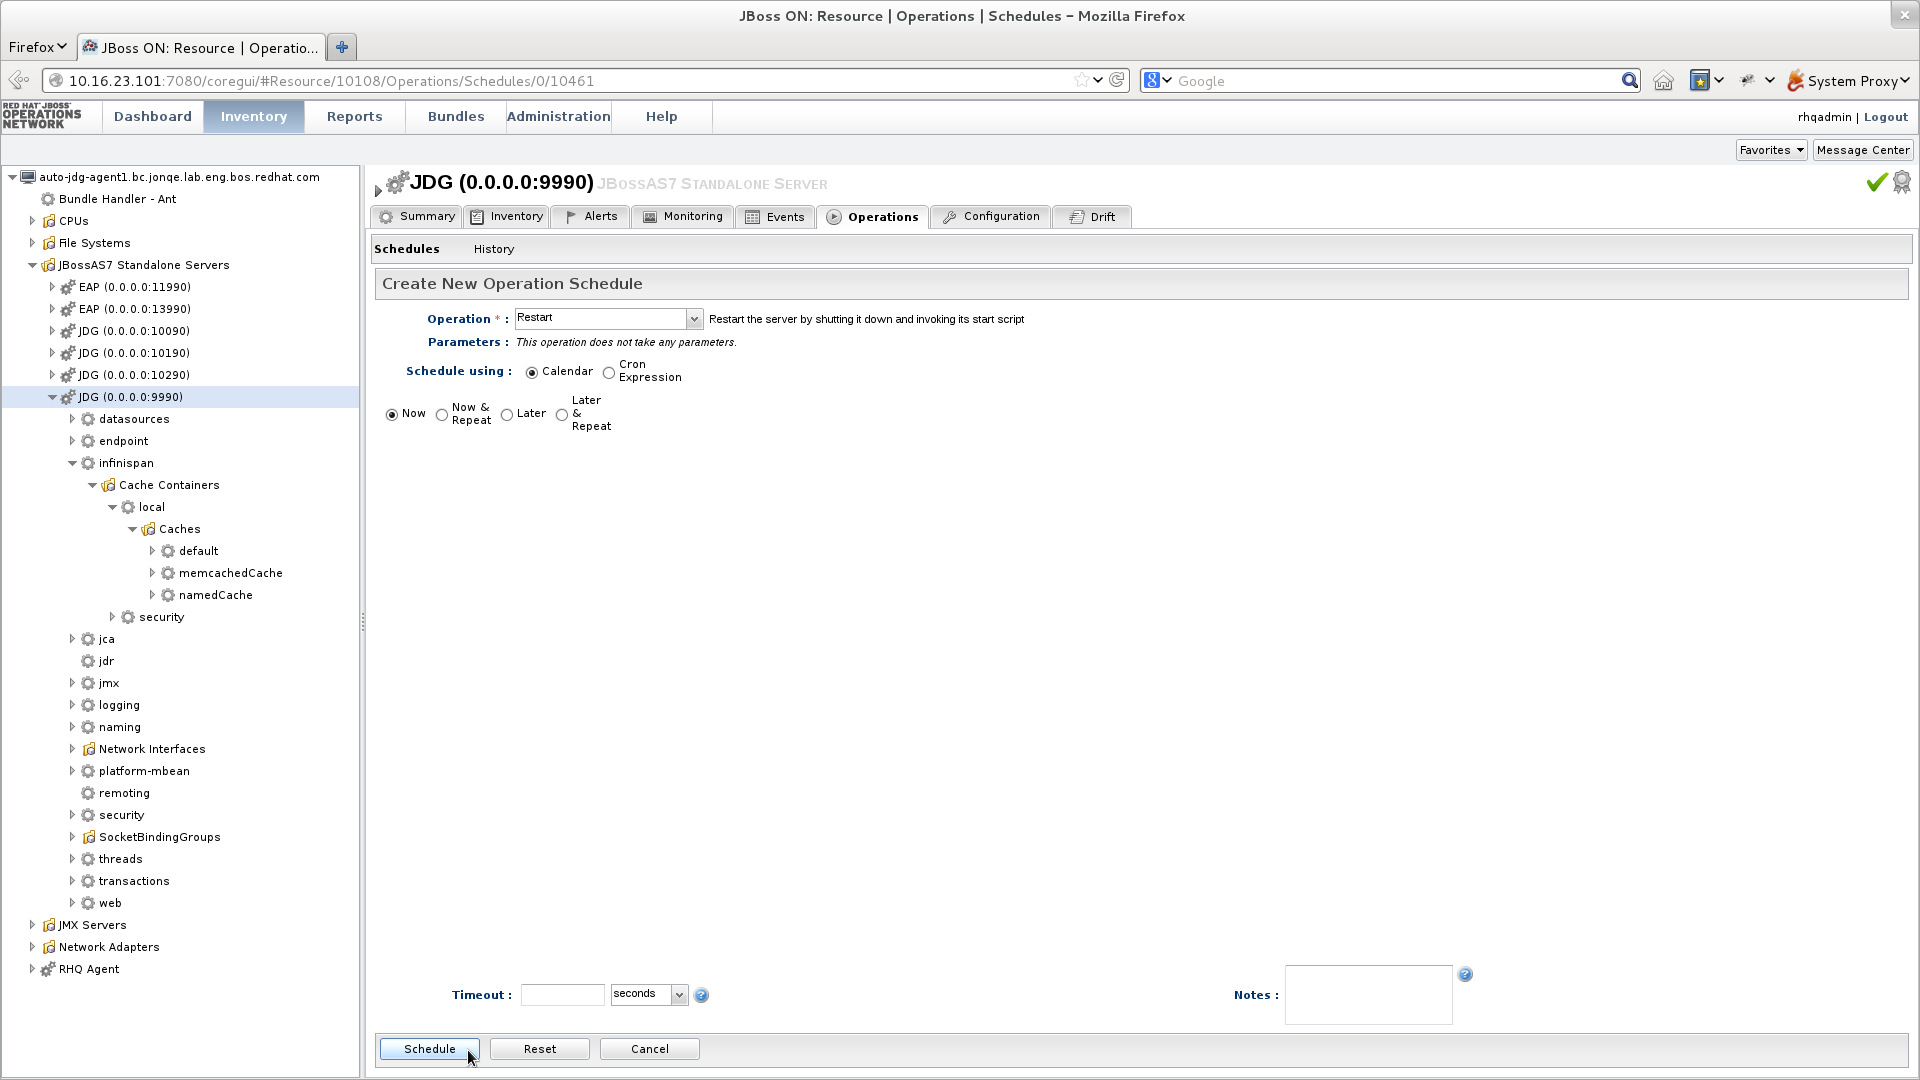
Figure 19.4. Schedule a Restart Operation
- In the screen's left panel, expand the JBossAS7 Standalone Servers entry, if it is not currently expanded.
- Click JDG (0.0.0.0:9990) from the expanded menu items.
- In the screen's right panel, details about the selected server display. Click the tab.
- In the Operation drop-down box, select the Restart operation.
- Select the radio button for the Now entry.
- Click to restart the server immediately.
- Discover the new LevelDB cache store as follows:
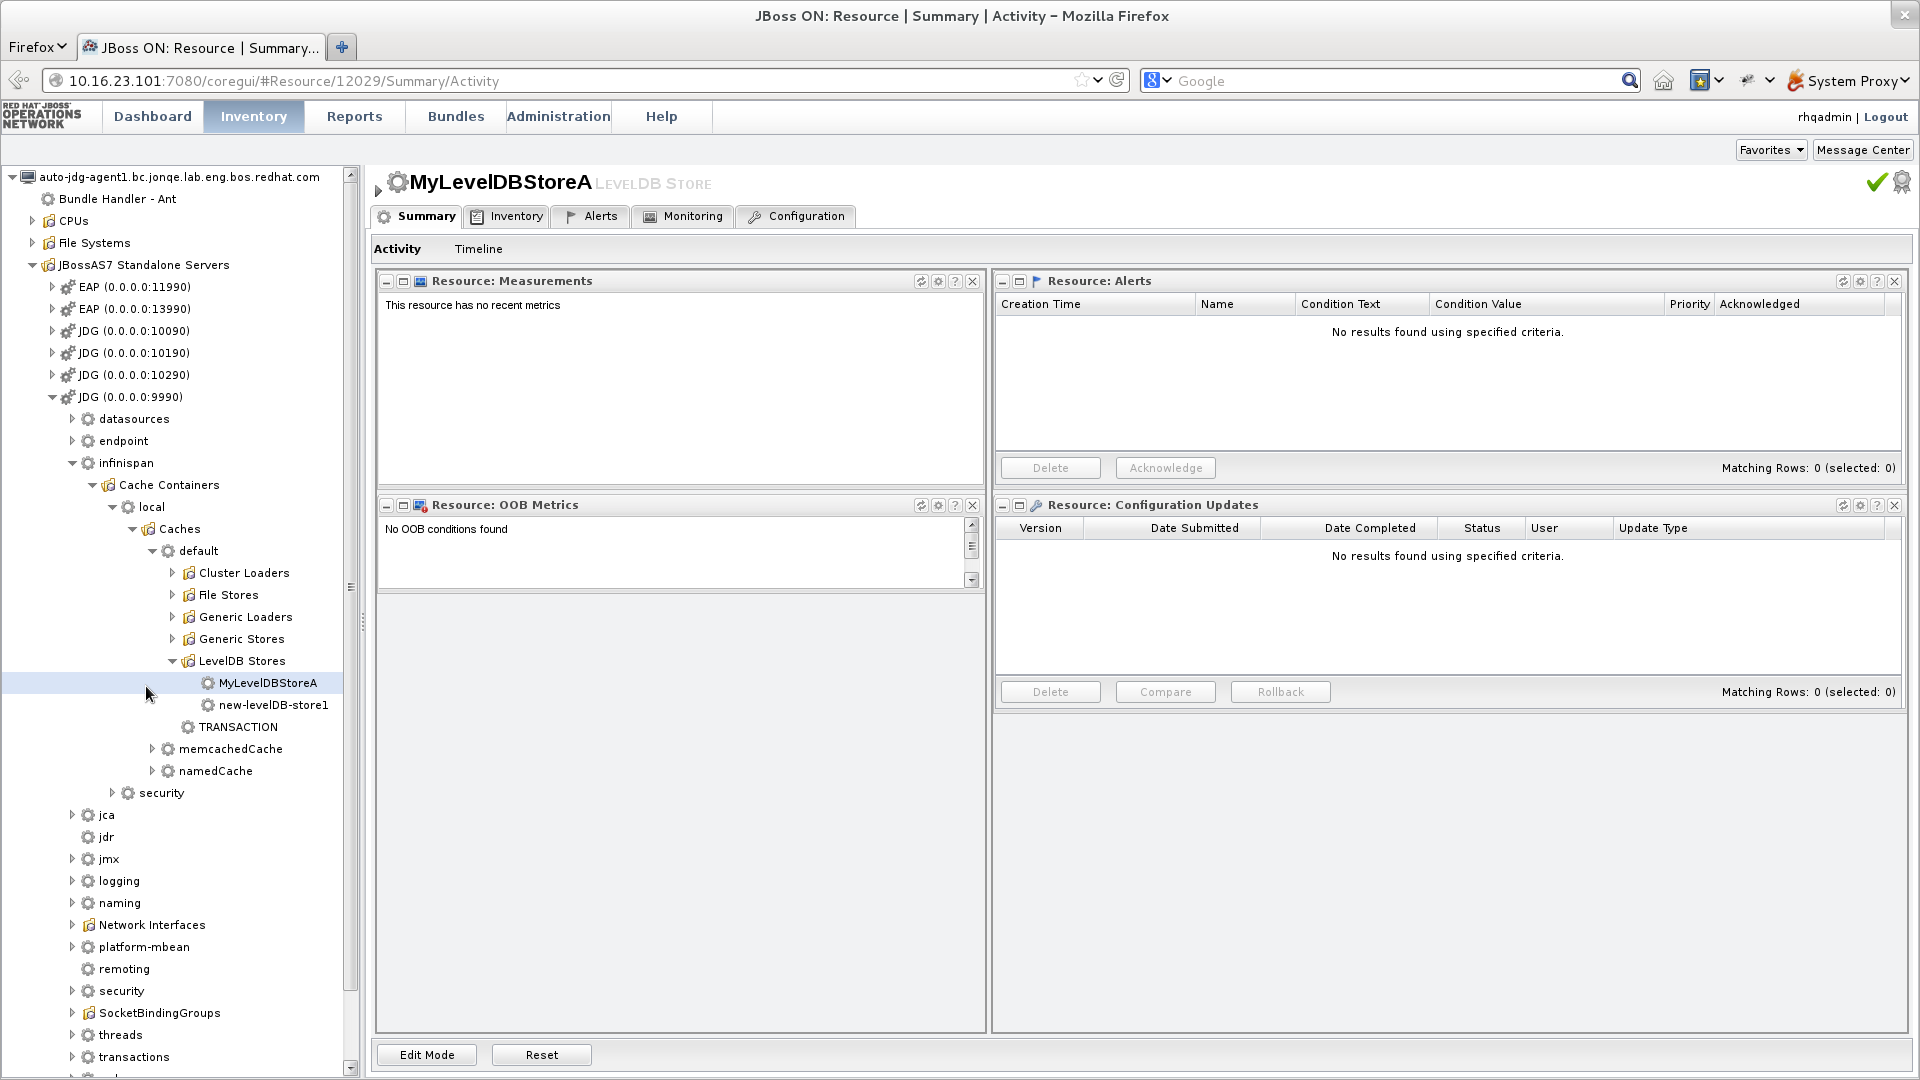
Figure 19.5. Discover the New LevelDB Cache Store
- In the screen's left panel, select each of the following items in the specified order to expand them: → → → → → → →
- Click the name of your new LevelDB Cache Store to view its configuration information in the right panel.