
3.6. Users and Roles
3.6.1. Introduction to Users
In Red Hat Virtualization, there are two types of user domains: local domain and external domain. A default local domain called the internal domain and a default user admin is created during the the Manager installation process.
You can create additional users on the internal domain using ovirt-aaa-jdbc-tool. User accounts created on local domains are known as local users. You can also attach external directory servers such as Red Hat Directory Server, Active Directory, OpenLDAP, and many other supported options to your Red Hat Virtualization environment and use them as external domains. User accounts created on external domains are known as directory users.
Both local users and directory users need to be assigned with appropriate roles and permissions through the Administration Portal before they can function in the environment. There are two main types of user roles: end user and administrator. An end user role uses and manages virtual resources from the VM Portal. An administrator role maintains the system infrastructure using the Administration Portal. The roles can be assigned to the users for individual resources like virtual machines and hosts, or on a hierarchy of objects like clusters and data centers.
3.6.2. Introduction to Directory Servers
During installation, Red Hat Virtualization Manager creates an admin user on the internal domain. The user is also referred to as admin@internal. This account is intended for use when initially configuring the environment and for troubleshooting. After you have attached an external directory server, added the directory users, and assigned them with appropriate roles and permissions, the admin@internal user can be disabled if it is not required.The directory servers supported are:
- 389ds
- 389ds RFC-2307 Schema
- Active Directory
- IBM Security Directory Server
- IBM Security Directory Server RFC-2307 Schema
- FreeIPA
- iDM
- Novell eDirectory RFC-2307 Schema
- OpenLDAP RFC-2307 Schema
- OpenLDAP Standard Schema
- Oracle Unified Directory RFC-2307 Schema
- RFC-2307 Schema (Generic)
- Red Hat Directory Server (RHDS)
- Red Hat Directory Server (RHDS) RFC-2307 Schema
- iPlanet
It is not possible to install Red Hat Virtualization Manager (rhevm) and IdM (ipa-server) on the same system. IdM is incompatible with the mod_ssl package, which is required by Red Hat Virtualization Manager.
If you are using Active Directory as your directory server, and you want to use sysprep in the creation of templates and virtual machines, then the Red Hat Virtualization administrative user must be delegated control over the Domain to:
- Join a computer to the domain
- Modify the membership of a group
For information on creation of user accounts in Active Directory, see Create a New User Account.
For information on delegation of control in Active Directory, see Delegate Control of an Organizational Unit.
3.6.3. Configuring an External LDAP Provider
3.6.3.1. Configuring an External LDAP Provider (Interactive Setup)
The ovirt-engine-extension-aaa-ldap is deprecated. For new installations, use Red Hat Single Sign On. For more information, see Installing and Configuring Red Hat Single Sign-On in the Administration Guide.
The ovirt-engine-extension-aaa-ldap extension allows users to customize their external directory setup easily. The ovirt-engine-extension-aaa-ldap extension supports many different LDAP server types, and an interactive setup script is provided to assist you with the setup for most LDAP types.
If the LDAP server type is not listed in the interactive setup script, or you want to do more customization, you can manually edit the configuration files. See Configuring an External LDAP Provider for more information.
For an Active Directory example, see Attaching an Active Directory.
Prerequisites
- You must know the domain name of the DNS or the LDAP server.
- To set up secure connection between the LDAP server and the Manager, ensure that a PEM-encoded CA certificate has been prepared.
- Have at least one set of account name and password ready to perform search and login queries to the LDAP server.
Procedure
On the Red Hat Virtualization Manager, install the LDAP extension package:
# dnf install ovirt-engine-extension-aaa-ldap-setup
Run
ovirt-engine-extension-aaa-ldap-setupto start the interactive setup:# ovirt-engine-extension-aaa-ldap-setup
Select an LDAP type by entering the corresponding number. If you are not sure which schema your LDAP server is, select the standard schema of your LDAP server type. For Active Directory, follow the procedure at Attaching_an_Active_Directory.
Available LDAP implementations:
 1 - 389ds
 2 - 389ds RFC-2307 Schema
 3 - Active Directory
 4 - IBM Security Directory Server
 5 - IBM Security Directory Server RFC-2307 Schema
 6 - IPA
 7 - Novell eDirectory RFC-2307 Schema
 8 - OpenLDAP RFC-2307 Schema
 9 - OpenLDAP Standard Schema
10 - Oracle Unified Directory RFC-2307 Schema
11 - RFC-2307 Schema (Generic)
12 - RHDS
13 - RHDS RFC-2307 Schema
14 - iPlanet
Please select:
Press
Enterto accept the default and configure domain name resolution for your LDAP server name:It is highly recommended to use DNS resolution for LDAP server. If for some reason you intend to use hosts or plain address disable DNS usage. Use DNS (Yes, No) [Yes]:
Select a DNS policy method:
- For option 1, the DNS servers listed in /etc/resolv.conf are used to resolve the IP address. Check that the /etc/resolv.conf file is updated with the correct DNS servers.
For option 2, enter the fully qualified domain name (FQDN) or the IP address of the LDAP server. You can use the
digcommand with the SRV record to find out the domain name. An SRV record takes the following format:_service._protocol.domain_name
Example:
dig _ldap._tcp.redhat.com SRV.- For option 3, enter a space-separated list of LDAP servers. Use either the FQDN or IP address of the servers. This policy provides load-balancing between the LDAP servers. Queries are distributed among all LDAP servers according to the round-robin algorithm.
For option 4, enter a space-separated list of LDAP servers. Use either the FQDN or IP address of the servers. This policy defines the first LDAP server to be the default LDAP server to respond to queries. If the first server is not available, the query will go to the next LDAP server on the list.
1 - Single server
2 - DNS domain LDAP SRV record
3 - Round-robin between multiple hosts
4 - Failover between multiple hosts
Please select:
Select the secure connection method your LDAP server supports and specify the method to obtain a PEM-encoded CA certificate:
-
Fileallows you to provide the full path to the certificate. -
URLallows you to specify a URL for the certificate. -
Inlineallows you to paste the content of the certificate in the terminal. -
Systemallows you to specify the default location for all CA files. Insecureskips certificate validation, but the connection is still encrypted using TLS.NOTE: It is highly recommended to use secure protocol to access the LDAP server. Protocol startTLS is the standard recommended method to do so. Only in cases in which the startTLS is not supported, fallback to non standard ldaps protocol. Use plain for test environments only. Please select protocol to use (startTLS, ldaps, plain) [startTLS]: startTLS Please select method to obtain PEM encoded CA certificate (File, URL, Inline, System, Insecure): Please enter the password:NoteLDAPS stands for Lightweight Directory Access Protocol Over Secure Socket Links. For SSL connections, select the
ldapsoption.
-
Enter the search user distinguished name (DN). The user must have permissions to browse all users and groups on the directory server. The search user must be specified in LDAP annotation. If anonymous search is allowed, press
Enterwithout any input.Enter search user DN (for example uid=username,dc=example,dc=com or leave empty for anonymous):
uid=user1,ou=Users,ou=department-1,dc=example,dc=comEnter search user password:Enter the base DN:
Please enter base DN (dc=redhat,dc=com) [dc=redhat,dc=com]: ou=department-1,dc=redhat,dc=comSelect
Yesif you intend to configure single sign-on for virtual machines. Note that the feature cannot be used with single sign-on to the Administration Portal feature. The script reminds you that the profile name must match the domain name. You will still need to follow the instructions in Configuring Single Sign-On for Virtual Machines in the Virtual Machine Management Guide.Are you going to use Single Sign-On for Virtual Machines (Yes, No) [Yes]:
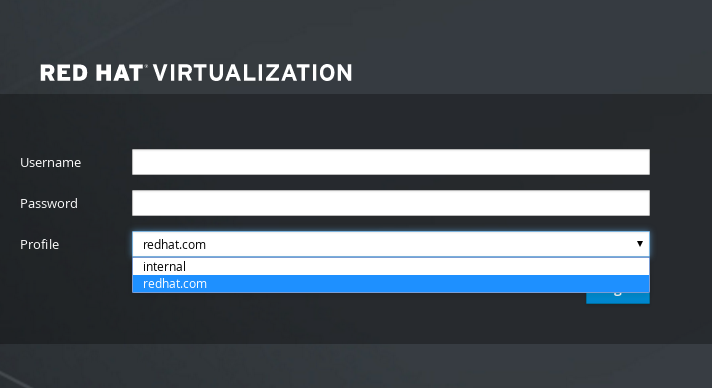
Specify a profile name. The profile name is visible to users on the login page. This example uses
redhat.com.NoteTo rename the profile after the domain has been configured, edit the
ovirt.engine.aaa.authn.profile.nameattribute in the /etc/ovirt-engine/extensions.d/redhat.com-authn.properties file. Restart theovirt-engineservice for the changes to take effect.Please specify profile name that will be visible to users: redhat.comFigure 3.1. The Administration Portal Login Page
 Note
NoteUsers must select the profile from the drop-down list when logging in for the first time. The information is stored in browser cookies and preselected the next time the user logs in.
Test the login function to ensure your LDAP server is connected to your Red Hat Virtualization environment properly. For the login query, enter your
user nameandpassword:NOTE: It is highly recommended to test drive the configuration before applying it into engine. Login sequence is executed automatically, but it is recommended to also execute Search sequence manually after successful Login sequence. Please provide credentials to test login flow: Enter user name: Enter user password: [ INFO ] Executing login sequence… … [ INFO ] Login sequence executed successfully
Check that the user details are correct. If the user details are incorrect, select
Abort:Please make sure that user details are correct and group membership meets expectations (search for PrincipalRecord and GroupRecord titles). Abort if output is incorrect. Select test sequence to execute (Done, Abort, Login, Search) [Abort]:
Manually testing the Search function is recommended. For the search query, select
Principalfor user accounts orGroupfor group accounts. SelectYestoResolve Groupsif you want the group account information for the user account to be returned. Three configuration files are created and displayed in the screen output.Select test sequence to execute (Done, Abort, Login, Search) [Search]: Search Select entity to search (Principal, Group) [Principal]: Term to search, trailing '*' is allowed: testuser1 Resolve Groups (Yes, No) [No]:
Select
Doneto complete the setup:Select test sequence to execute (Done, Abort, Login, Search) [Abort]: Done [ INFO ] Stage: Transaction setup [ INFO ] Stage: Misc configuration [ INFO ] Stage: Package installation [ INFO ] Stage: Misc configuration [ INFO ] Stage: Transaction commit [ INFO ] Stage: Closing up CONFIGURATION SUMMARY Profile name is: redhat.com The following files were created: /etc/ovirt-engine/aaa/redhat.com.properties /etc/ovirt-engine/extensions.d/redhat.com.properties /etc/ovirt-engine/extensions.d/redhat.com-authn.properties [ INFO ] Stage: Clean up Log file is available at /tmp/ovirt-engine-extension-aaa-ldap-setup-20171004101225-mmneib.log: [ INFO ] Stage: Pre-termination [ INFO ] Stage: TerminationRestart the
ovirt-engineservice. The profile you have created is now available on the Administration Portal and the VM Portal login pages. To assign the user accounts on the LDAP server appropriate roles and permissions, for example, to log in to the VM Portal, see Manager User Tasks.# systemctl restart ovirt-engine.service
For more information, see the LDAP authentication and authorization extension README file at /usr/share/doc/ovirt-engine-extension-aaa-ldap-version.
3.6.3.2. Attaching an Active Directory
The ovirt-engine-extension-aaa-ldap is deprecated. For new installations, use Red Hat Single Sign On. For more information, see Installing and Configuring Red Hat Single Sign-On in the Administration Guide.
Prerequisites
You need to know the Active Directory forest name. The forest name is also known as the root domain name.
NoteExamples of the most common Active Directory configurations, which cannot be configured using the ovirt-engine-extension-aaa-ldap-setup tool, are provided in
/usr/share/ovirt-engine-extension-aaa-ldap/examples/README.md.- You need to either add the DNS server that can resolve the Active Directory forest name to the /etc/resolv.conf file on the Manager, or note down the Active Directory DNS servers and enter them when prompted by the interactive setup script.
- To set up secure connection between the LDAP server and the Manager, ensure a PEM-encoded CA certificate has been prepared. See Setting Up SSL or TLS Connections between the Manager and an LDAP Server for more information.
- Unless anonymous search is supported, a user with permissions to browse all users and groups must be available on the Active Directory to be used as the search user. Note down the search user’s distinguished name (DN). Do not use the administrative user for the Active Directory.
- You must have at least one account name and password ready to perform search and login queries to the Active Directory.
-
If your Active Directory deployment spans multiple domains, be aware of the limitation described in the
/usr/share/ovirt-engine-extension-aaa-ldap/profiles/ad.propertiesfile.
Procedure
On the Red Hat Virtualization Manager, install the LDAP extension package:
# dnf install ovirt-engine-extension-aaa-ldap-setup
Run
ovirt-engine-extension-aaa-ldap-setupto start the interactive setup:# ovirt-engine-extension-aaa-ldap-setup
Select an LDAP type by entering the corresponding number. The LDAP-related questions after this step are different for different LDAP types.
Available LDAP implementations:
 1 - 389ds
 2 - 389ds RFC-2307 Schema
 3 - Active Directory
 4 - IBM Security Directory Server
 5 - IBM Security Directory Server RFC-2307 Schema
 6 - IPA
 7 - Novell eDirectory RFC-2307 Schema
 8 - OpenLDAP RFC-2307 Schema
 9 - OpenLDAP Standard Schema
10 - Oracle Unified Directory RFC-2307 Schema
11 - RFC-2307 Schema (Generic)
12 - RHDS
13 - RHDS RFC-2307 Schema
14 - iPlanet
Please select: 3
Enter the Active Directory forest name. If the forest name is not resolvable by your Manager’s DNS, the script prompts you to enter a space-separated list of Active Directory DNS server names.
Please enter Active Directory Forest name: ad-example.redhat.com
[ INFO  ] Resolving Global Catalog SRV record for ad-example.redhat.com
[ INFO  ] Resolving LDAP SRV record for ad-example.redhat.com
Select the secure connection method your LDAP server supports and specify the method to obtain a PEM-encoded CA certificate. The file option allows you to provide the full path to the certificate. The URL option allows you to specify a URL to the certificate. Use the inline option to paste the content of the certificate in the terminal. The system option allows you to specify the location for all CA files. The insecure option allows you to use startTLS in insecure mode.
NOTE:
It is highly recommended to use secure protocol to access the LDAP server.
Protocol startTLS is the standard recommended method to do so.
Only in cases in which the startTLS is not supported, fallback to non standard ldaps protocol.
Use plain for test environments only.
Please select protocol to use (startTLS, ldaps, plain) [startTLS]: startTLS
Please select method to obtain PEM encoded CA certificate (File, URL, Inline, System, Insecure): File
Please enter the password:
NoteLDAPS stands for Lightweight Directory Access Protocol Over Secure Socket Links. For SSL connections, select the
ldapsoption.For more information on creating a PEM-encoded CA certificate, see Setting Up SSL or TLS Connections between the Manager and an LDAP Server.
Enter the search user distinguished name (DN). The user must have permissions to browse all users and groups on the directory server. The search user must be of LDAP annotation. If anonymous search is allowed, press
Enterwithout any input.Enter search user DN (empty for anonymous): cn=user1,ou=Users,dc=test,dc=redhat,dc=com Enter search user password:Specify whether to use single sign-on for virtual machines. This feature is enabled by default, but cannot be used if single sign-on to the Administration Portal is enabled. The script reminds you that the profile name must match the domain name. You will still need to follow the instructions in Configuring Single Sign-On for Virtual Machines in the Virtual Machine Management Guide.
Are you going to use Single Sign-On for Virtual Machines (Yes, No) [Yes]:
Specify a profile name. The profile name is visible to users on the login page. This example uses
redhat.com.Please specify profile name that will be visible to users:redhat.comFigure 3.2. The Administration Portal Login Page
NoteUsers need to select the desired profile from the drop-down list when logging in for the first time. The information is then stored in browser cookies and preselected the next time the user logs in.
Test the search and login function to ensure your LDAP server is connected to your Red Hat Virtualization environment properly. For the login query, enter the account name and password. For the search query, select
Principalfor user accounts, and selectGroupfor group accounts. EnterYestoResolve Groupsif you want the group account information for the user account to be returned. SelectDoneto complete the setup. Three configuration files are created and displayed in the screen output.NOTE: It is highly recommended to test drive the configuration before applying it into engine. Login sequence is executed automatically, but it is recommended to also execute Search sequence manually after successful Login sequence. Select test sequence to execute (Done, Abort, Login, Search) [Abort]: Login Enter search user name: testuser1 Enter search user password: [ INFO ] Executing login sequence... ... Select test sequence to execute (Done, Abort, Login, Search) [Abort]: Search Select entity to search (Principal, Group) [Principal]: Term to search, trailing '*' is allowed: testuser1 Resolve Groups (Yes, No) [No]: [ INFO ] Executing login sequence... ... Select test sequence to execute (Done, Abort, Login, Search) [Abort]: Done [ INFO ] Stage: Transaction setup [ INFO ] Stage: Misc configuration [ INFO ] Stage: Package installation [ INFO ] Stage: Misc configuration [ INFO ] Stage: Transaction commit [ INFO ] Stage: Closing up CONFIGURATION SUMMARY Profile name is: redhat.com The following files were created: /etc/ovirt-engine/aaa/redhat.com.properties /etc/ovirt-engine/extensions.d/redhat.com-authz.properties /etc/ovirt-engine/extensions.d/redhat.com-authn.properties [ INFO ] Stage: Clean up Log file is available at /tmp/ovirt-engine-extension-aaa-ldap-setup-20160114064955-1yar9i.log: [ INFO ] Stage: Pre-termination [ INFO ] Stage: Termination
- The profile you have created is now available on the Administration Portal and the VM Portal login pages. To assign the user accounts on the LDAP server appropriate roles and permissions, for example, to log in to the VM Portal, see Manager User Tasks.
For more information, see the LDAP authentication and authorization extension README file at /usr/share/doc/ovirt-engine-extension-aaa-ldap-version.
3.6.3.3. Configuring an External LDAP Provider (Manual Method)
The ovirt-engine-extension-aaa-ldap is deprecated. For new installations, use Red Hat Single Sign On. For more information, see Installing and Configuring Red Hat Single Sign-On in the Administration Guide.
The ovirt-engine-extension-aaa-ldap extension uses the LDAP protocol to access directory servers and is fully customizable. Kerberos authentication is not required unless you want to enable the single sign-on to the VM Portal or the Administration Portal feature.
If the interactive setup method in the previous section does not cover your use case, you can manually modify the configuration files to attach your LDAP server. The following procedure uses generic details. Specific values depend on your setup.
Procedure
On the Red Hat Virtualization Manager, install the LDAP extension package:
# dnf install ovirt-engine-extension-aaa-ldap
Copy the LDAP configuration template file into the /etc/ovirt-engine directory. Template files are available for active directories (ad) and other directory types (simple). This example uses the simple configuration template.
# cp -r /usr/share/ovirt-engine-extension-aaa-ldap/examples/simple/. /etc/ovirt-engine
Rename the configuration files to match the profile name you want visible to users on the Administration Portal and the VM Portal login pages:
# mv /etc/ovirt-engine/aaa/profile1.properties /etc/ovirt-engine/aaa/example.properties
# mv /etc/ovirt-engine/extensions.d/profile1-authn.properties /etc/ovirt-engine/extensions.d/example-authn.properties
# mv /etc/ovirt-engine/extensions.d/profile1-authz.properties /etc/ovirt-engine/extensions.d/example-authz.properties
Edit the LDAP property configuration file by uncommenting an LDAP server type and updating the domain and passwords fields:
# vi /etc/ovirt-engine/aaa/example.propertiesExample 3.5. Example profile: LDAP server section
# Select one
#
include = <openldap.properties>
#include = <389ds.properties>
#include = <rhds.properties>
#include = <ipa.properties>
#include = <iplanet.properties>
#include = <rfc2307-389ds.properties>
#include = <rfc2307-rhds.properties>
#include = <rfc2307-openldap.properties>
#include = <rfc2307-edir.properties>
#include = <rfc2307-generic.properties>

# Server
#
vars.server = ldap1.company.com

# Search user and its password.
#
vars.user = uid=search,cn=users,cn=accounts,dc=company,dc=com
vars.password = 123456

pool.default.serverset.single.server = ${global:vars.server}
pool.default.auth.simple.bindDN = ${global:vars.user}
pool.default.auth.simple.password = ${global:vars.password}
To use TLS or SSL protocol to interact with the LDAP server, obtain the root CA certificate for the LDAP server and use it to create a public keystore file. Uncomment the following lines and specify the full path to the public keystore file and the password to access the file.
NoteFor more information on creating a public keystore file, see Setting Up SSL or TLS Connections between the Manager and an LDAP Server.
Example 3.6. Example profile: keystore section
# Create keystore, import certificate chain and uncomment
# if using tls.
pool.default.ssl.startTLS = true
pool.default.ssl.truststore.file = /full/path/to/myrootca.jks
pool.default.ssl.truststore.password = password
Review the authentication configuration file. The profile name visible to users on the Administration Portal and the VM Portal login pages is defined by ovirt.engine.aaa.authn.profile.name. The configuration profile location must match the LDAP configuration file location. All fields can be left as default.
# vi /etc/ovirt-engine/extensions.d/example-authn.propertiesExample 3.7. Example authentication configuration file
ovirt.engine.extension.name = example-authn
ovirt.engine.extension.bindings.method = jbossmodule
ovirt.engine.extension.binding.jbossmodule.module = org.ovirt.engine.extension.aaa.ldap
ovirt.engine.extension.binding.jbossmodule.class = org.ovirt.engine.extension.aaa.ldap.AuthnExtension
ovirt.engine.extension.provides = org.ovirt.engine.api.extensions.aaa.Authn
ovirt.engine.aaa.authn.profile.name = example
ovirt.engine.aaa.authn.authz.plugin = example-authz
config.profile.file.1 = ../aaa/example.properties
Review the authorization configuration file. The configuration profile location must match the LDAP configuration file location. All fields can be left as default.
# vi /etc/ovirt-engine/extensions.d/example-authz.propertiesExample 3.8. Example authorization configuration file
ovirt.engine.extension.name = example-authz
ovirt.engine.extension.bindings.method = jbossmodule
ovirt.engine.extension.binding.jbossmodule.module = org.ovirt.engine.extension.aaa.ldap
ovirt.engine.extension.binding.jbossmodule.class = org.ovirt.engine.extension.aaa.ldap.AuthzExtension
ovirt.engine.extension.provides = org.ovirt.engine.api.extensions.aaa.Authz
config.profile.file.1 = ../aaa/example.properties
Ensure that the ownership and permissions of the configuration profile are appropriate:
# chown ovirt:ovirt /etc/ovirt-engine/aaa/example.properties
# chmod 600 /etc/ovirt-engine/aaa/example.properties
Restart the engine service:
# systemctl restart ovirt-engine.service
- The example profile you have created is now available on the Administration Portal and the VM Portal login pages. To give the user accounts on the LDAP server appropriate permissions, for example, to log in to the VM Portal, see Manager User Tasks.
For more information, see the LDAP authentication and authorization extension README file at /usr/share/doc/ovirt-engine-extension-aaa-ldap-version.
3.6.3.4. Removing an External LDAP Provider
This procedure shows you how to remove an external configured LDAP provider and its users.
Procedure
Remove the LDAP provider configuration files, replacing the default name profile1:
# rm /etc/ovirt-engine/extensions.d/profile1-authn.properties
# rm /etc/ovirt-engine/extensions.d/profile1-authz.properties
# rm /etc/ovirt-engine/aaa/profile1.properties
Restart the
ovirt-engineservice:# systemctl restart ovirt-engine
-
In the Administration Portal, in the Users resource tab, select the users of this provider (those whose
Authorization provideris profile1-authz) and click Remove.
3.6.4. Configuring LDAP and Kerberos for Single Sign-on
Single sign-on allows users to log in to the VM Portal or the Administration Portal without re-typing their passwords. Authentication credentials are obtained from the Kerberos server. To configure single sign-on to the Administration Portal and the VM Portal, you need to configure two extensions: ovirt-engine-extension-aaa-misc and ovirt-engine-extension-aaa-ldap; and two Apache modules: mod_auth_gssapi and mod_session. You can configure single sign-on that does not involve Kerberos, however this is outside the scope of this documentation.
If single sign-on to the VM Portal is enabled, single sign-on to virtual machines is not possible. With single sign-on to the VM Portal enabled, the VM Portal does not need to accept a password, so you cannot delegate the password to sign in to virtual machines.
This example assumes the following:
- The existing Key Distribution Center (KDC) server uses the MIT version of Kerberos 5.
- You have administrative rights to the KDC server.
- The Kerberos client is installed on the Red Hat Virtualization Manager and user machines.
-
The
kadminutility is used to create Kerberos service principals and keytab files.
This procedure involves the following components:
On the KDC server
- Create a service principal and a keytab file for the Apache service on the Red Hat Virtualization Manager.
On the Red Hat Virtualization Manager
- Install the authentication and authorization extension packages and the Apache Kerberos authentication module.
- Configure the extension files.
3.6.4.1. Configuring Kerberos for the Apache Service
On the KDC server, use the
kadminutility to create a service principal for the Apache service on the Red Hat Virtualization Manager. The service principal is a reference ID to the KDC for the Apache service.# kadmin kadmin> addprinc -randkey HTTP/fqdn-of-rhevm@REALM.COM
Generate a keytab file for the Apache service. The keytab file stores the shared secret key.
NoteThe
engine-backupcommand includes the file/etc/httpd/http.keytabwhen backing up and restoring. If you use a different name for the keytab file, make sure you back up and restore it.kadmin> ktadd -k /tmp/http.keytab HTTP/fqdn-of-rhevm@REALM.COM kadmin> quit
Copy the keytab file from the KDC server to the Red Hat Virtualization Manager:
# scp /tmp/http.keytab root@rhevm.example.com:/etc/httpd== Configuring Single Sign-on to the VM Portal or Administration Portal
On the Red Hat Virtualization Manager, ensure that the ownership and permissions for the keytab are appropriate:
# chown apache /etc/httpd/http.keytab
# chmod 400 /etc/httpd/http.keytab
Install the authentication extension package, LDAP extension package, and the
mod_auth_gssapiandmod_sessionApache modules:# dnf install ovirt-engine-extension-aaa-misc ovirt-engine-extension-aaa-ldap mod_auth_gssapi mod_session
NoteThe
ovirt-engine-extension-aaa-ldapis deprecated. For new installations, use Red Hat Single Sign On. For more information, see Installing and Configuring Red Hat Single Sign-On in the Administration Guide.Copy the SSO configuration template file into the /etc/ovirt-engine directory. Template files are available for Active Directory (ad-sso) and other directory types (simple-sso). This example uses the simple SSO configuration template.
# cp -r /usr/share/ovirt-engine-extension-aaa-ldap/examples/simple-sso/. /etc/ovirt-engine
Move ovirt-sso.conf into the Apache configuration directory.
NoteThe
engine-backupcommand includes the file/etc/httpd/conf.d/ovirt-sso.confwhen backing up and restoring. If you use a different name for this file, make sure you back up and restore it.# mv /etc/ovirt-engine/aaa/ovirt-sso.conf /etc/httpd/conf.d
Review the authentication method file. You do not need to edit this file, as the realm is automatically fetched from the keytab file.
# vi /etc/httpd/conf.d/ovirt-sso.conf
Example 3.9. Example authentication method file
<LocationMatch ^/ovirt-engine/sso/(interactive-login-negotiate|oauth/token-http-auth)|^/ovirt-engine/api>
  <If "req('Authorization') !~ /^(Bearer|Basic)/i">
    RewriteEngine on
    RewriteCond %{LA-U:REMOTE_USER} ^(.*)$
    RewriteRule ^(.*)$ - [L,NS,P,E=REMOTE_USER:%1]
    RequestHeader set X-Remote-User %{REMOTE_USER}s

    AuthType GSSAPI
    AuthName "Kerberos Login"

    # Modify to match installation
    GssapiCredStore keytab:/etc/httpd/http.keytab
    GssapiUseSessions On
    Session On
    SessionCookieName ovirt_gssapi_session path=/private;httponly;secure;

    Require valid-user
    ErrorDocument 401 "<html><meta http-equiv=\"refresh\" content=\"0; url=/ovirt-engine/sso/login-unauthorized\"/><body><a href=\"/ovirt-engine/sso/login-unauthorized\">Here</a></body></html>"
  </If>
</LocationMatch>
Rename the configuration files to match the profile name you want visible to users on the Administration Portal and the VM Portal login pages:
# mv /etc/ovirt-engine/aaa/profile1.properties /etc/ovirt-engine/aaa/example.properties# mv /etc/ovirt-engine/extensions.d/profile1-http-authn.properties /etc/ovirt-engine/extensions.d/example-http-authn.properties# mv /etc/ovirt-engine/extensions.d/profile1-http-mapping.properties /etc/ovirt-engine/extensions.d/example-http-mapping.properties# mv /etc/ovirt-engine/extensions.d/profile1-authz.properties /etc/ovirt-engine/extensions.d/example-authz.propertiesEdit the LDAP property configuration file by uncommenting an LDAP server type and updating the domain and passwords fields:
# vi /etc/ovirt-engine/aaa/example.propertiesExample 3.10. Example profile: LDAP server section
# Select one
include = <openldap.properties>
#include = <389ds.properties>
#include = <rhds.properties>
#include = <ipa.properties>
#include = <iplanet.properties>
#include = <rfc2307-389ds.properties>
#include = <rfc2307-rhds.properties>
#include = <rfc2307-openldap.properties>
#include = <rfc2307-edir.properties>
#include = <rfc2307-generic.properties>

# Server
#
vars.server = ldap1.company.com

# Search user and its password.
#
vars.user = uid=search,cn=users,cn=accounts,dc=company,dc=com
vars.password = 123456

pool.default.serverset.single.server = ${global:vars.server}
pool.default.auth.simple.bindDN = ${global:vars.user}
pool.default.auth.simple.password = ${global:vars.password}
To use TLS or SSL protocol to interact with the LDAP server, obtain the root CA certificate for the LDAP server and use it to create a public keystore file. Uncomment the following lines and specify the full path to the public keystore file and the password to access the file.
NoteFor more information on creating a public keystore file, see Setting Up SSL or TLS Connections between the Manager and an LDAP Server.
Example 3.11. Example profile: keystore section
# Create keystore, import certificate chain and uncomment
# if using ssl/tls.
pool.default.ssl.startTLS = true
pool.default.ssl.truststore.file = /full/path/to/myrootca.jks
pool.default.ssl.truststore.password = password
Review the authentication configuration file. The profile name visible to users on the Administration Portal and the VM Portal login pages is defined by ovirt.engine.aaa.authn.profile.name. The configuration profile location must match the LDAP configuration file location. All fields can be left as default.
# vi /etc/ovirt-engine/extensions.d/example-http-authn.propertiesExample 3.12. Example authentication configuration file
ovirt.engine.extension.name = example-http-authn
ovirt.engine.extension.bindings.method = jbossmodule
ovirt.engine.extension.binding.jbossmodule.module = org.ovirt.engine.extension.aaa.misc
ovirt.engine.extension.binding.jbossmodule.class = org.ovirt.engine.extension.aaa.misc.http.AuthnExtension
ovirt.engine.extension.provides = org.ovirt.engine.api.extensions.aaa.Authn
ovirt.engine.aaa.authn.profile.name = example-http
ovirt.engine.aaa.authn.authz.plugin = example-authz
ovirt.engine.aaa.authn.mapping.plugin = example-http-mapping
config.artifact.name = HEADER
config.artifact.arg = X-Remote-User
Review the authorization configuration file. The configuration profile location must match the LDAP configuration file location. All fields can be left as default.
# vi /etc/ovirt-engine/extensions.d/example-authz.propertiesExample 3.13. Example authorization configuration file
ovirt.engine.extension.name = example-authz
ovirt.engine.extension.bindings.method = jbossmodule
ovirt.engine.extension.binding.jbossmodule.module = org.ovirt.engine.extension.aaa.ldap
ovirt.engine.extension.binding.jbossmodule.class = org.ovirt.engine.extension.aaa.ldap.AuthzExtension
ovirt.engine.extension.provides = org.ovirt.engine.api.extensions.aaa.Authz
config.profile.file.1 = ../aaa/example.properties
Review the authentication mapping configuration file. The configuration profile location must match the LDAP configuration file location. The configuration profile extension name must match the
ovirt.engine.aaa.authn.mapping.pluginvalue in the authentication configuration file. All fields can be left as default.# vi /etc/ovirt-engine/extensions.d/example-http-mapping.propertiesExample 3.14. Example authentication mapping configuration file
ovirt.engine.extension.name = example-http-mapping
ovirt.engine.extension.bindings.method = jbossmodule
ovirt.engine.extension.binding.jbossmodule.module = org.ovirt.engine.extension.aaa.misc
ovirt.engine.extension.binding.jbossmodule.class = org.ovirt.engine.extension.aaa.misc.mapping.MappingExtension
ovirt.engine.extension.provides = org.ovirt.engine.api.extensions.aaa.Mapping
config.mapAuthRecord.type = regex
config.mapAuthRecord.regex.mustMatch = true
config.mapAuthRecord.regex.pattern = ^(?<user>.*?)((\\\\(?<at>@)(?<suffix>.*?)@.*)|(?<realm>@.*))$
config.mapAuthRecord.regex.replacement = ${user}${at}${suffix}
Ensure that the ownership and permissions of the configuration files are appropriate:
# chown ovirt:ovirt /etc/ovirt-engine/aaa/example.properties# chown ovirt:ovirt /etc/ovirt-engine/extensions.d/example-http-authn.properties# chown ovirt:ovirt /etc/ovirt-engine/extensions.d/example-http-mapping.properties# chown ovirt:ovirt /etc/ovirt-engine/extensions.d/example-authz.properties# chmod 600 /etc/ovirt-engine/aaa/example.properties# chmod 640 /etc/ovirt-engine/extensions.d/example-http-authn.properties# chmod 640 /etc/ovirt-engine/extensions.d/example-http-mapping.properties# chmod 640 /etc/ovirt-engine/extensions.d/example-authz.propertiesRestart the Apache service and the
ovirt-engineservice:# systemctl restart httpd.service # systemctl restart ovirt-engine.service
3.6.5. Installing and Configuring Red Hat Single Sign-On
To use Red Hat Single Sign-On as your authorization method, you need to:
- Install Red Hat SSO.
- Configure the LDAP group mapper.
- Configure Apache on the Manager.
- Configure OVN provider credentials.
- Configure the Monitoring Portal (Grafana)
If Red Hat SSO is configured, previous LDAP sign ons will not work, as only a single authorization protocol may be used at a time.
3.6.5.1. Installing Red Hat SSO
You can install Red Hat Single Sign-On by downloading a ZIP file and unpacking it, or by using an RPM file.
Follow the installation instructions at Red Hat SSO Installation
Prepare the following information:
-
Path/location of the
Open ID Connectserver. - The subscription channel for the correct repositories.
- Valid Red Hat subscription login credentials.
3.6.5.2. Configuring the LDAP group mapper
Procedure
Add the LDAP groups mapper with the following information:
-
Name: ldapgroups -
Mapper Type: group-ldap-mapper -
LDAP Groups DN: ou=groups,dc=example,dc=com -
Group Object Classes: groupofuniquenames (adapt this class according to your LDAP server setup) -
Membership LDAP Attribute: uniquemember (adapt this class according to your LDAP server setup)
-
-
Click
Save. -
Click
Sync LDAP Groups to KeyCloak. -
At the bottom of the
User Federation Providerpage, clickSynchronize all users. -
In the
Clientstab, underAdd Client, addovirt-engineas theClient ID, and enter the engine url as theRoot URL. -
Modify the
Client Protocoltoopenid-connectand theAccess Typetoconfidential. -
In the
Clientstab, underOvirt-engine>Advanced Settings, increase theAccess Token Lifespan. -
Add
https://rhvm.example.com:443/*as a valid redirect URI. - The client secret is generated, and can be viewed in the Credentials tab.
In the
Clientstab underCreate Mapper Protocol, create a mapper with the following settings:-
Name: groups -
Mapper Type: Group Membership -
Token Claim Name: groups -
Full group path:ON -
Add to ID token:ON -
Add to access token:ON -
Add to userinfo:ON
-
-
Add the
Builtin Protocol Mapperforusername. -
Create the scopes needed by
ovirt-engine,ovirt-app-api,ovirt-app-admin, andovirt-ext=auth:sequence-priority=~. - Use the scopes created in the previous step to set up optional client scopes for the ovirt-engine client.
3.6.5.3. Configuring Apache in the Manager
Enable the
mod_auth_openidcmodule.# dnf module enable mod_auth_openidc:2.3 -y
Configure Apache in the Manager
# dnf install mod_auth_openidc
Create a new
httpdconfig fileovirt-openidc.confin /etc/httpd/conf.d/ with the following content:LoadModule auth_openidc_module modules/mod_auth_openidc.so OIDCProviderMetadataURL https://SSO.example.com/auth/realms/master/.well-known/openid-configuration OIDCSSLValidateServer Off OIDCClientID ovirt-engine OIDCClientSecret <client_SSO _generated_key> OIDCRedirectURI https://rhvm.example.com/ovirt-engine/callback OIDCDefaultURL https://rhvm.example.com/ovirt-engine/login?scope=ovirt-app-admin+ovirt-app-portal+ovirt-ext%3Dauth%3Asequence-priority%3D%7E # maps the prefered_username claim to the REMOTE_USER environment variable: OIDCRemoteUserClaim <preferred_username> OIDCCryptoPassphrase <random1234> <LocationMatch ^/ovirt-engine/sso/(interactive-login-negotiate|oauth/token-http-auth)|^/ovirt-engine/callback> <If "req('Authorization') !~ /^(Bearer|Basic)/i"> Require valid-user AuthType openid-connect ErrorDocument 401 "<html><meta http-equiv=\"refresh\" content=\"0; url=/ovirt-engine/sso/login-unauthorized\"/><body><a href=\"/ovirt-engine/sso/login-unauthorized\">Here</a></body></html>" </If> </LocationMatch> OIDCOAuthIntrospectionEndpoint https://SSO.example.com/auth/realms/master/protocol/openid-connect/token/introspect OIDCOAuthSSLValidateServer Off OIDCOAuthIntrospectionEndpointParams token_type_hint=access_token OIDCOAuthClientID ovirt-engine OIDCOAuthClientSecret <client_SSO _generated_key> OIDCOAuthRemoteUserClaim sub <LocationMatch ^/ovirt-engine/(api$|api/)> AuthType oauth20 Require valid-user </LocationMatch>To save the configuration changes, restart httpd and ovirt-engine:
# systemctl restart httpd
# systemctl restart ovirt-engine
Create the file
openidc-authn.propertiesin /etc/ovirt-engine/extensions.d/ with the following content:ovirt.engine.extension.name = openidc-authn ovirt.engine.extension.bindings.method = jbossmodule ovirt.engine.extension.binding.jbossmodule.module = org.ovirt.engine.extension.aaa.misc ovirt.engine.extension.binding.jbossmodule.class = org.ovirt.engine.extension.aaa.misc.http.AuthnExtension ovirt.engine.extension.provides = org.ovirt.engine.api.extensions.aaa.Authn ovirt.engine.aaa.authn.profile.name = openidchttp ovirt.engine.aaa.authn.authz.plugin = openidc-authz ovirt.engine.aaa.authn.mapping.plugin = openidc-http-mapping config.artifact.name = HEADER config.artifact.arg = OIDC_CLAIM_preferred_username
Create the file
openidc-http-mapping.propertiesin /etc/ovirt-engine/extensions.d/ with the following content:ovirt.engine.extension.name = openidc-http-mapping ovirt.engine.extension.bindings.method = jbossmodule ovirt.engine.extension.binding.jbossmodule.module = org.ovirt.engine.extension.aaa.misc ovirt.engine.extension.binding.jbossmodule.class = org.ovirt.engine.extension.aaa.misc.mapping.MappingExtension ovirt.engine.extension.provides = org.ovirt.engine.api.extensions.aaa.Mapping config.mapAuthRecord.type = regex config.mapAuthRecord.regex.mustMatch = false config.mapAuthRecord.regex.pattern = ^(?<user>.*?)((\\\\(?<at>@)(?<suffix>.*?)@.*)|(?<realm>@.*))$ config.mapAuthRecord.regex.replacement = ${user}${at}${suffix}Create the file
openidc-authz.propertiesin /etc/ovirt-engine/extensions.d/ with the following content:ovirt.engine.extension.name = openidc-authz ovirt.engine.extension.bindings.method = jbossmodule ovirt.engine.extension.binding.jbossmodule.module = org.ovirt.engine.extension.aaa.misc ovirt.engine.extension.binding.jbossmodule.class = org.ovirt.engine.extension.aaa.misc.http.AuthzExtension ovirt.engine.extension.provides = org.ovirt.engine.api.extensions.aaa.Authz config.artifact.name.arg = OIDC_CLAIM_preferred_username config.artifact.groups.arg = OIDC_CLAIM_groups
Create the file
99-enable-external-auth.confin /etc/ovirt-engine/engine.conf.d/ with the following content:ENGINE_SSO_ENABLE_EXTERNAL_SSO=true ENGINE_SSO_EXTERNAL_SSO_LOGOUT_URI="${ENGINE_URI}/callback" EXTERNAL_OIDC_USER_INFO_END_POINT=https://SSO.example.com/auth/realms/master/protocol/openid-connect/userinfo EXTERNAL_OIDC_TOKEN_END_POINT=https://SSO.example.com/auth/realms/master/protocol/openid-connect/token EXTERNAL_OIDC_LOGOUT_END_POINT=https://SSO.example.com/auth/realms/master/protocol/openid-connect/logout EXTERNAL_OIDC_CLIENT_ID=ovirt-engine EXTERNAL_OIDC_CLIENT_SECRET="<client_SSO _generated_key>" EXTERNAL_OIDC_HTTPS_PKI_TRUST_STORE="/etc/pki/java/cacerts" EXTERNAL_OIDC_HTTPS_PKI_TRUST_STORE_PASSWORD="" EXTERNAL_OIDC_SSL_VERIFY_CHAIN=false EXTERNAL_OIDC_SSL_VERIFY_HOST=false
3.6.5.4. Configuring OVN
If you configured the ovirt-ovn-provider in the Manager, you need to configure the OVN provider credentials.
Procedure
Create the file
20-setup-ovirt-provider-ovn.confin /etc/ovirt-provider-ovn/conf.d/ with the following contents, where user1 belongs to the LDAP group ovirt-administrator, and openidchttp is the profile configured for aaa-ldap-misc.[OVIRT] ovirt-admin-user-name=user1@openidchttp
Restart the
ovirt-provider-ovn:# systemctl restart ovirt-provider-ovn
- Log in to the Administration Portal, navigate to → , select ovirt-provider-ovn, and click to update the password for the ovn provider.
3.6.5.5. Configuring the Monitoring Portal (Grafana)
Procedure
Configure a client’s valid redirect URL:
- Select the client configured in earlier steps (ie. ovirt-engine)
-
Add an additional valid Redirect URI for the Monitoring Portal(Grafana). Valid Redirect URIs:
https://rhvm.example.com:443/ovirt-engine-grafana/login/generic_oauth/ - Select the Mappers tab.
Click to create a new Mapper, and fill in the following fields:
-
Name:
realm role -
Mapper Type:
User Realm Role -
Token Claim Name:
realm_access.roles - Claim JSON Type: String
-
Name:
Configure Grafana specific roles:
- Select Roles from the main menu.
-
Add the following roles:
admin,editor,viewer.
Assign Grafana specific roles to the desired groups:
- Select Groups from the main menu, and choose a desired group.
- Select Role Mappings.
- Move the desired roles from Available Roles to Assigned Roles.
Configure Grafana - modify the section
auth.generic_oauthin/etc/grafana/grafana.inias follows. Replace the values in arrow brackets < > as needed.(...) #################################### Generic OAuth ####################### [auth.generic_oauth] name = oVirt Engine Auth enabled = true allow_sign_up = true client_id = ovirt-engine client_secret = <client-secret-of-RH-SSO> scopes = openid,ovirt-app-admin,ovirt-app-portal,ovirt-ext=auth:sequence-priority=~ email_attribute_name = email:primary role_attribute_path = "contains(realm_access.roles[*], 'admin') && 'Admin' || contains(realm_access.roles[*], 'editor') && 'Editor' || 'Viewer'" auth_url = https://<rh-sso-hostname>/auth/realms/<RH-SSO-REALM>/protocol/openid-connect/auth token_url = https://<rh-sso-hostname>/auth/realms/<RH-SSO-REALM>/protocol/openid-connect/token api_url = https://<rh-sso-hostname>/auth/realms/<RH-SSO-REALM>/protocol/openid-connect/userinfo team_ids = allowed_organizations = tls_skip_verify_insecure = false tls_client_cert = tls_client_key = tls_client_ca = /etc/pki/ovirt-engine/apache-ca.pem send_client_credentials_via_post = false (...)
3.6.6. User Authorization
3.6.6.1. User Authorization Model
Red Hat Virtualization applies authorization controls based on the combination of the three components:
- The user performing the action
- The type of action being performed
- The object on which the action is being performed
3.6.6.2. User Actions
For an action to be successfully performed, the user must have the appropriate permission for the object being acted upon. Each type of action has a corresponding permission.
Some actions are performed on more than one object. For example, copying a template to another storage domain will impact both the template and the destination storage domain. The user performing an action must have appropriate permissions for all objects the action impacts.
3.6.7. Administering User Tasks From the Administration Portal
3.6.7.1. The Account Settings window
The → window allows you to view or edit the following Administration Portal user settings:
General tab:
- User Name - read only.
- E-mail - read only.
Home Page:
Default -
#dashboard-main.Custom home page - enter only the last part of the URL, including hash mark (
#). For example:#vms-snapshots;name-testVM.Serial Console
User’s Public Key - enter the SSH public key that is used to access the Manager using a serial console.
Tables
Persist grid settings - saves the grid column settings on the server.
Confirmations tab:
Show confirmation dialog on Suspend VM - enables a confirmation dialog when the VM is suspended.
3.6.7.2. Adding Users and Assigning VM Portal Permissions
Users must be created already before they can be added and assigned roles and permissions. The roles and permissions assigned in this procedure give the user the permission to log in to the VM Portal and to start creating virtual machines. The procedure also applies to group accounts.
Procedure
- On the header bar, click → . This opens the Configure window.
- Click System Permissions.
- Click Add. This opens the Add System Permission to User window.
- Select a profile under Search. The profile is the domain you want to search. Enter a name or part of a name in the search text field, and click GO. Alternatively, click GO to view a list of all users and groups.
- Select the check boxes for the appropriate users or groups.
- Select an appropriate role to assign under Role to Assign. The UserRole role gives the user account the permission to log in to the VM Portal.
- Click .
Log in to the VM Portal to verify that the user account has the permissions to log in.
3.6.7.3. Viewing User Information
Procedure
- Click → to display the list of authorized users.
- Click the user’s name. This opens the details view, usually with the General tab displaying general information, such as the domain name, email and status of the user.
- The other tabs allow you to view groups, permissions, quotas, and events for the user.
For example, to view the groups to which the user belongs, click the Directory Groups tab.
3.6.7.4. Viewing User Permissions on Resources
Users can be assigned permissions on specific resources or a hierarchy of resources. You can view the assigned users and their permissions on each resource.
Procedure
- Find and click the resource’s name. This opens the details view.
- Click the Permissions tab to list the assigned users, the user’s role, and the inherited permissions for the selected resource.
3.6.7.5. Removing Users
When a user account is no longer required, remove it from Red Hat Virtualization.
Procedure
- Click → to display the list of authorized users.
- Select the user to be removed. Ensure the user is not running any virtual machines.
- Click Remove, then click .
The user is removed from Red Hat Virtualization, but not from the external directory.
3.6.7.6. Viewing Logged-In Users
You can view the users who are currently logged in, along with session times and other details. Click → to view the Session DB ID, User Name, Authorization provider, User id, Source IP, Session Start Time, and Session Last Active Time for each logged-in user.
3.6.7.7. Terminating a User Session
You can terminate the session of a user who is currently logged in.
Terminating a User Session
- Click → .
- Select the user session to be terminated.
- Click Terminate Session.
- Click .
3.6.8. Administering User Tasks From the Command Line
You can use the ovirt-aaa-jdbc-tool tool to manage user accounts on the internal domain. Changes made using the tool take effect immediately and do not require you to restart the ovirt-engine service. For a full list of user options, run ovirt-aaa-jdbc-tool user --help. Common examples are provided in this section.
You must be logged into the Manager machine.
3.6.8.1. Creating a New User
You can create a new user account. The optional --attribute command specifies account details. For a full list of options, run ovirt-aaa-jdbc-tool user add --help.
# ovirt-aaa-jdbc-tool user add test1 --attribute=firstName=John --attribute=lastName=Doe
adding user test1...
user added successfully
You can add the newly created user in the Administration Portal and assign the user appropriate roles and permissions. See Adding users for more information.
3.6.8.2. Setting a User Password
You can create a password. You must set a value for --password-valid-to, otherwise the password expiry time defaults to the current time.
+ The date format is yyyy-MM-dd HH:mm:ssX. Where X is the time zone offset from UTC. In this example, -0800 stands for GMT minus 8 hours. For zero offset, use the value Z.
+ For more options, run ovirt-aaa-jdbc-tool user password-reset --help.
# ovirt-aaa-jdbc-tool user password-reset test1 --password-valid-to="2025-08-01 12:00:00-0800"
Password:
updating user test1...
user updated successfully
By default, the password policy for user accounts on the internal domain has the following restrictions:
- A minimum of 6 characters.
- Three previous passwords used cannot be set again during the password change.
For more information on the password policy and other default settings, run ovirt-aaa-jdbc-tool settings show.
Once the admin password is updated, the change must be manually propagated to ovirt-provider-ovn. Otherwise, the the admin user will become locked because the Red Hat Virtualization Manager will continue to use the old password to synchronize networks from ovirt-provider-ovn. To propogate the new password to ovirt-provider-ovn, do the following:
- In the Administration Portal, click → .
- Select ovirt-provider-ovn.
- Click Edit and enter the new password in the Password field.
- Click to test if authentication succeeds with the credentials you provided.
- When the authentication test succeeds, click .
3.6.8.3. Setting User Timeout
You can set the user timeout period:
# engine-config --set UserSessionTimeOutInterval=integer3.6.8.4. Pre-encrypting a User Password
You can create a pre-encrypted user password using the ovirt-engine-crypto-tool script. This option is useful if you are adding users and passwords to the database with a script.
Passwords are stored in the Manager database in encrypted form. The ovirt-engine-crypto-tool script is used because all passwords must be encrypted with the same algorithm.
If the password is pre-encrypted, password validity tests cannot be performed. The password will be accepted even if it does not comply with the password validation policy.
Run the following command:
# /usr/share/ovirt-engine/bin/ovirt-engine-crypto-tool.sh pbe-encode
The script will prompt you to enter the password.
Alternatively, you can use the
--password=file:fileoption to encrypt a single password that appears as the first line of a file. This option is useful for automation. In the following example,fileis a text file containing a single password for encryption:# /usr/share/ovirt-engine/bin/ovirt-engine-crypto-tool.sh pbe-encode --password=file:fileSet the new password with the
ovirt-aaa-jdbc-toolscript, using the--encryptedoption:# ovirt-aaa-jdbc-tool user password-reset test1 --password-valid-to="2025-08-01 12:00:00-0800" --encryptedEnter and confirm the encrypted password:
Password:
Reenter password:
updating user test1...
user updated successfully
3.6.8.5. Viewing User Information
You can view detailed user account information:
# ovirt-aaa-jdbc-tool user show test1
This command displays more information than in the Administration Portal’s → screen.
3.6.8.6. Editing User Information
You can update user information, such as the email address:
# ovirt-aaa-jdbc-tool user edit test1 --attribute=email=jdoe@example.com
3.6.8.7. Removing a User
You can remove a user account:
# ovirt-aaa-jdbc-tool user delete test1
Remove the user from the Administration Portal. See Removing Users for more information.
3.6.8.8. Disabling the Internal Administrative User
You can disable users on the local domains including the admin@internal user created during engine-setup. Make sure you have at least one user in the envrionment with full administrative permissions before disabling the default admin user.
Procedure
- Log in to the machine on which the Red Hat Virtualization Manager is installed.
- Make sure another user with the SuperUser role has been added to the environment. See Adding users for more information.
Disable the default admin user:
# ovirt-aaa-jdbc-tool user edit
admin--flag=+disabled
To enable a disabled user, run ovirt-aaa-jdbc-tool user edit username --flag=-disabled
3.6.8.9. Managing Groups
You can use the ovirt-aaa-jdbc-tool tool to manage group accounts on your internal domain. Managing group accounts is similar to managing user accounts. For a full list of group options, run ovirt-aaa-jdbc-tool group --help. Common examples are provided in this section.
Creating a Group
This procedure shows you how to create a group account, add users to the group, and view the details of the group.
- Log in to the machine on which the Red Hat Virtualization Manager is installed.
Create a new group:
# ovirt-aaa-jdbc-tool group add group1Add users to the group. The users must be created already.
# ovirt-aaa-jdbc-tool group-manage useradd group1 --user=test1
NoteFor a full list of the group-manage options, run
ovirt-aaa-jdbc-tool group-manage --help.View group account details:
# ovirt-aaa-jdbc-tool group show group1- Add the newly created group in the Administration Portal and assign the group appropriate roles and permissions. The users in the group inherit the roles and permissions of the group. See Adding users for more information.
Creating Nested Groups
This procedure shows you how to create groups within groups.
- Log in to the machine on which the Red Hat Virtualization Manager is installed.
Create the first group:
# ovirt-aaa-jdbc-tool group add group1Create the second group:
# ovirt-aaa-jdbc-tool group add group1-1Add the second group to the first group:
# ovirt-aaa-jdbc-tool group-manage groupadd group1 --group=group1-1
- Add the first group in the Administration Portal and assign the group appropriate roles and permissions. See Adding users for more information.
3.6.8.10. Querying Users and Groups
The query module allows you to query user and group information. For a full list of options, run ovirt-aaa-jdbc-tool query --help.
Listing All User or Group Account Details
This procedure shows you how to list all account information.
- Log in to the machine on which the Red Hat Virtualization Manager is installed.
List the account details.
All user account details:
# ovirt-aaa-jdbc-tool query --what=user
All group account details:
# ovirt-aaa-jdbc-tool query --what=group
Listing Filtered Account Details
This procedure shows you how to apply filters when listing account information.
- Log in to the machine on which the Red Hat Virtualization Manager is installed.
Filter account details using the
--patternparameter.List user account details with names that start with the character j.
# ovirt-aaa-jdbc-tool query --what=user --pattern="name=j*"List groups that have the department attribute set to marketing:
# ovirt-aaa-jdbc-tool query --what=group --pattern="department=marketing"
3.6.8.11. Managing Account Settings
To change the default account settings, use the ovirt-aaa-jdbc-tool settings module.
Updating Account Settings
This procedure shows you how to update the default account settings.
- Log in to the machine on which the Red Hat Virtualization Manager is installed.
Run the following command to show all the settings available:
# ovirt-aaa-jdbc-tool settings show
Change the desired settings:
This example updates the default log in session time to 60 minutes for all user accounts. The default value is 10080 minutes.
# ovirt-aaa-jdbc-tool settings set --name=MAX_LOGIN_MINUTES --value=60This example updates the number of failed login attempts a user can perform before the user account is locked. The default value is 5.
# ovirt-aaa-jdbc-tool settings set --name=MAX_FAILURES_SINCE_SUCCESS --value=3NoteTo unlock a locked user account, run
ovirt-aaa-jdbc-tool user unlock test1.
3.6.9. Configuring Additional Local Domains
Creating additional local domains other than the default internal domain is also supported. This can be done using the ovirt-engine-extension-aaa-jdbc extension and allows you to create multiple domains without attaching external directory servers, though the use case may not be common for enterprise environments.
Additionally created local domains will not get upgraded autonmatically during standard Red Hat Virtualization upgrades and need to be upgraded manually for each future release. For more information on creating additional local domains and how to upgrade the domains, see the README file at /usr/share/doc/ovirt-engine-extension-aaa-jdbc-version/README.admin.
The ovirt-engine-extension-aaa-jdbc extension is deprecated. For new installations, use Red Hat Single Sign On. For more information, see Installing and Configuring Red Hat Single Sign-On in the Administration Guide.