
Red Hat Training
A Red Hat training course is available for Red Hat Development Suite
Chapter 5. Installing Red Hat Development Suite
Prerequisites:
- (Optional) Install Docker individually to use Docker for Windows. Red Hat Development Suite includes the Docker tooling, but to use the full version of Docker for Windows (Docker Machine or Boot2Docker), you must install Docker and test it before installing any Eclipse Docker tools. This is only applicable to using Docker out of JBoss Developer Studio, such as Docker for Windows or Docker for Mac.
- Install Microsoft Visual C++ 2010 SP1 Redistributable Package (x86). Ensure that this package is downloaded and installed (https://www.microsoft.com/en-us/download/details.aspx?id=8328) before running the installer.
- Ensure that Virtualization is enabled in your machine’s BIOS settings. If Red Hat Development Suite is run on a new Windows system, ensure that Virtualization is enabled in the BIOS settings for your machine. This is required to run VirtualBox and Vagrant. For further information, consult your system’s documentation for instructions to change BIOS settings.
- Ensure that you are logged in using an Administrator account. Red Hat Development Suite adds drivers and changes environment variables and therefore requires Administrator permissions. Do not run Red Hat Development Suite using a non-Administrator account with the Run as Administrator option because this not provide the required permissions.
To install Red Hat Development Suite:
- Log in to the Red Hat Developers Portal (http://developers.redhat.com/) and download Red Hat Development Suite from the product download page at http://developers.redhat.com/products/devsuite/download/. If required, create a new Red Hat Developer Account using the Register link at http://developers.redhat.com/. After signing up for a Red Hat Developers account, you must wait approximately fifteen minutes to allow the new account information to propagate to the Red Hat Subscription Management system.
- In your Windows 7, 8, or 10 installation, run the downloaded file.
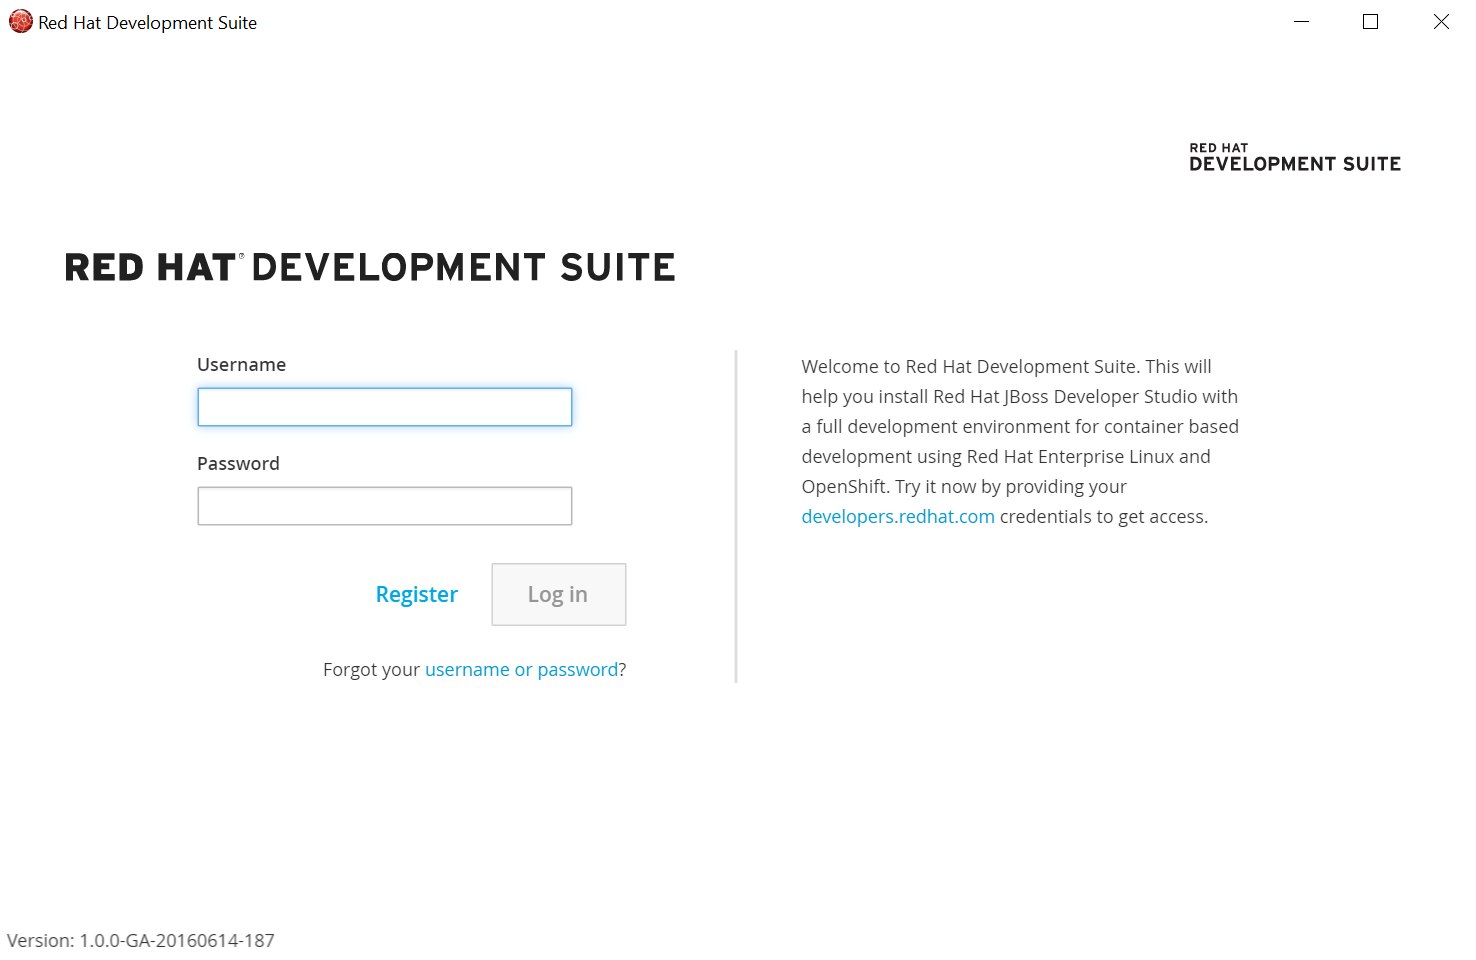
A Red Hat Developer account is required to install Red Hat Development Suite. Enter your existing Red Hat Developer login credentials to log in.
Figure 5.1. Enter Your Login Credentials
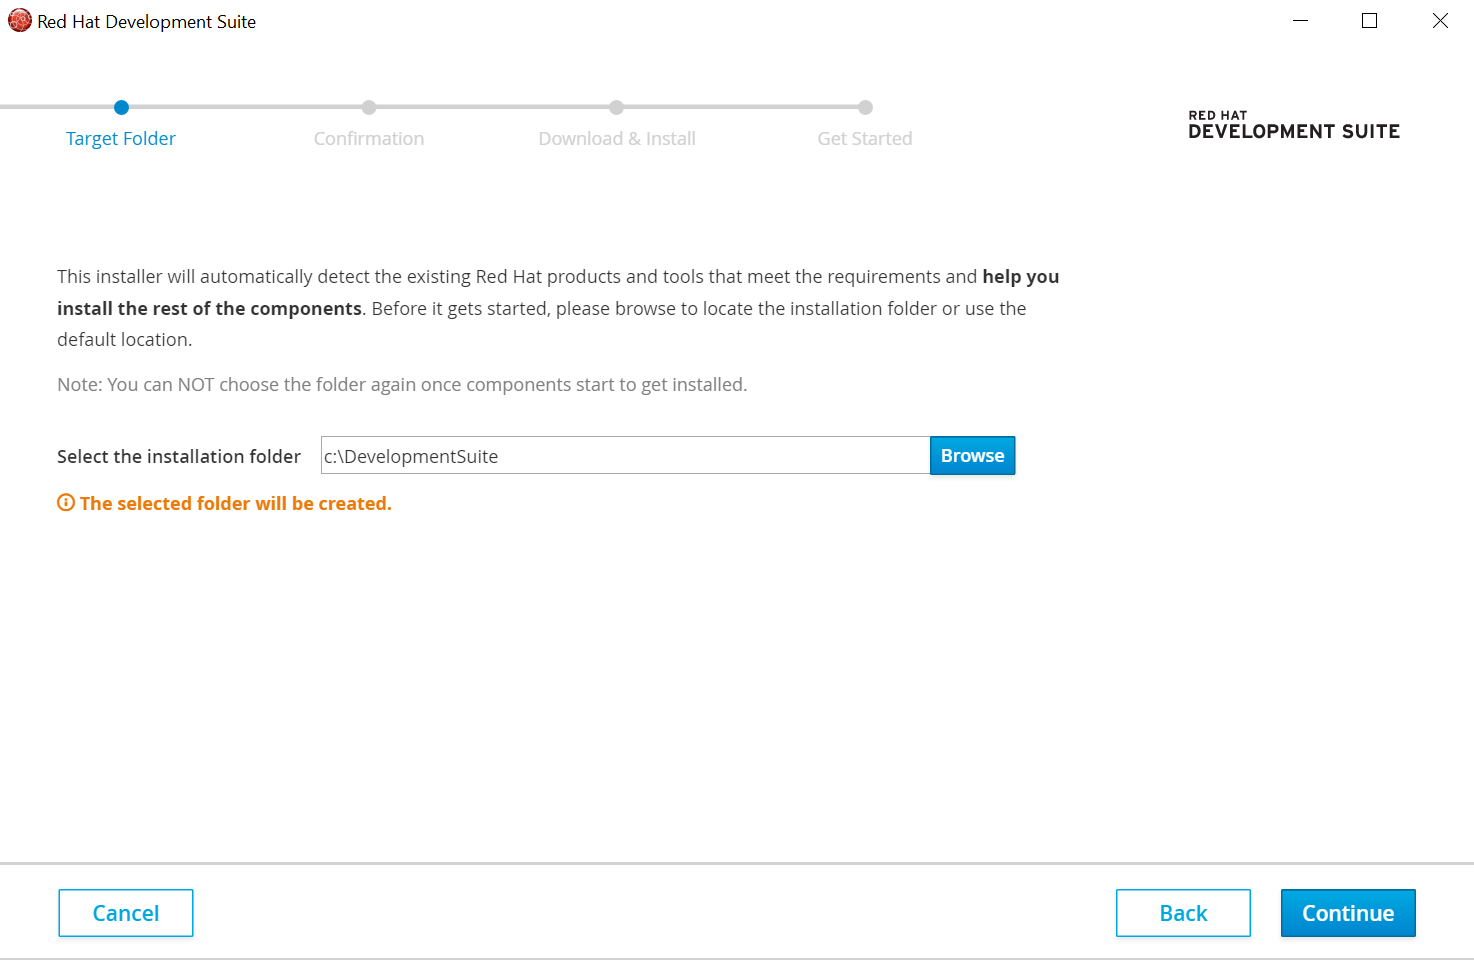
At the Target Folder screen, add a path to the target directory for the Red Hat Development Suite installation. The default path is c:\DevelopmentSuite.
Figure 5.2. Set the Target Directory
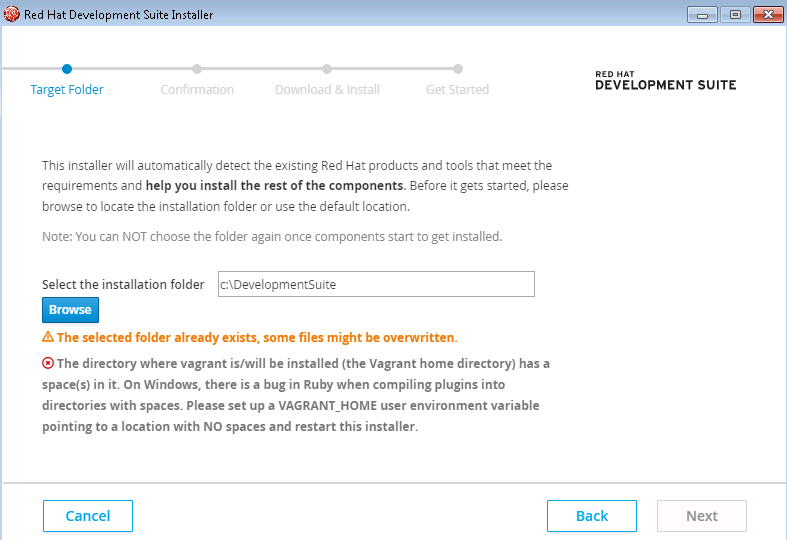
If your Windows user has a space in the username (for instance: Example User), the installer will not let you proceed and show an error.
In this case:
-
In the Control Panel, type
Environment variablesin the search box and click on the Environment Variable option in the search results. - In the User variables for $YourUsername section, select New…
-
Create a new variable with the name
VAGRANT_HOMEand set the value to a valid path. - Click OK to exit the Environment Variables options and restart the installer.
-
In the Control Panel, type
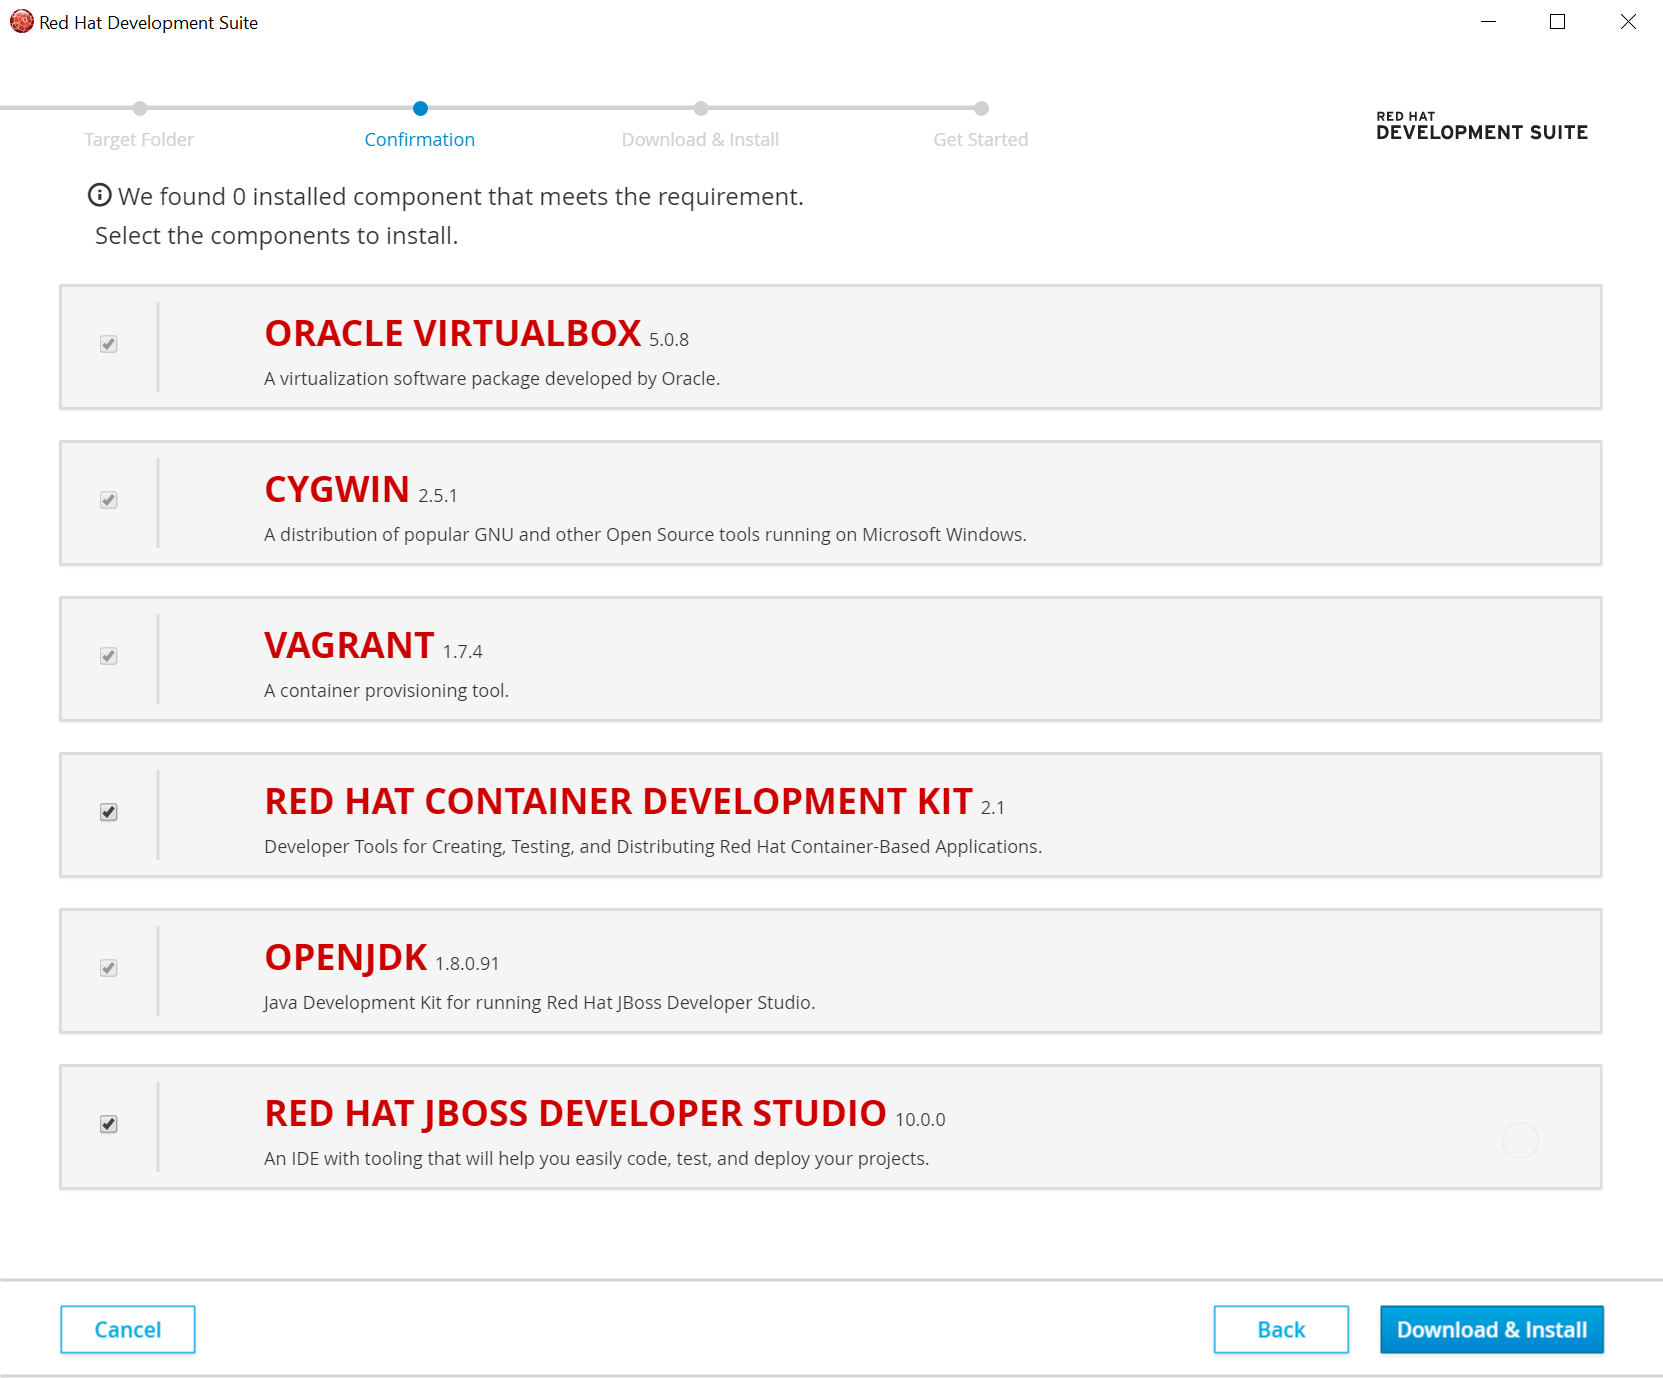
The Confirmation screen lists the components that Red Hat Development Suite downloads and installs. Red Hat Development Suite detects components based on the PATH environment variable. If none of the components are installed, no changes are required, but if an older version that supported is detected, exit Red Hat Development Suite, uninstall the component, and then start Red Hat Development Suite.
To Install Red Hat Development Suite:
- All required components are already selected by default.
- Click Download & Install to continue.
To only install Red Hat Container Development Kit:
- Deselect the Red Hat JBoss Developer Studio and OpenJDK. You must deselect JBoss Developer Studio before its dependency (OpenJDK) is available to select.
- Click Download & Install to continue.
To only install JBoss Developer Studio:
- Deselect the Red Hat Container Development Kit, Vagrant, Cygwin, and Oracle Virtualbox options. You must deselect the Container Development Kit option before its dependencies are available to select.
- Click Download & Install to continue.
To only install any of the dependencies (Oracle Virtualbox, Cygwin, Vagrant, OpenJDK):
- Deselect the Red Hat Container Development Kit and JBoss Developer Studio options.
- Select and deselect any of the other components as desired.
Click Download & Install to continue.
Figure 5.3. Download and Install the Components
- Red Hat Development Suite then downloads the listed software and installs it locally. This process involves large file downloads and can take some time to complete.
When complete, Red Hat Development Suite indicates that the download and install were successful and provides a link to the Red Hat Container Development Kit Getting Started page. Depending on what you want to do next, you can either:
- Click the Open Red Hat JBoss Developer Studio button to start using the Red Hat Container Development Kit Server Adapter.
- Visit http://developers.redhat.com/products/cdk/get-started/ to learn about using Red Hat Container Development Kit.
To run Red Hat Development Suite, click the Open Red Hat JBoss Developer Studio button:
- Set up a workspace folder, as prompted.
- Click the Servers tab to view the configured Red Hat Container Development Kit server adapter.
- Right-click the server and select Start to initiate the Red Hat Container Development Kit} server.
- When prompted, enter your Red Hat Customer Portal credentials and click OK. The Console tab displays the details of the Red Hat Container Development Kit server.
- When prompted, read the details of the new SSL certificate for OpenShift and click Yes to accept it.
- Click the OpenShift Explorer tab to view the new OpenShift server and sample project.