
6.3.2. Modify a Non-XA Datasource with the Management Interfaces
Task Summary
This topic covers the steps required to modify a non-XA datasource, using either the Management Console or the Management CLI.
Note
Non-XA datasources can be integrated with JTA transactions. To integrate the datasource with JTA, ensure that the
jta parameter is set to true.
Procedure 6.5. Task
Management CLI
- Use the
write-attributecommand to configure a datasource attribute:/subsystem=datasources/data-source=DATASOURCE_NAME:write-attribute(name=ATTRIBUTE_NAME,value=ATTRIBUTE_VALUE)
- Reload the server to confirm the changes:
:reload
Management Console
Navigate to the Datasources panel in the Management Console
Standalone Mode
Select the Profile tab from the top-right of the console.Domain Mode
- Select the Profiles tab from the top-right of the console.
- Select the appropriate profile from the drop-down box in the top left.
- Expand the menu on the left of the console.
- Select → from the menu on the left of the console.
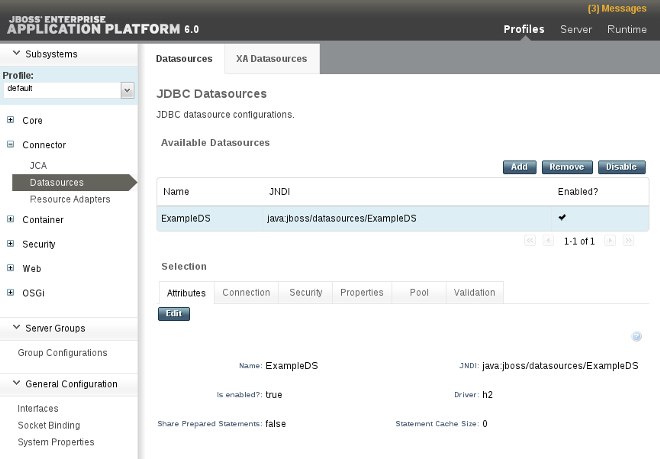
Figure 6.2. Datasources panel
Edit the datasource
- Select the relevant datasource from the Available Datasources list. The datasource attributes are displayed in the Attributes panel below it.
- Select the button to edit the datasource attributes.
- Edit the datasource attributes and select the button when done.
Result
The non-XA datasource has been configured. The changes are now visible in either the standalone.xml or domain.xml file, as well as the management interfaces.
- To create a new datasource, refer here: Section 6.3.1, “Create a Non-XA Datasource with the Management Interfaces”.
- To remove the datasource, refer here: Section 6.3.3, “Remove a Non-XA Datasource with the Management Interfaces”.