
Managing resources
Manage cluster resources, Jupyter notebooks, and data backup in OpenShift AI
Abstract
Preface
As an OpenShift AI administrator, you can manage the following resources:
- The dashboard interface, including the visibility of navigation menu options
- Applications that show in the dashboard
- Cluster resources to support compute-intensive data science work
- Jupyter notebook servers
- Data storage backup
You can also specify whether to allow Red Hat to collect data about OpenShift AI usage in your cluster.
Chapter 1. Customizing the dashboard
The OpenShift AI dashboard provides features that are designed to work for most scenarios. These features are configured in the OdhDashboardConfig custom resource (CR) file.
To see a description of the options in the OpenShift AI dashboard configuration file, see Dashboard configuration options.
As an administrator, you can customize the interface of the dashboard, for example to show or hide some of the dashboard navigation menu options. To change the default settings of the dashboard, edit the OdhDashboardConfig custom resource (CR) file as described in Editing the dashboard configuration file.
1.1. Editing the dashboard configuration file
As an administrator, you can customize the interface of the dashboard by editing the dashboard configuration file.
Prerequisites
- You have cluster administrator privileges for your OpenShift cluster.
Procedure
- Log in to the OpenShift console as a cluster administrator.
- In the Administrator perspective, click Home → API Explorer.
-
In the search bar, enter
OdhDashboardConfigto filter by kind. -
Click the
OdhDashboardConfigcustom resource (CR) to open the resource details page. -
Select the
redhat-ods-applicationsproject from the Project list. - Click the Instances tab.
-
Click the
odh-dashboard-configinstance to open the details page. Click the YAML tab. Here is an example
OdhDashboardConfigfile showing default values:apiVersion: opendatahub.io/v1alpha kind: OdhDashboardConfig metadata: name: odh-dashboard-config spec: dashboardConfig: enablement: true disableBYONImageStream: false disableClusterManager: false disableISVBadges: false disableInfo: false disableSupport: false disableTracking: true disableProjects: true disablePipelines: true disableModelServing: true disableProjectSharing: true disableCustomServingRuntimes: false disableAcceleratorProfiles: true modelMetricsNamespace: '' disablePerformanceMetrics: false notebookController: enabled: true notebookSizes: - name: Small resources: limits: cpu: '2' memory: 2Gi requests: cpu: '1' memory: 1Gi - name: Medium resources: limits: cpu: '4' memory: 4Gi requests: cpu: '2' memory: 2Gi - name: Large resources: limits: cpu: '8' memory: 8Gi requests: cpu: '4' memory: 4Gi modelServerSizes: - name: Small resources: limits: cpu: '2' memory: 8Gi requests: cpu: '1' memory: 4Gi - name: Medium resources: limits: cpu: '8' memory: 10Gi requests: cpu: '4' memory: 8Gi - name: Large resources: limits: cpu: '10' memory: 20Gi requests: cpu: '6' memory: 16Gi groupsConfig: adminGroups: 'odh-admins' allowedGroups: 'system:authenticated' templateOrder: - 'ovms' templateDisablement: - 'ovms'- Edit the values of the options that you want to change.
- Click Save to apply your changes and then click Reload to make sure that your changes are synced to the cluster.
Verification
Log in to OpenShift AI and verify that your dashboard configurations apply.
1.2. Dashboard configuration options
The OpenShift AI dashboard includes a set of core features enabled by default that are designed to work for most scenarios. Administrators can configure the OpenShift AI dashboard from the OdhDashboardConfig custom resource (CR) in OpenShift.
Table 1.1. Dashboard feature configuration options
| Feature | Default | Description |
|
|
|
Enables admin users to add applications to the OpenShift AI dashboard Application → Enabled page. To disable this ability, set the value to |
|
|
|
On the Applications → Explore page, when a user clicks on an application tile, an information panel opens with more details about the application. To disable the information panel for all applications on the Applications → Explore page , set the value to |
|
|
|
Shows the Support menu option when a user clicks the Help icon in the dashboard toolbar. To hide this menu option, set the value to |
|
|
|
Shows the Settings → Cluster settings option in the dashboard navigation menu. To hide this menu option, set the value to |
|
|
|
Allows Red Hat to collect data about OpenShift AI usage in your cluster. To enable data collection, set the value to |
|
|
|
Shows the Settings → Notebook images option in the dashboard navigation menu. To hide this menu option, set the value to |
|
|
|
Shows the label on a tile that indicates whether the application is “Red Hat managed”, “Partner managed”, or “Self-managed”. To hide these labels, set the value to |
|
|
|
Shows the Settings → User management option in the dashboard navigation menu. To hide this menu option, set the value to |
|
|
|
Shows the Data Science Projects option in the dashboard navigation menu. To hide this menu option, set the value to |
|
|
|
Shows the Data Science Pipelines option in the dashboard navigation menu. To hide this menu option, set the value to |
|
|
|
Shows the Model Serving option in the dashboard navigation menu and in the list of components for the data science projects. To hide Model Serving from the dashboard navigation menu and from the list of components for data science projects, set the value to |
|
|
|
Allows users to share access to their data science projects with other users. To prevent users from sharing data science projects, set the value to |
|
|
|
Shows the Serving runtimes option in the dashboard navigation menu. To hide this menu option, set the value to |
|
|
|
Enables the ability to select KServe as a Serving Platform. To disable this ability, set the value to |
|
|
|
Enables the ability to select ModelMesh as a Serving Platform. To disable this ability, set the value to |
|
|
|
Shows the Accelerator profiles option in the dashboard navigation menu. To hide this menu option, set the value to |
|
|
| Enables the namespace in which the Model Serving Metrics' Prometheus Operator is installed. |
|
|
|
Shows the Endpoint Performance tab on the Model Serving page. To hide this tab, set the value to |
|
|
| Controls the Notebook Controller options, such as whether it is enabled in the dashboard and which parts are visible. |
|
| Allows you to customize names and resources for notebooks. The Kubernetes-style sizes are shown in the dropdown menu that appears when spawning notebooks with the Notebook Controller. Note: These sizes must follow conventions. For example, requests must be smaller than limits. | |
|
| Allows you to customize names and resources for model servers. | |
|
| Controls access to dashboard features, such as the spawner for allowed users and the cluster settings UI for admin users. | |
|
| Specifies the order of custom Serving Runtime templates. When the user creates a new template, it is added to this list. |
Chapter 2. Managing applications that show in the dashboard
2.1. Adding an application to the dashboard
If you have installed an application in your OpenShift cluster, you can add a tile for that application to the OpenShift AI dashboard (the Applications → Enabled page) to make it accessible for OpenShift AI users.
Prerequisites
- You have cluster administrator privileges for your OpenShift cluster.
-
The dashboard configuration enablement option is set to
true(the default). Note that an admin user can disable this ability as described in Preventing users from adding applications to the dashboard.
Procedure
- Log in to the OpenShift console as a cluster administrator.
- In the Administrator perspective, click Home → API Explorer.
-
On the API Explorer page, search for the
OdhApplicationkind. -
Click the
OdhApplicationkind to open the resource details page. -
On the OdhApplication details page, select the
redhat-ods-applicationsproject from the Project list. - Click the Instances tab.
- Click Create OdhApplication.
On the Create OdhApplication page, copy the following code and paste it into the YAML editor.
apiVersion: dashboard.opendatahub.io/v1
kind: OdhApplication
metadata:
  name: examplename
  namespace: redhat-ods-applications
  labels:
    app: odh-dashboard
    app.kubernetes.io/part-of: odh-dashboard
spec:
  enable:
    validationConfigMap: examplename-enable
  img: >-
    <svg width="24" height="25" viewBox="0 0 24 25" fill="none" xmlns="http://www.w3.org/2000/svg">
    <path d="path data" fill="#ee0000"/>
    </svg>
  getStartedLink: 'https://example.org/docs/quickstart.html'
  route: exampleroutename
  routeNamespace: examplenamespace
  displayName: Example Name
  kfdefApplications: []
  support: third party support
  csvName: ''
  provider: example
  docsLink: 'https://example.org/docs/index.html'
  quickStart: ''
  getStartedMarkDown: >-
    # Example

    Enter text for the information panel.

  description: >-
    Enter summary text for the tile.
  category: Self-managed | Partner managed | {org-name} managed
Modify the parameters in the code for your application.
TipTo see example YAML files, click Home → API Explorer, select
OdhApplication, click the Instances tab, select an instance, and then click the YAML tab.- Click Create. The application details page appears.
- Log in to OpenShift AI.
- In the left menu, click Applications → Explore.
- Locate the new tile for your application and click it.
- In the information pane for the application, click Enable.
Verification
- In the left menu of the OpenShift AI dashboard, click Applications → Enabled and verify that your application is available.
2.2. Preventing users from adding applications to the dashboard
By default, admin users are allowed to add applications to the OpenShift AI dashboard Application → Enabled page.
You can disable the ability for admin users to add applications to the dashboard.
Note: The Jupyter tile is enabled by default. To disable it, see Hiding the default Jupyter application.
Prerequisite
- You have cluster administrator privileges for your OpenShift cluster.
Procedure
- Log in to the OpenShift console as a cluster administrator.
Open the dashboard configuration file:
- In the Administrator perspective, click Home → API Explorer.
-
In the search bar, enter
OdhDashboardConfigto filter by kind. -
Click the
OdhDashboardConfigcustom resource (CR) to open the resource details page. -
Select the
redhat-ods-applicationsproject from the Project list. - Click the Instances tab.
-
Click the
odh-dashboard-configinstance to open the details page. - Click the YAML tab.
-
In the
spec:dashboardConfigsection, set the value ofenablementtofalseto disable the ability for dashboard users to add applications to the dashboard. - Click Save to apply your changes and then click Reload to make sure that your changes are synced to the cluster.
Verification
Open the OpenShift AI dashboard Application → Enabled page.
2.3. Showing or hiding information about enabled applications
If you have installed another application in your OpenShift cluster, you can add a tile for that application to the OpenShift AI dashboard (the Applications → Enabled page) to make it accessible for OpenShift AI users.
Prerequisites
- You have cluster administrator privileges for your OpenShift cluster.
Procedure
- Log in to the OpenShift console as a cluster administrator.
- In the Administrator perspective, click Home → API Explorer.
-
On the API Explorer page, search for the
OdhApplicationkind. -
Click the
OdhApplicationkind to open the resource details page. -
On the OdhApplication details page, select the
redhat-ods-applicationsproject from the Project list. - Click the Instances tab.
- Click Create OdhApplication.
On the Create OdhApplication page, copy the following code and paste it into the YAML editor.
apiVersion: dashboard.opendatahub.io/v1
kind: OdhApplication
metadata:
  name: examplename
  namespace: redhat-ods-applications
  labels:
    app: odh-dashboard
    app.kubernetes.io/part-of: odh-dashboard
spec:
  enable:
    validationConfigMap: examplename-enable
  img: >-
    <svg width="24" height="25" viewBox="0 0 24 25" fill="none" xmlns="http://www.w3.org/2000/svg">
    <path d="path data" fill="#ee0000"/>
    </svg>
  getStartedLink: 'https://example.org/docs/quickstart.html'
  route: exampleroutename
  routeNamespace: examplenamespace
  displayName: Example Name
  kfdefApplications: []
  support: third party support
  csvName: ''
  provider: example
  docsLink: 'https://example.org/docs/index.html'
  quickStart: ''
  getStartedMarkDown: >-
    # Example

    Enter text for the information panel.

  description: >-
    Enter summary text for the tile.
  category: Self-managed | Partner managed | Red Hat managed
Modify the parameters in the code for your application.
TipTo see example YAML files, click Home → API Explorer, select
OdhApplication, click the Instances tab, select an instance, and then click the YAML tab.- Click Create. The application details page appears.
- Log in to OpenShift AI.
- In the left menu, click Applications → Explore.
- Locate the new tile for your application and click it.
- In the information pane for the application, click Enable.
Verification
- In the left menu of the OpenShift AI dashboard, click Applications → Enabled and verify that your application is available.
2.4. Hiding the default Jupyter application
The OpenShift AI dashboard includes Jupyter as an enabled application by default.
To hide the Jupyter tile from the list of Enabled applications, edit the dashboard configuration file.
Prerequisite
- You have cluster administrator privileges for your OpenShift cluster.
Procedure
- Log in to the OpenShift console as a cluster administrator.
Open the dashboard configuration file:
- In the Administrator perspective, click Home → API Explorer.
-
In the search bar, enter
OdhDashboardConfigto filter by kind. -
Click the
OdhDashboardConfigcustom resource (CR) to open the resource details page. -
Select the
redhat-ods-applicationsproject from the Project list. - Click the Instances tab.
-
Click the
odh-dashboard-configinstance to open the details page. - Click the YAML tab.
-
In the
spec:notebookControllersection, set the value ofenabledtofalseto hide the Jupyter tile from the list of Enabled applications. - Click Save to apply your changes and then click Reload to make sure that your changes are synced to the cluster.
Verification
In the OpenShift AI dashboard, select Applications> Enabled. You should not see the Jupyter tile.
Chapter 3. Managing cluster resources
3.1. Configuring the default PVC size for your cluster
To configure how resources are claimed within your OpenShift AI cluster, you can change the default size of the cluster’s persistent volume claim (PVC) ensuring that the storage requested matches your common storage workflow. PVCs are requests for resources in your cluster and also act as claim checks to the resource.
Prerequisites
- You have logged in to Red Hat OpenShift AI.
- You are part of the administrator group for OpenShift AI in OpenShift.
Changing the PVC setting restarts the Jupyter pod and makes Jupyter unavailable for up to 30 seconds. As a workaround, it is recommended that you perform this action outside of your organization’s typical working day.
Procedure
- From the OpenShift AI dashboard, click Settings → Cluster settings.
- Under PVC size, enter a new size in gibibytes. The minimum size is 1 GiB, and the maximum size is 16384 GiB.
- Click Save changes.
Verification
- New PVCs are created with the default storage size that you configured.
Additional resources
3.2. Restoring the default PVC size for your cluster
To change the size of resources utilized within your OpenShift AI cluster, you can restore the default size of your cluster’s persistent volume claim (PVC).
Prerequisites
- You have logged in to Red Hat OpenShift AI.
- You are part of the administrator group for OpenShift AI in OpenShift.
Procedure
- From the OpenShift AI dashboard, click Settings → Cluster settings.
- Click Restore Default to restore the default PVC size of 20GiB.
- Click Save changes.
Verification
- New PVCs are created with the default storage size of 20 GiB.
Additional resources
- Understanding persistent storage (OpenShift Dedicated)
- Understanding persistent storage (Red Hat OpenShift Service on AWS)
3.3. Overview of accelerators
If you work with large data sets, you can use accelerators to optimize the performance of your data science models in OpenShift AI. With accelerators, you can scale your work, reduce latency, and increase productivity. You can use accelerators in OpenShift AI to assist your data scientists in the following tasks:
- Natural language processing (NLP)
- Inference
- Training deep neural networks
- Data cleansing and data processing
OpenShift AI supports the following accelerators:
NVIDIA graphics processing units (GPUs)
- To use compute-heavy workloads in your models, you can enable NVIDIA graphics processing units (GPUs) in OpenShift AI.
- To enable GPUs on OpenShift, you must install the NVIDIA GPU Operator.
Habana Gaudi devices (HPUs)
- Habana, an Intel company, provides hardware accelerators intended for deep learning workloads. You can use the Habana libraries and software associated with Habana Gaudi devices available from your notebook.
- Before you can enable Habana Gaudi devices in OpenShift AI, you must install the necessary dependencies and the version of the HabanaAI Operator that matches the Habana version of the HabanaAI workbench image in your deployment. For more information about how to enable your OpenShift environment for Habana Gaudi devices, see HabanaAI Operator v1.10 for OpenShift and HabanaAI Operator v1.13 for OpenShift.
- You can enable Habana Gaudi devices on-premises or with AWS DL1 compute nodes on an AWS instance.
Before you can use an accelerator in OpenShift AI, your OpenShift instance must contain an associated accelerator profile. For accelerators that are new to your deployment, you must configure an accelerator profile for the accelerator in context. You can create an accelerator profile from the Settings → Accelerator profiles page on the OpenShift AI dashboard. If your deployment contains existing accelerators that had associated accelerator profiles already configured, an accelerator profile is automatically created after you upgrade to the latest version of OpenShift AI.
Additional resources
3.3.1. Enabling GPU support in OpenShift AI
Optionally, to ensure that your data scientists can use compute-heavy workloads in their models, you can enable graphics processing units (GPUs) in OpenShift AI.
The NVIDIA GPU add-on is no longer supported. Instead, enable GPUs by installing the NVIDIA GPU Operator. If your deployment has a previously-installed NVIDIA GPU add-on, before you install the NVIDIA GPU Operator, use Red Hat OpenShift Cluster Manager to uninstall the NVIDIA GPU add-on from your cluster.
Prerequisites
- You have logged in to your OpenShift cluster.
-
You have the
cluster-adminrole in your OpenShift cluster.
Procedure
- To enable GPU support on an OpenShift cluster, follow the instructions here: NVIDIA GPU Operator on Red Hat OpenShift Container Platform in the NVIDIA documentation.
Delete the migration-gpu-status ConfigMap.
- In the OpenShift web console, switch to the Administrator perspective.
- Set the Project to All Projects or redhat-ods-applications to ensure you can see the appropriate ConfigMap.
- Search for the migration-gpu-status ConfigMap.
Click the action menu (⋮) and select Delete ConfigMap from the list.
The Delete ConfigMap dialog appears.
- Inspect the dialog and confirm that you are deleting the correct ConfigMap.
- Click Delete.
Restart the dashboard replicaset.
- In the OpenShift web console, switch to the Administrator perspective.
- Click Workloads → Deployments.
- Set the Project to All Projects or redhat-ods-applications to ensure you can see the appropriate deployment.
- Search for the rhods-dashboard deployment.
- Click the action menu (⋮) and select Restart Rollout from the list.
- Wait until the Status column indicates that all pods in the rollout have fully restarted.
Verification
- The NVIDIA GPU Operator appears on the Operators → Installed Operators page in the OpenShift web console.
-
The reset migration-gpu-status instance is present in the Instances tab on the
AcceleratorProfilecustom resource definition (CRD) details page.
After installing the NVIDIA GPU Operator, create an accelerator profile as described in Working with accelerator profiles.
3.3.2. Enabling Habana Gaudi devices
Before you can use Habana Gaudi devices in OpenShift AI, you must install the necessary dependencies and deploy the HabanaAI Operator.
Prerequisites
- You have logged in to OpenShift.
-
You have the
cluster-adminrole in OpenShift.
Procedure
- To enable Habana Gaudi devices in OpenShift AI, follow the instructions at HabanaAI Operator for OpenShift.
From the OpenShift AI dashboard, click Settings → Accelerator profiles.
The Accelerator profiles page appears, displaying existing accelerator profiles. To enable or disable an existing accelerator profile, on the row containing the relevant accelerator profile, click the toggle in the Enable column.
Click Create accelerator profile.
The Create accelerator profile dialog opens.
- In the Name field, enter a name for the Habana Gaudi device.
-
In the Identifier field, enter a unique string that identifies the Habana Gaudi device, for example,
habana.ai/gaudi. - Optional: In the Description field, enter a description for the Habana Gaudi device.
- To enable or disable the accelerator profile for the Habana Gaudi device immediately after creation, click the toggle in the Enable column.
Optional: Add a toleration to schedule pods with matching taints.
Click Add toleration.
The Add toleration dialog opens.
From the Operator list, select one of the following options:
- Equal - The key/value/effect parameters must match. This is the default.
- Exists - The key/effect parameters must match. You must leave a blank value parameter, which matches any.
From the Effect list, select one of the following options:
- None
- NoSchedule - New pods that do not match the taint are not scheduled onto that node. Existing pods on the node remain.
- PreferNoSchedule - New pods that do not match the taint might be scheduled onto that node, but the scheduler tries not to. Existing pods on the node remain.
- NoExecute - New pods that do not match the taint cannot be scheduled onto that node. Existing pods on the node that do not have a matching toleration are removed.
-
In the Key field, enter the toleration key
habana.ai/gaudi. The key is any string, up to 253 characters. The key must begin with a letter or number, and may contain letters, numbers, hyphens, dots, and underscores. - In the Value field, enter a toleration value. The value is any string, up to 63 characters. The value must begin with a letter or number, and may contain letters, numbers, hyphens, dots, and underscores.
In the Toleration Seconds section, select one of the following options to specify how long a pod stays bound to a node that has a node condition.
- Forever - Pods stays permanently bound to a node.
- Custom value - Enter a value, in seconds, to define how long pods stay bound to a node that has a node condition.
- Click Add.
- Click Create accelerator profile.
Verification
From the Administrator perspective, the following Operators appear on the Operators → Installed Operators page.
- HabanaAI
- Node Feature Discovery (NFD)
- Kernel Module Management (KMM)
- The Accelerator list displays the Habana Gaudi accelerator on the Start a notebook server page. After you select an accelerator, the Number of accelerators field appears, which you can use to choose the number of accelerators for your notebook server.
- The accelerator profile appears on the Accelerator profiles page
-
The accelerator profile appears on the Instances tab on the details page for the
AcceleratorProfilecustom resource definition (CRD).
Additional resources
3.4. Allocating additional resources to OpenShift AI users
As a cluster administrator, you can allocate additional resources to a cluster to support compute-intensive data science work. This support includes increasing the number of nodes in the cluster and changing the cluster’s allocated machine pool.
Prerequisites
- You have credentials for administering clusters in OpenShift Cluster Manager (https://console.redhat.com/openshift/). For more information about configuring administrative access in OpenShift Cluster Manager, see Configuring access to clusters in OpenShift Cluster Manager.
- If you intend to increase the size of a machine pool by using accelerators, you have ensured that your OpenShift cluster supports them.
-
You have an AWS or GCP instance with the capacity to create larger container sizes. For compute-intensive operations, your AWS or GCP instance has enough capacity to accommodate the largest container size,
XL.
Procedure
- Log in to OpenShift Cluster Manager (https://console.redhat.com/openshift/).
Click Clusters.
The Clusters page opens.
- Click the name of the cluster you want to allocate additional resources to.
- Click Actions → Edit node count.
- Select a Machine pool from the list.
- Select the number of nodes assigned to the machine pool from the Node count list.
- Click Apply.
Verification
- The additional resources that you allocated to the cluster appear on the Machine Pools tab.
Chapter 4. Managing Jupyter notebook servers
4.1. Accessing the Jupyter administration interface
You can use the Jupyter administration interface to control notebook servers in your Red Hat OpenShift AI environment.
Prerequisite
- You are part of the OpenShift Dedicated or Red Hat OpenShift Service on AWS (ROSA) administrator group. For more information, see Adding administrative users.
Procedure
To access the Jupyter administration interface from OpenShift AI, perform the following actions:
- In OpenShift AI, in the Applications section of the left menu, click Enabled.
- Locate the Jupyter tile and click Launch application.
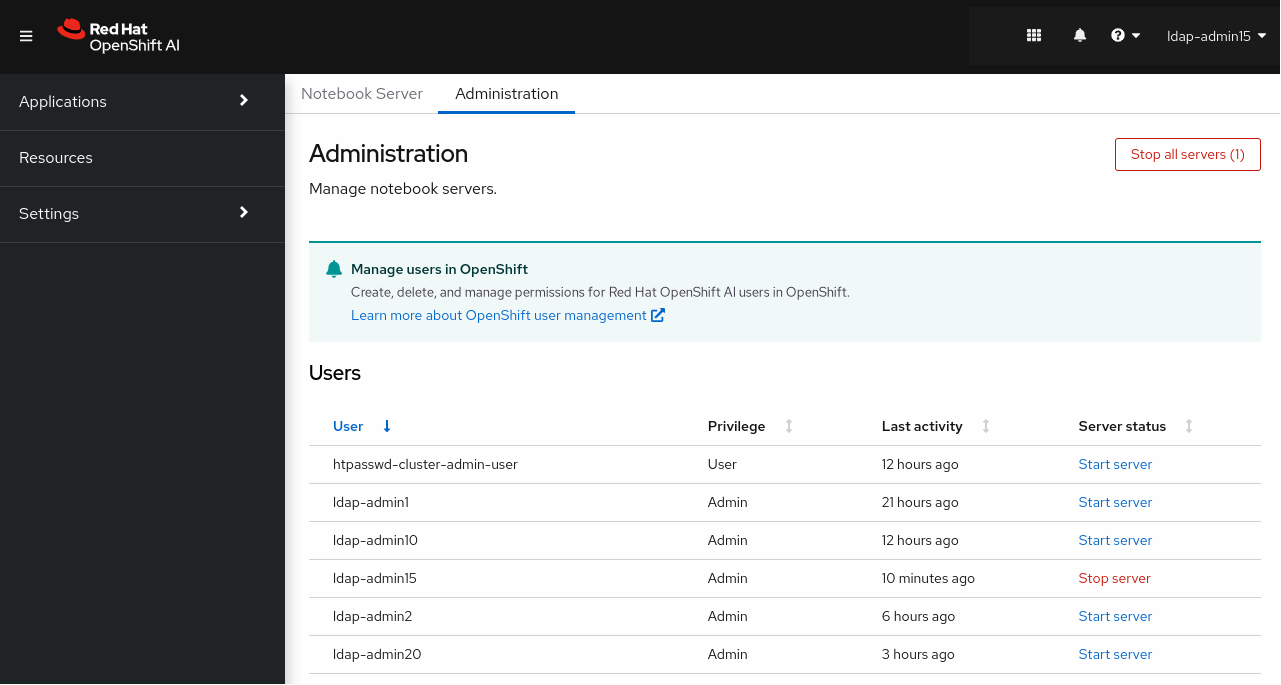
On the page that opens when you launch Jupyter, click the Administration tab.
The Administration page opens.
To access the Jupyter administration interface from JupyterLab, perform the following actions:
- Click File → Hub Control Panel.
On the page that opens in OpenShift AI, click the Administration tab.
The Administration page opens.
Verification
You can see the Jupyter administration interface.
4.2. Starting notebook servers owned by other users
Administrators can start a notebook server for another existing user from the Jupyter administration interface.
Prerequisites
- You are part of the OpenShift Dedicated or Red Hat OpenShift Service on AWS (ROSA) administrator group. For more information, see Adding administrative users.
- You have launched the Jupyter application, as described in Launching Jupyter and starting a notebook server.
Procedure
- On the page that opens when you launch Jupyter, click the Administration tab.
On the Administration tab, perform the following actions:
- In the Users section, locate the user whose notebook server you want to start.
- Click Start server beside the relevant user.
- Complete the Start a notebook server page.
- Optional: Select the Start server in current tab checkbox if necessary.
Click Start server.
After the server starts, you see one of the following behaviors:
- If you previously selected the Start server in current tab checkbox, the JupyterLab interface opens in the current tab of your web browser.
If you did not previously select the Start server in current tab checkbox, the Starting server dialog box prompts you to open the server in a new browser tab or in the current tab.
The JupyterLab interface opens according to your selection.
Verification
- The JupyterLab interface opens.
Additional resources
4.3. Accessing notebook servers owned by other users
Administrators can access notebook servers that are owned by other users to correct configuration errors or to help them troubleshoot problems with their environment.
Prerequisites
- You are part of the OpenShift Dedicated or Red Hat OpenShift Service on AWS (ROSA) administrator group. For more information, see Adding administrative users.
- You have launched the Jupyter application, as described in Launching Jupyter and starting a notebook server.
- The notebook server that you want to access is running.
Procedure
- On the page that opens when you launch Jupyter, click the Administration tab.
On the Administration page, perform the following actions:
- In the Users section, locate the user that the notebook server belongs to.
- Click View server beside the relevant user.
- On the Notebook server control panel page, click Access notebook server.
Verification
- The user’s notebook server opens in JupyterLab.
4.4. Stopping notebook servers owned by other users
Administrators can stop notebook servers that are owned by other users to reduce resource consumption on the cluster, or as part of removing a user and their resources from the cluster.
Prerequisites
-
If you are using specialized OpenShift AI groups, you are part of the administrator group (for example,
rhoai-admins). If you are not using specialized groups, you are part of the OpenShift Dedicated or Red Hat OpenShift Service on AWS (ROSA) administrator group. For more information, see Adding administrative users. - You have launched the Jupyter application, as described in Launching Jupyter and starting a notebook server.
- The notebook server that you want to stop is running.
Procedure
- On the page that opens when you launch Jupyter, click the Administration tab.
Stop one or more servers.
If you want to stop one or more specific servers, perform the following actions:
- In the Users section, locate the user that the notebook server belongs to.
To stop the notebook server, perform one of the following actions:
- Click the action menu (⋮) beside the relevant user and select Stop server.
Click View server beside the relevant user and then click Stop notebook server.
The Stop server dialog box appears.
- Click Stop server.
If you want to stop all servers, perform the following actions:
- Click the Stop all servers button.
- Click OK to confirm stopping all servers.
Verification
- The Stop server link beside each server changes to a Start server link when the notebook server has stopped.
4.5. Stopping idle notebooks
You can reduce resource usage in your OpenShift AI deployment by stopping notebook servers that have been idle (without logged in users) for a period of time. This is useful when resource demand in the cluster is high. By default, idle notebooks are not stopped after a specific time limit.
If you have configured your cluster settings to disconnect all users from a cluster after a specified time limit, then this setting takes precedence over the idle notebook time limit. Users are logged out of the cluster when their session duration reaches the cluster-wide time limit.
Prerequisites
- You have logged in to Red Hat OpenShift AI.
- You are part of the administrator group for OpenShift AI in OpenShift.
Procedure
- From the OpenShift AI dashboard, click Settings → Cluster settings.
- Under Stop idle notebooks, select Stop idle notebooks after.
- Enter a time limit, in hours and minutes, for when idle notebooks are stopped.
- Click Save changes.
Verification
The
notebook-controller-culler-configConfigMap, located in theredhat-ods-applicationsproject on the Workloads → ConfigMaps page, contains the following culling configuration settings:-
ENABLE_CULLING: Specifies if the culling feature is enabled or disabled (this isfalseby default). -
IDLENESS_CHECK_PERIOD: The polling frequency to check for a notebook’s last known activity (in minutes). -
CULL_IDLE_TIME: The maximum allotted time to scale an inactive notebook to zero (in minutes).
-
- Idle notebooks stop at the time limit that you set.
4.6. Configuring a custom notebook image
In addition to notebook images provided and supported by Red Hat and independent software vendors (ISVs), you can configure custom notebook images that cater to your project’s specific requirements.
Red Hat supports you in adding custom notebook images to your deployment of OpenShift AI and ensuring that they are available for selection when creating a notebook server. However, Red Hat does not support the contents of your custom notebook image. That is, if your custom notebook image is available for selection during notebook server creation, but does not create a usable notebook server, Red Hat does not provide support to fix your custom notebook image.
Prerequisites
- You have logged in to Red Hat OpenShift AI.
-
You are part of the
cluster-adminsordedicated-adminsuser group in your OpenShift cluster. Thededicated-adminsuser group applies only to OpenShift Dedicated. - Your custom notebook image exists in an image registry and is accessible.
- You can access the Settings → Notebook images dashboard navigation menu option.
Procedure
From the OpenShift AI dashboard, click Settings → Notebook images.
The Notebook images page appears. Previously imported notebook images are displayed. To enable or disable a previously imported notebook image, on the row containing the relevant notebook image, click the toggle in the Enable column.
NoteIf you have already configured an accelerator identifier for a notebook image, you can specify a recommended accelerator for the notebook image by creating an associated accelerator profile. To do this, click Create profile on the row containing the notebook image and complete the relevant fields. If the notebook image does not contain an accelerator identifier, you must manually configure one before creating an associated accelerator profile.
Click Import new image. Alternatively, if no previously imported images were found, click Import image.
The Import Notebook images dialog appears.
-
In the Image location field, enter the URL of the repository containing the notebook image. For example:
quay.io/my-repo/my-image:tag,quay.io/my-repo/my-image@sha256:xxxxxxxxxxxxx, ordocker.io/my-repo/my-image:tag. - In the Name field, enter an appropriate name for the notebook image.
- Optional: In the Description field, enter a description for the notebook image.
- Optional: From the Accelerator identifier list, select an identifier to set its accelerator as recommended with the notebook image. If the notebook image contains only one accelerator identifier, the identifier name displays by default.
Optional: Add software to the notebook image. After the import has completed, the software is added to the notebook image’s meta-data and displayed on the Jupyter server creation page.
- Click the Software tab.
- Click the Add software button.
-
Click Edit (
 ).
).
- Enter the Software name.
- Enter the software Version.
-
Click Confirm (
 ) to confirm your entry.
- To add additional software, click Add software, complete the relevant fields, and confirm your entry.
Optional: Add packages to the notebook images. After the import has completed, the packages are added to the notebook image’s meta-data and displayed on the Jupyter server creation page.
- Click the Packages tab.
- Click the Add package button.
-
Click Edit (
).
- Enter the Package name.
- Enter the package Version.
-
Click Confirm (
) to confirm your entry.
- To add an additional package, click Add package, complete the relevant fields, and confirm your entry.
- Click Import.
Verification
- The notebook image that you imported is displayed in the table on the Notebook images page.
- Your custom notebook image is available for selection on the Start a notebook server page in Jupyter.
Additional resources
Chapter 5. Backing up data
5.1. Backing up storage data from Amazon EBS
Red Hat recommends that you back up the data on your persistent volume claims (PVCs) regularly. Backing up your data is particularly important before deleting a user and before uninstalling OpenShift AI, as all PVCs are deleted when OpenShift AI is uninstalled.
Prerequisites
- You have credentials for Red Hat OpenShift Cluster Manager (https://console.redhat.com/openshift/).
- You have administrator access to the OpenShift Dedicated cluster.
- You have credentials for the Amazon Web Services (AWS) account that the OpenShift Dedicated cluster is deployed under.
Procedure
Determine the IDs of the persistent volumes (PVs) that you want to back up.
- In the OpenShift Dedicated web console, change into the Administrator perspective.
- Click Home → Projects.
Click the rhods-notebooks project.
The Details page for the project opens.
Click the PersistentVolumeClaims in the Inventory section.
The PersistentVolumeClaims page opens.
Note the ID of the persistent volume (PV) that you want to back up.
NoteThe persistent volumes (PV) that you make a note of are required to identify the correct EBS volume to back up in your AWS instance.
Locate the EBS volume containing the PVs that you want to back up.
See Amazon Web Services documentation: Create Amazon EBS snapshots for more information.
- Log in to AWS (https://aws.amazon.com) and ensure that you are viewing the region that your OpenShift Dedicated cluster is deployed in.
- Click Services.
- Click Compute → EC2.
Click Elastic Block Storage → Volumes in the side navigation.
The Volumes page opens.
In the search bar, enter the ID of the persistent volume (PV) that you made a note of earlier.
The Volumes page reloads to display the search results.
-
Click on the volume shown and verify that any
kubernetes.io/created-for/pvc/namespacetags contain the valuerhods-notebooks, and anykubernetes.io/created-for/pvc/nametags match the name of the persistent volume that the EC2 volume is being used for, for example,jupyter-nb-user1-pvc.
Back up the EBS volume that contains your persistent volume (PV).
Right-click on the volume that you want to back up and select Create Snapshot from the list.
The Create Snapshot page opens.
- Enter a Description for the volume.
Click Create Snapshot.
The snapshot of the volume is created.
- Click Close.
Verification
- The snapshot that you created is visible on the Snapshots page in AWS.
Additional resources
5.2. Backing up storage data from Google Persistent Disk
Red Hat recommends that you back up the data on your persistent volume claims (PVCs) regularly. Backing up your data is particularly important before deleting a user and before uninstalling OpenShift AI, as all PVCs are deleted when OpenShift AI is uninstalled.
Prerequisites
- You have credentials for Red Hat OpenShift Cluster Manager (https://console.redhat.com/openshift/).
- You have administrator access to the OpenShift Dedicated cluster.
- You have credentials for the Google Cloud Platform (GCP) account that the OpenShift Dedicated cluster is deployed under.
Procedure
Determine the IDs of the persistent volumes (PVs) that you want to back up.
- In the OpenShift Dedicated web console, change into the Administrator perspective.
- Click Home → Projects.
Click the rhods-notebooks project.
The Details page for the project opens.
Click the PersistentVolumeClaims in the Inventory section.
The PersistentVolumeClaims page opens.
Note the ID of the persistent volume (PV) that you want to back up.
The persistent volume (PV) IDs are required to identify the correct persistent disk to back up in your GCP instance.
Locate the persistent disk containing the PVs that you want to back up.
- Log in to the Google Cloud console (https://console.cloud.google.com) and ensure that you are viewing the region that your OpenShift Dedicated cluster is deployed in.
- Click the navigation menu (≡) and then click Compute Engine.
From the side navigation, under Storage, click Disks.
The Disks page opens.
In the Filter query box, enter the ID of the persistent volume (PV) that you made a note of earlier.
The Disks page reloads to display the search results.
-
Click on the disk shown and verify that any
kubernetes.io/created-for/pvc/namespacetags contain the valuerhods-notebooks, and anykubernetes.io/created-for/pvc/nametags match the name of the persistent volume that the persistent disk is being used for, for example,jupyterhub-nb-user1-pvc.
Back up the persistent disk that contains your persistent volume (PV).
Select CREATE SNAPSHOT from the top navigation.
The Create a snapshot page opens.
- Enter a unique Name for the snapshot.
- Under Source disk, verify the persistent disk you want to back up is displayed.
- Change any optional settings as needed.
Click CREATE.
The snapshot of the persistent disk is created.
Verification
- The snapshot that you created is visible on the Snapshots page in GCP.
Additional resources
Chapter 6. Usage data collection
Red Hat OpenShift AI administrators can choose whether to allow Red Hat to collect data about OpenShift AI usage in their cluster. Collecting this data allows Red Hat to monitor and improve our software and support. For further details about the data Red Hat collects, see Usage data collection notice for OpenShift AI.
Usage data collection is enabled by default when you install OpenShift AI on your OpenShift cluster.
See Disabling usage data collection for instructions on disabling the collection of this data in your cluster. If you have disabled data collection on your cluster, and you want to enable it again, see Enabling usage data collection for more information.
6.1. Usage data collection notice for OpenShift AI
In connection with your use of this Red Hat offering, Red Hat may collect usage data about your use of the software. This data allows Red Hat to monitor the software and to improve Red Hat offerings and support, including identifying, troubleshooting, and responding to issues that impact users.
- What information does Red Hat collect?
Tools within the software monitor various metrics and this information is transmitted to Red Hat. Metrics include information such as:
- Information about applications enabled in the product dashboard.
- The deployment sizes used (that is, the CPU and memory resources allocated).
- Information about documentation resources accessed from the product dashboard.
- The name of the notebook images used (that is, Minimal Python, Standard Data Science, and other images.).
- A unique random identifier that generates during the initial user login to associate data to a particular username.
- Usage information about components, features, and extensions.
- Third Party Service Providers
- Red Hat uses certain third party service providers to collect the telemetry data.
- Security
- Red Hat employs technical and organizational measures designed to protect the usage data.
- Personal Data
- Red Hat does not intend to collect personal information. If Red Hat discovers that personal information has been inadvertently received, Red Hat will delete such personal information and treat such personal information in accordance with Red Hat’s Privacy Statement. For more information about Red Hat’s privacy practices, see Red Hat’s Privacy Statement.
- Enabling and Disabling Usage Data
- You can disable or enable usage data by following the instructions in Disabling usage data collection or Enabling usage data collection.
6.2. Enabling usage data collection
Red Hat OpenShift AI administrators can choose whether to allow Red Hat to collect data about OpenShift AI usage in their cluster. Usage data collection is enabled by default when you install OpenShift AI on your OpenShift cluster. If you have disabled data collection previously, you can re-enable it by following these steps.
Prerequisites
- You have logged in to Red Hat OpenShift AI.
- You are part of the administrator group for OpenShift AI in your OpenShift Cluster.
Procedure
- From the OpenShift AI dashboard, click Settings → Cluster settings.
- Locate the Usage data collection section.
- Select the Allow collection of usage data checkbox.
- Click Save changes.
Verification
-
A notification is shown when settings are updated:
Settings changes saved.
Additional resources
6.3. Disabling usage data collection
Red Hat OpenShift AI administrators can choose whether to allow Red Hat to collect data about OpenShift AI usage in their cluster. Usage data collection is enabled by default when you install OpenShift AI on your OpenShift cluster.
You can disable data collection by following these steps.
Prerequisites
- You have logged in to Red Hat OpenShift AI.
- You are part of the administrator group for OpenShift AI in your OpenShift cluster.
Procedure
- From the OpenShift AI dashboard, click Settings → Cluster settings.
- Locate the Usage data collection section.
- Deselect the Allow collection of usage data checkbox.
- Click Save changes.
Verification
-
A notification is shown when settings are updated:
Settings changes saved.
Additional resources