
Red Hat Training
A Red Hat training course is available for Red Hat Enterprise Linux
17.5. Establishing an xDSL Connection
DSL stands for Digital Subscriber Lines. There are different types of DSL such as ADSL, IDSL, and SDSL. The Network Administration Tool uses the term xDSL to mean all types of DSL connections.
Some DSL providers require that the system is configured to obtain an IP address through DHCP with an Ethernet card. Some DSL providers require you to configure a PPPoE (Point-to-Point Protocol over Ethernet) connection with an Ethernet card. Ask your DSL provider which method to use.
If you are required to use DHCP, refer to Section 17.2, “Establishing an Ethernet Connection” to configure your Ethernet card.
If you are required to use PPPoE, follow these steps:
- Click the Devices tab.
- Click the button.
- Select xDSL connection from the Device Type list, and click as shown in Figure 17.8, “Select Device Type”.
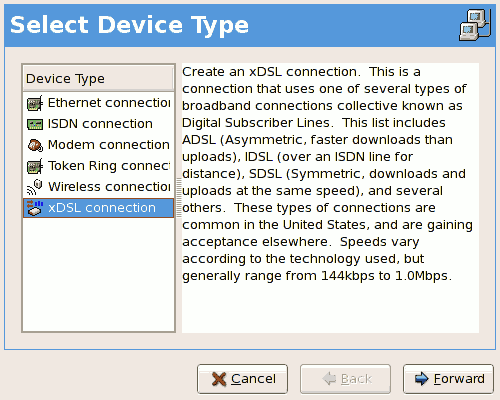
Figure 17.8. Select Device Type
- If your Ethernet card is in the hardware list, select the Ethernet Device from the pulldown menu from the page shown in Figure 17.9, “xDSL Settings”. Otherwise, the Select Ethernet Adapter window appears.
Note
The installation program detects supported Ethernet devices and prompts you to configure them. If you configured any Ethernet devices during the installation, they are displayed in the hardware list on the Hardware tab.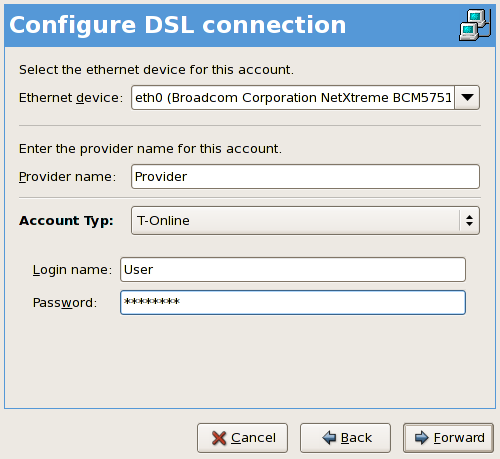
Figure 17.9. xDSL Settings
- Enter the Provider Name, Login Name, and Password. If you are not setting up a T-Online account, select Normal from the Account Type pulldown menu.If you are setting up a T-Online account, select T-Online from the Account Type pulldown menu and enter any values in the Login name and Password field. You can further configure your T-Online account settings once the DSL connection has been fully configured (refer to Setting Up a T-Online Account).
- Click the to go to the menu. Check your settings and click to finish.
- After configuring the DSL connection, it appears in the device list as shown in Figure 17.10, “xDSL Device”.

Figure 17.10. xDSL Device
- After adding the xDSL connection, you can edit its configuration by selecting the device from the device list and clicking .
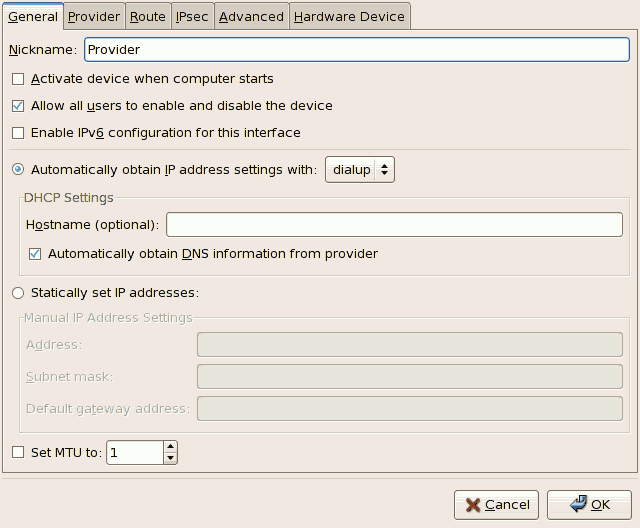
Figure 17.11. xDSL Configuration
For example, when the device is added, it is configured not to start at boot time by default. Edit its configuration to modify this setting. Click when finished. - Once you are satisfied with your xDSL connection settings, select > to save the changes.
Setting Up a T-Online Account
If you are setting up a T-Online Account, follow these additional steps:
- Select the device from the device list and click .
- Select the Provider tab from the menu as shown in Figure 17.12, “xDSL Configuration - Provider Tab”.
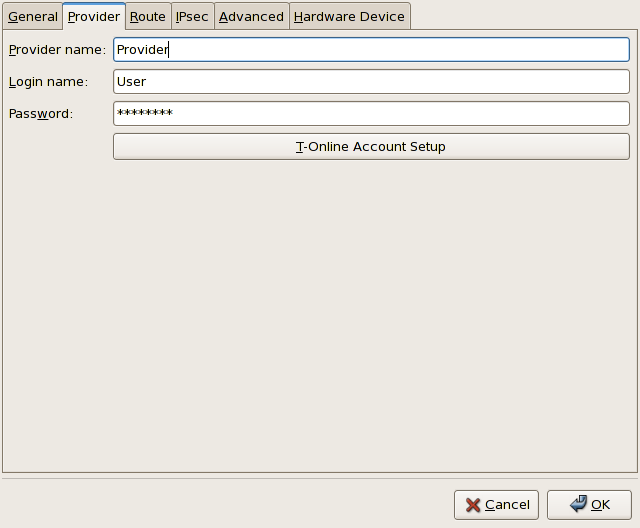
Figure 17.12. xDSL Configuration - Provider Tab
- Click the button. This will open the window for your T-Online account as shown in Figure 17.13, “Account Setup”.

Figure 17.13. Account Setup
- Enter your Adapter identifier, Associated T-Online number, Concurrent user number/suffix, and Personal password.. Click when finished to close the window.
- On the window, click . Be sure to select > from the Network Administration Tool to save the changes.
When the device is added, it is not activated immediately, as seen by its Inactive status. To activate the device, select it from the device list, and click the button. If the system is configured to activate the device when the computer starts (the default), this step does not have to be performed again.