
Chapter 3. Event templates
Cryostat includes default event templates that you can use to quickly create a JFR recording for monitoring your target JVM’s performance.
3.1. Using custom event templates
You can choose either one of the following default event templates when creating a JDK Flight Recorder (JFR) recording:
- Continuous template, which collects basic target Java Virtual Machine (JVM) data for either a fixed duration or until it is explicitly stopped.
- Profiling template, which collects in-depth target JVM data for either a fixed duration or until it is explicitly stopped.
By using either of these default event templates, you can quickly create a JFR recording for monitoring your target JVM’s performance. You can edit either event template at a later stage to suit your needs. For example, the default event templates do not contain application-specific custom events, so you must add these custom events to the custom template.
Cryostat also supports the ALL meta-template, which enables a JFR to monitor all event types for a target JVM. Default values exist for each event type. The ALL meta-template does not contain an XML definition, so you cannot download an XML file for the ALL meta-template.
Prerequisites
- Installed Cryostat 2.4 on Red Hat OpenShift by using the Installed Operators option.
- Created a Cryostat instance in your Red Hat OpenShift project.
Procedure
- On the Dashboard panel for your Cryostat instance, select a Target JVM from the drop-down list.
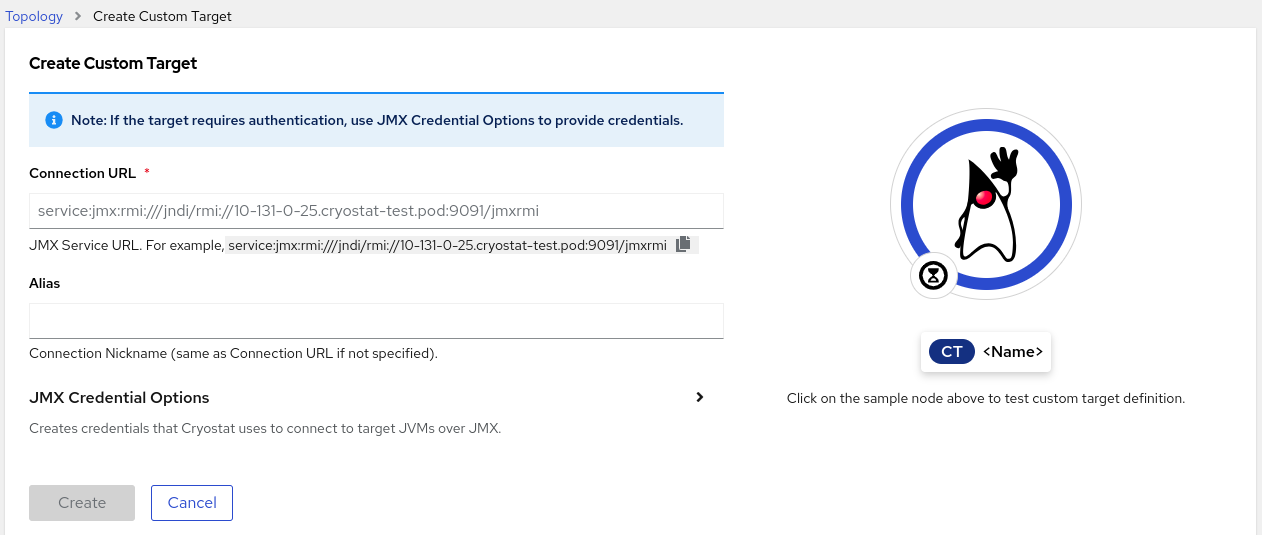
Optional: On the Topology panel, you can define a target JVM by selecting the Add to view icon. After you select the icon, a window opens for defining a custom target connection URL.
- In the Connection URL field, enter the URL for your JVM’s Java Management Extension (JMX) endpoint.
- Optional: In the Alias field, enter an alias for your JMX Service URL.
Click Create.
Figure 3.1. Create Target dialog box
From the navigation menu on the Cryostat web console, click Events. An Authentication Required dialog might open on your web console. If prompted, enter your Username and Password in the Authentication Required dialog box, and click Save to provide your credentials to the target JVM.
NoteIf the selected target JMX has SSL certification enabled for JMX connections, you must add its certificate when prompted.
Cryostat can encrypt and store credentials for a target JVM application in a database that is stored on a persistent volume claim (PVC) on Red Hat OpenShift.
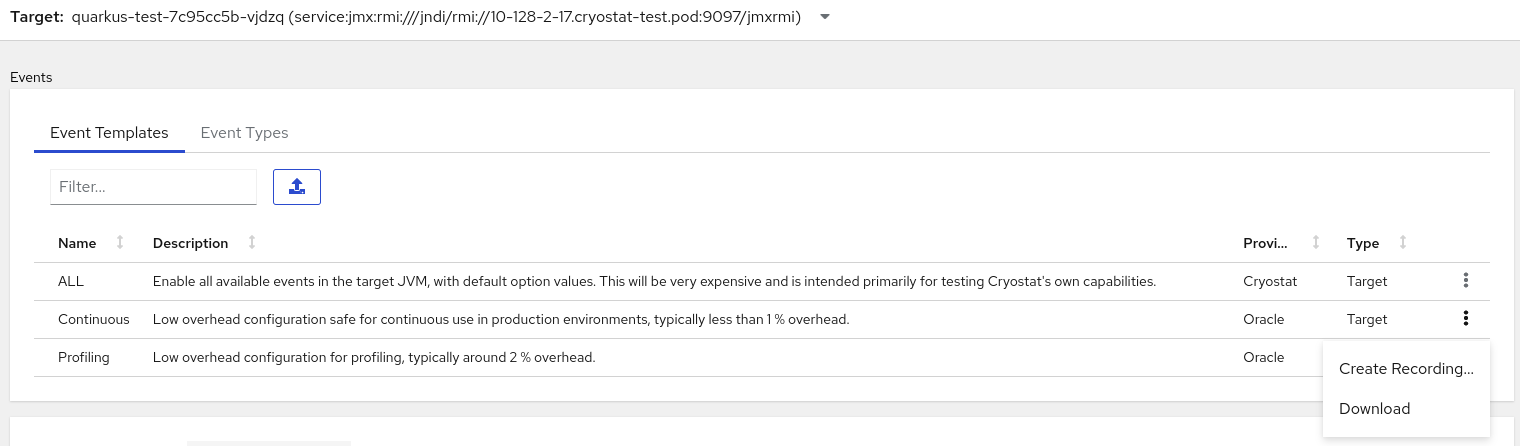
- Under the Event Templates tab, locate your listed event template and then select its more options menu.
From the more options menu, click Download. Depending on how you configured your operating system, a file-save dialog opens. Save the file to your preferred location.
Figure 3.2. Example of an event template’s more options menu
Open the file with your default file editor and edit the file to meet your needs. You must save your file to retain your configuration changes.
NoteYou can add values to the
descriptionandproviderattributes that can help with identifying your file at a later stage.From the Events menu, go to the Event Templates tab then click the Upload icon. A Create Custom Event Template window opens in your Cryostat web console.
Figure 3.3. Create Custom Event Template window
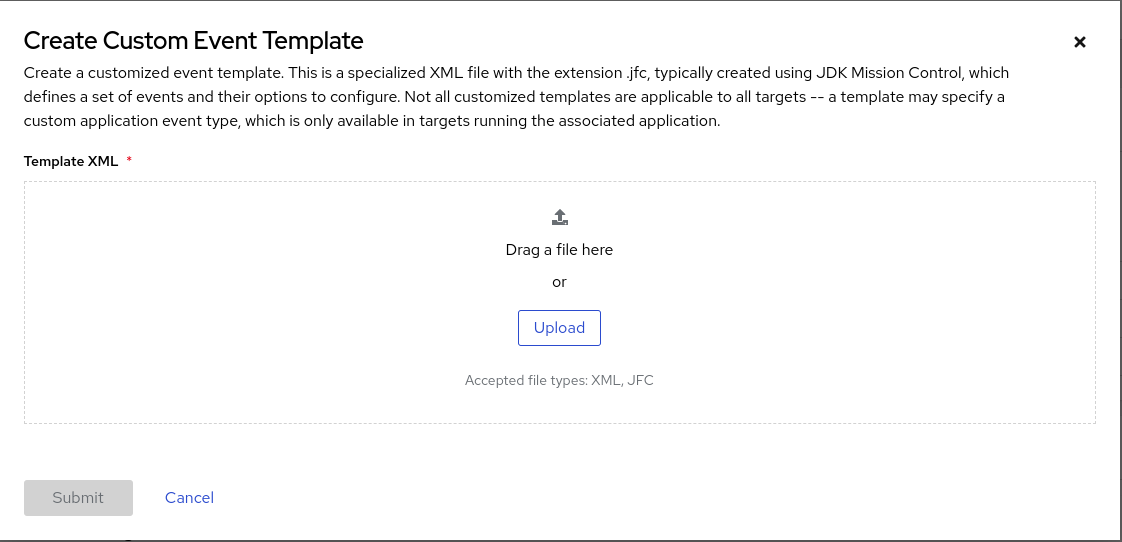
- Click Upload and use your default file editor to upload one or more configured event template files to the Cryostat web console. You can also drag and drop the files into the Template XML window.
- Click the Submit button. The Event Templates tab opens on your Cryostat web console, where you can now view your custom event template.
Optional: After you create your event template, you can choose one of the following options for using your template to create a JFR recording:
- From the Automated Rules menu, click Create and then select an event template from the Template list.
- From the Events menu, locate your listed event template, then from the more options menu, select Create Recording.
- From the Recordings menu, under the Active Recordings tab, click Create.
Additional resources
- See Creating a JDK Flight Recorder (JFR) recording (Creating a JFR recording with Cryostat)
- See Uploading an SSL certificate (Using Cryostat to manage a JFR recording)
- See Archiving JDK Flight Recorder (JFR) recordings (Using Cryostat to manage a JFR recording)
- See Enabling or disabling automated rules(Using automated rules on Cryostat)