
Chapter 3. Developing with Docker in CodeReady Studio
3.1. Managing Docker connections
3.1.1. Setting up a Docker account
The following section describes how to set up a Docker account in CodeReady Studio.
Prerequisites
Docker is installed on your system.
For more information on how to install Docker, see Docker Docs - Get Docker.
You have a Docker ID.
For more information on how to get a Docker ID, see Register for a Docker ID.
Procedure
- Start CodeReady Studio.
Click → .
The Preferences window appears.
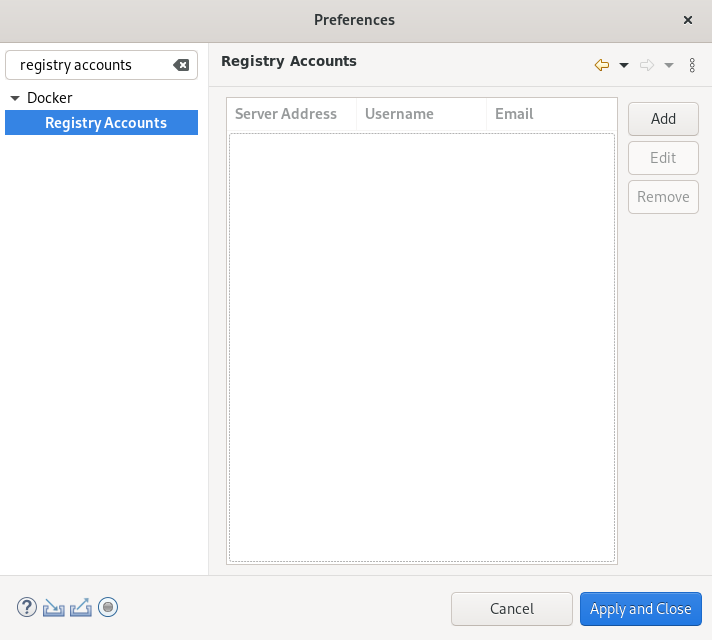
- Enter Registry Accounts in the search field.
- Select Registry Accounts.
Click .
The New Registry Account window appears.
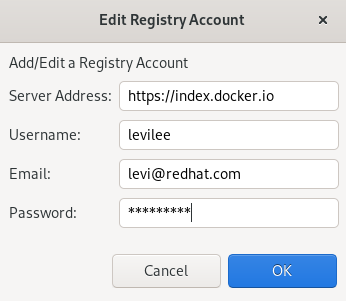
- Enter the Server Address.
- Enter your Doker ID as the Username.
- Enter the email associated with your Docker account.
- Enter your password.
- Click .
- Click .
Your Docker account has been set up.
3.1.2. Testing an existing Docker connection
Prerequisites
Your Docker account in CodeReady Studio is set up.
For more information on how to set up a Docker account in CodeReady Studio, see Setting up a Docker account.
- You are logged in to your Docker account.
Procedure
- Start CodeReady Studio.
Click → → .
The Show View window appears.
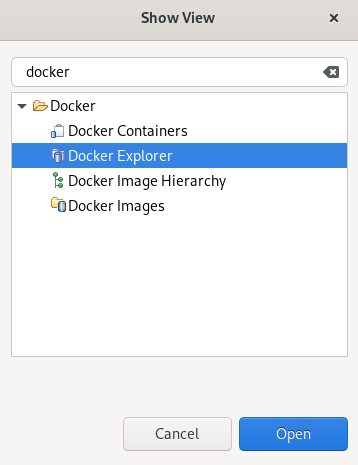
- Enter Docker in the search field.
- Select Docker Explorer.
Click .
The Docker Explorer view appears.
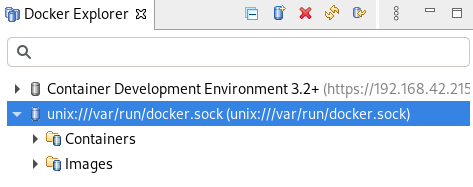
Right-click → .
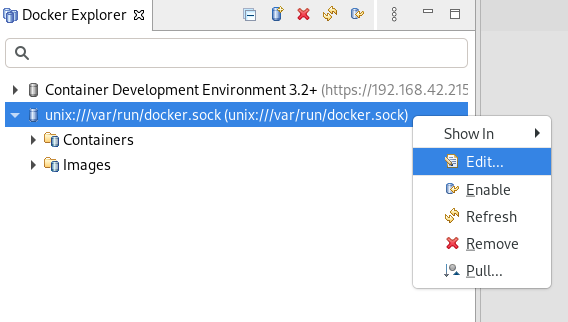
The Edit Docker Connection window appears.
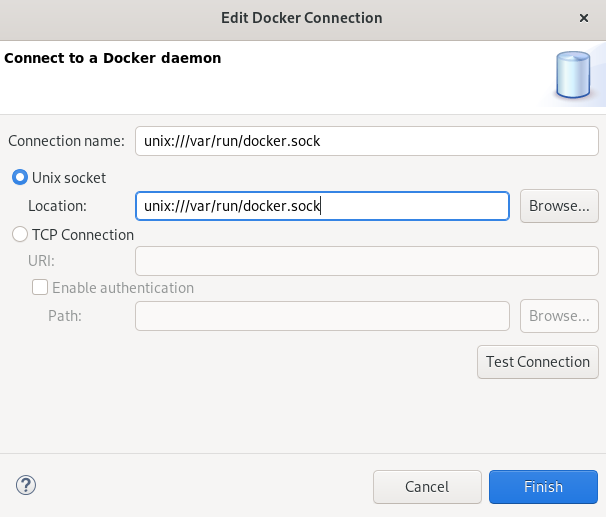
Click .
If the connection is configured correctly, a window stating Ping succeeded! appears.
- Click .
- Click .
3.1.3. Editing a Docker connection
Prerequisites
A set up Docker account in CodeReady Studio.
For more information on how to set up a Docker account in CodeReady Studio, see Setting up a Docker account.
- You are logged in to your Docker account.
Procedure
- Start CodeReady Studio.
Click → → .
The Show View window appears.
- Enter Docker in the search field.
- Select Docker Explorer.
Click .
The Docker Explorer view appears.
Right-click → .
The Edit Docker Connection window appears.
- Click in the Unix socket Location field to locate a new socket or check the TCP Connection option and add your host URI.
- Click .
Your docker connection has been edited.
3.2. Managing Docker images
Prerequisites
A set up Docker account in CodeReady Studio.
For more information on how to set up a Docker account in CodeReady Studio, see Setting up a Docker account.
- You are logged in to your Docker account.
3.2.1. Pulling Docker images
Procedure
- Start CodeReady Studio.
Click → → .
The Show View window appears.
- Enter Docker in the search field.
- Select Docker Explorer.
Click .
The Docker Explorer view appears.
- Expand the Docker socket folder.
Right-click → .
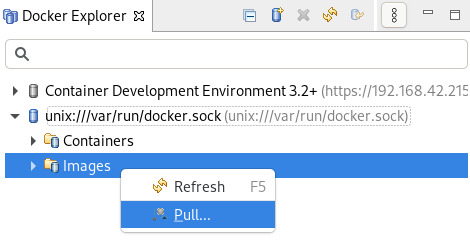
The Pull Image window appears.
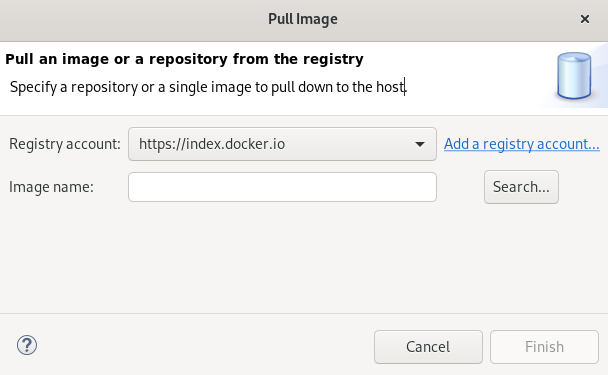
Click .
The Search the Docker Registry for images window appears.
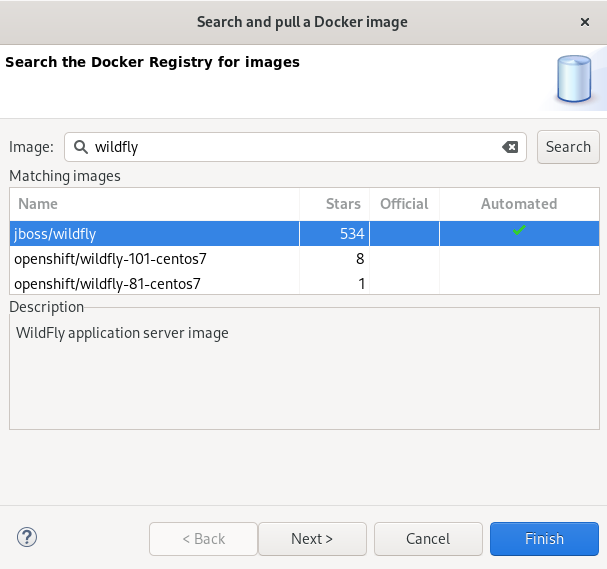
- Enter your image name into the search field.
Click .
The Choose a tag for the selected image window appears.
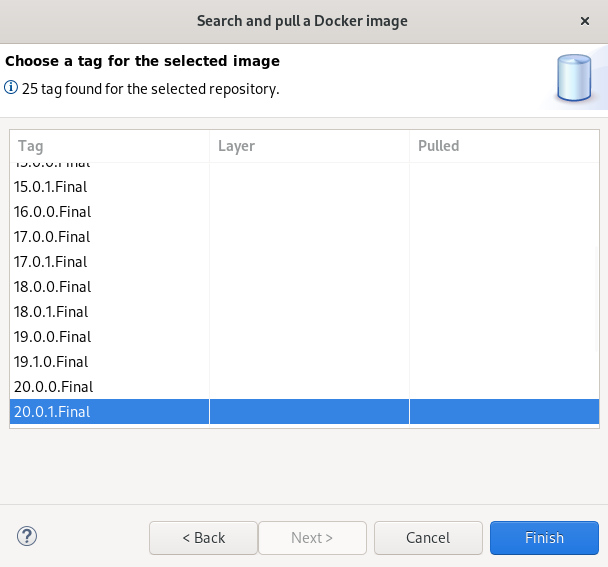
- Choose a tag for your image.
Click .
The Pull an image or a repository from the registry window appears.
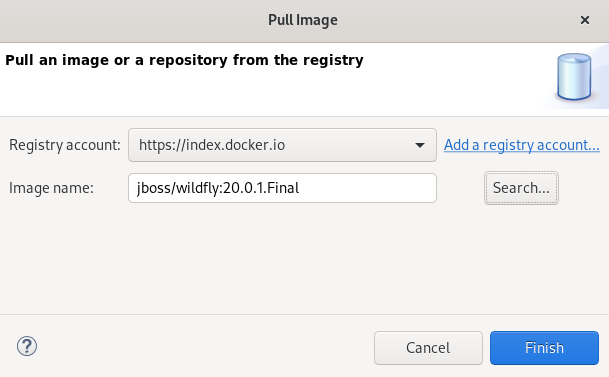
- Click .
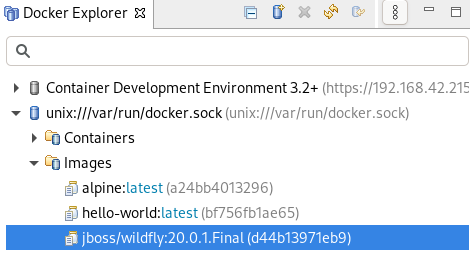
Your new Docker image is now listed in the Docker Explorer view.
3.2.2. Pushing Docker images
Before pushing an image you must tag it. The following section describes how to tag and push a Docker image in CodeReady Studio.
Procedure
- Start CodeReady Studio.
Click → → .
The Show View window appears.
- Enter Docker in the search field.
- Select Docker Explorer.
Click .
The Docker Explorer view appears.
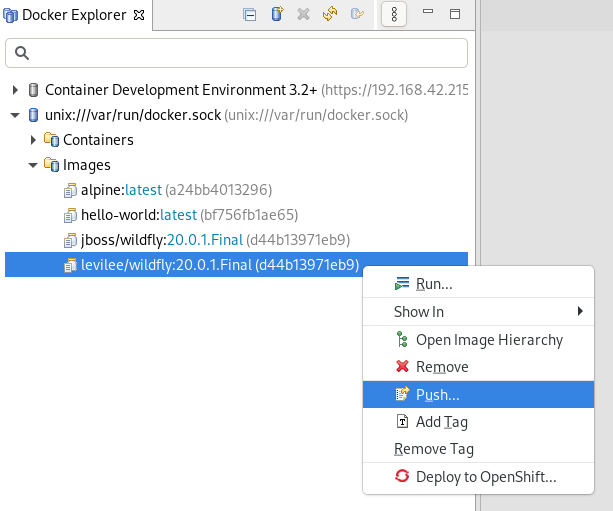
- Expand → .
- Right-click the image you want to tag.
Click Add tag.

The Tag Image window appears.
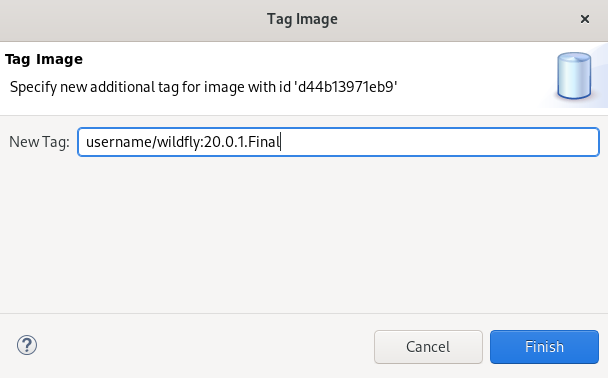
Enter your tag in the New Tag field.
The tag should be in the form of
username/image_name:tag_name, whereusernameis your Docker ID on https://hub.docker.com,image_nameis the name of your image, andtag_nameis the version of your image.- Click .
Right-click the → .
The Push image to Registry window appears.
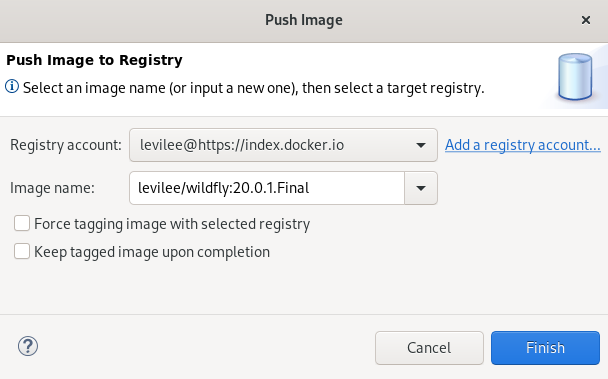
- Select the Registry Account that starts with your Docker ID.
- Click .
After you push the image it appears in the Docker Cloud. This image is then available for other developers to use.
3.2.3. Running Docker images
Procedure
- Start CodeReady Studio.
Click → → .
The Show View window appears.
- Enter Docker in the search field.
- Select Docker Explorer.
Click .
The Docker Explorer view appears.
- Expand → .
- Right-click an image you want to run.
Click Run.
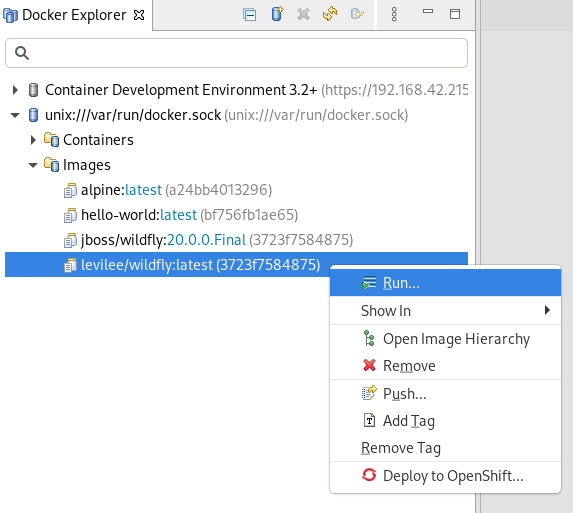
The Docker Container settings window appears.
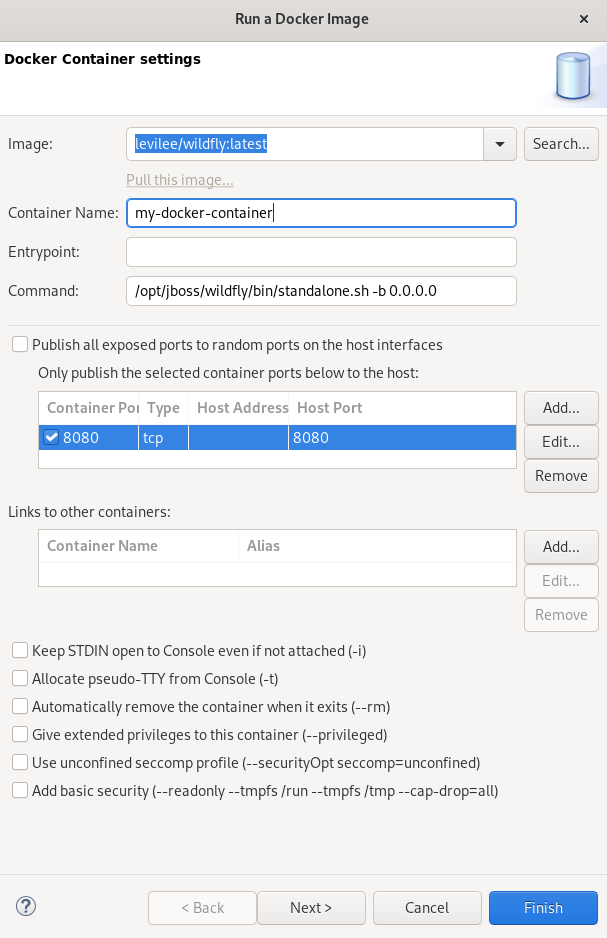
- Name the container.
- Clear the Publish all exposed ports to random ports on the host interfaces check box.
-
Check the box for the
8080port. Click .
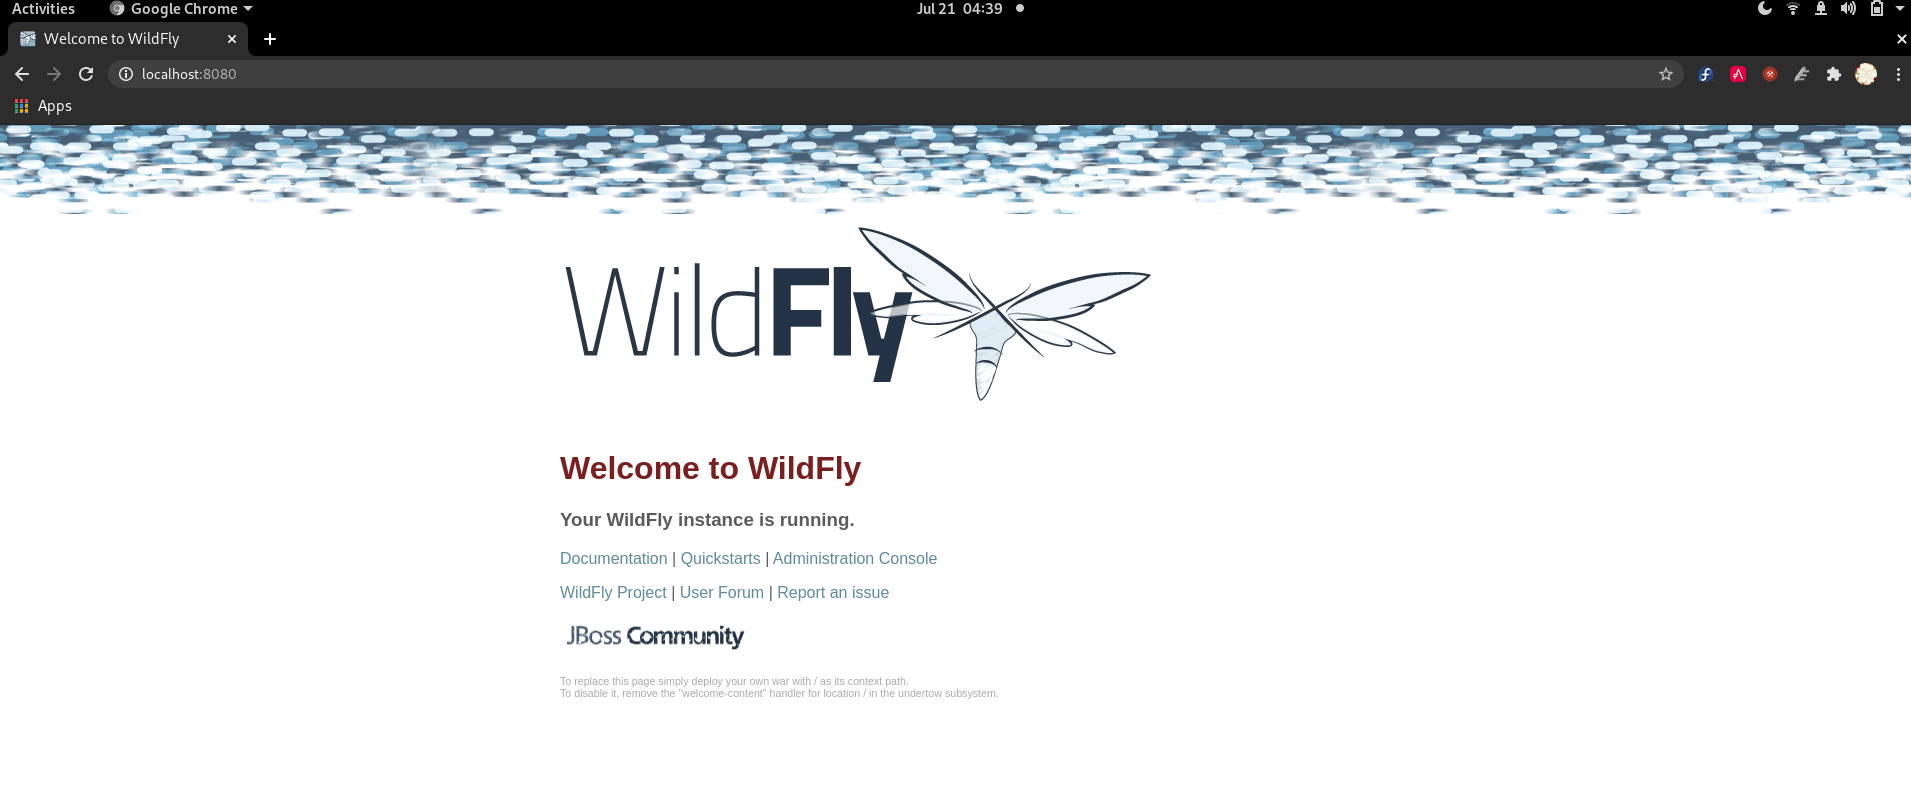
The Console view appears showing the process of starting the image.
In the web browser, navigate to http://localhost:8080/ to see the image running.
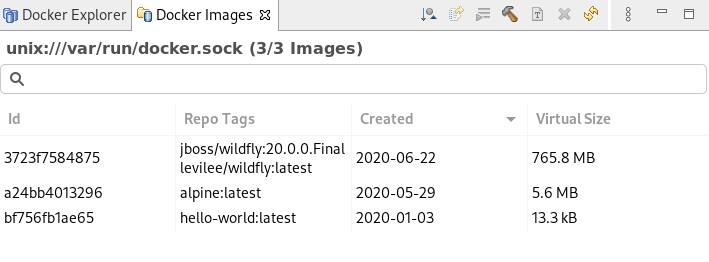
3.2.4. Building images with Dockerfile
You can build or create an image by modifying an existing image. Typically, this involves installing new packages. The specification of the new Docker image is done via Dockerfile.
Prerequisites
- You must have a Dockerfile created on your local machine.
Procedure
- Start CodeReady Studio.
Click → → .
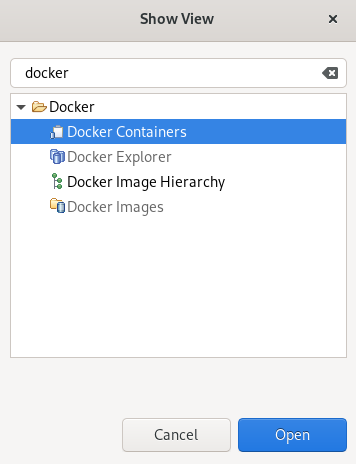
The Show View window appears.
- Enter Docker in the search field.
- Select Docker Images.
Click .
The Docker Images view appears.
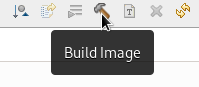
Click the Build Image icon.
The Build a Docker Image window appears.
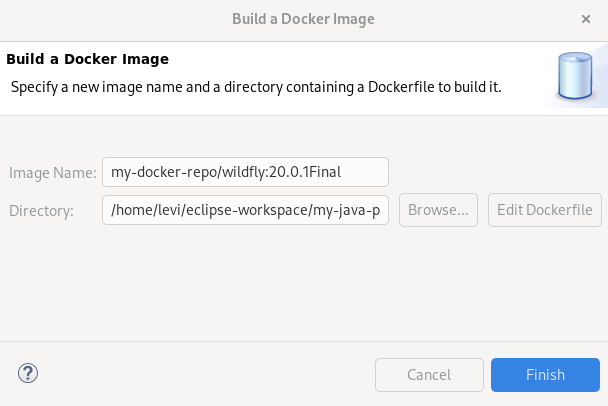
-
Name the image in the format of
repo/name:version. - Click to locate the Dockerfile.
- Click .
The Console view appears displaying the build process.
3.3. Managing Docker Containers
Docker containers are isolated processes that are based on Docker images. Once created, users can stop, start, pause, unpause, kill, or remove the containers as well as read their logs.
The following section describes how to manage Docker containers in CodeReady Studio.
Procedure
- Start CodeReady Studio.
Click → → .
The Show View window appears.
- Enter Docker into the search field.
- Select Docker Containers.
Click .
The Docker Containers view appears.

You can start, pause, unpause, stop, kill, restart, remove, or refresh the containers by using the panel.
