
Getting started with Red Hat OpenShift AI Self-Managed
Learn how to work in an OpenShift AI environment
Abstract
Chapter 1. Logging in to OpenShift AI
Log in to OpenShift AI from a browser for easy access to Jupyter and your data science projects.
Procedure
Browse to the OpenShift AI instance URL and click Log in with OpenShift.
-
If you are a data scientist user, your administrator must provide you with the OpenShift AI instance URL, for example,
https://rhods-dashboard-redhat-oai-applications.apps.example.abc1.p1.openshiftapps.com/ -
If you have access to OpenShift Container Platform, you can browse to the OpenShift Container Platform web console and click the Application Launcher (
 ) → Red Hat OpenShift AI.
-
If you are a data scientist user, your administrator must provide you with the OpenShift AI instance URL, for example,
-
Click the name of your identity provider, for example,
GitHub. - Enter your credentials and click Log in (or equivalent for your identity provider).
Verification
- OpenShift AI opens on the Enabled applications page.
Troubleshooting
If you see
An authentication error occurredorCould not create userwhen you try to log in:- You might have entered your credentials incorrectly. Confirm that your credentials are correct.
- You might have an account in more than one configured identity provider. If you have logged in with a different identity provider previously, try again with that identity provider.
Additional resources
Chapter 2. The OpenShift AI user interface
The Red Hat OpenShift AI interface is based on the OpenShift web console user interface.
The Red Hat OpenShift AI user interface is divided into several areas:
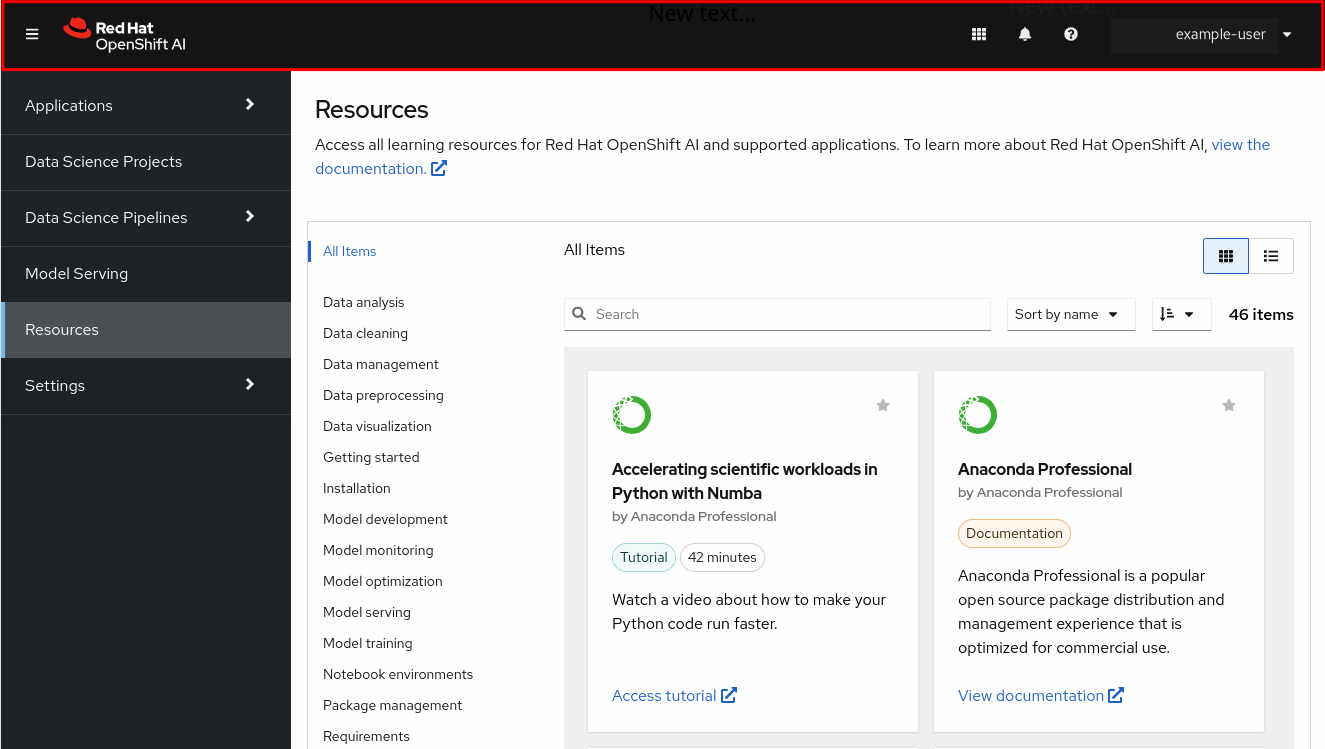
The global navigation bar, which provides access to useful controls, such as Help and Notifications.
Figure 2.1. The global navigation bar
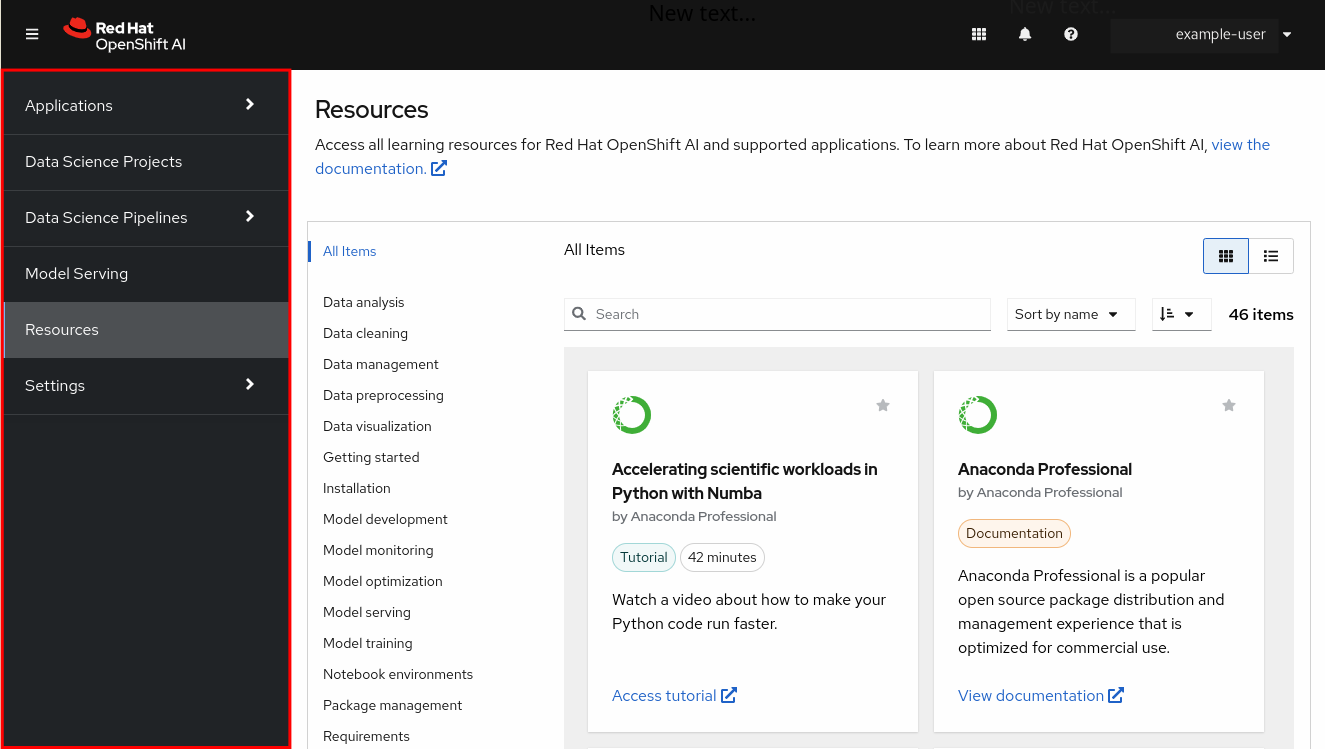
The side navigation menu, which contains different categories of pages available in OpenShift AI.
Figure 2.2. The side navigation menu
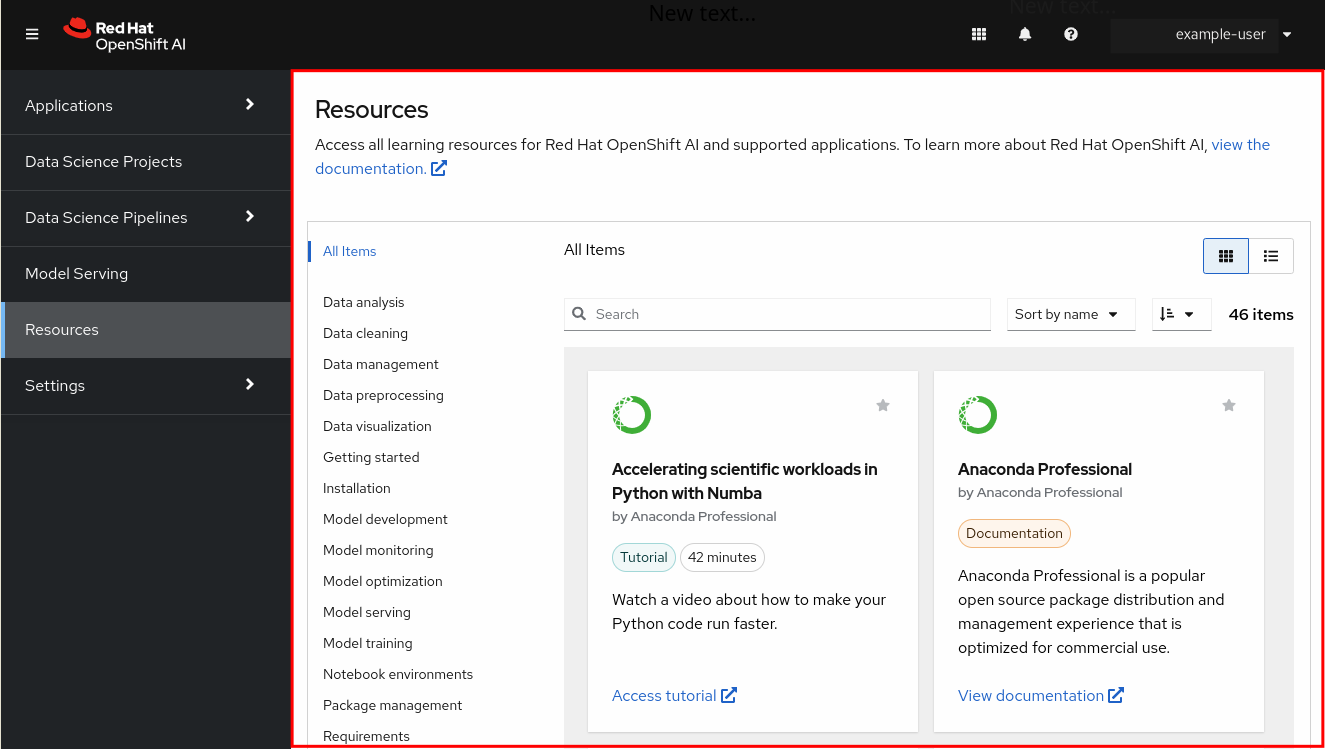
The main display area, which displays the current page and shares space with any drawers currently displaying information, such as notifications or quick start guides. The main display area also displays the Notebook server control panel where you can launch Jupyter by starting and configuring a notebook server. Administrators can also use the Notebook server control panel to manage other users' notebook servers.
Figure 2.3. The main display area
2.1. Global navigation
There are four items in the top navigation:
-
The Toggle side navigation menu button (
 ) toggles whether or not the side navigation is displayed.
-
The Notifications button (
 ) opens and closes the Notifications drawer, letting you read current and previous notifications in more detail.
-
The Help menu (
 ) provides a link to create a ticket with Red Hat Support and access the OpenShift AI documentation.
- The User menu displays the name of the currently logged-in user and provides access to the Log out button.
Chapter 3. Notifications in OpenShift AI
Red Hat OpenShift AI displays notifications when important events happen in the cluster.
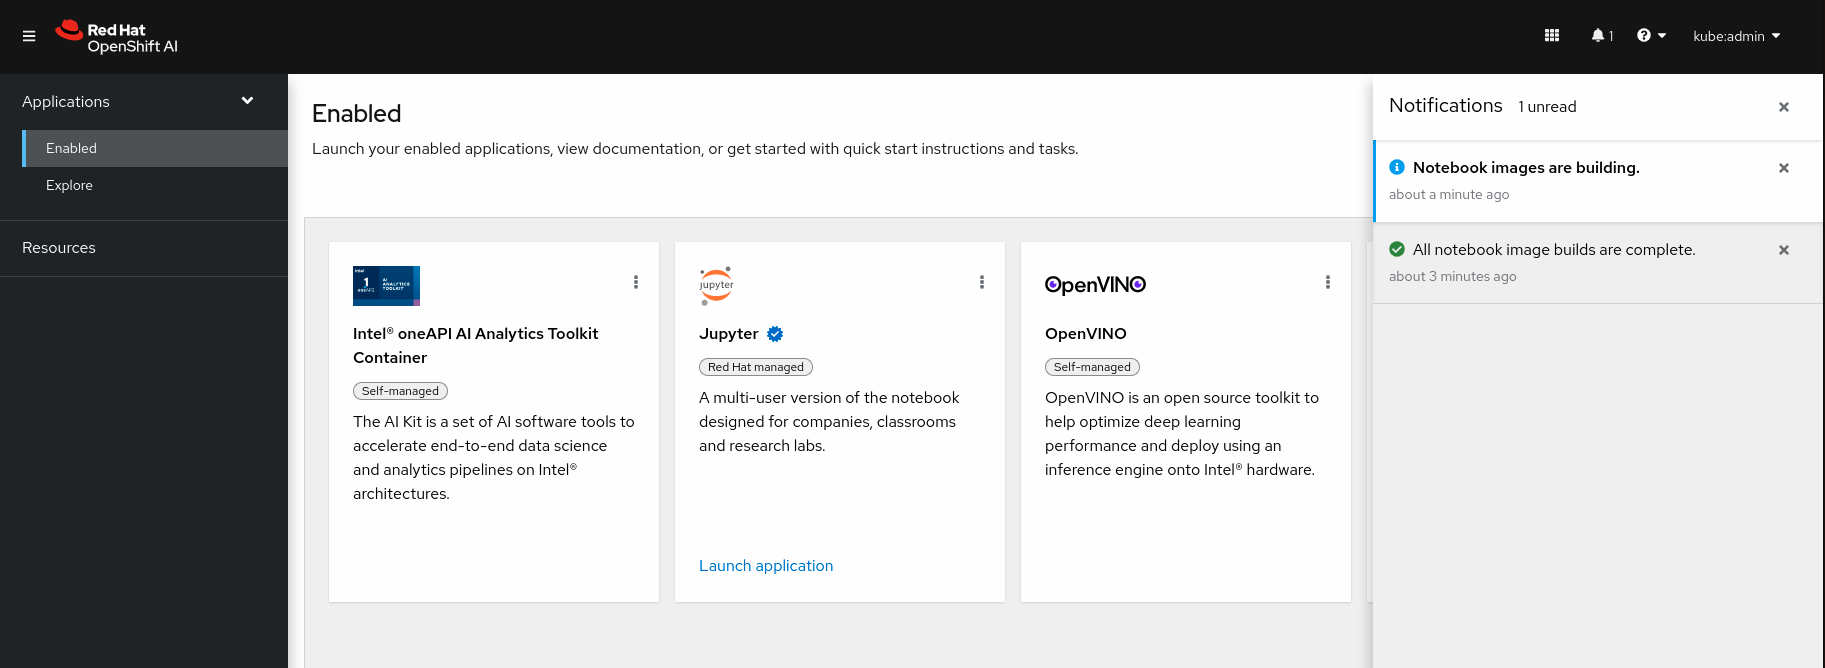
If you miss a notification message, click the Notifications button (
![]() ) to open the Notifications drawer and view unread messages.
) to open the Notifications drawer and view unread messages.
Figure 3.1. The Notifications drawer
Chapter 4. Creating a data science project
To start your data science work, create a data science project. Creating a project helps you organize your work in one place. You can also enhance your data science project by adding the following functionality:
- Workbenches
- Storage for your project’s cluster
- Data connections
- Data science pipelines
- Model servers
Prerequisites
- You have logged in to Red Hat OpenShift AI.
-
If you are using specialized OpenShift AI groups, you are part of the user group or admin group (for example,
rhoai-usersorrhoai-admins) in OpenShift.
Procedure
From the OpenShift AI dashboard, click Data Science Projects.
The Data Science Projects page opens.
Click Create data science project.
The Create a data science project dialog opens.
- Enter a name for your data science project.
- Optional: Edit the resource name for your data science project. The resource name must consist of lowercase alphanumeric characters, -, and must start and end with an alphanumeric character.
- Enter a description for your data science project.
Click Create.
A project details page opens. From this page, you can create workbenches, add cluster storage and data connections, import pipelines, and deploy models.
Verification
- The project that you created is displayed on the Data Science Projects page.
Chapter 5. Creating a project workbench
To examine and work with models in an isolated area, you can create a workbench. You can use this workbench to create a Jupyter notebook from an existing notebook container image to access its resources and properties. For data science projects that require data retention, you can add container storage to the workbench you are creating. If you require extra power for use with large datasets, you can assign accelerators to your workbench to optimize performance.
Prerequisites
- You have logged in to Red Hat OpenShift AI.
-
If you use specialized OpenShift AI groups, you are part of the user group or admin group (for example,
rhoai-usersorrhoai-admins) in OpenShift. - You have created a data science project that you can add a workbench to.
Procedure
From the OpenShift AI dashboard, click Data Science Projects.
The Data Science Projects page opens.
Click the name of the project that you want to add the workbench to.
A project details page opens.
- Click the Workbenches tab.
Click Create workbench.
The Create workbench page opens.
Configure the properties of the workbench you are creating.
- In the Name field, enter a name for your workbench.
- Optional: In the Description field, enter a description to define your workbench.
In the Notebook image section, complete the fields to specify the notebook image to use with your workbench.
- From the Image selection list, select a notebook image.
In the Deployment size section, specify the size of your deployment instance.
- From the Container size list, select a container size for your server.
- Optional: From the Accelerator list, select an accelerator.
- If you selected an accelerator in the preceding step, specify the number of accelerators to use.
- Optional: Select and specify values for any new environment variables.
Configure the storage for your OpenShift AI cluster.
- Select Create new persistent storage to create storage that is retained after you log out of OpenShift AI. Complete the relevant fields to define the storage.
- Select Use existing persistent storage to reuse existing storage and select the storage from the Persistent storage list.
To use a data connection, in the Data connections section, select the Use a data connection checkbox.
Create a new data connection as follows:
- Select Create new data connection.
- In the Name field, enter a unique name for the data connection.
- In the Access key field, enter the access key ID for the S3-compatible object storage provider.
- In the Secret key field, enter the secret access key for the S3-compatible object storage account that you specified.
- In the Endpoint field, enter the endpoint of your S3-compatible object storage bucket.
- In the Region field, enter the default region of your S3-compatible object storage account.
- In the Bucket field, enter the name of your S3-compatible object storage bucket.
Use an existing data connection as follows:
- Select Use existing data connection.
- From the Data connection list, select a data connection that you previously defined.
- Click Create workbench.
Verification
- The workbench that you created appears on the Workbenches tab for the project.
- Any cluster storage that you associated with the workbench during the creation process appears on the Cluster storage tab for the project.
- The Status column on the Workbenches tab displays a status of Starting when the workbench server is starting, and Running when the workbench has successfully started.
5.1. Launching Jupyter and starting a notebook server
Launch Jupyter and start a notebook server to start working with your notebooks. If you require extra power for use with large datasets, you can assign accelerators to your notebook server to optimize performance.
Prerequisites
- You have logged in to Red Hat OpenShift AI.
-
You know the names and values you want to use for any environment variables in your notebook server environment, for example,
AWS_SECRET_ACCESS_KEY. - If you want to work with a large data set, work with your administrator to proactively increase the storage capacity of your notebook server. If applicable, also consider assigning accelerators to your notebook server.
Procedure
- Locate the Jupyter tile on the Enabled applications page.
Click Launch application.
If you see an Access permission needed message, you are not in the default user group or the default administrator group for OpenShift AI. Ask your administrator to add you to the correct group by using Adding users.
If you have not previously authorized the
jupyter-nb-<username>service account to access your account, the Authorize Access page appears prompting you to provide authorization. Inspect the permissions selected by default, and click the Allow selected permissions button.If you credentials are accepted, the Notebook server control panel opens displaying the Start a notebook server page.
Start a notebook server.
This is not required if you have previously opened Jupyter.
- In the Notebook image section, select the notebook image to use for your server.
If the notebook image contains multiple versions, select the version of the notebook image from the Versions section.
NoteWhen a new version of a notebook image is released, the previous version remains available and supported on the cluster. This gives you time to migrate your work to the latest version of the notebook image.
- From the Container size list, select a suitable container size for your server.
- Optional: From the Accelerator list, select an accelerator.
If you selected an accelerator in the preceding step, specify the number of accelerators to use.
ImportantUsing accelerators is only supported with specific notebook images. For GPUs, only the PyTorch, TensorFlow, and CUDA notebook images are supported. For Habana Gaudi devices, only the HabanaAI notebook image is supported. In addition, you can only specify the number of accelerators required for your notebook server if accelerators are enabled on your cluster. To learn how to enable GPU support, see Enabling GPU support in OpenShift AI.
Optional: Select and specify values for any new Environment variables.
The interface stores these variables so that you only need to enter them once. Example variable names for common environment variables are automatically provided for frequently integrated environments and frameworks, such as Amazon Web Services (AWS).
ImportantSelect the Secret checkbox for variables with sensitive values that must remain private, such as passwords.
- Optional: Select the Start server in current tab checkbox if necessary.
Click Start server.
The Starting server progress indicator appears. Click Expand event log to view additional information about the server creation process. Depending on the deployment size and resources you requested, starting the server can take up to several minutes. Click Cancel to cancel the server creation.
After the server starts, you see one of the following behaviors:
- If you previously selected the Start server in current tab checkbox, the JupyterLab interface opens in the current tab of your web browser.
If you did not previously select the Start server in current tab checkbox, the Starting server dialog box prompts you to open the server in a new browser tab or in the current browser tab.
The JupyterLab interface opens according to your selection.
Verification
- The JupyterLab interface opens.
Additional resources
Troubleshooting
- If you see the "Unable to load notebook server configuration options" error message, contact your administrator so that they can review the logs associated with your Jupyter pod and determine further details about the problem.
5.2. Options for notebook server environments
When you start Jupyter for the first time, or after stopping your notebook server, you must select server options in the Start a notebook server wizard so that the software and variables that you expect are available on your server. This section explains the options available in the Start a notebook server wizard in detail.
The Start a notebook server page consists of the following sections:
- Notebook image
Specifies the container image that your notebook server is based on. Different notebook images have different packages installed by default. If the notebook image has multiple versions available, you can select the notebook image version to use from the Versions section.
NoteNotebook images are supported for a minimum of one year. Major updates to preconfigured notebook images occur about every six months. Therefore, two supported notebook image versions are typically available at any given time. Legacy notebook image versions, that is, not the two most recent versions, might still be available for selection. Legacy image versions include a label that indicates the image is out-of-date.
Versions 1.2 and 2023.1 of notebook images are no longer supported. Notebooks that are already running on versions 1.2 or 2023.1 of an image will continue to work normally, but they are not available to select for new users or notebooks.
If you want to use OpenShift AI with Data Science Pipelines (DSP) 2.0, you must use notebook image versions 2024.1 or later.
To use the latest package versions, Red Hat recommends that you use the most recently added notebook image.
After you start a notebook image, you can check which Python packages are installed on your notebook server and which version of the package you have by running the
piptool in a notebook cell.The following table shows the package versions used in the available notebook images.
Notebook images denoted with (Technology Preview) in this table are not supported with Red Hat production service level agreements (SLAs) and might not be functionally complete. Red Hat does not recommend using Technology Preview features in production. These features provide early access to upcoming product features, enabling customers to test functionality and provide feedback during the development process. For more information about the support scope of Red Hat Technology Preview features, see Technology Preview Features Support Scope.
Table 5.1. Notebook image options
| Image name | Image version | Preinstalled packages |
|---|---|---|
| CUDA | 2024.1 (Recommended) |
|
| 2023.2 |
| |
| 2023.1 (Deprecated) |
| |
| Minimal Python (default) | 2024.1 (Recommended) |
|
| 2023.2 |
| |
| 2023.1 (Deprecated) |
| |
| PyTorch | 2024.1 (Recommended) |
|
| 2023.2 |
| |
| 2023.1 (Deprecated) |
| |
| Standard Data Science | 2024.1 (Recommended) |
|
| 2023.2 |
| |
| 2023.1 (Deprecated) |
| |
| TensorFlow | 2024.1 (Recommended) |
|
| 2023.2 |
| |
| 2023.1 (Deprecated) |
| |
| TrustyAI | 2024.1 (Recommended) |
|
| 2023.2 |
| |
| 2023.1 (Deprecated) |
| |
| HabanaAI | 2024.1 (Recommended) |
|
| 2023.2 |
| |
| code-server (Technology Preview) | 2024.1 (Recommended) |
|
| 2023.2 |
|
- Deployment size
specifies the compute resources available on your notebook server.
Container size controls the number of CPUs, the amount of memory, and the minimum and maximum request capacity of the container.
Accelerators specifies the accelerators available on your notebook server.
Number of accelerators specifies the number of accelerators to use.
ImportantUsing accelerators is only supported with specific notebook images. For GPUs, only the PyTorch, TensorFlow, and CUDA notebook images are supported. For Habana Gaudi devices, only the HabanaAI notebook image is supported. In addition, you can only specify the number of accelerators required for your notebook server if accelerators are enabled on your cluster. To learn how to enable GPU support, see Enabling GPU support in OpenShift AI.
- Environment variables
Specifies the name and value of variables to be set on the notebook server. Setting environment variables during server startup means that you do not need to define them in the body of your notebooks, or with the Jupyter command line interface. Some recommended environment variables are shown in the table.
Table 5.2. Recommended environment variables
Environment variable option Recommended variable names AWS
-
AWS_ACCESS_KEY_IDspecifies your Access Key ID for Amazon Web Services. -
AWS_SECRET_ACCESS_KEYspecifies your Secret access key for the account specified inAWS_ACCESS_KEY_ID.
-
Additional resources
Chapter 6. Tutorials for data scientists
To help you get started quickly, you can access learning resources for Red Hat OpenShift AI and its supported applications.
The OpenShift AI tutorial: Fraud detection example provides step-by-step guidance for using RHOAI to develop and train an example model in Jupyter notebooks, deploy the model, integrate the model into a fraud detection application, and refine the model by using automated pipelines.
Additonal resources are available on the Resources tab of the Red Hat OpenShift AI user interface.
Table 6.1. Tutorials
| Resource Name | Description |
|---|---|
| Accelerating scientific workloads in Python with Numba | Watch a video about how to make your Python code run faster. |
| Building interactive visualizations and dashboards in Python | Explore a variety of data across multiple notebooks and learn how to deploy full dashboards and applications. |
| Building machine learning models with scikit-learn | Learn how to build machine learning models with scikit-learn for supervised learning, unsupervised learning, and classification problems. |
| Building a binary classification model | Train a model to predict if a customer is likely to subscribe to a bank promotion. |
| Choosing Python tools for data visualization | Use the PyViz.org website to help you decide on the best open source Python data visualization tools for you. |
| Exploring Anaconda for data science | Learn about Anaconda, a freemium open source distribution of the Python and R programming languages. |
| Getting started with Pachyderm concepts | Learn Pachyderm’s main concepts by creating pipelines that perform edge detection on a few images. |
| GPU Computing in Python with Numba | Learn how to create GPU accelerated functions using Numba. |
| Run a Python notebook to generate results in IBM Watson OpenScale | Run a Python notebook to create, train, and deploy a machine learning model. |
| Running an AutoAI experiment to build a model | Watch a video about building a binary classification model for a marketing campaign. |
| Training a regression model in Pachyderm | Learn how to create a sample housing data repository using a Pachyderm cluster to run experiments, analyze data, and set up regression. |
| Using Dask for parallel data analysis | Analyze medium-sized datasets in parallel locally using Dask, a parallel computing library that scales the existing Python ecosystem. |
| Using Jupyter notebooks in Watson Studio | Watch a video about working with Jupyter notebooks in Watson Studio. |
| Using Pandas for data analysis in Python | Learn how to use pandas, a data analysis library for the Python programming language. |
Table 6.2. Quick start guides
| Resource Name | Description |
|---|---|
| Creating a Jupyter notebook | Create a Jupyter notebook in JupyterLab. |
| Creating an Anaconda-enabled Jupyter notebook | Create an Anaconda-enabled Jupyter notebook and access Anaconda packages that are curated for security and compatibility. |
| Deploying a model with Watson Studio | Import a notebook in Watson Studio and use AutoAI to build and deploy a model. |
| Deploying a sample Python application using Flask and OpenShift | Deploy your data science model out of a Jupyter notebook and into a Flask application to use as a development sandbox. |
| Importing Pachyderm Beginner Tutorial Notebook | Load Pachyderm’s beginner tutorial notebook and learn about Pachyderm’s main concepts such as data repositories, pipelines, and using the pachctl CLI from your cells. |
| Querying data with Starburst Enterprise | Learn to query data using Starburst Enterprise from a Jupyter notebook. |
| Using the Intel® oneAPI AI Analytics Toolkit (AI Kit) Notebook | Run a data science notebook sample with the Intel® oneAPI AI Analytics Toolkit. |
| Using the OpenVINO toolkit | Quantize an ONNX computer vision model using the OpenVINO model optimizer and use the result for inference from a notebook. |
Table 6.3. How to guides
| Resource Name | Description |
|---|---|
| How to choose between notebook runtime environment options | Explore available options for configuring your notebook runtime environment. |
| How to clean, shape, and visualize data | Learn how to clean and shape tabular data using IBM Watson Studio data refinery. |
| How to create a connection to access data | Learn how to create connections to various data sources across the platform. |
| How to create a deployment space | Learn how to create a deployment space for machine learning. |
| How to create a notebook in Watson Studio | Learn how to create a basic Jupyter notebook in Watson Studio. |
| How to create a project in Watson Studio | Learn how to create an analytics project in Watson Studio. |
| How to create a project that integrates with Git | Learn how to add assets from a Git repository into a project. |
| How to install Python packages on your notebook server | Learn how to install additional Python packages on your notebook server. |
| How to load data into a Jupyter notebook | Learn how to integrate data sources into a Jupyter notebook by loading data. |
| How to serve a model using OpenVINO Model Server | Learn how to deploy optimized models with the OpenVINO Model Server using OpenVINO custom resources. |
| How to set up Watson OpenScale | Learn how to track and measure outcomes from models with OpenScale. |
| How to update notebook server settings | Learn how to update the settings or the notebook image on your notebook server. |
| How to use data from Amazon S3 buckets | Learn how to connect to data in S3 Storage using environment variables. |
| How to view installed packages on your notebook server | Learn how to see which packages are installed on your running notebook server. |
| Installation Requirements for Starburst Enterprise | Explore hardware and software requirements for installing Starburst Enterprise on Kubernetes. |
| Overview of Starburst Enterprise on OpenShift | Explore the available options for deploying Starburst on OpenShift. |
| Starburst Enterprise Deployment Guide for OpenShift | Learn how to deploy Starburst Enterprise on OpenShift. |
6.1. Accessing tutorials
You can access learning resources for Red Hat OpenShift AI and supported applications.
Prerequisites
- Ensure that you have logged in to Red Hat OpenShift AI.
- You have logged in to the OpenShift Container Platform web console.
Procedure
On the Red Hat OpenShift AI home page, click Resources.
The Resources page opens.
- Click Access tutorial on the relevant tile.
Verification
- You can view and access the learning resources for Red Hat OpenShift AI and supported applications.
Additional resources
Chapter 7. Configuring your IDE
You can configure some notebook workbenches to get the most out of your data science work.
7.1. Configuring your code-server workbench
You can use extensions to streamline your workflow, add new languages, themes, debuggers, and connect to additional services.
For more information on code-server, see code-server in GitHub.
The code-server notebook image is currently available in Red Hat OpenShift AI 2-latest as a Technology Preview feature. Technology Preview features are not supported with Red Hat production service level agreements (SLAs) and might not be functionally complete. Red Hat does not recommend using them in production. These features provide early access to upcoming product features, enabling customers to test functionality and provide feedback during the development process.
For more information about the support scope of Red Hat Technology Preview features, see Technology Preview Features Support Scope.
7.1.1. Installing extensions with code-server
Prerequisites
- You have logged in to Red Hat OpenShift AI.
-
If you use specialized OpenShift AI groups, you are part of the user group or admin group (for example,
rhoai-usersorrhoai-admins) in OpenShift. - You have created a data science project that has a code-server workbench.
Procedure
From the OpenShift AI dashboard, click Data Science Projects.
The Data Science Projects page opens.
Click the name of the project containing the code-server workbench you want to start.
A project details page opens.
- Click the Workbenches tab.
Click the toggle in the Status column for the relevant workbench to start a workbench that is not running.
The status of the workbench that you started changes from Stopped to Running.
- After the workbench has started, click Open to open the workbench notebook.
-
In the Activity Bar, click the Extensions icon. (
 )
)
- Search for the name of the extension you want to install.
Click Install to add the extension to your code-server environment.
The extension you installed appears in the Browser - Installed list on the Extensions panel.
7.1.1.1. Extensions
See Open VSX Registry for available third-party extensions that you can consider installing.
Chapter 8. Enabling services connected to OpenShift AI
You must enable SaaS-based services, such as Anaconda Professional Edition, before using them with Red Hat OpenShift AI. On-cluster services are enabled automatically.
Typically, you can install services, or enable services connected to OpenShift AI using one of the following methods:
- Enabling the service from the Explore page on the OpenShift AI dashboard, as documented in the following procedure.
Installing the Operator for the service from OperatorHub. OperatorHub is a web console for cluster administrators to discover and select Operators to install on their cluster. It is deployed by default in OpenShift Container Platform (Installing from OperatorHub using the web console).
NoteDeployments containing Operators installed from OperatorHub may not be fully supported by Red Hat.
- Installing the Operator for the service from Red Hat Marketplace (Install Operators).
- Installing the service as an Operator to your OpenShift Container Platform cluster (Adding Operators to a cluster).
For some services (such as Jupyter), the service endpoint is available on the tile for the service on the Enabled page of OpenShift AI. Certain services cannot be accessed directly from their tiles, for example, OpenVINO and Anaconda provide notebook images for use in Jupyter and do not provide an endpoint link from their tile. Additionally, it may be useful to store these endpoint URLs as environment variables for easy reference in a notebook environment.
Some independent software vendor (ISV) applications must be installed in specific namespaces. In these cases, the tile for the application in the OpenShift AI dashboard specifies the required namespace.
To help you get started quickly, you can access the service’s learning resources and documentation on the Resources page, or by clicking the relevant link on the tile for the service on the Enabled page.
Prerequisites
- You have logged in to OpenShift AI.
- Your administrator has installed or configured the service on your OpenShift Container Platform cluster.
Procedure
On the OpenShift AI home page, click Explore.
The Explore page opens.
- Click the tile of the service that you want to enable.
- Click Enable on the drawer for the service.
- If prompted, enter the service’s key and click Connect.
- Click Enable to confirm that you are enabling the service.
Verification
- The service that you enabled appears on the Enabled page.
- The service endpoint is displayed on the tile for the service on the Enabled page.
Chapter 9. Disabling applications connected to OpenShift AI
You can disable applications and components so that they do not appear on the OpenShift AI dashboard when you no longer want to use them, for example, when data scientists no longer use an application or when the application license expires.
Disabling unused applications allows your data scientists to manually remove these application tiles from their OpenShift AI dashboard so that they can focus on the applications that they are most likely to use. See Removing disabled applications from OpenShift AI for more information about manually removing application tiles.
Do not follow this procedure when disabling the following applications:
- Anaconda Professional Edition. You cannot manually disable Anaconda Professional Edition. It is automatically disabled only when its license expires.
Prerequisites
- You have logged in to the OpenShift Container Platform web console.
-
You are part of the
cluster-adminsuser group in OpenShift Container Platform. - You have installed or configured the service on your OpenShift Container Platform cluster.
- The application or component that you want to disable is enabled and appears on the Enabled page.
Procedure
- In the OpenShift Container Platform web console, switch to the Administrator perspective.
-
Switch to the
redhat-ods-applicationsproject. - Click Operators → Installed Operators.
- Click on the Operator that you want to uninstall. You can enter a keyword into the Filter by name field to help you find the Operator faster.
Delete any Operator resources or instances by using the tabs in the Operator interface.
During installation, some Operators require the administrator to create resources or start process instances using tabs in the Operator interface. These must be deleted before the Operator can uninstall correctly.
On the Operator Details page, click the Actions drop-down menu and select Uninstall Operator.
An Uninstall Operator? dialog box is displayed.
- Select Uninstall to uninstall the Operator, Operator deployments, and pods. After this is complete, the Operator stops running and no longer receives updates.
Removing an Operator does not remove any custom resource definitions or managed resources for the Operator. Custom resource definitions and managed resources still exist and must be cleaned up manually. Any applications deployed by your Operator and any configured off-cluster resources continue to run and must be cleaned up manually.
Verification
- The Operator is uninstalled from its target clusters.
- The Operator no longer appears on the Installed Operators page.
-
The disabled application is no longer available for your data scientists to use, and is marked as
Disabledon the Enabled page of the OpenShift AI dashboard. This action may take a few minutes to occur following the removal of the Operator.
9.1. Removing disabled applications from OpenShift AI
After your administrator has disabled your unused applications, you can manually remove them from the Red Hat OpenShift AI dashboard. Disabling and removing unused applications allows you to focus on the applications that you are most likely to use.
Prerequisites
- Ensure that you have logged in to Red Hat OpenShift AI.
- You have logged in to the OpenShift Container Platform web console.
- Your administrator has previously disabled the application that you want to remove.
Procedure
In the OpenShift AI interface, click Enabled.
The Enabled page opens. Disabled applications are denoted with
Disabledon the tile for the application.- Click Disabled on the tile for the application that you want to remove.
- Click the link to remove the application tile.
Verification
- The tile for the disabled application no longer appears on the Enabled page.
Chapter 10. Support requirements and limitations
Review this section to understand the requirements for Red Hat support and any limitations to Red Hat support of Red Hat OpenShift AI.
10.1. Supported browsers
Red Hat OpenShift AI supports the latest version of the following browsers:
- Google Chrome
- Mozilla Firefox
- Safari
10.2. Supported services
Red Hat OpenShift AI supports the following services:
Table 10.1. Supported services
| Service Name | Description |
|---|---|
| Anaconda Professional | Anaconda Professional is a popular open source package distribution and management experience that is optimized for commercial use. |
| IBM Watson Studio | IBM Watson Studio is a platform for embedding AI and machine learning into your business and creating custom models with your own data. |
| Intel® oneAPI AI Analytics Toolkit Container | The AI Kit is a set of AI software tools to accelerate end-to-end data science and analytics pipelines on Intel® architectures. |
| Jupyter | Jupyter is a multi-user version of the notebook designed for companies, classrooms, and research labs. Important While every effort is made to make Red Hat OpenShift AI resilient to OpenShift node failure, upgrades, and similarly disruptive operations, individual users' notebook environments can be interrupted during these events. If an OpenShift node restarts or becomes unavailable, any user notebook environment on that node is restarted on a different node. When this occurs, any ongoing process executing in the user’s notebook environment is interrupted, and the user needs to re-execute it when their environment becomes available again. Due to this limitation, Red Hat recommends that processes for which interruption is unacceptable are not executed in the Jupyter notebook server environment on OpenShift AI. |
| OpenVINO | OpenVINO is an open source toolkit to help optimize deep learning performance and deploy using an inference engine onto Intel hardware. |
| Pachyderm | Use Pachyderm’s data versioning, pipeline and lineage capabilities to automate the machine learning life cycle and optimize machine learning operations. Note
The |
| Starburst Enterprise | Starburst Enterprise platform (SEP) is the commercial distribution of Trino, which is an open-source, Massively Parallel Processing (MPP) ANSI SQL query engine. Starburst simplifies data access for your Red Hat OpenShift AI workloads by providing fast access to all of your data. Starburst does this by connecting directly to each data source and pulling the data back into memory for processing, alleviating the need to copy or move the data into a single location first. |
10.3. Supported packages
The latest supported notebook server images in Red Hat OpenShift AI are installed with Python by default. See the table in Options for notebook server environments for a complete list of packages and versions included in these images.
You can install packages that are compatible with the supported version of Python on any notebook server that has the binaries required by that package. If the required binaries are not included on the notebook server image you want to use, contact Red Hat Support to request that the binary be considered for inclusion.
You can install packages on a temporary basis by using the pip install command. You can also provide a list of packages to the pip install command using a requirements.txt file. See Installing Python packages on your notebook server for more information.
You must re-install these packages each time you start your notebook server.
You can remove packages by using the pip uninstall command.
Chapter 11. Common questions
In addition to documentation, Red Hat provides a rich set of learning resources for OpenShift AI and supported applications.
On the Resources page of the OpenShift AI dashboard, you can use the category links to filter the resources for various stages of your data science workflow. For example, click the Model serving category to display resources that describe various methods of deploying models. Click All items to show the resources for all categories.
For the selected category, you can apply additional options to filter the available resources. For example, you can filter by type, such as how-to articles, quick starts, tutorials; these resources provide the answers to common questions.
Chapter 12. Troubleshooting common problems in Jupyter for administrators
If your users are experiencing errors in Red Hat OpenShift AI relating to Jupyter, their notebooks, or their notebook server, read this section to understand what could be causing the problem, and how to resolve the problem.
If you cannot see the problem here or in the release notes, contact Red Hat Support.
12.1. A user receives a 404: Page not found error when logging in to Jupyter
Problem
If you have configured specialized user groups for OpenShift AI, the user name might not be added to the default user group for OpenShift AI.
Diagnosis
Check whether the user is part of the default user group.
Find the names of groups allowed access to Jupyter.
- Log in to the OpenShift Container Platform web console.
- Click User Management → Groups.
Click the name of your user group, for example,
rhoai-users.The Group details page for that group appears.
- Click the Details tab for the group and confirm that the Users section for the relevant group contains the users who have permission to access Jupyter.
Resolution
- If the user is not added to any of the groups with permission access to Jupyter, follow Adding users to add them.
- If the user is already added to a group with permission to access Jupyter, contact Red Hat Support.
12.2. A user’s notebook server does not start
Problem
The OpenShift Container Platform cluster that hosts the user’s notebook server might not have access to enough resources, or the Jupyter pod may have failed.
Diagnosis
- Log in to the OpenShift Container Platform web console.
Delete and restart the notebook server pod for this user.
-
Click Workloads → Pods and set the Project to
rhods-notebooks. Search for the notebook server pod that belongs to this user, for example,
jupyter-nb-<username>-*.If the notebook server pod exists, an intermittent failure may have occurred in the notebook server pod.
If the notebook server pod for the user does not exist, continue with diagnosis.
-
Click Workloads → Pods and set the Project to
Check the resources currently available in the OpenShift Container Platform cluster against the resources required by the selected notebook server image.
If worker nodes with sufficient CPU and RAM are available for scheduling in the cluster, continue with diagnosis.
- Check the state of the Jupyter pod.
Resolution
If there was an intermittent failure of the notebook server pod:
- Delete the notebook server pod that belongs to the user.
- Ask the user to start their notebook server again.
- If the notebook server does not have sufficient resources to run the selected notebook server image, either add more resources to the OpenShift Container Platform cluster, or choose a smaller image size.
If the Jupyter pod is in a FAILED state:
-
Retrieve the logs for the
jupyter-nb-*pod and send them to Red Hat Support for further evaluation. -
Delete the
jupyter-nb-*pod.
-
Retrieve the logs for the
- If none of the previous resolutions apply, contact Red Hat Support.
12.3. The user receives a database or disk is full error or a no space left on device error when they run notebook cells
Problem
The user might have run out of storage space on their notebook server.
Diagnosis
Log in to Jupyter and start the notebook server that belongs to the user having problems. If the notebook server does not start, follow these steps to check whether the user has run out of storage space:
- Log in to the OpenShift Container Platform web console.
-
Click Workloads → Pods and set the Project to
rhods-notebooks. -
Click the notebook server pod that belongs to this user, for example,
jupyter-nb-<idp>-<username>-*. Click Logs. The user has exceeded their available capacity if you see lines similar to the following:
Unexpected error while saving file: XXXX database or disk is full
Resolution
- Increase the user’s available storage by expanding their persistent volume: Expanding persistent volumes
-
Work with the user to identify files that can be deleted from the
/opt/app-root/srcdirectory on their notebook server to free up their existing storage space.
When you delete files using the JupyterLab file explorer, the files move to the hidden /opt/app-root/src/.local/share/Trash/files folder in the persistent storage for the notebook. To free up storage space for notebooks, you must permanently delete these files.
Chapter 13. Troubleshooting common problems in Jupyter for users
If you are seeing errors in Red Hat OpenShift AI related to Jupyter, your notebooks, or your notebook server, read this section to understand what could be causing the problem.
If you cannot see your problem here or in the release notes, contact Red Hat Support.
13.1. I see a 403: Forbidden error when I log in to Jupyter
Problem
If your administrator has configured specialized user groups for OpenShift AI, your user name might not be added to the default user group or the default administrator group for OpenShift AI.
Resolution
Contact your administrator so that they can add you to the correct group/s.
13.2. My notebook server does not start
Problem
The OpenShift Container Platform cluster that hosts your notebook server might not have access to enough resources, or the Jupyter pod may have failed.
Resolution
Check the logs in the Events section in OpenShift for error messages associated with the problem. For example:
Server requested
2021-10-28T13:31:29.830991Z [Warning] 0/7 nodes are available: 2 Insufficient memory,
2 node(s) had taint {node-role.kubernetes.io/infra: }, that the pod didn't tolerate, 3 node(s) had taint {node-role.kubernetes.io/master: },
that the pod didn't tolerate.
Contact your administrator with details of any relevant error messages so that they can perform further checks.
13.3. I see a database or disk is full error or a no space left on device error when I run my notebook cells
Problem
You might have run out of storage space on your notebook server.
Resolution
Contact your administrator so that they can perform further checks.