-
Language:
English
-
Language:
English
Deploying Red Hat Hyperconverged Infrastructure for Virtualization on a single node
Create a hyperconverged configuration with a single server
Laura Bailey
lbailey@redhat.comAbstract
Chapter 1. Workflow for deploying a single hyperconverged host
- Verify that your planned deployment meets Support Requirements, with exceptions described in Chapter 2, Additional requirements for single node deployments.
- Install the virtualization host machine.
- Browse to the Cockpit UI and deploy a single hyperconverged node.
- Browse to the Red Hat Virtualization Administration Console and configure Red Hat Gluster Storage as a Red Hat Virtualization storage domain.
Chapter 2. Additional requirements for single node deployments
Red Hat Hyperconverged Infrastructure for Virtualization is supported for deployment on a single node provided that all Support Requirements are met, with the following additions and exceptions.
A single node deployment requires a physical machine with:
- 1 Network Interface Controller
- at least 12 cores
- at least 64GB RAM
- at most 48TB storage
Single node deployments cannot be scaled, and are not highly available.
Chapter 3. Install the virtualization host
Follow the instructions in the Red Hat Virtualization Installation Guide to install either a Red Hat Virtualization host or a Red Hat Enterprise Linux host.
Chapter 4. Configuring a single node RHHI for Virtualization deployment
4.1. Configuring Red Hat Gluster Storage on a single node
Ensure that disks specified as part of this deployment process do not have any partitions or labels.
Log into the Cockpit UI
Browse to the Cockpit management interface of the first virtualization host, for example, https://node1.example.com:9090/, and log in with the credentials you created in Chapter 3, Install the virtualization host.
Start the deployment wizard
Click Virtualization → Hosted Engine and click Start underneath Hyperconverged.
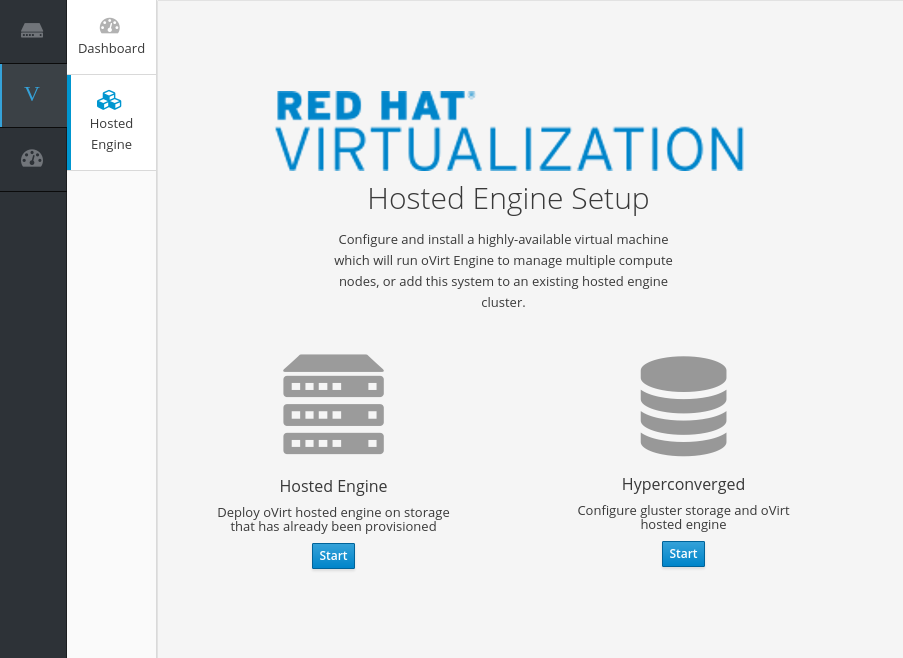
The Gluster Configuration window opens.
Click the Run Gluster Wizard button.

The Gluster Deployment window opens in single node mode.
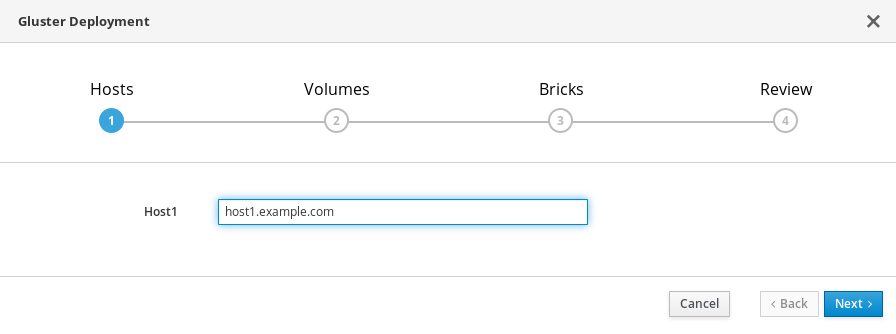
Specify storage host
Specify the back-end FQDN on the storage network of the virtualization host and click Next.
Specify volumes
Specify the volumes to create.
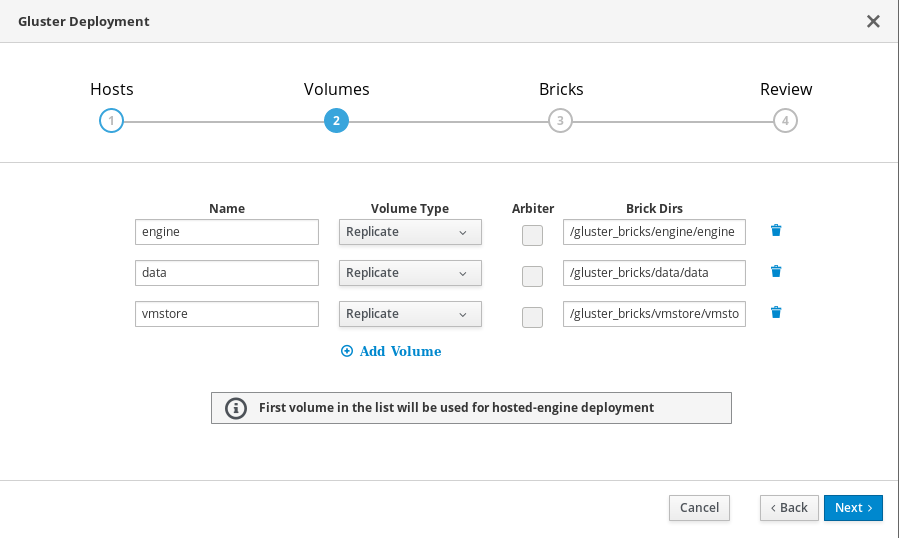
- Name
- Specify the name of the volume to be created.
- Volume Type
Specify a Distribute volume type. Only distributed volumes are supported for single node deployments.
ImportantThis step is affected by a known issue, BZ#1641483. It is not currently possible to select Distribute. Instead, select Replicated. The volume created is a single-brick distributed volume, which is correct for single-node RHHI for Virtualization deployments.
- Brick Dirs
- The directory that contains this volume’s bricks.
Specify bricks
Specify the bricks to create.
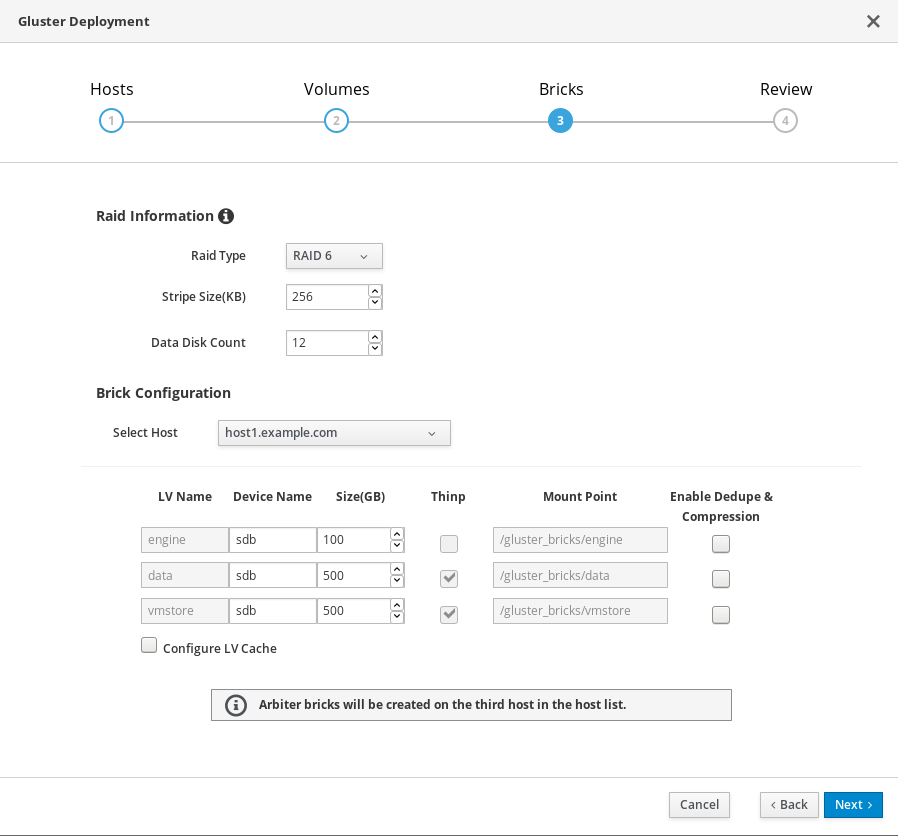
- RAID
- Specify the RAID configuration to use. This should match the RAID configuration of your host. Supported values are raid5, raid6, and jbod. Setting this option ensures that your storage is correctly tuned for your RAID configuration.
- Stripe Size
- Specify the RAID stripe size in KB. Do not enter units, only the number. This can be ignored for jbod configurations.
- Disk Count
- Specify the number of data disks in a RAID volume. This can be ignored for jbod configurations.
- LV Name
- Specify the name of the logical volume to be created.
- Device
- Specify the raw device you want to use. Red Hat recommends an unpartitioned device.
- Size
- Specify the size of the logical volume to create in GB. Do not enter units, only the number.
- Mount Point
- Specify the mount point for the logical volume. This should be inside the brick directory that you specified on the previous page of the wizard.
- Thinp
- Specify whether to provision the volume thinly or not. Note that thick provisioning is recommended for the engine volume. Do not use Enable Dedupe & Compression at the same time as this option.
- Enable Dedupe & Compression
- Specify whether to provision the volume using VDO for compression and deduplication at deployment time. Do not use Thinp at the same time as this option.
- Logical Size (GB)
- Specify the logical size of the VDO volume. This can be up to 10 times the size of the physical volume, with an absolute maximum logical size of 4 PB.
Review and edit configuration
Review the contents of the generated configuration file and click Edit to modify the file, and Save to keep your changes.
Click Deploy when you are satisfied with the configuration file.

Wait for deployment to complete
You can watch the deployment process in the text field as the gdeploy process runs using the generated configuration file.
The window displays Successfully deployed gluster when complete.
Click Continue to Hosted Engine Deployment and continue the deployment process with the instructions in Section 4.2, “Deploy the Hosted Engine on a single node using the Cockpit UI”.
If deployment fails, click the Redeploy button. This returns you to the Review and edit configuration tab so that you can correct any issues in the generated configuration file before reattempting deployment.
It may be necessary to clean up previous deployment attempts before you try again. Follow the steps in Appendix A, Cleaning up automated Red Hat Gluster Storage deployment errors to clean up previous deployment attempts.
4.2. Deploy the Hosted Engine on a single node using the Cockpit UI
This section shows you how to deploy the Hosted Engine on a single node using the Cockpit UI. Following this process results in Red Hat Virtualization Manager running in a virtual machine on your node, and managing that virtual machine. It also configures a Default cluster consisting only of that node, and enables Red Hat Gluster Storage functionality and the virtual-host tuned performance profile for the cluster of one.
Prerequisites
- This procedure assumes you have continued directly from the end of Configure Red Hat Gluster Storage for Hosted Engine using the Cockpit UI
Gather the information you need for Hosted Engine deployment
Have the following information ready before you start the deployment process.
- IP address for a pingable gateway to the virtualization host
- IP address of the front-end management network
- Fully-qualified domain name (FQDN) for the Hosted Engine virtual machine
- MAC address that resolves to the static FQDN and IP address of the Hosted Engine
Procedure
Specify virtual machine details

Enter the following details:
- Engine VM FQDN
- The fully qualified domain name to be used for the Hosted Engine virtual machine.
- MAC Address
- The MAC address associated with the FQDN to be used for the Hosted Engine virtual machine.
- Root password
- The root password to be used for the Hosted Engine virtual machine.
- Click Next.
Specify virtualization management details
Enter the password to be used by the
adminaccount in Red Hat Virtualization Manager. You can also specify notification behaviour here.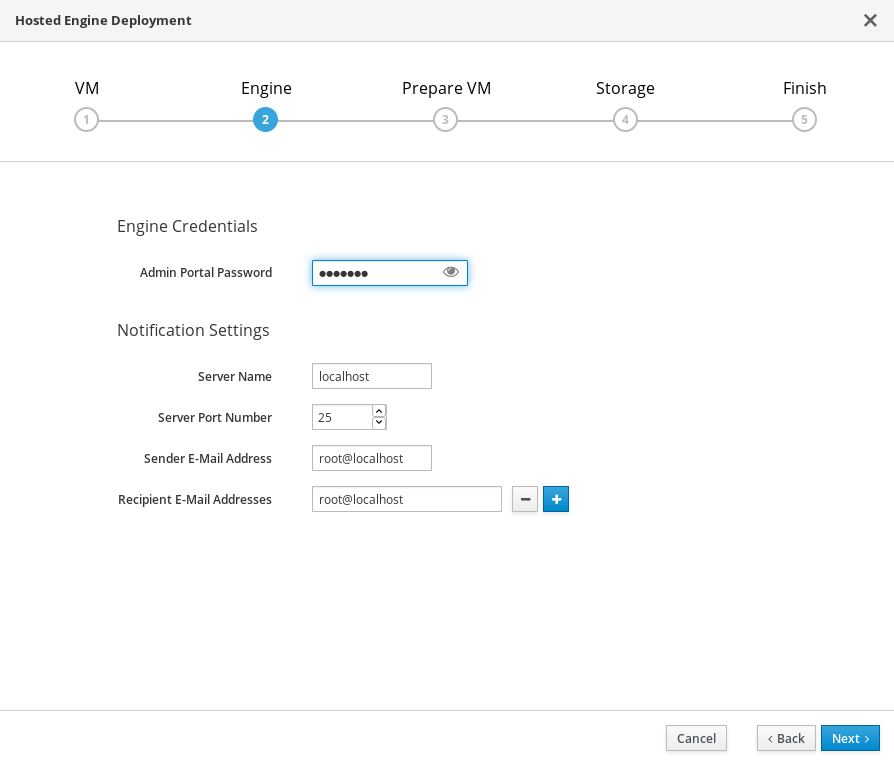
- Click Next.
Review virtual machine configuration
Ensure that the details listed on this tab are correct. Click Back to correct any incorrect information.
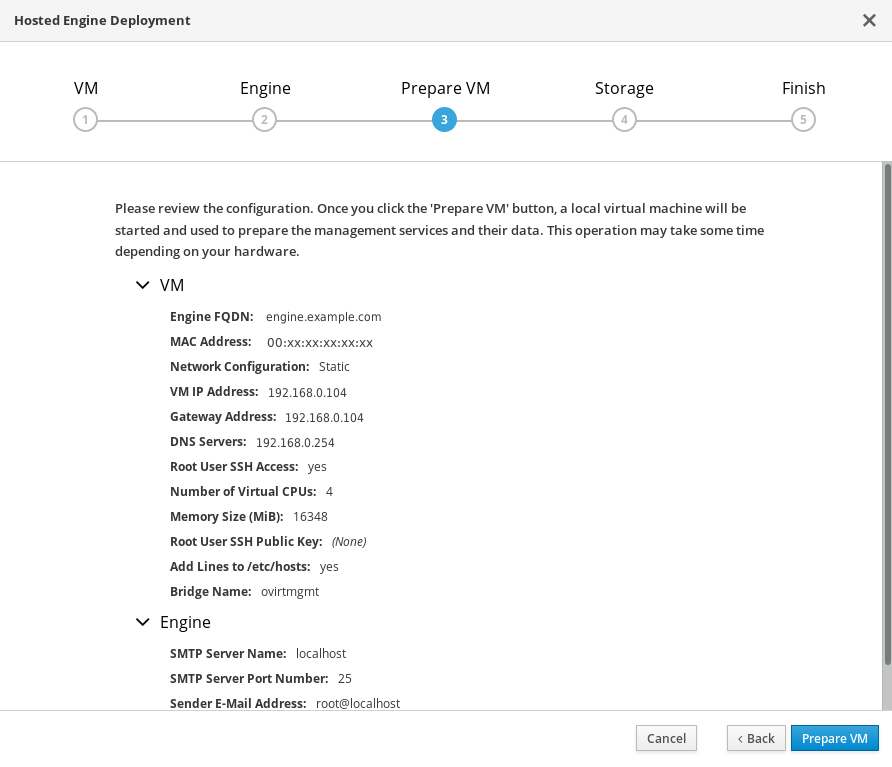
Click Prepare VM.
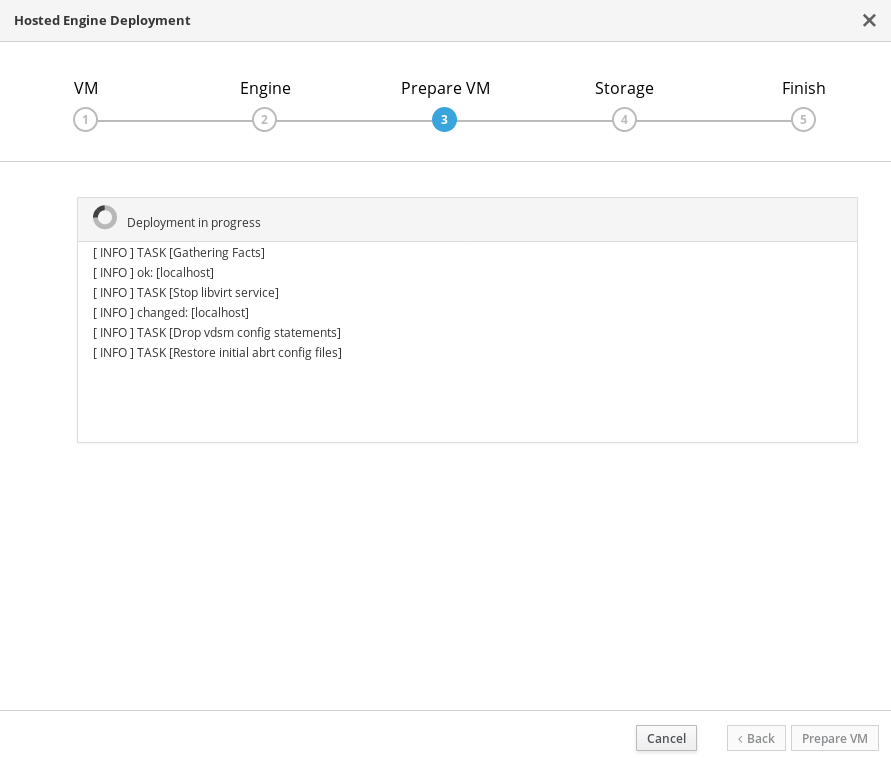
Wait for virtual machine preparation to complete.
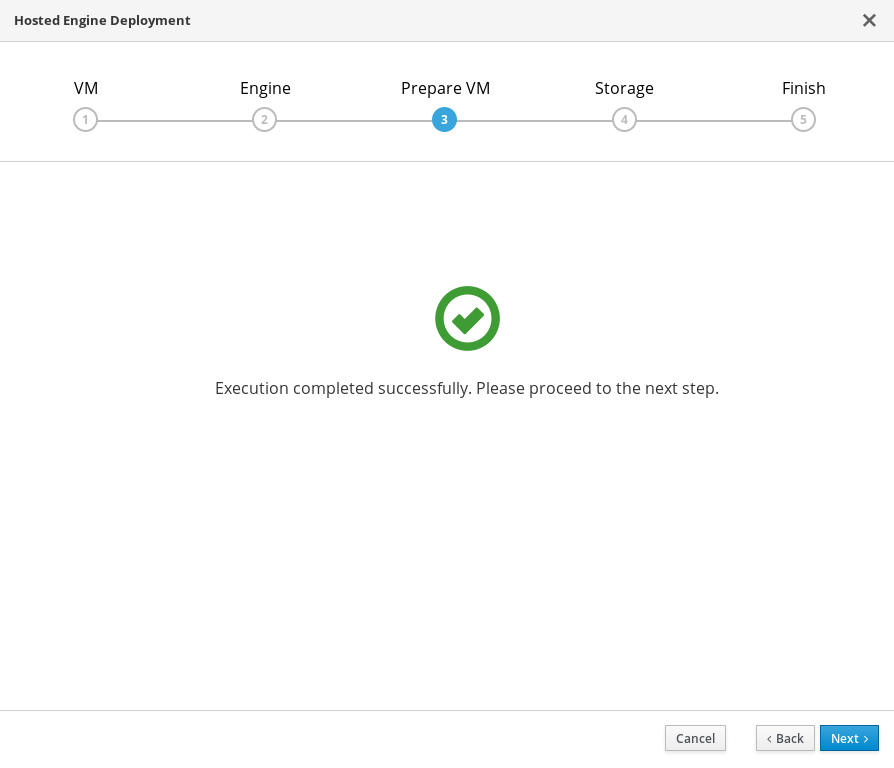
If preparation does not occur successfully, see Viewing Hosted Engine deployment errors.
- Click Next.
Specify storage for the Hosted Engine virtual machine
Specify the back-end address and location of the
enginevolume.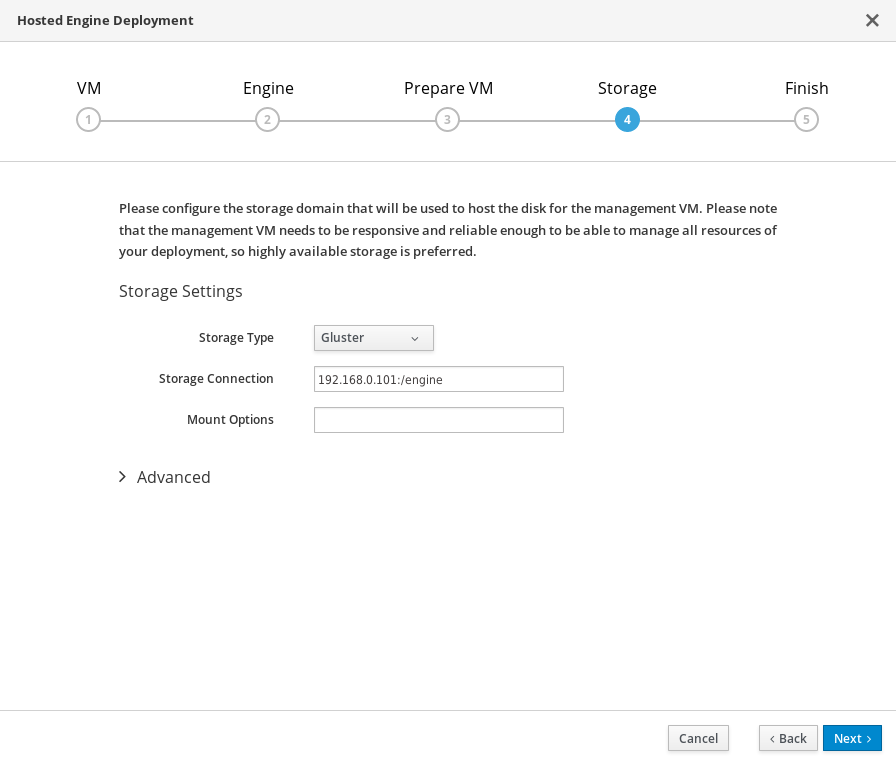
- Click Next.
Finalize Hosted Engine deployment
Review your deployment details and verify that they are correct.
NoteThe responses you provided during configuration are saved to an answer file to help you reinstall the hosted engine if necessary. The answer file is created at
/etc/ovirt-hosted-engine/answers.confby default. This file should not be modified manually without assistance from Red Hat Support.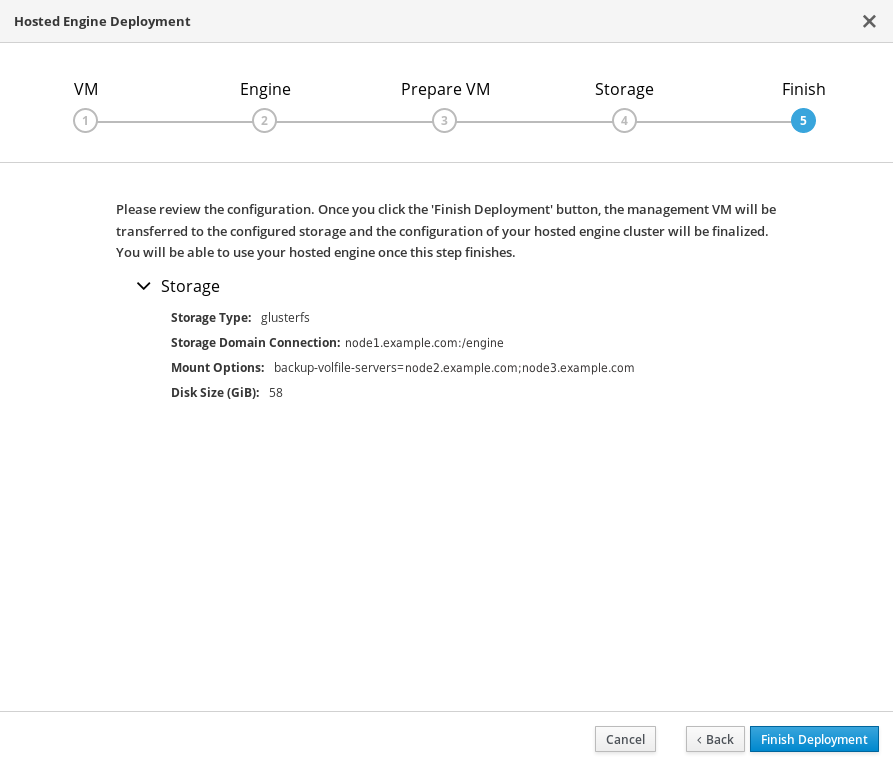
- Click Finish Deployment.
Wait for deployment to complete
This takes up to 30 minutes.
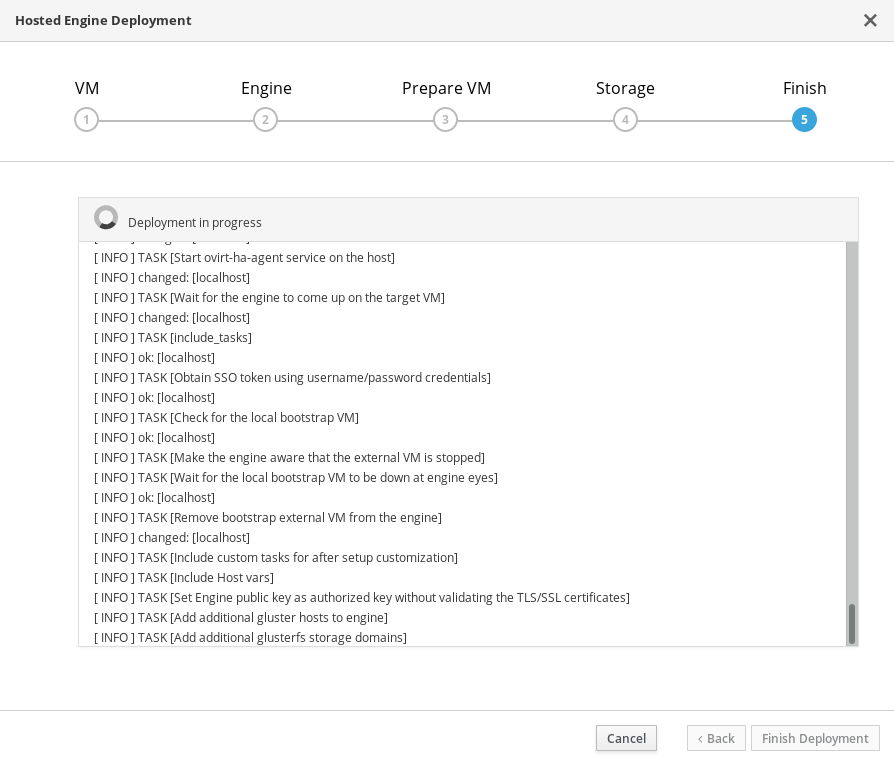
The window displays the following when complete.
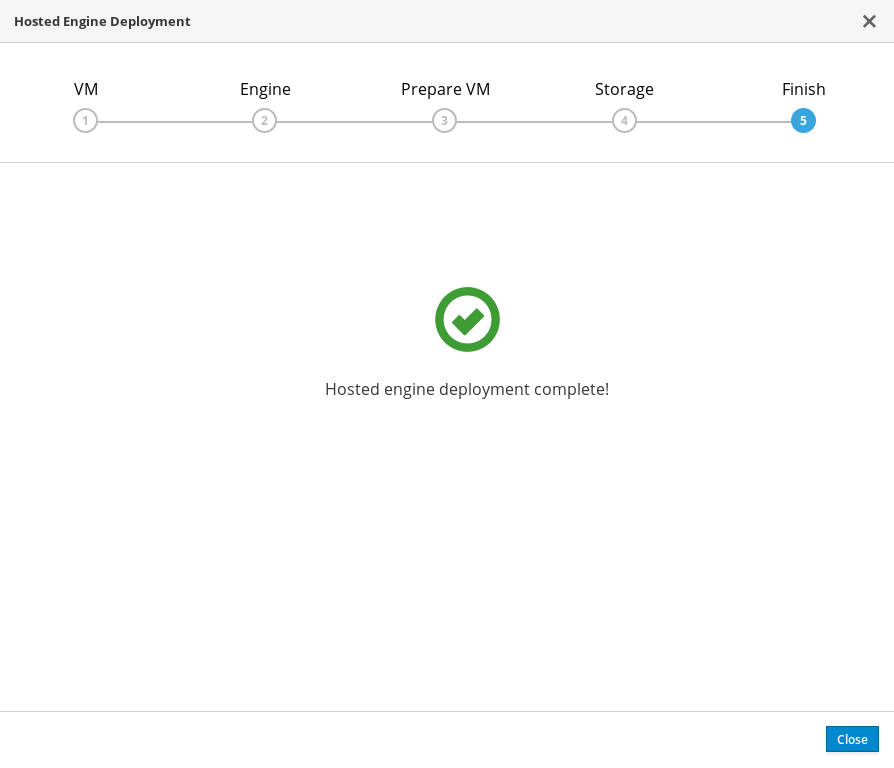 Important
If deployment does not complete successfully, see Viewing Hosted Engine deployment errors.
Click Close.
Verify hosted engine deployment
Browse to the engine user interface (for example, http://engine.example.com/ovirt-engine) and verify that you can log in using the administrative credentials you configured earlier. Click Dashboard and look for your hosts, storage domains, and virtual machines.

Chapter 5. Configure Red Hat Gluster Storage as a Red Hat Virtualization storage domain
5.1. Create the logical network for gluster traffic
Log in to the engine
Browse to the engine user interface (for example, http://engine.example.com/ovirt-engine) and log in using the administrative credentials you configured in Section 4.2, “Deploy the Hosted Engine on a single node using the Cockpit UI”.
Create a logical network for gluster traffic
- Click the Networks tab and then click New. The New Logical Network wizard appears.
- On the General tab of the wizard, provide a Name for the new logical network, and uncheck the VM Network checkbox.
- On the Cluster tab of the wizard, uncheck the Required checkbox.
- Click OK to create the new logical network.
Enable the new logical network for gluster
- Click the Networks tab and select the new logical network.
- Click the Clusters subtab and then click Manage Network. The Manage Network dialogue appears.
- In the Manage Network dialogue, check the Migration Network and Gluster Network checkboxes.
- Click OK to save.
Attach the gluster network to the host
- Click the Hosts tab and select the host.
- Click the Network Interfaces subtab and then click Setup Host Networks.
- Drag and drop the newly created network to the correct interface.
- Ensure that the Verify connectivity checkbox is checked.
- Ensure that the Save network configuration checkbox is checked.
- Click OK to save.
Verify the health of the network
Click the Hosts tab and select the host. Click the Network Interfaces subtab and check the state of the host’s network.
If the network interface enters an "Out of sync" state or does not have an IPv4 Address, click the Management tab that corresponds to the host and click Refresh Capabilities.
5.2. Create storage domains
The hosted engine storage domain is imported automatically, but other storage domains must be added to be used.
- Click the Storage tab and then click New Domain.
- Select GlusterFS as the Storage Type and provide a Name for the domain.
- Check the Use managed gluster volume option and select the volume to use.
- Click OK to save.
Chapter 6. Verify your deployment
After deployment is complete, verify that your deployment has completed successfully.
Browse to the engine user interface, for example, http://engine.example.com/ovirt-engine.
Administration Console Login
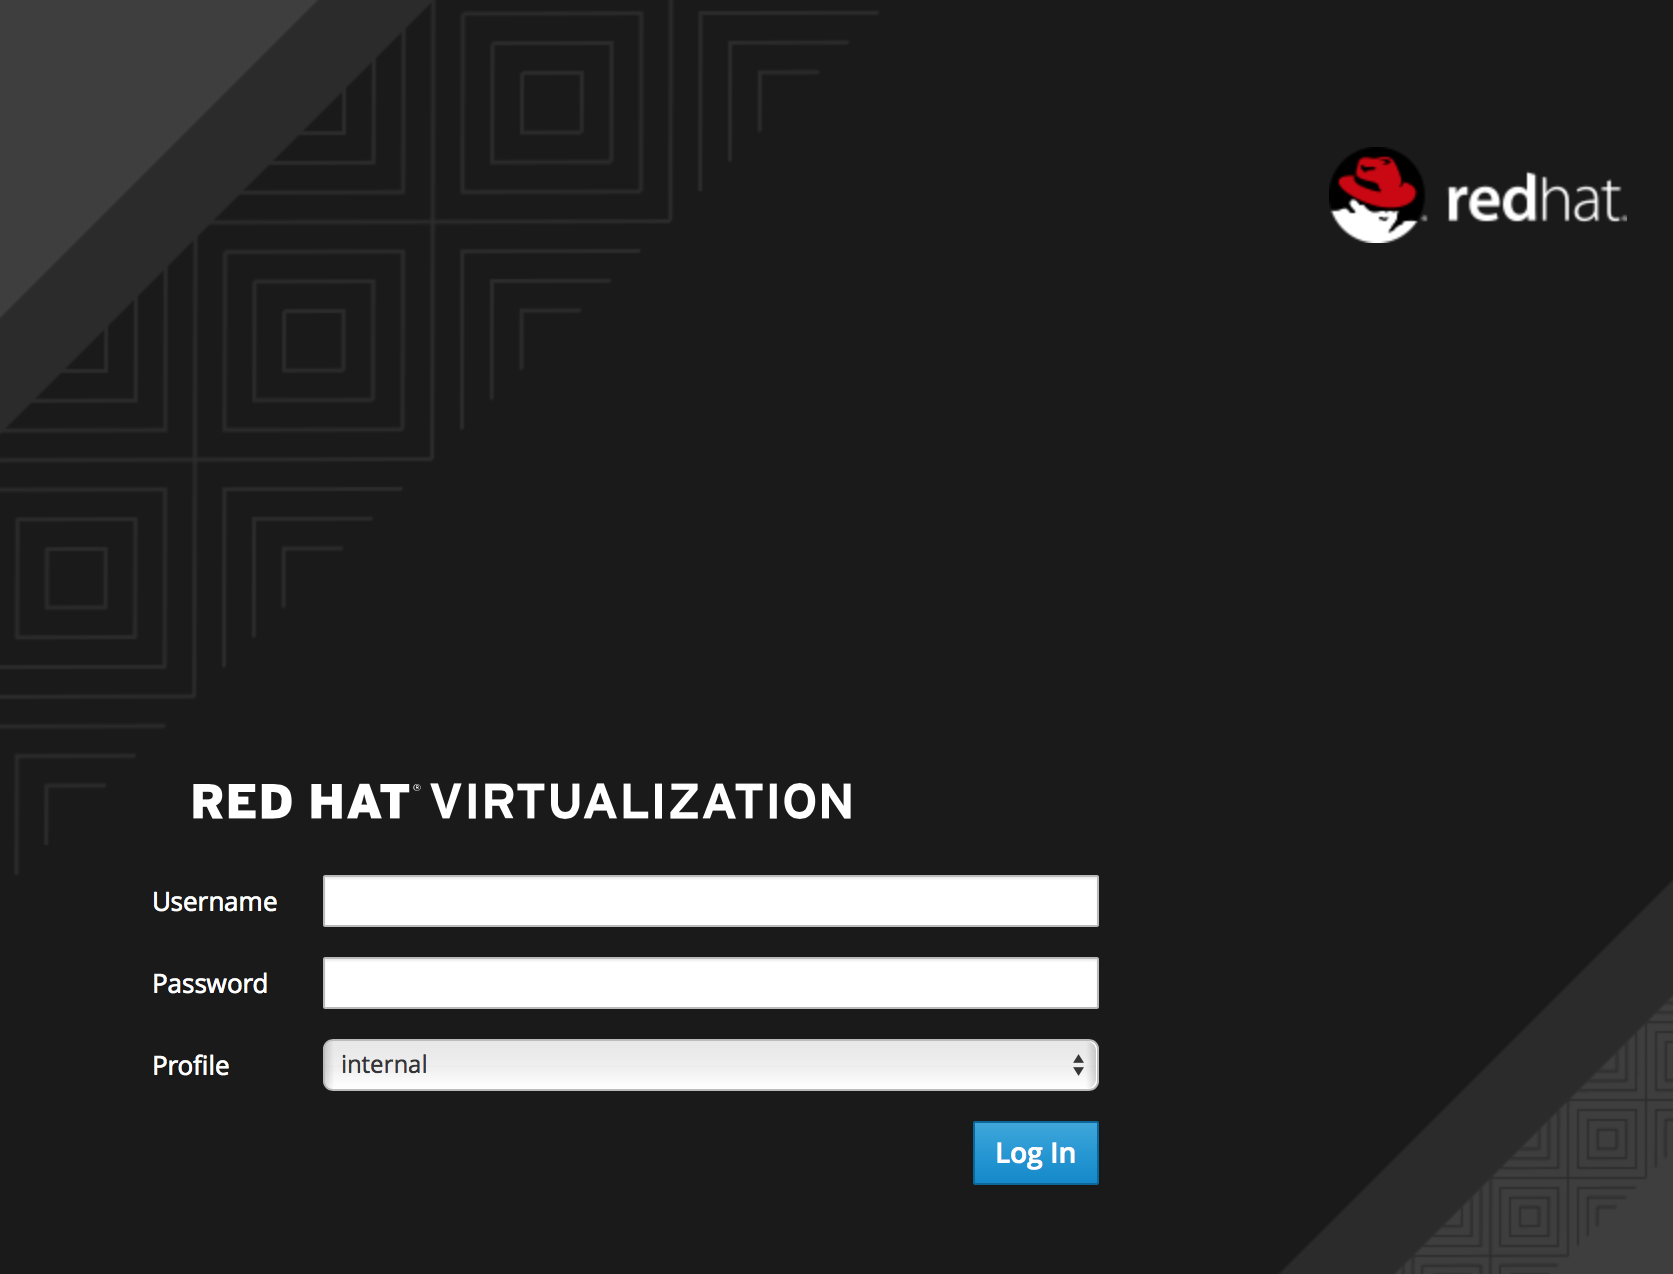
Log in using the administrative credentials added during hosted engine deployment.
When login is successful, the Dashboard appears.
Administration Console Dashboard
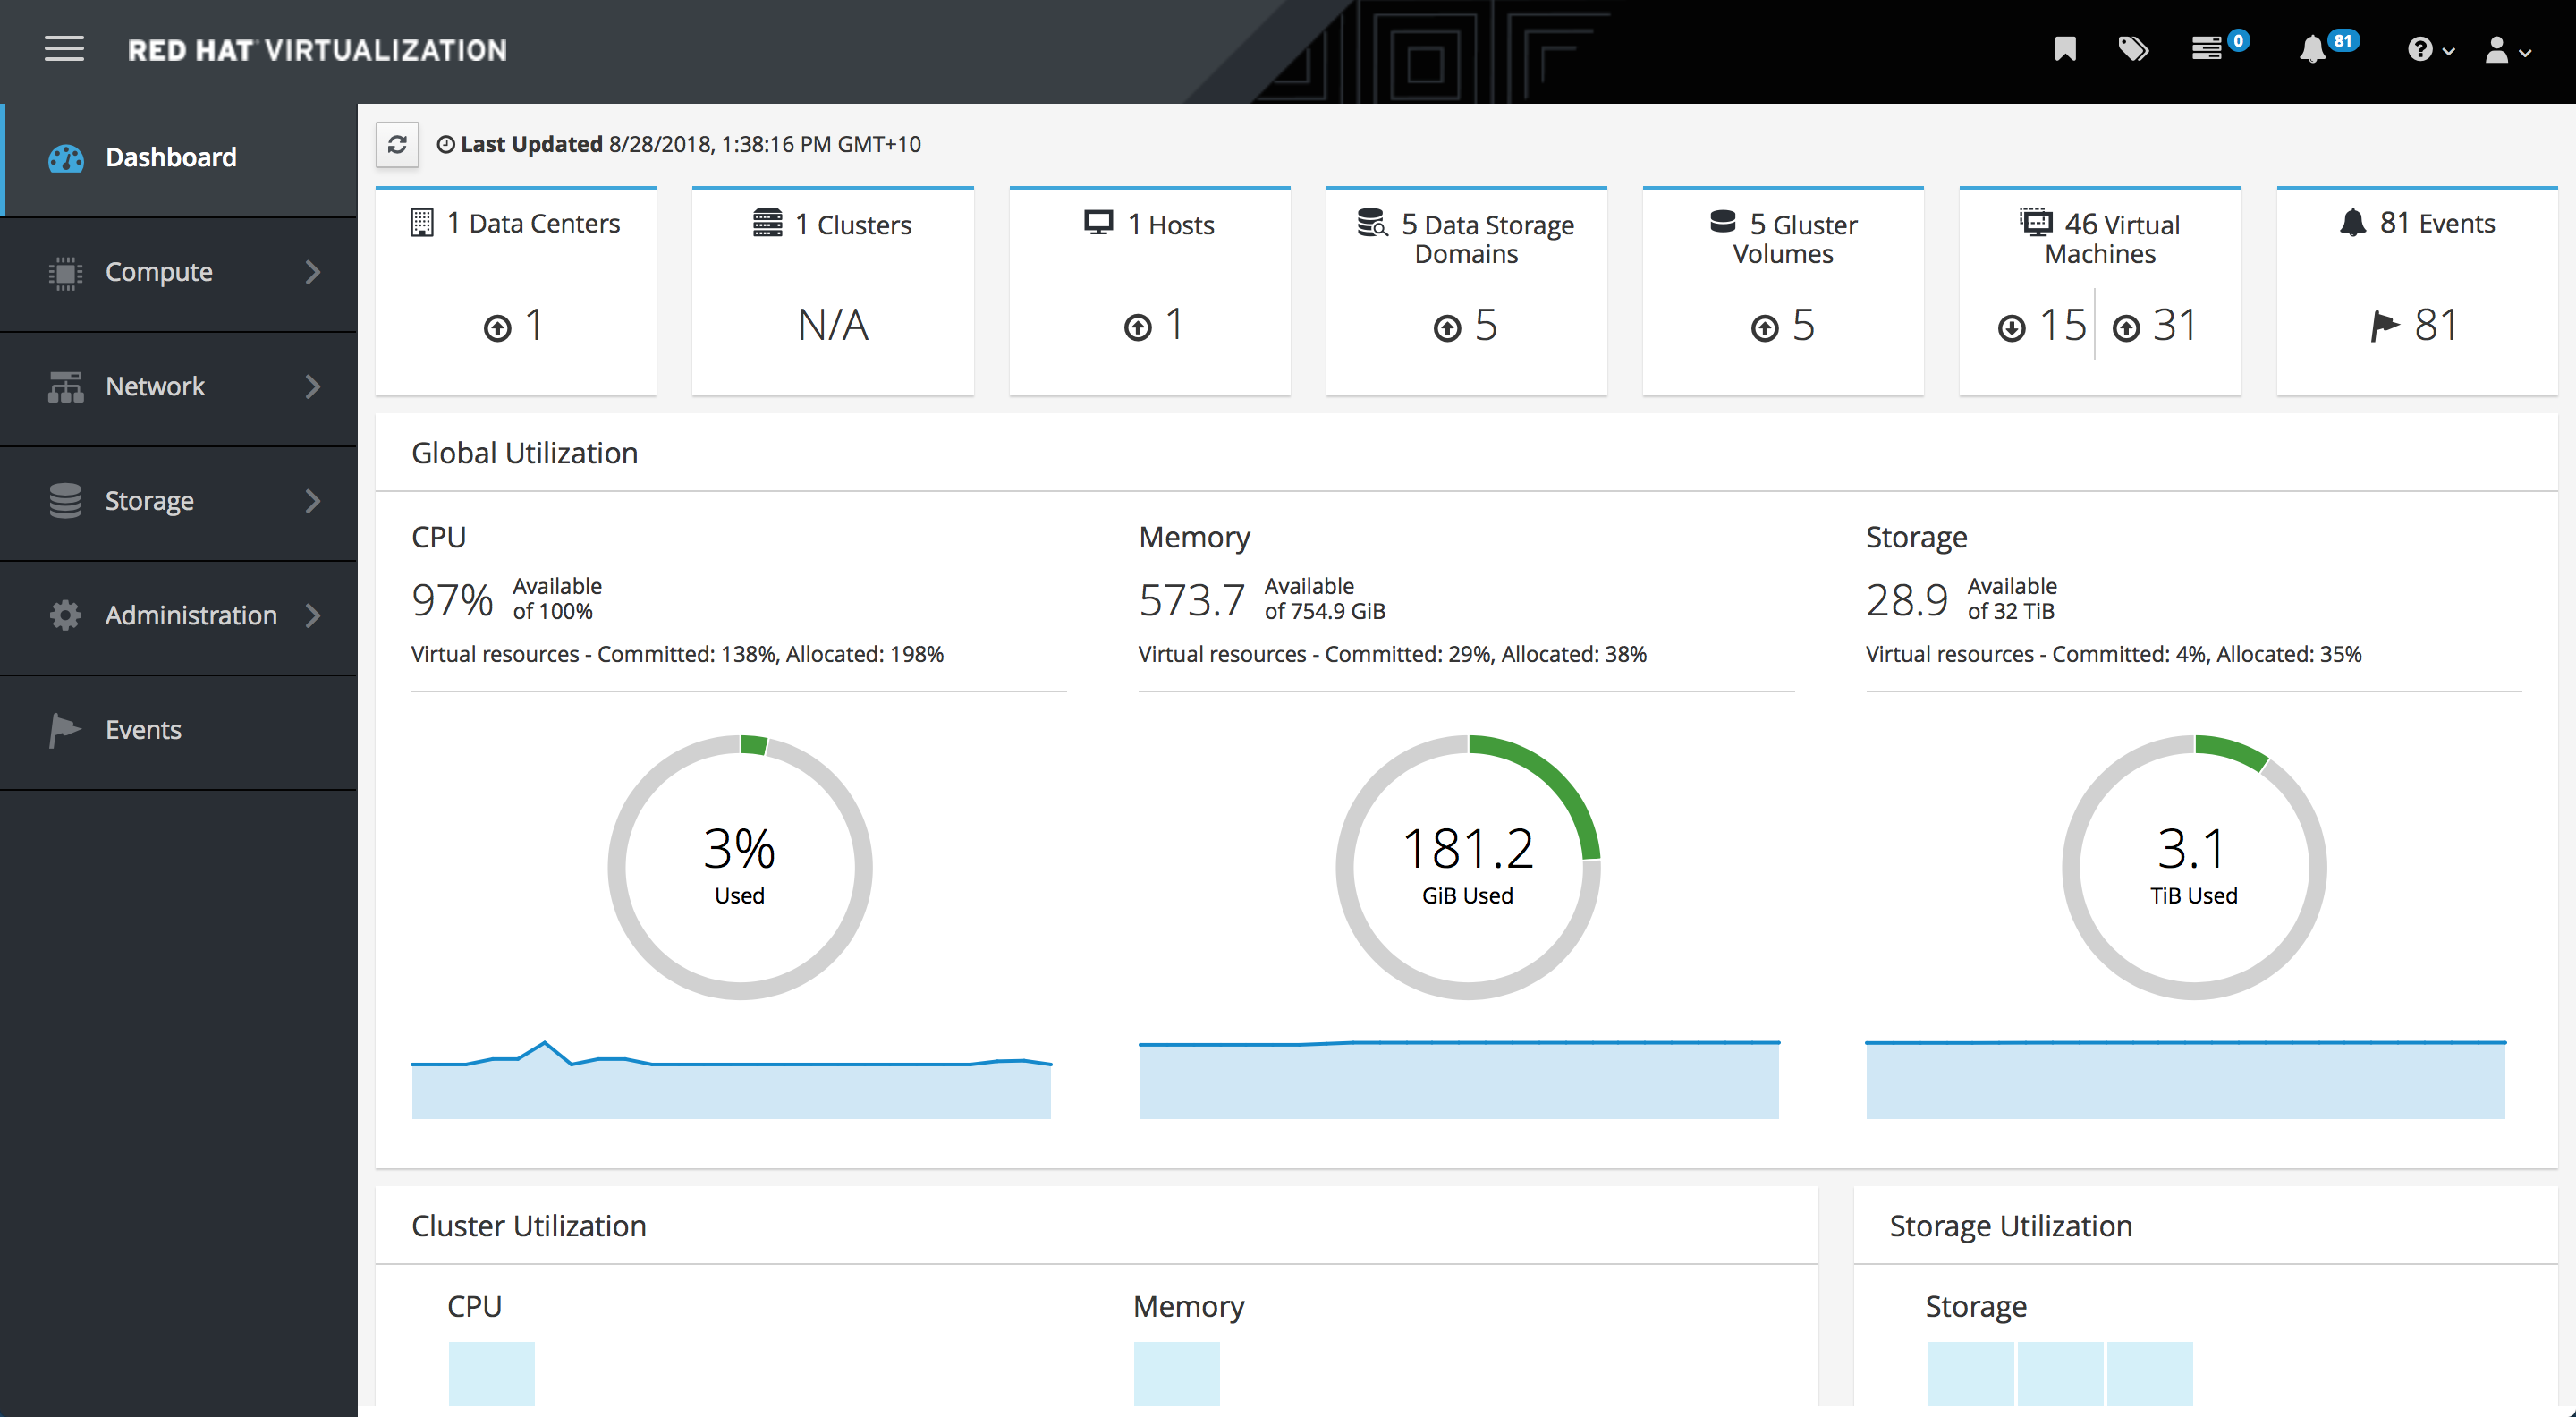
Verify that your cluster is available.
Administration Console Dashboard - Clusters
Verify that one host is available.
- Click Compute → Hosts.
-
Verify that your host is listed with a Status of
Up.
Verify that all storage domains are available.
- Click Storage → Domains.
Verify that the
Activeicon is shown in the first column.Administration Console - Storage Domains

Chapter 7. Managing Red Hat Gluster Storage volumes
Chapter 8. Next steps
- Learn to create and manage Red Hat Gluster Storage using the Administration Portal in Managing Red Hat Gluster Storage using the RHV Administration Portal.
- Learn to create and manage virtual machines in the Red Hat Virtualization Virtual Machine Management Guide.
- Review the RHHI for Virtualization documentation on the Red Hat Customer Portal.
Appendix A. Cleaning up automated Red Hat Gluster Storage deployment errors
If the deployment process fails after the physical volumes and volume groups are created, you need to undo that work to start the deployment from scratch. Follow this process to clean up a failed deployment so that you can try again.
Procedure
- Create a volume_cleanup.conf file based on the volume_cleanup.conf file in Appendix B, Example cleanup configuration files for gdeploy.
Run gdeploy using the volume_cleanup.conf file.
# gdeploy -c volume_cleanup.conf
- Create a lv_cleanup.conf file based on the lv_cleanup.conf file in Appendix B, Example cleanup configuration files for gdeploy.
Run gdeploy using the lv_cleanup.conf file.
# gdeploy -c lv_cleanup.conf
Check mount configurations on all hosts
Check the
/etc/fstabfile on all hosts, and remove any lines that correspond to XFS mounts of automatically created bricks.
Appendix B. Example cleanup configuration files for gdeploy
In the event that deployment fails, it is necessary to clean up the previous deployment attempts before retrying the deployment. The following two example files can be run with gdeploy to clean up previously failed deployment attempts so that deployment can be reattempted.
volume_cleanup.conf
[hosts]
<Gluster_Network_NodeA>
<Gluster_Network_NodeB>
<Gluster_Network_NodeC>

[volume1]
action=delete
volname=engine

[volume2]
action=delete
volname=vmstore

[volume3]
action=delete
volname=data

[peer]
action=detach
lv_cleanup.conf
[hosts]
<Gluster_Network_NodeA>
<Gluster_Network_NodeB>
<Gluster_Network_NodeC>

[backend-reset]
pvs=sdb,sdc
unmount=yes

