
Pen Drive powered by Red Hat Lightspeed: User Guide
Table of Contents
- 1. Overview
- 2. Data Collection Strategies
- Insights Operator (IO) On-Demand Gather
- 3. Requirements
- 4. Deploy the Pen Drive tool
- 5. Run Pen Drive tool
- 5.1. Export must-gather folder and kubeconfig
- 5.2. Run with a helper script (recommended)
- 5.3. Run a workflow using the menu
- 5.4. Run a workflow using the CLI
- 5.4.1. Gather: Collect must-gather data from the cluster
- 5.4.2. Scan: Run Lightspeed rules against must-gather data
- 5.4.3. Full-run: Collect must-gather data and scan with Lightspeed rules
- 5.4.4. Light-Run: Fast analysis with Insights Operator on-demand gather
- 5.4.5. In-Cluster-Check: Run direct rule checks on cluster nodes
- 5.4.6. Kube-Compare: Detect Configuration Drift Against a Baseline
- 5.4.7. Report: Generate HTML Report from JSON File
- 5.5. Pen Drive Help option
- 6. Check workflow run results for analysis
- 7. Demo
# Pen Drive powered by Red Hat Lightspeed: User Guide
The Pen Drive tool delivers system tests for disconnected clusters, enabling the execution of Lightspeed rules on-premise. It handles must-gather data collection using required images (e.g., default must-gather, phased-gates, and other plugins). To simplify deployment and guarantee isolation, the solution is distributed as a container image. For optimization, some logs are fetched directly from the cluster.
1. Overview
The Pen Drive tool supports both an interactive menu and CLI commands with the following workflows:
1. full-run - Optimized workflow that collects lightweight must-gather data while fetching default must-gather pod logs directly from the cluster, then scans with Lightspeed rules and includes in-cluster rules.
2. light-run - Fastest analysis - Uses Insights Operator on-demand gather (no must-gather collection) + in-cluster checks in light mode (essential checks only, excluding resource-intensive rules). Minimal cluster impact with real-time data collection. Best for quick health assessments.
3. gather - Collect comprehensive must-gather data from the cluster for later analysis
4. scan - Scan Lightspeed rules against an existing collected data of must-gather archive
5. in-cluster-check - Very light run - Run direct in-cluster rule checks on cluster nodes without collecting must-gather data. Supports --in-cluster-check-light flag to exclude resource-intensive rules and run only essential checks. Preferred for live traffic environments with minimal cluster impact.
6. kube-compare - Detect configuration drift by comparing the live cluster against a mounted baseline reference directory of a known valid reference configuration.
7. report - Generate HTML report from an existing .pendrive.json file. Useful for regenerating reports in disconnected environments or creating reports from shared JSON files without re-running scans.
2. Data Collection Strategies
Pen Drive uses different data collection strategies depending on the workflow:
-
gatherworkflow: Collects comprehensive must-gather data including full pod logs based on the--sinceparameter (default: 24h). This is ideal when you want to collect complete diagnostic data for later analysis or troubleshooting. -
full-runworkflow: Collects lightweight must-gather data with only 1 second of pod logs for efficiency. This optimized approach reduces collection time and disk space usage. Additionally collects data using Insights Operator on-demand gather for real-time cluster diagnostics. Lightspeed rules will fetch additional pod logs directly as needed during scanning, ensuring all required information is available for rule execution. -
light-runworkflow: Fastest option - Uses only Insights Operator on-demand gather (no must-gather collection) combined with in-cluster checks. The Insights Operator triggers real-time data collection by executing commands directly on the cluster and gathering diagnostics on-demand, creating a focused archive with only essential data. This provides the minimal cluster footprint while still running comprehensive Lightspeed rules. -
in-cluster-checkworkflow: No must-gather data is collected. Only in-cluster rules are performed directly on cluster nodes usingoc debug.
Insights Operator (IO) On-Demand Gather
The Insights Operator is a built-in OpenShift component that can collect diagnostic data on-demand without requiring traditional must-gather collection. When triggered, it:
- Executes diagnostic commands directly on the cluster
- Collects targeted data (configurations, logs, resource states)
- Packages data into a compact archive
- Provides real-time cluster insights with minimal overhead
This approach is used by both full-run and light-run workflows to complement or replace must-gather data collection.
Recommendation:
The full-run and gather+scan workflows return the same results.
Use light-run for the fastest analysis with minimal cluster impact - ideal for quick health checks and live traffic systems.
Use full-run for normal/preventive usage when you want both Insights Operator data and must-gather pod logs.
Use gather if you want complete must-gather data for further investigation of field cases.
Use in-cluster-check if you only need in-cluster health validation without any Lightspeed rules.
3. Requirements
Workstation Requirements for Pen Drive run:
- RHEL 8.8+
- Podman 4.0+
- It is recommended to run this from a non-root user. If you must run as root, use the --network=host flag.
- Disk space: Minimum 30 GB free (configurable via --required-disk-gb=<value>)
Cluster Requirements for Pen Drive run:
- Ensure the mirror registry contains must-gather plugin images for operators installed on the cluster. For example, if LSO (local-storage-operator) is installed on the cluster, the corresponding LSO must-gather plugin image must be available in the mirror registry. Other common plugins include: ODF (ocs-operator), cluster-logging, OSC (openshift-sandboxed-containers-operator).
- Disk space: 30% available disk space on a master node. Pen Drive selects the master node with the most available space.
4. Deploy the Pen Drive tool
To run the Pen Drive solution in the environment use the following steps:
1. Get the container image registry URL from the Red Hat Catalog:
Pen Drive powered by Red Hat Lightspeed
2. Pull the image (in a connected environment):
podman login registry.redhat.io
podman pull registry.redhat.io/pen-drive/pen-drive-scanner-rhel9:latest
3. For on-premises environment:
a. Save the image from a connected environment
podman save --format oci-archive -o pen-drive-latest.tar registry.redhat.io/pen-drive/pen-drive-scanner-rhel9:latest
b. Transfer Pen Drive image archive to the on-premises environment.
c. Load Pen Drive tool on on-premises environment
podman load -i pen-drive-latest.tar
5. Run Pen Drive tool
Notes:
- Data collection behavior:
- gather workflow: Collects comprehensive data. By default, must-gather collects pod logs from the last 24 hours. You can modify this time range using the --since=<duration_in_hours>h option or through the interactive menu.
- full-run workflow: Collects minimal data (1 second of pod logs) for efficiency. Lightspeed rules will collect additional data as needed during scanning.
- You can define the maximum allowed disk usage in percentage for must-gather collected data by using the flag --extra-must-gather-flags='--volume-percentage=<max_allowed_in_percentage>' via CLI or through the interactive menu.
- The --tz=local flag requires Podman 3.0+. For older Podman versions or Docker, replace --tz=local with -v /etc/localtime:/etc/localtime:ro in all podman run commands.
- The -v option requires an absolute path to the file or directory on the local host.
- For rootless Podman, the --userns=keep-id --user=$(id -u):$(id -g) ensures proper file permissions on mounted volumes.
5.1. Export must-gather folder and kubeconfig
Option 1: Using the Kubeconfig
export KUBECONFIG=<absolute-path-to-kubeconfig>
export MG_DIR=<absolute-path-to-must-gather-dir>
IMPORTANT: Kubeconfig with certificate-authority paths
If your kubeconfig file references a certificate-authority file path (instead of embedded certificate-authority-data), you MUST mount the CA certificate file to match the exact path specified in your kubeconfig.
For example, if your kubeconfig contains:
clusters:
- cluster:
    certificate-authority: /home/user/.kube/ca.crt
    server: https://api.example-cluster.com:6443
  name: example-cluster
Then you need to mount your local CA file to /home/user/.kube/ca.crt inside the container:
export CLUSTER_CA_FILE=<absolute-path-to-your-local-ca.crt>
The podman run command should include both mounts:
-v ${KUBECONFIG}:/opt/app-root/.kube/config:Z,ro \
-v ${CLUSTER_CA_FILE}:/home/user/.kube/ca.crt:Z,ro
Note: The container mount path (e.g., /home/user/.kube/ca.crt) must exactly match the path in your kubeconfig's certificate-authority field.
Option 2: Using interactive cluster authentication
If you don't have a kubeconfig file, you can authenticate interactively. Pen Drive will prompt you for:
- Cluster URL (you can find it by running oc whoami --show-server on a machine with cluster access)
- Username
- Password
Export only the must-gather directory:
export MG_DIR=<absolute-path-to-must-gather-dir>
Note: TLS Certificate Verification
When authenticating interactively, Pen Drive needs to verify the cluster's TLS certificate for secure connections.
Option 1: Mount the cluster's CA certificate (Recommended)
export CLUSTER_CA_FILE=<absolute-path-to-cluster-ca.crt>
If you mount the CA certificate, it will be used automatically without prompting.
Note: You can generate ca.crt by running the following command:
#Log in insecurely just once to get the CA (you will be prompted for password)
oc login -u <username> --insecure-skip-tls-verify <cluster-url>

#Download the CA certificate
oc get configmap kube-root-ca.crt -n openshift-config -o jsonpath='{.data.ca\.crt}' > ca.crt

#Logout from the insecure session
oc logout

#Verify the CA certificate works (you will be prompted for password)
oc login -u <username> --certificate-authority=ca.crt <cluster-url>
Option 2: Skip TLS verification interactively (Not recommended)
If you are using a self-signed certificate or testing in a lab environment, and you don't mount a CA certificate, Pen Drive will prompt you during execution:
Skip TLS certificate verification for this Pen Drive run? (y/n):
5.2. Run with a helper script (recommended)
This helper script provides a convenient wrapper around the podman run command, simplifying the workflow execution.
1. Create the script:
cat > pendrive.sh <<'EOF'
#!/usr/bin/env bash

MG_DIR="${MG_DIR:-./mg}"
IMAGE_TAG="${IMAGE_TAG:-latest}"

mkdir -p "${MG_DIR}"

PODMAN_CMD=(podman run --rm -it --userns=keep-id --user="$(id -u):$(id -g)" --tz=local -v "${MG_DIR}:/mg:Z")
[[ -n "${KUBECONFIG:-}" && -f "${KUBECONFIG}" ]] && PODMAN_CMD+=(-v "${KUBECONFIG}:/opt/app-root/.kube/config:Z,ro")
[[ -n "${CLUSTER_CA_FILE:-}" && -f "${CLUSTER_CA_FILE}" ]] && PODMAN_CMD+=(-v "${CLUSTER_CA_FILE}:/opt/app-root/.kube/ca.crt:Z,ro")
[[ -n "${KUBECOMPARE_DIR:-}" && -d "${KUBECOMPARE_DIR}" ]] && PODMAN_CMD+=(-v "${KUBECOMPARE_DIR}:/kube-compare-baseline:Z,ro")
PODMAN_CMD+=("registry.redhat.io/pen-drive/pen-drive-scanner-rhel9:${IMAGE_TAG}" "$@")

exec "${PODMAN_CMD[@]}"
EOF
chmod +x pendrive.sh
The script only forwards workflow arguments such as gather, scan, full-run, kube-compare, report, --keep-must-gather-data=true, and --keep-insights-operator-data=true.
It does not parse or forward additional Podman flags like -v after the workflow name. If you need custom mounts not covered by the helper script, you can either update the script or use the raw podman run ... command shown later in this guide.
2. Export relevant environment variables
Export any environment variables used by the helper script before running it, as like:
export MG_DIR=<absolute-path-to-must-gather-dir>
export KUBECONFIG=<absolute-path-to-kubeconfig>
3. Run pendrive.sh script:
You can run the script directly with ./pendrive.sh or copy it to your PATH (e.g., /usr/local/bin/pendrive) for system-wide access.
Usage examples:
#Run interactive menu
./pendrive.sh

#Run gather workflow
./pendrive.sh gather

#Run scan workflow
./pendrive.sh scan --selected-data-source=<must_gather_folder_name>

#Run full-run workflow
./pendrive.sh full-run --keep-must-gather-data=true --keep-insights-operator-data=true

#Run light-run workflow (fastest - Insights Operator + in-cluster checks)
./pendrive.sh light-run

#Run in-cluster-check workflow
./pendrive.sh in-cluster-check

#Run kube-compare workflow
./pendrive.sh kube-compare

#Generate HTML report from .pendrive.json file
#The HTML report will be saved in the same folder
./pendrive.sh report <path-to-folder-with-pendrive-json>
#Example:
./pendrive.sh report /mg/pendrive-2026-05-17_10-15-11
5.3. Run a workflow using the menu
The interactive menu allows you to execute the gather, scan, or full-run workflows, with the option to define or modify the default parameters.
Option 1: Use kubeconfig
podman run --rm -it --userns=keep-id --user=$(id -u):$(id -g) -v ${KUBECONFIG}:/opt/app-root/.kube/config:Z,ro -v ${MG_DIR}:/mg:Z --tz=local registry.redhat.io/pen-drive/pen-drive-scanner-rhel9:latest
Option 2: Use 'oc login' with interactive prompts
When no kubeconfig is provided, Pen Drive will prompt you interactively for cluster connection details:
#With CA certificate (recommended)
podman run --rm -it \
    --userns=keep-id --user=$(id -u):$(id -g) \
    -v ${CLUSTER_CA_FILE}:/opt/app-root/.kube/ca.crt:Z,ro \
    -v ${MG_DIR}:/mg:Z \
    --tz=local \
    registry.redhat.io/pen-drive/pen-drive-scanner-rhel9:latest

#Without CA certificate (will prompt for --insecure-skip-tls-verify)
podman run --rm -it \
    --userns=keep-id --user=$(id -u):$(id -g) \
    -v ${MG_DIR}:/mg:Z \
    --tz=local \
    registry.redhat.io/pen-drive/pen-drive-scanner-rhel9:latest
You will be prompted to enter:
- Cluster URL (e.g., https://api.your-cluster.com:6443)
- Username
- Password
- TLS verification preference (if no CA certificate is mounted)
5.4. Run a workflow using the CLI
5.4.1. Gather: Collect must-gather data from the cluster
Option 1: Use kubeconfig
podman run --rm -it \
    --userns=keep-id --user=$(id -u):$(id -g) \
    -v ${MG_DIR}:/mg:Z \
    -v ${KUBECONFIG}:/opt/app-root/.kube/config:Z,ro \
    --tz=local \
    registry.redhat.io/pen-drive/pen-drive-scanner-rhel9:latest gather
Option 2: Use 'oc login' with interactive prompts
When no kubeconfig is provided, Pen Drive will prompt you interactively for cluster connection details:
#With CA certificate (recommended)
podman run --rm -it \
    --userns=keep-id --user=$(id -u):$(id -g) \
    -v ${MG_DIR}:/mg:Z \
    -v ${CLUSTER_CA_FILE}:/opt/app-root/.kube/ca.crt:Z,ro \
    --tz=local \
    registry.redhat.io/pen-drive/pen-drive-scanner-rhel9:latest gather

#Without CA certificate (will prompt for --insecure-skip-tls-verify)
podman run --rm -it \
    --userns=keep-id --user=$(id -u):$(id -g) \
    -v ${MG_DIR}:/mg:Z \
    --tz=local \
    registry.redhat.io/pen-drive/pen-drive-scanner-rhel9:latest gather
You will be prompted to enter:
- Cluster URL (e.g., https://api.your-cluster.com:6443)
- Username
- Password
- TLS verification preference (if no CA certificate is mounted)
Example with additional options:
#Collect data from last 48h with volume percentage limit
podman run --rm -it \
    --userns=keep-id --user=$(id -u):$(id -g) \
    -v ${KUBECONFIG}:/opt/app-root/.kube/config:Z,ro \
    -v ${MG_DIR}:/mg:Z \
    --tz=local \
    registry.redhat.io/pen-drive/pen-drive-scanner-rhel9:latest gather \
    --since=48h \
    --extra-must-gather-flags='--volume-percentage=80'
5.4.2. Scan: Run Lightspeed rules against must-gather data
Scan Lightspeed rules against an existing collected data of must-gather archive.
Notes:
This flow uses a mandatory flag --selected-data-source=<must_gather_folder_name>, which specifies the must-gather folder name that the rules will run against.
podman run --rm -it --userns=keep-id --user=$(id -u):$(id -g) -v ${MG_DIR}:/mg:Z --tz=local registry.redhat.io/pen-drive/pen-drive-scanner-rhel9:latest scan --selected-data-source=<must_gather_folder_name>
5.4.3. Full-run: Collect must-gather data and scan with Lightspeed rules
Notes:
- This workflow collects minimal must-gather data (1 second of pod logs) for efficiency and faster execution
- Lightspeed rules will automatically collect additional data as needed during scanning
- The --since parameter only affects operator must-gather collections; default must-gather always uses minimal pod logs
- This flow requires two mandatory flags:
- --keep-must-gather-data=true|false — whether to keep must-gather data after completion
- --keep-insights-operator-data=true|false — whether to keep Insights Operator data after completion
Use the same authentication methods as described in Gather section, but replace gather with full-run operation name, specifying --keep-must-gather-data=true (or false) and --keep-insights-operator-data=true (or false).
Example:
podman run --rm -it \
    --userns=keep-id --user=$(id -u):$(id -g) \
    -v ${KUBECONFIG}:/opt/app-root/.kube/config:Z,ro \
    -v ${MG_DIR}:/mg:Z \
    --tz=local \
    registry.redhat.io/pen-drive/pen-drive-scanner-rhel9:latest full-run \
    --keep-must-gather-data=true \
    --keep-insights-operator-data=true \
    --extra-must-gather-flags='--volume-percentage=80'
5.4.4. Light-Run: Fast analysis with Insights Operator on-demand gather
Notes:
- This is the fastest analysis workflow - uses Insights Operator on-demand gather without must-gather collection
- Triggers the Insights Operator to collect diagnostic data in real-time
- Includes in-cluster checks for comprehensive validation
- Minimal cluster impact and disk space usage
- Best for quick health assessments and live traffic environments
- No --keep-must-gather-data flag needed (no must-gather is collected)
- Optional --keep-insights-operator-data=true|false to retain Insights Operator data (default: false)
Option 1: Use kubeconfig
podman run --rm -it \
    --userns=keep-id --user=$(id -u):$(id -g) \
    -v ${KUBECONFIG}:/opt/app-root/.kube/config:Z,ro \
    -v ${MG_DIR}:/mg:Z \
    --tz=local \
    registry.redhat.io/pen-drive/pen-drive-scanner-rhel9:latest light-run \
    --keep-insights-operator-data=true
Option 2: Use 'oc login' with interactive prompts
When no kubeconfig is provided, Pen Drive will prompt you interactively for cluster connection details:
#With CA certificate (recommended)
podman run --rm -it \
    --userns=keep-id --user=$(id -u):$(id -g) \
    -v ${MG_DIR}:/mg:Z \
    -v ${CLUSTER_CA_FILE}:/opt/app-root/.kube/ca.crt:Z,ro \
    --tz=local \
    registry.redhat.io/pen-drive/pen-drive-scanner-rhel9:latest light-run \
    --keep-insights-operator-data=true

#Without CA certificate (will prompt for --insecure-skip-tls-verify)
podman run --rm -it \
    --userns=keep-id --user=$(id -u):$(id -g) \
    -v ${MG_DIR}:/mg:Z \
    --tz=local \
    registry.redhat.io/pen-drive/pen-drive-scanner-rhel9:latest light-run \
    --keep-insights-operator-data=true
You will be prompted to enter:
- Cluster URL (e.g., https://api.your-cluster.com:6443)
- Username
- Password
- TLS verification preference (if no CA certificate is mounted)
5.4.5. In-Cluster-Check: Run direct rule checks on cluster nodes
Notes:
- This is the lightest workflow - runs validation rules directly on cluster nodes without collecting must-gather data
- Preferred for live traffic environments - minimal cluster impact and fastest execution
- Executes in-cluster healthcheck rules across multiple domains:
- Hardware (HW): Disk, memory, CPU, temperature
- Network: OVS interface/port validation, bond0 DNS configuration
- Linux: Systemd services, SELinux status, clock synchronization, open files limits
- Storage: Ceph health, OSD status, PG distribution
- Security: Certificate expiry validation (node certificates, TLS secrets)
- Kubernetes (K8s): API server and etcd validation
- Hardware/Firmware Details: BIOS, CPU, disk, memory, NIC, NUMA configuration comparison across nodes
- Uses oc debug to execute commands on nodes
- Generates JSON results and HTML report
- Supports --in-cluster-namespace to run debug pods in a custom namespace (default: default) for in-cluster-check workflow
- Optional --debug-rule flag for troubleshooting specific rules with full command output
Option 1: Use kubeconfig
podman run --rm -it \
    --userns=keep-id --user=$(id -u):$(id -g) \
    -v ${KUBECONFIG}:/opt/app-root/.kube/config:Z,ro \
    -v ${MG_DIR}:/mg:Z \
    --tz=local \
    registry.redhat.io/pen-drive/pen-drive-scanner-rhel9:latest in-cluster-check
Option 2: Use 'oc login' with interactive prompts
When no kubeconfig is provided, Pen Drive will prompt you interactively for cluster connection details:
#With CA certificate (recommended)
podman run --rm -it \
    --userns=keep-id --user=$(id -u):$(id -g) \
    -v ${MG_DIR}:/mg:Z \
    -v ${CLUSTER_CA_FILE}:/opt/app-root/.kube/ca.crt:Z,ro \
    --tz=local \
    registry.redhat.io/pen-drive/pen-drive-scanner-rhel9:latest in-cluster-check

#Without CA certificate (will prompt for --insecure-skip-tls-verify)
podman run --rm -it \
    --userns=keep-id --user=$(id -u):$(id -g) \
    -v ${MG_DIR}:/mg:Z \
    --tz=local \
    registry.redhat.io/pen-drive/pen-drive-scanner-rhel9:latest in-cluster-check
You will be prompted to enter:
- Cluster URL (e.g., https://api.your-cluster.com:6443)
- Username
- Password
- TLS verification preference (if no CA certificate is mounted)
Examples:
#Debug a specific rule by unique name or title
podman run --rm -it \
    --userns=keep-id --user=$(id -u):$(id -g) \
    -v ${KUBECONFIG}:/opt/app-root/.kube/config:Z,ro \
    -v ${MG_DIR}:/mg:Z \
    --tz=local \
    registry.redhat.io/pen-drive/pen-drive-scanner-rhel9:latest in-cluster-check \
    --debug-rule="node_certificate_expiry"

#Specify a custom namespace for in-cluster debug pods
podman run --rm -it \
    --userns=keep-id --user=$(id -u):$(id -g) \
    -v ${KUBECONFIG}:/opt/app-root/.kube/config:Z,ro \
    -v ${MG_DIR}:/mg:Z \
    --tz=local \
    registry.redhat.io/pen-drive/pen-drive-scanner-rhel9:latest in-cluster-check \
    --in-cluster-namespace="my-namespace"
5.4.6. Kube-Compare: Detect Configuration Drift Against a Baseline
Notes:
- This workflow compares the live cluster configuration against a mounted baseline reference directory of a known valid reference configuration.
- The baseline directory must include a top-level metadata.yaml file and reference manifests for the expected cluster state.
- If a baseline is mounted at /kube-compare-baseline, the full-run workflow will execute kube-compare automatically during the run.
- Kube-compare output is saved as <cluster_name>.kube_compare.json.
Example command:
podman run --rm -it \
    --userns=keep-id --user=$(id -u):$(id -g) \
    -v ${KUBECONFIG}:/opt/app-root/.kube/config:Z,ro \
    -v ${MG_DIR}:/mg:Z \
    -v /absolute/path/to/kube-compare-baseline:/kube-compare-baseline:Z,ro \
    --tz=local \
    registry.redhat.io/pen-drive/pen-drive-scanner-rhel9:latest kube-compare
5.4.7. Report: Generate HTML Report from JSON File
Notes:
- This workflow generates HTML reports from existing .pendrive.json files
- No cluster access required - works with previously generated JSON files
- Useful for regenerating reports in disconnected environments or sharing results without re-running scans
- If multiple .pendrive.json files are present in the folder, HTML reports will be generated for all of them
- The HTML reports will be saved in the same folder as the .pendrive.json files
- The folder must contain at least one .pendrive.json file (generated by scan or full-run workflows)
Example command:
podman run --rm -it \
    --userns=keep-id --user=$(id -u):$(id -g) \
    -v ${MG_DIR}:/mg:Z \
    --tz=local \
    registry.redhat.io/pen-drive/pen-drive-scanner-rhel9:latest report <folder-path>
Example with specific folder:
#Generate HTML from a specific pendrive output folder
podman run --rm -it \
    --userns=keep-id --user=$(id -u):$(id -g) \
    -v ${MG_DIR}:/mg:Z \
    --tz=local \
    registry.redhat.io/pen-drive/pen-drive-scanner-rhel9:latest report /mg/pendrive-2026-05-17_10-15-11

#Or if the JSON file is in the root /mg directory
podman run --rm -it \
    --userns=keep-id --user=$(id -u):$(id -g) \
    -v ${MG_DIR}:/mg:Z \
    --tz=local \
    registry.redhat.io/pen-drive/pen-drive-scanner-rhel9:latest report /mg
5.5. Pen Drive Help option
You can get informative help by running workflow via CLI with --help option. You can find examples in Demo section.
6. Check workflow run results for analysis
After the workflow completes, a new folder named pendrive-<date&time> is created. This folder contains the following items for analysis:
- The pendrive.log log file
- For scan, full-run, or light-run executions: a JSON file with Lightspeed rules results
- For scan, full-run, or light-run executions: an HTML report of the Lightspeed rules results
- For full-run or light-run executions: an artifacts/ subdirectory with processed data files
- For kube-compare or full-run with a mounted baseline: a <cluster_name>.kube_compare.json drift report and HTML report section for kube-compare results
- For report executions: an HTML report regenerated from an existing .pendrive.json file (saved in the same folder as the JSON file, no cluster access required)
When --keep-must-gather-data=true or --keep-insights-operator-data=true is specified, an additional folder named pendrive_collected_data-<date&time> is created containing:
- For gather or full-run executions: a must-gather-<date&time> folder with the must-gather data
- For full-run or light-run executions: an insights-gather.pendrive.<date&time> folder with Insights Operator on-demand gathered data
All output files are saved on the host in the MG_DIR path.
Security Notice: Must-Gather Data May Contain Sensitive Information
Must-gather archives may contain sensitive or private cluster data. If you choose to retain must-gather data (e.g., using --keep-must-gather-data=true), you are responsible for securing and handling this data appropriately. Before sharing must-gather archives (via support tickets, Jira, email, etc.), consider sanitizing them using must-gather-clean to remove sensitive information.
Notes:
- In order to load the image archives, ensure that oci-archive format is not blocked by /etc/containers/policy.json.
E.g. a valid configuration:
"default": [
  {
    "type": "insecureAcceptAnything"
  }
]
7. Demo
1. Help for available workflow:
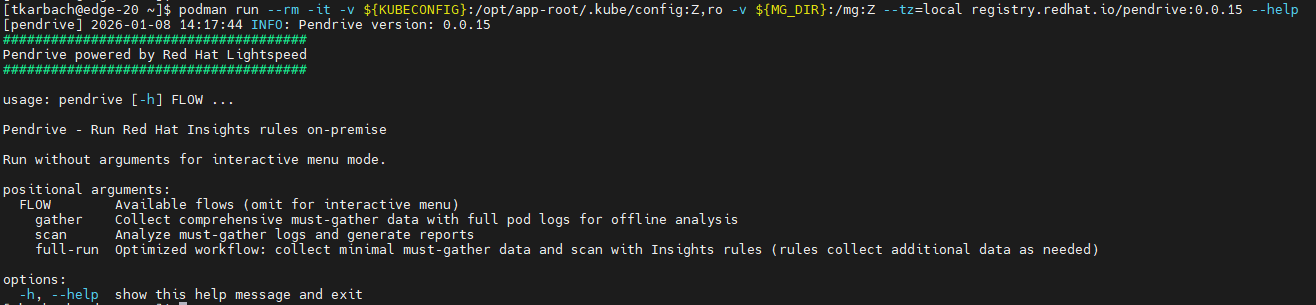
2. Help for operation options (i.e. for gather operation):

3. Interactive menu:

4. Run only gather - collecting must-gather data:

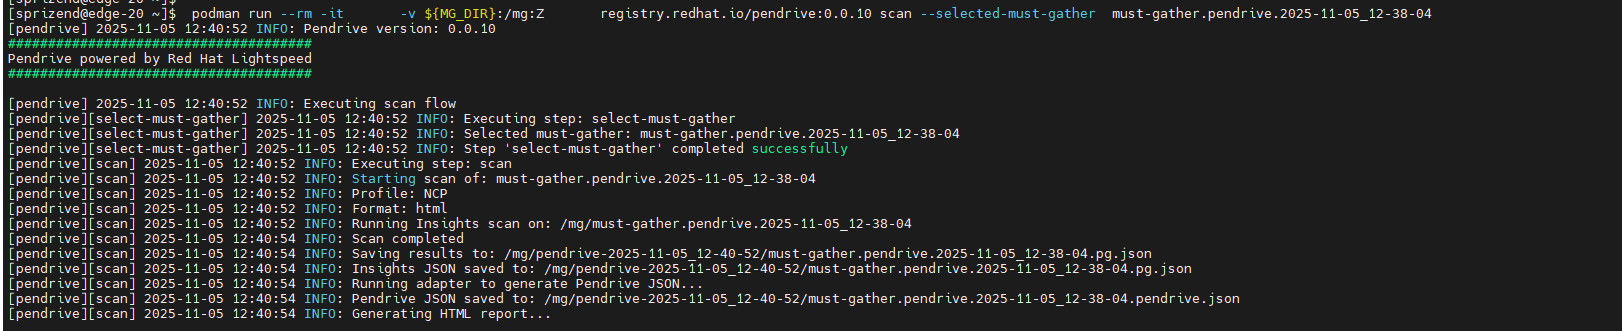
5. Run only scan - execute Lightspeed rules against an existing collected must-gather data:
6. Run full-run - Collect must-gather data and scan with Lightspeed rules:

Comments