
Red Hat JBoss Developer Studio 9.1 Platform Installer [Technology Preview]
Table of Contents
Important: This article is only valid for JBoss Developer Studio 9.1. See Product Documentation for Red Hat Development Suite for information about the current version of Red Hat Development Suite.
Important: The Red Hat JBoss Developer Studio Platform Installer is currently available as a Technology Preview. For details about Red Hat’s support policy for Technology Preview features, see Technology Preview Features Support Scope.
The Red Hat JBoss Developer Studio Platform Installer provides an easy way for users to start working with the Red Hat Container Development Kit and Red Hat JBoss Developer Studio. The Installer currently only works on 64-bit Windows.
Red Hat JBoss Developer Studio Platform Installer Component Details
The Red Hat JBoss Developer Studio Platform Installer scans for the products listed below using your PATH environment variable to determine if they are already installed. If not found, or if an older version is installed, the following supported versions will then be installed for you by the installer:
Note: If an older than required version of one of the listed products is detected, the current version of the Installer requires the user to quit the Installation, uninstall/update the relevant product(s), and then start the Installer afresh.
- OpenJDK 8.0
- Red Hat JBoss Developer Studio 9.1 GA
- Cygwin 2.5
- PSCP
- OpenShift Client (OC) Tools 1.1.6
- Red Hat Container Development Kit 2.0
- Vagrant 1.7.4
- VirtualBox 5.0.8
System Requirements
The minimum system requirements for the Red Hat JBoss Developer Studio Platform Installer are:
- 8 GB RAM
- 20 GB disk space
- CPU Intel i3 2GHz Processor
The recommended system requirements for the Red Hat JBoss Developer Studio Platform Installer are:
- 16 GB RAM
- 47 GB disk space
- CPU Intel i5 2GHz or better
Install Red Hat JBoss Developer Studio Platform
Important: If this installer is run on a new Windows system, ensure that Virtualization is enabled in the BIOS settings for your machine. This is required to run VirtualBox and Vagrant. For further information, consult your system's documentation for instructions to change BIOS settings.
To use the Red Hat JBoss Developer Studio Platform Installer:
-
Log in to the Red Hat Customer Portal and download the installer from the product download page: Red Hat JBoss Developer Studio Platform 9.1.0 Beta 1 Technology Preview Installer for 64-bit Windows. The download is also available from the Red Hat JBoss Developer Studio product page at the Red Hat Developers Portal.
-
In your Windows 7, 8, or 10 installation, run the downloaded installer file.
-
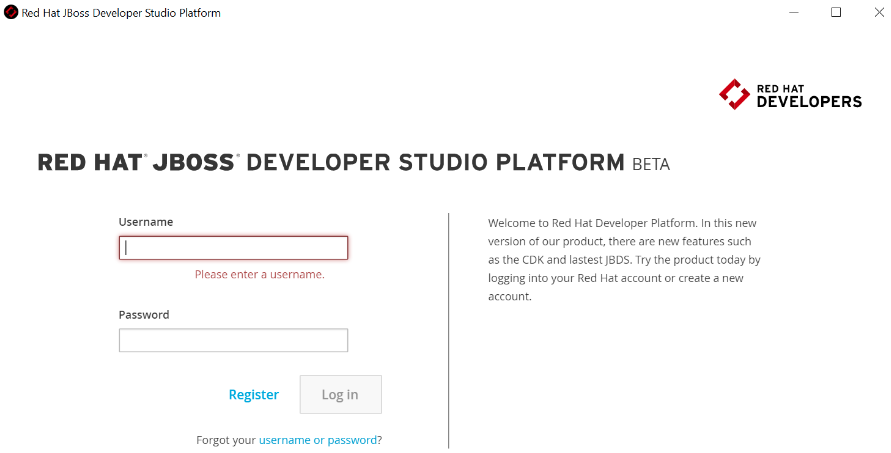
A Red Hat Developer account is required to use the Installer. Enter your existing Red Hat Developer login credentials to log in, or create a new Red Hat Developer Account using the Register link.
-
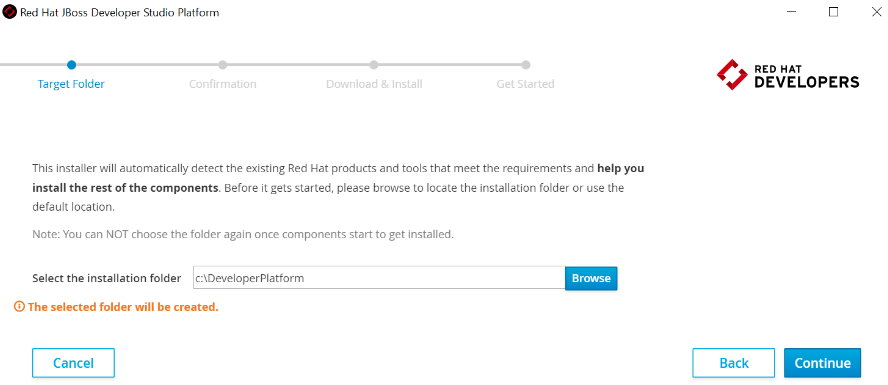
At the Target Folder screen, provide a path to the target directory where Red Hat JBoss Developer Studio Platform will be installed. The default path is c:\DeveloperPlatform.
-
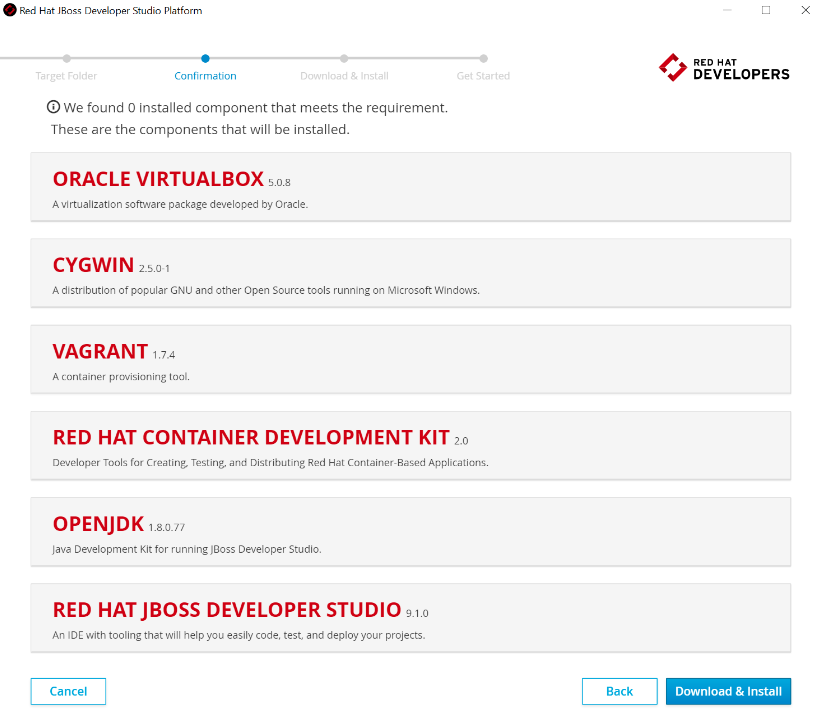
The Confirmation screen lists the software that will be downloaded and installed. The Installer detects components based on the PATH environment variable. If none of them are installed, no changes are required. Click Download & Install to continue.
-
The Installer then downloads the listed software and installs it locally. This process involves large file downloads and can take some time to complete.
-
When complete, the Installer indicates that the download and install were successful and links to the CDK Getting Started page. Depending on what you want to do next, you can either:
a. Click the Open Red Hat JBoss Developer Studio button to start using the CDK Server Adapter in JBoss Developer Studio.
b. Visit Red Hat Container Development Kit to learn about using the Container Development Kit.
-
If you click the Open Red Hat JBoss Developer Studio button:
a. Set up a workspace folder, as prompted.
b. Click the Servers tab to view the configured CDK server adapter.
c. Right-click the server and select Start to initiate the CDK server.
d. When prompted, enter your Red Hat Customer Portal credentials and click OK. The Console tab displays the details of the CDK server.
e. When prompted, read the details of the new SSL certificate for OpenShift and click Yes to accept it.
f. Click the OpenShift Explorer tab to view the new OpenShift server and sample project.
Troubleshooting
To troubleshoot a general installation failure, see the contents of the installer.log file. The installer log file is automatically created in the target directory for the installation. Depending on the point at which the installation failed, there may also be the additional log files for Vagrant and VirtualBox installation in the same directory.
CDK Installation Failure
If the Installer fails to install the Container Development Kit, this may be due to a space in the installation path for Vagrant. In Windows, there is a Ruby bug that prevents successfully compiling plugins into directories with spaces in the name.
Terms and Conditions Error
Error: “Terms and Conditions for CDK have not been signed”
This error appears on the Log In page when starting the Installer. To fix the problem, start downloading the Installer to ensure the Terms and Conditions are viewed and accepted and then cancel the binary download.
BrowserSim Does Not Work After Using the Installer
Red Hat JBoss Developer Studio Platform Installer installs OpenJDK 8. BrowserSim requires JavaFX which is not yet available in OpenJDK. As a result, when the Installer is used, BrowserSim will not work. As a workaround for this issue, Red Hat recommends installing and using Oracle Java for BrowserSim instead. For further information, see http://tools.jboss.org/documentation/faq/browsersim.html#general-browsersim
OpenShift Console Inaccessible on Microsoft Edge Browser
The OpenShift Console web address will not work on Microsoft’s Edge Browser. This is a known issue and the only workaround is to use a different browser to access the console.
Report an Issue
The Red Hat JBoss Developer Studio Platform Installer is currently a Technology Preview feature. If you encounter issues other than the ones listed in this section, log an issue at http://issues.jboss.org under the Installer component in the JBoss Developer Studio project.
Uninstall Red Hat JBoss Developer Studio Platform
The Red Hat JBoss Developer Studio Platform Installer currently does not automatically uninstall the installed components. Use the following steps to remove all installed components from your machine after using the Red Hat JBoss Developer Studio Platform Installer:
-
To uninstall Vagrant:
a. Go to the Control Panel application.
b. Click Uninstall a program under the Programs header.
c. Right-click Vagrant from the list of programs.
d. Click the Uninstall option in the context menu at the top of the application window.
e. Click Yes when asked to confirm uninstallation.
f. After the uninstall process concludes, restart Windows.
-
To uninstall VirtualBox:
a. Go to the Control Panel application.
b. Click Uninstall a program under the Programs header.
c. Right-click Oracle VM VirtualBox from the list of programs.
d. Click the Uninstall option in the context menu at the top of the application window.
e. Click Yes when asked to confirm uninstallation.
f. After the uninstall process concludes, restart Windows.
-
In the user home directory, which is located at C:\Users{username}\ by default:
a. Remove the vagrant.d folder.
b. Remove the VirtualBox VMs folder.
-
Remove the target directory for the Developer Platform installation. The default location used by the installer for this is the c:\DeveloperPlatform directory.
-
Remove all Developer Platform home directory environment path entries:
a. Go to the Control Panel application.
b. Click System to view system properties.
c. Click the Advanced tab to view the advanced properties.
d. Click the Environment Variables button.
e. Select the PATH variable from the list of user variables and click Edit.
f. Remove the VAGRANT_DETECTED_OS environment variable as well. This environment variable tells Vagrant to use Cygwin.
g. Select and delete all the DeveloperPlatform entries for the variable and click OK.
Comments