
Create Your First Mobile Web Application with JBoss Developer Studio 9.x
Table of Contents
Important: This article is intended for use with Red Hat JBoss Developer Studio 9.x. See Create Your First Mobile Web Application with JBoss Developer Studio 8.x for instructions about performing these tasks with an older version of JBoss Developer Studio.
Mobile Web Tools provides an HTML5 Project wizard that enables you to create web applications optimized for mobile devices. The HTML5 Project wizard is a useful starting point for creating all new HTML5 web applications in the IDE. The wizard generates a sample ready-to-deploy HTML5 mobile application with REST resources from a Maven archetype.
As demonstrated in this article, you can customize the application using the JBoss Tools HTML Editor, deploy and view the application with the mobile browser simulator BrowserSim, and use LiveReload to refresh BrowserSim as the application source code is modified and saved in the IDE.
The instructions here demonstrate how to complete the following tasks:
- Create an HTML5 Project
- Build and Deploy the Application
- View the Application with BrowserSim
- Enable LiveReload for BrowserSim
- Change the Application
This article guides you through each of these configuration requirements and must be completed in the order given.
Prerequisite: Configure the IDE for an Available Server
The instructions in this article show you how to deploy the generated HTML5 web application to a server. The IDE must be configured for any servers to which you want to deploy applications, including the location and type of application server and any custom configuration or management settings. You can complete this configuration at the time of deploying the application but in this article it is assumed that you have completed the configuration beforehand.
For information on configuring a local runtime server and deploying applications to it, see Deploy Applications to a Local Server with JBoss Developer Studio.
1. Create an HTML5 Project
The HTML5 Project wizard generates a sample project based on a Maven archetype and the project and application identifiers provided by you. The Maven archetype version is indicated in the Description field of the wizard first page and you can change the version, and therefore the project look and dependencies, by selected either an enterprise or non-enterprise target runtime within the wizard.
To create a HTML5 project, complete the following steps:
- In JBoss Central, click
HTML5 Project. - From the
Target Runtimelist, select an IDE-ready server and clickNext. - Complete the fields about the HTML5 project as follows:
- In the
Project namefield, type a name for the project. - In the
Packagefield, type an alpha-numeric package for the project.
- In the
- Click
Finish. - When prompted with
'HTML5 Project' Project is now ready, clickFinish.
The project is generated and listed in the Project Explorer view.
2. Build and Deploy the Application
After the HTML5 project is generated, it can immediately be built and deployed to an application server.
To build and deploy the application, complete the following steps:
- In the
Project Explorerview, right-click{project name}and clickRun As > Run on Server. - Ensure
Choose an existing serveris selected. -
From the table of servers, expand
localhost, select the server on which to deploy the application and clickFinish.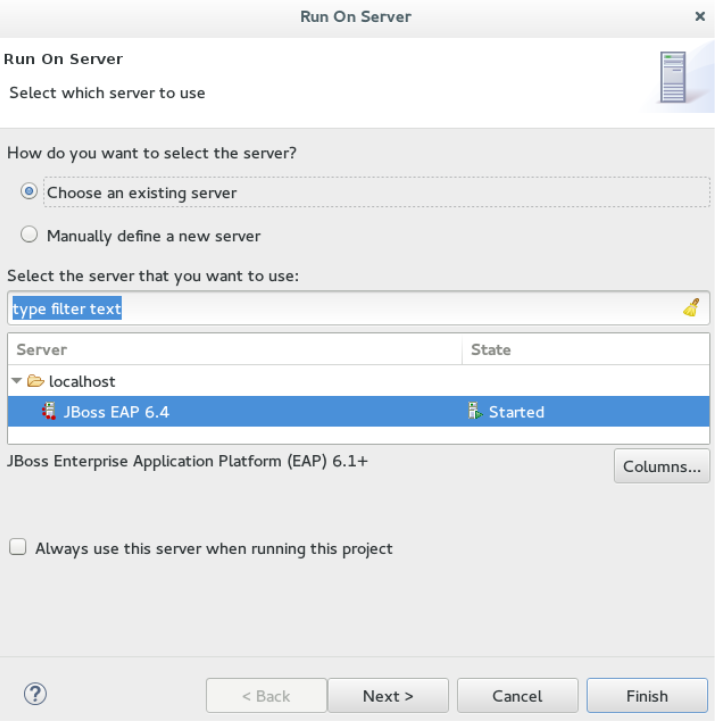
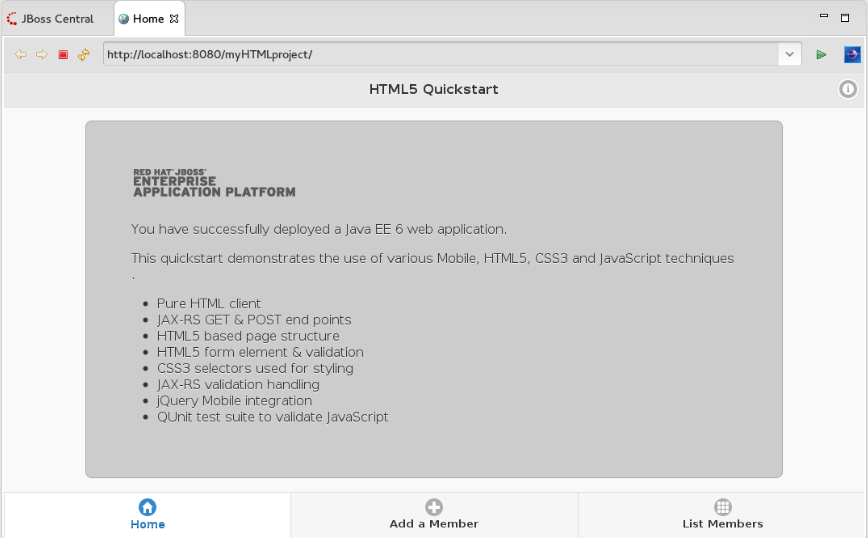
The Console view shows output from the server starting and deploying the application. When deployment is complete, an IDE default web browser opens and shows the deployed web application.
3. View the Application with BrowserSim
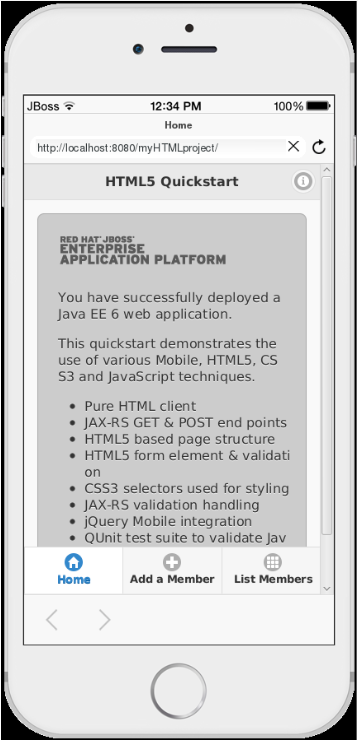
The HTML5 web application has an interface optimized for mobile devices. You can view and test such web pages as they would be on mobile devices using BrowserSim. This mobile device web browser simulator provides skins for different mobile devices, making it easy to test and debug web applications for mobile devices.
To view the deployed application with BrowserSim, complete the following steps:
- Ensure
JBossis the perspective in use. To open theJBossperspective, clickWindow>Perspective>Open Perspective>Otherand double-clickJBoss (default). - In the
Serversview, expand the server adapter to list the application. - Right-click
{application name}and clickShow In > BrowserSim.
4. Enable LiveReload for BrowserSim
Mobile Web Tools supports the LiveReload protocol for automatic reloading of web pages in enabled browsers as the application source is modified and saved. LiveReload can be enabled for your system browsers and, as demonstrated here, BrowserSim. This provides an interactive web development experience.
To enable LiveReload for BrowserSim, complete the following steps:
- Close any open BrowserSim simulated devices.
- In the
Serversview, right-click an existing server to display the context menu and clickNew > Server. - From the list, expand
Basic, selectLiveReload Serverand clickFinish. - In the
Serversview, right-clickLiveReload Serverand clickStart. - In the
Serversview, right-click{application name}and clickShow In > BrowserSim.
LiveReload is automatically enabled for this BrowserSim simulated device and all subsequent devices opened while the LiveReload server is running.
5. Change the Application
With LiveReload enabled for BrowserSim, you can make changes to your application source code and BrowserSim automatically reloads the application when changes are saved. This is demonstrated here by making a simple change to the project index.html file, specifically changing the text in the application title banner.
To change your application, complete the following steps:
- In the
Project Explorerview, expand{project name} > src > main > webapp. - Double-click
index.htmlto open it for editing with theJBoss Tools HTML Editor. -
Locate the following line of code inside the
<body>tags<h3>HTML5 Quickstart</h3>and replace it with
<h3>My Quickstart</h3> -
Save the file by pressing
Ctrl+S(orCmd+S).
This code change modifies the heading displayed on the main application page. Notice that BrowserSim automatically reloads the web page when you save the changed file and the application modifications are immediately visible.
Did You Know?
- You can also launch the
HTML5 Projectwizard from theJBossperspective by clickingFile>New>Projectand then searching forHTML5 Project. - You can test an undeployed
.htmlfile with BrowserSim by right-clicking the.htmlfile in theProject Explorerview and clickingOpen With > BrowserSim. - To set BrowserSim as the IDE default web browser, in the
JBossperspective clickWindow>Web Browser>BrowserSimor clickWindow>Preferences>General>Web Browserand from theExternal web browserslist selectBrowserSim. - You can also enable LiveReload for already opened BrowserSim simulated devices. After starting the LiveReload server, right-click the BrowserSim simulated device frame and click
Enable LiveReload.
Comments