
Access Control
Define your API, create as many plans as you need and set up limits and pricing rules.
Abstract
Chapter 1. Defining Your API (Methods And Metrics)
To define your API on 3scale, navigate to [Your_API_service] > Integration > Methods & Metrics and add your methods and metrics.
Metrics lets you track the usage of your API in 3scale. Hits is the built-in metric, it exists in each API service and is used to track the hits made to your API. You can achieve finer granularity for the API usage tracking by defining Methods under the Hits metric. Reporting traffic to a method will increase counters for the method and for the Hits metric automatically. You can define separate methods for each endpoint of you API, or a combination of endpoint and HTTP method. See Mapping rules section to learn how to map the endpoints of your API to the methods defined here.
For measuring other, not hit-based usage of your API, you can define new Metrics and report the usage in different units. A unit can be anything meaningful: megabytes, CPU time, number of elements returned by the API etc.
Methods and metrics are also the scaffolding to package your API: each application plan lets you define different usage limits and pricing rules for each method and metric.
You will be able to see the the usage reported to metrics and methods in the Analytics section.
1.1. Manually add methods and metrics
Navigate to [Your_API_name] > Integration > Methods & Metrics.

- Click on New method.
Specify the parameters:
- Friendly name is a short description of the method, it appears in different sections of the 3scale admin portal. This name must be unique for the service.
-
System name is the name of the method which will be used to report the usage through 3scale Service Management API. It also must be unique, and it should only contain alphanumeric characters, underscore
_, hyphen-and forward slash/without spaces. Other than that, you are free to decide how the system name will look like, it can be exactly the same as the endpoint ("/status"), or for example can include the method and the path ("GET_/status"). The Description field can be used for a more detailed description of the method, it is optional.
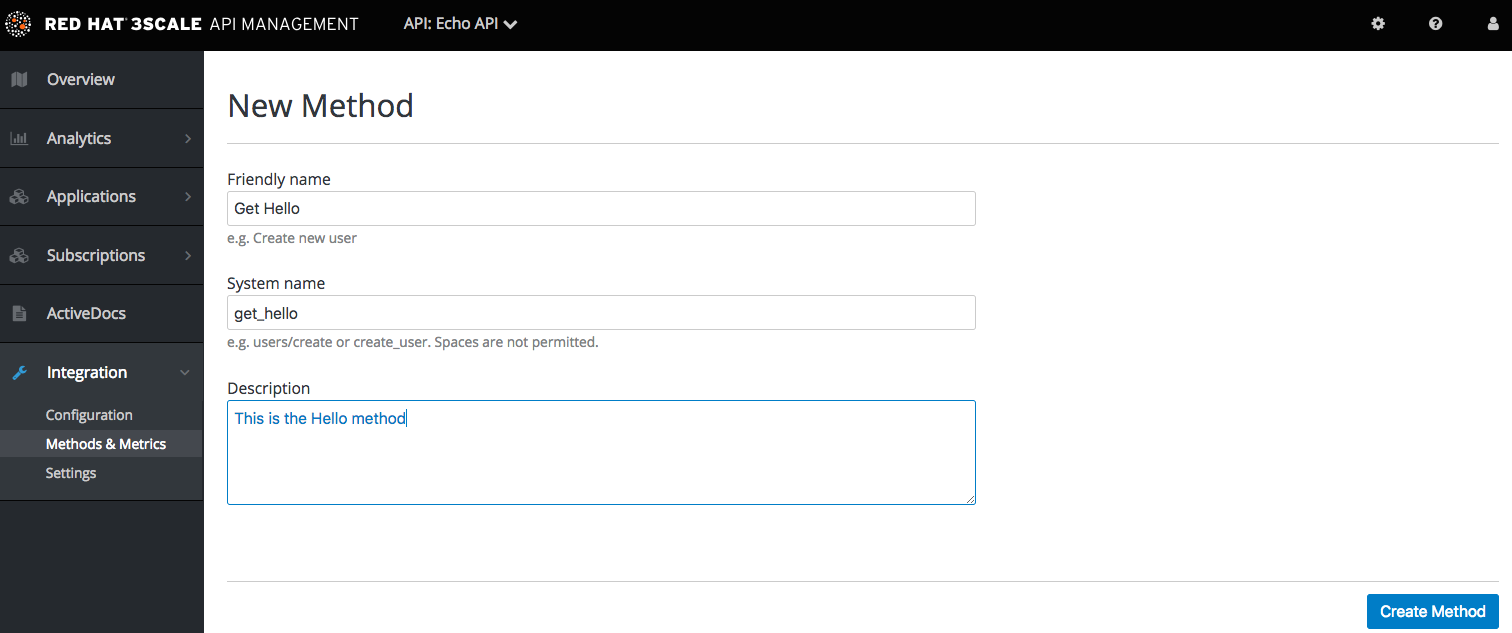
- Finally, click on Create Method button.
You can later change the definition of the method. Just click on the method name (in the column Method), update the fields and click on Update Method.
Be very careful with changing the system name of the methods and metrics or deleting them! It may break your already deployed 3scale integration, if there are mapping rules poining to the previous system name of the method.
For creating a new metric, click on New metric and provide the required parameters. When specifying the unit, use singular noun (e.g. "hit"), as it will be pluralized automatically in the Analytics charts.
These new methods and metrics will be available in all your current and future plans. You can now edit limits and pricing rules for them on each plan going to [Your_API_service] > Applications > Application Plans > [plan_you_want_to_edit].
1.2. Import your methods and metrics automatically
If your API has a lot of endpoints, we offer two additional ways of automatically creating your methods and metrics on 3scale:
Chapter 2. Application Plans
Application Plans define the different sets of access rights you might want to allow for consumers of your API. These can determine anything from rate limits, which methods or resources are accessible and which features are enabled.
2.1. How to create an application plan
By default, when your 3scale account is created, you are given two plans: Basic and Unlimited. You can keep and edit these or create your own. You can create as many plans as you need.
To create a new application plan, follow these steps:
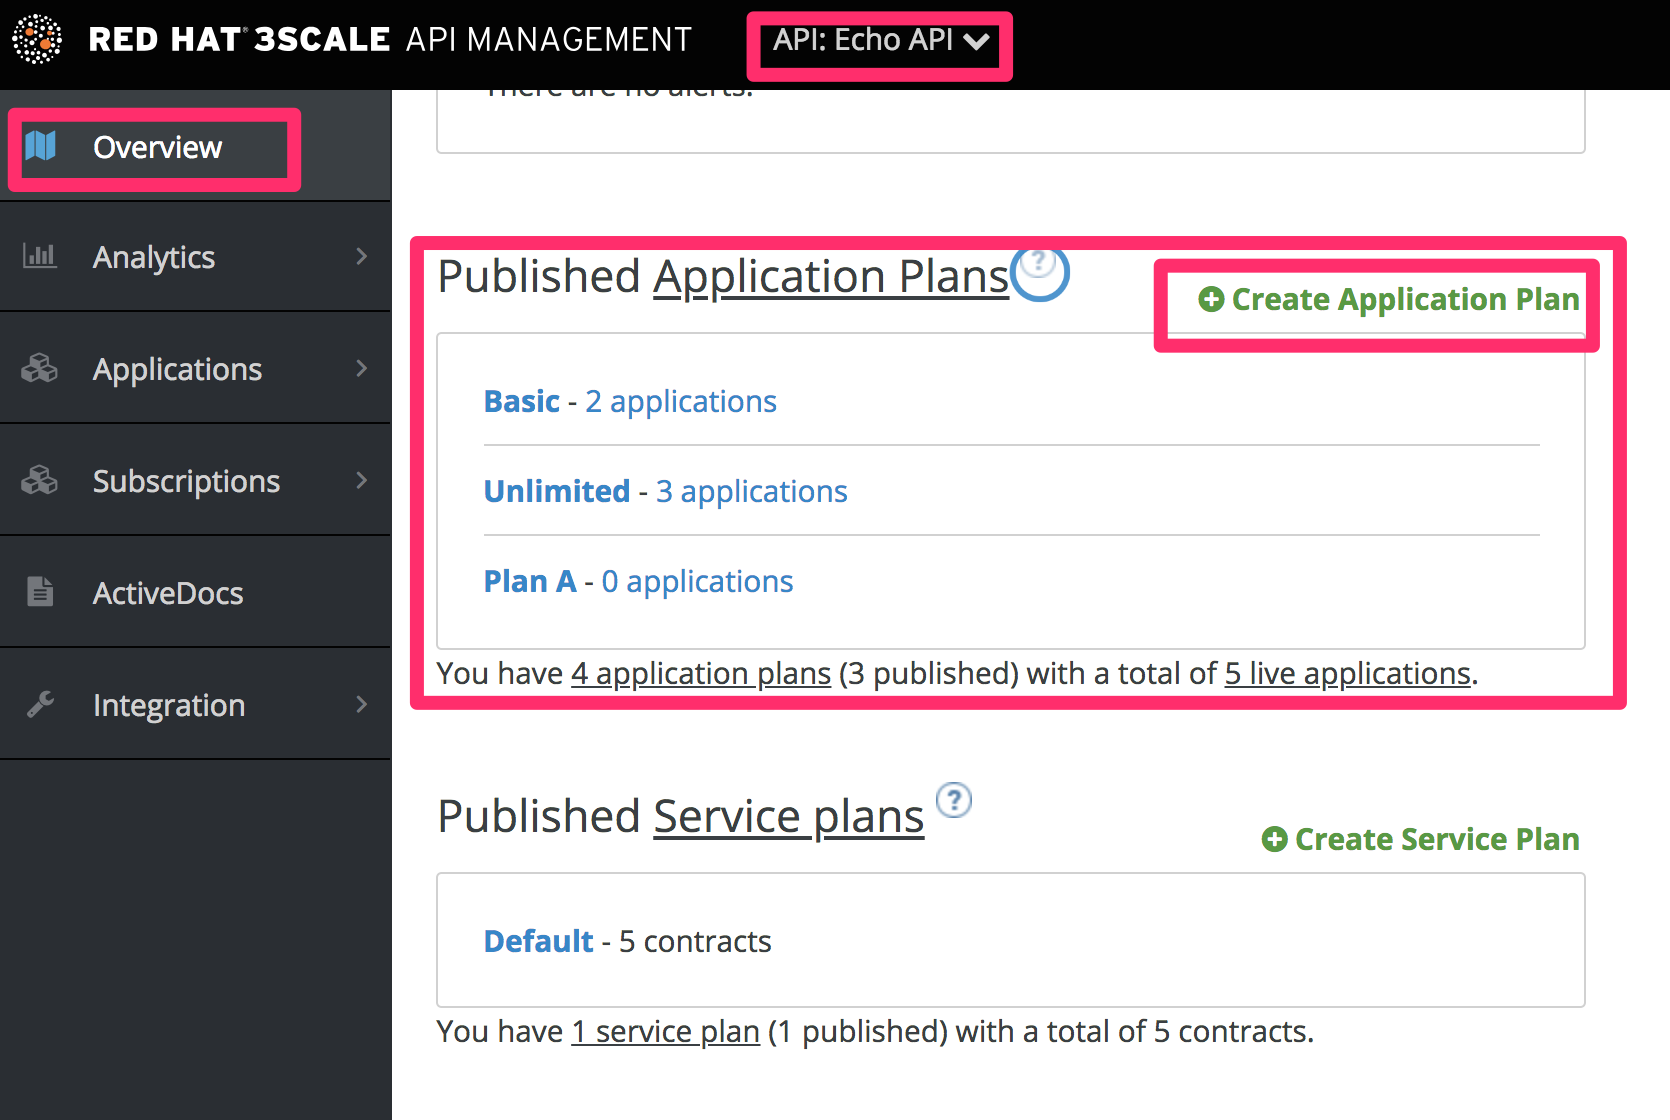
- Navigate to [Your_API_service] > Applications > Application Plans.
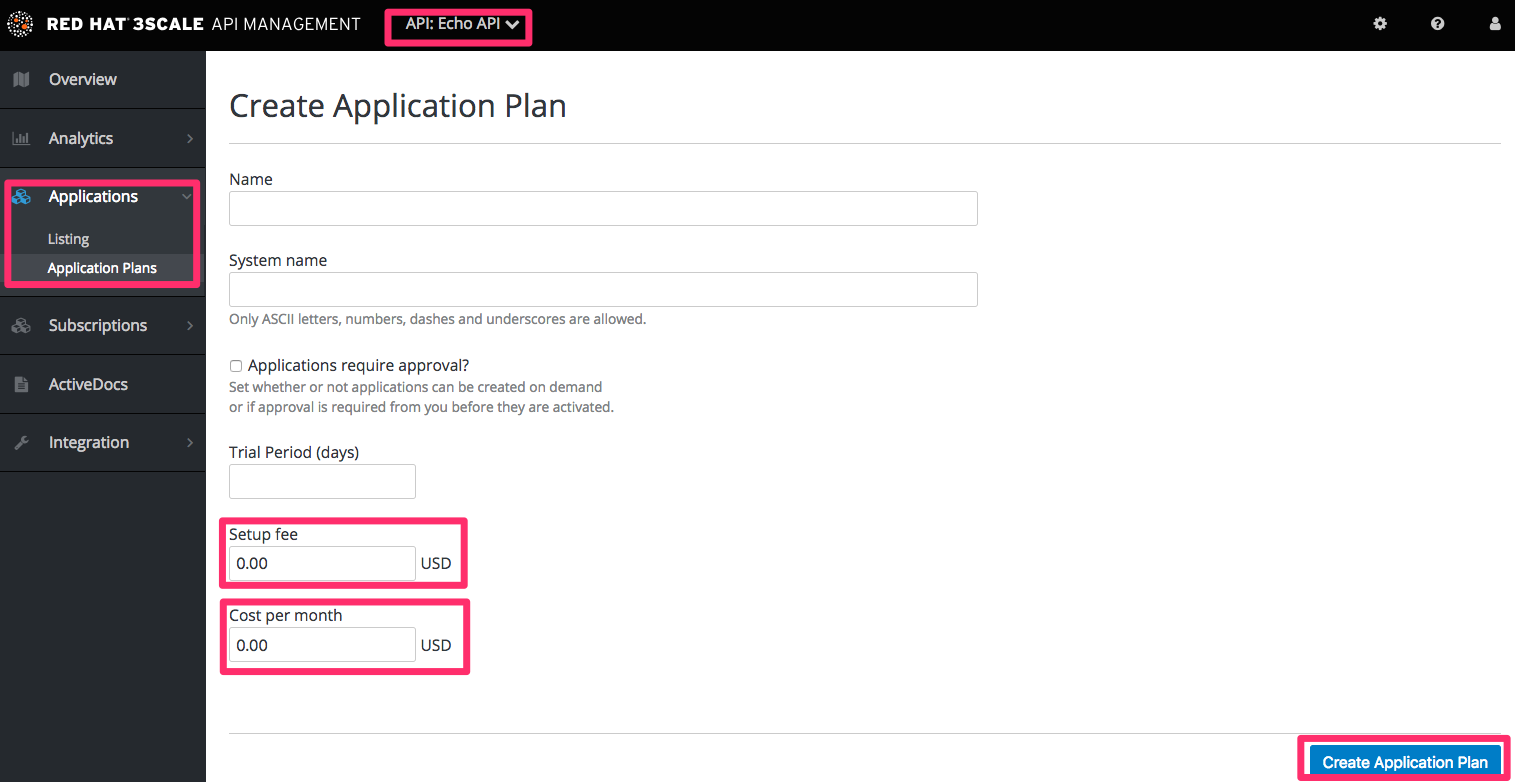
- Click ‘Create Application Plan’.
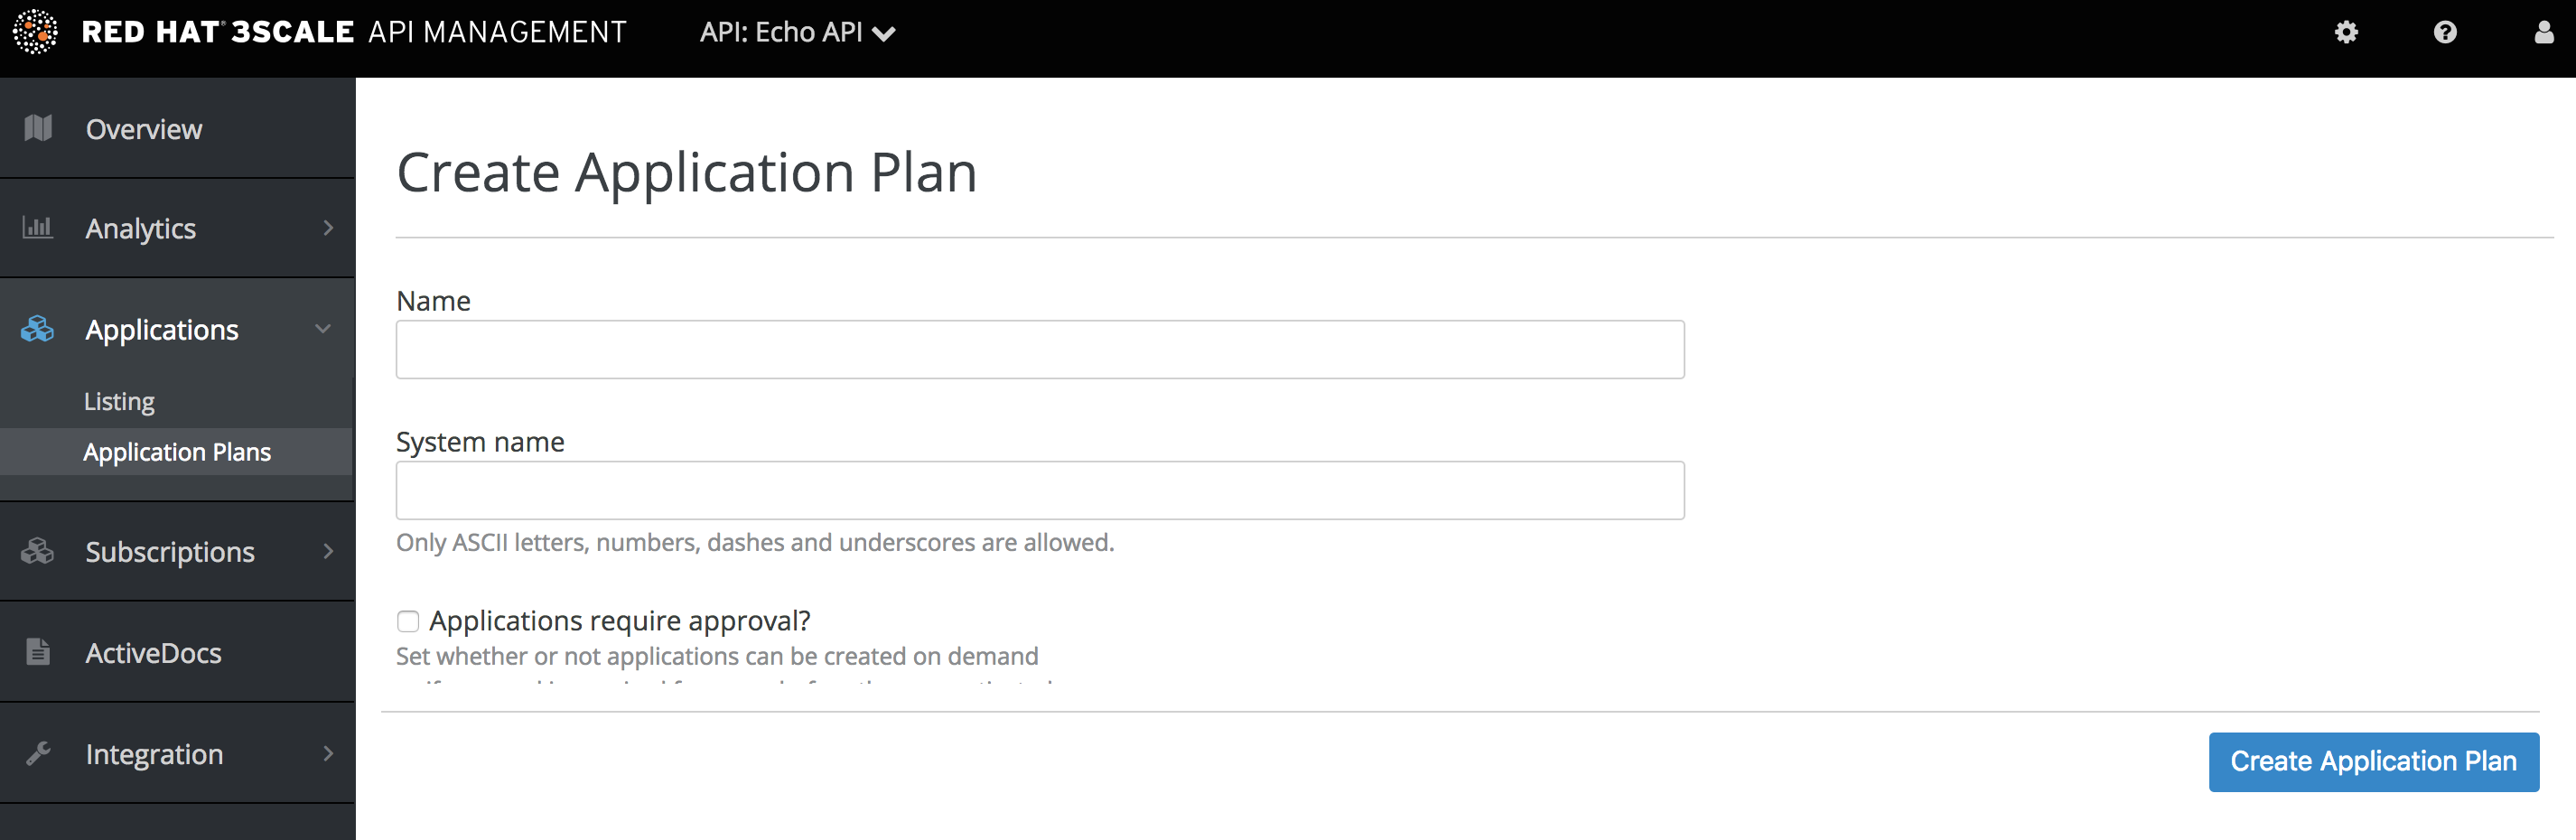
In the next screen, pick a name and a system name (system names must be unique) for your new plan. If the Applications require approval? checkbox is selected, no applications will be able to access your API without approval.
Once you have created a plan, you can provision rate limits and set up paid plans.
2.2. Setting up a default application plan
After you have created all your plans, you can select a default plan for when people sign up to register their applications. To do so, navigate to [Your_API_service] > Applications > Application Plans, and select the default plan:
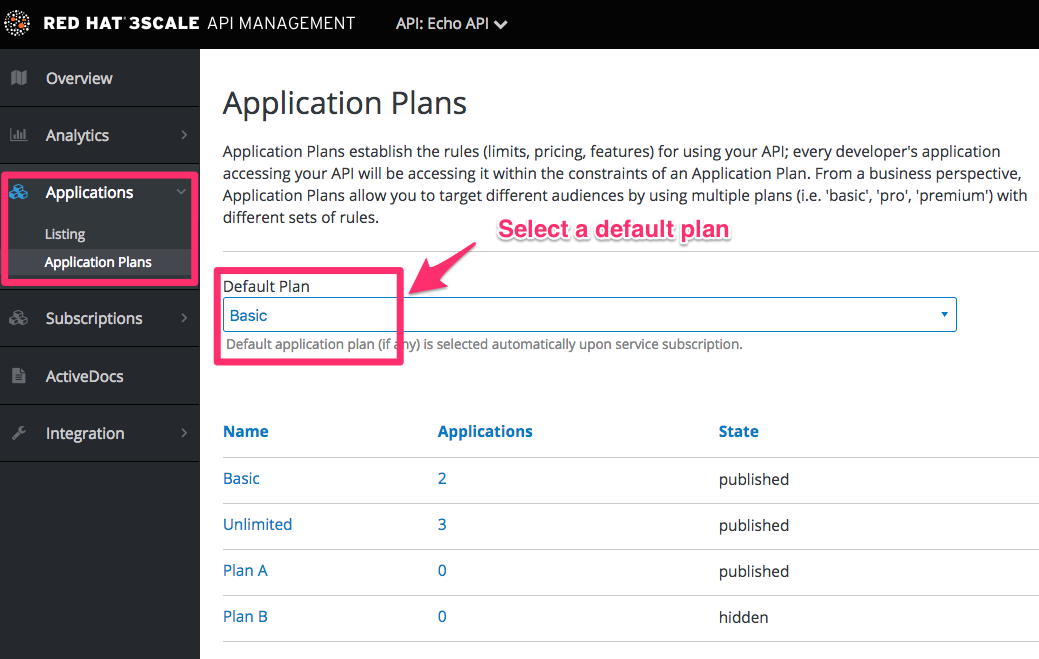
If you don’t indicate a default application plan, when a new user signs up to get access to your API, they won’t be created an application by default (meaning they won’t really get access to your API).
Chapter 3. Mapping Rules
After defining your API creating methods and metrics, you can map your API endpoints or paths to the methods you have defined in the Definition page. To do so:
- Navigate to [Your_API_service] > Integration > Configuration > Edit APIcast configuration and find the Mapping rules section in the page.
- Choose the HTTP method, available on the specific endpoint path
- Select the equivalent method to map against. Different operations (GET, PUT, POST, DELETE, etc…) on the same endpoint can be tracked separately.
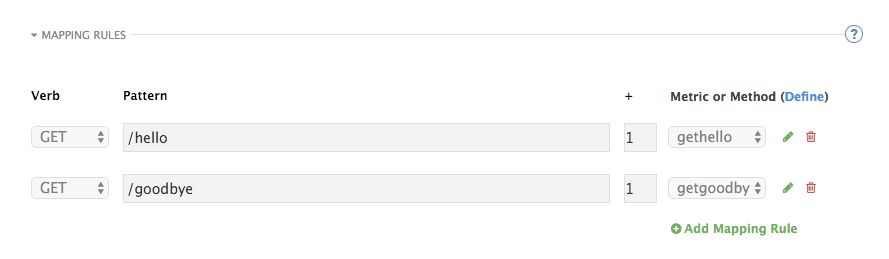
The workflow to define mapping rules is as follows:
Add new rules by clicking on Add Mapping Rule link. Then select an HTTP method, a pattern, a metric (or method), and its increment. When you’re done, click the Update & Test Staging Configuration button.
- Mapping rules will be grayed out on the next reload to prevent accidental modifications.
- To edit an existing mapping rule, you must first enable editing by clicking on the pencil icon on the right. To delete a rule, click on the red trash icon. Edits, modifications, and deletions will be saved when you hit the Update & Test Staging Configuration button.
Once the setup is done, you can test your integration with the Staging APIcast Cloud Gateway to ensure your setup will work in production.
If all the parameters and mapping rules are set correctly, you should see a green line showing a correct test integration between 3scale and your API Backend.

Chapter 4. Provisioning Paid Plans
One of the most popular ways to monetize an API is by defining subscription fees based on usage. This section focuses on how to use application plans to provision pricing tiers. It’s also possible to apply pricing rules at the account and the service level – these topics are covered in advanced guides.
Below you’ll learn about the pricing options for application plans and how to set up a paid plan.
4.1. Step 1: Make decisions about your pricing model
The first decision to make is how to differentiate between the tiers in your pricing model. Will the tiers be driven by volume/usage, API functionality, access to other resources, or a combination?
- Volume / Usage. The most common way to differentiate between tiers is based on volume because volume usually has a strong correlation to value to the customer as well as cost to serve. You can apply a global hit count for calls on the API or a more granular measurement at the method level.
- Functionality. You can enable or disable access to parts of your API depending on the tier. This is a good approach to distinguish between standard and premium levels.
- Resources. You can also create tiers based on access to any other resources that provide value to the customer or drive costs in your infrastructure – for example, GB’s of bandwidth consumed, number of users, or transaction values.
Once you have decided on your pricing drivers, you must decide whether the tiers will be based on a flat rate subscription, a variable rate, or a one-off upfront charge. All three of the pricing drivers above are compatible with the one off, or monthly flat rate subscriptions. If you decide your pricing will be based on volume of hits or resource consumption, there will of course be a variable element to your pricing.
4.2. Step 2: Set up an application plan with your pricing rules
You can either create a new application plan or edit an existing one. When creating a new application plan, you can enter any upfront charges or flat rate subscriptions.
In the edit application view, you can enter or modify the upfront charges and subscriptions.
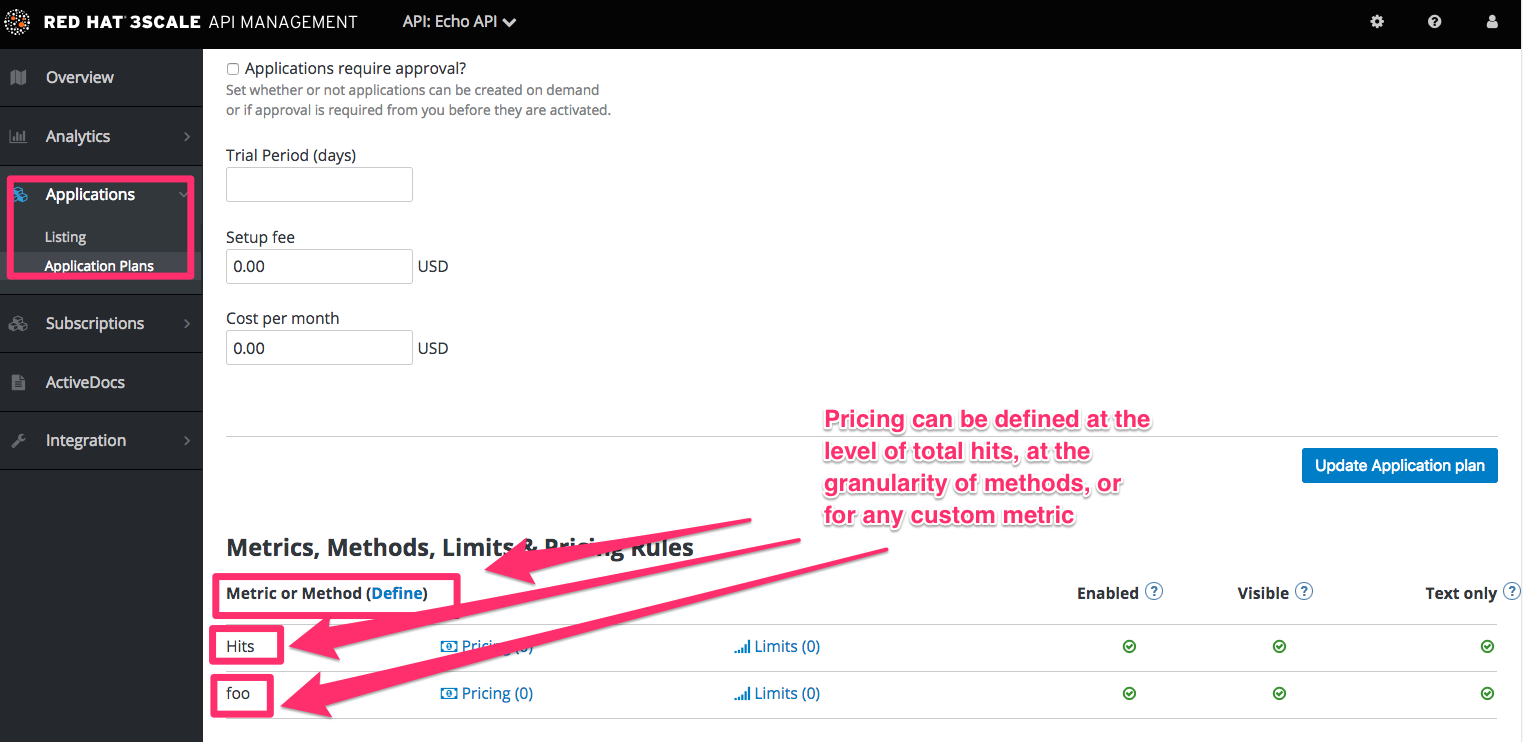
Next, set up the pricing drivers you decided on in step 1. If some of them already exist as metrics, you can simply edit the item.
- Volume drivers: are applied at the level of the global hits metric, or for individual methods under hits. Multiple pricing rules can be applied to any metric. Note that the hits calculation is cumulated over a one-month billing cycle.
- Functionality drivers are set by enabling or disabling the metric for this plan.
- Resource drivers are similar to volume drivers but are applied on custom metrics.
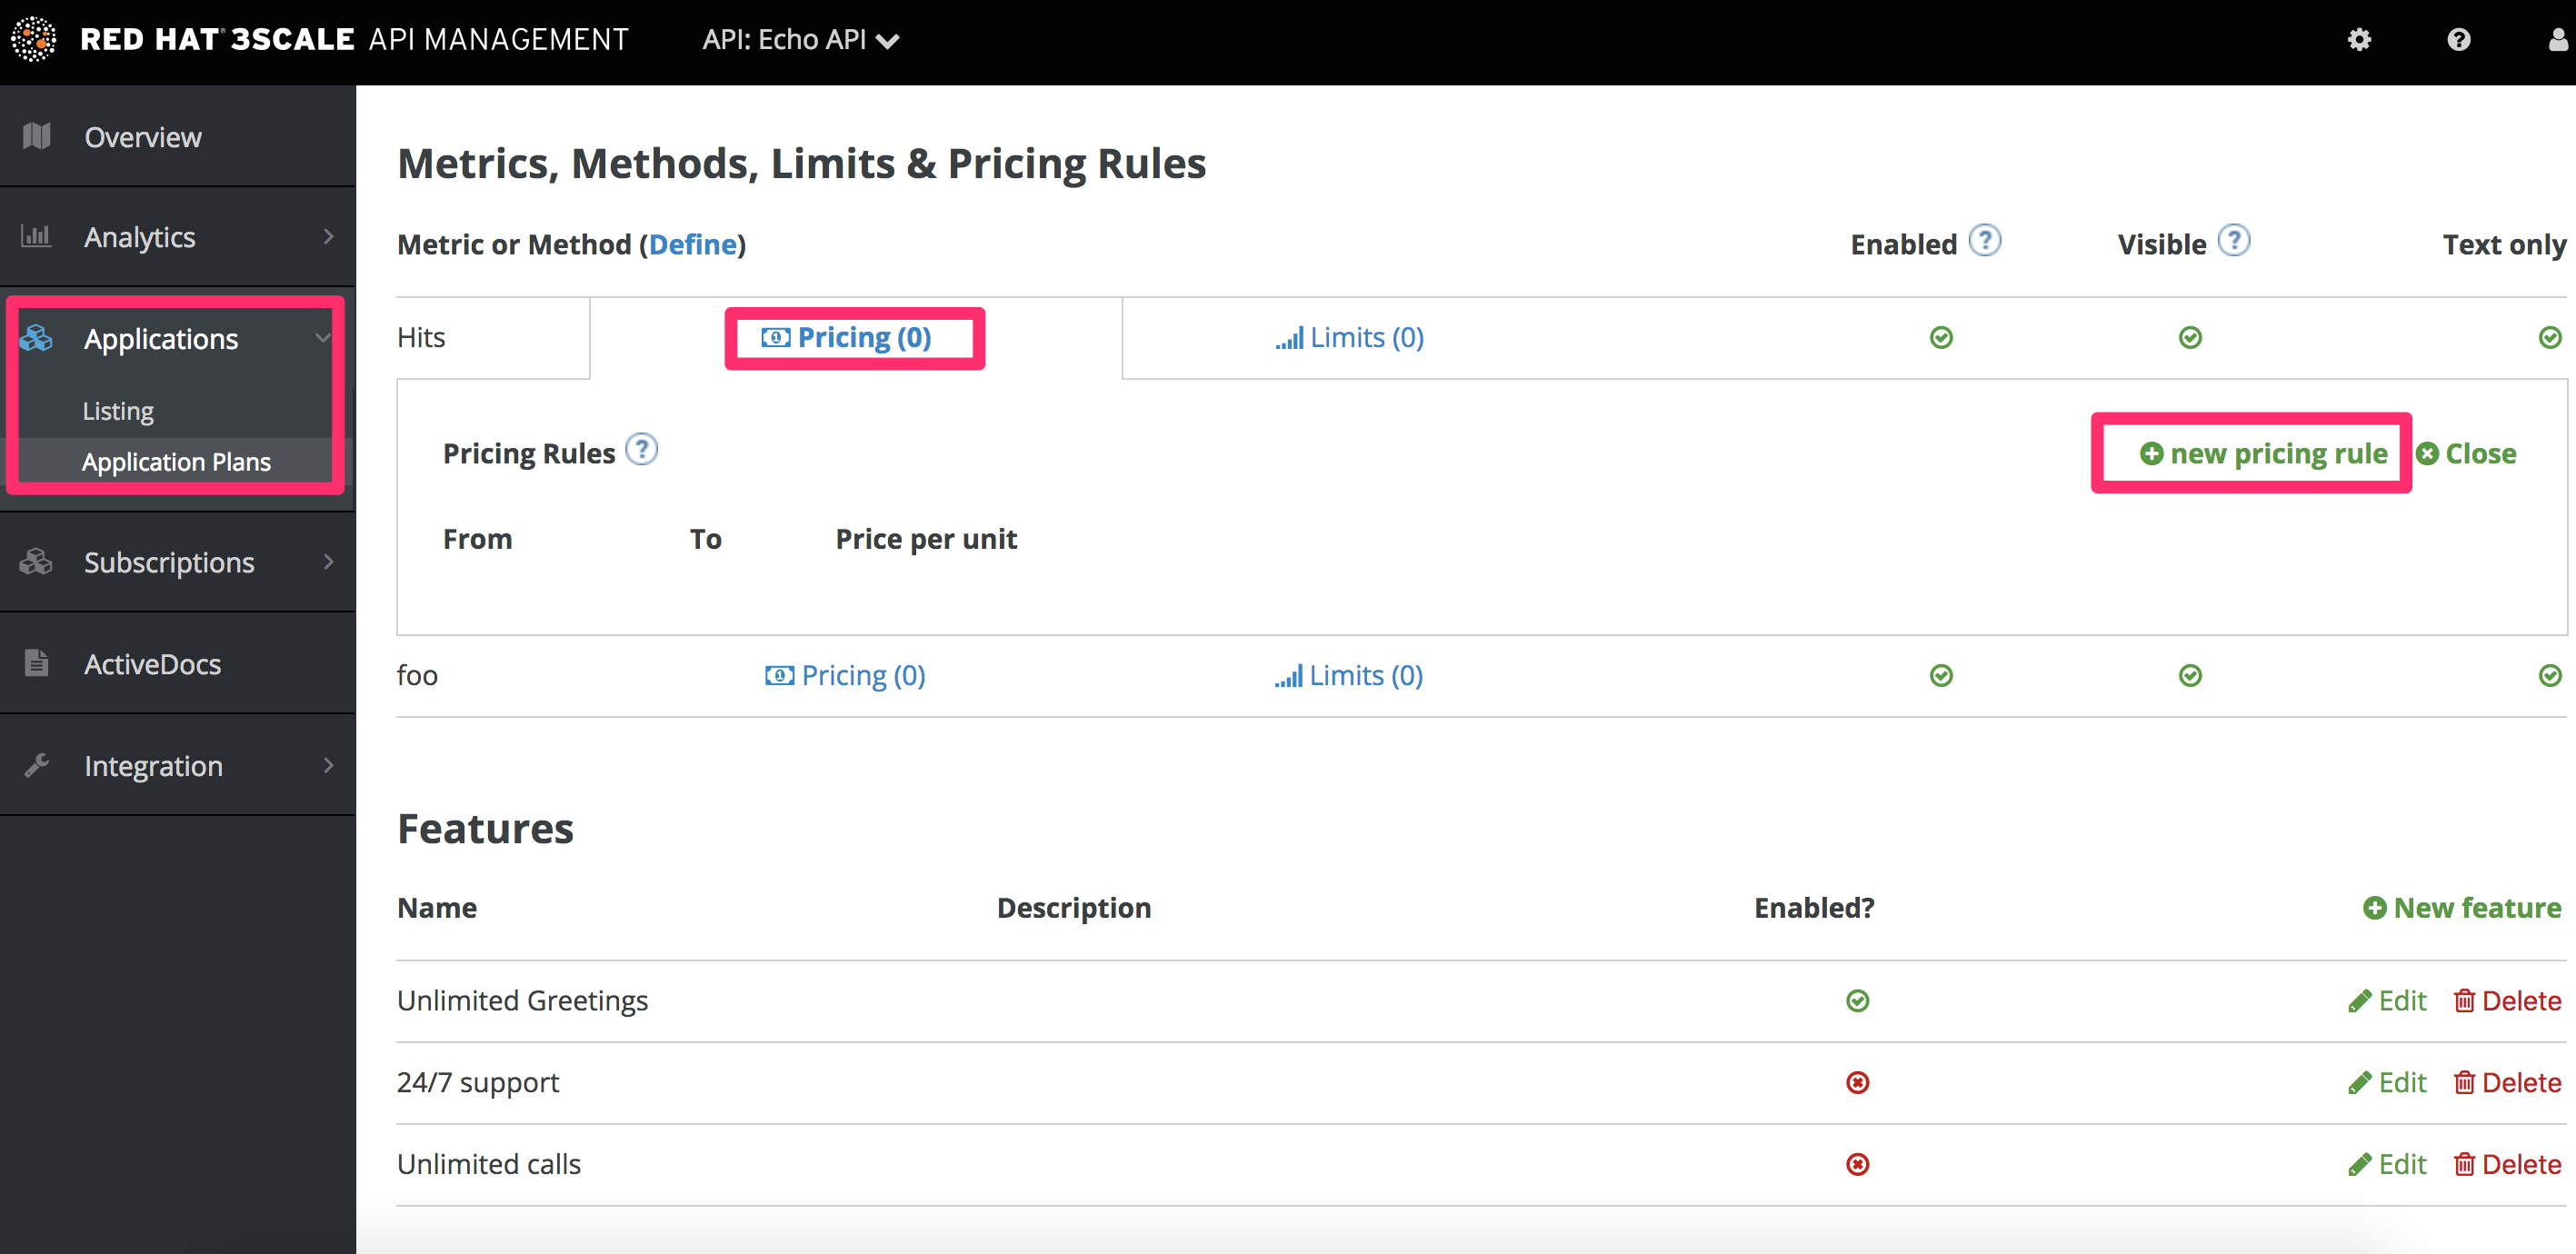
Once you’re finished setting up your pricing rules, be sure to click “update application plan”.
4.3. Step 3: Create further pricing tiers
It’s ok to define an API paid plan with a single application plan. Usually this would be the case if all your pricing rules are defined by volume or resource drivers. However if you want to offer separate plans for different segments of your developer community, you’ll need to add more application plans.
The easiest way to do this is to copy the first application plan from the application plan overview page. This way, it will be pre-populated with all the existing metrics and pricing rules. The more care you take to create a full plan the first time, the more time you will save with the plan copy feature.
4.4. Step 4: Provision the paid plans
In order to provision the plans, your developers must create new applications and select one of the new paid plans. You can also do this on their behalf from the admin console. For any existing applications, it’s also possible to change from an existing plan to one of the new paid plans.
4.5. More information
In conjunction with flat-rate pricing plans it’s common to differentiate between tiers using rate limits. This is explained in provision rate limits
Chapter 5. Provisioning Rate Limits
Rate limits allow you to throttle access to your API resources. You can configure different limits for separate developer segments through the use of application plans.
Once you have rate limits in place, these limits will control the responses a developer receives when they make authorization request calls to the 3scale back end.
5.1. Step 1: Go to the application plan
If you do not have an application plan defined yet, create one first. Otherwise, select the plan you want to set rate limits for and click edit.
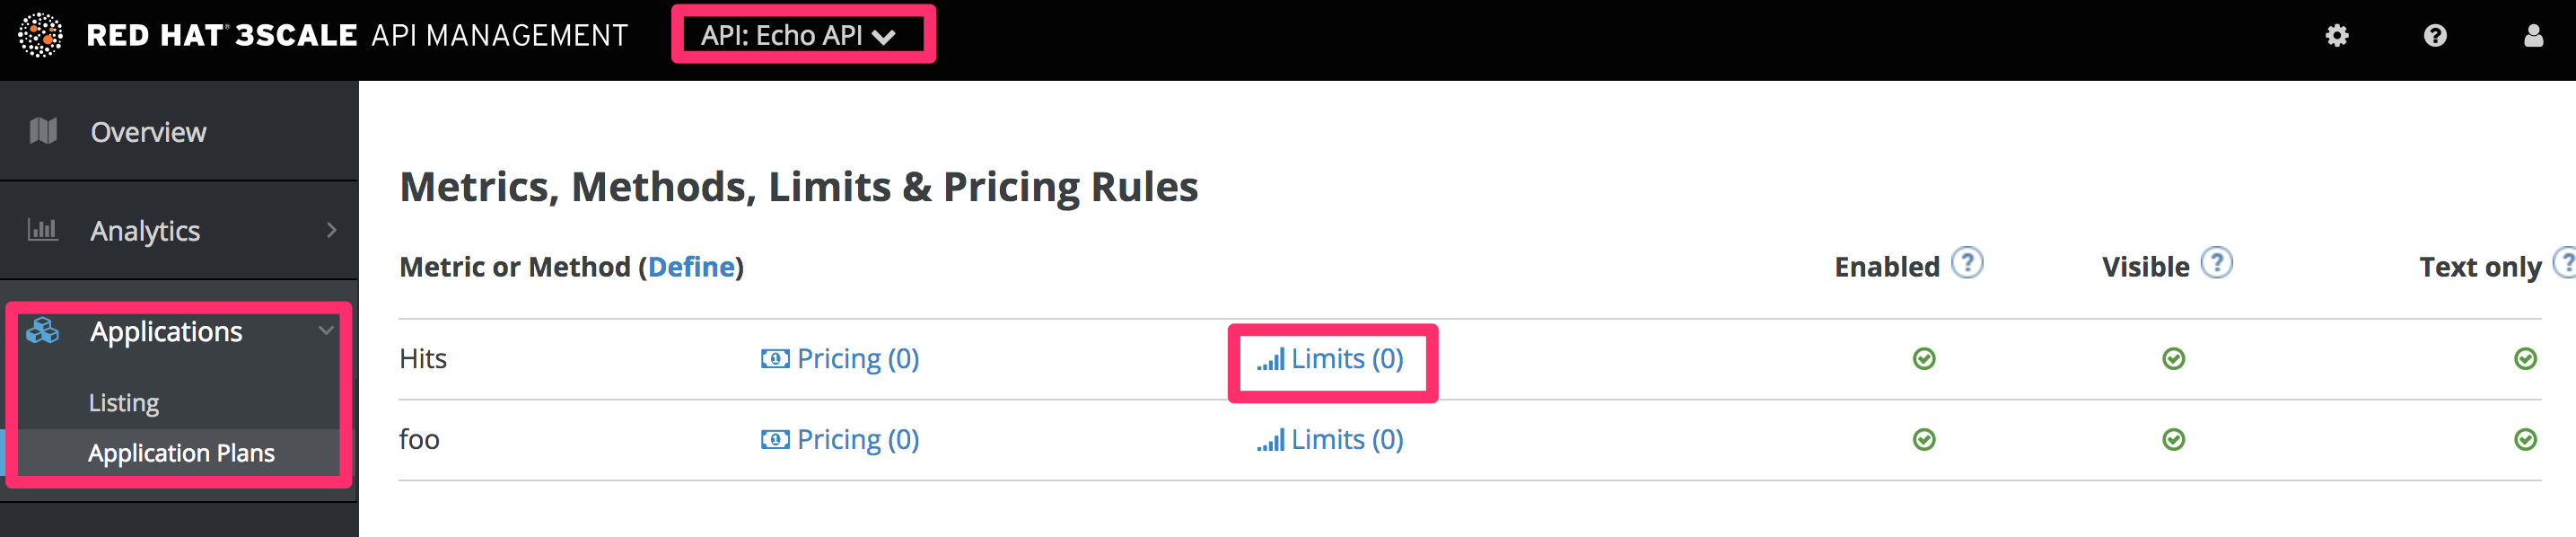
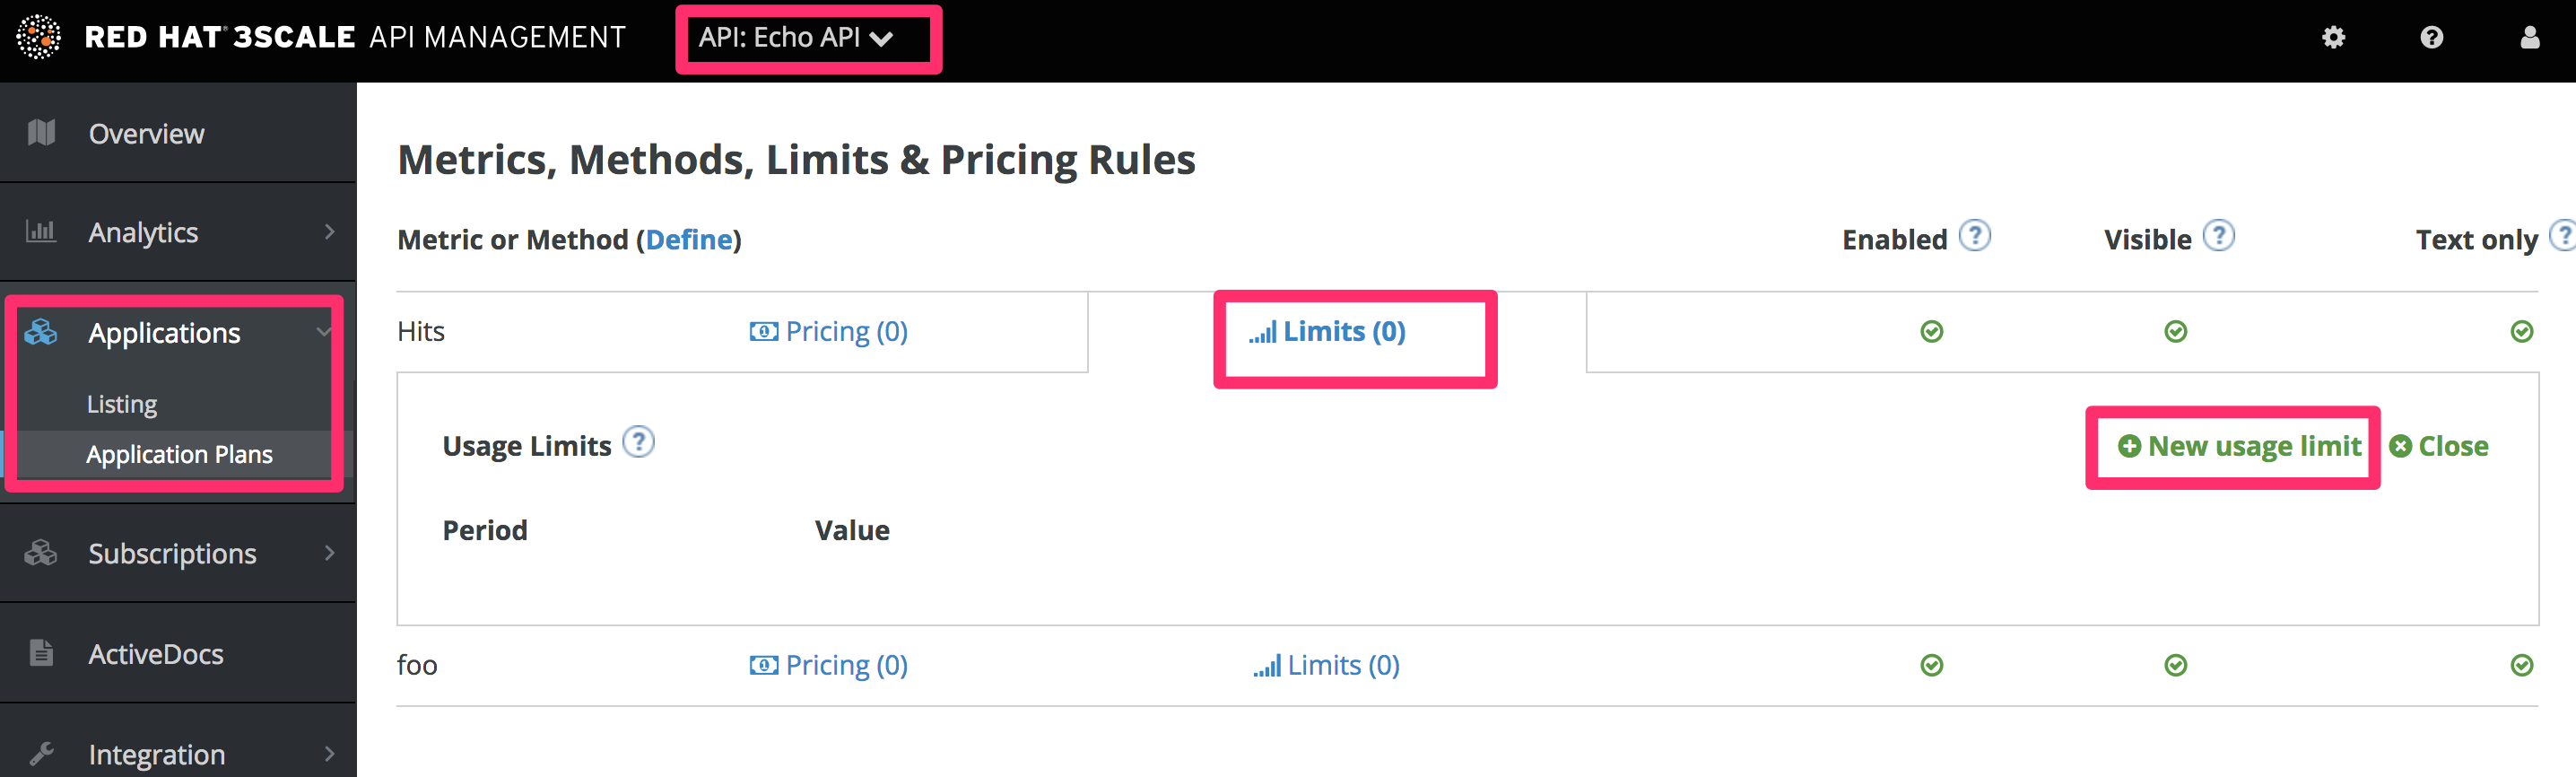
5.2. Step 2: Set the rate limits
5.3. Step 3: Update the application plan
When you are finished setting the limits you require, save your changes by clicking Update Application plan.
5.4. Step 4: Put the new rate limits into action
Now that you have your rate limits defined, the following will happen:
- If you have alerts configured, the new limits will be used to decide when notifications are sent.
-
When you make authorization calls to the 3scale back end, the limits will be taken into account and the response will be with status code
409. In this case the APIcast API gateway sends a response to the client with the status code429 Too Many Requestsand the message,Limits exceeded.
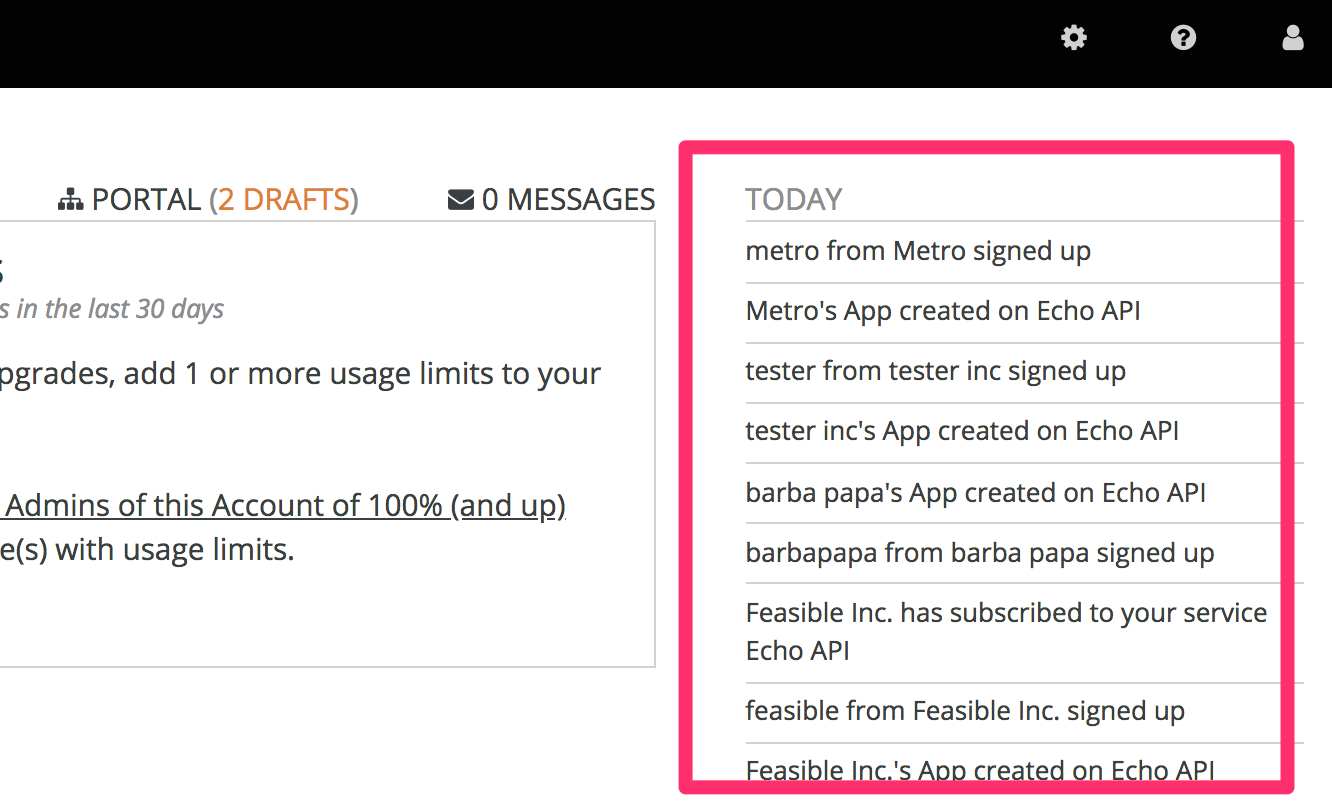
Once your rate limits are operational, you will see the users who are reaching the limits on your dashboard, making it quick and easy to check for potential plan upgrade candidates.
For more information about soft and hard limits, you should read 1.1.3.2. Configure your API access policies with application plans, window="_blank" in our Quickstart guide.
5.5. More information
Besides setting rate limits, you can also set variable pricing rules for the same metrics – see provision paid plans