
Getting started with Red Hat Developer Hub
Abstract
Preface
As a developer, you can use Red Hat Developer Hub to experience a streamlined development environment. Red Hat Developer Hub is driven by a centralized software catalog, providing efficiency to your microservices and infrastructure. It enables your product team to deliver quality code without any compromises.
Red Hat Developer Hub support
If you experience difficulty with a procedure described in this documentation, visit the Red Hat Customer Portal at http://access.redhat.com. You can use the Red Hat Customer Portal to search or browse through the Red Hat Knowledgebase of technical support articles about Red Hat products. You can also create a support case for Red Hat Global Support Services (GSS). Please select "Red Hat Developer Hub" as the product and select the appropriate product version.
Chapter 1. Overview of Red Hat Developer Hub
Red Hat Developer Hub (Developer Hub) serves as an open developer platform designed for building developer portals. Using Developer Hub, the engineering teams can access a unified platform that streamlines the development process and provides a variety of tools and resources to build high-quality software efficiently.
The goal of Developer Hub is to address the difficulties associated with creating and sustaining developer portals using:
- A centralized dashboard to view all available developer tools and resources to increase productivity
- Self-service capabilities, along with guardrails, for cloud-native application development that complies with enterprise-class best practices
- Proper security and governance for all developers across the enterprise
The Red Hat Developer Hub simplifies decision-making by providing a developer experience that presents a selection of internally approved tools, programming languages, and various developer resources within a self-managed portal. This approach contributes to the acceleration of application development and the maintenance of code quality, all while fostering innovation.
Chapter 2. Installing Red Hat Developer Hub using Helm Chart
You can use a Helm Chart in Red Hat OpenShift (OpenShift) to install Red Hat Developer Hub, which is a flexible installation method.
Helm is a package manager on OpenShift that provides the following features:
- Applies regular application updates using custom hooks
- Manages the installation of complex applications
- Provides charts that you can host on public and private servers
- Supports rolling back to previous application versions
The Red Hat Developer Hub Helm Chart is available in the Helm catalog in Red Hat OpenShift Dedicated and OpenShift Container Platform (OCP).
Prerequisites
- You are logged in to the OCP using the OpenShift web console.
- You have configured the appropriate roles and permissions within your project to create an application.
Procedure
Create a project in the OpenShift, if not present.
For more information about creating a project in OpenShift, see Red Hat OpenShift documentation.
- Switch to Developer mode on your Red Hat OpenShift web console.
- Click +Add.
- From the Developer Catalog panel, click Helm Chart.
- Search for Developer Hub in the search bar and select the Red Hat Developer Hub card.
- Click Create.
-
Copy the OpenShift router host (for example:
apps.<clusterName>.com) to Root Schema → global → Shorthand for users who do not want to specify a custom HOSTNAME. Used ONLY with the DEFAULT upstream.backstage.appConfig value and with OCP Route enabled., and adjust the other values if needed. Alternatively, copy the OpenShift router host (for example:
apps.<clusterName>.com) toglobal.clusterRouterBase, and adjust other values if needed, such asglobal.clusterRouterBase: apps.example.com.In the previous steps, the information about the host is copied, which is accessed by the Developer Hub backend.
When an OCP route is generated automatically, the host value for the route is inferred and the same host information is sent to the Developer Hub. Also, if the Developer Hub is present on a custom domain by setting the host manually using values, the custom host takes precedence.
- Click Create and wait for the database and Red Hat Developer Hub to start.
Click the Open URL option to start using the Red Hat Developer Hub platform.
If your developer-hub pod is stuck in a CrashLoopBackOff and you see the following logs:
Loaded config from app-config-from-configmap.yaml, env
...
2023-07-24T19:44:46.223Z auth info Configuring "database" as KeyStore provider type=plugin
Backend failed to start up Error: Missing required config value at 'backend.database.client'
Then, verify the configuration files. This is because the configuration files are not being accessed by the RHDH container.
Chapter 3. Supported configurations for Red Hat Developer Hub
This section describes the configurations that are required to access the Red Hat Developer Hub, including:
- Custom applications configuration
- Source control configuration for Developer Hub Catalog
3.1. Adding a custom application configuration file to Red Hat OpenShift
To access the Red Hat Developer Hub, you must add a custom application configuration file to OpenShift. In OpenShift, you can use the following content as a base template to create a ConfigMap named app-config-rhdh:
kind: ConfigMap
apiVersion: v1
metadata:
  name: app-config-rhdh
data:
  app-config-rhdh.yaml: |
    app:
      title: Red Hat Developer Hub
Prerequisites
- You have created an account in Red Hat OpenShift.
Procedure
- Navigate to OpenShift and select the ConfigMaps tab.
Click Create ConfigMap.
Create ConfigMap page appears.
- Select the YAML view option in Configure via and make the changes to the file, if needed.
- Click Create.
Go to the Helm tab.
The list of Helm Releases appears on the page.
- Click the three dots of a Helm release and select Upgrade.
Add the following values in Root Schema → Backstage Chart Schema → Backstage Parameters → Extra App Configuration files to inline into command arguments:
-
ConfigMapRef:
app-config-rhdh -
filename:
app-config-rhdh.yaml
-
ConfigMapRef:
- Click Upgrade.
-
Alternatively, go to the YAML view for the helm values and set the value of
upstream.backstage.commandto[]. - Click Upgrade.
3.2. Adding source control for Catalog in Red Hat Developer Hub
To populate the Catalog in Red Hat Developer Hub, you need to add software templates, and to add the templates, you must enable a source control such as GitHub, GitLab, or BitBucket.
3.2.1. Setting GitHub integration and authentication
The GitHub integration and authentication is required to enable the GitHub plugins in Red Hat Developer Hub.
Prerequisites
- You have a GitHub account.
- You have an account in Red Hat OpenShift
Procedure
- In OpenShift, click ConfigMap.
Modify your
app-config-rhdhfile to include the GitHub configuration as follows:kind: ConfigMap apiVersion: v1 metadata: name: app-config-rhdh data: app-config-rhdh.yaml: | app: title: Red Hat Developer Hub integrations: github: - host: github.com apps: - appId: ${GITHUB_APP_APP_ID} clientId: ${GITHUB_APP_CLIENT_ID} clientSecret: ${GITHUB_APP_CLIENT_SECRET} webhookUrl: ${GITHUB_APP_WEBHOOK_URL} webhookSecret: ${GITHUB_APP_WEBHOOK_SECRET} privateKey: | ${GITHUB_APP_PRIVATE_KEY} auth: # see https://backstage.io/docs/auth/ to learn about auth providers environment: development providers: github: development: clientId: ${GITHUB_APP_CLIENT_ID} clientSecret: ${GITHUB_APP_CLIENT_SECRET}- Click Save.
Create a key or value Secret file named
rhdh-secretsusing the environment variables as keys from the previous code snippet by following the steps below:- In Red Hat OpenShift, go to the Secrets tab and click Create.
-
Enter Secret name as
rhdh-secrets. - Add environment variables as Key and Value and click Create.
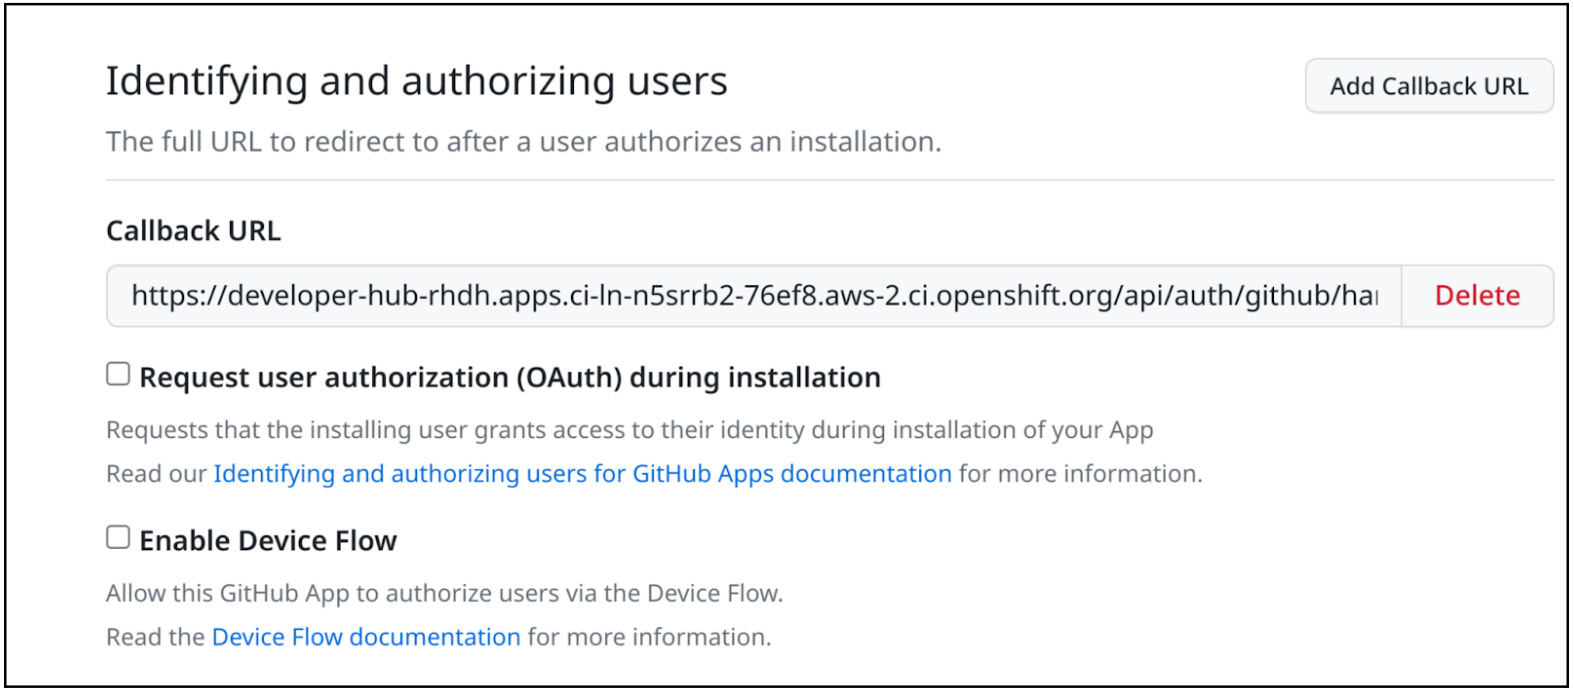
To log in using your GitHub application, ensure that the Callback URL in your GitHub application is configured as follows:
https://developer-hub-<NAMESPACE_NAME>.<OPENSHIFT_ROUTE_HOST>/api/auth/github/handler/frameIn the previous example of Callback URL,
OPENSHIFT_ROUTE_HOSTis the API URL added into the Root Schema → global → clusterRouteBase field.The following is an example of the Callback URL:
 Note
NoteTo access the GitHub security insights widget on the Overview page in Developer Hub, ensure that your GitHub application has Read-only Dependabot Alerts permissions.
- Navigate to the Helm tab and select Upgrade.
-
Under Root Schema → Backstage Chart Schema → Backstage Parameters → Backstage container environment variables from existing Secrets, add
rhdh-secretsas value. - Click Upgrade.
3.2.2. Enabling GitHub discovery in Red Hat Developer Hub
You can enable GitHub discoverability for your components in Developer Hub, such as any repositories that contain catalog-info.yaml file.
Prerequisites
- You have set up the GitHub integration. For more information, see Section 3.2.1, “Setting GitHub integration and authentication”.
Procedure
- In Red Hat Openshift, go to the Helm tab and upgrade the Developer Hub release.
Under global → Dynamic plugins configuration → List of dynamic plugins that should be installed in the backstage application. → Package specification of the dynamic plugin to install. It should be usable by the
npm packcommand., add the following value:./dynamic-plugins/dist/backstage-plugin-catalog-backend-module-github-dynamic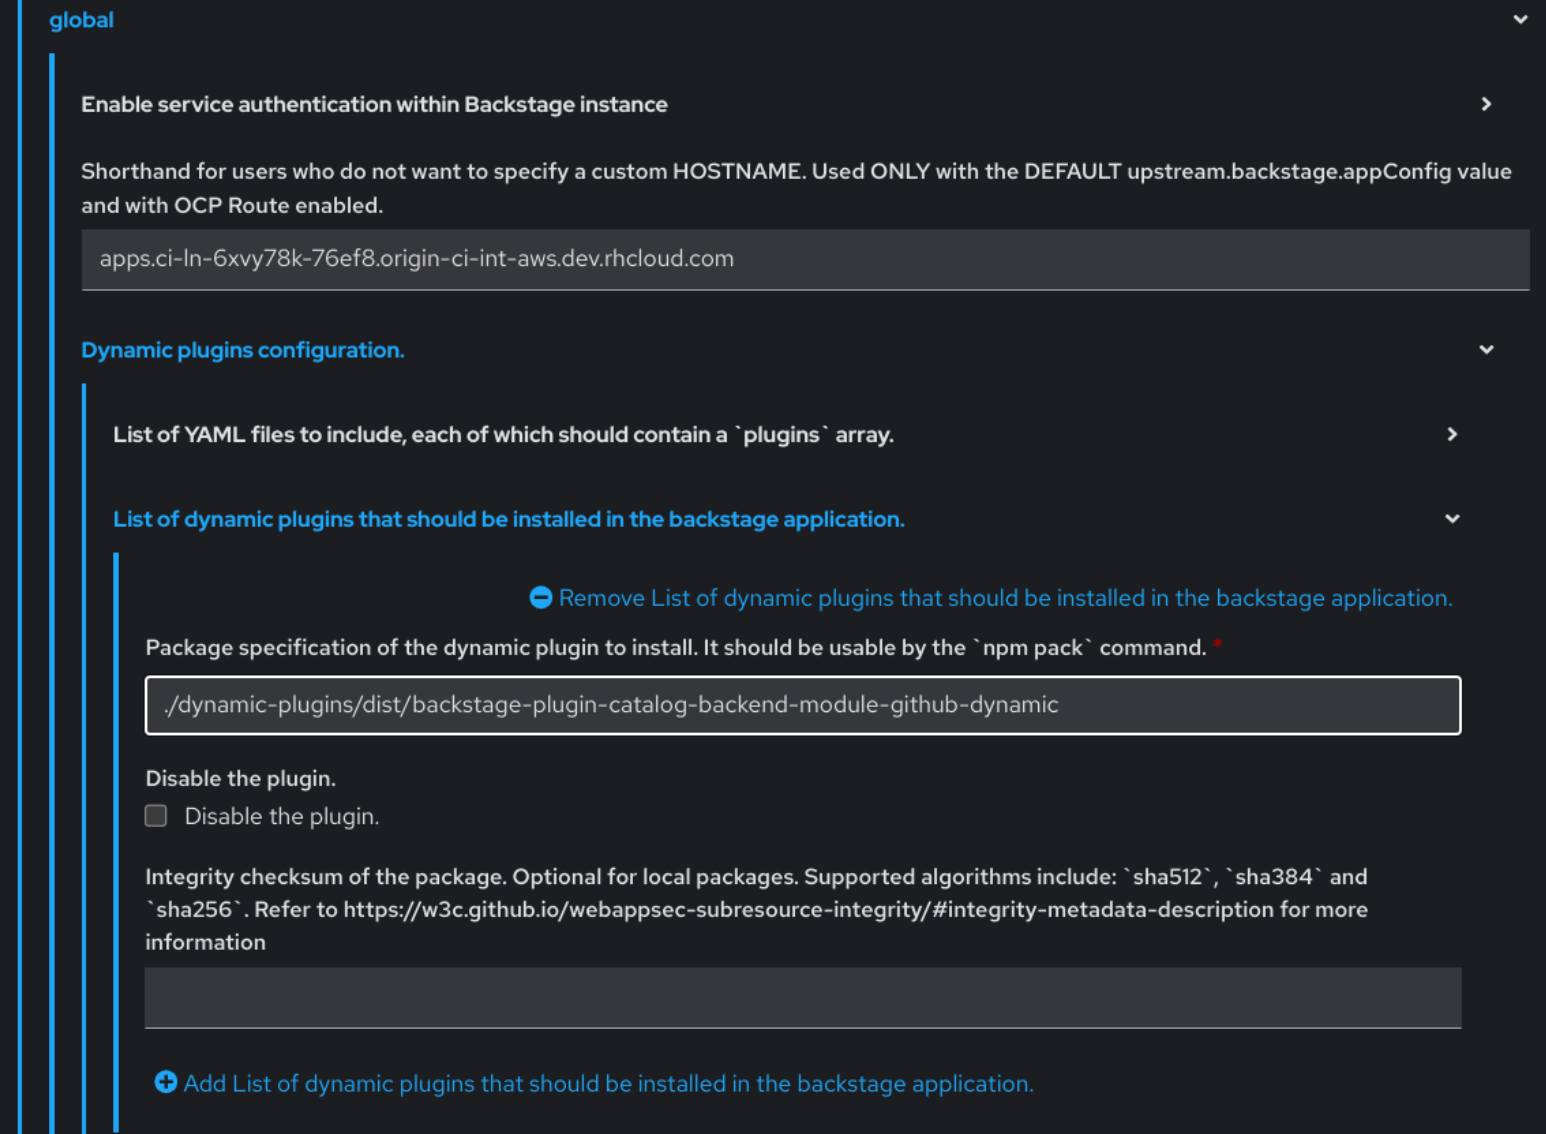
- Click Upgrade.
Add the following code in the ConfigMap:
kind: ConfigMap
apiVersion: v1
metadata:
  name: app-config-rhdh
data:
  app-config-rhdh.yaml: |
    ...
      catalog:
        providers:
          github:
            providerId:
              organization: '${GITHUB_ORG}'
              schedule:
                frequency:
                  minutes: 30
                initialDelay:
                  seconds: 15
                timeout:
                  minutes: 3
    ...
In the previous code, replace
${GITHUB_ORG}with the GitHub organization from where you want to discover the components. Also, if there is a single provider, then following code can be added in the ConfigMap:kind: ConfigMap apiVersion: v1 metadata: name: app-config-rhdh data: app-config-rhdh.yaml: | ... catalog: providers: github: organization: ${GITHUB_ORG} schedule: frequency: { minutes: 1 } timeout: { minutes: 1 } initialDelay: { seconds: 100 } ...The
providerIdin the previous code is required to identify the provider when there is a list of them.- Click Save.
3.2.3. Enabling GitHub organization member discovery in Red Hat Developer Hub
You can also enable GitHub discoverability for the members of your GitHub organization.
Prerequisites
- You have set up the GitHub integration. For more information, see Section 3.2.1, “Setting GitHub integration and authentication”.
Procedure
- In Red Hat Openshift, go to the Helm tab and upgrade the Developer Hub release.
Under global → Dynamic plugins configuration → List of dynamic plugins that should be installed in the backstage application. → Package specification of the dynamic plugin to install. It should be usable by the
npm packcommand., add the following value:./dynamic-plugins/dist/backstage-plugin-catalog-backend-module-github-org-dynamic
- Click Upgrade.
Add the following code in the ConfigMap:
kind: ConfigMap
apiVersion: v1
metadata:
  name: app-config-rhdh
data:
  app-config-rhdh.yaml: |
    ...
    catalog:
      providers:
        githubOrg:
          default:
            id: production
            orgUrl: '${GITHUB_ORG_URL}'
    ...
In the previous code, replace
${GITHUB_ORG_URL}with the GitHub organization you want to ingest users from.- Click Save.
Chapter 4. Customizing the Home page in Red Hat Developer Hub
In Red Hat Developer Hub, the Home page data is configurable, which can be passed into the app-config.yaml file as a proxy. You can provide the Home page data using the following ways:
Using JSON files that are hosted or GitHub or GitLab. To access the data from the JSON files, you can add the following code in the
app-config.yamlfile:proxy: endpoints: # Other Proxies # customize developer hub instance '/developer-hub': target: <DOMAIN_URL> # i.e https://raw.githubusercontent.com/ pathRewrite: '^/api/proxy/developer-hub': <path to json file> # i.e /janus-idp/backstage-showcase/main/packages/app/public/homepage/data.json changeOrigin: true secure: true # Change to "false" in case of using self hosted cluster with a self-signed certificate headers: <HEADER_KEY>: <HEADER_VALUE> # optional and can be passed as needed i.e Authorization can be passed for private GitHub repo and PRIVATE-TOKEN can be passed for private GitLab repoUsing a separate service that provides the Home page data in JSON format using an API.
NoteIt is not necessary that the same service provides the Home page and Tech Radar data.
You can use the
red-hat-developer-hub-customization-provideras an example service, which provides data for both Home page and Tech Radar. Thered-hat-developer-hub-customization-providerservice provides the same data as default Developer Hub data. You can fork thered-hat-developer-hub-customization-providerservice repository from GitHub and modify it with your own data, if required.
This section describes how you can deploy the red-hat-developer-hub-customization-provider service onto the cluster where the Developer Hub Helm Chart is deployed.
Prerequisites
- You have installed the Red Hat Developer Hub using Helm Chart. For more information, see Chapter 2, Installing Red Hat Developer Hub using Helm Chart.
Procedure
- In Red Hat OpenShift, select +Add and click Import from Git option.
Add the URL of your Git repository to the Git Repo URL field.
To use the
red-hat-developer-hub-customization-providerservice, you can add the URL of red-hat-developer-hub-customization-provider repository.- In the General section, rename the value in the Name field to rhdh-customization-provider and click Create.
Go to the Advanced Options and copy the value from the Target Port.
The Target Port is used to automatically generate a Kubernetes or OpenShift service to communicate with.
To view the service, navigate to the OpenShift Administrator view and go to the Networking → Service section.
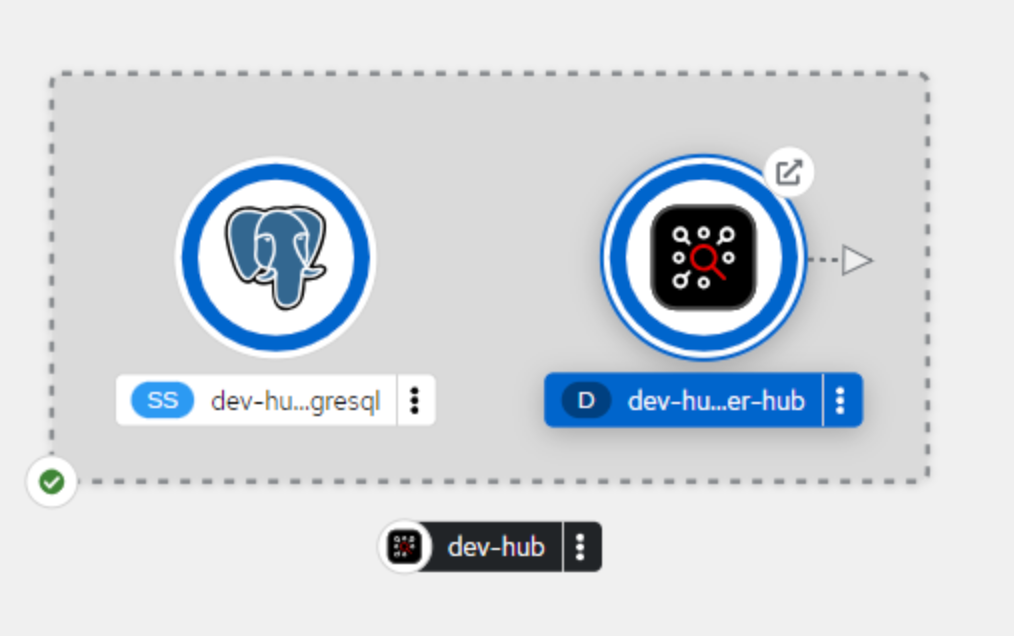
You can also view the Service Resources in the Topology view.
If you follow this procedure with examples, then
rhdh-customization-providerservice is called and contains the 8080 port. The provided API URL for the Home page must return the data in JSON format as shown in the following example:[ { "title": "Dropdown 1", "isExpanded": false, "links": [ { "iconUrl": "https://imagehost.com/image.png", "label": "Dropdown 1 Item 1", "url": "https://example.com/" }, { "iconUrl": "https://imagehost2.org/icon.png", "label": "Dropdown 1 Item 2", "url": "" } ] }, { "title": "Dropdown 2", "isExpanded": true, "links": [ { "iconUrl": "http://imagehost3.edu/img.jpg", "label": "Dropdown 2 Item 1", "url": "http://example.com" } ] } ]If the request call fails or is not configured, the Developer Hub instance falls back to the default local data.
To access the Home page in Red Hat Developer Hub, the base URL must include the
/developer-hubproxy.Add the following code to the
app-config-rhdh.yamlfile:proxy: endpoints: # Other Proxies # customize developer hub instance '/developer-hub': target: ${HOMEPAGE_DATA_URL} changeOrigin: true # Change to "false" in case of using self-hosted cluster with a self-signed certificate secure: trueEnsure that the API request call returns the response in JSON format.
Define the
HOMEPAGE_DATA_URLas http://<SERVICE_NAME>:8080. For example,http://rhdh-customization-provider:8080.You can replace the
HOMEPAGE_DATA_URLby adding the URL torhdh-secretsor directly replacing it in your custom ConfigMap.Delete the Developer Hub Pod to pull in the changes.
If the images or icons do not load, then whitelist them by adding your image or icon host URLs to the content security policy’s (csp)
img-srcin your custom ConfigMap as follows:kind: ConfigMap apiVersion: v1 metadata: name: app-config-rhdh data: app-config-rhdh.yaml: | app: title: Red Hat Developer Hub backend: csp: connect-src: - "'self'" - 'http:' - 'https:' img-src: - "'self'" - 'data:' - <image host url 1> - <image host url 2> - <image host url 3> # Other ConfigurationsAfter that, delete the pod to ensure that the new configurations are loaded correctly.
Chapter 5. Customizing the Tech Radar page in the Red Hat Developer Hub
In Red Hat Developer Hub, the Tech Radar page is not enabled using the dynamic plugin feature in the Helm Chart.
Similar to Home page customization, the base Tech Radar URL must include the /developer-hub/tech-radar proxy. You can provide the Tech Radar page data using the following ways:
Using JSON files that are hosted or GitHub or GitLab. To access the data from the JSON files, you can add the following code in the
app-config.yamlfile:proxy: endpoints: # Other Proxies # customize developer hub instance '/developer-hub': target: <DOMAIN_URL> # i.e https://raw.githubusercontent.com/ pathRewrite: '^/api/proxy/developer-hub/tech-radar': <path to json file> # i.e /janus-idp/backstage-showcase/main/packages/app/public/tech-radar/data-default.json '^/api/proxy/developer-hub': <path to json file> # i.e /janus-idp/backstage-showcase/main/packages/app/public/homepage/data.json changeOrigin: true secure: true # Change to "false" in case of using self hosted cluster with a self-signed certificate headers: <HEADER_KEY>: <HEADER_VALUE> # optional and can be passed as needed i.e Authorization can be passed for private GitHub repo and PRIVATE-TOKEN can be passed for private GitLab repoNoteAs overlapping exist between the
pathRewritesthat are used for thetech-radarandhomepagequick access proxies, the configuration for thetech-radar(^api/proxy/developer-hub/tech-radar) must exist before the configuration for thehomepage(^/api/proxy/developer-hub).For more information about customizing the Home page in Red Hat Developer Hub, see Chapter 4, Customizing the Home page in Red Hat Developer Hub.
- Using a separate service that provides the Tech Radar data in JSON format using an API.
Prerequisites
- You have installed the Red Hat Developer Hub using Helm Chart. For more information, see Chapter 2, Installing Red Hat Developer Hub using Helm Chart.
Procedure
Add the following code to the
app-config-rhdh.yamlfile:proxy: endpoints: # Other Proxies '/developer-hub/tech-radar': target: ${TECHRADAR_DATA_URL} changeOrigin: true # Change to "false" in case of using self hosted cluster with a self-signed certificate secure: trueEnsure that the API request call returns the response in JSON format.
Define the
TECHRADAR_DATA_URL`ashttp://<SERVICE_NAME>/tech-radar, for examplehttp://rhdh-customization-provider/tech-radar.NoteYou can define the
TECHRADAR_DATA_URLeither by adding it torhdh-secretsor directly replacing it with its value in your custom ConfigMap.- Delete the Developer Hub Pod to pull in the changes.
Chapter 6. Additional customizations in Red Hat Developer Hub
This section describes additional customization options that you can apply to the Red Hat Developer Hub.
- Customizing tab tooltip
To customize the tab tooltip, add the following content to your
app-config-rhdh.yamlfile:app: title: My custom developer hub
- Customizing branding of your Developer Hub instance
To customize the branding of your Developer Hub instance, add the following content to your
app-config-rhdh.yamlfile:app: branding: fullLogo: ${BASE64_EMBEDDED_FULL_LOGO} iconLogo: ${BASE64_EMBEDDED_ICON_LOGO} theme: light: primaryColor: ${PRIMARY_LIGHT_COLOR} headerColor1: ${HEADER_LIGHT_COLOR_1} headerColor2: ${HEADER_LIGHT_COLOR_2} navigationIndicatorColor: ${NAV_INDICATOR_LIGHT_COLOR} dark: primaryColor: ${PRIMARY_DARK_COLOR} headerColor1: ${HEADER_DARK_COLOR_1} headerColor2: ${HEADER_DARK_COLOR_2} navigationIndicatorColor: ${NAV_INDICATOR_DARK_COLOR}In the previous configuration,
-
fullLogois the logo on the expanded (pinned) sidebar and expects a base64 encoded image. -
iconLogois the logo on the collapsed (unpinned) sidebar and expects a base64 encoded image. primaryColoris the color of links and most buttons to the inputted color. The supported formats forprimaryColorinclude:-
#nnn -
#nnnnnn -
rgb() -
rgba() -
hsl() -
hsla() -
color()
-
headerColor1(left-side of the banner) andheaderColor2(right-side of the banner) changes the color of the header banner of each page, as well as the banner for template cards. The supported formats forheaderColor1andheaderColor2include:-
#nnn -
#nnnnnn -
rgb() -
rgba() -
hsl() -
hsla() -
color()
-
navigationIndicatorColorchanges the color of the indicator in the sidebar that indicates which tab you are on. The supported formats fornavigationIndicatorColorinclude:-
#nnn -
#nnnnnn -
rgb() -
rgba() -
hsl() -
hsla() -
color()
-
-
Chapter 7. Customizing your theme in Red Hat Developer Hub
You can customize your Red Hat Developer Hub (Developer Hub) theme mode.
RHDH supports the following theme modes:
- Light theme (default)
- Dark theme
- Auto
Prerequisites
- You are logged in to the RHDH web console.
Procedure
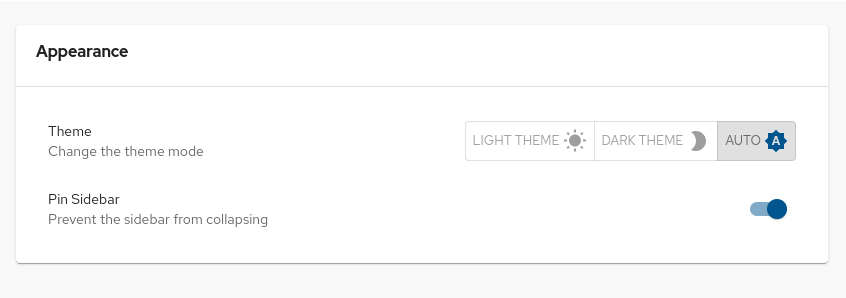
- Click Settings.
From the Appearance panel, click LIGHT THEME, DARK THEME, or AUTO to change the theme mode.
Chapter 8. ServiceNow Custom actions in Red Hat Developer Hub
These features are for Technology Preview only. Technology Preview features are not supported with Red Hat production service level agreements (SLAs), might not be functionally complete, and Red Hat does not recommend using them for production. These features provide early access to upcoming product features, enabling customers to test functionality and provide feedback during the development process.
For more information on Red Hat Technology Preview features, see Technology Preview Features Scope.
In Red Hat Developer Hub, you can access ServiceNow custom actions (custom actions) for fetching and registering resources in the catalog.
The custom actions in Developer Hub enable you to facilitate and automate the management of records. Using the custom actions, you can perform the following actions:
- Create, update, or delete a record
- Retrieve information about a single record or multiple records
8.1. Enabling ServiceNow custom actions plugin in Red Hat Developer Hub
In Red Hat Developer Hub, the ServiceNow custom actions are provided as a pre-loaded plugin, which is disabled by default. You can enable the custom actions plugin using the following procedure.
Prerequisites
- Red Hat Developer Hub is installed and running. For more information about installing the Developer Hub, see Chapter 2, Installing Red Hat Developer Hub using Helm Chart.
- You have created a project in the Developer Hub.
Procedure
To activate the custom actions plugin, add a
packagewith plugin name and update thedisabledfield in your Helm Chart as follows:global: dynamic: includes: - dynamic-plugins.default.yaml plugins: - package: ./dynamic-plugins/dist/janus-idp-backstage-scaffolder-backend-module-servicenow-dynamic disabled: falseNoteThe default configuration for a plugin is extracted from the
dynamic-plugins.default.yamlfile, however, you can use apluginConfigentry to override the default configuration.Set the following variables in the Helm Chart to access the custom actions:
servicenow:
  # The base url of the ServiceNow instance.
  baseUrl: ${SERVICENOW_BASE_URL}
  # The username to use for authentication.
  username: ${SERVICENOW_USERNAME}
  # The password to use for authentication.
  password: ${SERVICENOW_PASSWORD}
8.2. Supported ServiceNow custom actions in Red Hat Developer Hub
The ServiceNow custom actions enable you to manage records in the Red Hat Developer Hub. The custom actions support the following HTTP methods for API requests:
-
GET: Retrieves specified information from a specified resource endpoint -
POST: Creates or updates a resource -
PUT: Modify a resource -
PATCH: Updates a resource -
DELETE: Deletes a resource
8.2.1. ServiceNow custom actions
- [GET] servicenow:now:table:retrieveRecord
Retrieves information of a specified record from a table in the Developer Hub.
Table 8.1. Input parameters
Name Type Requirement Description tableNamestringRequired
Name of the table to retrieve the record from
sysIdstringRequired
Unique identifier of the record to retrieve
sysparmDisplayValueenum("true", "false", "all")Optional
Returns field display values such as
true, actual values asfalse, or both. The default value isfalse.sysparmExcludeReferenceLinkbooleanOptional
Set as
trueto exclude Table API links for reference fields. The default value isfalse.sysparmFieldsstring[]Optional
Array of fields to return in the response
sysparmViewstringOptional
Renders the response according to the specified UI view. You can override this parameter using
sysparm_fields.sysparmQueryNoDomainbooleanOptional
Set as
trueto access data across domains if authorized. The default value isfalse.Table 8.2. Output parameters
Name Type Description resultRecord<PropertyKey, unknown>The response body of the request
- [GET] servicenow:now:table:retrieveRecords
Retrieves information about multiple records from a table in the Developer Hub.
Table 8.3. Input parameters
Name Type Requirement Description tableNamestringRequired
Name of the table to retrieve the records from
sysparamQuerystringOptional
Encoded query string used to filter the results
sysparmDisplayValueenum("true", "false", "all")Optional
Returns field display values such as
true, actual values asfalse, or both. The default value isfalse.sysparmExcludeReferenceLinkbooleanOptional
Set as
trueto exclude Table API links for reference fields. The default value isfalse.sysparmSuppressPaginationHeaderbooleanOptional
Set as
trueto suppress pagination header. The default value isfalse.sysparmFieldsstring[]Optional
Array of fields to return in the response
sysparmLimitintOptional
Maximum number of results returned per page. The default value is
10,000.sysparmViewstringOptional
Renders the response according to the specified UI view. You can override this parameter using
sysparm_fields.sysparmQueryCategorystringOptional
Name of the query category to use for queries
sysparmQueryNoDomainbooleanOptional
Set as
trueto access data across domains if authorized. The default value isfalse.sysparmNoCountbooleanOptional
Does not execute a select count(*) on the table. The default value is
false.Table 8.4. Output parameters
Name Type Description resultRecord<PropertyKey, unknown>The response body of the request
- [POST] servicenow:now:table:createRecord
Creates a record in a table in the Developer Hub.
Table 8.5. Input parameters
Name Type Requirement Description tableNamestringRequired
Name of the table to save the record in
requestBodyRecord<PropertyKey, unknown>Optional
Field name and associated value for each parameter to define in the specified record
sysparmDisplayValueenum("true", "false", "all")Optional
Returns field display values such as
true, actual values asfalse, or both. The default value isfalse.sysparmExcludeReferenceLinkbooleanOptional
Set as
trueto exclude Table API links for reference fields. The default value isfalse.sysparmFieldsstring[]Optional
Array of fields to return in the response
sysparmInputDisplayValuebooleanOptional
Set field values using their display value such as
trueor actual value asfalse. The default value isfalse.sysparmSuppressAutoSysFieldbooleanOptional
Set as
trueto suppress auto-generation of system fields. The default value isfalse.sysparmViewstringOptional
Renders the response according to the specified UI view. You can override this parameter using
sysparm_fields.Table 8.6. Output parameters
Name Type Description resultRecord<PropertyKey, unknown>The response body of the request
- [PUT] servicenow:now:table:modifyRecord
Modifies a record in a table in the Developer Hub.
Table 8.7. Input parameters
Name Type Requirement Description tableNamestringRequired
Name of the table to modify the record from
sysIdstringRequired
Unique identifier of the record to modify
requestBodyRecord<PropertyKey, unknown>Optional
Field name and associated value for each parameter to define in the specified record
sysparmDisplayValueenum("true", "false", "all")Optional
Returns field display values such as
true, actual values asfalse, or both. The default value isfalse.sysparmExcludeReferenceLinkbooleanOptional
Set as
trueto exclude Table API links for reference fields. The default value isfalse.sysparmFieldsstring[]Optional
Array of fields to return in the response
sysparmInputDisplayValuebooleanOptional
Set field values using their display value such as
trueor actual value asfalse. The default value isfalse.sysparmSuppressAutoSysFieldbooleanOptional
Set as
trueto suppress auto-generation of system fields. The default value isfalse.sysparmViewstringOptional
Renders the response according to the specified UI view. You can override this parameter using
sysparm_fields.sysparmQueryNoDomainbooleanOptional
Set as
trueto access data across domains if authorized. The default value isfalse.Table 8.8. Output parameters
Name Type Description resultRecord<PropertyKey, unknown>The response body of the request
- [PATCH] servicenow:now:table:updateRecord
Updates a record in a table in the Developer Hub.
Table 8.9. Input parameters
Name Type Requirement Description tableNamestringRequired
Name of the table to update the record in
sysIdstringRequired
Unique identifier of the record to update
requestBodyRecord<PropertyKey, unknown>Optional
Field name and associated value for each parameter to define in the specified record
sysparmDisplayValueenum("true", "false", "all")Optional
Returns field display values such as
true, actual values asfalse, or both. The default value isfalse.sysparmExcludeReferenceLinkbooleanOptional
Set as
trueto exclude Table API links for reference fields. The default value isfalse.sysparmFieldsstring[]Optional
Array of fields to return in the response
sysparmInputDisplayValuebooleanOptional
Set field values using their display value such as
trueor actual value asfalse. The default value isfalse.sysparmSuppressAutoSysFieldbooleanOptional
Set as
trueto suppress auto-generation of system fields. The default value isfalse.sysparmViewstringOptional
Renders the response according to the specified UI view. You can override this parameter using
sysparm_fields.sysparmQueryNoDomainbooleanOptional
Set as
trueto access data across domains if authorized. The default value isfalse.Table 8.10. Output parameters
Name Type Description resultRecord<PropertyKey, unknown>The response body of the request
- [DELETE] servicenow:now:table:deleteRecord
Deletes a record from a table in the Developer Hub.
Table 8.11. Input parameters
Name Type Requirement Description tableNamestringRequired
Name of the table to delete the record from
sysIdstringRequired
Unique identifier of the record to delete
sysparmQueryNoDomainbooleanOptional
Set as
trueto access data across domains if authorized. The default value isfalse.