Chapter 11. Managing virtual devices
One of the most effective ways to manage the functionality, features, and performance of a virtual machine (VM) is to adjust its virtual devices.
The following sections provide a general overview of what virtual devices are, and instructions on how to manage them using the CLI or the web console.
11.1. How virtual devices work
Just like physical machines, virtual machines (VMs) require specialized devices to provide functions to the system, such as processing power, memory, storage, networking, or graphics. Physical systems usually use hardware devices for these purposes. However, because VMs work as software implements, they need to use software abstractions of such devices instead, referred to as virtual devices.
The basics
Virtual devices attached to a VM can be configured when creating the VM, and can also be managed on an existing VM. Generally, virtual devices can be attached or detached from a VM only when the VM is shut off, but some can be added or removed when the VM is running. This feature is referred to as device hot plug and hot unplug.
When creating a new VM, libvirt automatically creates and configures a default set of essential virtual devices, unless specified otherwise by the user. These are based on the host system architecture and machine type, and usually include:
- the CPU
- memory
- a keyboard
- a network interface controller (NIC)
- various device controllers
- a video card
- a sound card
To manage virtual devices after the VM is created, use the command line (CLI). However, to manage virtual storage devices and NICs, you can also use the RHEL 8 web console.
Performance or flexibility
For some types of devices, RHEL 8 supports multiple implementations, often with a trade-off between performance and flexibility.
For example, the physical storage used for virtual disks can be represented by files in various formats, such as qcow2 or raw, and presented to the VM by using a variety of controllers:
- an emulated controller
-
virtio-scsi -
virtio-blk
An emulated controller is slower than a virtio controller, because virtio devices are designed specifically for virtualization purposes. On the other hand, emulated controllers make it possible to run operating systems that have no drivers for virtio devices. Similarly, virtio-scsi offers a more complete support for SCSI commands, and makes it possible to attach a larger number of disks to the VM. Finally, virtio-blk provides better performance than both virtio-scsi and emulated controllers, but a more limited range of use-cases. For example, attaching a physical disk as a LUN device to a VM is not possible when using virtio-blk.
For more information about types of virtual devices, see Types of virtual devices.
11.2. Types of virtual devices
Virtualization in RHEL 8 can present several distinct types of virtual devices that you can attach to virtual machines (VMs):
- Emulated devices
Emulated devices are software implementations of widely used physical devices. Drivers designed for physical devices are also compatible with emulated devices. Therefore, emulated devices can be used very flexibly.
However, since they need to faithfully emulate a particular type of hardware, emulated devices may suffer a significant performance loss compared with the corresponding physical devices or more optimized virtual devices.
The following types of emulated devices are supported:
- Virtual CPUs (vCPUs), with a large choice of CPU models available. The performance impact of emulation depends significantly on the differences between the host CPU and the emulated vCPU.
- Emulated system components, such as PCI bus controllers.
- Emulated storage controllers, such as SATA, SCSI or even IDE.
- Emulated sound devices, such as ICH9, ICH6 or AC97.
- Emulated graphics cards, such as VGA or QXL cards.
- Emulated network devices, such as rtl8139.
- Paravirtualized devices
Paravirtualization provides a fast and efficient method for exposing virtual devices to VMs. Paravirtualized devices expose interfaces that are designed specifically for use in VMs, and thus significantly increase device performance. RHEL 8 provides paravirtualized devices to VMs by using the virtio API as a layer between the hypervisor and the VM. The drawback of this approach is that it requires a specific device driver in the guest operating system.
It is recommended to use paravirtualized devices instead of emulated devices for VM whenever possible, notably if they are running I/O intensive applications. Paravirtualized devices decrease I/O latency and increase I/O throughput, in some cases bringing them very close to bare-metal performance. Other paravirtualized devices also add functionality to VMs that is not otherwise available.
The following types of paravirtualized devices are supported:
-
The paravirtualized network device (
virtio-net). Paravirtualized storage controllers:
-
virtio-blk- provides block device emulation. -
virtio-scsi- provides more complete SCSI emulation.
-
- The paravirtualized clock.
-
The paravirtualized serial device (
virtio-serial). -
The balloon device (
virtio-balloon), used to dynamically distribute memory between a VM and its host. -
The paravirtualized random number generator (
virtio-rng). -
The paravirtualized graphics card (
QXL).
-
The paravirtualized network device (
- Physically shared devices
Certain hardware platforms enable VMs to directly access various hardware devices and components. This process is known as device assignment or passthrough.
When attached in this way, some aspects of the physical device are directly available to the VM as they would be to a physical machine. This provides superior performance for the device when used in the VM. However, devices physically attached to a VM become unavailable to the host, and also cannot be migrated.
Nevertheless, some devices can be shared across multiple VMs. For example, a single physical device can in certain cases provide multiple mediated devices, which can then be assigned to distinct VMs.
The following types of passthrough devices are supported:
- USB, PCI, and SCSI passthrough - expose common industry standard buses directly to VMs in order to make their specific features available to guest software.
- Single-root I/O virtualization (SR-IOV) - a specification that enables hardware-enforced isolation of PCI Express resources. This makes it safe and efficient to partition a single physical PCI resource into virtual PCI functions. It is commonly used for network interface cards (NICs).
- N_Port ID virtualization (NPIV) - a Fibre Channel technology to share a single physical host bus adapter (HBA) with multiple virtual ports.
- GPUs and vGPUs - accelerators for specific kinds of graphic or compute workloads. Some GPUs can be attached directly to a VM, while certain types also offer the ability to create virtual GPUs (vGPUs) that share the underlying physical hardware.
Some devices of these types might be unsupported or not compatible with RHEL. If you require assistance with setting up virtual devices, consult Red Hat support.
11.3. Managing devices attached to virtual machines by using the CLI
To modify the functionality of your virtual machine (VM), you can manage the devices attached to your VM by using the command line (CLI).
11.3.1. Attaching devices to virtual machines
You can add a specific functionality to your virtual machines (VMs) by attaching a new virtual device.
The following procedure creates and attaches virtual devices to your virtual machines (VMs) by using the command line (CLI). Some devices can also be attached to VMs using the RHEL web console.
For example, you can increase the storage capacity of a VM by attaching a new virtual disk device to it. This is also referred to as memory hot plug.
Removing a memory device from a VM, also known as memory hot unplug, is not supported in RHEL 8, and Red Hat highly discourages its use.
Prerequisites
Obtain the required options for the device you intend to attach to a VM. To see the available options for a specific device, use the
virt-xml --device=?command. For example:# virt-xml --network=? --network options: [...] address.unit boot_order clearxml driver_name [...]
Procedure
To attach a device to a VM, use the
virt-xml --add-devicecommand, including the definition of the device and the required options:For example, the following command creates a 20GB newdisk qcow2 disk image in the
/var/lib/libvirt/images/directory, and attaches it as a virtual disk to the running testguest VM on the next start-up of the VM:# virt-xml testguest --add-device --disk /var/lib/libvirt/images/newdisk.qcow2,format=qcow2,size=20 Domain 'testguest' defined successfully. Changes will take effect after the domain is fully powered off.The following attaches a USB flash drive, attached as device 004 on bus 002 on the host, to the testguest2 VM while the VM is running:
# virt-xml testguest2 --add-device --update --hostdev 002.004 Device hotplug successful. Domain 'testguest2' defined successfully.The bus-device combination for defining the USB can be obtained by using the
lsusbcommand.
Verification
To verify the device has been added, do any of the following:
Use the
virsh dumpxmlcommand and see if the device’s XML definition has been added to the<devices>section in the VM’s XML configuration.For example, the following output shows the configuration of the testguest VM and confirms that the 002.004 USB flash disk device has been added.
# virsh dumpxml testguest [...] <hostdev mode='subsystem' type='usb' managed='yes'> <source> <vendor id='0x4146'/> <product id='0x902e'/> <address bus='2' device='4'/> </source> <alias name='hostdev0'/> <address type='usb' bus='0' port='3'/> </hostdev> [...]- Run the VM and test if the device is present and works properly.
Additional resources
-
The
man virt-xmlcommand
11.3.2. Modifying devices attached to virtual machines
You can change the functionality of your virtual machines (VMs) by editing a configuration of the attached virtual devices. For example, if you want to optimize the performance of your VMs, you can change their virtual CPU models to better match the CPUs of the hosts.
The following procedure provides general instructions for modifying virtual devices by using the command line (CLI). Some devices attached to your VM, such as disks and NICs, can also be modified using the RHEL 8 web console.
Prerequisites
-
Obtain the required options for the device you intend to attach to a VM. To see the available options for a specific device, use the
virt-xml --device=?command. For example:
# virt-xml --network=?
--network options:
[...]
address.unit
boot_order
clearxml
driver_name
[...]-
Optional: Back up the XML configuration of your VM by using
virsh dumpxml vm-nameand sending the output to a file. For example, the following backs up the configuration of your testguest1 VM as thetestguest1.xmlfile:
# virsh dumpxml testguest1 > testguest1.xml
# cat testguest1.xml
<domain type='kvm' xmlns:qemu='http://libvirt.org/schemas/domain/qemu/1.0'>
  <name>testguest1</name>
  <uuid>ede29304-fe0c-4ca4-abcd-d246481acd18</uuid>
  [...]
</domain>
Procedure
Use the
virt-xml --editcommand, including the definition of the device and the required options:For example, the following clears the <cpu> configuration of the shut-off testguest VM and sets it to host-model:
# virt-xml testguest --edit --cpu host-model,clearxml=yes
Domain 'testguest' defined successfully.
Verification
To verify the device has been modified, do any of the following:
- Run the VM and test if the device is present and reflects the modifications.
Use the
virsh dumpxmlcommand and see if the device’s XML definition has been modified in the VM’s XML configuration.For example, the following output shows the configuration of the testguest VM and confirms that the CPU mode has been configured as host-model.
# virsh dumpxml testguest
[...]
<cpu mode='host-model' check='partial'>
  <model fallback='allow'/>
</cpu>
[...]
Troubleshooting
If modifying a device causes your VM to become unbootable, use the
virsh defineutility to restore the XML configuration by reloading the XML configuration file you backed up previously.# virsh define testguest.xml
For small changes to the XML configuration of your VM, you can use the virsh edit command - for example virsh edit testguest. However, do not use this method for more extensive changes, as it is more likely to break the configuration in ways that could prevent the VM from booting.
Additional resources
-
The
man virt-xmlcommand
11.3.3. Removing devices from virtual machines
You can change the functionality of your virtual machines (VMs) by removing a virtual device. For example, you can remove a virtual disk device from one of your VMs if it is no longer needed.
The following procedure demonstrates how to remove virtual devices from your virtual machines (VMs) by using the command line (CLI). Some devices, such as disks or NICs, can also be removed from VMs using the RHEL 8 web console.
Prerequisites
-
Optional: Back up the XML configuration of your VM by using
virsh dumpxml vm-nameand sending the output to a file. For example, the following backs up the configuration of your testguest1 VM as thetestguest1.xmlfile:
# virsh dumpxml testguest1 > testguest1.xml
# cat testguest1.xml
<domain type='kvm' xmlns:qemu='http://libvirt.org/schemas/domain/qemu/1.0'>
  <name>testguest1</name>
  <uuid>ede29304-fe0c-4ca4-abcd-d246481acd18</uuid>
  [...]
</domain>
Procedure
Use the
virt-xml --remove-devicecommand, including a definition of the device. For example:The following removes the storage device marked as vdb from the running testguest VM after it shuts down:
# virt-xml testguest --remove-device --disk target=vdb
Domain 'testguest' defined successfully.
Changes will take effect after the domain is fully powered off.
The following immediately removes a USB flash drive device from the running testguest2 VM:
# virt-xml testguest2 --remove-device --update --hostdev type=usb
Device hotunplug successful.
Domain 'testguest2' defined successfully.
Troubleshooting
If removing a device causes your VM to become unbootable, use the
virsh defineutility to restore the XML configuration by reloading the XML configuration file you backed up previously.# virsh define testguest.xml
Additional resources
-
The
man virt-xmlcommand
11.4. Managing host devices by using the web console
To modify the functionality of your virtual machine (VM), you can manage the host devices attached to your VM by using the RHEL 8 web console.
Host devices are physical devices that are attached to the host system. Based on your requirements, you can enable your VMs to directly access these hardware devices and components.
You can use the web console to:
11.4.1. Viewing devices attached to virtual machines by using the web console
Before adding or modifying the devices attached to your virtual machine (VM), you may want to view the devices that are already attached to your VM. The following procedure provides instructions for viewing such devices by using the web console.
Prerequisites
- You have installed the RHEL 8 web console.
- You have enabled the cockpit service.
Your user account is allowed to log in to the web console.
For instructions, see Installing and enabling the web console.
- The web console VM plug-in is installed on your system.
Procedure
Log in to the RHEL 8 web console.
For details, see Logging in to the web console.
In the interface, click the VM whose information you want to see.
A new page opens with detailed information about the VM.
Scroll to the Host devices section.

Additional resources
11.4.2. Attaching devices to virtual machines by using the web console
To add specific functionalities to your virtual machine (VM), you can use the web console to attach host devices to the VM.
Attaching multiple host devices at the same time does not work. You can attach only one device at a time.
For more information, see RHEL 8 Known Issues.
Prerequisites
- You have installed the RHEL 8 web console.
- You have enabled the cockpit service.
Your user account is allowed to log in to the web console.
For instructions, see Installing and enabling the web console.
If you are attaching PCI devices, ensure that the status of the
managedattribute of thehostdevelement is set toyes.NoteWhen attaching PCI devices to your VM, do not omit the
managedattribute of thehostdevelement, or set it tono. If you do so, PCI devices cannot automatically detach from the host when you pass them to the VM. They also cannot automatically reattach to the host when you turn off the VM.As a consequence, the host may become unresponsive or shut down unexpectedly.
You can find the status of the
managedattribute in your VM’s XML configuration. The following example opens the XML configuration of theexample-VM-1VM.# virsh edit example-VM-1- Back up important data from the VM.
Optional: Back up the XML configuration of your VM. For example, to back up the
example-VM-1VM:# virsh dumpxml example-VM-1 > example-VM-1.xml- The web console VM plug-in is installed on your system.
Procedure
Log in to the RHEL 8 web console.
For details, see Logging in to the web console.
In the interface, click the VM to which you want to attach a host device.
A new page opens with an Overview section with basic information about the selected VM and a Console section to access the VM’s graphical interface.
Scroll to .
The Host devices section displays information about the devices attached to the VM as well as options to Add or Remove devices.
Click .
The Add host device dialog appears.

- Select the device you wish to attach to the VM.
Click
The selected device is attached to the VM.
Verification
- Run the VM and check if the device appears in the Host devices section.
11.4.3. Removing devices from virtual machines by using the web console
To free up resources, modify the functionalities of your VM, or both, you can use the web console to modify the VM and remove host devices that are no longer required.
Removing attached USB host devices by using the web console may fail because of incorrect correlation between the device and bus numbers of the USB device.
For more information, see RHEL 8 Known Issues.
As a workaround, remove the <hostdev> part of the USB device, from the XML configuration of VM by using the virsh utility. The following example opens the XML configuration of the example-VM-1 VM:
# virsh edit <example-VM-1>Prerequisites
- You have installed the RHEL 8 web console.
- You have enabled the cockpit service.
Your user account is allowed to log in to the web console.
For instructions, see Installing and enabling the web console.
- The web console VM plug-in is installed on your system.
Optional: Back up the XML configuration of your VM by using
virsh dumpxml example-VM-1and sending the output to a file. For example, the following backs up the configuration of your testguest1 VM as thetestguest1.xmlfile:# virsh dumpxml testguest1 > testguest1.xml # cat testguest1.xml <domain type='kvm' xmlns:qemu='http://libvirt.org/schemas/domain/qemu/1.0'> <name>testguest1</name> <uuid>ede29304-fe0c-4ca4-abcd-d246481acd18</uuid> [...] </domain>
Procedure
In the interface, click the VM from which you want to remove a host device.
A new page opens with an Overview section with basic information about the selected VM and a Console section to access the VM’s graphical interface.
Scroll to .
The Host devices section displays information about the devices attached to the VM as well as options to Add or Remove devices.
Click the button next to the device you want to remove from the VM.
A remove device confirmation dialog appears.
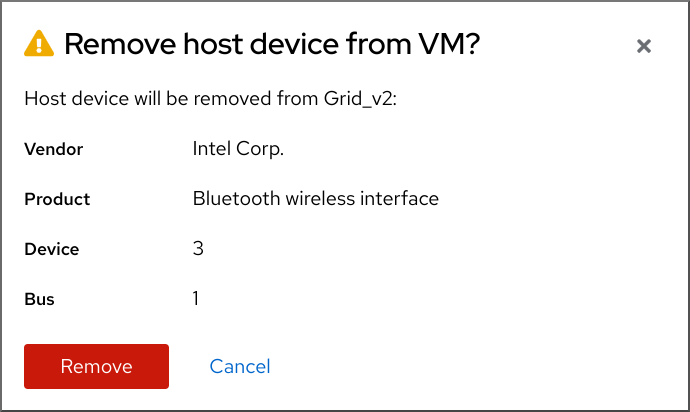
Click .
The device is removed from the VM.
Troubleshooting
If removing a host device causes your VM to become unbootable, use the
virsh defineutility to restore the XML configuration by reloading the XML configuration file you backed up previously.# virsh define testguest1.xml
11.5. Managing virtual USB devices
When using a virtual machine (VM), you can access and control a USB device, such as a flash drive or a web camera, that is attached to the host system. In this scenario, the host system passes control of the device to the VM. This is also known as a USB-passthrough.
11.5.1. Attaching USB devices to virtual machines
To attach a USB device to a virtual machine (VM), you can include the USB device information in the XML configuration file of the VM.
Prerequisites
- Ensure the device you want to pass through to the VM is attached to the host.
Procedure
Locate the bus and device values of the USB that you want to attach to the VM.
For example, the following command displays a list of USB devices attached to the host. The device we will use in this example is attached on bus 001 as device 005.
# lsusb
[...]
Bus 001 Device 003: ID 2567:0a2b Intel Corp.
Bus 001 Device 005: ID 0407:6252 Kingston River 2.0
[...]
Use the
virt-xmlutility along with the--add-deviceargument.For example, the following command attaches a USB flash drive to the
example-VM-1VM.# virt-xml example-VM-1 --add-device --hostdev 001.005 Domain 'example-VM-1' defined successfully.
To attach a USB device to a running VM, add the --update argument to the previous command.
Verification
- Run the VM and test if the device is present and works as expected.
Use the
virsh dumpxmlcommand to see if the device’s XML definition has been added to the <devices> section in the VM’s XML configuration file.# virsh dumpxml example-VM-1 [...] <hostdev mode='subsystem' type='usb' managed='yes'> <source> <vendor id='0x0407'/> <product id='0x6252'/> <address bus='1' device='5'/> </source> <alias name='hostdev0'/> <address type='usb' bus='0' port='3'/> </hostdev> [...]
Additional resources
-
virt-xml (1)man page on your system - Attaching devices to virtual machines
11.5.2. Removing USB devices from virtual machines
To remove a USB device from a virtual machine (VM), you can remove the USB device information from the XML configuration of the VM.
Procedure
Locate the bus and device values of the USB that you want to remove from the VM.
For example, the following command displays a list of USB devices attached to the host. The device we will use in this example is attached on bus 001 as device 005.
# lsusb
[...]
Bus 001 Device 003: ID 2567:0a2b Intel Corp.
Bus 001 Device 005: ID 0407:6252 Kingston River 2.0
[...]
Use the
virt-xmlutility along with the--remove-deviceargument.For example, the following command removes a USB flash drive, attached to the host as device 005 on bus 001, from the
example-VM-1VM.# virt-xml example-VM-1 --remove-device --hostdev 001.005 Domain 'example-VM-1' defined successfully.
To remove a USB device from a running VM, add the --update argument to the previous command.
Verification
- Run the VM and check if the device has been removed from the list of devices.
Additional resources
-
virt-xml (1)man page on your system - Attaching devices to virtual machines
11.5.3. Attaching smart card readers to virtual machines
If you have a smart card reader attached to a host, you can also make it available to virtual machines (VMs) on that host. Libvirt provides a specialized virtual device that presents a smart card interface to the guest VM. It is recommended you only use the spicevmc device type, which utilizes the SPICE remote display protocol to tunnel authentication requests to the host.
Although it is possible to use standard device passthrough with smart card readers, this method does not make the device available on both the host and guest system. As a consequence, you could lock the host system when you attach the smart card reader to the VM.
The SPICE remote display protocol has become deprecated in RHEL 8. Since the only recommended way to attach smart card readers to VMs depends on the SPICE protocol, the usage of smart cards in guest VMs is also deprecated in RHEL 8.
In a future major version of RHEL, the functionality of attaching smart card readers to VMs will only be supported by third party remote visualization solutions.
Prerequisites
- Ensure the smart card reader you want to pass through to the VM is attached to the host.
- Ensure the smart card reader type is supported in RHEL 8.
Procedure
Create and attach a virtual smart card reader device to a VM. For example, to attach a smart card reader to the
testguestVM:# virt-xml testguest --add-device --smartcard mode=passthrough,type=spicevmc Domain 'testguest' defined successfully. Changes will take effect after the domain is fully powered off.NoteTo attach a virtual smart card reader device to a running VM, add the
--updateargument to the previous command.
Verification
View the XML configuration of the VM.
# virsh dumpxml testguestEnsure the XML configuration contains the following smart card device definition.
<smartcard mode='passthrough' type='spicevmc'/>
11.6. Managing virtual optical drives
When using a virtual machine (VM), you can access information stored in an ISO image on the host. To do so, attach the ISO image to the VM as a virtual optical drive, such as a CD drive or a DVD drive.
11.6.1. Attaching optical drives to virtual machines
To attach an ISO image as a virtual optical drive, edit the XML configuration file of the virtual machine (VM) and add the new drive.
Prerequisites
- You must store and copy path of the ISO image on the host machine.
Procedure
Use the
virt-xmlutility with the--add-deviceargument:For example, the following command attaches the
example-ISO-nameISO image, stored in the/home/username/Downloadsdirectory, to theexample-VM-nameVM.# virt-xml example-VM-name --add-device --disk /home/username/Downloads/example-ISO-name.iso,device=cdrom Domain 'example-VM-name' defined successfully.
Verification
- Run the VM and test if the device is present and works as expected.
Additional resources
-
The
man virt-xmlcommand - Attaching devices to virtual machines
11.6.2. Adding a CD-ROM to a running virtual machine by using the web console
You can use the web console to insert a CD-ROM to a running virtual machine (VM) without specifying the media.
Prerequisites
Procedure
- Shut down the VM.
Attach a virtual CD-ROM device without specifying a source image.
# virt-xml vmname --add-device --disk target.dev=sda,device=cdrom- Run the VM.
- Open the web console and in the interface, click the VM to which you want to attach a CD-ROM.
Scroll to .
The Disks section displays information about the disks assigned to the VM, as well as options to Add or Edit disks.
Click the option for the cdrom device.

Choose a Source for the file you want to attach:
- Custom Path: The file is located in a custom directory on the host machine.
- Use existing: The file is located in the storage pools that you have created.
- Click .
Verification
- In the interface, the file will appear under the Disks section.
11.6.3. Replacing ISO images in virtual optical drives
To replace an ISO image attached as a virtual optical drive to a virtual machine (VM), edit the XML configuration file of the VM and specify the replacement.
Prerequisites
- You must store the ISO image on the host machine.
- You must know the path to the ISO image.
Procedure
Locate the target device where the CD-ROM is attached to the VM. You can find this information in the VM’s XML configuration file.
For example, the following command displays the
example-VM-nameVM’s XML configuration file, where the target device for CD-ROM issda.# virsh dumpxml example-VM-name ... <disk> ... <source file='$(/home/username/Downloads/example-ISO-name.iso)'/> <target dev='sda' bus='sata'/> ... </disk> ...
Use the
virt-xmlutility with the--editargument.For example, the following command replaces the
example-ISO-nameISO image, attached to theexample-VM-nameVM at targetsda, with theexample-ISO-name-2ISO image stored in the/dev/cdromdirectory.# virt-xml example-VM-name --edit target=sda --disk /dev/cdrom/example-ISO-name-2.iso Domain 'example-VM-name' defined successfully.
Verification
- Run the VM and test if the device is replaced and works as expected.
Additional resources
-
The
man virt-xmlcommand
11.6.4. Removing ISO images from virtual optical drives
To remove an ISO image from a virtual optical drive attached to a virtual machine (VM), edit the XML configuration file of the VM.
Procedure
Locate the target device where the CD-ROM is attached to the VM. You can find this information in the VM’s XML configuration file.
For example, the following command displays the
example-VM-nameVM’s XML configuration file, where the target device for CD-ROM issda.# virsh dumpxml example-VM-name ... <disk> ... <source file='$(/home/username/Downloads/example-ISO-name.iso)'/> <target dev='sda' bus='sata'/> ... </disk> ...
Use the
virt-xmlutility with the--editargument.For example, the following command removes the
example-ISO-nameISO image from the CD drive attached to theexample-VM-nameVM.# virt-xml example-VM-name --edit target=sda --disk path= Domain 'example-VM-name' defined successfully.
Verification
- Run the VM and check that image is no longer available.
Additional resources
-
The
man virt-xmlcommand
11.6.5. Removing optical drives from virtual machines
To remove an optical drive attached to a virtual machine (VM), edit the XML configuration file of the VM.
Procedure
Locate the target device where the CD-ROM is attached to the VM. You can find this information in the VM’s XML configuration file.
For example, the following command displays the
example-VM-nameVM’s XML configuration file, where the target device for CD-ROM issda.# virsh dumpxml example-VM-name ... <disk type='file' device='cdrom'> <driver name='qemu' type='raw'/> <target dev='sda' bus='sata'/> ... </disk> ...Use the
virt-xmlutility with the--remove-deviceargument.For example, the following command removes the optical drive attached as target
sdafrom theexample-VM-nameVM.# virt-xml example-VM-name --remove-device --disk target=sda Domain 'example-VM-name' defined successfully.
Verification
- Confirm that the device is no longer listed in the XML configuration file of the VM.
Additional resources
-
The
man virt-xmlcommand
11.6.6. Removing a CD-ROM from a running virtual machine by using the web console
You can use the web console to eject a CD-ROM device from a running virtual machine (VM).
Prerequisites
Procedure
- In the interface, click the VM from which you want to remove the CD-ROM.
Scroll to .
The Disks section displays information about the disks assigned to the VM, as well as options to Add or Edit disks.

Click the option for the cdrom device.
The Eject media from VM? dialog box opens.
- Click .
Verification
- In the interface, the attached file is no longer displayed under the Disks section.
11.7. Managing SR-IOV devices
An emulated virtual device often uses more CPU and memory than a hardware network device. This can limit the performance of a virtual machine (VM). However, if any devices on your virtualization host support Single Root I/O Virtualization (SR-IOV), you can use this feature to improve the device performance, and possibly also the overall performance of your VMs.
11.7.1. What is SR-IOV?
Single-root I/O virtualization (SR-IOV) is a specification that enables a single PCI Express (PCIe) device to present multiple separate PCI devices, called virtual functions (VFs), to the host system. Each of these devices:
- Is able to provide the same or similar service as the original PCIe device.
- Appears at a different address on the host PCI bus.
- Can be assigned to a different VM by using VFIO assignment.
For example, a single SR-IOV capable network device can present VFs to multiple VMs. While all of the VFs use the same physical card, the same network connection, and the same network cable, each of the VMs directly controls its own hardware network device, and uses no extra resources from the host.
How SR-IOV works
The SR-IOV functionality is possible thanks to the introduction of the following PCIe functions:
- Physical functions (PFs) - A PCIe function that provides the functionality of its device (for example networking) to the host, but can also create and manage a set of VFs. Each SR-IOV capable device has one or more PFs.
- Virtual functions (VFs) - Lightweight PCIe functions that behave as independent devices. Each VF is derived from a PF. The maximum number of VFs a device can have depends on the device hardware. Each VF can be assigned only to a single VM at a time, but a VM can have multiple VFs assigned to it.
VMs recognize VFs as virtual devices. For example, a VF created by an SR-IOV network device appears as a network card to a VM to which it is assigned, in the same way as a physical network card appears to the host system.
Figure 11.1. SR-IOV architecture

Advantages
The primary advantages of using SR-IOV VFs rather than emulated devices are:
- Improved performance
- Reduced use of host CPU and memory resources
For example, a VF attached to a VM as a vNIC performs at almost the same level as a physical NIC, and much better than paravirtualized or emulated NICs. In particular, when multiple VFs are used simultaneously on a single host, the performance benefits can be significant.
Disadvantages
- To modify the configuration of a PF, you must first change the number of VFs exposed by the PF to zero. Therefore, you also need to remove the devices provided by these VFs from the VM to which they are assigned.
- A VM with an VFIO-assigned devices attached, including SR-IOV VFs, cannot be migrated to another host. In some cases, you can work around this limitation by pairing the assigned device with an emulated device. For example, you can bond (Red Hat Knowledgebase) an assigned networking VF to an emulated vNIC, and remove the VF before the migration.
- In addition, VFIO-assigned devices require pinning of VM memory, which increases the memory consumption of the VM and prevents the use of memory ballooning on the VM.
Additional resources
11.7.2. Attaching SR-IOV networking devices to virtual machines
To attach an SR-IOV networking device to a virtual machine (VM) on an Intel or AMD host, you must create a virtual function (VF) from an SR-IOV capable network interface on the host and assign the VF as a device to a specified VM. For details, see the following instructions.
Prerequisites
The CPU and the firmware of your host support the I/O Memory Management Unit (IOMMU).
- If using an Intel CPU, it must support the Intel Virtualization Technology for Directed I/O (VT-d).
- If using an AMD CPU, it must support the AMD-Vi feature.
The host system uses Access Control Service (ACS) to provide direct memory access (DMA) isolation for PCIe topology. Verify this with the system vendor.
For additional information, see Hardware Considerations for Implementing SR-IOV.
The physical network device supports SR-IOV. To verify if any network devices on your system support SR-IOV, use the
lspci -vcommand and look forSingle Root I/O Virtualization (SR-IOV)in the output.# lspci -v [...] 02:00.0 Ethernet controller: Intel Corporation 82576 Gigabit Network Connection (rev 01) Subsystem: Intel Corporation Gigabit ET Dual Port Server Adapter Flags: bus master, fast devsel, latency 0, IRQ 16, NUMA node 0 Memory at fcba0000 (32-bit, non-prefetchable) [size=128K] [...] Capabilities: [150] Alternative Routing-ID Interpretation (ARI) Capabilities: [160] Single Root I/O Virtualization (SR-IOV) Kernel driver in use: igb Kernel modules: igb [...]
The host network interface you want to use for creating VFs is running. For example, to activate the eth1 interface and verify it is running:
# ip link set eth1 up
# ip link show eth1
8: eth1: <BROADCAST,MULTICAST,UP,LOWER_UP> mtu 1500 qdisc mq state UP mode DEFAULT qlen 1000
   link/ether a0:36:9f:8f:3f:b8 brd ff:ff:ff:ff:ff:ff
   vf 0 MAC 00:00:00:00:00:00, spoof checking on, link-state auto
   vf 1 MAC 00:00:00:00:00:00, spoof checking on, link-state auto
   vf 2 MAC 00:00:00:00:00:00, spoof checking on, link-state auto
   vf 3 MAC 00:00:00:00:00:00, spoof checking on, link-state auto
For SR-IOV device assignment to work, the IOMMU feature must be enabled in the host BIOS and kernel. To do so:
On an Intel host, enable VT-d:
Regenerate the GRUB configuration with the
intel_iommu=onandiommu=ptparameters:# grubby --args="intel_iommu=on iommu=pt" --update-kernel=ALL- Reboot the host.
On an AMD host, enable AMD-Vi:
Regenerate the GRUB configuration with the
iommu=ptparameter:# grubby --args="iommu=pt" --update-kernel=ALL- Reboot the host.
Procedure
Optional: Confirm the maximum number of VFs your network device can use. To do so, use the following command and replace eth1 with your SR-IOV compatible network device.
# cat /sys/class/net/eth1/device/sriov_totalvfs
7
Use the following command to create a virtual function (VF):
# echo VF-number > /sys/class/net/network-interface/device/sriov_numvfsIn the command, replace:
- VF-number with the number of VFs you want to create on the PF.
- network-interface with the name of the network interface for which the VFs will be created.
The following example creates 2 VFs from the eth1 network interface:
# echo 2 > /sys/class/net/eth1/device/sriov_numvfsVerify the VFs have been added:
# lspci | grep Ethernet
82:00.0 Ethernet controller: Intel Corporation 82599ES 10-Gigabit SFI/SFP+ Network Connection (rev 01)
82:00.1 Ethernet controller: Intel Corporation 82599ES 10-Gigabit SFI/SFP+ Network Connection (rev 01)
82:10.0 Ethernet controller: Intel Corporation 82599 Ethernet Controller Virtual Function (rev 01)
82:10.2 Ethernet controller: Intel Corporation 82599 Ethernet Controller Virtual Function (rev 01)
Make the created VFs persistent by creating a udev rule for the network interface you used to create the VFs. For example, for the eth1 interface, create the
/etc/udev/rules.d/eth1.rulesfile, and add the following line:ACTION=="add", SUBSYSTEM=="net", ENV{ID_NET_DRIVER}=="ixgbe", ATTR{device/sriov_numvfs}="2"This ensures that the two VFs that use the
ixgbedriver will automatically be available for theeth1interface when the host starts. If you do not require persistent SR-IOV devices, skip this step.WarningCurrently, the setting described above does not work correctly when attempting to make VFs persistent on Broadcom NetXtreme II BCM57810 adapters. In addition, attaching VFs based on these adapters to Windows VMs is currently not reliable.
Hot-plug one of the newly added VF interface devices to a running VM.
# virsh attach-interface testguest1 hostdev 0000:82:10.0 --managed --live --config
Verification
- If the procedure is successful, the guest operating system detects a new network interface card.
11.7.3. Supported devices for SR-IOV assignment
Not all devices can be used for SR-IOV. The following devices have been tested and verified as compatible with SR-IOV in RHEL 8.
Networking devices
-
Intel 82599ES 10 Gigabit Ethernet Controller - uses the
ixgbedriver -
Intel Ethernet Controller XL710 Series - uses the
i40edriver -
Intel Ethernet Network Adapter XXV710 - uses the
i40edriver -
Intel 82576 Gigabit Ethernet Controller - uses the
igbdriver -
Broadcom NetXtreme II BCM57810 - uses the
bnx2xdriver -
Ethernet Controller E810-C for QSFP - uses the
icedriver -
SFC9220 10/40G Ethernet Controller - uses the
sfcdriver -
FastLinQ QL41000 Series 10/25/40/50GbE Controller - uses the
qededriver - Mellanox ConnectX-5 Ethernet Adapter Cards
- Mellanox MT2892 Family [ConnectX-6 Dx]
11.8. Attaching DASD devices to virtual machines on IBM Z
By using the vfio-ccw feature, you can assign direct-access storage devices (DASDs) as mediated devices to your virtual machines (VMs) on IBM Z hosts. This for example makes it possible for the VM to access a z/OS dataset, or to provide the assigned DASDs to a z/OS machine.
Prerequisites
- You have a system with IBM Z hardware architecture supported with the FICON protocol.
- You have a target VM of a Linux operating system.
The driverctl package is installed.
# yum install driverctlThe necessary
vfiokernel modules have been loaded on the host.# lsmod | grep vfioThe output of this command must contain the following modules:
-
vfio_ccw -
vfio_mdev -
vfio_iommu_type1
-
You have a spare DASD device for exclusive use by the VM, and you know the identifier of the device.
The following procedure uses
0.0.002cas an example. When performing the commands, replace0.0.002cwith the identifier of your DASD device.
Procedure
Obtain the subchannel identifier of the DASD device.
# lscss -d 0.0.002c
Device   Subchan.  DevType CU Type Use  PIM PAM POM  CHPIDs
----------------------------------------------------------------------
0.0.002c 0.0.29a8  3390/0c 3990/e9 yes  f0  f0  ff   02111221 00000000
In this example, the subchannel identifier is detected as
0.0.29a8. In the following commands of this procedure, replace0.0.29a8with the detected subchannel identifier of your device.If the
lscsscommand in the previous step only displayed the header output and no device information, perform the following steps:Remove the device from the
cio_ignorelist.# cio_ignore -r 0.0.002cIn the guest OS, edit the kernel command line of the VM and add the device identifier with a
!mark to the line that starts withcio_ignore=, if it is not present already.cio_ignore=all,!condev,!0.0.002c- Repeat step 1 on the host to obtain the subchannel identifier.
Bind the subchannel to the
vfio_ccwpassthrough driver.# driverctl -b css set-override 0.0.29a8 vfio_ccwNoteThis binds the 0.0.29a8 subchannel to
vfio_ccwpersistently, which means the DASD will not be usable on the host. If you need to use the device on the host, you must first remove the automatic binding to 'vfio_ccw' and rebind the subchannel to the default driver:# driverctl -b css unset-override 0.0.29a8
Define and start the DASD mediated device.
# cat nodedev.xml <device> <parent>css_0_0_29a8</parent> <capability type="mdev"> <type id="vfio_ccw-io"/> </capability> </device> # virsh nodedev-define nodedev.xml Node device 'mdev_30820a6f_b1a5_4503_91ca_0c10ba12345a_0_0_29a8' defined from 'nodedev.xml' # virsh nodedev-start mdev_30820a6f_b1a5_4503_91ca_0c10ba12345a_0_0_29a8 Device mdev_30820a6f_b1a5_4503_91ca_0c10ba12345a_0_0_29a8 started- Shut down the VM, if it is running.
Display the UUID of the previously defined device and save it for the next step.
# virsh nodedev-dumpxml mdev_30820a6f_b1a5_4503_91ca_0c10ba12345a_0_0_29a8

<device>
  <name>mdev_30820a6f_b1a5_4503_91ca_0c10ba12345a_0_0_29a8</name>
  <parent>css_0_0_29a8</parent>
  <capability type='mdev'>
    <type id='vfio_ccw-io'/>
    <uuid>30820a6f-b1a5-4503-91ca-0c10ba12345a</uuid>
    <iommuGroup number='0'/>
    <attr name='assign_adapter' value='0x02'/>
    <attr name='assign_domain' value='0x002b'/>
  </capability>
</device>
Attach the mediated device to the VM. To do so, use the
virsh editutility to edit the XML configuration of the VM, add the following section to the XML, and replace theuuidvalue with the UUID you obtained in the previous step.<hostdev mode='subsystem' type='mdev' model='vfio-ccw'> <source> <address uuid="30820a6f-b1a5-4503-91ca-0c10ba12345a"/> </source> </hostdev>Optional: Configure the mediated device to start automatically on host boot.
# virsh nodedev-autostart mdev_30820a6f_b1a5_4503_91ca_0c10ba12345a_0_0_29a8
Verification
Ensure that the mediated device is configured correctly.
# virsh nodedev-info mdev_30820a6f_b1a5_4503_91ca_0c10ba12345a_0_0_29a8
Name:           mdev_30820a6f_b1a5_4503_91ca_0c10ba12345a_0_0_29a8
Parent:         css_0_0_0121
Active:         yes
Persistent:     yes
Autostart:      yes
Obtain the identifier that
libvirtassigned to the mediated DASD device. To do so, display the XML configuration of the VM and look for avfio-ccwdevice.# virsh dumpxml vm-name <domain> [...] <hostdev mode='subsystem' type='mdev' managed='no' model='vfio-ccw'> <source> <address uuid='10620d2f-ed4d-437b-8aff-beda461541f9'/> </source> <alias name='hostdev0'/> <address type='ccw' cssid='0xfe' ssid='0x0' devno='0x0009'/> </hostdev> [...] </domain>
In this example, the assigned identifier of the device is
0.0.0009.- Start the VM and log in to its guest OS.
In the guest OS, confirm that the DASD device is listed. For example:
# lscss | grep 0.0.0009
0.0.0009 0.0.0007  3390/0c 3990/e9      f0  f0  ff   12212231 00000000
In the guest OS, set the device online. For example:
# chccwdev -e 0.0009
Setting device 0.0.0009 online
Done
Additional resources
11.9. Attaching a watchdog device to a virtual machine by using the web console
To force the virtual machine (VM) to perform a specified action when it stops responding, you can attach virtual watchdog devices to a VM.
Prerequisites
- You have installed the RHEL 8 web console.
- You have enabled the cockpit service.
Your user account is allowed to log in to the web console.
For instructions, see Installing and enabling the web console.
- You have installed the web console VM plug-in on your system. For more information, see Section 6.2, “Setting up the web console to manage virtual machines”.
Procedure
On the command line, install the watchdog service.
# yum install watchdog
- Shut down the VM.
Add the watchdog service to the VM.
# virt-xml vmname --add-device --watchdog action=reset --update
- Run the VM.
Log in to the RHEL 8 web console.
For details, see Logging in to the web console.
- In the interface of the web console, click on the VM to which you want to add the watchdog device.
Click next to the Watchdog field in the Overview pane.
The Add watchdog device type dialog appears.
Select the action that you want the watchdog device to perform if the VM stops responding.
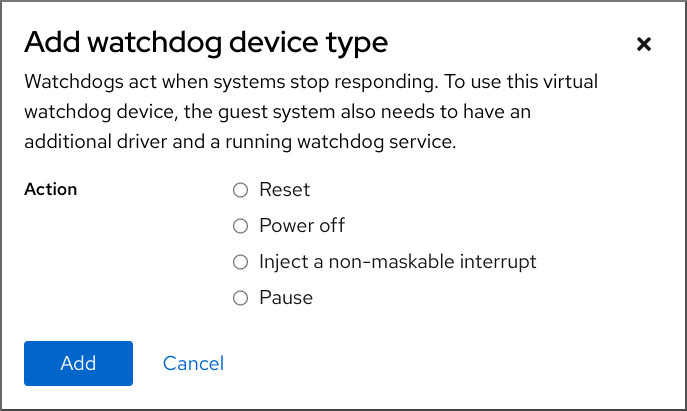
- Click .
Verification
- The action you selected is visible next to the Watchdog field in the Overview pane.
11.10. Attaching PCI devices to virtual machines on IBM Z
By using the vfio-pci device driver, you can assign PCI devices in pass-through mode to your virtual machines (VMs) on IBM Z hosts. This for example makes it possible for the VM to use NVMe flash disks for handling databases.
Prerequisites
- You have a host system with the IBM Z hardware architecture.
- You have a target VM of Linux operating system.
The necessary
vfiokernel modules have been loaded on the host.# lsmod | grep vfioThe output of this command must contain the following modules:
-
vfio_pci -
vfio_pci_core -
vfio_iommu_type1
-
Procedure
Obtain the PCI address identifier of the device that you want to use.
# lspci -nkD

0000:00:00.0 0000: 1014:04ed
	Kernel driver in use: ism
	Kernel modules: ism
0001:00:00.0 0000: 1014:04ed
	Kernel driver in use: ism
	Kernel modules: ism
0002:00:00.0 0200: 15b3:1016
	Subsystem: 15b3:0062
	Kernel driver in use: mlx5_core
	Kernel modules: mlx5_core
0003:00:00.0 0200: 15b3:1016
	Subsystem: 15b3:0062
	Kernel driver in use: mlx5_core
	Kernel modules: mlx5_core
Open the XML configuration of the VM to which you want to attach the PCI device.
# virsh edit vm-nameAdd the following
<hostdev>configuration to the<devices>section of the XML file.Replace the values on the
addressline with the PCI address of your device. For example, if the device address is0003:00:00.0, use the following configuration:<hostdev mode="subsystem" type="pci" managed="yes"> <driver name="vfio"/> <source> <address domain="0x0003" bus="0x00" slot="0x00" function="0x0"/> </source> <address type="pci"/> </hostdev>Optional: To modify how the guest operating system will detect the PCI device, you can also add a
<zpci>sub-element to the<address>element. In the<zpci>line, you can adjust theuidandfidvalues, which modifies the PCI address and function ID of the device in the guest operating system.<hostdev mode="subsystem" type="pci" managed="yes"> <driver name="vfio"/> <source> <address domain="0x0003" bus="0x00" slot="0x00" function="0x0"/> </source> <address type="pci"> <zpci uid="0x0008" fid="0x001807"/> </address> </hostdev>In this example:
-
uid="0x0008"sets the domain PCI address of the device in the VM to0008:00:00.0. fid="0x001807"sets the slot value of the device to0x001807. As a result, the device configuration in the file system of the VM is saved to/sys/bus/pci/slots/00001087/address.If these values are not specified,
libvirtconfigures them automatically.
-
- Save the XML configuration.
If the VM is running, shut it down.
# virsh shutdown vm-name
Verification
- Start the VM and log in to its guest operating system.
In the guest operating system, confirm that the PCI device is listed.
For example, if the device address is
0003:00:00.0, use the following command:# lspci -nkD | grep 0003:00:00.0 0003:00:00.0 8086:9a09 (rev 01)