Chapter 4. User Management
This section describes the administration functions for managing users.
4.1. Searching For Users
If you need to manage a specific user, click on Users in the left menu bar.
Users
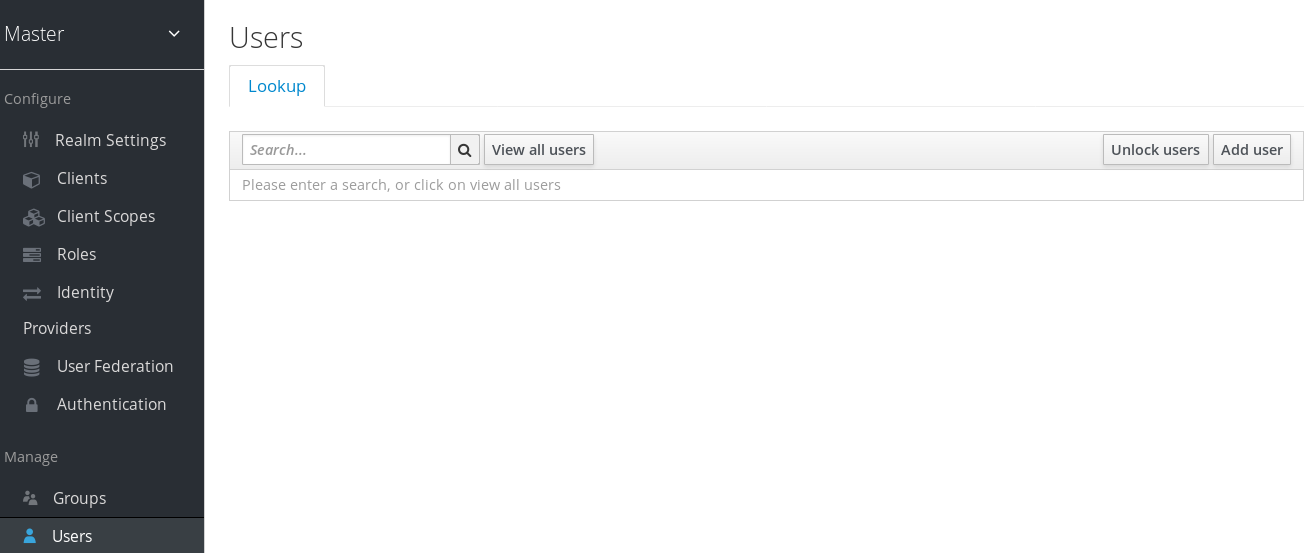
This menu option brings you to the user list page. In the search box you can type in a full name, last name, or email address you want to search for in the user database. The query will bring up all users that match your criteria. The View all users button will list every user in the system. This will search just local Red Hat Single Sign-On database and not the federated database (ie. LDAP) because some backends like LDAP don’t have a way to page through users. So if you want the users from federated backend to be synced into Red Hat Single Sign-On database you need to either:
- Adjust search criteria. That will sync just the backend users matching the criteria into Red Hat Single Sign-On database.
-
Go to
User Federationtab and clickSync all usersorSync changed usersin the page with your federation provider.
See User Federation for more details.
4.2. Creating New Users
To create a user click on Users in the left menu bar.
Users
This menu option brings you to the user list page. On the right side of the empty user list, you should see an Add User button. Click that to start creating your new user.
Add User
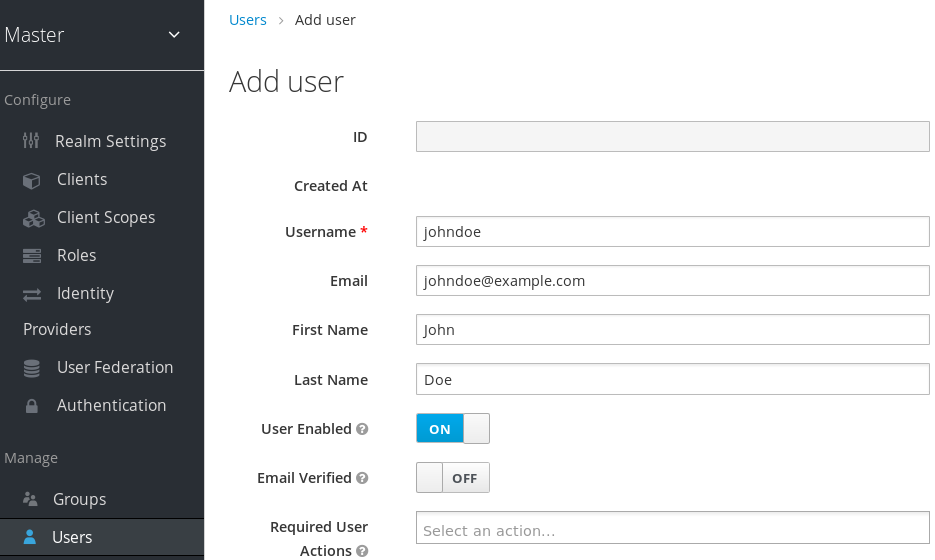
The only required field is Username. Click save. This will bring you to the management page for your new user.
4.3. Deleting Users
To delete a user click on Users in the left menu bar.
Users
This menu option brings you to the user list page. Click View all users or search to find the user you intend to delete.
View All Users
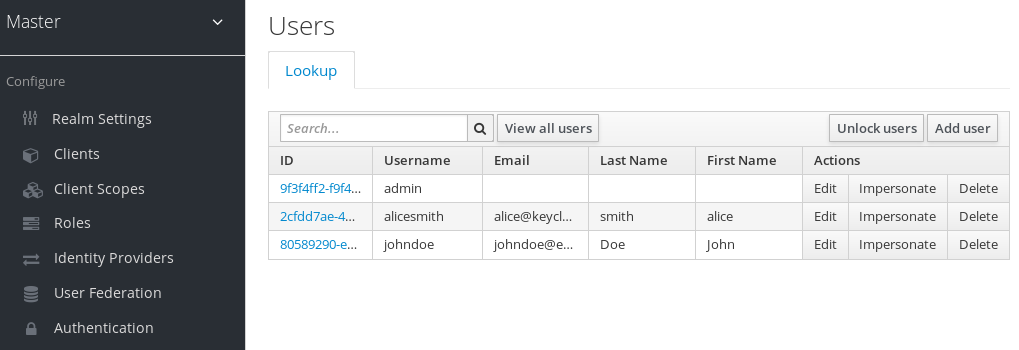
In the list of users, click Delete next to the user you want to remove. You will be asked to confirm that you are sure you want to delete this user. Click Delete in the confirmation box to confirm.
4.4. User Attributes
Beyond basic user metadata like name and email, you can store arbitrary user attributes. Choose a user to manage then click on the Attributes tab.
Users

Enter in the attribute name and value in the empty fields and click the Add button next to it to add a new field. Note that any edits you make on this page will not be stored until you hit the Save button.
4.5. User Credentials
When viewing a user if you go to the Credentials tab you can manage a user’s credentials.
Credential Management

The credentials are listed in a table, which has the following fields:
- Position
- The arrow buttons in this column allows you to shift the priority of the credential for the user, with the topmost credential having the highest priority. This priority determines which credential will be shown first to a user in case of a choice during login. The highest priority of those available to the user will be the one selected.
- Type
-
This shows the type of the credential, for example
passwordorotp. - User Label
- This is an assignable label to recognise the credential when presented as a selection option during login. It can be set to any value to describe the credential.
- Data
-
This shows the non-confidential technical information about the credential. It is originally hidden, but you can press
Show data…to reveal it for a credential. - Actions
-
This column has two buttons.
Saverecords the value of the User Label, whileDeletewill remove the credential.
4.5.1. Creating a Password for the User
If a user doesn’t have a password, or if the password has been deleted, the Set Password section will be shown on the page.
Credential Management - Set Password

To create a password for a user, type in a new one. Click on the Set Password button after you’ve typed everything in. If the Temporary switch is on, this new password can only be used once and the user will be asked to change their password after they have logged in.
If a user already has a password, it can be reset in the Reset Password section.
Alternatively, if you have email set up, you can send an email to the user that asks them to reset their password. Choose Update Password from the Reset Actions list box and click Send Email. You can optionally set the validity of the e-mail link which defaults to the one preset in Tokens tab in the realm settings. The sent email contains a link that will bring the user to the update password screen.
Note that a user can only have a single credential of type password.
4.5.2. Creating other credentials
You cannot configure other types of credentials for a specific user within the Admin Console. This is the responsibility of the user. You can only delete credentials for a user on the Credentials tab, for example if the user has lost an OTP device, or if a credential has been compromised.
4.5.2.1. Creating an OTP
If OTP is conditional in your realm, the user will have to go to the User Account Management service to re-configure a new OTP generator. If OTP is required, then the user will be asked to re-configure a new OTP generator when they log in.
Like passwords, you can alternatively send an email to the user that will ask them to reset their OTP generator. Choose Configure OTP in the Reset Actions list box and click the Send Email button. The sent email contains a link that will bring the user to the OTP setup screen. You can use this method even if the user already has an OTP credential, and would like to set up some more.
4.6. Required Actions
Required Actions are tasks that a user must finish before they are allowed to log in. A user must provide their credentials before required actions are executed. Once a required action is completed, the user will not have to perform the action again. Here are explanations of some of the built-in required action types:
- Update Password
- When set, a user must change their password.
- Configure OTP
- When set, a user must configure a one-time password generator on their mobile device using either the Free OTP or Google Authenticator application.
- Verify Email
- When set, a user must verify that they have a valid email account. An email will be sent to the user with a link they have to click. Once this workflow is successfully completed, they will be allowed to log in.
- Update Profile
- This required action asks the user to update their profile information, i.e. their name, address, email, and/or phone number.
Admins can add required actions for each individual user within the user’s Details tab in the Admin Console.
Setting Required Action
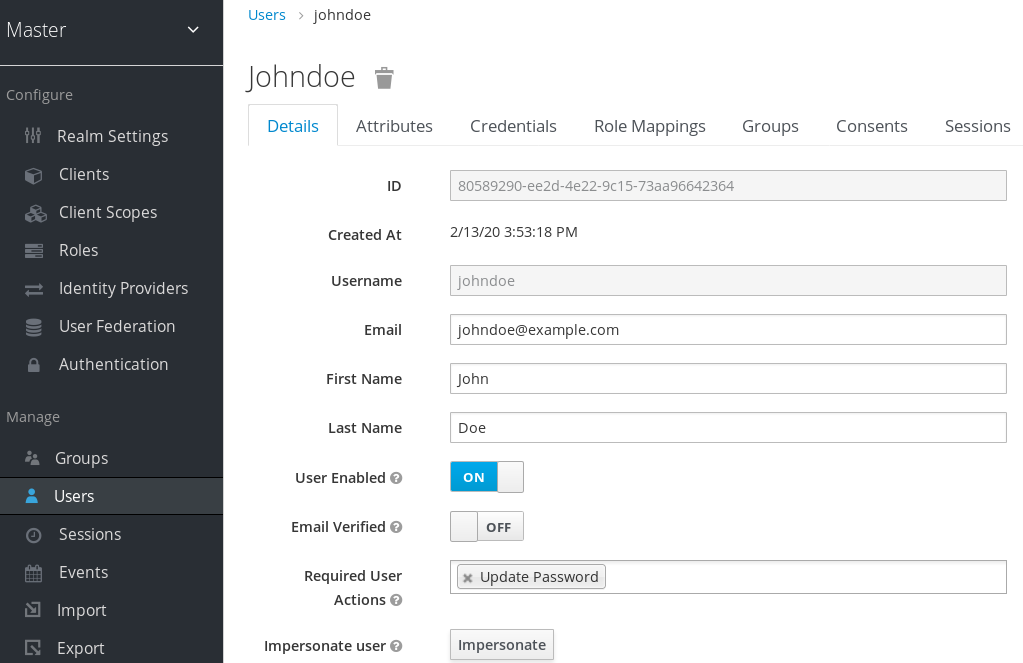
In the Required User Actions list box, select all the actions you want to add to the account. If you want to remove one, click the X next to the action name. Also remember to click the Save button after you’ve decided what actions to add.
4.6.1. Default Required Actions
You can also specify required actions that will be added to an account whenever a new user is created, i.e. through the Add User button the user list screen, or via the user registration link on the login page. To specify the default required actions go to the Authentication left menu item and click on the Required Actions tab.
Default Required Actions

Simply click the checkbox in the Default Action column of the required actions that you want to be executed when a brand new user logs in.
4.6.2. Terms and Conditions
Many organizations have a requirement that when a new user logs in for the first time, they need to agree to the terms and conditions of the website. Red Hat Single Sign-On has this functionality implemented as a required action, but it requires some configuration. For one, you have to go to the Required Actions tab described earlier and enable the Terms and Conditions action. You must also edit the terms.ftl file in the base login theme. See the Server Developer Guide for more information on extending and creating themes.
4.7. Impersonation
It is often useful for an admin to impersonate a user. For example, a user may be experiencing a bug in one of your applications and an admin may want to impersonate the user to see if they can duplicate the problem. Admins with the appropriate permission can impersonate a user. There are two locations an admin can initiate impersonation. The first is on the Users list tab.
Users

You can see here that the admin has searched for john. Next to John’s account you can see an impersonate button. Click that to impersonate the user.
Also, you can impersonate the user from the user Details tab.
User Details
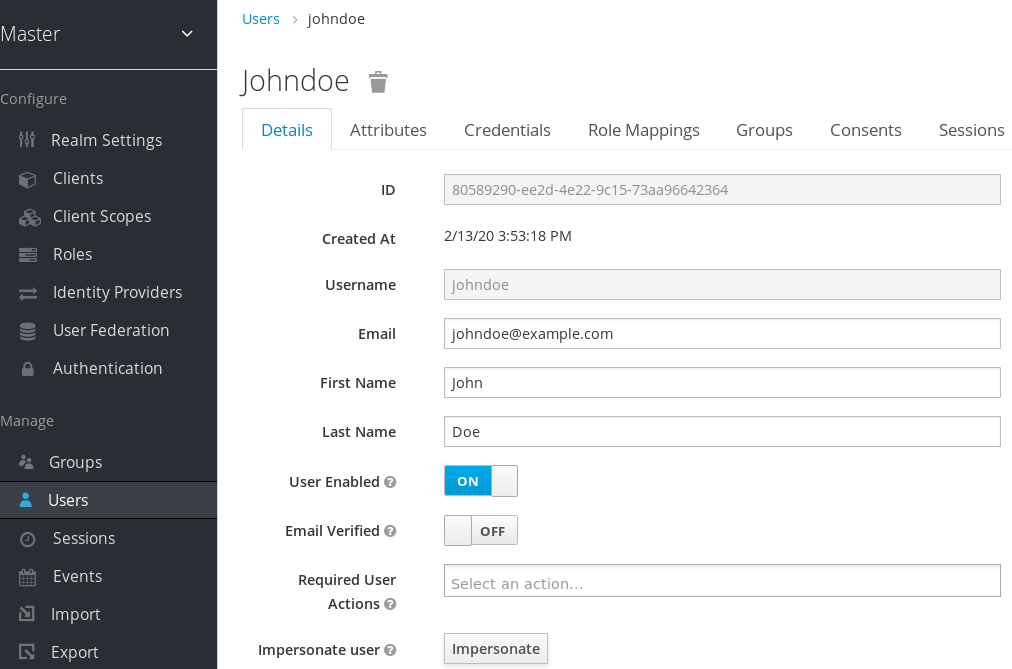
Near the bottom of the page you can see the Impersonate button. Click that to impersonate the user.
When impersonating, if the admin and the user are in the same realm, then the admin will be logged out and automatically logged in as the user being impersonated. If the admin and user are not in the same realm, the admin will remain logged in, but additionally be logged in as the user in that user’s realm. In both cases, the browser will be redirected to the impersonated user’s User Account Management page.
Any user with the realm’s impersonation role can impersonate a user. Please see the Admin Console Access Control chapter for more details on assigning administration permissions.
4.8. User Registration
You can enable Red Hat Single Sign-On to allow user self registration. When enabled, the login page has a registration link the user can click on to create their new account.
When user self registration is enabled it is possible to use the registration form to detect valid usernames and emails. It is also possible to enable reCAPTCHA Support.
Enabling registration is pretty simple. Go to the Realm Settings left menu and click it. Then go to the Login tab. There is a User Registration switch on this tab. Turn it on, then click the Save button.
Login Tab
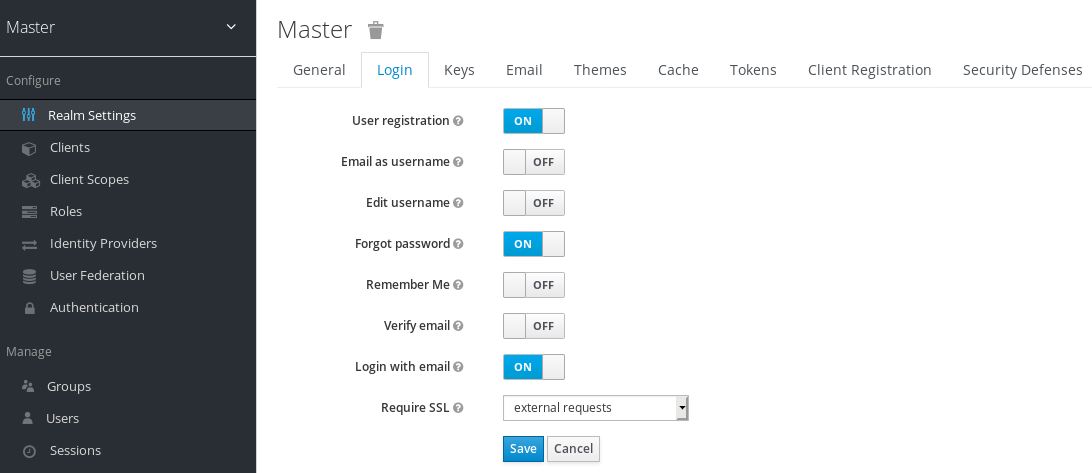
After you enable this setting, a Register link should show up on the login page.
Registration Link

Clicking on this link will bring the user to the registration page where they have to enter in some user profile information and a new password.
Registration Form
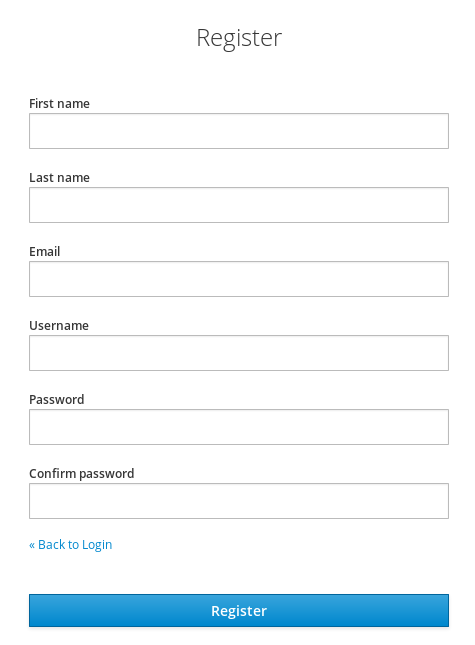
You can change the look and feel of the registration form as well as removing or adding additional fields that must be entered. See the Server Developer Guide for more information.
4.8.1. reCAPTCHA Support
To safeguard registration against bots, Red Hat Single Sign-On has integration with Google reCAPTCHA. To enable this you need to first go to Google Recaptcha Website and create an API key so that you can get your reCAPTCHA site key and secret. (FYI, localhost works by default so you don’t have to specify a domain).
Next, there are a few steps you need to perform in the Red Hat Single Sign-On Admin Console. Click the Authentication left menu item and go to the Flows tab. Select the Registration flow from the drop down list on this page.
Registration Flow
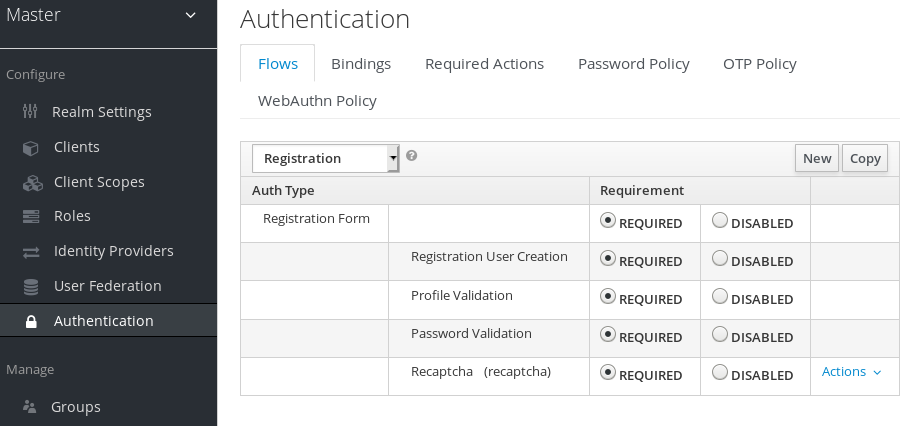
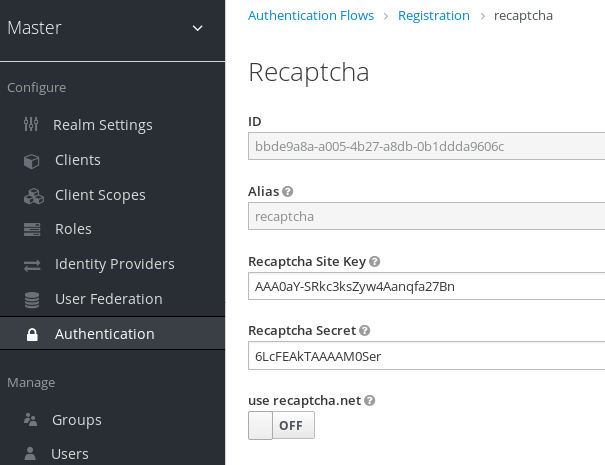
Set the 'reCAPTCHA' requirement to Required by clicking the appropriate radio button. This will enable reCAPTCHA on the screen. Next, you have to enter in the reCAPTCHA site key and secret that you generated at the Google reCAPTCHA Website. Click on the 'Actions' button that is to the right of the reCAPTCHA flow entry, then "Config" link, and enter in the reCAPTCHA site key and secret on this config page.
Recaptcha Config Page
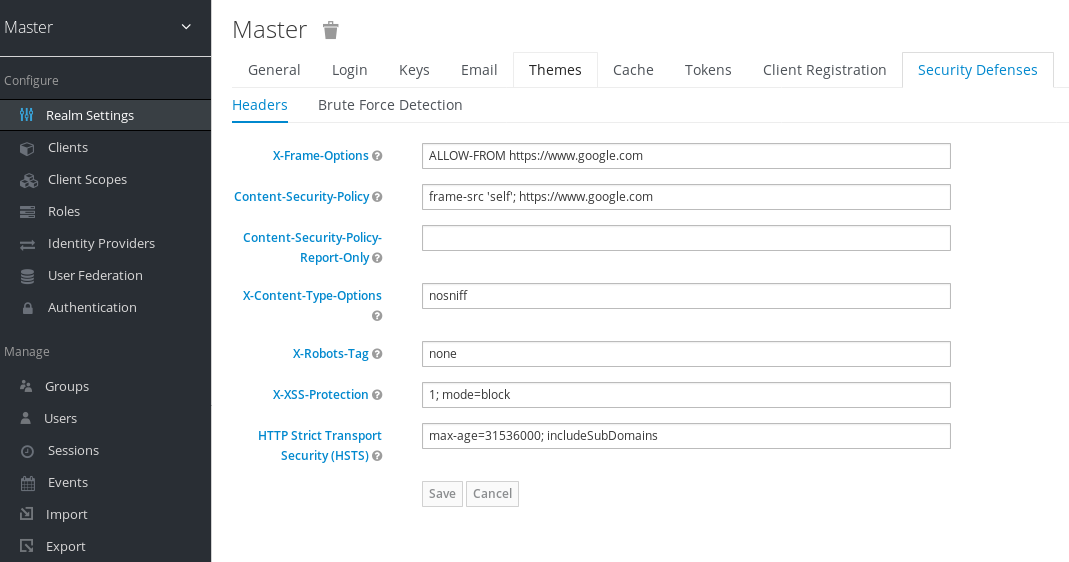
The final step you have to do is to change some default HTTP response headers that Red Hat Single Sign-On sets. Red Hat Single Sign-On will prevent a website from including any login page within an iframe. This is to prevent clickjacking attacks. You need to authorize Google to use the registration page within an iframe. Go to the Realm Settings left menu item and then go to the Security Defenses tab. You will need to add https://www.google.com to the values of both the X-Frame-Options and Content-Security-Policy headers.
Authorizing Iframes
Once you do this, reCAPTCHA should show up on your registration page. You may want to edit register.ftl in your login theme to muck around with the placement and styling of the reCAPTCHA button. See the Server Developer Guide for more information on extending and creating themes.
4.9. Personal data collected by Red Hat Single Sign-On
By default, Red Hat Single Sign-On collects the following:
- Basic user profile, such as email, firstname, and lastname
- Basic user profile used for social accounts and references to the social account when using a social login
- Device information collected for audit and security purposes, such as the IP address, operating system name, and browser name
The information collected in Red Hat Single Sign-On is highly customizable. Be aware of the following guidelines when making customizations:
- Registration and account forms could contain custom fields, such as birthday, gender, and nationality. An administrator could configure Red Hat Single Sign-On to retrieve that data from a social provider or a user storage provider such as LDAP.
- Red Hat Single Sign-On collects user credentials, such as password, OTP codes, and WebAuthn public keys. This information is encrypted and saved in a database, so it is not visible to Red Hat Single Sign-On administrators. However, each type of credential can include non-confidential metadata that is visible to administrators such as the algorithm that is used to hash the password and the number of hash iterations used to hash the password.
- With authorization services and UMA support enabled, Red Hat Single Sign-On can hold information about some objects for which a particular user is the owner. For example, Red Hat Single Sign-On can track that the user john is the owner of a photoalbum album with animals and a few photos called lion picture and cow picture in this album.