Server Administration Guide
For Use with Red Hat Single Sign-On 7.4
Abstract
Making open source more inclusive
Red Hat is committed to replacing problematic language in our code, documentation, and web properties. We are beginning with these four terms: master, slave, blacklist, and whitelist. Because of the enormity of this endeavor, these changes will be implemented gradually over several upcoming releases.
Chapter 1. Overview
Red Hat Single Sign-On is a single sign on solution for web apps and RESTful web services. The goal of Red Hat Single Sign-On is to make security simple so that it is easy for application developers to secure the apps and services they have deployed in their organization. Security features that developers normally have to write for themselves are provided out of the box and are easily tailorable to the individual requirements of your organization. Red Hat Single Sign-On provides customizable user interfaces for login, registration, administration, and account management. You can also use Red Hat Single Sign-On as an integration platform to hook it into existing LDAP and Active Directory servers. You can also delegate authentication to third party identity providers like Facebook and Google+.
1.1. Features
- Single-Sign On and Single-Sign Out for browser applications.
- OpenID Connect support.
- OAuth 2.0 support.
- SAML support.
- Identity Brokering - Authenticate with external OpenID Connect or SAML Identity Providers.
- Social Login - Enable login with Google, GitHub, Facebook, Twitter, and other social networks.
- User Federation - Sync users from LDAP and Active Directory servers.
- Kerberos bridge - Automatically authenticate users that are logged-in to a Kerberos server.
- Admin Console for central management of users, roles, role mappings, clients and configuration.
- Account Management console that allows users to centrally manage their account.
- Theme support - Customize all user facing pages to integrate with your applications and branding.
- Two-factor Authentication - Support for TOTP/HOTP via Google Authenticator or FreeOTP.
- Login flows - optional user self-registration, recover password, verify email, require password update, etc.
- Session management - Admins and users themselves can view and manage user sessions.
- Token mappers - Map user attributes, roles, etc. how you want into tokens and statements.
- Not-before revocation policies per realm, application and user.
- CORS support - Client adapters have built-in support for CORS.
- Client adapters for JavaScript applications, JBoss EAP, Fuse, etc.
- Supports any platform/language that has an OpenID Connect Relying Party library or SAML 2.0 Service Provider library.
1.2. How Does Security Work?
Red Hat Single Sign-On is a separate server that you manage on your network. Applications are configured to point to and be secured by this server. Red Hat Single Sign-On uses open protocol standards like OpenID Connect or SAML 2.0 to secure your applications. Browser applications redirect a user’s browser from the application to the Red Hat Single Sign-On authentication server where they enter their credentials. This is important because users are completely isolated from applications and applications never see a user’s credentials. Applications instead are given an identity token or assertion that is cryptographically signed. These tokens can have identity information like username, address, email, and other profile data. They can also hold permission data so that applications can make authorization decisions. These tokens can also be used to make secure invocations on REST-based services.
1.3. Core Concepts and Terms
There are some key concepts and terms you should be aware of before attempting to use Red Hat Single Sign-On to secure your web applications and REST services.
- users
- Users are entities that are able to log into your system. They can have attributes associated with themselves like email, username, address, phone number, and birth day. They can be assigned group membership and have specific roles assigned to them.
- authentication
- The process of identifying and validating a user.
- authorization
- The process of granting access to a user.
- credentials
- Credentials are pieces of data that Red Hat Single Sign-On uses to verify the identity of a user. Some examples are passwords, one-time-passwords, digital certificates, or even fingerprints.
- roles
-
Roles identify a type or category of user.
Admin,user,manager, andemployeeare all typical roles that may exist in an organization. Applications often assign access and permissions to specific roles rather than individual users as dealing with users can be too fine grained and hard to manage. - user role mapping
- A user role mapping defines a mapping between a role and a user. A user can be associated with zero or more roles. This role mapping information can be encapsulated into tokens and assertions so that applications can decide access permissions on various resources they manage.
- composite roles
-
A composite role is a role that can be associated with other roles. For example a
superusercomposite role could be associated with thesales-adminandorder-entry-adminroles. If a user is mapped to thesuperuserrole they also inherit thesales-adminandorder-entry-adminroles. - groups
- Groups manage groups of users. Attributes can be defined for a group. You can map roles to a group as well. Users that become members of a group inherit the attributes and role mappings that group defines.
- realms
- A realm manages a set of users, credentials, roles, and groups. A user belongs to and logs into a realm. Realms are isolated from one another and can only manage and authenticate the users that they control.
- clients
- Clients are entities that can request Red Hat Single Sign-On to authenticate a user. Most often, clients are applications and services that want to use Red Hat Single Sign-On to secure themselves and provide a single sign-on solution. Clients can also be entities that just want to request identity information or an access token so that they can securely invoke other services on the network that are secured by Red Hat Single Sign-On.
- client adapters
- Client adapters are plugins that you install into your application environment to be able to communicate and be secured by Red Hat Single Sign-On. Red Hat Single Sign-On has a number of adapters for different platforms that you can download. There are also third-party adapters you can get for environments that we don’t cover.
- consent
- Consent is when you as an admin want a user to give permission to a client before that client can participate in the authentication process. After a user provides their credentials, Red Hat Single Sign-On will pop up a screen identifying the client requesting a login and what identity information is requested of the user. User can decide whether or not to grant the request.
- client scopes
-
When a client is registered, you must define protocol mappers and role scope mappings for that client. It is often useful to store a client scope, to make creating new clients easier by sharing some common settings. This is also useful for requesting some claims or roles to be conditionally based on the value of
scopeparameter. Red Hat Single Sign-On provides the concept of a client scope for this. - client role
- Clients can define roles that are specific to them. This is basically a role namespace dedicated to the client.
- identity token
- A token that provides identity information about the user. Part of the OpenID Connect specification.
- access token
- A token that can be provided as part of an HTTP request that grants access to the service being invoked on. This is part of the OpenID Connect and OAuth 2.0 specification.
- assertion
- Information about a user. This usually pertains to an XML blob that is included in a SAML authentication response that provided identity metadata about an authenticated user.
- service account
- Each client has a built-in service account which allows it to obtain an access token.
- direct grant
- A way for a client to obtain an access token on behalf of a user via a REST invocation.
- protocol mappers
- For each client you can tailor what claims and assertions are stored in the OIDC token or SAML assertion. You do this per client by creating and configuring protocol mappers.
- session
- When a user logs in, a session is created to manage the login session. A session contains information like when the user logged in and what applications have participated within single-sign on during that session. Both admins and users can view session information.
- user federation provider
- Red Hat Single Sign-On can store and manage users. Often, companies already have LDAP or Active Directory services that store user and credential information. You can point Red Hat Single Sign-On to validate credentials from those external stores and pull in identity information.
- identity provider
- An identity provider (IDP) is a service that can authenticate a user. Red Hat Single Sign-On is an IDP.
- identity provider federation
- Red Hat Single Sign-On can be configured to delegate authentication to one or more IDPs. Social login via Facebook or Google+ is an example of identity provider federation. You can also hook Red Hat Single Sign-On to delegate authentication to any other OpenID Connect or SAML 2.0 IDP.
- identity provider mappers
- When doing IDP federation you can map incoming tokens and assertions to user and session attributes. This helps you propagate identity information from the external IDP to your client requesting authentication.
- required actions
-
Required actions are actions a user must perform during the authentication process. A user will not be able to complete the authentication process until these actions are complete. For example, an admin may schedule users to reset their passwords every month. An
update passwordrequired action would be set for all these users. - authentication flows
- Authentication flows are work flows a user must perform when interacting with certain aspects of the system. A login flow can define what credential types are required. A registration flow defines what profile information a user must enter and whether something like reCAPTCHA must be used to filter out bots. Credential reset flow defines what actions a user must do before they can reset their password.
- events
- Events are audit streams that admins can view and hook into.
- themes
- Every screen provided by Red Hat Single Sign-On is backed by a theme. Themes define HTML templates and stylesheets which you can override as needed.
Chapter 2. Server Initialization
After performing all the installation and configuration tasks defined in the Server Installation and Configuration Guide, you will need to create an initial admin account. Red Hat Single Sign-On does not have any configured admin account out of the box. This account will allow you to create an admin that can log into the master realm’s administration console so that you can start creating realms, users and registering applications to be secured by Red Hat Single Sign-On.
If your server is accessible from localhost, you can boot it up and create this admin user by going to the http://localhost:8080/auth URL.
Welcome Page
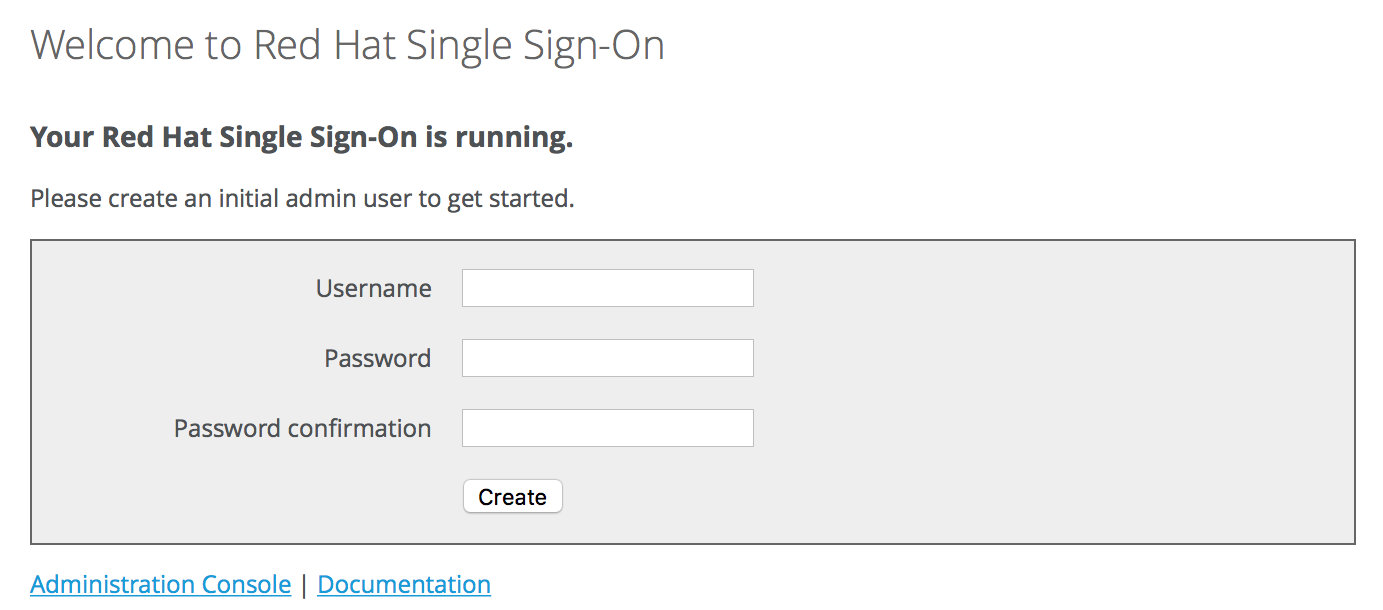
Simply specify the username and password you want for this initial admin.
If you cannot access the server via a localhost address, or just want to provision Red Hat Single Sign-On from the command line you can do this with the …/bin/add-user-keycloak script.
add-user-keycloak script

The parameters are a little different depending if you are using the standalone operation mode or domain operation mode. For standalone mode, here is how you use the script.
Linux/Unix
$ .../bin/add-user-keycloak.sh -r master -u <username> -p <password>
Windows
> ...\bin\add-user-keycloak.bat -r master -u <username> -p <password>
For domain mode, you have to point the script to one of your server hosts using the -sc switch.
Linux/Unix
$ .../bin/add-user-keycloak.sh --sc domain/servers/server-one/configuration -r master -u <username> -p <password>
Windows
> ...\bin\add-user-keycloak.bat --sc domain/servers/server-one/configuration -r master -u <username> -p <password>
Chapter 3. Admin Console
The bulk of your administrative tasks will be done through the Red Hat Single Sign-On Admin Console. You can go to the console url directly at http://localhost:8080/auth/admin/
Login Page

Enter the username and password you created on the Welcome Page or the add-user-keycloak script in the bin directory. This will bring you to the Red Hat Single Sign-On Admin Console.
Admin Console
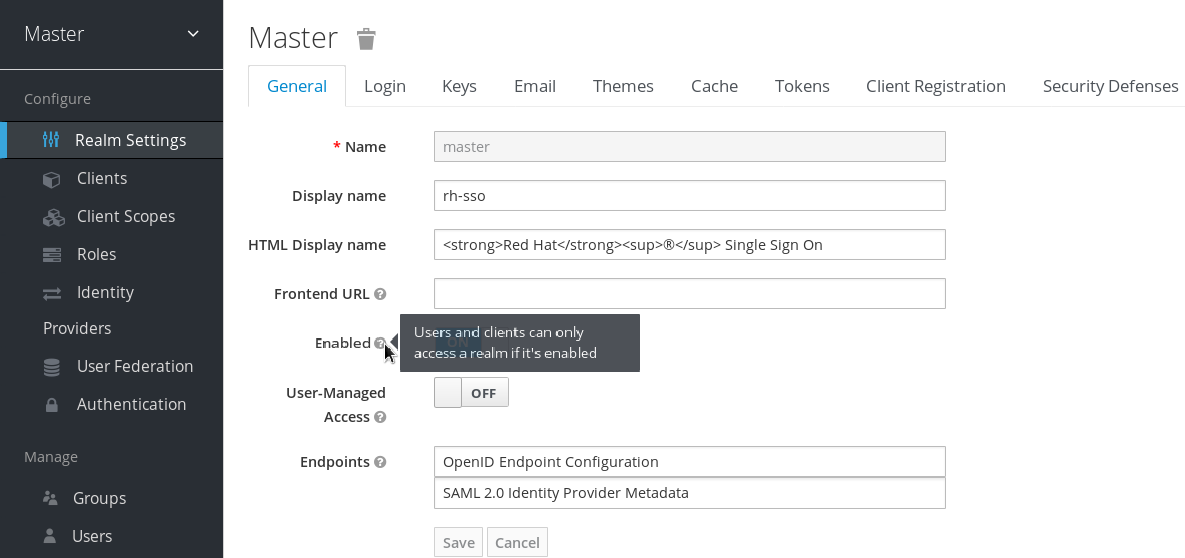
The left drop down menu allows you to pick a realm you want to manage or to create a new one. The right drop down menu allows you to view your user account or logout. If you are curious about a certain feature, button, or field within the Admin Console, simply hover your mouse over any question mark ? icon. This will pop up tooltip text to describe the area of the console you are interested in. The image above shows the tooltip in action.
3.1. The Master Realm
When you boot Red Hat Single Sign-On for the first time Red Hat Single Sign-On creates a pre-defined realm for you. This initial realm is the master realm. It is the highest level in the hierarchy of realms. Admin accounts in this realm have permissions to view and manage any other realm created on the server instance. When you define your initial admin account, you create an account in the master realm. Your initial login to the admin console will also be via the master realm.
We recommend that you do not use the master realm to manage the users and applications in your organization. Reserve use of the master realm for super admins to create and manage the realms in your system. Following this security model helps prevent accidental changes and follows the tradition of permitting user accounts access to only those privileges and powers necessary for the successful completion of their current task.
It is possible to disable the master realm and define admin accounts within each individual new realm you create. Each realm has its own dedicated Admin Console that you can log into with local accounts. This guide talks more about this in the Dedicated Realm Admin Consoles chapter.
3.2. Create a New Realm
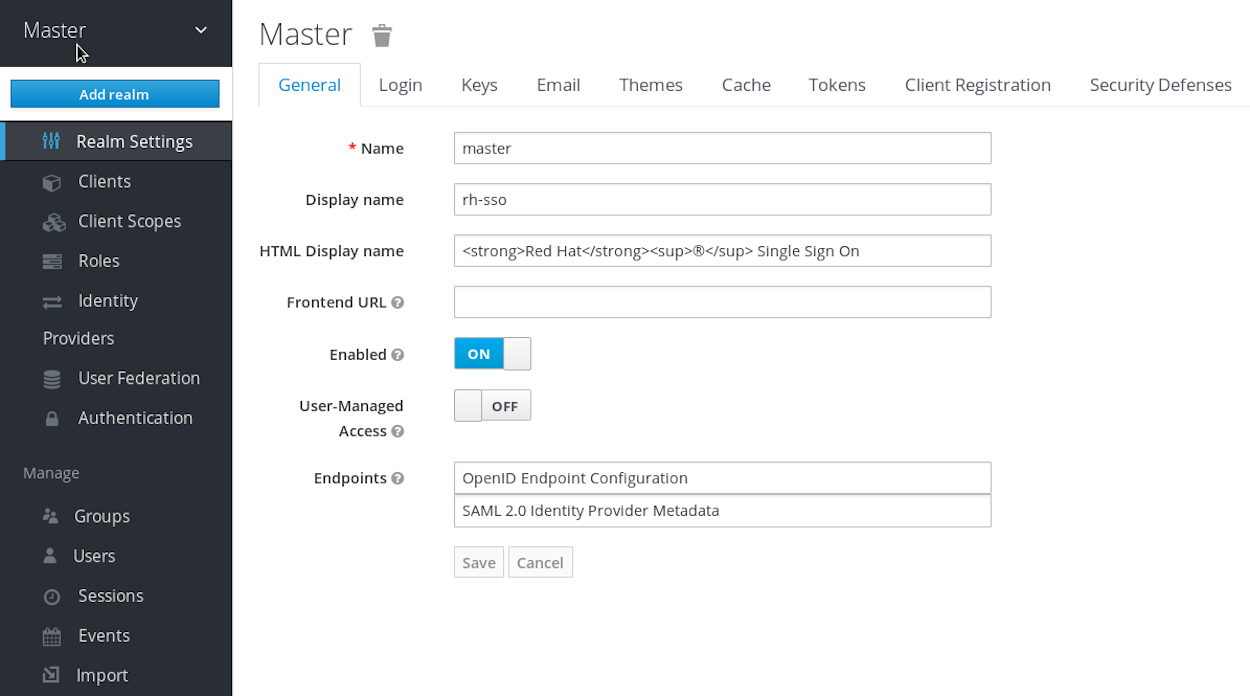
Creating a new realm is very simple. Mouse over the top left corner drop down menu that is titled with Master. If you are logged in the master realm this drop down menu lists all the realms created. The last entry of this drop down menu is always Add Realm. Click this to add a realm.
Add Realm Menu
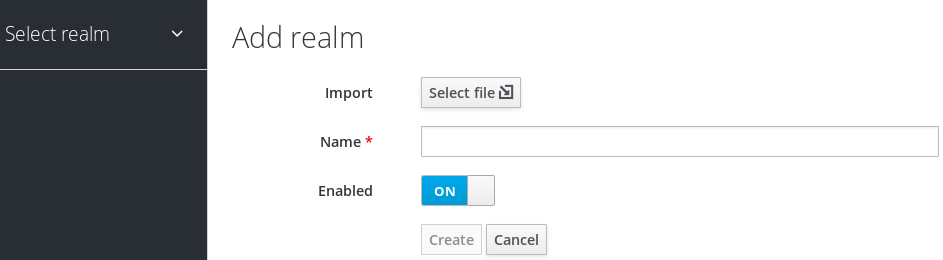
This menu option will bring you to the Add Realm page. Specify the realm name you want to define and click the Create button. Alternatively you can import a JSON document that defines your new realm. We’ll go over this in more detail in the Export and Import chapter.
Create Realm
After creating the realm you are brought back to the main Admin Console page. The current realm will now be set to the realm you just created. You can switch between managing different realms by doing a mouse over on the top left corner drop down menu.
3.3. SSL Mode
Each realm has an SSL Mode associated with it. The SSL Mode defines the SSL/HTTPS requirements for interacting with the realm. Browsers and applications that interact with the realm must honor the SSL/HTTPS requirements defined by the SSL Mode or they will not be allowed to interact with the server.
Red Hat Single Sign-On generates a self-signed certificate the first time it runs. Please note that self-signed certificates are not secure, and should only be used for testing purposes. It is highly recommended that you install a CA-signed certificate on the Red Hat Single Sign-On server itself or on a reverse proxy in front of the Red Hat Single Sign-On server. See the Server Installation and Configuration Guide.
To configure the SSL Mode of your realm, you need to click on the Realm Settings left menu item and go to the Login tab.
Login Tab
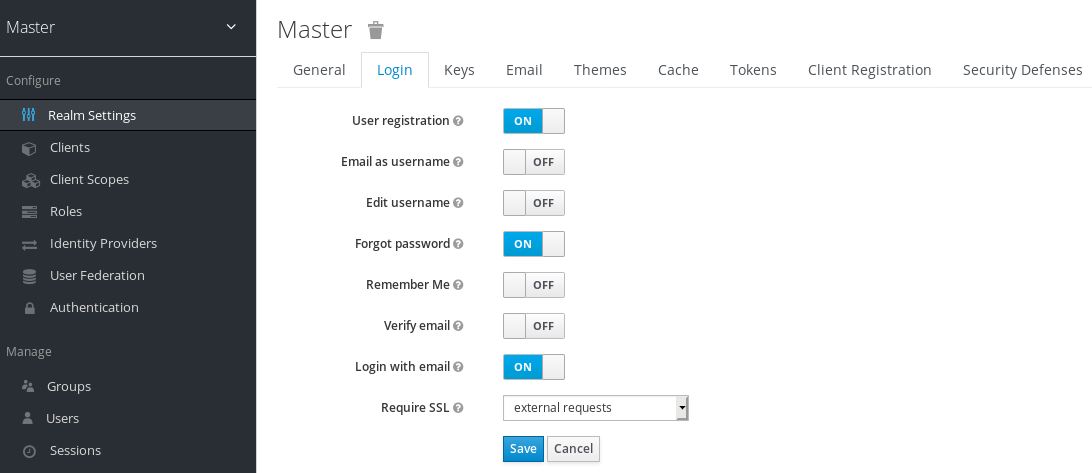
The Require SSL option allows you to pick the SSL Mode you want. Here is an explanation of each mode:
- external requests
-
Users can interact with Red Hat Single Sign-On without SSL so long as they stick to private IP addresses like
localhost,127.0.0.1,10.x.x.x,192.168.x.x, and172.16.x.x. If you try to access Red Hat Single Sign-On without SSL from a non-private IP address you will get an error. - none
- Red Hat Single Sign-On does not require SSL. This should really only be used in development when you are playing around with things and don’t want to bother configuring SSL on your server.
- all requests
- Red Hat Single Sign-On requires SSL for all IP addresses.
3.4. Clearing Server Caches
Red Hat Single Sign-On will cache everything it can in memory within the limits of your JVM and/or the limits you’ve configured it for. If the Red Hat Single Sign-On database is modified by a third party (i.e. a DBA) outside the scope of the server’s REST APIs or Admin Console there’s a chance parts of the in-memory cache may be stale. You can clear the realm cache, user cache or cache of external public keys (Public keys of external clients or Identity providers, which Red Hat Single Sign-On usually uses to verify signatures of particular external entity) from the Admin Console by going to the Realm Settings left menu item and the Cache tab.
Cache tab

Just click the clear button on the cache you want to evict.
3.5. Email Settings
Red Hat Single Sign-On sends emails to users to verify their email address, when they forget their passwords, or when an admin needs to receive notifications about a server event. To enable Red Hat Single Sign-On to send emails you need to provide Red Hat Single Sign-On with your SMTP server settings. This is configured per realm. Go to the Realm Settings left menu item and click the Email tab.
Email Tab
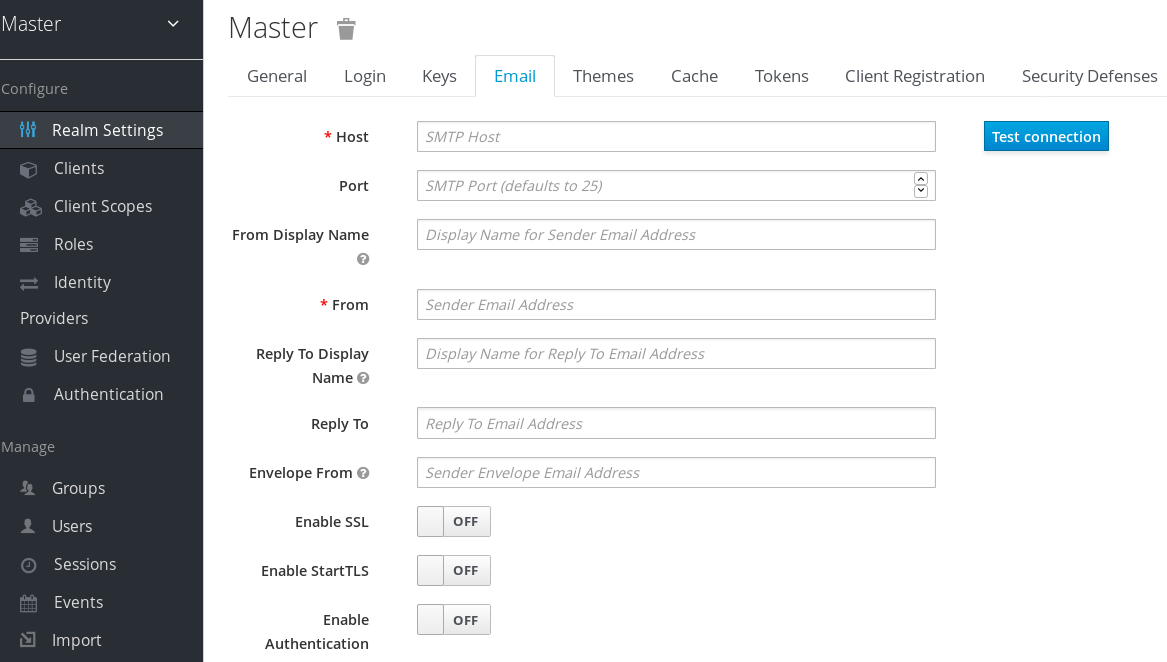
- Host
-
Hostdenotes the SMTP server hostname used for sending emails. - Port
-
Portdenotes the SMTP server port. - From
-
Fromdenotes the address used for theFromSMTP-Header for the emails sent. - From Display Name
-
From Display Nameallows to configure a user friendly email address aliases (optional). If not set the plainFromemail address will be displayed in email clients. - Reply To
-
Reply Todenotes the address used for theReply-ToSMTP-Header for the mails sent (optional). If not set the plainFromemail address will be used. - Reply To Display Name
-
Reply To Display Nameallows to configure a user friendly email address aliases (optional). If not set the plainReply Toemail address will be displayed. - Envelope From
-
Envelope Fromdenotes the Bounce Address used for theReturn-PathSMTP-Header for the mails sent (optional).
As emails are used for recovering usernames and passwords it’s recommended to use SSL or TLS, especially if the SMTP server is on an external network. To enable SSL click on Enable SSL or to enable TLS click on Enable TLS. You will most likely also need to change the Port (the default port for SSL/TLS is 465).
If your SMTP server requires authentication click on Enable Authentication and insert the Username and Password. The value of the Password field can refer a value from an external vault.
3.6. Themes and Internationalization
Themes allow you to change the look and feel of any UI in Red Hat Single Sign-On. Themes are configured per realm. To change a theme go to the Realm Settings left menu item and click on the Themes tab.
Themes Tab
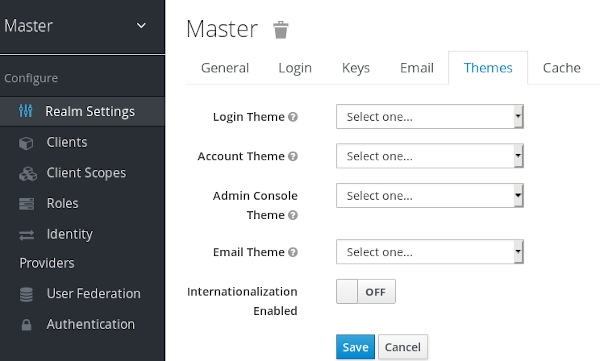
Pick the theme you want for each UI category and click Save.
- Login Theme
- Username password entry, OTP entry, new user registration, and other similar screens related to login.
- Account Theme
- Each user has an User Account Management UI.
- Admin Console Theme
- The skin of the Red Hat Single Sign-On Admin Console.
- Email Theme
- Whenever Red Hat Single Sign-On has to send out an email, it uses templates defined in this theme to craft the email.
The Server Developer Guide goes into how to create a new themes or modify existing ones.
3.6.1. Internationalization
Every UI screen is internationalized in Red Hat Single Sign-On. The default language is English, but if you turn on the Internationalization switch on the Theme tab you can choose which locales you want to support and what the default locale will be. The next time a user logs in, they will be able to choose a language on the login page to use for the login screens, User Account Management UI, and Admin Console. The Server Developer Guide explains how you can offer additional languages.
3.6.1.1. User Locale selection
In order to select the best possible locale for a user there is a locale selector provider that handles deciding what is the best locale on the information available. One thing to note here is that it is not always known who the user is. For this reason the previously authenticated users locale is remembered in a persisted cookie.
The logic for selecting the locale uses the first of the following that is available:
- User selected - when the user has selected a locale using the drop-down locale selector
- User profile - when there is an authenticated user and the user has a preferred locale set
- Client selected - passed by the client using for example ui_locales parameter
- Cookie - last locale selected on the browser
-
Accepted language - locale from
Accept-Languageheader - Realm default
- If none of the above, fallback to English
When a user is authenticated an action is triggered to update the locale in the persisted cookie mentioned earlier. If the user has actively switched the locale through the locale selector on the login pages the users locale is also updated at this point.
Chapter 4. User Management
This section describes the administration functions for managing users.
4.1. Searching For Users
If you need to manage a specific user, click on Users in the left menu bar.
Users
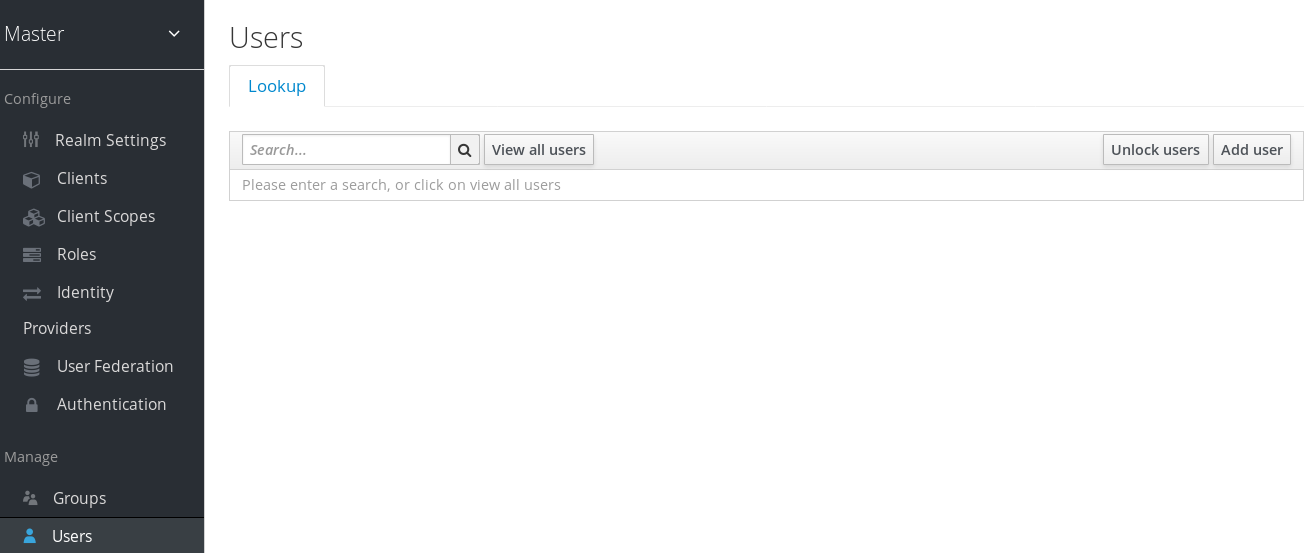
This menu option brings you to the user list page. In the search box you can type in a full name, last name, or email address you want to search for in the user database. The query will bring up all users that match your criteria. The View all users button will list every user in the system. This will search just local Red Hat Single Sign-On database and not the federated database (ie. LDAP) because some backends like LDAP don’t have a way to page through users. So if you want the users from federated backend to be synced into Red Hat Single Sign-On database you need to either:
- Adjust search criteria. That will sync just the backend users matching the criteria into Red Hat Single Sign-On database.
-
Go to
User Federationtab and clickSync all usersorSync changed usersin the page with your federation provider.
See User Federation for more details.
4.2. Creating New Users
To create a user click on Users in the left menu bar.
Users
This menu option brings you to the user list page. On the right side of the empty user list, you should see an Add User button. Click that to start creating your new user.
Add User
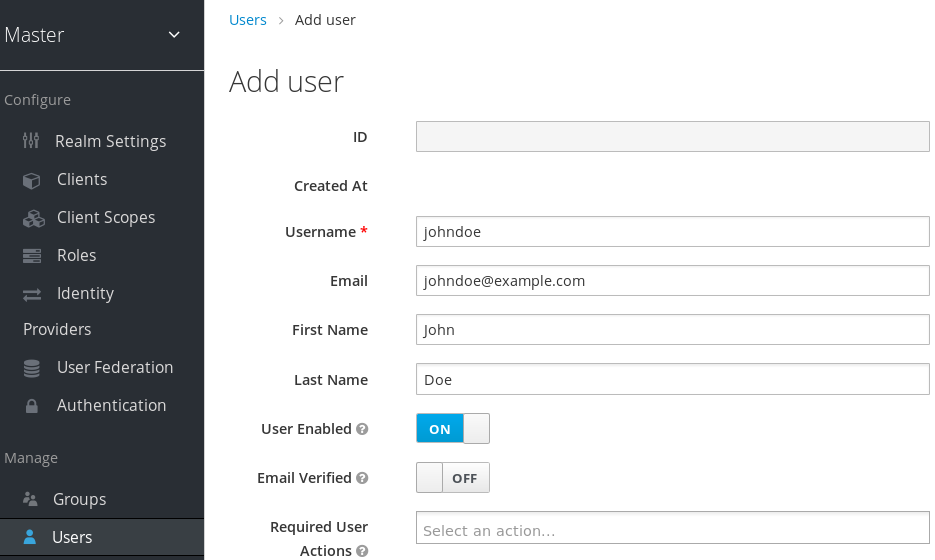
The only required field is Username. Click save. This will bring you to the management page for your new user.
4.3. Deleting Users
To delete a user click on Users in the left menu bar.
Users
This menu option brings you to the user list page. Click View all users or search to find the user you intend to delete.
View All Users
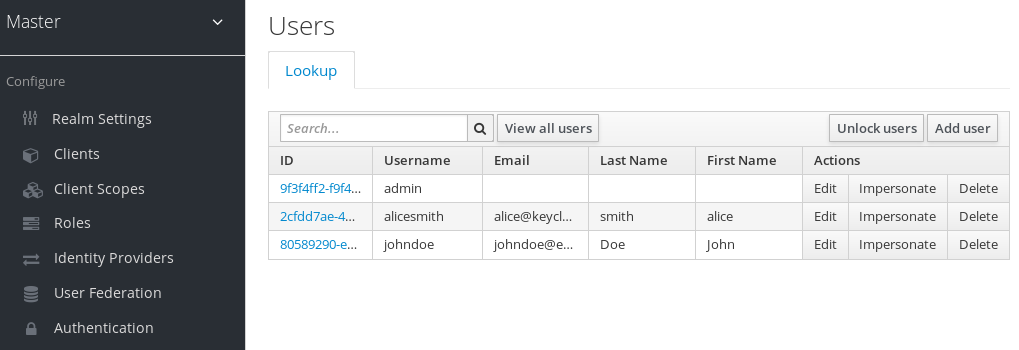
In the list of users, click Delete next to the user you want to remove. You will be asked to confirm that you are sure you want to delete this user. Click Delete in the confirmation box to confirm.
4.4. User Attributes
Beyond basic user metadata like name and email, you can store arbitrary user attributes. Choose a user to manage then click on the Attributes tab.
Users

Enter in the attribute name and value in the empty fields and click the Add button next to it to add a new field. Note that any edits you make on this page will not be stored until you hit the Save button.
4.5. User Credentials
When viewing a user if you go to the Credentials tab you can manage a user’s credentials.
Credential Management

The credentials are listed in a table, which has the following fields:
- Position
- The arrow buttons in this column allows you to shift the priority of the credential for the user, with the topmost credential having the highest priority. This priority determines which credential will be shown first to a user in case of a choice during login. The highest priority of those available to the user will be the one selected.
- Type
-
This shows the type of the credential, for example
passwordorotp. - User Label
- This is an assignable label to recognise the credential when presented as a selection option during login. It can be set to any value to describe the credential.
- Data
-
This shows the non-confidential technical information about the credential. It is originally hidden, but you can press
Show data…to reveal it for a credential. - Actions
-
This column has two buttons.
Saverecords the value of the User Label, whileDeletewill remove the credential.
4.5.1. Creating a Password for the User
If a user doesn’t have a password, or if the password has been deleted, the Set Password section will be shown on the page.
Credential Management - Set Password

To create a password for a user, type in a new one. Click on the Set Password button after you’ve typed everything in. If the Temporary switch is on, this new password can only be used once and the user will be asked to change their password after they have logged in.
If a user already has a password, it can be reset in the Reset Password section.
Alternatively, if you have email set up, you can send an email to the user that asks them to reset their password. Choose Update Password from the Reset Actions list box and click Send Email. You can optionally set the validity of the e-mail link which defaults to the one preset in Tokens tab in the realm settings. The sent email contains a link that will bring the user to the update password screen.
Note that a user can only have a single credential of type password.
4.5.2. Creating other credentials
You cannot configure other types of credentials for a specific user within the Admin Console. This is the responsibility of the user. You can only delete credentials for a user on the Credentials tab, for example if the user has lost an OTP device, or if a credential has been compromised.
4.5.2.1. Creating an OTP
If OTP is conditional in your realm, the user will have to go to the User Account Management service to re-configure a new OTP generator. If OTP is required, then the user will be asked to re-configure a new OTP generator when they log in.
Like passwords, you can alternatively send an email to the user that will ask them to reset their OTP generator. Choose Configure OTP in the Reset Actions list box and click the Send Email button. The sent email contains a link that will bring the user to the OTP setup screen. You can use this method even if the user already has an OTP credential, and would like to set up some more.
4.6. Required Actions
Required Actions are tasks that a user must finish before they are allowed to log in. A user must provide their credentials before required actions are executed. Once a required action is completed, the user will not have to perform the action again. Here are explanations of some of the built-in required action types:
- Update Password
- When set, a user must change their password.
- Configure OTP
- When set, a user must configure a one-time password generator on their mobile device using either the Free OTP or Google Authenticator application.
- Verify Email
- When set, a user must verify that they have a valid email account. An email will be sent to the user with a link they have to click. Once this workflow is successfully completed, they will be allowed to log in.
- Update Profile
- This required action asks the user to update their profile information, i.e. their name, address, email, and/or phone number.
Admins can add required actions for each individual user within the user’s Details tab in the Admin Console.
Setting Required Action
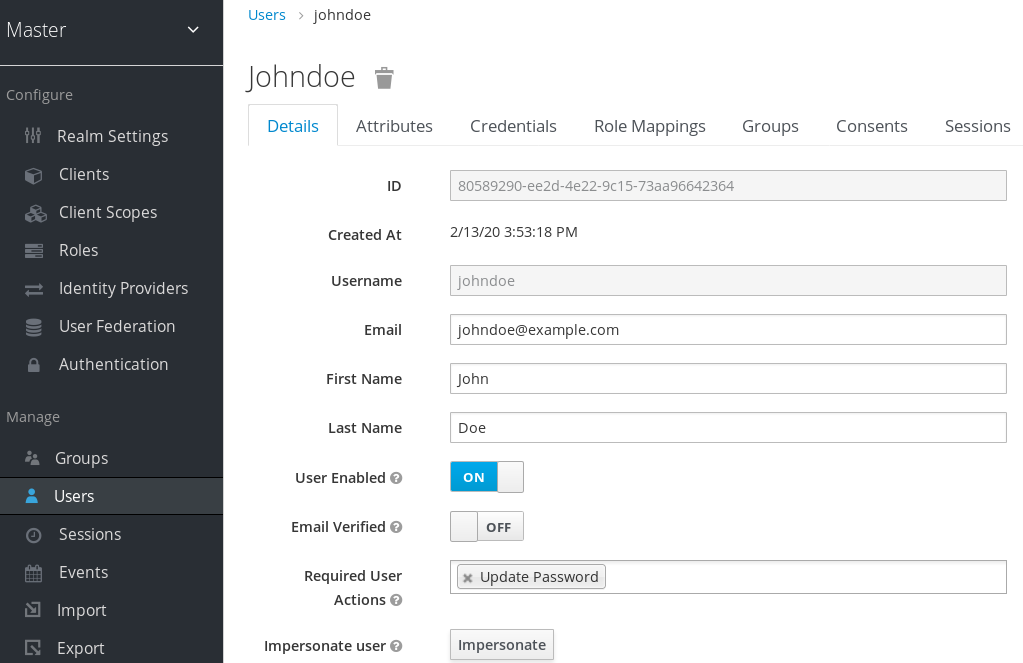
In the Required User Actions list box, select all the actions you want to add to the account. If you want to remove one, click the X next to the action name. Also remember to click the Save button after you’ve decided what actions to add.
4.6.1. Default Required Actions
You can also specify required actions that will be added to an account whenever a new user is created, i.e. through the Add User button the user list screen, or via the user registration link on the login page. To specify the default required actions go to the Authentication left menu item and click on the Required Actions tab.
Default Required Actions

Simply click the checkbox in the Default Action column of the required actions that you want to be executed when a brand new user logs in.
4.6.2. Terms and Conditions
Many organizations have a requirement that when a new user logs in for the first time, they need to agree to the terms and conditions of the website. Red Hat Single Sign-On has this functionality implemented as a required action, but it requires some configuration. For one, you have to go to the Required Actions tab described earlier and enable the Terms and Conditions action. You must also edit the terms.ftl file in the base login theme. See the Server Developer Guide for more information on extending and creating themes.
4.7. Impersonation
It is often useful for an admin to impersonate a user. For example, a user may be experiencing a bug in one of your applications and an admin may want to impersonate the user to see if they can duplicate the problem. Admins with the appropriate permission can impersonate a user. There are two locations an admin can initiate impersonation. The first is on the Users list tab.
Users

You can see here that the admin has searched for john. Next to John’s account you can see an impersonate button. Click that to impersonate the user.
Also, you can impersonate the user from the user Details tab.
User Details
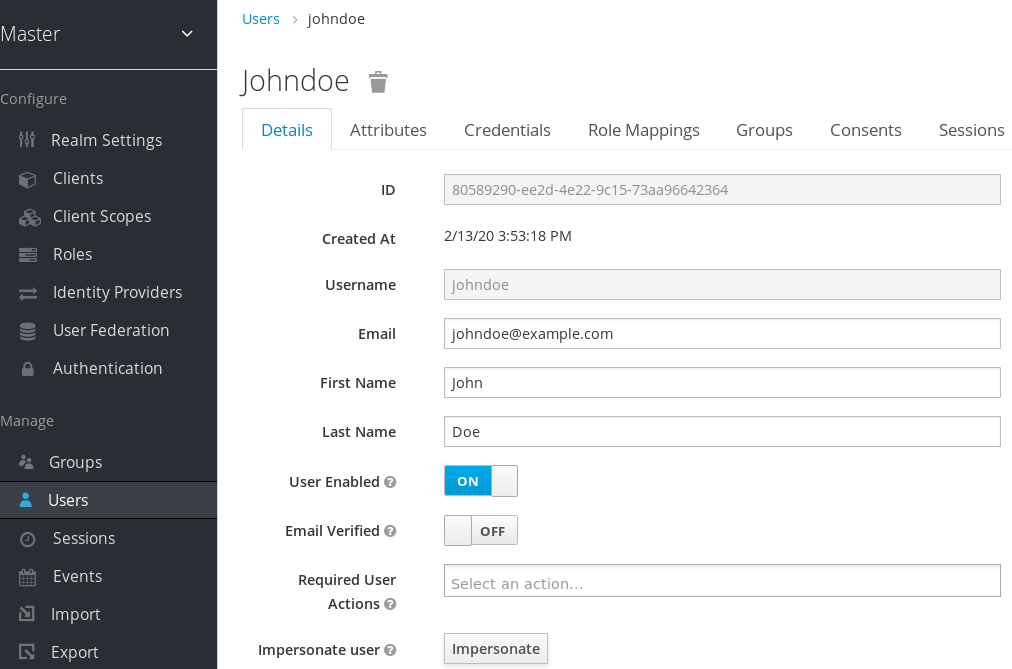
Near the bottom of the page you can see the Impersonate button. Click that to impersonate the user.
When impersonating, if the admin and the user are in the same realm, then the admin will be logged out and automatically logged in as the user being impersonated. If the admin and user are not in the same realm, the admin will remain logged in, but additionally be logged in as the user in that user’s realm. In both cases, the browser will be redirected to the impersonated user’s User Account Management page.
Any user with the realm’s impersonation role can impersonate a user. Please see the Admin Console Access Control chapter for more details on assigning administration permissions.
4.8. User Registration
You can enable Red Hat Single Sign-On to allow user self registration. When enabled, the login page has a registration link the user can click on to create their new account.
When user self registration is enabled it is possible to use the registration form to detect valid usernames and emails. It is also possible to enable reCAPTCHA Support.
Enabling registration is pretty simple. Go to the Realm Settings left menu and click it. Then go to the Login tab. There is a User Registration switch on this tab. Turn it on, then click the Save button.
Login Tab
After you enable this setting, a Register link should show up on the login page.
Registration Link

Clicking on this link will bring the user to the registration page where they have to enter in some user profile information and a new password.
Registration Form
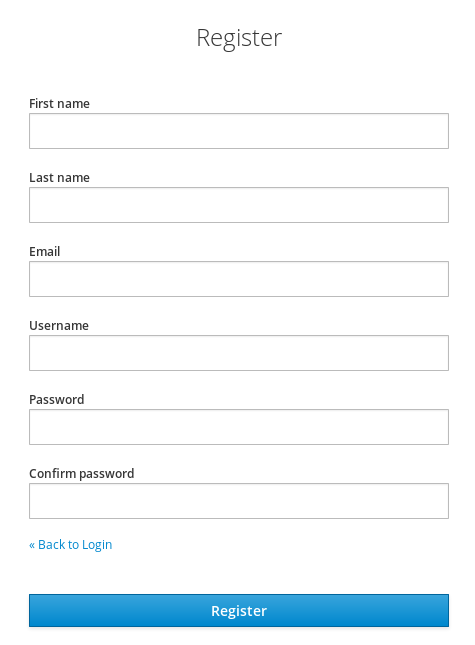
You can change the look and feel of the registration form as well as removing or adding additional fields that must be entered. See the Server Developer Guide for more information.
4.8.1. reCAPTCHA Support
To safeguard registration against bots, Red Hat Single Sign-On has integration with Google reCAPTCHA. To enable this you need to first go to Google Recaptcha Website and create an API key so that you can get your reCAPTCHA site key and secret. (FYI, localhost works by default so you don’t have to specify a domain).
Next, there are a few steps you need to perform in the Red Hat Single Sign-On Admin Console. Click the Authentication left menu item and go to the Flows tab. Select the Registration flow from the drop down list on this page.
Registration Flow
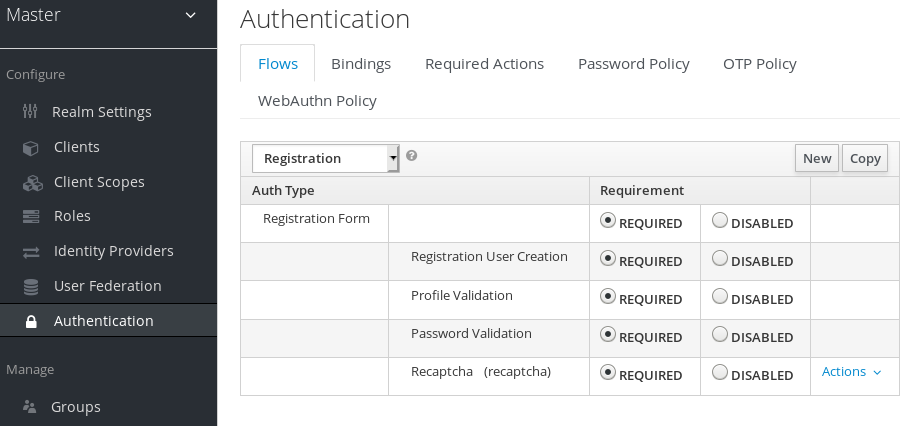
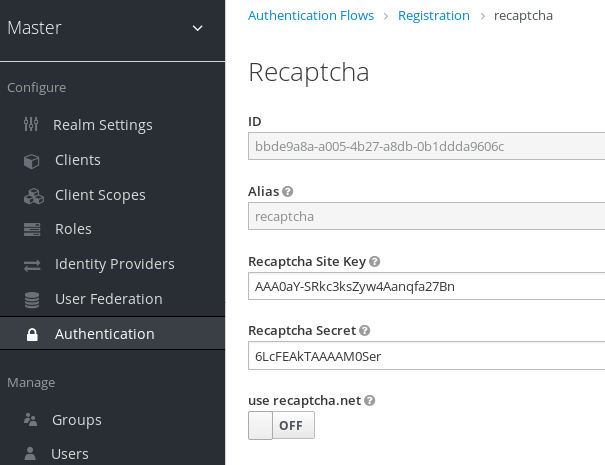
Set the 'reCAPTCHA' requirement to Required by clicking the appropriate radio button. This will enable reCAPTCHA on the screen. Next, you have to enter in the reCAPTCHA site key and secret that you generated at the Google reCAPTCHA Website. Click on the 'Actions' button that is to the right of the reCAPTCHA flow entry, then "Config" link, and enter in the reCAPTCHA site key and secret on this config page.
Recaptcha Config Page
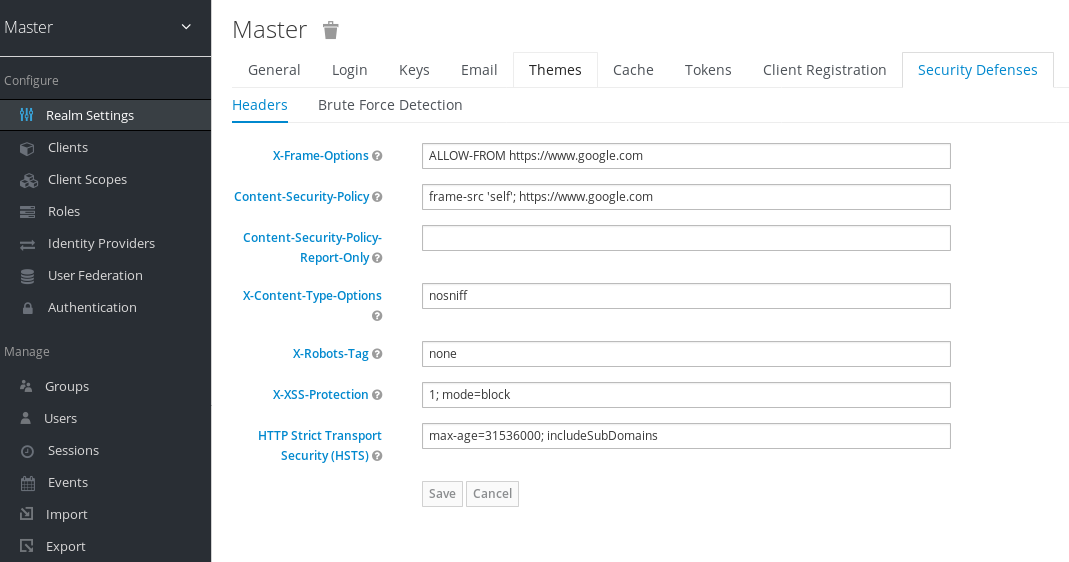
The final step you have to do is to change some default HTTP response headers that Red Hat Single Sign-On sets. Red Hat Single Sign-On will prevent a website from including any login page within an iframe. This is to prevent clickjacking attacks. You need to authorize Google to use the registration page within an iframe. Go to the Realm Settings left menu item and then go to the Security Defenses tab. You will need to add https://www.google.com to the values of both the X-Frame-Options and Content-Security-Policy headers.
Authorizing Iframes
Once you do this, reCAPTCHA should show up on your registration page. You may want to edit register.ftl in your login theme to muck around with the placement and styling of the reCAPTCHA button. See the Server Developer Guide for more information on extending and creating themes.
4.9. Personal data collected by Red Hat Single Sign-On
By default, Red Hat Single Sign-On collects the following:
- Basic user profile, such as email, firstname, and lastname
- Basic user profile used for social accounts and references to the social account when using a social login
- Device information collected for audit and security purposes, such as the IP address, operating system name, and browser name
The information collected in Red Hat Single Sign-On is highly customizable. Be aware of the following guidelines when making customizations:
- Registration and account forms could contain custom fields, such as birthday, gender, and nationality. An administrator could configure Red Hat Single Sign-On to retrieve that data from a social provider or a user storage provider such as LDAP.
- Red Hat Single Sign-On collects user credentials, such as password, OTP codes, and WebAuthn public keys. This information is encrypted and saved in a database, so it is not visible to Red Hat Single Sign-On administrators. However, each type of credential can include non-confidential metadata that is visible to administrators such as the algorithm that is used to hash the password and the number of hash iterations used to hash the password.
- With authorization services and UMA support enabled, Red Hat Single Sign-On can hold information about some objects for which a particular user is the owner. For example, Red Hat Single Sign-On can track that the user john is the owner of a photoalbum album with animals and a few photos called lion picture and cow picture in this album.
Chapter 5. Login Page Settings
There are several nice built-in login page features you can enable if you need the functionality.
5.1. Forgot Password
If you enable it, users are able to reset their credentials if they forget their password or lose their OTP generator. Go to the Realm Settings left menu item, and click on the Login tab. Switch on the Forgot Password switch.
Login Tab
A forgot password link will now show up on your login pages.
Forgot Password Link
Clicking on this link will bring the user to a page where they can enter in their username or email and receive an email with a link to reset their credentials.
Forgot Password Page
The text sent in the email is completely configurable. You just need to extend or edit the theme associated with it. See the Server Developer Guide for more information.
When the user clicks on the email link, they will be asked to update their password, and, if they have an OTP generator set up, they will also be asked to reconfigure this as well. Depending on the security requirements of your organization you may not want users to be able to reset their OTP generator through email. You can change this behavior by going to the Authentication left menu item, clicking on the Flows tab, and selecting the Reset Credentials flow:
Reset Credentials Flow

If you do not want OTP reset, then just chose the disabled radio button to the right of Reset OTP.
Be sure to leave Update Password enabled on the Required Actions tab. Otherwise, Forgot Password does not work.
5.2. Remember Me
If a logged in user closes their browser, their session is destroyed and they will have to log in again. You can set things up so that if a user checks a remember me checkbox, they will remain logged in even if the browser is closed. This basically turns the login cookie from a session-only cookie to a persistence cookie.
To enable this feature go to Realm Settings left menu item and click on the Login tab and turn on the Remember Me switch:
Login Tab
Once you save this setting, a remember me checkbox will be displayed on the realm’s login page.
Remember Me
Chapter 6. Authentication
There are a few features you should be aware of when configuring authentication for your realm. Many organizations have strict password and OTP policies that you can enforce via settings in the Admin Console. You may or may not want to require different credential types for authentication. You may want to give users the option to login via Kerberos or disable or enable various built-in credential types. This chapter covers all of these topics.
6.1. Password Policies
Each new realm created has no password policies associated with it. Users can have as short, as long, as complex, as insecure a password, as they want. Simple settings are fine for development or learning Red Hat Single Sign-On, but unacceptable in production environments. Red Hat Single Sign-On has a rich set of password policies you can enable through the Admin Console.
Click on the Authentication left menu item and go to the Password Policy tab. Choose the policy you want to add in the right side drop down list box. This will add the policy in the table on the screen. Choose the parameters for the policy. Hit the Save button to store your changes.
Password Policy
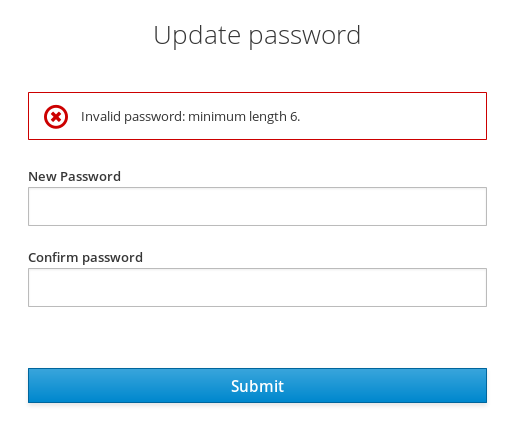
After saving your policy, user registration and the Update Password required action will enforce your new policy. An example of a user failing the policy check:
Failed Password Policy
If the password policy is updated, an Update Password action must be set for every user. An automatic trigger is scheduled as a future enhancement.
6.1.1. Password Policy Types
Here’s an explanation of each policy type:
- Hashing Algorithm
- Passwords are not stored as clear text. Instead they are hashed using standard hashing algorithms before they are stored or validated. Supported values are pbkdf2, pbkdf2-sha256 and pbkdf2-sha512.
- Hashing Iterations
- This value specifies the number of times a password will be hashed before it is stored or verified. The default value is 27,500. This hashing is done in the rare case that a hacker gets access to your password database. Once they have access to the database, they can reverse engineer user passwords. The industry recommended value for this parameter changes every year as CPU power improves. A higher hashing iteration value takes more CPU power for hashing, and can impact performance. You’ll have to weigh what is more important to you: performance or protecting your passwords stores. There may be more cost effective ways of protecting your password stores.
- Digits
- The number of digits required to be in the password string.
- Lowercase Characters
- The number of lower case letters required to be in the password string.
- Uppercase Characters
- The number of upper case letters required to be in the password string.
- Special Characters
- The number of special characters like '?!#%$' required to be in the password string.
- Not Username
- When set, the password is not allowed to be the same as the username.
- Regular Expression
-
Define one or more regular expression patterns (defined in
java.util.regex.Pattern) that passwords must match. - Expire Password
- The number of days for which the password is valid. After the number of days has expired, the user is required to change their password.
- Not Recently Used
- This policy saves a history of previous passwords. The number of old passwords stored is configurable. When a user changes their password they cannot use any stored passwords.
- Password Blacklist
-
This policy checks if a given password (converted to lowercase) is contained in a blacklist file, which is potentially a very large file. Password blacklists are UTF-8 plain-text files with Unix line endings where every line represents a blacklisted password. All passwords in the blacklist must be lowercased to facilitate case-insensitive comparison. The file name of the blacklist file must be provided as the password policy value, e.g.
10_million_password_list_top_1000000.txt. Blacklist files are resolved against${jboss.server.data.dir}/password-blacklists/by default. This path can be customized via thekeycloak.password.blacklists.pathsystem property, or theblacklistsPathproperty of thepasswordBlacklistpolicy SPI configuration.
6.2. OTP Policies
Red Hat Single Sign-On has a number of policies you can set up for your FreeOTP or Google Authenticator One-Time Password generator. Click on the Authentication left menu item and go to the OTP Policy tab.
OTP Policy
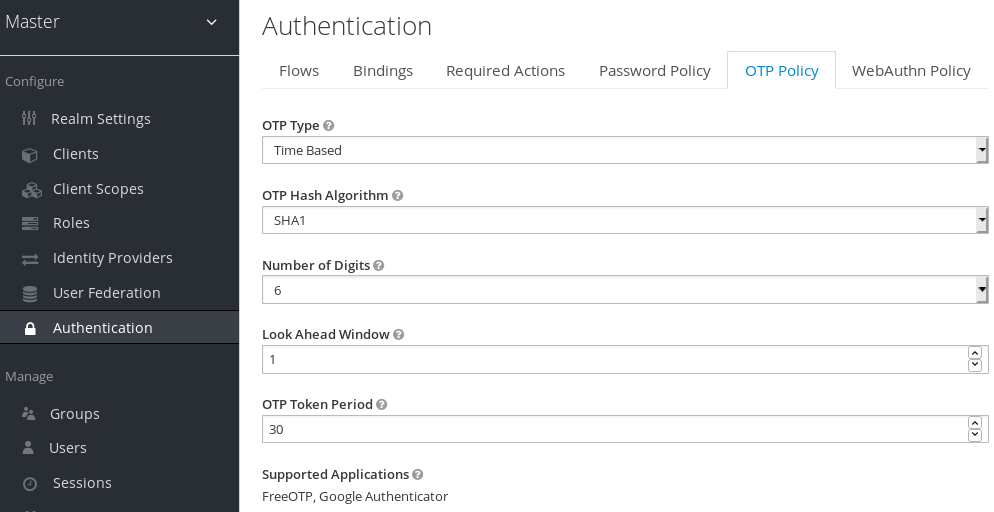
Any policies you set here will be used to validate one-time passwords. When configuring OTP, FreeOTP and Google Authenticator can scan a QR code that is generated on the OTP set up page that Red Hat Single Sign-On has. The bar code is also generated from information configured on the OTP Policy tab.
6.2.1. TOTP vs. HOTP
There are two different algorithms to choose from for your OTP generators. Time Based (TOTP) and Counter Based (HOTP). For TOTP, your token generator will hash the current time and a shared secret. The server validates the OTP by comparing all the hashes within a certain window of time to the submitted value. So, TOTPs are valid only for a short window of time (usually 30 seconds). For HOTP a shared counter is used instead of the current time. The server increments the counter with each successful OTP login. So, valid OTPs only change after a successful login.
TOTP is considered a little more secure because the matchable OTP is only valid for a short window of time while the OTP for HOTP can be valid for an indeterminate amount of time. HOTP is much more user friendly as the user won’t have to hurry to enter in their OTP before the time interval is up. With the way Red Hat Single Sign-On has implemented TOTP this distinction becomes a little more blurry. HOTP requires a database update every time the server wants to increment the counter. This can be a performance drain on the authentication server when there is heavy load. So, to provide a more efficient alternative, TOTP does not remember passwords used. This bypasses the need to do any DB updates, but the downside is that TOTPs can be re-used in the valid time interval. For future versions of Red Hat Single Sign-On it is planned that you will be able to configure whether TOTP checks older OTPs in the time interval.
6.2.2. TOTP Configuration Options
- OTP Hash Algorithm
- Default is SHA1, more secure options are SHA256 and SHA512.
- Number of Digits
- How many characters is the OTP? Short means more user friendly as it is less the user has to type. More means more security.
- Look Ahead Window
- How many intervals ahead should the server try and match the hash? This exists so just in case the clock of the TOTP generator or authentication server get out of sync. The default value of 1 is usually good enough. For example, if the time interval for a new token is every 30 seconds, the default value of 1 means that it will only accept valid tokens in that 30 second window. Each increment of this config value will increase the valid window by 30 seconds.
- OTP Token Period
- Time interval in seconds during which the server will match a hash. Each time the interval passes, a new TOTP will be generated by the token generator.
6.2.3. HOTP Configuration Options
- OTP Hash Algorithm
- Default is SHA1, more secure options are SHA256 and SHA512.
- Number of Digits
- How many characters is the OTP? Short means more user friendly as it is less the user has to type. More means more security.
- Look Ahead Window
- How many counters ahead should the server try and match the hash? The default value is 1. This exists to cover the case where the user’s counter gets ahead of the server’s. This can often happen as users often increment the counter manually too many times by accident. This value really should be increased to a value of 10 or so.
- Initial Counter
- What is the value of the initial counter?
6.3. Authentication Flows
An authentication flow is a container for all authentications, screens, and actions that must happen during login, registration, and other Red Hat Single Sign-On workflows. If you go to the admin console Authentication left menu item and go to the Flows tab, you can view all the defined flows in the system and what actions and checks each flow requires.
6.3.1. Built-in flows
Red Hat Single Sign-On comes with a certain number of built-in flows. These flows cannot be modified, but the requirements can be modified to suit your needs.
This section does a walk-through of the built-in browser login flow. In the left drop-down list select browser to come to the screen shown below:
Browser Flow

If you hover over the tooltip (the tiny question mark) to the right of the flow selection list, this will describe what the flow is and does.
The Auth Type column is the name of authentication or action that will be executed. If an authentication is indented this means it is in a sub-flow and may or may not be executed depending on the behavior of its parent. The Requirement column is a set of radio buttons which define whether or not the action will execute. Let’s describe what each radio button means in this context.
6.3.1.1. Execution requirements
- Required
- For a flow to be evaluated as successful, all required elements in the flow must evaluate as successful. This means that all Required elements in the flow must be sequentially executed, from top to bottom, unless one of the elements causes the flow to fail. However, this is only true for the current flow. Any Required element within a sub-flow is only processed if that sub-flow is entered.
- Alternative
- When a flow contains only Alternative elements, only a single element must evaluate as successful for the flow to evaluate as successful. Because the Required flow elements within a flow are sufficient to mark a flow as successful, any Alternative flow element within a flow that contains Required flow elements will never be executed. In this case, they are functionally Disabled.
- Disabled
- Any Disabled element is not evaluated and does not count to mark a flow as successful.
- Conditional
- This requirement type can only be set on sub-flows. A Conditional sub-flow can contain a "Condition" execution. These "Condition" executions must evaluate as logical statements. If all "Condition" executions evaluate as true then the Conditional sub-flow acts as Required. If not, the Conditional sub-flow acts as Disabled. If no "Condition" execution is set, the Conditional sub-flow acts as Disabled. If a flow contains "Condition" executions and is not set to Conditional, the "Condition" executions are not evaluated, and can be considered functionally Disabled.
This is better described in an example. Let’s walk through the browser authentication flow.
-
The first authentication type is
Cookie. When a user successfully logs in for the first time, a session cookie is set. If this cookie has already been set, then this authentication type is successful. In this case, since the cookie provider returned success and each execution at this level of the flow is alternative, no other execution is executed and this results in a successful login. -
The second execution of the flow looks at the
Kerberosexecution. This authenticator is disabled by default and will be skipped. -
The third execution is the
Identity Provider Redirector. It can be configured through theActions>Configlink to automatically redirect to another IdP for identity brokering. -
The next execution is a sub-flow called
Forms. Since this sub-flow is marked as alternative it will not be executed if theCookieauthentication type passed. This sub-flow contains additional authentication type that needs to be executed. The executions for this sub-flow are loaded and the same processing logic occurs. - The first execution in the Forms sub-flow is the Username Password Form. This authentication type renders the username and password page. It is marked as required so the user must enter in a valid username and password.
-
The second execution in the Forms sub-flow is a new sub-flow: the
Browser - Conditional OTPsub-flow. Since this sub-flow is conditional, whether it is executed depends on the result of the evaluation of theCondition - User Configuredexecution. If it is, the executions for this sub-flow are loaded and the same processing logic occurs -
The next execution is the
Condition - User Configured. This checks if the other executions in the flow are configured for the user. Meaning that theBrowser - Conditional OTPsub-flow will only be executed if the user has an OTP credential configured. -
The final execution is the
OTP Form. This is marked as required, but because of the setup in the conditional subflow, it will only be run if the user has an OTP credential set up. If he doesn’t, the user will not see an OTP form.
6.3.2. Creating flows
This section explains in greater depth how flows work, and how to create your own flows. Note that there are important functionality and security considerations when designing your own flow. A badly created flow could either let no one log in, let users in with less verification than you would like, or simply result in an error.
To create a flow, you can either:
-
Copy and then modify an existing flow. To do this select an existing flow (for example the
Browserflow), and press theCopybutton. This will then ask you to set a name for the new flow, before creating it. -
Create a new flow from scratch. To do this press the
Newbutton. Since this is the more general case, we will use this for our example.
When creating a new flow, you will have to create a top level flow
Create a top level flow

With the following options:
- Alias
- The name of the flow.
- Description
- The description you can set to the flow.
- Top Level Flow Type
-
The type of flow. the type
clientis used only for the authentication of clients (applications). For all other cases choosegeneric.
Once the flow is created, in addition to the New and Copy buttons, you now have, Delete, Add execution and Add flow.
An empty new flow

What a flow finally does is determined by the structure of the flow and sub-flows, the executions in those flows, and the requirements set on the sub-flows and the executions.
Executions can be added with the Add execution button. Executions can have a wide variety of actions, from sending a reset email to validating an OTP. If you hover over the tooltip (the tiny question mark) next to Provider, this will describe what the execution does.
Adding an authentication execution

These can be divided into automatic executions and interactive executions. Automatic executions are similar to the Cookie execution, and will automatically perform their action when they are encountered in the flow. Interactive executions will halt the flow, usually to get some user input. Executions that execute successfully will get the success status. This is important, because this is part of whether a flow is successful or not. For example, an empty Browser flow would not allow anyone to log in. For that it would need at least one execution that successfully evaluates, for example a Username Password Form that is corrected filled and submitted.
Sub-flows can be added in top level flow with the Add flow button, which opens a Create Execution Flow page that is very similar to the Create Top Level Form page. The only difference is that the Flow Type can be either generic (like before), or form. The form type is used to construct a sub-flow that generates a single form for the user, like what is done for the built-in Registration flow. Sub-flows are a special type of execution that evaluate as successful depending on how the executions they contain evaluate (and this includes the evaluation of their contained sub-flows). And the logic of this evaluation depends on the Requirement of each execution and sub-flow.
Fully understanding this requires a more complete explanation of how requirements work when evaluating a flow, and this also applies to sub-flows. Refer to the execution requirements section above for more details.
Note that after adding an execution, you should check that the Requirement is set to the correct value. Even if there is only a single possible Requirement, it can happen that it is not set.
When constructing a flow, all elements added to the flow will have an Actions menu on the right-hand side. All elements added to the flow have a Delete option in this menu to remove it from the flow. Executions can contain a Config menu option to configure the execution, as is the case for the Identity Provider Redirector. Sub-flows can also have executions and sub-flows added to them, with their Add execution and Add flow menu options.
Finally, since the order of execution is important, you can move executions and sub-flows up and down within their respective flows with the up and down buttons that are set to left of their name.
6.3.3. Creating a password-less browser login flow
To illustrate the creation of flows, this section describes the creation of a more advanced browser login flow. The purpose of this flow is to allow a user to choose between logging in in a password-less manner using WebAuthn, and a two-factor authentication with password and OTP. The flow to create is similar to the standard browser login, but diverges when reaching the username selection. Instead of copying the flow however, you’ll be creating the flow from the start:
- Select a realm, click on Authentication link
- Select "new", and give the new flow a distinctive Alias, i.e. "Browser Password-less"
- Select "Add execution", and using the drop-down select "Cookie". After pressing "Save", set its Requirement to Alternative.
- Select "Add execution", and using the drop-down select "Kerberos".
- Select "Add execution", and using the drop-down select "Identity Provider Redirector". After pressing "Save", set its Requirement to Alternative.
- Select "Add flow", and choose an representative Alias, e.g. "Forms". After pressing "Save", set its Requirement to Alternative.
The common part with the browser flow

-
Using the
Actionsmenu on the right-hand side of the "Forms" subflow, select "Add execution". Using the drop-down select "Username Form". After pressing "Save", set its Requirement to Required.
The Username form is similar to "Browser" flow’s Username Password Form, but only asks for a username, allowing a user to perform a password-less login. However, note that this inevitably allows a user enumeration attack on your Red Hat Single Sign-On server. This is an unavoidable security risk for the convenience, so the flow should make sure that an attacker cannot just have to guess a password to be able to enter.
-
Using the
Actionsmenu on the right-hand side of the "Forms" subflow, select "Add flow". Choose an representative Alias, e.g. "Authentication". After pressing "Save", set its Requirement to Required. -
Using the
Actionsmenu on the right-hand side of the "Authentication" subflow, select "Add execution". Using the drop-down select "Webauthn Passwordless Authenticator". After pressing "Save", set its Requirement to Alternative. -
Using the
Actionsmenu on the right-hand side of the "Authentication" subflow, select "Add flow". Choose an representative Alias, e.g. "Password with OTP". After pressing "Save", set its Requirement to Alternative. -
Using the
Actionsmenu on the right-hand side of the "Password with OTP" subflow, select "Add execution". Using the drop-down select "Password Form". After pressing "Save", set its Requirement to Required. -
Using the
Actionsmenu on the right-hand side of the "Password with OTP" subflow, select "Add execution". Using the drop-down select "OTP Form". After pressing "Save", set its Requirement to Required. - In the "Bindings" menu, change the browser flow from "Browser" to "Browser Password-less"
The final flow that is produced is the following:
A password-less browser login
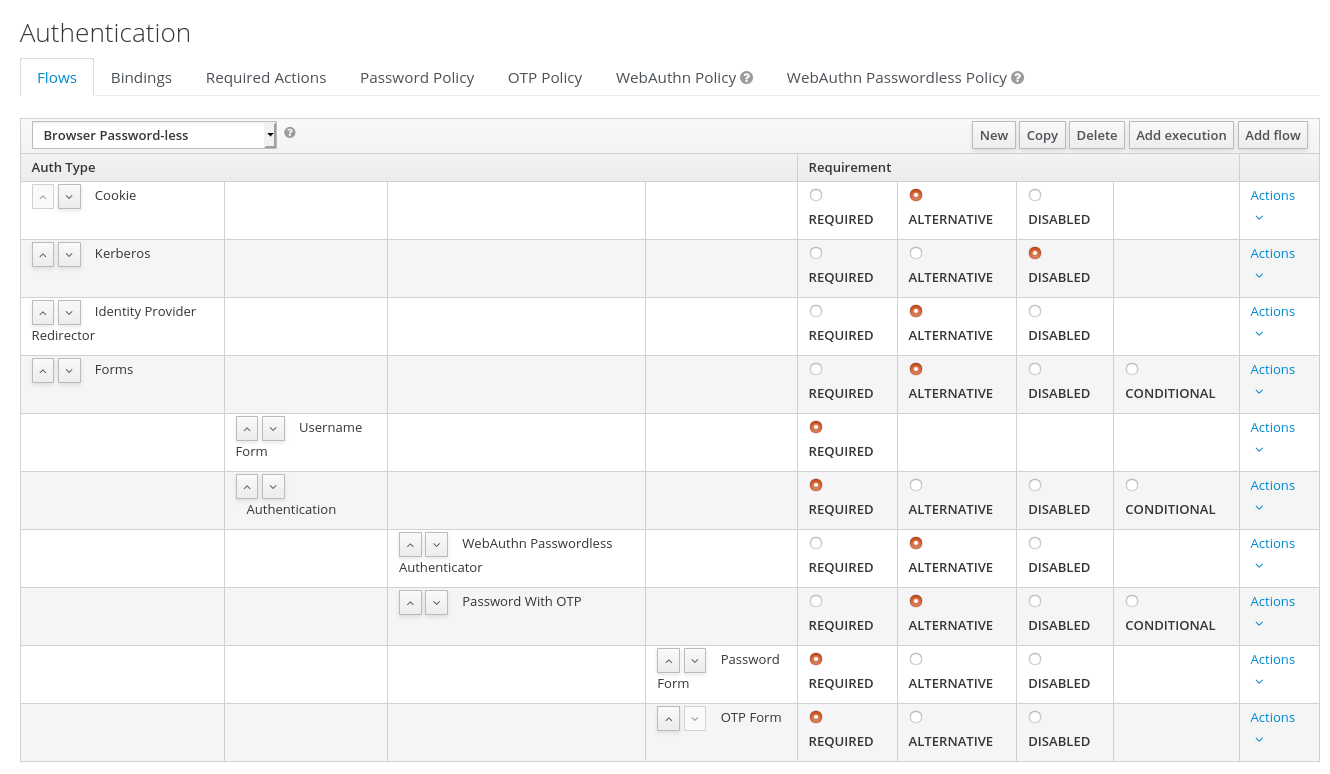
After entering the username, the way this flow works is the following:
- If the user has any WebAuthn passwordless credentials recorded, that user will be able to use any of them to log in directly. This is the password-less login. The user can instead select "Password with OTP". The user can do this because the "WebAuthn Passwordless" execution and the "Password with OTP" flow are set to Alternative. Were they set to Required the user would have to enter WebAuthn, password, and OTP.
-
If the user selects
Try another waylink on the screen with "WebAuthn passwordless" authentication, the user can choose between "Password" and "Security Key" (WebAuthn passwordless). When selecting the password, the user will need to continue and log in with the assigned OTP as well. If the user has no WebAuthn credentials, he will have to first enter his password, and then his OTP. If the user has no OTP credential, he will be asked to record one.
It is important to note that since the WebAuthn Passwordless execution is set to Alternative instead of Required, this flow will never ask the user to register a WebAuthn credential. For a user to have a Webauthn credential, that user must have a required action added by an administrator. This is done first by making sure that the Webauthn Register Passwordless required action is enabled in the realm (see the WebAuthn documentation), and then by setting the required action by using the Credential Reset part of a user’s Credentials management menu.
Creating a more advanced flow such as this one can have some subtle side effects. For example, if you were to enable the ability to reset the password for the user, then this would be accessible from the password form. In the default "Reset Credentials" flow, the user has to enter his username. Since he’s already entered his username earlier in the "Browser Password-less" flow, this would be unnecessary for Red Hat Single Sign-On, and a sub-optimal in terms of user experience. To correct this, you could:
- Copy the "Reset Credentials" flow, setting its name to, for example "Reset Credentials for password-less"
-
Use the
Actionsmenu on the right-hand side of the "Choose user" execution, select "Delete" - In the "Bindings" menu, change the reset credential flow from "Reset Credentials" to "Reset Credentials for password-less"
6.4. Kerberos
Red Hat Single Sign-On supports login with a Kerberos ticket through the SPNEGO protocol. SPNEGO (Simple and Protected GSSAPI Negotiation Mechanism) is used to authenticate transparently through the web browser after the user has been authenticated when logging-in his session. For non-web cases or when ticket is not available during login, Red Hat Single Sign-On also supports login with Kerberos username/password.
A typical use case for web authentication is the following:
- User logs into his desktop (Such as a Windows machine in Active Directory domain or Linux machine with Kerberos integration enabled).
- User then uses his browser (IE/Firefox/Chrome) to access a web application secured by Red Hat Single Sign-On.
- Application redirects to Red Hat Single Sign-On login.
-
Red Hat Single Sign-On renders HTML login screen together with status 401 and HTTP header
WWW-Authenticate: Negotiate -
In case that the browser has Kerberos ticket from desktop login, it transfers the desktop sign on information to the Red Hat Single Sign-On in header
Authorization: Negotiate 'spnego-token'. Otherwise it just displays the login screen. - Red Hat Single Sign-On validates token from the browser and authenticates the user. It provisions user data from LDAP (in case of LDAPFederationProvider with Kerberos authentication support) or let user to update his profile and prefill data (in case of KerberosFederationProvider).
- Red Hat Single Sign-On returns back to the application. Communication between Red Hat Single Sign-On and application happens through OpenID Connect or SAML messages. The fact that Red Hat Single Sign-On was authenticated through Kerberos is hidden from the application. So Red Hat Single Sign-On acts as broker to Kerberos/SPNEGO login.
For setup there are 3 main parts:
- Setup and configuration of Kerberos server (KDC)
- Setup and configuration of Red Hat Single Sign-On server
- Setup and configuration of client machines
6.4.1. Setup of Kerberos server
This is platform dependent. Exact steps depend on your OS and the Kerberos vendor you’re going to use. Consult Windows Active Directory, MIT Kerberos and your OS documentation for how exactly to setup and configure Kerberos server.
At least you will need to:
- Add some user principals to your Kerberos database. You can also integrate your Kerberos with LDAP, which means that user accounts will be provisioned from LDAP server.
Add service principal for "HTTP" service. For example if your Red Hat Single Sign-On server will be running on
www.mydomain.orgyou may need to add principalHTTP/www.mydomain.org@MYDOMAIN.ORGassuming that MYDOMAIN.ORG will be your Kerberos realm.For example on MIT Kerberos you can run a "kadmin" session. If you are on the same machine where is MIT Kerberos, you can simply use the command:
sudo kadmin.local
Then add HTTP principal and export his key to a keytab file with the commands like:
addprinc -randkey HTTP/www.mydomain.org@MYDOMAIN.ORG
ktadd -k /tmp/http.keytab HTTP/www.mydomain.org@MYDOMAIN.ORG
The Keytab file /tmp/http.keytab will need to be accessible on the host where Red Hat Single Sign-On server will be running.
6.4.2. Setup and configuration of Red Hat Single Sign-On server
You need to install a kerberos client on your machine. This is also platform dependent. If you are on Fedora, Ubuntu or RHEL, you can install the package freeipa-client, which contains a Kerberos client and several other utilities. Configure the kerberos client (on Linux it’s in file /etc/krb5.conf ). You need to put your Kerberos realm and at least configure the HTTP domains your server will be running on. For the example realm MYDOMAIN.ORG you may configure the domain_realm section like this:
[domain_realm]
  .mydomain.org = MYDOMAIN.ORG
  mydomain.org = MYDOMAIN.ORG
Next you need to export the keytab file with the HTTP principal and make sure the file is accessible to the process under which Red Hat Single Sign-On server is running. For production, it’s ideal if it’s readable just by this process and not by someone else. For the MIT Kerberos example above, we already exported keytab to /tmp/http.keytab . If your KDC and Red Hat Single Sign-On are running on same host, you have that file already available.
6.4.2.1. Enable SPNEGO Processing
Red Hat Single Sign-On does not have the SPNEGO protocol support turned on by default. So, you have to go to the browser flow and enable Kerberos.
Browser Flow
Switch the Kerberos requirement from disabled to either alternative or required. Alternative basically means that Kerberos is optional. If the user’s browser hasn’t been configured to work with SPNEGO/Kerberos, then Red Hat Single Sign-On will fall back to the regular login screens. If you set the requirement to required then all users must have Kerberos enabled for their browser.
6.4.2.2. Configure Kerberos User Storage Federation Provider
Now that the SPNEGO protocol is turned on at the authentication server, you’ll need to configure how Red Hat Single Sign-On interprets the Kerberos ticket. This is done through User Storage Federation. We have 2 different federation providers with Kerberos authentication support.
If you want to authenticate with Kerberos backed by an LDAP server, you have to first configure the LDAP Federation Provider. If you look at the configuration page for your LDAP provider you’ll see a Kerberos Integration section.
LDAP Kerberos Integration
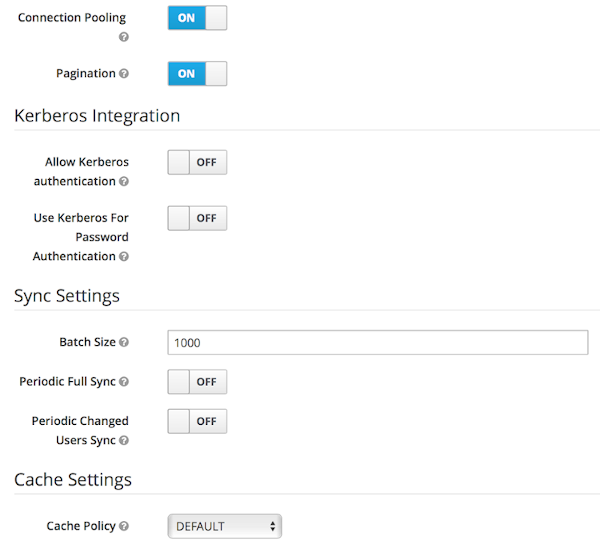
Turning on the switch Allow Kerberos authentication will make Red Hat Single Sign-On use the Kerberos principal to lookup information about the user so that it can be imported into the Red Hat Single Sign-On environment.
If your Kerberos solution is not backed by an LDAP server, you have to use the Kerberos User Storage Federation Provider. Go to the User Federation left menu item and select Kerberos from the Add provider select box.
Kerberos User Storage Provider
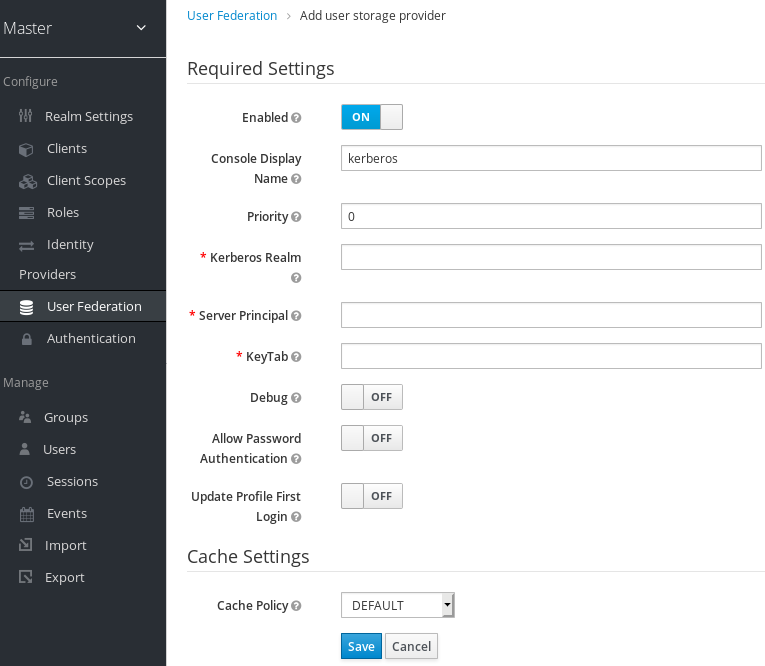
This provider parses the Kerberos ticket for simple principal information and does a small import into the local Red Hat Single Sign-On database. User profile information like first name, last name, and email are not provisioned.
6.4.3. Setup and configuration of client machines
Clients need to install kerberos client and setup krb5.conf as described above. Additionally they need to enable SPNEGO login support in their browser. See configuring Firefox for Kerberos if you are using that browser. URI .mydomain.org must be allowed in the network.negotiate-auth.trusted-uris config option.
In a Windows domain, clients usually don’t need to configure anything special as IE is already able to participate in SPNEGO authentication for the Windows domain.
6.4.4. Credential Delegation
Kerberos 5 supports the concept of credential delegation. In this scenario, your applications may want access to the Kerberos ticket so that they can re-use it to interact with other services secured by Kerberos. Since the SPNEGO protocol is processed in the Red Hat Single Sign-On server, you have to propagate the GSS credential to your application within the OpenID Connect token claim or a SAML assertion attribute that is transmitted to your application from the Red Hat Single Sign-On server. To have this claim inserted into the token or assertion, each application will need to enable the built-in protocol mapper called gss delegation credential. This is enabled in the Mappers tab of the application’s client page. See Protocol Mappers chapter for more details.
Applications will need to deserialize the claim it receives from Red Hat Single Sign-On before it can use it to make GSS calls against other services. Once you deserialize the credential from the access token to the GSSCredential object, the GSSContext will need to be created with this credential passed to the method GSSManager.createContext for example like this:
// Obtain accessToken in your application.
KeycloakPrincipal keycloakPrincipal = (KeycloakPrincipal) servletReq.getUserPrincipal();
AccessToken accessToken = keycloakPrincipal.getKeycloakSecurityContext().getToken();

// Retrieve kerberos credential from accessToken and deserialize it
String serializedGssCredential = (String) accessToken.getOtherClaims().
    get(org.keycloak.common.constants.KerberosConstants.GSS_DELEGATION_CREDENTIAL);

GSSCredential deserializedGssCredential = org.keycloak.common.util.KerberosSerializationUtils.
    deserializeCredential(serializedGssCredential);

// Create GSSContext to call other kerberos-secured services
GSSContext context = gssManager.createContext(serviceName, krb5Oid,
    deserializedGssCredential, GSSContext.DEFAULT_LIFETIME);
Note that you also need to configure forwardable kerberos tickets in krb5.conf file and add support for delegated credentials to your browser.
Credential delegation has some security implications so only use it if you really need it. It’s highly recommended to use it together with HTTPS. See for example this article for more details.
6.4.5. Cross-realm trust
In the Kerberos V5 protocol, the realm is a set of Kerberos principals defined in the Kerberos database (typically LDAP server). The Kerberos protocol has a concept of cross-realm trust. For example, if there are 2 kerberos realms A and B, the cross-realm trust will allow the users from realm A to access resources (services) of realm B. This means that realm B trusts the realm A.
Kerberos cross-realm trust
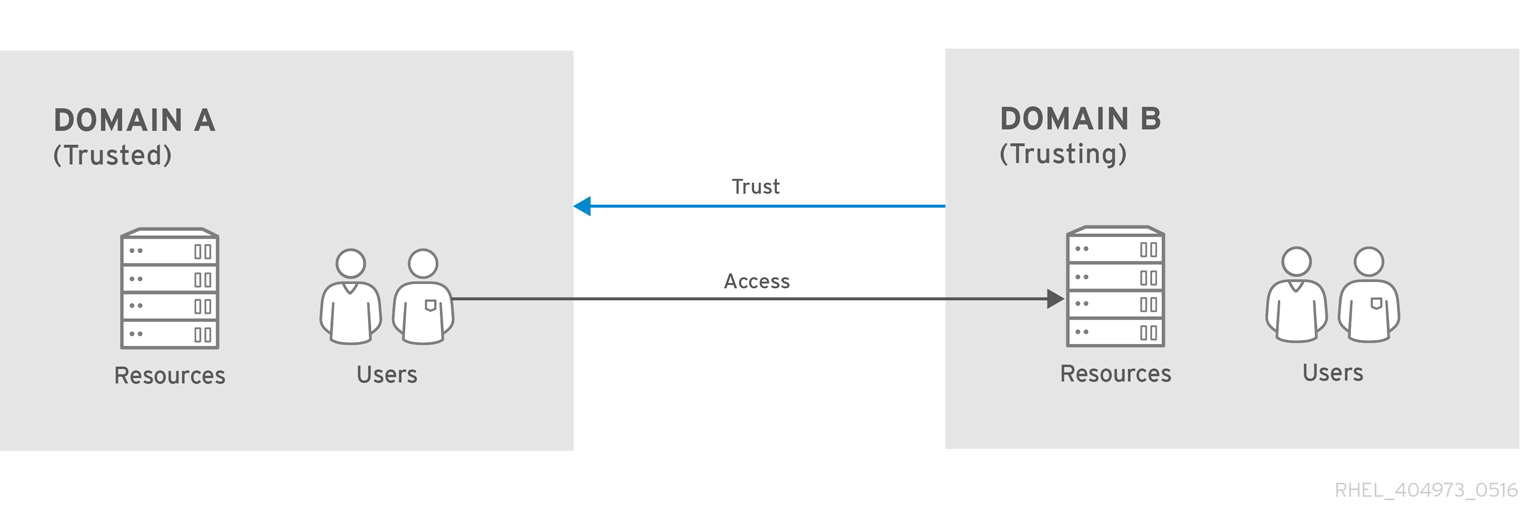
The Red Hat Single Sign-On server has support for cross-realm trust. There are few things which need to be done to achieve this:
-
Configure the Kerberos servers for the cross-realm trust. This step is dependent on the concrete Kerberos server implementations used. In general, it is needed to add the Kerberos principal
krbtgt/B@Ato both Kerberos databases of realm A and B. It is needed that this principal has same keys on both Kerberos realms. This is usually achieved when the principals have same password, key version number and there are same ciphers used in both realms. It is recommended to consult the Kerberos server documentation for more details.
The cross-realm trust is unidirectional by default. If you want bidirectional trust to have realm A also trust realm B, you must also add the principal krbtgt/A@B to both Kerberos databases. However, trust is transitive by default. If realm B trusts realm A and realm C trusts realm B, then realm C automatically trusts realm A without a need to have principal krbtgt/C@A available. Some additional configuration (for example capaths) may be needed to configure on Kerberos client side, so that the clients are able to find the trust path. Consult the Kerberos documentation for more details.
Configure Red Hat Single Sign-On server
-
If you use an LDAP storage provider with Kerberos support, you need to configure the server principal for realm B as in this example:
HTTP/mydomain.com@B. The LDAP server must be able to find the users from realm A if you want users from realm A to successfully authenticate to Red Hat Single Sign-On, as Red Hat Single Sign-On server must be able to do SPNEGO flow and then find the users. For example, kerberos principal userjohn@Amust be available as a user in the LDAP under an LDAP DN such asuid=john,ou=People,dc=example,dc=com. If you want both users from realm A and B to authenticate, you need to ensure that LDAP is able to find users from both realms A and B. We want to improve this limitation in future versions, so you can potentially create more separate LDAP providers for separate realms and ensure that SPNEGO works for both of them. -
If you use a Kerberos user storage provider (typically the Kerberos without LDAP integration), you need to configure the server principal as
HTTP/mydomain.com@Band users from both Kerberos realms A and B should be able to authenticate.
-
If you use an LDAP storage provider with Kerberos support, you need to configure the server principal for realm B as in this example:
For the Kerberos user storage provider, it is recommended that there are no conflicting users among kerberos realms. If conflicting users exist, they will be mapped to the same Red Hat Single Sign-On user. This is also something, which we want to improve in future versions and provide some more flexible mappings from Kerberos principals to Red Hat Single Sign-On usernames.
6.4.6. Troubleshooting
If you have issues, we recommend that you enable additional logging to debug the problem:
-
Enable
Debugflag in admin console for Kerberos or LDAP federation providers -
Enable TRACE logging for category
org.keycloakin logging section ofstandalone/configuration/standalone.xmlto receive more infostandalone/log/server.log -
Add system properties
-Dsun.security.krb5.debug=trueand-Dsun.security.spnego.debug=true
6.5. X.509 Client Certificate User Authentication
Red Hat Single Sign-On supports login with a X.509 client certificate if the server is configured for mutual SSL authentication.
A typical workflow is as follows:
- A client sends an authentication request over SSL/TLS channel
- During SSL/TLS handshake, the server and the client exchange their x.509/v3 certificates
- The container (JBoss EAP) validates the certificate PKIX path and the certificate expiration
The x.509 client certificate authenticator validates the client certificate as follows:
- Optionally checks the certificate revocation status using CRL and/or CRL Distribution Points
- Optionally checks the Certificate revocation status using OCSP (Online Certificate Status Protocol)
- Optionally validates whether the key usage in the certificate matches the expected key usage
- Optionally validates whether the extended key usage in the certificate matches the expected extended key usage
- If any of the above checks fails, the x.509 authentication fails
- Otherwise, the authenticator extracts the certificate identity and maps it to an existing user
Once the certificate is mapped to an existing user, the behavior diverges depending on the authentication flow:
- In the Browser Flow, the server prompts the user to confirm identity or to ignore it and instead sign in with username/password
- In the case of the Direct Grant Flow, the server signs in the user
6.5.1. Features
- Supported Certificate Identity Sources
- Match SubjectDN using regular expression
- X500 Subject’s e-mail attribute
- X500 Subject’s e-mail from Subject Alternative Name Extension (RFC822Name General Name)
- X500 Subject’s other name from Subject Alternative Name Extension. This is typically UPN (User Principal Name)
- X500 Subject’s Common Name attribute
- Match IssuerDN using regular expression
- Certificate Serial Number
- Certificate Serial Number and IssuerDN
- SHA-256 Certificate thumbprint
- Full certificate in PEM format
- Regular Expressions
- The certificate identity can be extracted from either Subject DN or Issuer DN using a regular expression as a filter. For example, the regular expression below will match the e-mail attribute:
emailAddress=(.*?)(?:,|$)
The regular expression filtering is applicable only if the Identity Source is set to either Match SubjectDN using regular expression or Match IssuerDN using regular expression.
- Mapping certificate identity to an existing user
-
The certificate identity mapping can be configured to map the extracted user identity to an existing user’s username or e-mail or to a custom attribute which value matches the certificate identity. For example, setting the
Identity sourceto Subject’s e-mail andUser mapping methodto Username or email will have the X.509 client certificate authenticator use the e-mail attribute in the certificate’s Subject DN as a search criteria to look up an existing user by username or by e-mail.
Please notice that if we disable Login with email at realm settings, the same rules will be applied to certificate authentication. In other words, users won’t be able to log in using e-mail attribute.
Usage of Certificate Serial Number and IssuerDN as an identity source requires two custom attributes - one for serial number and the other for IssuerDN.
SHA-256 Certificate thumbprint is lowercase hexadecimal representation of SHA-256 certificate thumbprint.
Usage of Full certificate in PEM format as an identity source is limited to custom attributes mapped to external federation sources like LDAP. You must enable Always Read Value From LDAP in this case, because certificates cannot be stored in Keycloak database due to a length limitation.
- Other Features: Extended Certificate Validation
- Revocation status checking using CRL
- Revocation status checking using CRL/Distribution Point
- Revocation status checking using OCSP/Responder URI
- Certificate KeyUsage validation
- Certificate ExtendedKeyUsage validation
6.5.2. Enable X.509 Client Certificate User Authentication
The following sections describe how to configure JBoss EAP/Undertow and the Red Hat Single Sign-On Server to enable X.509 client certificate authentication.
- Enable mutual SSL in JBoss EAP
See Enable SSL for the instructions how to enable SSL in JBoss EAP.
- Open RHSSO_HOME/standalone/configuration/standalone.xml and add a new realm:
<security-realms>
    <security-realm name="ssl-realm">
        <server-identities>
            <ssl>
                <keystore path="servercert.jks"
                          relative-to="jboss.server.config.dir"
                          keystore-password="servercert password"/>
            </ssl>
        </server-identities>
        <authentication>
            <truststore path="truststore.jks"
                        relative-to="jboss.server.config.dir"
                        keystore-password="truststore password"/>
        </authentication>
    </security-realm>
</security-realms>ssl/keystore-
The
sslelement contains thekeystoreelement that defines how to load the server public key pair from a JKS keystore ssl/keystore/path- A path to a JKS keystore
ssl/keystore/relative-to- Defines a path the keystore path is relative to
ssl/keystore/keystore-password- The password to open the keystore
ssl/keystore/alias(optional)- The alias of the entry in the keystore. Set it if the keystore contains multiple entries
ssl/keystore/key-password(optional)- The private key password, if different from the keystore password.
authentication/truststore- Defines how to load a trust store to verify the certificate presented by the remote side of the inbound/outgoing connection. Typically, the truststore contains a collection of trusted CA certificates.
authentication/truststore/path- A path to a JKS keystore that contains the certificates of the trusted CAs (certificate authorities)
authentication/truststore/relative-to- Defines a path the truststore path is relative to
authentication/truststore/keystore-password- The password to open the truststore
- Enable https listener
See HTTPS Listener for the instructions how to enable HTTPS in WildFly.
- Add the <https-listener> element as shown below:
<subsystem xmlns="urn:jboss:domain:undertow:10.0">
	....
    <server name="default-server">
	    <https-listener name="default"
                        socket-binding="https"
                        security-realm="ssl-realm"
                        verify-client="REQUESTED"/>
    </server>
</subsystem>https-listener/security-realm- The value must match the name of the realm from the previous section
https-listener/verify-client-
If set to
REQUESTED, the server will optionally ask for a client certificate. Setting the attribute toREQUIREDwill have the server to refuse inbound connections if no client certificate has been provided.
6.5.3. Adding X.509 Client Certificate Authentication to a Browser Flow
- Select a realm, click on Authentication link, select the "Browser" flow
- Make a copy of the built-in "Browser" flow. You may want to give the new flow a distinctive name, i.e. "X.509 Browser"
- Using the drop down, select the copied flow, and click on "Add execution"
- Select "X509/Validate Username Form" using the drop down and click on "Save"

- Using the up/down arrows, change the order of the "X509/Validate Username Form" by moving it above the "Browser Forms" execution, and set the requirement to "ALTERNATIVE"
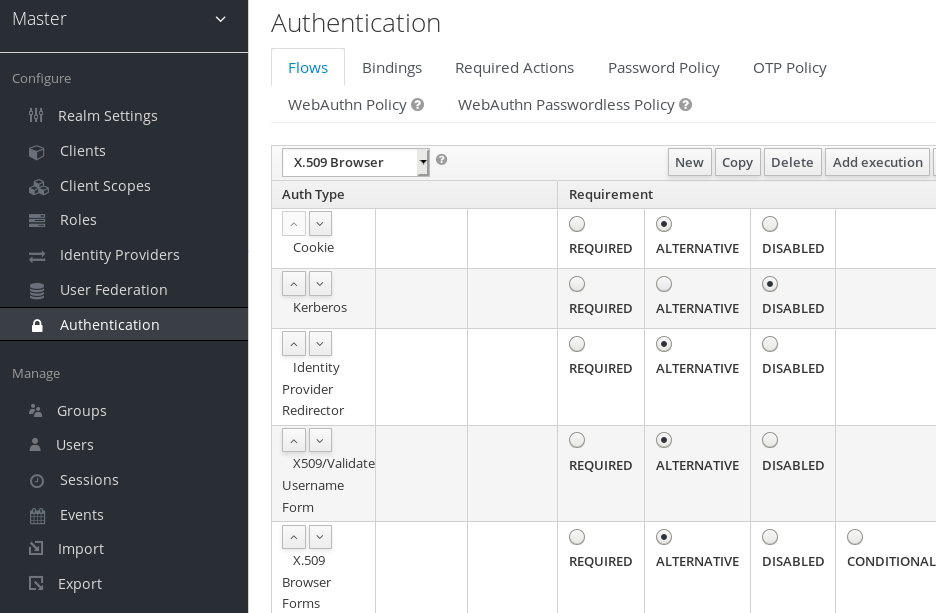
- Select the "Bindings" tab, find the drop down for "Browser Flow". Select the newly created X509 browser flow from the drop down and click on "Save".
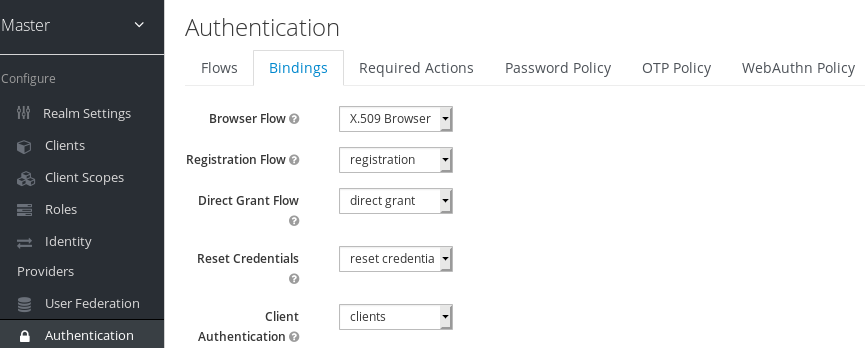
- Configuring X.509 Client Certificate Authentication
-
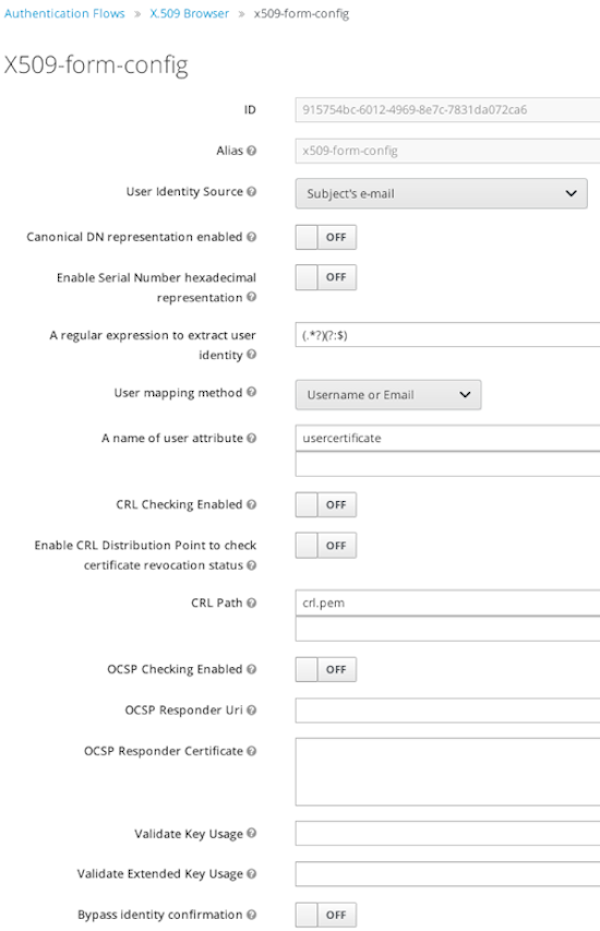
User Identity Source- Defines how to extract the user identity from a client certificate.
Canonical DN representation enabled(optional)- Defines whether to use the canonical format to determine a distinguished name. The format is described in detail in the official Java API documentation . This option only affects the two User Identity Sources Match SubjectDN using regular expression and Match IssuerDN using regular expression. If you setup a new Red Hat Single Sign-On instance it is recommended to enable this option. Leave this option disabled to remain beckward compatible with existing Red Hat Single Sign-On instances.
Enable Serial Number hexadecimal representation(optional)- An option to use hexadecimal representation of the Serial Number. See RFC5280, Section-4.1.2.2. Serial Number with sign bit set to 1 should be left padded with 00 octet. E.g. Serial number with decimal value 161, or a1 in hexadecimal representation according to RFC5280 must be encoded as 00a1. More details can be found: RFC5280, appendix-B.
A regular expression(optional)- Defines a regular expression to use as a filter to extract the certificate identity. The regular expression must contain a single group.
User Mapping Method- Defines how to match the certificate identity to an existing user. Username or e-mail will search for an existing user by username or e-mail. Custom Attribute Mapper will search for an existing user with a custom attribute which value matches the certificate identity. The name of the custom attribute is configurable.
A name of user attribute(optional)- A custom attribute which value will be matched against the certificate identity. Multiple custom attributes are relevant when attribute mapping is related to multiple values, e.g. 'Certificate Serial Number and IssuerDN'.
CRL Checking Enabled(optional)- Defines whether to check the revocation status of the certificate using Certificate Revocation List.
Enable CRL Distribution Point to check certificate revocation status(optional)- Defines whether to use CDP to check the certificate revocation status. Most PKI authorities include CDP in their certificates.
CRL file path(optional)-
Defines a path to a file that contains a CRL list. The value must be a path to a valid file if
CRL Checking Enabledoption is turned on. OCSP Checking Enabled(optional)- Defines whether to check the certificate revocation status using Online Certificate Status Protocol.
OCSP Responder URI(optional)- Allows to override a value of the OCSP responder URI in the certificate.
Validate Key Usage(optional)- Verifies whether the certificate’s KeyUsage extension bits are set. For example, "digitalSignature,KeyEncipherment" will verify if bits 0 and 2 in the KeyUsage extension are asserted. Leave the parameter empty to disable the Key Usage validation. See RFC5280, Section-4.2.1.3. The server will raise an error only when flagged as critical by the issuing CA and there is a key usage extension mismatch.
Validate Extended Key Usage(optional)- Verifies one or more purposes as defined in the Extended Key Usage extension. See RFC5280, Section-4.2.1.12. Leave the parameter empty to disable the Extended Key Usage validation. The server will raise an error only when flagged as critical by the issuing CA and there is a key usage extension mismatch.
Bypass identity confirmation- If set, X.509 client certificate authentication will not prompt the user to confirm the certificate identity and will automatically sign in the user upon successful authentication.
6.5.4. Adding X.509 Client Certificate Authentication to a Direct Grant Flow
- Using Red Hat Single Sign-On admin console, click on "Authentication" and select the "Direct Grant" flow,
- Make a copy of the build-in "Direct Grant" flow. You may want to give the new flow a distinctive name, i.e. "X509 Direct Grant",
- Delete "Username Validation" and "Password" authenticators,
- Click on "Add execution" and add "X509/Validate Username" and click on "Save" to add the execution step to the parent flow.

-
Change the
Requirementto REQUIRED.
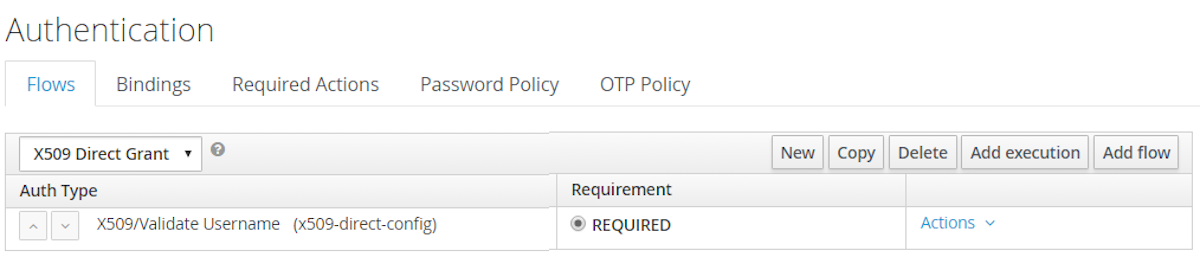
- Set up the x509 authentication configuration by following the steps described earlier in the x.509 Browser Flow section.
- Select the "Bindings" tab, find the drop down for "Direct Grant Flow". Select the newly created X509 direct grant flow from the drop down and click on "Save".

6.5.5. Client certificate lookup
When an HTTP request is sent directly to Red Hat Single Sign-On server, the JBoss EAP undertow subsystem will establish an SSL handshake and extract the client certificate. The client certificate will be then saved to the attribute javax.servlet.request.X509Certificate of the HTTP request, as specified in the servlet specification. The Red Hat Single Sign-On X509 authenticator will be then able to lookup the certificate from this attribute.
However, when the Red Hat Single Sign-On server listens to HTTP requests behind a load balancer or reverse proxy, it may be the proxy server which extracts the client certificate and establishes the mutual SSL connection. A reverse proxy usually puts the authenticated client certificate in the HTTP header of the underlying request and forwards it to the back end Red Hat Single Sign-On server. In this case, Red Hat Single Sign-On must be able to look up the X.509 certificate chain from the HTTP headers instead of from the attribute of HTTP request, as is done for Undertow.
If Red Hat Single Sign-On is behind a reverse proxy, you usually need to configure alternative provider of the x509cert-lookup SPI in RHSSO_HOME/standalone/configuration/standalone.xml. Along with the default provider, which looks up the certificate from the HTTP header, we also have two additional built-in providers: haproxy and apache, which are described next.
6.5.5.1. HAProxy certificate lookup provider
You can use this provider when your Red Hat Single Sign-On server is behind an HAProxy reverse proxy. Configure the server like this:
<spi name="x509cert-lookup">
    <default-provider>haproxy</default-provider>
    <provider name="haproxy" enabled="true">
        <properties>
            <property name="sslClientCert" value="SSL_CLIENT_CERT"/>
            <property name="sslCertChainPrefix" value="CERT_CHAIN"/>
            <property name="certificateChainLength" value="10"/>
        </properties>
    </provider>
</spi>
In this example configuration, the client certificate will be looked up from the HTTP header, SSL_CLIENT_CERT, and the other certificates from its chain will be looked up from HTTP headers like CERT_CHAIN_0 , CERT_CHAIN_1, …, CERT_CHAIN_9 . The attribute certificateChainLength is the maximum length of the chain, so the last one tried attribute would be CERT_CHAIN_9 .
Consult the HAProxy documentation for the details of how the HTTP Headers for the client certificate and client certificate chain can be configured and their proper names.
6.5.5.2. Apache certificate lookup provider
You can use this provider when your Red Hat Single Sign-On server is behind an Apache reverse proxy. Configure the server like this:
<spi name="x509cert-lookup">
    <default-provider>apache</default-provider>
    <provider name="apache" enabled="true">
        <properties>
            <property name="sslClientCert" value="SSL_CLIENT_CERT"/>
            <property name="sslCertChainPrefix" value="CERT_CHAIN"/>
            <property name="certificateChainLength" value="10"/>
        </properties>
    </provider>
</spi>
The configuration is same as for the haproxy provider. Consult the Apache documentation on mod_ssl and mod_headers for the details of how the HTTP Headers for the client certificate and client certificate chain can be configured and their proper names.
6.5.5.3. Nginx certificate lookup provider
You can use this provider when your Red Hat Single Sign-On server is behind an Nginx reverse proxy. Configure the server like this:
<spi name="x509cert-lookup">
    <default-provider>nginx</default-provider>
    <provider name="nginx" enabled="true">
        <properties>
            <property name="sslClientCert" value="ssl-client-cert"/>
            <property name="sslCertChainPrefix" value="USELESS"/>
            <property name="certificateChainLength" value="2"/>
        </properties>
    </provider>
</spi>NGINX SSL/TLS module does not expose the client certificate chain, so Keycloak NGINX certificate lookup provider is rebuilding it using the Keycloak truststore. Please populate Keycloak truststore using keytool CLI with all root and intermediate CA’s needed for rebuilding client certificate chain.
Consult the NGINX documentation for the details of how the HTTP Headers for the client certificate can be configured. Example of NGINX configuration file :
 ...
 server {
    ...
    ssl_client_certificate                  trusted-ca-list-for-client-auth.pem;
    ssl_verify_client                       optional_no_ca;
    ssl_verify_depth                        2;
    ...
    location / {
      ...
      proxy_set_header ssl-client-cert        $ssl_client_escaped_cert;
      ...
    }
    ...
}all certificates in trusted-ca-list-for-client-auth.pem must be added to Keycloak truststore.
6.5.5.4. Other reverse proxy implementations
We do not have built-in support for other reverse proxy implementations. However, it is possible that other reverse proxies can be made to behave in a similar way to apache or haproxy and that some of those providers can be used. If none of those works, you may need to create your own implementation of the org.keycloak.services.x509.X509ClientCertificateLookupFactory and org.keycloak.services.x509.X509ClientCertificateLookup provider. See the Server Developer Guide for the details on how to add your own provider.
6.5.6. Troubleshooting
- Dumping HTTP headers
-
If you want to view what the reverse proxy is sending to Keycloak, enable the
RequestDumpingHandlerUndertow filter and consultserver.logfile. - Enable TRACE logging under the logging subsystem
...
    <profile>
        <subsystem xmlns="urn:jboss:domain:logging:3.0">
...
            <logger category="org.keycloak.authentication.authenticators.x509">
                <level name="TRACE"/>
            </logger>
            <logger category="org.keycloak.services.x509">
                <level name="TRACE"/>
            </logger>
WARNING: Don't use RequestDumpingHandler or TRACE logging in production.
- Direct Grant authentication with X.509
- The following template can be used to request a token using the Resource Owner Password Credentials Grant:
$ curl https://[host][:port]/auth/realms/master/protocol/openid-connect/token \
       --insecure \
       --data "grant_type=password&scope=openid profile&username=&password=&client_id=CLIENT_ID&client_secret=CLIENT_SECRET" \
       -E /path/to/client_cert.crt \
--key /path/to/client_cert.key[host][:port]- The host and the port number of a remote Red Hat Single Sign-On server that has been configured to allow users authenticate with x.509 client certificates using the Direct Grant Flow.
CLIENT_ID- A client id.
CLIENT_SECRET- For confidential clients, a client secret; otherwise, leave it empty.
client_cert.crt- A public key certificate that will be used to verify the identity of the client in mutual SSL authentication. The certificate should be in PEM format.
client_cert.key- A private key in the public key pair. Also expected in PEM format.
6.6. W3C Web Authentication (WebAuthn)
Red Hat Single Sign-On provides the limited support for W3C Web Authentication (WebAuthn). Red Hat Single Sign-On works as a WebAuthn’s Relying Party (RP).
WebAuthn is Technology Preview and is not fully supported. This feature is disabled by default.
To enable start the server with -Dkeycloak.profile=preview or -Dkeycloak.profile.feature.web_authn=enabled . For more details see Profiles.
Whether WebAuthn’s operations succeed depends on a user’s WebAuthn supporting authenticator, browser and platform. If you use this WebAuthn support, please clarify to what extent those entities support the WebAuthn specification.
6.6.1. Setup
The setup procedure of WebAuthn support for 2FA is the following :
6.6.1.1. Enable Webauthn Authenticator Registration
An administrator carries out the following operations on the Admin Console :
-
Open the
Authentication → Required Actionstab. -
Click
Register. -
Select
Webauthn RegisterasRequired Action. -
Mark
Enabledcheckbox. Optionally markDefault Actioncheckbox if you want all new created users to be required to register WebAuthn credential.
6.6.1.2. Adding WebAuthn Authentication to a Browser Flow
-
Select a realm, click on
Authenticationlink, select theBrowserflow - Make a copy of the built-in "Browser" flow. You may want to give the new flow a distinctive name, for example "WebAuthn Browser"
- Using the drop down, select the copied flow
-
Delete the
WebAuthn Browser Browser - Conditional OTPsub-flow using itsActionsmenu
If you want to have WebAuthn required for all users:
-
Using the
Actionsmenu of theWebAuthn Browser Forms, click onAdd execution -
Select
WebAuthn Authenticatorusing the drop down and click onSave - Set its Requirement to Required.
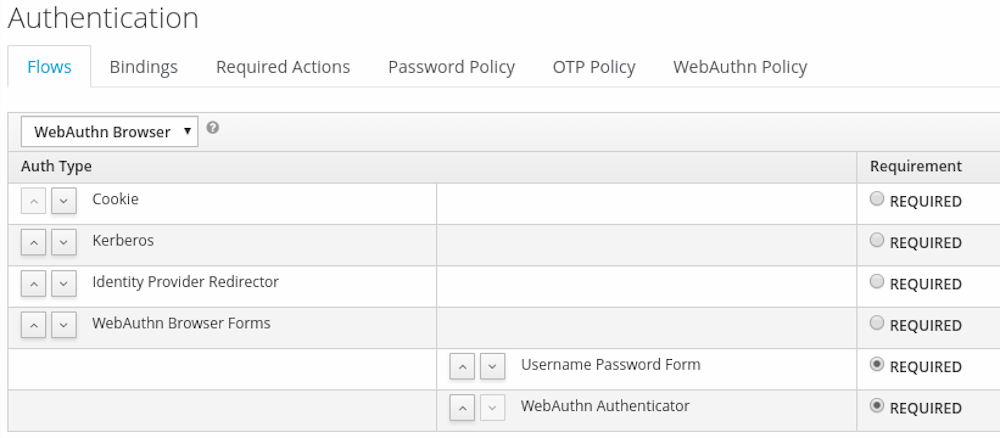
-
In the
Bindingsmenu, change the browser flow toWebAuthn Browser
Note that in this scenario, if a user doesn’t have a WebAuthn credential, a required action will be set that forces that user to register one.
Alternatively, you can have users log in with WebAuthn only if they have a WebAuthn credential registered, so instead of adding the WebAuthn Authenticator execution:
-
Using the
Actionsmenu of theWebAuthn Browser Forms, click onAdd flow -
Set the alias to "Conditional 2FA" and click on
Save -
Set the Requirement of
Conditional 2FAto Conditional -
Using the
Actionsmenu of theConditional 2FA, click onAdd execution -
Select
Condition - User Configuredusing the drop down and click onSave -
Set the Requirement of
Condition - User Configuredexecution to Required -
Using the
Actionsmenu of theConditional 2FA, click onAdd execution -
Select
WebAuthn Authenticatorusing the drop down and click onSave - Set its Requirement to Alternative.

You can also allow the user to choose between using WebAuthn and OTP for his second factor:
-
Using the
Actionsmenu of theConditional 2FA, click onAdd execution -
Select
OTP Formusing the drop down and click onSave - Set its Requirement to Alternative.

6.6.2. Authenticate with WebAuthn Authenticator
After registering a WebAuthn authenticator, the user carries out the following operations assuming that authentication flow configuration above with the conditional subflow using WebAuthn Authenticator was used:
- Open the login form. The user must authenticate with a username and password.
- The user’s browser asks the user to authenticate by their WebAuthn authenticator.
6.6.3. Managing WebAuthn as an administrator
6.6.3.1. Managing Credentials
WebAuthn credentials are managed in a similar manner as other credentials, such as OTP, from the User credential management:
-
Users can be assigned a required action to create a WebAuthn credential from the
Reset Actionslist, and selectingWebauthn Register -
The administrator can delete a WebAuthn credential by pressing
Delete. -
The administrator can view the credential’s data such as the AAGUID by selecting
Show data…. -
The administrator can set a label for the credential by setting a value in the
User Labelfield and saving the data.
6.6.3.2. Managing Policy
An administrator can configure WebAuthn related operations as WebAuthn Policy per realm.
An administrator carries out the following operations on the Admin Console :
-
Open the
Authentication → WebAuthn Policytab. -
Configure items and click
Save.
The configurable items and their description follow.
| Configuration | Description |
|---|---|
| Relying Party Entity Name | Human-readable server name as a WebAuthn Relying Party. This is a mandatory configuration, which is applied to the operation of registering the WebAuthn authenticator. The default setting is "keycloak". For more details, see WebAuthn Specification. |
| Signature Algorithms | It tells the WebAuthn authenticator which signature algorithms to use for the Public Key Credential that can be used for signing and verifying the Authentication Assertion. Multiple algorithms can be specified. If no algorithm is specified, ES256 is adapted. The default setting is ES256. This is an optional configuration item that is applied to the operation of registering a WebAuthn authenticator. For more details, see WebAuthn Specification. |
| Relying Party ID | This is the ID as a WebAuthn Relying Party and determines the scope of Public Key Credentials. It must be origin’s effective domain. This is an optional configuration item that is applied to the operation of registering a WebAuthn authenticator. If no entry is entered, the host part of the base URL of Red Hat Single Sign-On’s server is adapted. For more details, see WebAuthn Specification. |
| Attestation Conveyance Preference | It tells the WebAuthn API implementation on the browser (WebAuthn Client) the preference of how to generate an Attestation Statement. This is an optional configuration item that is applied to the operation of registering a WebAuthn authenticator. If no option is selected, its behavior is the same as selecting "none". For more details, see WebAuthn Specification. |
| Authenticator Attachment | It tells the WebAuthn Client an acceptable attachment pattern of a WebAuthn authenticator. This is an optional configuration item that is applied to the operation of registering a WebAuthn authenticator. If no option is selected, the WebAuthn Client does not consider the attachment pattern. For more details, see WebAuthn Specification. |
| Require Resident Key | It tells the WebAuthn authenticator to generate the Public Key Credential as Client-side-resident Public Key Credential Source. This is an optional configuration item that is applied to the operation of registering a WebAuthn authenticator. If no option is selected, its behavior is the same as selecting "No". For more details, see WebAuthn Specification. |
| User Verification Requirement | It tells the WebAuthn authenticator to confirm actually verifying a user. This is an optional configuration item that is applied to the operation of registering a WebAuthn authenticator and authenticating the user by a WebAuthn authenticator. If no option is selected, its behavior is the same as selecting "preferred". For more details, see WebAuthn Specification for registering a WebAuthn authenticator and WebAuthn Specification for authenticating the user by a WebAuthn authenticator. |
| Timeout | It specifies the timeout value in seconds for registering a WebAuthn authenticator and authenticating the user by a WebAuthn authenticator. If set to 0, its behavior depends on the WebAuthn authenticator’s implementation. The default value is 0. For more details, see WebAuthn Specification for registering a WebAuthn authenticator and WebAuthn Specification for authenticating the user by a WebAuthn authenticator. |
| Avoid Same Authenticator Registration | If set to "ON", the WebAuthn authenticator that has already been registered can not be newly registered. This is applied to the operation of registering a WebAuthn authenticator. The default setting is "OFF". |
| Acceptable AAGUIDs | The white list of AAGUID of which a WebAuthn authenticator can be registered. This is applied to the operation of registering a WebAuthn authenticator. If no entry is set on this list, any WebAuthn authenticator can be registered. |
6.6.4. Attestation Statement Verification
When registering a WebAuthn authenticator, Red Hat Single Sign-On verifies an attestation statement generated by this WebAuthn authenticator. On this verification process, Red Hat Single Sign-On validates this attestation statement’s trustworthiness. It requires trust anchor’s certificates. Red Hat Single Sign-On uses the Keycloak truststore so that you need to import these certificates onto it in advance.
If you want to omit this attestation statement trustworthiness validation, please disable this truststore or set the WebAuthn policy’s configuration item "Attestation Conveyance Preference" to "none".
6.6.5. Managing WebAuthn credentials as a user
6.6.5.1. Register WebAuthn Authenticator
The appropriate method to register a WebAuthn authenticator depends on if the user has or has not already registered an account on Red Hat Single Sign-On.
- New user
If the
WebAuthn Registerrequired action is set asDefault Actionin a realm, new users are required to set up the WebAuthn security key after the first successful login. A new user carries out the following operations :- Open the login form.
-
Click the
Registerlink. -
Fill in items on the register form and click
Register. - The user’s browser asks the user to register their WebAuthn authenticator.
- After successful registration, the user’s browser asks the user to enter the text as their just registered WebAuthn authenticator’s label.
- Existing user
If
WebAuthn Authenticatoris set up as required as shown in the first example, then when existing users try to log in, they are required to register their WebAuthn authenticator automatically :- Open the login form.
-
Fill in items, click
Saveand clickLogin. - When the users log in, they are required to register their WebAuthn authenticator.
- After successful registration, the user’s browser asks the user to enter the text as their just registered WebAuthn authenticator’s label.
6.6.6. Passwordless WebAuthn together with Two-Factor
WebAuthn is often used for two-factor authentication, however it can be desired to use it also as first factor authentication. In this case, a user with passwordless WebAuthn credential will be able to authenticate to Red Hat Single Sign-On without a password. Red Hat Single Sign-On allows to use WebAuthn as both the passwordless and two-factor authentication mechanism in the context of a single realm and even in the context of a single authentication flow.
Administrator may typically require that Security Keys registered by users for the WebAuthn passwordless authentication must meet different (usually stronger) requirements. For example, those security keys may require users to authenticate to that security key using a PIN, or the security key should be attested with stronger certificate authority.
Because of this situation, Red Hat Single Sign-On allows administrator to configure separate WebAuthn Passwordless Policy. There is a separate required action of type Webauthn Register Passwordless and separate authenticator of type WebAuthn Passwordless Authenticator.
6.6.6.1. Setup
The setup procedure of WebAuthn passwordless support is the following :
-
Register new required action for WebAuthn passwordless support. Use the same steps as described above with the only difference, that you need to register the action called
Webauthn Register Passwordless. -
Configure the policy. You can use same steps and configuration options as described above, however you need to configure them in the admin console in the tab
WebAuthn Passwordless Policy. You can configure this policy as you want, however typically the requirements for the security key will be stronger than for the two-factor policy. For example theUser Verification Requirementcan be set toRequiredwhen you configure the passwordless policy. Finally configure the authentication flow. Let’s assume that we will use same flow called
WebAuthn Browseras described above, but we will configure it as follows:-
The
WebAuthn Browser Formssubflow will containUsername Formas the first authenticator. Delete the defaultUsername Password Formauthenticator and add theUsername Formauthenticator instead. This setting means that the user will provide just his or her username as the first step. -
There will be a required subflow, which can be named for example
Passwordless Or Two-factor. This setting indicates that user can authenticate either with Passwordless WebAuthn credential or with Two-factor authentication. -
Flow will contain
WebAuthn Passwordless Authenticatoras the first alternative. -
The second alternative will be a subflow named for example
Password And Two-factor Webauthn. This subflow will contain aPassword Formand aWebAuthn Authenticator.
-
The
The final configuration of the flow will look like the following:
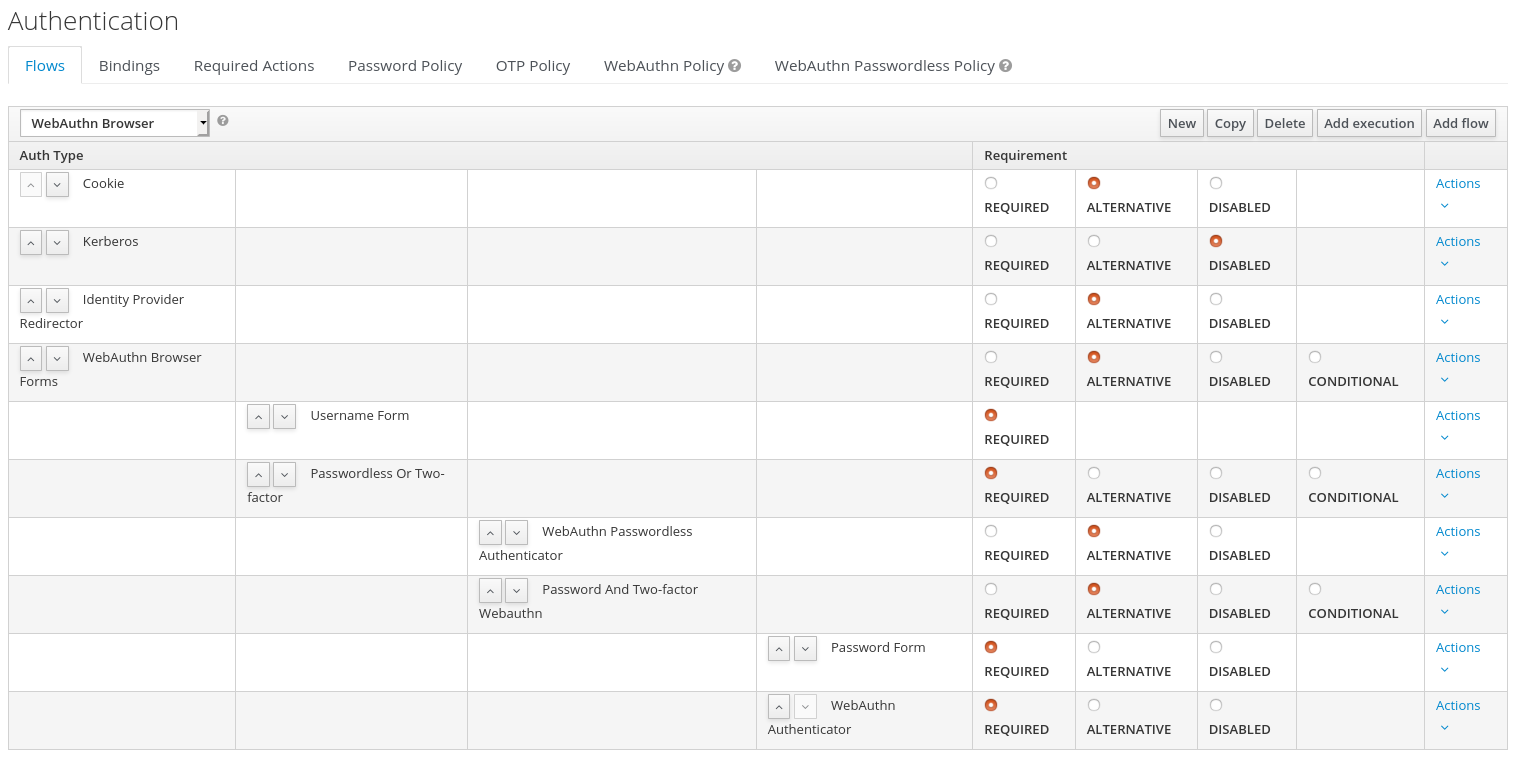
You can now add WebAuthn Register Passwordless as the required action to some user, already known to Red Hat Single Sign-On, to test this. During the first authentication, the user will be still required to use the password and second-factor WebAuthn credential. However, once the user registers the credentials, that user will be able to choose during future authentications. If he uses his or her WebAuthn Passwordless credential, he won’t need to provide the password and second-factor WebAuthn credential at all.
Chapter 7. SSO Protocols
The chapter gives a brief overview of the authentication protocols and how the Red Hat Single Sign-On authentication server and the applications it secures interact with these protocols.
7.1. OpenID Connect
OpenID Connect (OIDC) is an authentication protocol that is an extension of OAuth 2.0. While OAuth 2.0 is only a framework for building authorization protocols and is mainly incomplete, OIDC is a full-fledged authentication and authorization protocol. OIDC also makes heavy use of the Json Web Token (JWT) set of standards. These standards define an identity token JSON format and ways to digitally sign and encrypt that data in a compact and web-friendly way.
There are really two types of use cases when using OIDC. The first is an application that asks the Red Hat Single Sign-On server to authenticate a user for them. After a successful login, the application will receive an identity token and an access token. The identity token contains information about the user such as username, email, and other profile information. The access token is digitally signed by the realm and contains access information (like user role mappings) that the application can use to determine what resources the user is allowed to access on the application.
The second type of use cases is that of a client that wants to gain access to remote services. In this case, the client asks Red Hat Single Sign-On to obtain an access token it can use to invoke on other remote services on behalf of the user. Red Hat Single Sign-On authenticates the user then asks the user for consent to grant access to the client requesting it. The client then receives the access token. This access token is digitally signed by the realm. The client can make REST invocations on remote services using this access token. The REST service extracts the access token, verifies the signature of the token, then decides based on access information within the token whether or not to process the request.
7.1.1. OIDC Auth Flows
OIDC has different ways for a client or application to authenticate a user and receive an identity and access token. Which path you use depends greatly on the type of application or client requesting access. All of these flows are described in the OIDC and OAuth 2.0 specifications so only a brief overview will be provided here.
7.1.1.1. Authorization Code Flow
This is a browser-based protocol and it is what we recommend you use to authenticate and authorize browser-based applications. It makes heavy use of browser redirects to obtain an identity and access token. Here’s a brief summary:
- Browser visits application. The application notices the user is not logged in, so it redirects the browser to Red Hat Single Sign-On to be authenticated. The application passes along a callback URL (a redirect URL) as a query parameter in this browser redirect that Red Hat Single Sign-On will use when it finishes authentication.
- Red Hat Single Sign-On authenticates the user and creates a one-time, very short lived, temporary code. Red Hat Single Sign-On redirects back to the application using the callback URL provided earlier and additionally adds the temporary code as a query parameter in the callback URL.
- The application extracts the temporary code and makes a background out of band REST invocation to Red Hat Single Sign-On to exchange the code for an identity, access and refresh token. Once this temporary code has been used once to obtain the tokens, it can never be used again. This prevents potential replay attacks.
It is important to note that access tokens are usually short lived and often expired after only minutes. The additional refresh token that was transmitted by the login protocol allows the application to obtain a new access token after it expires. This refresh protocol is important in the situation of a compromised system. If access tokens are short lived, the whole system is only vulnerable to a stolen token for the lifetime of the access token. Future refresh token requests will fail if an admin has revoked access. This makes things more secure and more scalable.
Another important aspect of this flow is the concept of a public vs. a confidential client. Confidential clients are required to provide a client secret when they exchange the temporary codes for tokens. Public clients are not required to provide this client secret. Public clients are perfectly fine so long as HTTPS is strictly enforced and you are very strict about what redirect URIs are registered for the client. HTML5/JavaScript clients always have to be public clients because there is no way to transmit the client secret to them in a secure manner. Again, this is ok so long as you use HTTPS and strictly enforce redirect URI registration. This guide goes more detail into this in the Managing Clients chapter.
Red Hat Single Sign-On also supports the optional Proof Key for Code Exchange specification.
7.1.1.2. Implicit Flow
This is a browser-based protocol that is similar to Authorization Code Flow except there are fewer requests and no refresh tokens involved. We do not recommend this flow as there remains the possibility of access tokens being leaked in the browser history as tokens are transmitted via redirect URIs (see below). Also, since this flow doesn’t provide the client with a refresh token, access tokens would either have to be long-lived or users would have to re-authenticate when they expired. This flow is supported because it is in the OIDC and OAuth 2.0 specification. Here’s a brief summary of the protocol:
- Browser visits application. The application notices the user is not logged in, so it redirects the browser to Red Hat Single Sign-On to be authenticated. The application passes along a callback URL (a redirect URL) as a query parameter in this browser redirect that Red Hat Single Sign-On will use when it finishes authentication.
- Red Hat Single Sign-On authenticates the user and creates an identity and access token. Red Hat Single Sign-On redirects back to the application using the callback URL provided earlier and additionally adding the identity and access tokens as query parameters in the callback URL.
- The application extracts the identity and access tokens from the callback URL.
7.1.1.3. Resource Owner Password Credentials Grant (Direct Access Grants)
This is referred to in the Admin Console as Direct Access Grants. This is used by REST clients that want to obtain a token on behalf of a user. It is one HTTP POST request that contains the credentials of the user as well as the id of the client and the client’s secret (if it is a confidential client). The user’s credentials are sent within form parameters. The HTTP response contains identity, access, and refresh tokens.
7.1.1.4. Client Credentials Grant
This is also used by REST clients, but instead of obtaining a token that works on behalf of an external user, a token is created based on the metadata and permissions of a service account that is associated with the client. More info together with example is in Service Accounts chapter.
7.1.2. Red Hat Single Sign-On Server OIDC URI Endpoints
Here’s a list of OIDC endpoints that the Red Hat Single Sign-On publishes. These URLs are useful if you are using a non-Red Hat Single Sign-On client adapter to talk OIDC with the auth server. These are all relative URLs and the root of the URL being the HTTP(S) protocol, hostname, and usually path prefixed with /auth: i.e. https://localhost:8080/auth
- /realms/{realm-name}/protocol/openid-connect/auth
- This is the URL endpoint for obtaining a temporary code in the Authorization Code Flow or for obtaining tokens via the Implicit Flow, Direct Grants, or Client Grants.
- /realms/{realm-name}/protocol/openid-connect/token
- This is the URL endpoint for the Authorization Code Flow to turn a temporary code into a token.
- /realms/{realm-name}/protocol/openid-connect/logout
- This is the URL endpoint for performing logouts.
- /realms/{realm-name}/protocol/openid-connect/userinfo
- This is the URL endpoint for the User Info service described in the OIDC specification.
- /realms/{realm-name}/protocol/openid-connect/revoke
- This is the URL endpoint for OAuth 2.0 Token Revocation, which is described in RFC7009.
In all of these replace {realm-name} with the name of the realm.
7.2. SAML
SAML 2.0 is a similar specification to OIDC but a lot older and more mature. It has its roots in SOAP and the plethora of WS-* specifications so it tends to be a bit more verbose than OIDC. SAML 2.0 is primarily an authentication protocol that works by exchanging XML documents between the authentication server and the application. XML signatures and encryption is used to verify requests and responses.
There are really two types of use cases when using SAML. The first is an application that asks the Red Hat Single Sign-On server to authenticate a user for them. After a successful login, the application will receive an XML document that contains something called a SAML assertion that specify various attributes about the user. This XML document is digitally signed by the realm and contains access information (like user role mappings) that the application can use to determine what resources the user is allowed to access on the application.
The second type of use cases is that of a client that wants to gain access to remote services. In this case, the client asks Red Hat Single Sign-On to obtain an SAML assertion it can use to invoke on other remote services on behalf of the user.
7.2.1. SAML Bindings
SAML defines a few different ways to exchange XML documents when executing the authentication protocol. The Redirect and Post bindings cover browser based applications. The ECP binding covers REST invocations. There are other binding types but Red Hat Single Sign-On only supports those three.
7.2.1.1. Redirect Binding
The Redirect Binding uses a series of browser redirect URIs to exchange information. This is a rough overview of how it works.
- The user visits the application and the application finds the user is not authenticated. It generates an XML authentication request document and encodes it as a query param in a URI that is used to redirect to the Red Hat Single Sign-On server. Depending on your settings, the application may also digitally sign this XML document and also stuff this signature as a query param in the redirect URI to Red Hat Single Sign-On. This signature is used to validate the client that sent this request.
- The browser is redirected to Red Hat Single Sign-On. The server extracts the XML auth request document and verifies the digital signature if required. The user then has to enter in their credentials to be authenticated.
- After authentication, the server generates an XML authentication response document. This document contains a SAML assertion that holds metadata about the user like name, address, email, and any role mappings the user might have. This document is almost always digitally signed using XML signatures, and may also be encrypted.
- The XML auth response document is then encoded as a query param in a redirect URI that brings the browser back to the application. The digital signature is also included as a query param.
- The application receives the redirect URI and extracts the XML document and verifies the realm’s signature to make sure it is receiving a valid auth response. The information inside the SAML assertion is then used to make access decisions or display user data.
7.2.1.2. POST Binding
The SAML POST binding works almost the exact same way as the Redirect binding, but instead of GET requests, XML documents are exchanged by POST requests. The POST Binding uses JavaScript to trick the browser into making a POST request to the Red Hat Single Sign-On server or application when exchanging documents. Basically HTTP responses contain an HTML document that contains an HTML form with embedded JavaScript. When the page is loaded, the JavaScript automatically invokes the form. You really don’t need to know about this stuff, but it is a pretty clever trick.
POST binding is usually recommended because of security and size restrictions. When using REDIRECT the SAML response is part of the URL (it is a query parameter as it was explained before), so it can be captured in logs and it is considered less secure. Regarding size, if the assertion contains a lot or large attributes sending the document inside the HTTP payload is always better than in the more limited URL.
7.2.1.3. ECP
ECP stands for "Enhanced Client or Proxy", a SAML v.2.0 profile which allows for the exchange of SAML attributes outside the context of a web browser. This is used most often for REST or SOAP-based clients.
7.2.2. Red Hat Single Sign-On Server SAML URI Endpoints
Red Hat Single Sign-On really only has one endpoint for all SAML requests.
http(s)://authserver.host/auth/realms/{realm-name}/protocol/saml
All bindings use this endpoint.
7.3. OpenID Connect vs. SAML
Choosing between OpenID Connect and SAML is not just a matter of using a newer protocol (OIDC) instead of the older more mature protocol (SAML).
In most cases Red Hat Single Sign-On recommends using OIDC.
SAML tends to be a bit more verbose than OIDC.
Beyond verbosity of exchanged data, if you compare the specifications you’ll find that OIDC was designed to work with the web while SAML was retrofitted to work on top of the web. For example, OIDC is also more suited for HTML5/JavaScript applications because it is easier to implement on the client side than SAML. As tokens are in the JSON format, they are easier to consume by JavaScript. You will also find several nice features that make implementing security in your web applications easier. For example, check out the iframe trick that the specification uses to easily determine if a user is still logged in or not.
SAML has its uses though. As you see the OIDC specifications evolve you see they implement more and more features that SAML has had for years. What we often see is that people pick SAML over OIDC because of the perception that it is more mature and also because they already have existing applications that are secured with it.
7.4. Docker Registry v2 Authentication
Docker authentication is disabled by default. To enable see Profiles.
Docker Registry V2 Authentication is an OIDC-Like protocol used to authenticate users against a Docker registry. Red Hat Single Sign-On’s implementation of this protocol allows for a Red Hat Single Sign-On authentication server to be used by a Docker client to authenticate against a registry. While this protocol uses fairly standard token and signature mechanisms, it has a few wrinkles that prevent it from being treated as a true OIDC implementation. The largest deviations include a very specific JSON format for requests and responses as well as the ability to understand how to map repository names and permissions to the OAuth scope mechanism.
7.4.1. Docker Auth Flow
The Docker API documentation best describes and illustrates this process, however a brief summary will be given below from the perspective of the Red Hat Single Sign-On authentication server.
This flow assumes that a docker login command has already been performed
- The flow begins when the Docker client requests a resource from the Docker registry. If the resource is protected and no auth token is present in the request, the Docker registry server will respond to the client with a 401 + some information on required permissions and where to find the authorization server.
-
The Docker client will construct an authentication request based on the 401 response from the Docker registry. The client will then use the locally cached credentials (from a previously run
docker logincommand) as part of a HTTP Basic Authentication request to the Red Hat Single Sign-On authentication server. - The Red Hat Single Sign-On authentication server will attempt to authenticate the user and return a JSON body containing an OAuth-style Bearer token.
- The Docker client will get the bearer token from the JSON response and use it in the Authorization header to request the protected resource.
- When the Docker registry receives the new request for the protected resource with the token from the Red Hat Single Sign-On server, the registry validates the token and grants access to the requested resource (if appropriate).
No user session is created on the Red Hat Single Sign-On side after successful authentication with the Docker protocol. The Docker protocol is not used in case of a browser SSO session and it does not have a way to refresh the token or ask Red Hat Single Sign-On server if a particular token/session is still valid. So creating the session is unnecessary overhead for this protocol. For more details, see the transient session section.
7.4.2. Red Hat Single Sign-On Docker Registry v2 Authentication Server URI Endpoints
Red Hat Single Sign-On really only has one endpoint for all Docker auth v2 requests.
http(s)://authserver.host/auth/realms/{realm-name}/protocol/docker-v2
Chapter 8. Managing Clients
Clients are entities that can request authentication of a user. Clients come in two forms. The first type of client is an application that wants to participate in single-sign-on. These clients just want Red Hat Single Sign-On to provide security for them. The other type of client is one that is requesting an access token so that it can invoke other services on behalf of the authenticated user. This section discusses various aspects around configuring clients and various ways to do it.
8.1. OIDC Clients
OpenID Connect is the preferred protocol to secure applications. It was designed from the ground up to be web friendly and work best with HTML5/JavaScript applications.
To create an OIDC client go to the Clients left menu item. On this page you’ll see a Create button on the right.
Clients
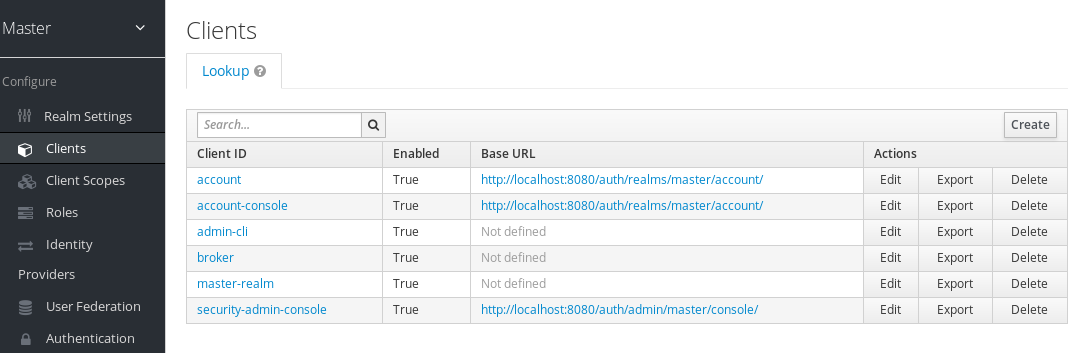
This will bring you to the Add Client page.
Add Client

Enter in the Client ID of the client. This should be a simple alpha-numeric string that will be used in requests and in the Red Hat Single Sign-On database to identify the client. Next select openid-connect in the Client Protocol drop down box. Finally enter in the base URL of your application in the Root URL field and click Save. This will create the client and bring you to the client Settings tab.
Client Settings
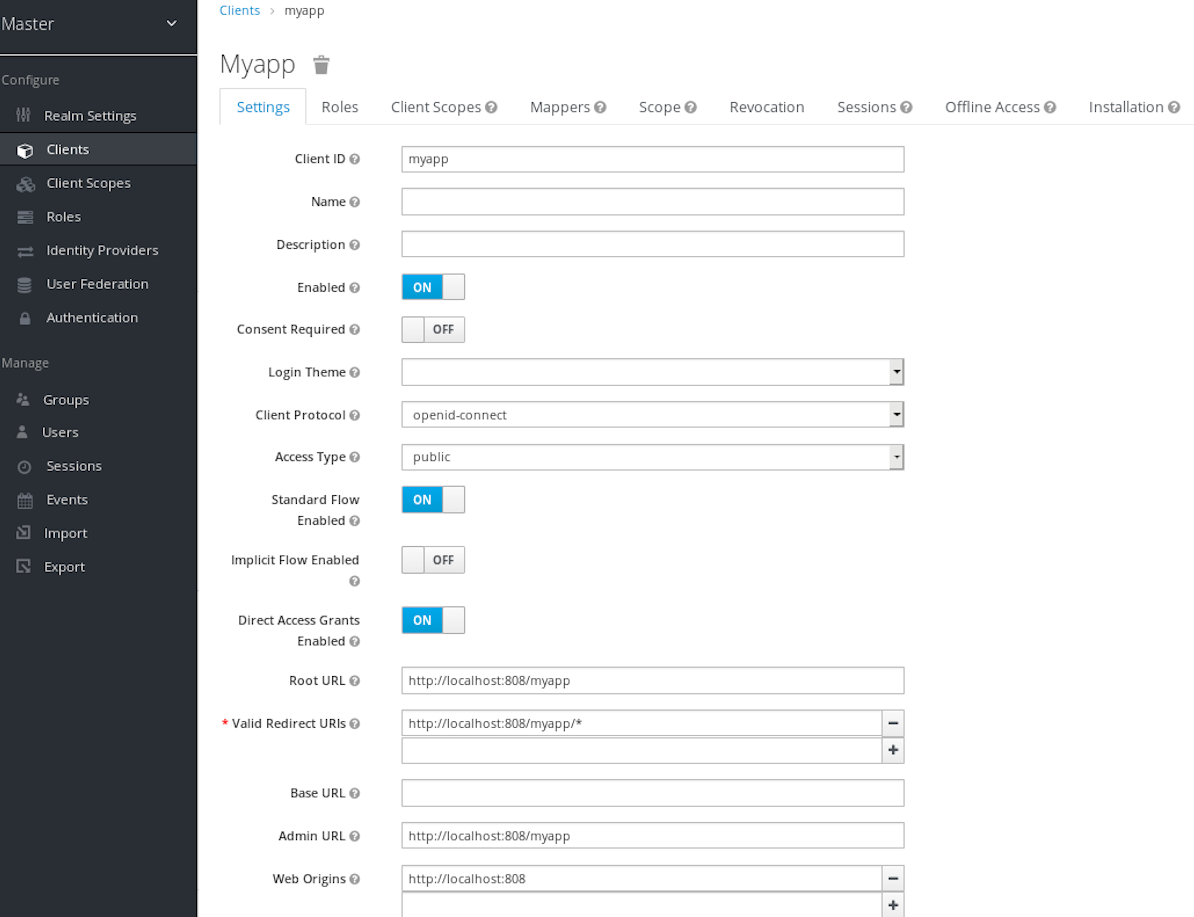
Let’s walk through each configuration item on this page.
Client ID
This specifies an alpha-numeric string that will be used as the client identifier for OIDC requests.
Name
This is the display name for the client whenever it is displayed in a Red Hat Single Sign-On UI screen. You can localize the value of this field by setting up a replacement string value i.e. ${myapp}. See the Server Developer Guide for more information.
Description
This specifies the description of the client. This can also be localized.
Enabled
If this is turned off, the client will not be allowed to request authentication.
Consent Required
If this is on, then users will get a consent page which asks the user if they grant access to that application. It will also display the metadata that the client is interested in so that the user knows exactly what information the client is getting access to. If you’ve ever done a social login to Google, you’ll often see a similar page. Red Hat Single Sign-On provides the same functionality.
Access Type
This defines the type of the OIDC client.
- confidential
- Confidential access type is for server-side clients that need to perform a browser login and require a client secret when they turn an access code into an access token, (see Access Token Request in the OAuth 2.0 spec for more details). This type should be used for server-side applications.
- public
- Public access type is for client-side clients that need to perform a browser login. With a client-side application there is no way to keep a secret safe. Instead it is very important to restrict access by configuring correct redirect URIs for the client.
- bearer-only
- Bearer-only access type means that the application only allows bearer token requests. If this is turned on, this application cannot participate in browser logins.
Standard Flow Enabled
If this is on, clients are allowed to use the OIDC Authorization Code Flow.
Implicit Flow Enabled
If this is on, clients are allowed to use the OIDC Implicit Flow.
Direct Access Grants Enabled
If this is on, clients are allowed to use the OIDC Direct Access Grants.
Root URL
If Red Hat Single Sign-On uses any configured relative URLs, this value is prepended to them.
Valid Redirect URIs
This is a required field. Enter in a URL pattern and click the + sign to add. Click the - sign next to URLs you want to remove. Remember that you still have to click the Save button! Wildcards (*) are only allowed at the end of a URI, i.e. http://host.com/*
You should take extra precautions when registering valid redirect URI patterns. If you make them too general you are vulnerable to attacks. See Threat Model Mitigation chapter for more information.
Base URL
If Red Hat Single Sign-On needs to link to the client, this URL is used.
Admin URL
For Red Hat Single Sign-On specific client adapters, this is the callback endpoint for the client. The Red Hat Single Sign-On server will use this URI to make callbacks like pushing revocation policies, performing backchannel logout, and other administrative operations. For Red Hat Single Sign-On servlet adapters, this can be the root URL of the servlet application. For more information see Securing Applications and Services Guide.
Web Origins
This option centers around CORS which stands for Cross-Origin Resource Sharing. If browser JavaScript tries to make an AJAX HTTP request to a server whose domain is different from the one the JavaScript code came from, then the request must use CORS. The server must handle CORS requests in a special way, otherwise the browser will not display or allow the request to be processed. This protocol exists to protect against XSS, CSRF and other JavaScript-based attacks.
Red Hat Single Sign-On has support for validated CORS requests. The way it works is that the domains listed in the Web Origins setting for the client are embedded within the access token sent to the client application. The client application can then use this information to decide whether or not to allow a CORS request to be invoked on it. This is an extension to the OIDC protocol so only Red Hat Single Sign-On client adapters support this feature. See Securing Applications and Services Guide for more information.
To fill in the Web Origins data, enter in a base URL and click the + sign to add. Click the - sign next to URLs you want to remove. Remember that you still have to click the Save button!
8.1.1. Advanced Settings
OAuth 2.0 Mutual TLS Certificate Bound Access Tokens Enabled
Mutual TLS binds an access token and a refresh token with a client certificate exchanged during TLS handshake. This prevents an attacker who finds a way to steal these tokens from exercising the tokens. This type of token is called a holder-of-key token. Unlike bearer tokens, the recipient of a holder-of-key token can verify whether the sender of the token is legitimate.
If the following conditions are satisfied on a token request, Red Hat Single Sign-On will bind an access token and a refresh token with a client certificate and issue them as holder-of-key tokens. If all conditions are not met, Red Hat Single Sign-On rejects the token request.
- The feature is turned on
- A token request is sent to the token endpoint in an authorization code flow or a hybrid flow
- On TLS handshake, Red Hat Single Sign-On requests a client certificate and a client send its client certificate
- On TLS handshake, Red Hat Single Sign-On successfully verifies the client certificate
To enable mutual TLS in Red Hat Single Sign-On, see Enable mutual SSL in WildFly.
In the following cases, Red Hat Single Sign-On will verify the client sending the access token or the refresh token; if verification fails, Red Hat Single Sign-On rejects the token.
- A token refresh request is sent to the token endpoint with a holder-of-key refresh token
- A UserInfo request is sent to UserInfo endpoint with a holder-of-key access token
- A logout request is sent to Logout endpoint with a holder-of-key refresh token
Please see Mutual TLS Client Certificate Bound Access Tokens in the OAuth 2.0 Mutual TLS Client Authentication and Certificate Bound Access Tokens for more details.
None of the keycloak client adapters currently support holder-of-key token verification. Instead, keycloak adapters currently treat access and refresh tokens as bearer tokens.
Proof Key for Code Exchange (PKCE)
When an attacker steals an authorization code that was issued to a legitimate client, PKCE prevents the attacker from receiving the tokens that apply to that code.
The administrator can select the following three options:
Proof Key for Code Exchange Code Challenge Method
- (blank) : Red Hat Single Sign-On does not apply PKCE unless the client sends PKCE’s parameters appropriately to Red Hat Single Sign-On’s authorization endpoint. It is the default setting.
- S256 : Red Hat Single Sign-On applies to the client PKCE whose code challenge method is S256.
- plain : Red Hat Single Sign-On applies to the client PKCE whose code challenge method is plain.
Please see RFC 7636 Proof Key for Code Exchange by OAuth Public Clients for more details.
Signed and Encrypted ID Token Support
Red Hat Single Sign-On can encrypt ID token according to Json Web Encryption (JWE) specification. The administrator can determine whether encrypting ID token or not per client. This feature is disabled as default.
The key for encrypting ID token is called Content Encryption Key (CEK). Red Hat Single Sign-On and a client need to negotiate which CEK is used and how to deliver it. The way to do so is called Key Management Mode.
JWE specification determines 5 types of Key Management Mode. Red Hat Single Sign-On supports Key Encryption among them.
In Key Encryption, the client generates a key pair of asymmetric cryptography. The public key is used to encrypt CEK. Red Hat Single Sign-On generates CEK per ID token, encrypts the ID token by this generated CEK and encrypts this CEK by this client’s public key. The client decrypts this encrypted CEK by their private key, and decrypt the ID token by decrypted CEK. Therefore, any party other than the client is not able to decrypt ID token.
The client needs to pass their public key for encrypting CEK onto Red Hat Single Sign-On. Red Hat Single Sign-On supports downloading public keys from the URL the client provides. The client needs to provide their public keys according to Json Web Keys (JWK) specification. The way to do so is defined in Signed JWT of Confidential Client Credentials. The detailed procedure is as follows:
-
open the client’s
Credentialstab -
select
Signed JwtfromClient Authenticatorpulldown menu -
set ON to
JWKS URLswitch -
input the client’s public key providing URL on
JWKS URLtextbox
Key Encryption’s algorithms are defined in Json Web Algorithm (JWA) specification. Red Hat Single Sign-On supports RSAES-PKCS1-v1_5(RSA1_5) and RSAES OAEP using default parameters (RSA-OAEP). The detailed procedure to select this algorithm is as follows:
-
open the client’s
Settingstab -
open
Advanced Settings -
select
RSA1_5orRSA-OAEPfromID Token Encryption Key Management Algorithmpulldown menu
ID token encryption algorithms by CEK are also defined in JWA specification. Red Hat Single Sign-On supports AES_128_CBC_HMAC_SHA_256 authenticated encryption (A128CBC-HS256) and AES GCM using 128-bit key (A128GCM). The detailed procedure to select this algorithm is as follows:
-
open the client’s
Settingstab -
open
Advanced Settings -
select
A128CBC-HS256orA128GCMfromID Token Encryption Content Encryption Algorithmpulldown menu
8.1.2. Confidential Client Credentials
If you’ve set the client’s access type to confidential in the client’s Settings tab, a new Credentials tab will show up. As part of dealing with this type of client you have to configure the client’s credentials.
Credentials Tab
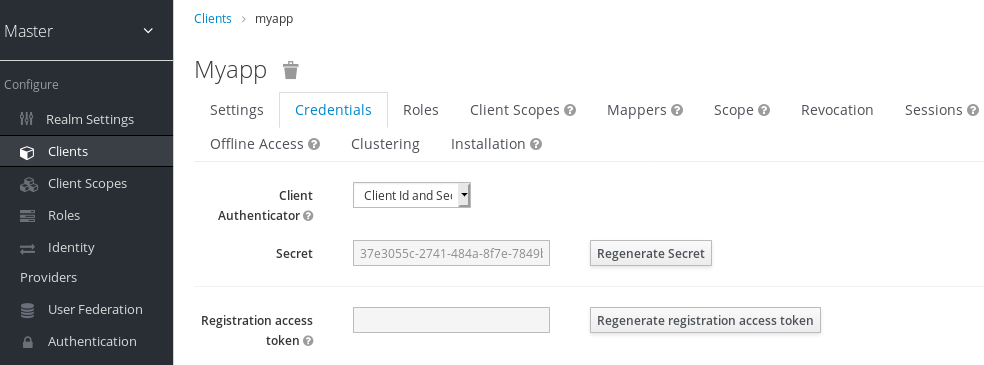
The Client Authenticator list box specifies the type of credential you are going to use for your confidential client. It defaults to client ID and secret. The secret is automatically generated for you and the Regenerate Secret button allows you to recreate this secret if you want or need to.
Alternatively, you can opt to use a signed Json Web Token (JWT) or x509 certificate validation (also called Mutual TLS) instead of a secret.
Signed JWT
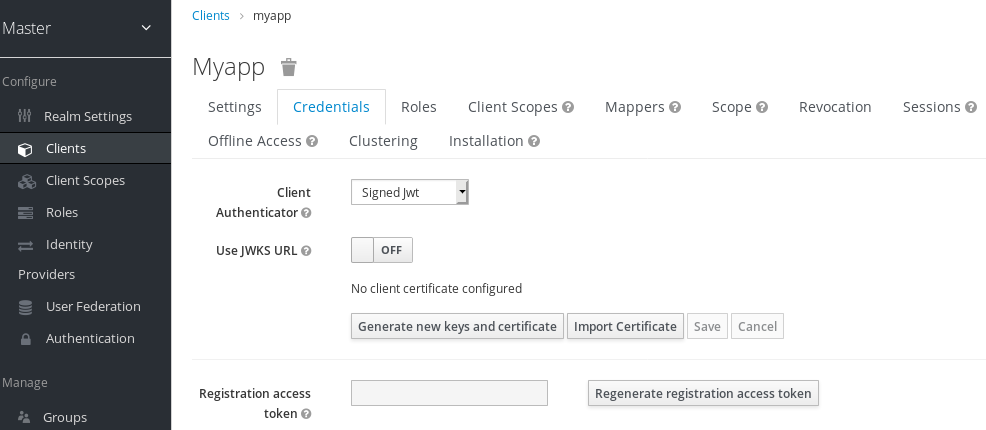
When choosing this credential type you will have to also generate a private key and certificate for the client. The private key will be used to sign the JWT, while the certificate is used by the server to verify the signature. Click on the Generate new keys and certificate button to start this process.
Generate Keys
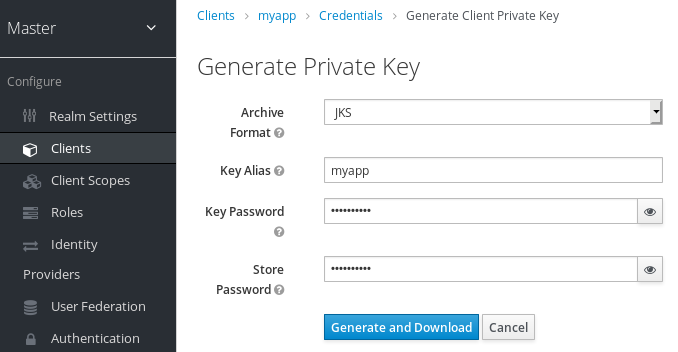
When you generate these keys, Red Hat Single Sign-On will store the certificate, and you’ll need to download the private key and certificate for your client to use. Pick the archive format you want and specify the password for the private key and store.
You can also opt to generate these via an external tool and just import the client’s certificate.
Import Certificate

There are multiple formats you can import from, just choose the archive format you have the certificate stored in, select the file, and click the Import button.
Finally note that you don’t even need to import certificate if you choose to Use JWKS URL . In that case, you can provide the URL where client publishes its public key in JWK format. This is flexible because when client changes its keys, Red Hat Single Sign-On will automatically download them without need to re-import anything on Red Hat Single Sign-On side.
If you use client secured by Red Hat Single Sign-On adapter, you can configure the JWKS URL like https://myhost.com/myapp/k_jwks assuming that https://myhost.com/myapp is the root URL of your client application. See Server Developer Guide for additional details.
For the performance purposes, Red Hat Single Sign-On caches the public keys of the OIDC clients. If you think that private key of your client was compromised, it is obviously good to update your keys, but it’s also good to clear the keys cache. See Clearing the cache section for more details.
Signed JWT with Client Secret
If you select this option in the Client Authenticator list box, you can use a JWT signed by client secret instead of the private key.
This client secret will be used to sign the JWT by the client.
X509 Certificate
By enabling this option Red Hat Single Sign-On will validate if the client uses proper X509 certificate during the TLS Handshake.
This option requires mutual TLS in Red Hat Single Sign-On, see Enable mutual SSL in WildFly.
X509 Certificate
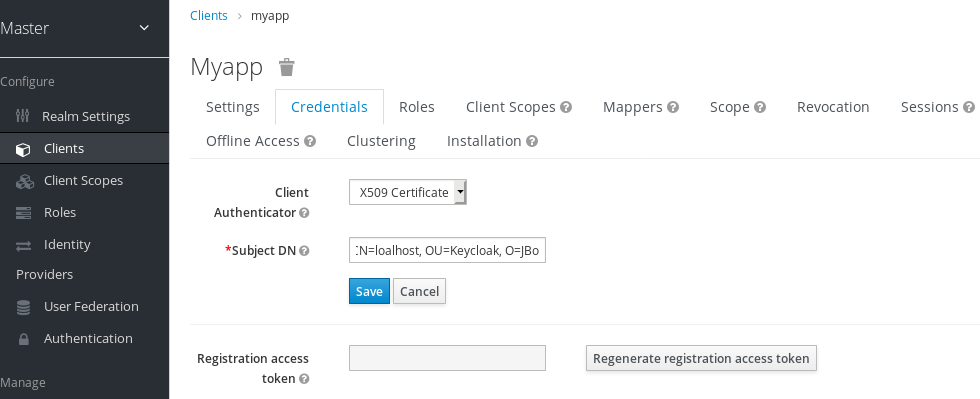
The validator checks also the certificate’s Subject DN field with configured regexp validation expression. For some use cases, it is sufficient to accept all certificates. In that case, you can use (.*?)(?:$) expression.
There are two ways for Red Hat Single Sign-On to obtain the Client ID from the request. The first option is the client_id parameter in the query (described in Section 2.2 of the OAuth 2.0 Specification). The second option is to supply client_id as a form parameter.
8.1.3. Service Accounts
Each OIDC client has a built-in service account which allows it to obtain an access token. This is covered in the OAuth 2.0 specifiation under Client Credentials Grant. To use this feature you must set the Access Type of your client to confidential. When you do this, the Service Accounts Enabled switch will appear. You need to turn on this switch. Also make sure that you have configured your client credentials.
To use it you must have registered a valid confidential Client and you need to check the switch Service Accounts Enabled in Red Hat Single Sign-On admin console for this client. In tab Service Account Roles you can configure the roles available to the service account retrieved on behalf of this client. Remember that you must have the roles available in Role Scope Mappings (tab Scope) of this client as well, unless you have Full Scope Allowed on. As in a normal login, roles from access token are the intersection of:
- Role scope mappings of particular client combined with the role scope mappings inherited from linked client scopes
- Service account roles
The REST URL to invoke on is /auth/realms/{realm-name}/protocol/openid-connect/token. Invoking on this URL is a POST request and requires you to post the client credentials. By default, client credentials are represented by clientId and clientSecret of the client in Authorization: Basic header, but you can also authenticate the client with a signed JWT assertion or any other custom mechanism for client authentication. You also need to use the parameter grant_type=client_credentials as per the OAuth2 specification.
For example the POST invocation to retrieve a service account can look like this:
    POST /auth/realms/demo/protocol/openid-connect/token
    Authorization: Basic cHJvZHVjdC1zYS1jbGllbnQ6cGFzc3dvcmQ=
    Content-Type: application/x-www-form-urlencoded

    grant_type=client_credentials
The response would be this standard JSON document from the OAuth 2.0 specification.
HTTP/1.1 200 OK
Content-Type: application/json;charset=UTF-8
Cache-Control: no-store
Pragma: no-cache

{
    "access_token":"2YotnFZFEjr1zCsicMWpAA",
    "token_type":"bearer",
    "expires_in":60
}
Only the access token is returned by default. No refresh token is returned and also no user session is created on the Red Hat Single Sign-On side upon successful authentication by default. Due the lack of refresh token, there is a need to re-authenticate when the access token expires, however this does not mean any additional overhead on the Red Hat Single Sign-On server side because sessions are not created by default.
In this situation, logout is unnecessary. However, issued access tokens can be revoked by sending requests to the OAuth2 Revocation Endpoint as described in the OpenID Connect Endpoints section.
8.1.4. Audience Support
The typical environment where the Red Hat Single Sign-On is deployed generally consists of a set of confidential or public client applications (frontend client applications) which use Red Hat Single Sign-On for authentication.
There are also services (called Resource Servers in the OAuth 2 specification), which serve requests from frontend client applications and provide resources. These services typically require an Access token (Bearer token) to be sent to them to authenticate for a particular request. This token was previously obtained by the frontend application when it tries to log in against Red Hat Single Sign-On.
In the environment where the trust among services is low, you may encounter this scenario:
-
A frontend client called
my-appis required to be authenticated against Red Hat Single Sign-On. -
A user is authenticated in Red Hat Single Sign-On. Red Hat Single Sign-On then issued tokens to the
my-appapplication. -
The application
my-appused the token to invoke the serviceevil-service. The application needs to invokeevil-serviceas the service is able to serve some very useful data. -
The
evil-serviceapplication returned the response tomy-app. However, at the same time, it kept the token previously sent to it. -
The
evil-serviceapplication then invoked another service calledgood-servicewith the previously kept token. The invocation was successful andgood-servicereturned the data. This results in broken security as theevil-servicemisused the token to access other services on behalf of the clientmy-app.
This flow may not be an issue in many environments with the high level of trust among services. However in other environments, where the trust among services is lower, this can be problematic.
In some environments, this example work flow may be even requested behavior as the evil-service may need to retrieve additional data from good-service to be able to properly return the requested data to the original caller (my-app client). You may notice similarities with the Kerberos Credential Delegation. As with the Kerberos Credential Delegation, an unlimited audience is a mixed blessing as it is only useful when a high level of trust exists among services. Otherwise, it is recommended to limit audience as described next. You can limit audience and at the same time allow the evil-service to retrieve required data from the good-service. In this case, you need to ensure that both the evil-service and good-service are added as audiences to the token.
To prevent any misuse of the access token as in the example above, it is recommended to limit Audience on the token and configure your services to verify the audience on the token. If this is done, the flow above will change, like this:
-
A frontend client called
my-appis required to be authenticated against Red Hat Single Sign-On. -
A user is authenticated in Red Hat Single Sign-On. Red Hat Single Sign-On then issued tokens to the
my-appapplication. The client application already knows that it will need to invoke serviceevil-service, so it usedscope=evil-servicein the authentication request sent to the Red Hat Single Sign-On server. See Client Scopes section for more details about the scope parameter. The token issued to themy-appclient contains the audience, as in"audience": [ "evil-service" ], which declares that the client wants to use this access token to invoke just the serviceevil-service. -
The
evil-serviceapplication served the request to themy-app. At the same time, it kept the token previously sent to it. -
The
evil-serviceapplication then invoked thegood-servicewith the previously kept token. Invocation was not successful becausegood-servicechecks the audience on the token and it sees that audience is onlyevil-service. This is expected behavior and security is not broken.
If the client wants to invoke the good-service later, it will need to obtain another token by issuing the SSO login with the scope=good-service. The returned token will then contain good-service as an audience:
"audience": [ "good-service" ]
and can be used to invoke good-service.
8.1.4.1. Setup
To properly set up audience checking:
- Ensure that services are configured to check audience on the access token sent to them by adding the flag verify-token-audience in the adapter configuration. See Adapter configuration for details.
- Ensure that when an access token is issued by Red Hat Single Sign-On, it contains all requested audiences and does not contain any audiences that are not needed. The audience can be either automatically added due the client roles as described in the next section or it can be hardcoded as described below.
8.1.4.2. Automatically add audience
In the default client scope roles, there is an Audience Resolve protocol mapper defined. This protocol mapper will check all the clients for which current token has at least one client role available. Then the client ID of each of those clients will be added as an audience automatically. This is especially useful if your service (usually bearer-only) clients rely on client roles.
As an example, let us assume that you have a bearer-only client good-service and the confidential client my-app, which you want to authenticate and then use the access token issued for the my-app to invoke the good-service REST service. If the following are true:
-
The
good-serviceclient has any client roles defined on itself - Target user has at least one of those client roles assigned
-
Client
my-apphas the role scope mappings for the assigned role
then the good-service will be automatically added as an audience to the access token issued for the my-app.
If you want to ensure that audience is not added automatically, do not configure role scope mappings directly on the my-app client, but instead create a dedicated client scope, for example called good-service, which will contain the role scope mappings for the client roles of the good-service client. Assuming that this client scope will be added as an optional client scope to the my-app client, the client roles and audience will be added to the token just if explicitly requested by the scope=good-service parameter.
The frontend client itself is not automatically added to the access token audience. This allows for easy differentiation between the access token and the ID token, because the access token will not contain the client for which the token was issued as an audience. So in the example above, the my-app won’t be added as an audience. If you need the client itself as an audience, see the hardcoded audience option. However, using the same client as both frontend and REST service is not recommended.
8.1.4.3. Hardcoded audience
For the case when your service relies on realm roles or does not rely on the roles in the token at all, it can be useful to use hardcoded audience. This is a protocol mapper, which will add client ID of the specified service client as an audience to the token. You can even use any custom value, for example some URL, if you want different audience than client ID.
You can add protocol mapper directly to the frontend client, however than the audience will be always added. If you want more fine-grain control, you can create protocol mapper on the dedicated client scope, which will be called for example good-service.
Audience Protocol Mapper
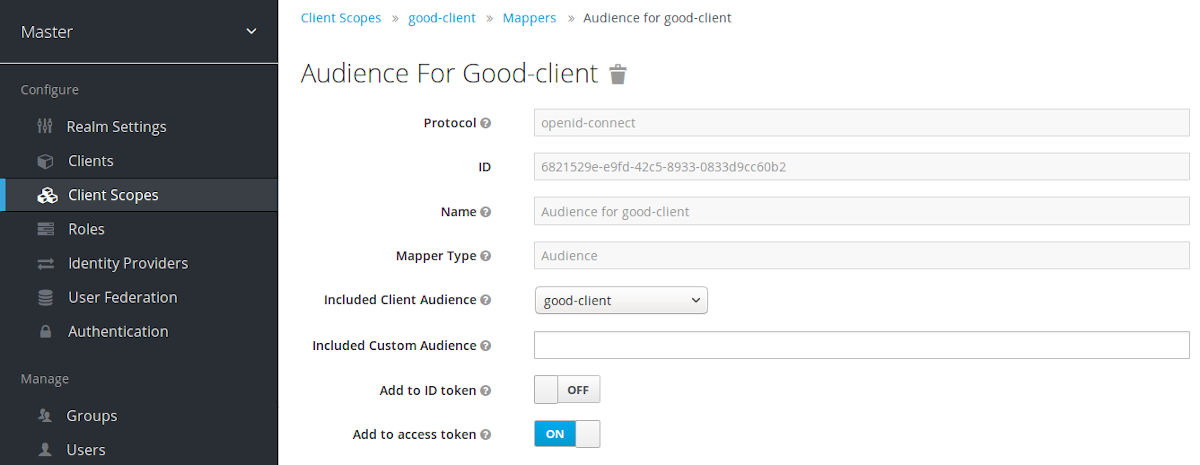
-
From the Installation tab of the
good-serviceclient, you can generate the adapter configuration and you can confirm that verify-token-audience option will be set to true. This indicates that the adapter will require verifying the audience if you use this generated configuration. -
Finally, you need to ensure that the
my-appfrontend client is able to requestgood-serviceas an audience in its tokens. On themy-appclient, click the Client Scopes tab. Then assigngood-serviceas an optional (or default) client scope. See Client Scopes Linking section for more details. -
You can optionally Evaluate Client Scopes and generate an example access token. If you do, notice that
good-servicewill be added to the audience of the generated access token only ifgood-serviceis included in the scope parameter in the case you assigned it as an optional client scope. -
In your
my-appapplication, you must ensure that scope parameter is used with the valuegood-servicealways included when you want to issue the token for accessing thegood-service. See the parameters forwarding section, if your application uses the servlet adapter, or the javascript adapter section, if your application uses the javascript adapter.
If you are unsure what the correct audience and roles in the token will be, it is always a good idea to Evaluate Client Scopes in the admin console and do some testing around it.
Both the Audience and Audience Resolve protocol mappers add the audiences just to the access token by default. The ID Token typically contains only single audience, which is the client ID of the client for which the token was issued. This is a requirement of the OpenID Connect specification. On the other hand, the access token does not necessarily have the client ID of the client, which was the token issued for, unless any of the audience mappers added it.
8.2. SAML Clients
Red Hat Single Sign-On supports SAML 2.0 for registered applications. Both POST and Redirect bindings are supported. You can choose to require client signature validation and can have the server sign and/or encrypt responses as well.
To create a SAML client go to the Clients left menu item. On this page you’ll see a Create button on the right.
Clients
This will bring you to the Add Client page.
Add Client
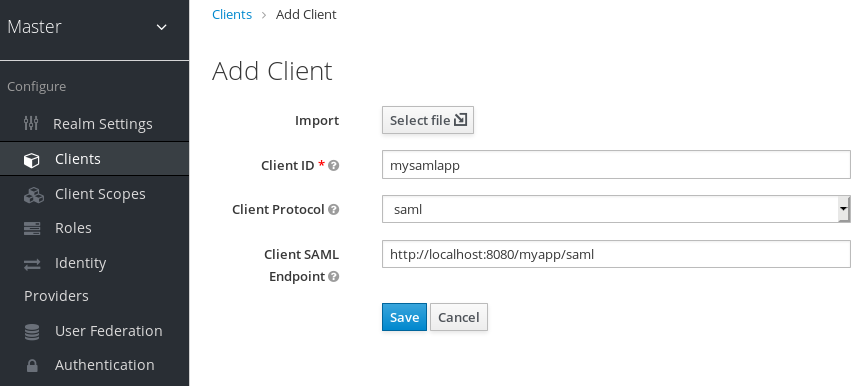
Enter in the Client ID of the client. This is often a URL and will be the expected issuer value in SAML requests sent by the application. Next select saml in the Client Protocol drop down box. Finally enter in the Client SAML Endpoint URL. Enter the URL you want the Red Hat Single Sign-On server to send SAML requests and responses to. Usually applications have only one URL for processing SAML requests. If your application has different URLs for its bindings, don’t worry, you can fix this in the Settings tab of the client. Click Save. This will create the client and bring you to the client Settings tab.
Client Settings
- Client ID
- This value must match the issuer value sent with AuthNRequests. Red Hat Single Sign-On will pull the issuer from the Authn SAML request and match it to a client by this value.
- Name
- This is the display name for the client whenever it is displayed in a Red Hat Single Sign-On UI screen. You can localize the value of this field by setting up a replacement string value i.e. ${myapp}. See the Server Developer Guide for more information.
- Description
- This specifies the description of the client. This can also be localized.
- Enabled
- If this is turned off, the client will not be allowed to request authentication.
- Consent Required
- If this is on, then users will get a consent page which asks the user if they grant access to that application. It will also display the metadata that the client is interested in so that the user knows exactly what information the client is getting access to. If you’ve ever done a social login to Google, you’ll often see a similar page. Red Hat Single Sign-On provides the same functionality.
- Include AuthnStatement
-
SAML login responses may specify the authentication method used (password, etc.) as well as timestamps of the login and the session expiration. This is enabled by default, which means that
AuthStatementelement will be included in login responses. Note that setting this to off would prevent the client from determining the maximum session length which could result into never expiring client session. - Sign Documents
- When turned on, Red Hat Single Sign-On will sign the document using the realm’s private key.
- Optimize REDIRECT signing key lookup
-
When turned on, the SAML protocol messages will include Red Hat Single Sign-On native extension that contains a hint with signing key ID. When the SP understands this extension, it can use it for signature validation instead of attempting to validate signature with all known keys. This option only applies to REDIRECT bindings where the signature is transferred in query parameters where there is no place with this information in the signature information (contrary to POST binding messages where key ID is always included in document signature). Currently this is relevant to situations where both IDP and SP are provided by Red Hat Single Sign-On server and adapter. This option is only relevant when
Sign Documentsis switched on. - Sign Assertions
-
The
Sign Documentsswitch signs the whole document. With this setting the assertion is also signed and embedded within the SAML XML Auth response. - Signature Algorithm
- Choose between a variety of algorithms for signing SAML documents.
- SAML Signature Key Name
-
Signed SAML documents sent via POST binding contain identification of signing key in
KeyNameelement. This by default contains Red Hat Single Sign-On key ID. However various vendors might expect a different key name or no key name at all. This switch controls whetherKeyNamecontains key ID (optionKEY_ID), subject from certificate corresponding to the realm key (optionCERT_SUBJECT- expected for instance by Microsoft Active Directory Federation Services), or that the key name hint is completely omitted from the SAML message (optionNONE). - Canonicalization Method
- Canonicalization method for XML signatures.
- Encrypt Assertions
- Encrypt assertions in SAML documents with the realm’s private key. The AES algorithm is used with a key size of 128 bits.
- Client Signature Required
-
Expect that documents coming from a client are signed. Red Hat Single Sign-On will validate this signature using the client public key or cert set up in the
SAML Keystab. - Force POST Binding
- By default, Red Hat Single Sign-On will respond using the initial SAML binding of the original request. By turning on this switch, you will force Red Hat Single Sign-On to always respond using the SAML POST Binding even if the original request was the Redirect binding.
- Front Channel Logout
- If true, this application requires a browser redirect to be able to perform a logout. For example, the application may require a cookie to be reset which could only be done via a redirect. If this switch is false, then Red Hat Single Sign-On will invoke a background SAML request to logout the application.
- Force Name ID Format
- If the request has a name ID policy, ignore it and used the value configured in the admin console under Name ID Format
- Name ID Format
- Name ID Format for the subject. If no name ID policy is specified in the request or if the Force Name ID Format attribute is true, this value is used. Properties used for each of the respective formats are defined below.
- Root URL
- If Red Hat Single Sign-On uses any configured relative URLs, this value is prepended to them.
- Valid Redirect URIs
-
This is an optional field. Enter in a URL pattern and click the + sign to add. Click the - sign next to URLs you want to remove. Remember that you still have to click the
Savebutton! Wildcards (*) are only allowed at the end of a URI, i.e. http://host.com/*. This field is used when the exact SAML endpoints are not registered and Red Hat Single Sign-On is pulling the Assertion Consumer URL from the request. - Base URL
- If Red Hat Single Sign-On needs to link to the client, this URL would be used.
- Master SAML Processing URL
- This URL will be used for all SAML requests and the response will be directed to the SP. It will be used as the Assertion Consumer Service URL and the Single Logout Service URL. If a login request contains the Assertion Consumer Service URL, that will take precedence, but this URL must be validated by a registered Valid Redirect URI pattern
- Assertion Consumer Service POST Binding URL
- POST Binding URL for the Assertion Consumer Service.
- Assertion Consumer Service Redirect Binding URL
- Redirect Binding URL for the Assertion Consumer Service.
- Logout Service POST Binding URL
- POST Binding URL for the Logout Service.
- Logout Service Redirect Binding URL
- Redirect Binding URL for the Logout Service.
8.2.1. IDP Initiated Login
IDP Initiated Login is a feature that allows you to set up an endpoint on the Red Hat Single Sign-On server that will log you into a specific application/client. In the Settings tab for your client, you need to specify the IDP Initiated SSO URL Name. This is a simple string with no whitespace in it. After this you can reference your client at the following URL: root/auth/realms/{realm}/protocol/saml/clients/{url-name}
The IDP initiated login implementation prefers POST over REDIRECT binding (check saml bindings for more information). Therefore the final binding and SP URL are selected in the following way:
-
If the specific
Assertion Consumer Service POST Binding URLis defined (insideFine Grain SAML Endpoint Configurationsection of the client settings) POST binding is used through that URL. -
If the general
Master SAML Processing URLis specified then POST binding is used again throught this general URL. -
As the last resort, if the
Assertion Consumer Service Redirect Binding URLis configured (insideFine Grain SAML Endpoint Configuration) REDIRECT binding is used with this URL.
If your client requires a special relay state, you can also configure this on the Settings tab in the IDP Initiated SSO Relay State field. Alternatively, browsers can specify the relay state in a RelayState query parameter, i.e. root/auth/realms/{realm}/protocol/saml/clients/{url-name}?RelayState=thestate.
When using identity brokering, it is possible to set up an IDP Initiated Login for a client from an external IDP. The actual client is set up for IDP Initiated Login at broker IDP as described above. The external IDP has to set up the client for application IDP Initiated Login that will point to a special URL pointing to the broker and representing IDP Initiated Login endpoint for a selected client at the brokering IDP. This means that in client settings at the external IDP:
-
IDP Initiated SSO URL Nameis set to a name that will be published as IDP Initiated Login initial point, Assertion Consumer Service POST Binding URLin theFine Grain SAML Endpoint Configurationsection has to be set to the following URL:broker-root/auth/realms/{broker-realm}/broker/{idp-name}/endpoint/clients/{client-id}, where:- broker-root is base broker URL
- broker-realm is name of the realm at broker where external IDP is declared
- idp-name is name of the external IDP at broker
-
client-id is the value of
IDP Initiated SSO URL Nameattribute of the SAML client defined at broker. It is this client, which will be made available for IDP Initiated Login from the external IDP.
Please note that you can import basic client settings from the brokering IDP into client settings of the external IDP - just use SP Descriptor available from the settings of the identity provider in the brokering IDP, and add clients/client-id to the endpoint URL.
8.2.2. SAML Entity Descriptors
Instead of manually registering a SAML 2.0 client, you can import it via a standard SAML Entity Descriptor XML file. There is an Import option on the Add Client page.
Add Client
Click the Select File button and load your entity descriptor file. You should review all the information there to make sure everything is set up correctly.
Some SAML client adapters like mod-auth-mellon need the XML Entity Descriptor for the IDP. You can obtain this by going to this public URL: root/auth/realms/{realm}/protocol/saml/descriptor
8.3. Client Links
For scenarios where one wants to link from one client to another, Red Hat Single Sign-On provides a special redirect endpoint: /realms/realm_name/clients/{client-id}/redirect.
If a client accesses this endpoint via an HTTP GET request, Red Hat Single Sign-On returns the configured base URL for the provided Client and Realm in the form of an HTTP 307 (Temporary Redirect) via the response’s Location header.
Thus, a client only needs to know the Realm name and the Client ID in order to link to them. This indirection helps avoid hard-coding client base URLs.
As an example, given the realm master and the client-id account:
http://host:port/auth/realms/master/clients/account/redirect
Would temporarily redirect to: http://host:port/auth/realms/master/account
8.4. OIDC Token and SAML Assertion Mappings
Applications that receive ID Tokens, Access Tokens, or SAML assertions may need or want different user metadata and roles. Red Hat Single Sign-On allows you to define what exactly is transferred. You can hardcode roles, claims and custom attributes. You can pull user metadata into a token or assertion. You can rename roles. Basically you have a lot of control of what exactly goes back to the client.
Within the Admin Console, if you go to an application you’ve registered, you’ll see a Mappers tab. Here’s one for an OIDC based client.
Mappers Tab
The new client does not have any built-in mappers, however it usually inherits some mappers from the client scopes as described in the client scopes section. Protocol mappers map things like, for example, email address to a specific claim in the identity and access token. Their function should each be self explanatory from their name. There are additional pre-configured mappers that are not attached to the client that you can add by clicking the Add Builtin button.
Each mapper has common settings as well as additional ones depending on which type of mapper you are adding. Click the Edit button next to one of the mappers in the list to get to the config screen.
Mapper Config
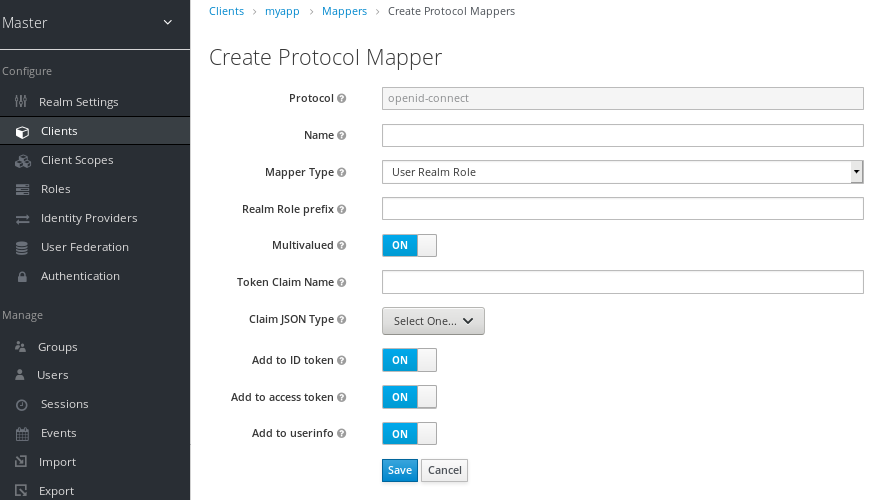
The best way to learn about a config option is to hover over its tooltip.
Most OIDC mappers also allow you to control where the claim gets put. You can opt to include or exclude the claim from both the id and access tokens by fiddling with the Add to ID token and Add to access token switches.
Finally, you can also add other mapper types. If you go back to the Mappers tab, click the Create button.
Add Mapper
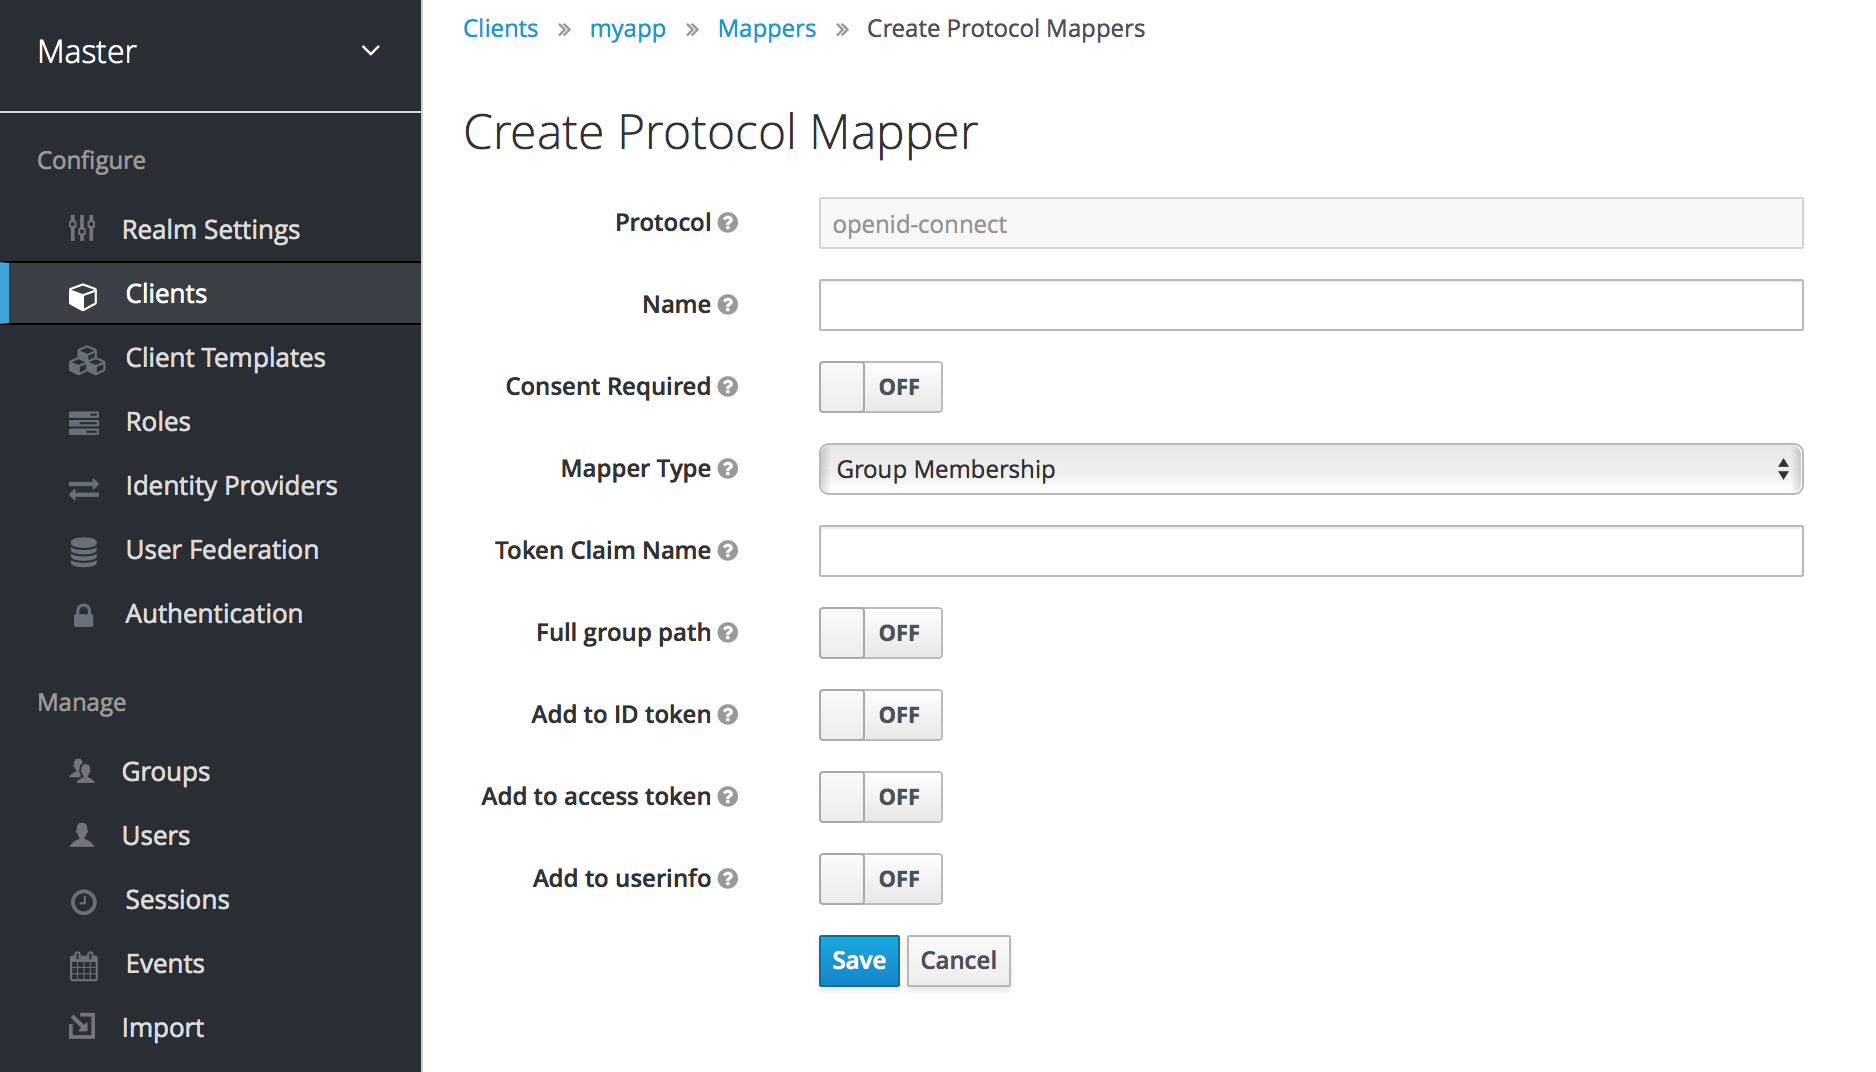
Pick a Mapper Type from the list box. If you hover over the tooltip, you’ll see a description of what that mapper type does. Different config parameters will appear for different mapper types.
8.4.1. Priority order
Mapper implementations have priority order. This priority order is not the configuration property of the mapper; rather, it is the property of the concrete implementation of the mapper.
Mappers are sorted in the admin console by the order in the list of mappers and the changes in the token or assertion will be applied using that order with the lowest being applied first. This means that implementations which are dependent on other implementations are processed in the needed order.
For example, when we first want to compute the roles which will be included with a token, we first resolve audiences based on those roles. Then, we process a JavaScript script that uses the roles and audiences already available in the token.
8.4.2. OIDC User Session Note Mappers
User session details are via mappers and depend on various criteria. User session details are automatically included when you use or enable a feature on a client. You can also click the Add builtin button to include session details.
Impersonated user sessions provide the following details:
-
IMPERSONATOR_ID: The ID of an impersonating user -
IMPERSONATOR_USERNAME: The username of an impersonating user
Service account sessions provide the following details:
-
clientId: The client ID of the service account -
clientAddress: The remote host IP of the service account authenticated device -
clientHost: The remote host name of the service account authenticated device
8.4.3. Script Mapper
The Script Mapper allows you to map claims to tokens by running a user-defined JavaScript code. For more details about how to deploy scripts to the server, please take a look at JavaScript Providers.
Once you have your scripts deployed, you should be able to select the scripts you deployed from the list of available mappers.
8.5. Generating Client Adapter Config
The Red Hat Single Sign-On can pre-generate configuration files that you can use to install a client adapter for in your application’s deployment environment. A number of adapter types are supported for both OIDC and SAML. Go to the Installation tab of the client you want to generate configuration for.
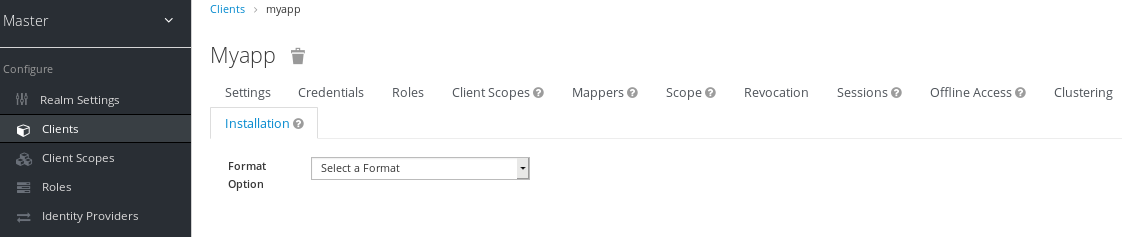
Select the Format Option you want configuration generated for. All Red Hat Single Sign-On client adapters for OIDC and SAML are supported. The mod-auth-mellon Apache HTTPD adapter for SAML is supported as well as standard SAML entity descriptor files.
8.6. Client Scopes
If you have many applications you need to secure and register within your organization, it can become tedious to configure the protocol mappers and role scope mappings for each of these clients. Red Hat Single Sign-On allows you to define a shared client configuration in an entity called a client scope.
Client scopes also provide support for the OAuth 2 scope parameter, which allows a client application to request more or fewer claims or roles in the access token, according to the application needs.
To create a client scope, follow these steps:
-
Go to the
Client Scopesleft menu item. This initial screen shows you a list of currently defined client scopes.
Client Scopes List
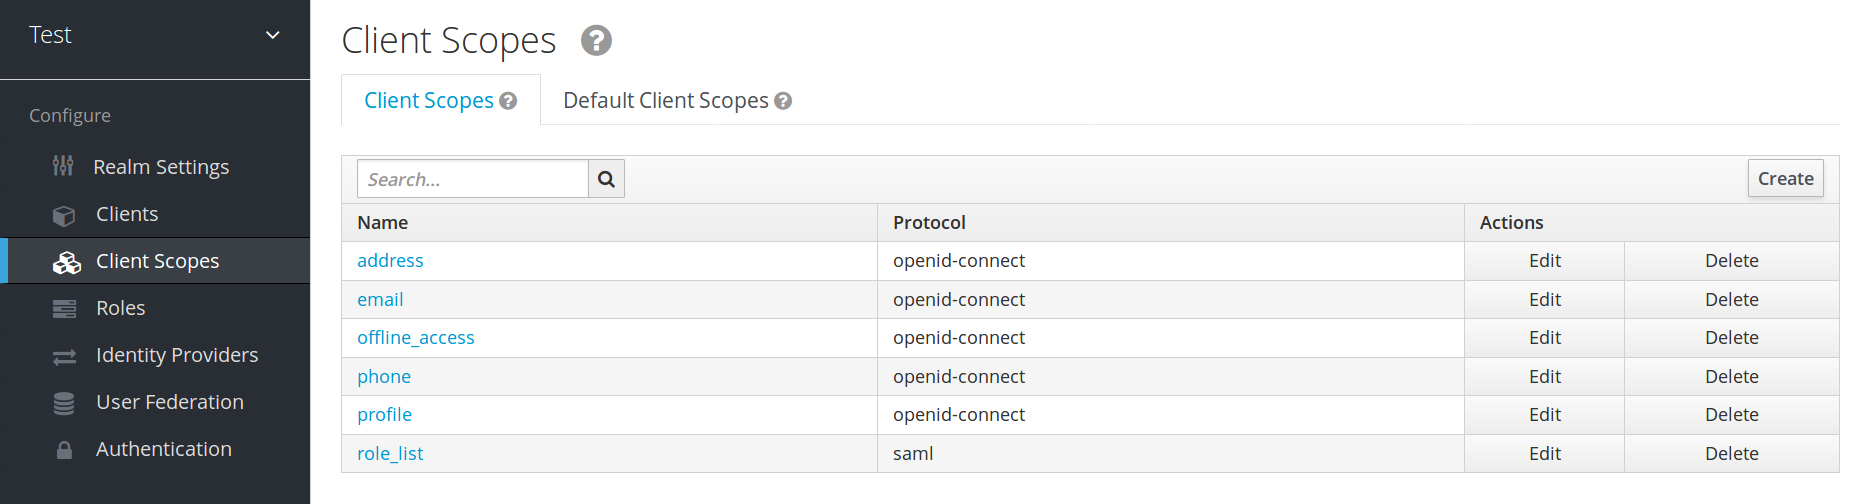
-
Click the
Createbutton. Name the client scope and save. A client scope will have similar tabs to a regular clients. You can define protocol mappers and role scope mappings, which can be inherited by other clients, and which are configured to inherit from this client scope.
8.6.1. Protocol
When you are creating the client scope, you must choose the Protocol. Only the clients which use same protocol can then be linked with this client scope.
Once you have created new realm, you can see that there is a list of pre-defined (builtin) client scopes in the menu.
-
For the SAML protocol, there is one builtin client scope,
roles_list, which contains one protocol mapper for showing the roles list in the SAML assertion. -
For the OpenID Connect protocol, there are client scopes
profile,email,address,phone,offline_access,roles,web-originsandmicroprofile-jwt.
The client scope, offline_access, is useful when client wants to obtain offline tokens. Learn about offline tokens in the Offline Access section or in the OpenID Connect specification, where scope parameter is defined with the value offline_access.
The client scopes profile, email, address and phone are also defined in the OpenID Connect specification. These client scopes do not have any role scope mappings defined, but they have some protocol mappers defined, and these mappers correspond to the claims defined in the OpenID Connect specification.
For example, when you click to open the phone client scope and open the Mappers tab, you will see the protocol mappers, which correspond to the claims defined in the specification for the scope phone.
Client Scope Mappers
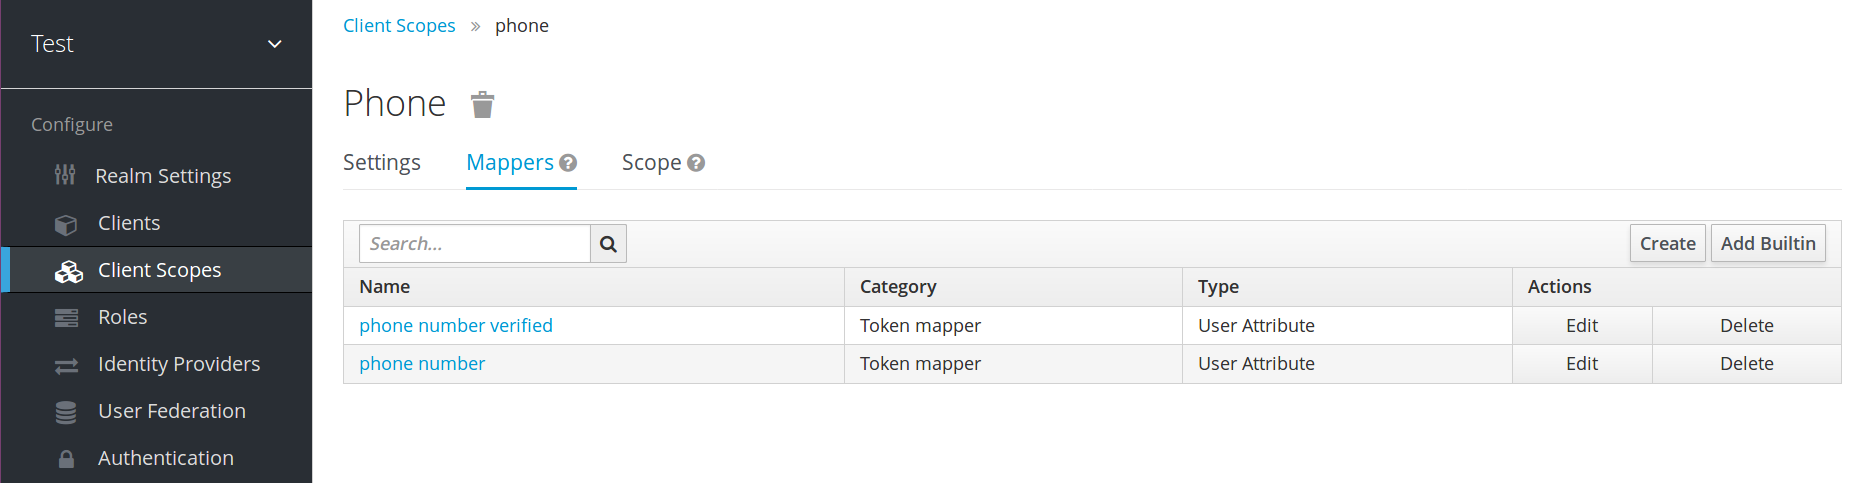
When the phone client scope is linked to a client, that client automatically inherits all the protocol mappers defined in the phone client scope. Access tokens issued for this client will contain the phone number information about the user, assuming that the user has a defined phone number.
Builtin client scopes contain exactly the protocol mappers as defined per the specification, however you are free to edit client scopes and create/update/remove any protocol mappers (or role scope mappings).
The client scope roles is not defined in the OpenID Connect specification and it is also not added automatically to the scope claim in the access token. This client scope has some mappers, which are used to add roles of the user to the access token and possibly add some audiences for the clients with at least one client role as described in the Audience section.
The client scope web-origins is also not defined in the OpenID Connect specification and not added to the scope claim. This is used to add allowed web origins to the access token allowed-origins claim.
The client scope microprofile-jwt was created to handle the claims defined in the MicroProfile/JWT Auth Specification. This client scope defines a user property mapper for the upn claim and also a realm role mapper for the groups claim. These mappers can be changed as needed so that different properties can be used to create the MicroProfile/JWT specific claims.
8.6.3. Link Client Scope with the Client
Linking between client scope and client is configured in the Client Scopes tab of the particular client. There are 2 ways of linking between client scope and client.
- Default Client Scopes
- This is applicable for both OpenID Connect and SAML clients. Default client scopes are always applied when issuing OpenID Connect tokens or SAML assertions for this client. The client will inherit Protocol mappers and Role Scope Mappings defined on the client scope. For the OpenID Connect Protocol, the Mappers and Role Scope Mappings are always applied, regardless of the value used for the scope parameter in the OpenID Connect authorization request.
- Optional Client Scopes
-
This is applicable only for OpenID Connect clients. Optional client scopes are applied when issuing tokens for this client, but only when they are requested by the
scopeparameter in the OpenID Connect authorization request.
8.6.3.1. Example
For this example, we assume that the client has profile and email linked as default client scopes, and phone and address are linked as optional client scopes. The client will use the value of the scope parameter when sending a request to the OpenID Connect authorization endpoint:
scope=openid phone
The scope parameter contains the string, with the scope values divided by space (which is also the reason why a client scope name cannot contain a space character in it). The value openid is the meta-value used for all OpenID Connect requests, so we will ignore it for this example. The token will contain mappers and role scope mappings from the client scopes profile, email (which are default scopes) and phone (an optional client scope requested by the scope parameter).
8.6.4. Evaluating Client Scopes
The tabs Mappers and Scope of the client contain the protocol mappers and role scope mappings declared solely for this client. They do not contain the mappers and scope mappings inherited from client scopes. However, it may be useful to see what the effective protocol mappers will be (protocol mappers defined on the client itself as well as inherited from the linked client scopes) and the effective role scope mappings used when you generate the token for the particular client.
You can see all of these when you click the Client Scopes tab for the client and then open the sub-tab Evaluate. From here you can select the optional client scopes that you want to apply. This will also show you the value of the scope parameter, which needs to be sent from the application to the Red Hat Single Sign-On OpenID Connect authorization endpoint.
Evaluating Client Scopes
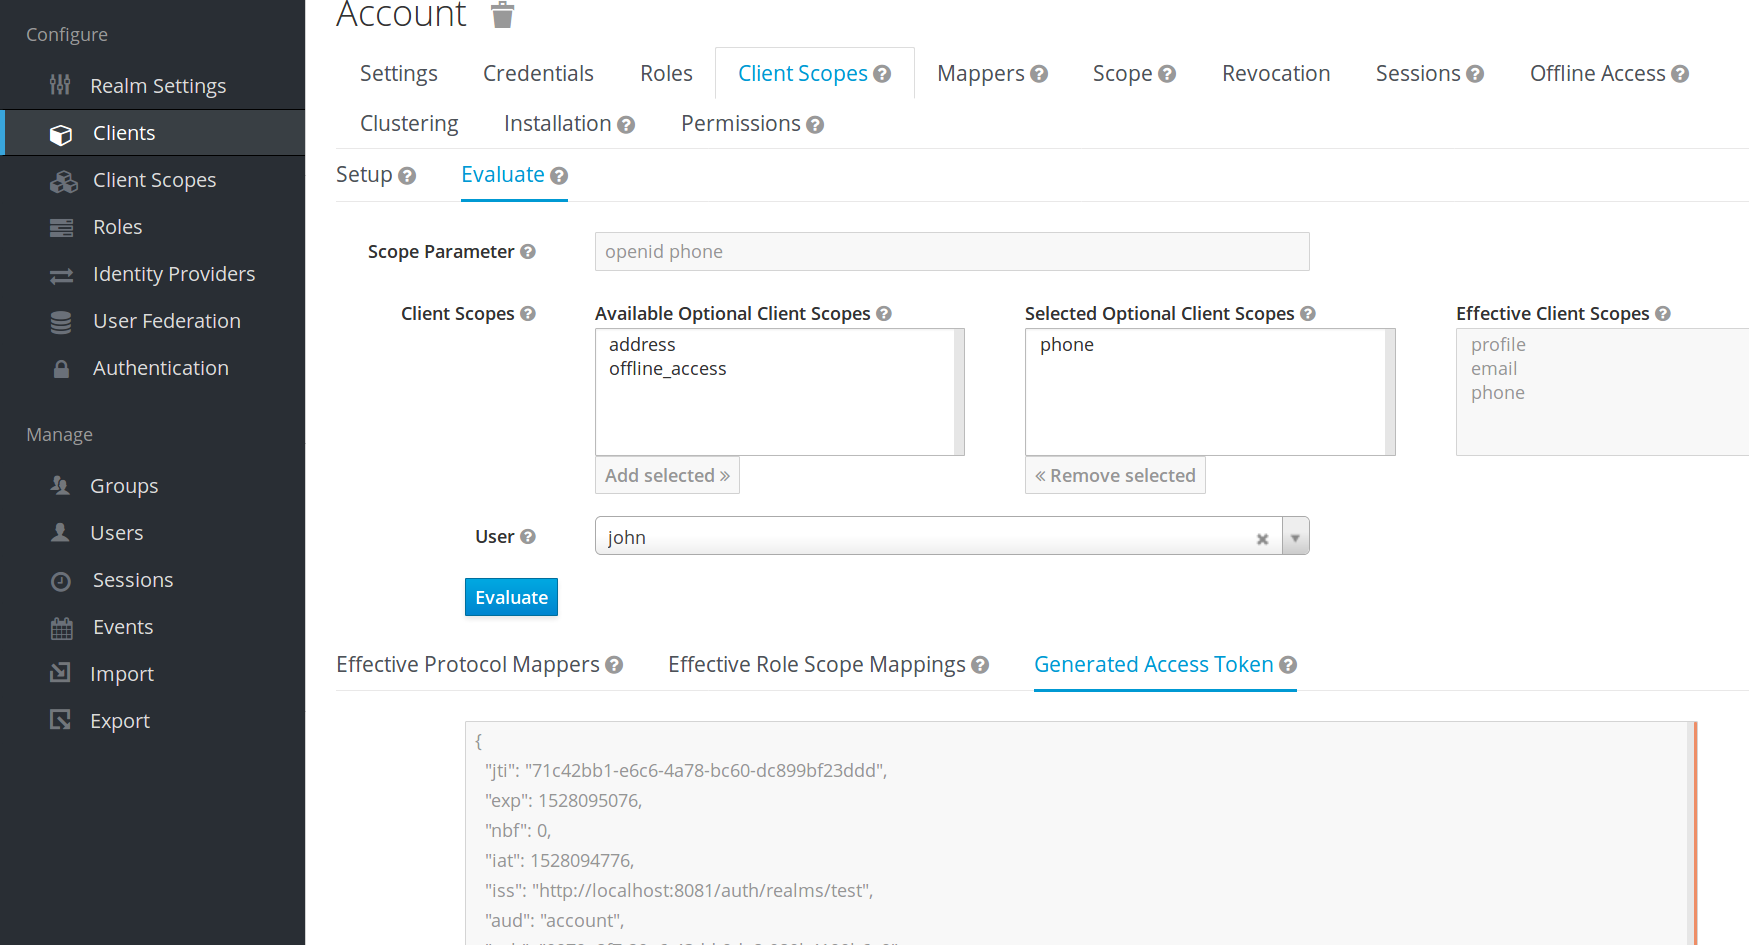
If you want to see how you can send a custom value for a scope parameter from your application, see the parameters forwarding section, if your application uses the servlet adapter, or the javascript adapter section, if your application uses the javascript adapter.
8.6.4.1. Generating Example Tokens
To see an example of a real access token, generated for the particular user and issued for the particular client, with the specified value of scope parameter, select the user from the Evaluate screen. This will generate an example token that includes all of the claims and role mappings used.
8.6.5. Client Scopes Permissions
When issuing tokens for a particular user, the client scope is applied only if the user is permitted to use it. In the case that a client scope does not have any role scope mappings defined on itself, then each user is automatically permitted to use this client scope. However, when a client scope has any role scope mappings defined on itself, then the user must be a member of at least one of the roles. In other words, there must be an intersection between the user roles and the roles of the client scope. Composite roles are taken into account when evaluating this intersection.
If a user is not permitted to use the client scope, then no protocol mappers or role scope mappings will be used when generating tokens and the client scope will not appear in the scope value in the token.
8.6.6. Realm Default Client Scopes
The Realm Default Client Scopes allow you to define set of client scopes, which will be automatically linked to newly created clients.
Open the left menu item Client Scopes and then select Default Client Scopes.
From here, select the client scopes that you want to add as Default Client Scopes to newly created clients and Optional Client Scopes to newly created clients.
Default Client Scopes
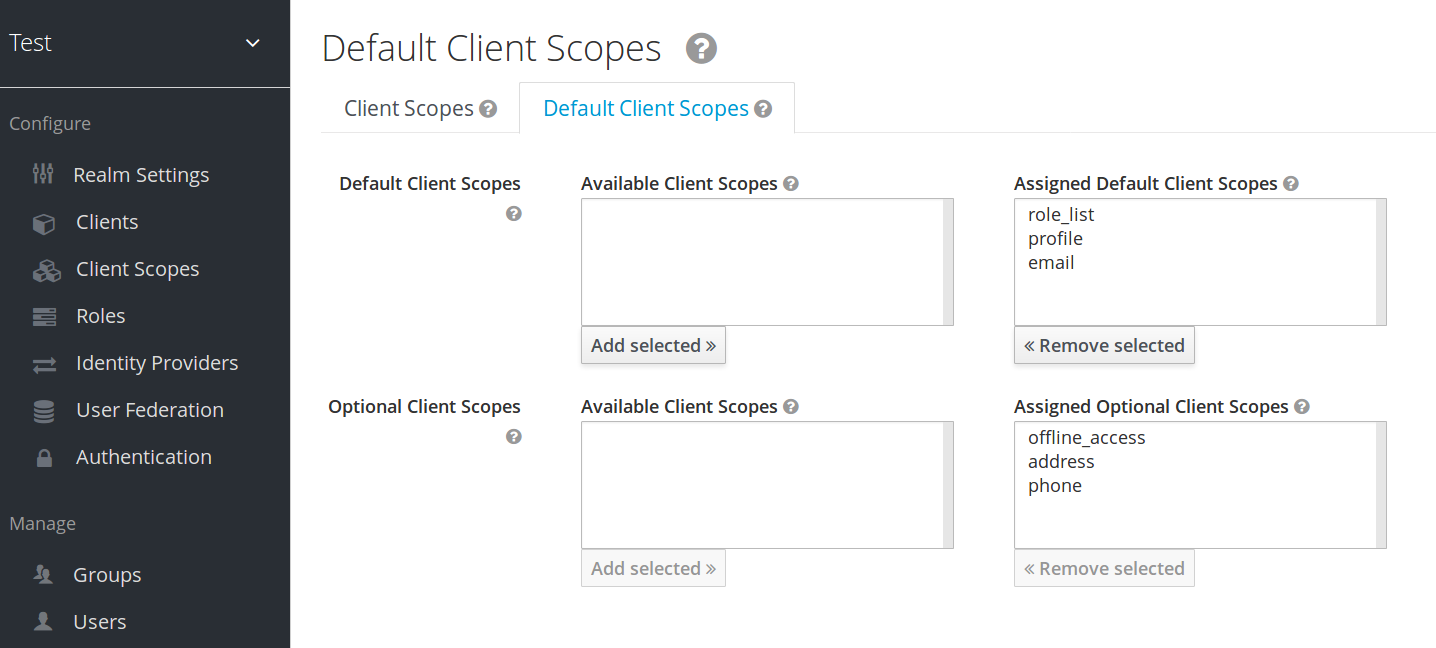
Once the client is created, you can unlink the default client scopes, if needed. This is similar to how you remove Default Roles.
8.6.7. Scopes explained
The term scope is used in Red Hat Single Sign-On on few places. Various occurrences of scopes are related to each other, but may have a different context and meaning. To clarify, here we explain the various scopes used in Red Hat Single Sign-On.
- Client scope
-
Referenced in this chapter. Client scopes are entities in Red Hat Single Sign-On, which are configured at the realm level and they can be linked to clients. The client scopes are referenced by their name when a request is sent to the Red Hat Single Sign-On authorization endpoint with a corresponding value of the
scopeparameter. The details are described in the section about client scopes linking. - Role scope mapping
-
This can be seen when you open tab
Scopeof a client or client scope. Role scope mapping allows you to limit the roles which can be used in the access tokens. The details are described in the Role Scope Mappings section.
Chapter 9. Roles
Roles identify a type or category of user. Admin, user, manager, and employee are all typical roles that may exist in an organization. Applications often assign access and permissions to specific roles rather than individual users as dealing with users can be too fine grained and hard to manage. For example, the Admin Console has specific roles which give permission to users to access parts of the Admin Console UI and perform certain actions. There is a global namespace for roles and each client also has its own dedicated namespace where roles can be defined.
9.1. Realm Roles
Realm-level roles are a global namespace to define your roles. You can see the list of built-in and created roles by clicking the Roles left menu item.
To create a role, click Add Role on this page, enter in the name and description of the role, and click Save.
Add Role
The value for the description field is localizable by specifying a substitution variable with ${var-name} strings. The localized value is then configured within property files in your theme. See the Server Developer Guide for more information on localization.
9.2. Client Roles
Client roles are basically a namespace dedicated to a client. Each client gets its own namespace. Client roles are managed under the Roles tab under each individual client. You interact with this UI the same way you do for realm-level roles.
9.3. Composite Roles
Any realm or client level role can be turned into a composite role. A composite role is a role that has one or more additional roles associated with it. When a composite role is mapped to the user, the user also gains the roles associated with that composite. This inheritance is recursive so any composite of composites also gets inherited.
To turn a regular role into a composite role, go to the role detail page and flip the Composite Role switch on.
Composite Role
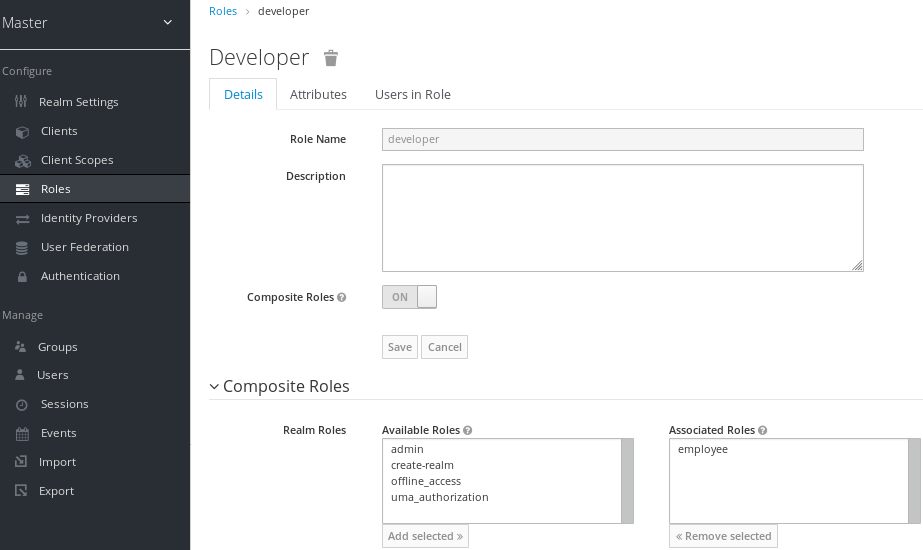
Once you flip this switch the role selection UI will be displayed lower on the page and you’ll be able to associate realm level and client level roles to the composite you are creating. In this example, the employee realm-level role was associated with the developer composite role. Any user with the developer role will now also inherit the employee role too.
When tokens and SAML assertions are created, any composite will also have its associated roles added to the claims and assertions of the authentication response sent back to the client.
9.4. User Role Mappings
User role mappings can be assigned individually to each user through the Role Mappings tab for that single user.
Role Mappings

In the above example, we are about to assign the composite role developer that was created in the Composite Roles chapter.
Effective Role Mappings
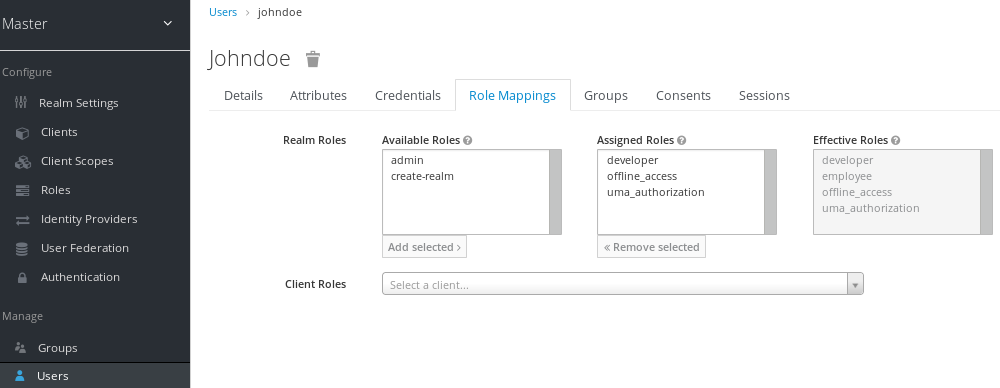
Once the developer role is assigned, you see that the employee role that is associated with the developer composite shows up in the Effective Roles. Effective Roles are all roles that are explicitly assigned to the user as well as any roles that are inherited from composites.
9.4.1. Default Roles
Default roles allow you to automatically assign user role mappings when any user is newly created or imported through Identity Brokering. To specify default roles go to the Roles left menu item, and click the Default Roles tab.
Default Roles

As you can see from the screenshot, there are already a number of default roles set up by default.
9.5. Role Scope Mappings
When an OIDC access token or SAML assertion is created, all the user role mappings of the user are, by default, added as claims within the token or assertion. Applications use this information to make access decisions on the resources controlled by that application. In Red Hat Single Sign-On, access tokens are digitally signed and can actually be re-used by the application to invoke on other remotely secured REST services. This means that if an application gets compromised or there is a rogue client registered with the realm, attackers can get access tokens that have a broad range of permissions and your whole network is compromised. This is where role scope mappings becomes important.
Role Scope Mappings is a way to limit the roles that get declared inside an access token. When a client requests that a user be authenticated, the access token they receive back will only contain the role mappings you’ve explicitly specified for the client’s scope. This allows you to limit the permissions each individual access token has rather than giving the client access to all of the user’s permissions. By default, each client gets all the role mappings of the user. You can view this in the Scope tab of each client.
Full Scope
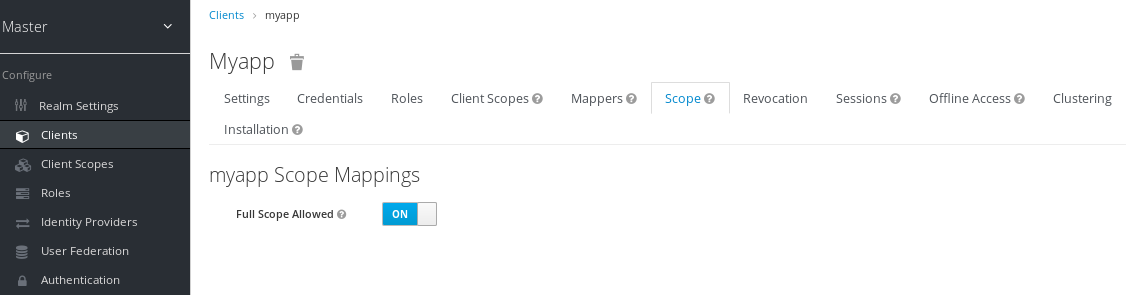
You can see from the picture that the effective roles of the scope are every declared role in the realm. To change this default behavior, you must explicitly turn off the Full Scope Allowed switch and declare the specific roles you want in each individual client. Alternatively, you can also use client scopes to define the same role scope mappings for a whole set of clients.
Partial Scope
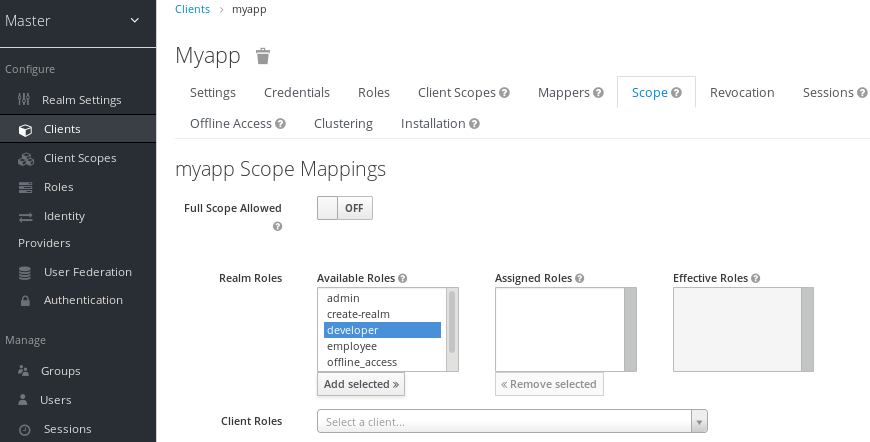
Chapter 10. Groups
Groups in Red Hat Single Sign-On allow you to manage a common set of attributes and role mappings for a set of users. Users can be members of zero or more groups. Users inherit the attributes and role mappings assigned to each group. To manage groups go to the Groups left menu item.
Groups
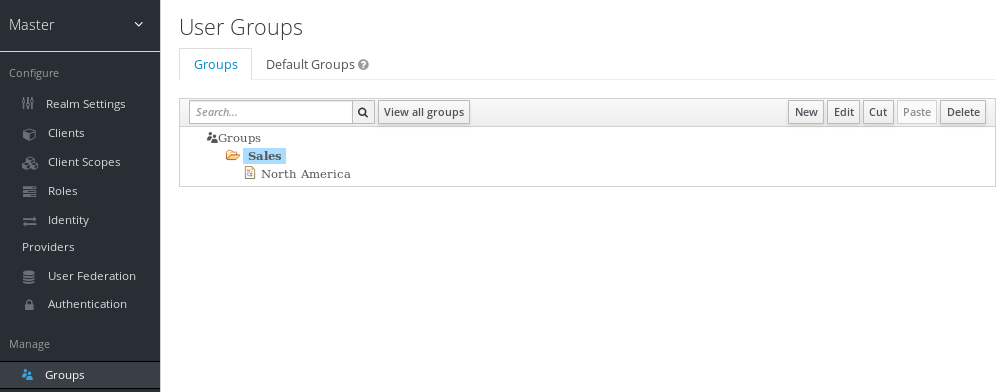
Groups are hierarchical. A group can have many subgroups, but a group can only have one parent. Subgroups inherit the attributes and role mappings from the parent. This applies to the user as well. So, if you have a parent group and a child group and a user that only belongs to the child group, the user inherits the attributes and role mappings of both the parent and child. In this example, we have a top level Sales group and a child North America subgroup. To add a group, click on the parent you want to add a new child to and click New button. Select the Groups icon in the tree to make a top-level group. Entering in a group name in the Create Group screen and hitting Save will bring you to the individual group management page.
Group
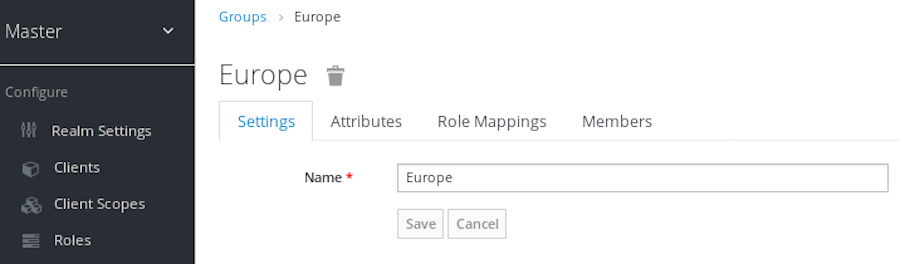
The Attributes and Role Mappings tab work exactly as the tabs with similar names under a user. Any attributes and role mappings you define will be inherited by the groups and users that are members of this group.
To add a user to a group you need to go all the way back to the user detail page and click on the Groups tab there.
User Groups

Select a group from the Available Groups tree and hit the join button to add the user to a group. Vice versa to remove a group. Here we’ve added the user Jim to the North America sales group. If you go back to the detail page for that group and select the Membership tab, Jim is now displayed there.
Group Membership
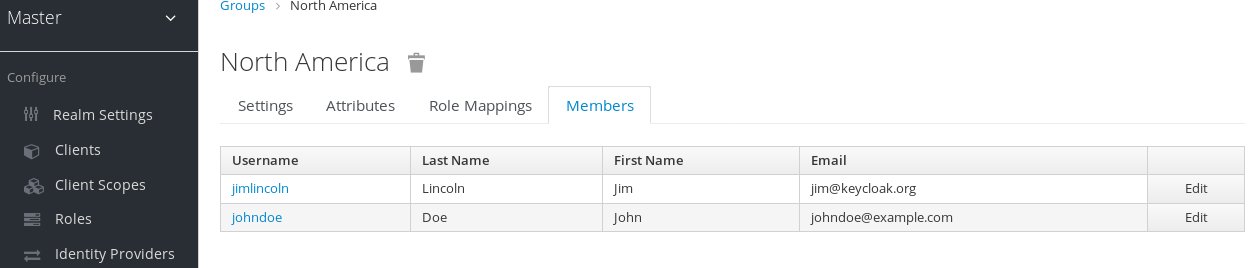
10.1. Groups vs. Roles
In the IT world the concepts of Group and Role are often blurred and interchangeable. In Red Hat Single Sign-On, Groups are just a collection of users that you can apply roles and attributes to in one place. Roles define a type of user and applications assign permission and access control to roles.
Aren’t Composite Roles also similar to Groups? Logically they provide the same exact functionality, but the difference is conceptual. Composite roles should be used to apply the permission model to your set of services and applications. Groups should focus on collections of users and their roles in your organization. Use groups to manage users. Use composite roles to manage applications and services.
10.2. Default Groups
Default groups allow you to automatically assign group membership whenever any new user is created or imported through Identity Brokering. To specify default groups go to the Groups left menu item, and click the Default Groups tab.
Default Groups

Chapter 11. Admin Console Access Control and Permissions
Each realm created on the Red Hat Single Sign-On has a dedicated Admin Console from which that realm can be managed. The master realm is a special realm that allows admins to manage more than one realm on the system. You can also define fine-grained access to users in different realms to manage the server. This chapter goes over all the scenarios for this.
11.1. Master Realm Access Control
The master realm in Red Hat Single Sign-On is a special realm and treated differently than other realms. Users in the Red Hat Single Sign-On master realm can be granted permission to manage zero or more realms that are deployed on the Red Hat Single Sign-On server. When a realm is created, Red Hat Single Sign-On automatically creates various roles that grant fine-grain permissions to access that new realm. Access to The Admin Console and Admin REST endpoints can be controlled by mapping these roles to users in the master realm. It’s possible to create multiple super users, as well as users that can only manage specific realms.
11.1.1. Global Roles
There are two realm-level roles in the master realm. These are:
- admin
- create-realm
Users with the admin role are super users and have full access to manage any realm on the server. Users with the create-realm role are allowed to create new realms. They will be granted full access to any new realm they create.
11.1.2. Realm Specific Roles
Admin users within the master realm can be granted management privileges to one or more other realms in the system. Each realm in Red Hat Single Sign-On is represented by a client in the master realm. The name of the client is <realm name>-realm. These clients each have client-level roles defined which define varying level of access to manage an individual realm.
The roles available are:
- view-realm
- view-users
- view-clients
- view-events
- manage-realm
- manage-users
- create-client
- manage-clients
- manage-events
- view-identity-providers
- manage-identity-providers
- impersonation
Assign the roles you want to your users and they will only be able to use that specific part of the administration console.
Admins with the manage-users role will only be able to assign admin roles to users that they themselves have. So, if an admin has the manage-users role but doesn’t have the manage-realm role, they will not be able to assign this role.
11.2. Dedicated Realm Admin Consoles
Each realm has a dedicated Admin Console that can be accessed by going to the url /auth/admin/{realm-name}/console. Users within that realm can be granted realm management permissions by assigning specific user role mappings.
Each realm has a built-in client called realm-management. You can view this client by going to the Clients left menu item of your realm. This client defines client-level roles that specify permissions that can be granted to manage the realm.
- view-realm
- view-users
- view-clients
- view-events
- manage-realm
- manage-users
- create-client
- manage-clients
- manage-events
- view-identity-providers
- manage-identity-providers
- impersonation
Assign the roles you want to your users and they will only be able to use that specific part of the administration console.
11.3. Fine Grain Admin Permissions
Fine Grain Admin Permissions is Technology Preview and is not fully supported. This feature is disabled by default.
To enable start the server with -Dkeycloak.profile=preview or -Dkeycloak.profile.feature.admin_fine_grained_authz=enabled . For more details see Profiles.
Sometimes roles like manage-realm or manage-users are too coarse grain and you want to create restricted admin accounts that have more fine grain permissions. Red Hat Single Sign-On allows you to define and assign restricted access policies for managing a realm. Things like:
- Managing one specific client
- Managing users that belong to a specific group
- Managing membership of a group
- Limited user management.
- Fine grain impersonization control
- Being able to assign a specific restricted set of roles to users.
- Being able to assign a specific restricted set of roles to a composite role.
- Being able to assign a specific restricted set of roles to a client’s scope.
- New general policies for viewing and managing users, groups, roles, and clients.
There’s some important things to note about fine grain admin permissions:
- Fine grain admin permissions were implemented on top of Authorization Services. It is highly recommended that you read up on those features before diving into fine grain permissions.
- Fine grain permissions are only available within dedicated admin consoles and admins defined within those realms. You cannot define cross-realm fine grain permissions.
- Fine grain permissions are used to grant additional permissions. You cannot override the default behavior of the built in admin roles.
11.3.1. Managing One Specific Client
Let’s look first at allowing an admin to manage one client and one client only. In our example we have a realm called test and a client called sales-application. In realm test we will give a user in that realm permission to only manage that application.
You cannot do cross realm fine grain permissions. Admins in the master realm are limited to the predefined admin roles defined in previous chapters.
11.3.1.1. Permission Setup
The first thing we must do is login to the Admin Console so we can set up permissions for that client. We navigate to the management section of the client we want to define fine-grain permissions for.
Client Management
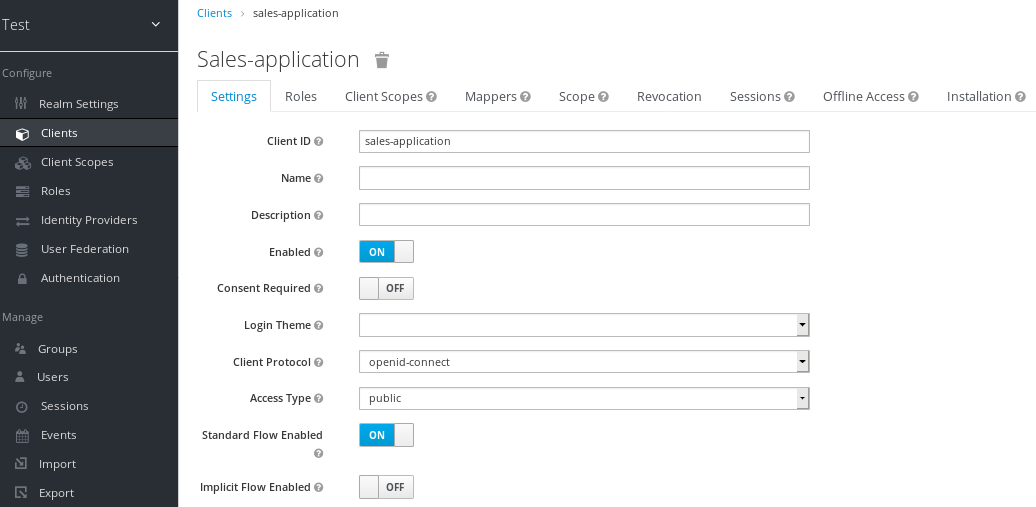
You should see a tab menu item called Permissions. Click on that tab.
Client Permissions Tab
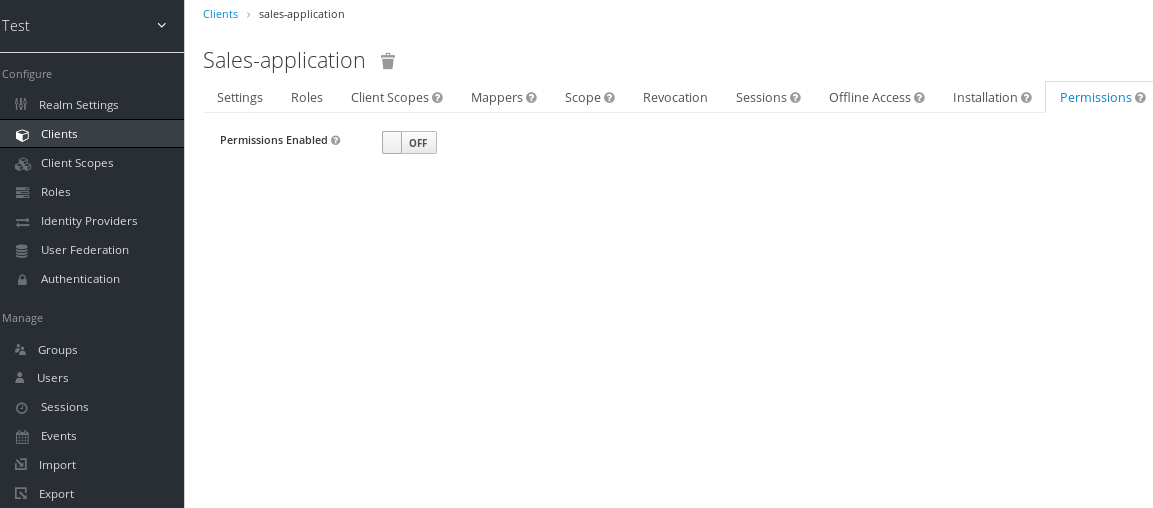
By default, each client is not enabled to do fine grain permissions. So turn the Permissions Enabled switch to on to initialize permissions.
If you turn the Permissions Enabled switch to off, it will delete any and all permissions you have defined for this client.
Client Permissions Tab

When you switch Permissions Enabled to on, it initializes various permission objects behind the scenes using Authorization Services. For this example, we’re interested in the manage permission for the client. Clicking on that will redirect you to the permission that handles the manage permission for the client. All authorization objects are contained in the realm-management client’s Authorization tab.
Client Manage Permission

When first initialized the manage permission does not have any policies associated with it. You will need to create one by going to the policy tab. To get there fast, click on the Authorization link shown in the above image. Then click on the policies tab.
There’s a pull down menu on this page called Create policy. There’s a multitude of policies you can define. You can define a policy that is associated with a role or a group or even define rules in JavaScript. For this simple example, we’re going to create a User Policy.
User Policy
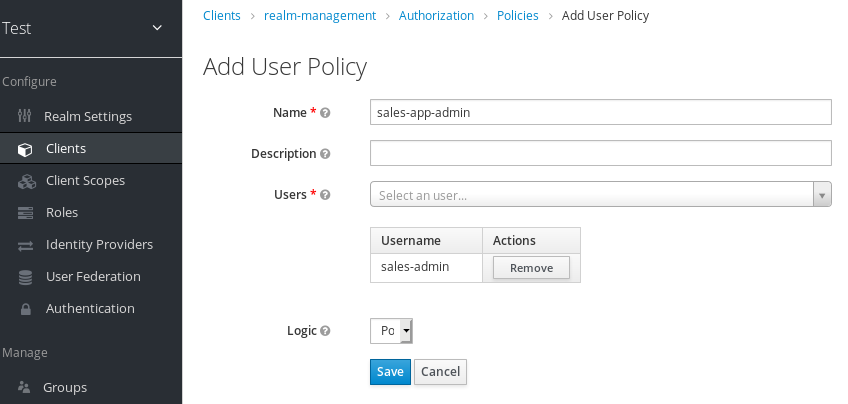
This policy will match a hard-coded user in the user database. In this case it is the sales-admin user. We must then go back to the sales-application client’s manage permission page and assign the policy to the permission object.
Assign User Policy
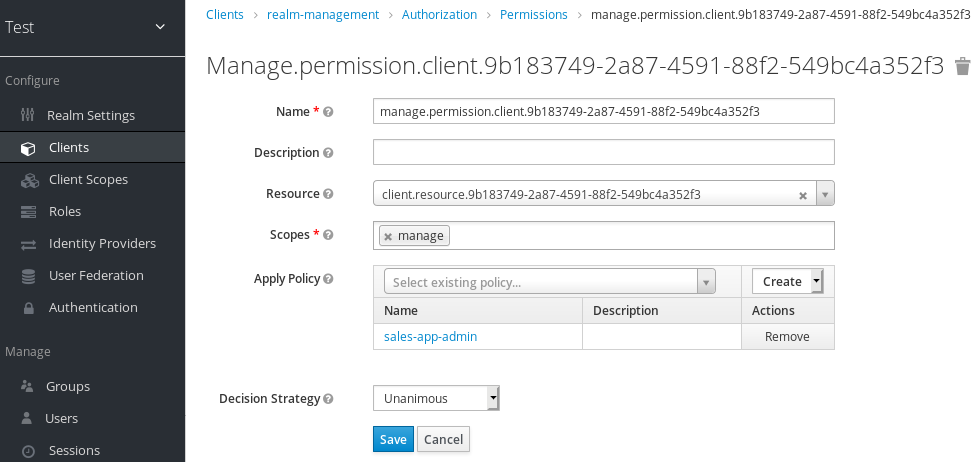
The sales-admin user can now has permission to manage the sales-application client.
There’s one more thing we have to do. Go to the Role Mappings tab and assign the query-clients role to the sales-admin.
Assign query-clients
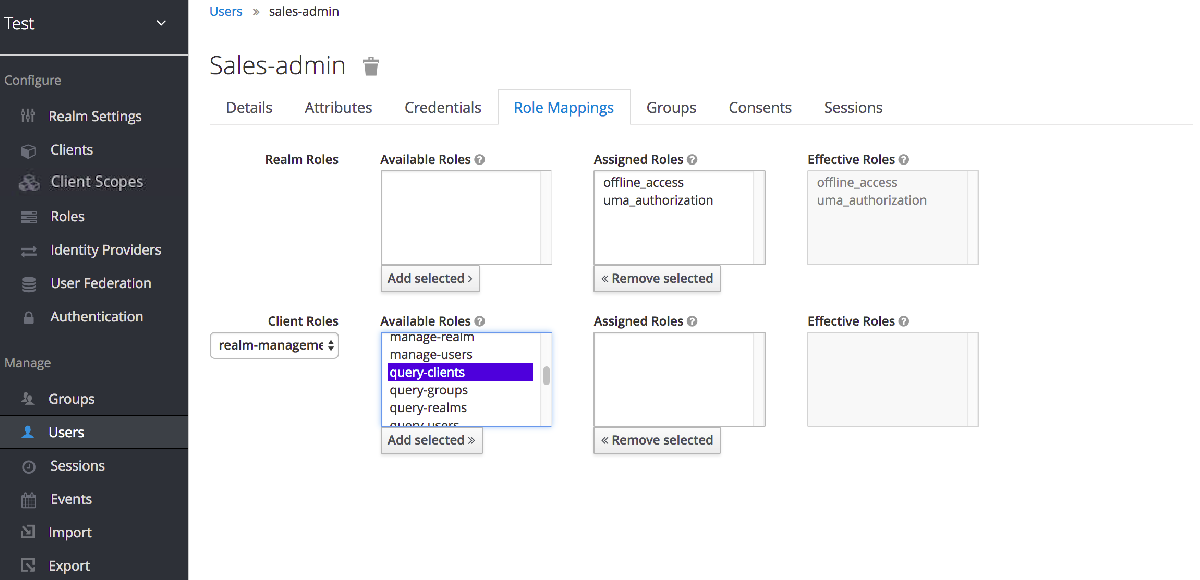
Why do you have to do this? This role tells the Admin Console what menu items to render when the sales-admin visits the Admin Console. The query-clients role tells the Admin Console that it should render client menus for the sales-admin user.
IMPORTANT If you do not set the query-clients role, restricted admins like sales-admin will not see any menu options when they log into the Admin Console
11.3.1.2. Testing It Out.
Next we log out of the master realm and re-login to the dedicated admin console for the test realm using the sales-admin as a username. This is located under /auth/admin/test/console.
Sales Admin Login

This admin is now able to manage this one client.
11.3.2. Restrict User Role Mapping
Another thing you might want to do is to restrict the set a roles an admin is allowed to assign to a user. Continuing our last example, let’s expand the permission set of the 'sales-admin' user so that he can also control which users are allowed to access this application. Through fine grain permissions we can enable it so that the sales-admin can only assign roles that grant specific access to the sales-application. We can also restrict it so that the admin can only map roles and not perform any other types of user administration.
The sales-application has defined three different client roles.
Sales Application Roles
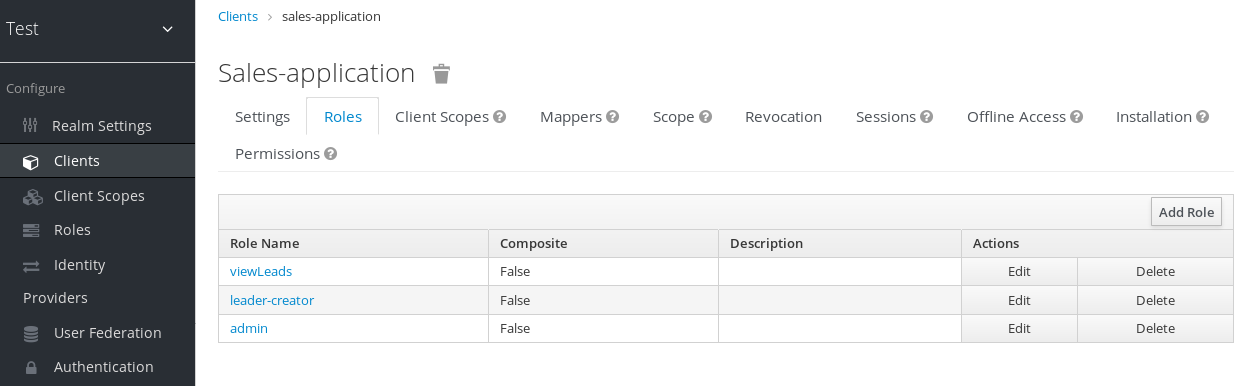
We want the sales-admin user to be able to map these roles to any user in the system. The first step to do this is to allow the role to be mapped by the admin. If we click on the viewLeads role, you’ll see that there is a Permissions tab for this role.
View Leads Role Permission Tab

If we click on that tab and turn the Permissions Enabled on, you’ll see that there are a number of actions we can apply policies to.
View Leads Permissions
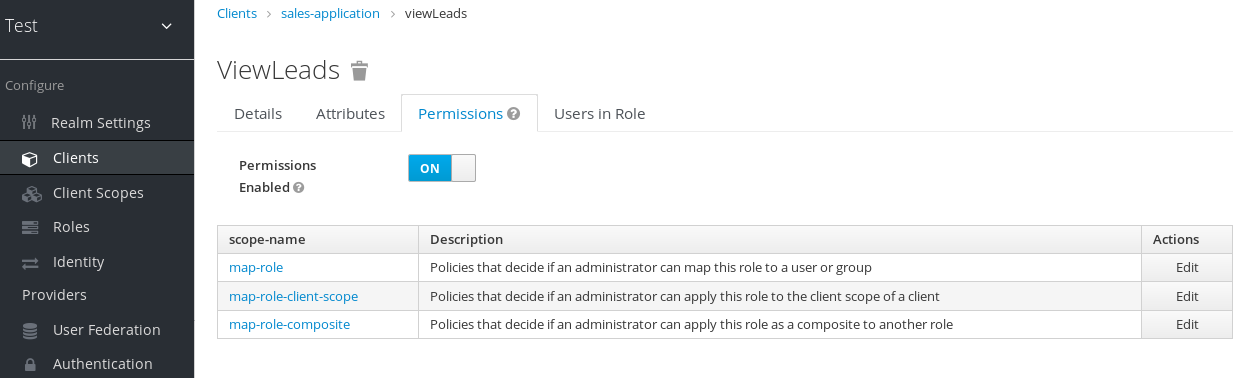
The one we are interested in is map-role. Click on this permission and add the same User Policy that was created in the earlier example.
Map-roles Permission
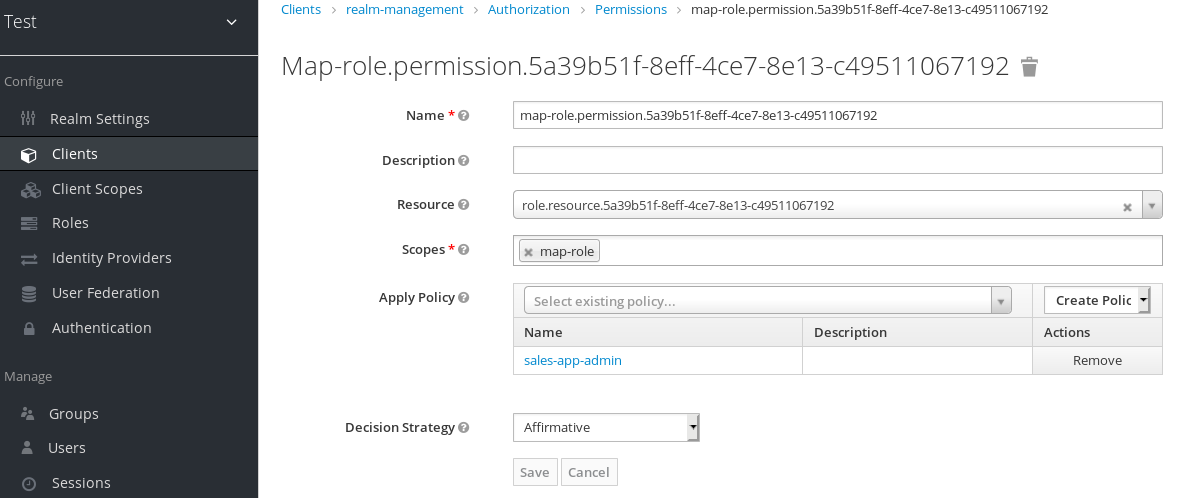
What we’ve done is say that the sales-admin can map the viewLeads role. What we have not done is specify which users the admin is allowed to map this role too. To do that we must go to the Users section of the admin console for this realm. Clicking on the Users left menu item brings us to the users interface of the realm. You should see a Permissions tab. Click on that and enable it.
Users Permissions
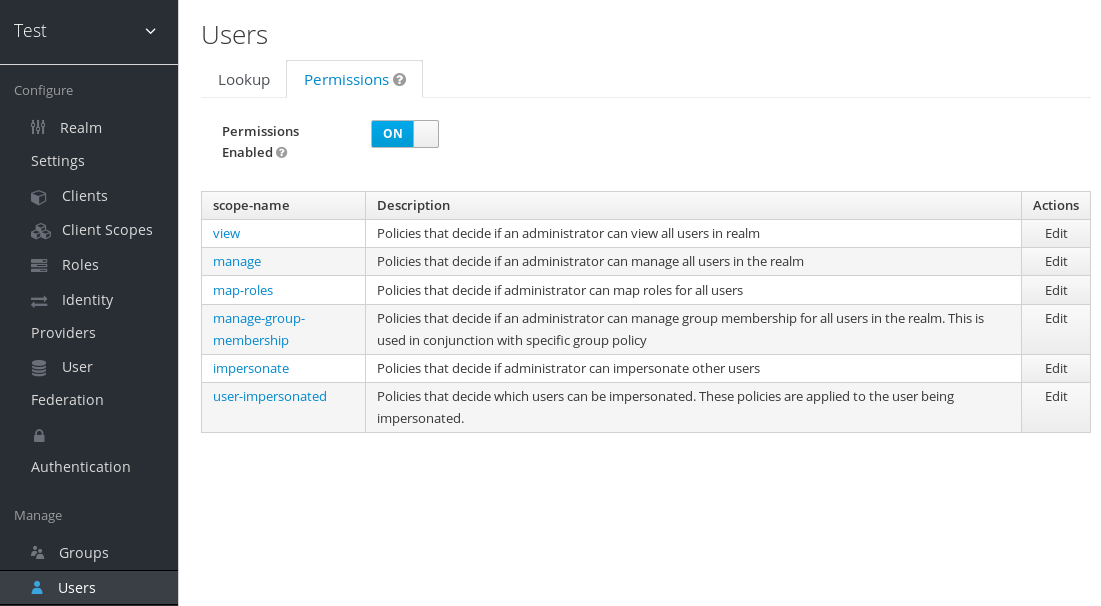
The permission we are interested in is map-roles. This is a restrictive policy in that it only allows admins the ability to map roles to a user. If we click on the map-roles permission and again add the User Policy we created for this, our sales-admin will be able to map roles to any user.
The last thing we have to do is add the view-users role to the sales-admin. This will allow the admin to view users in the realm he wants to add the sales-application roles to.
Add view-users
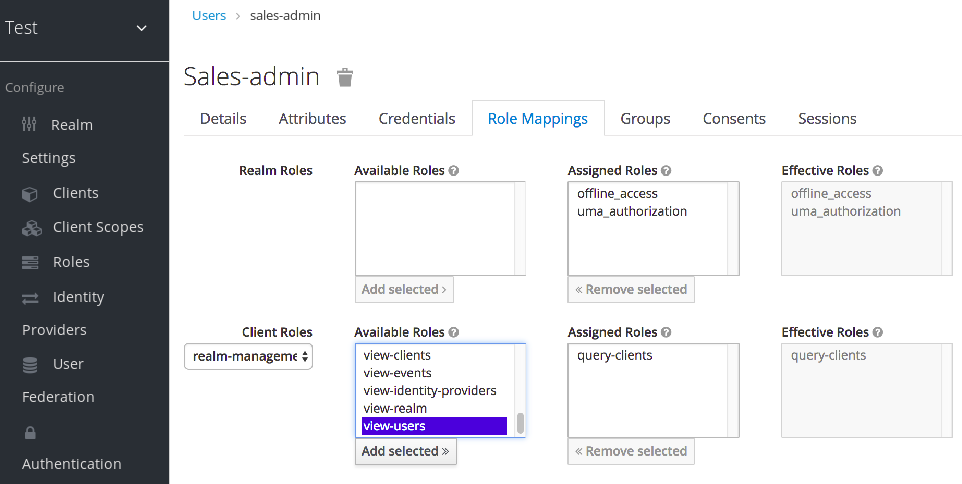
11.3.2.1. Testing It Out.
Next we log out of the master realm and re-login to the dedicated admin console for the test realm using the sales-admin as a username. This is located under /auth/admin/test/console.
You will see that now the sales-admin can view users in the system. If you select one of the users you’ll see that each user detail page is read only, except for the Role Mappings tab. Going to these tab you’ll find that there are no Available roles for the admin to map to the user except when we browse the sales-application roles.
Add viewLeads

We’ve only specified that the sales-admin can map the viewLeads role.
11.3.2.2. Per Client map-roles Shortcut
It would be tedious if we had to do this for every client role that the sales-application published. to make things easier, there’s a way to specify that an admin can map any role defined by a client. If we log back into the admin console to our master realm admin and go back to the sales-application permissions page, you’ll see the map-roles permission.
Client map-roles Permission
If you grant access to this particular parmission to an admin, that admin will be able map any role defined by the client.
11.3.3. Full List of Permissions
You can do a lot more with fine grain permissions beyond managing a specific client or the specific roles of a client. This chapter defines the whole list of permission types that can be described for a realm.
11.3.3.1. Role
When going to the Permissions tab for a specific role, you will see these permission types listed.
- map-role
- Policies that decide if an admin can map this role to a user. These policies only specify that the role can be mapped to a user, not that the admin is allowed to perform user role mapping tasks. The admin will also have to have manage or role mapping permissions. See Users Permissions for more information.
- map-role-composite
-
Policies that decide if an admin can map this role as a composite to another role. An admin can define roles for a client if he has manage permissions for that client but he will not be able to add composites to those roles unless he has the
map-role-compositeprivileges for the role he wants to add as a composite. - map-role-client-scope
- Policies that decide if an admin can apply this role to the scope of a client. Even if the admin can manage the client, he will not have permission to create tokens for that client that contain this role unless this privilege is granted.
11.3.3.2. Client
When going to the Permissions tab for a specific client, you will see these permission types listed.
- view
- Policies that decide if an admin can view the client’s configuration.
- manage
- Policies that decide if an admin can view and manage the client’s configuration. There is some issues with this in that privileges could be leaked unintentionally. For example, the admin could define a protocol mapper that hardcoded a role even if the admin does not have privileges to map the role to the client’s scope. This is currently the limitation of protocol mappers as they don’t have a way to assign individual permissions to them like roles do.
- configure
-
Reduced set of prileges to manage the client. Its like the
managescope except the admin is not allowed to define protocol mappers, change the client template, or the client’s scope. - map-roles
- Policies that decide if an admin can map any role defined by the client to a user. This is a shortcut, easy-of-use feature to avoid having to defin policies for each and every role defined by the client.
- map-roles-composite
- Policies that decide if an admin can map any role defined by the client as a composite to another role. This is a shortcut, easy-of-use feature to avoid having to define policies for each and every role defined by the client.
- map-roles-client-scope
- Policies that decide if an admin can map any role defined by the client to the scope of another client. This is a shortcut, easy-of-use feature to avoid having to define policies for each and every role defined by the client.
11.3.3.3. Users
When going to the Permissions tab for all users, you will see these permission types listed.
- view
- Policies that decide if an admin can view all users in the realm.
- manage
- Policies that decide if an admin can manage all users in the realm. This permission grants the admin the privilege to perfor user role mappings, but it does not specify which roles the admin is allowed to map. You’ll need to define the privilege for each role you want the admin to be able to map.
- map-roles
-
This is a subset of the privileges granted by the
managescope. In this case the admin is only allowed to map roles. The admin is not allowed to perform any other user management operation. Also, likemanage, the roles that the admin is allowed to apply must be specified per role or per set of roles if dealing with client roles. - manage-group-membership
-
Similar to
map-rolesexcept that it pertains to group membership: which groups a user can be added or removed from. These policies just grant the admin permission to manage group membership, not which groups the admin is allowed to manage membership for. You’ll have to specify policies for each group’smanage-memberspermission. - impersonate
- Policies that decide if the admin is allowed to impersonate other users. These policies are applied to the admin’s attributes and role mappings.
- user-impersonated
- Policies that decide which users can be impersonated. These policies will be applied to the user being impersonated. For example, you might want to define a policy that will forbid anybody from impersonating a user that has admin privileges.
11.3.3.4. Group
When going to the Permissions tab for a specific group, you will see these permission types listed.
- view
- Policies that decide if the admin can view information about the group.
- manage
- Policies that decide if the admin can manage the configuration of the group.
- view-members
- Policies that decide if the admin can view the user details of members of the group.
- manage-members
- Policies that decide if the admin can manage the users that belong to this group.
- manage-membership
- Policies that decide if an admin can change the membership of the group. Add or remove members from the group.
11.4. Realm Keys
The authentication protocols that are used by Red Hat Single Sign-On require cryptographic signatures and sometimes encryption. Red Hat Single Sign-On uses asymmetric key pairs, a private and public key, to accomplish this.
Red Hat Single Sign-On has a single active keypair at a time, but can have several passive keys as well. The active keypair is used to create new signatures, while the passive keypairs can be used to verify previous signatures. This makes it possible to regularly rotate the keys without any downtime or interruption to users.
When a realm is created a key pair and a self-signed certificate is automatically generated.
To view the active keys for a realm select the realm in the admin console click on Realm settings then Keys. This will show the currently active keys for the realm.
To view passive or disabled keys select Passive or Disabled. A keypair can have the status Active, but still not be selected as the currently active keypair for the realm. The selected active pair which is used for signatures is selected based on the first key provider sorted by priority that is able to provide an active keypair.
11.4.1. Rotating keys
It’s recommended to regularly rotate keys. To do so you should start by creating new keys with a higher priority than the existing active keys. Or create new keys with the same priority and making the previous keys passive.
Once new keys are available all new tokens and cookies will be signed with the new keys. When a user authenticates to an application the SSO cookie is updated with the new signature. When OpenID Connect tokens are refreshed new tokens are signed with the new keys. This means that over time all cookies and tokens will use the new keys and after a while the old keys can be removed.
How long you wait to delete old keys is a tradeoff between security and making sure all cookies and tokens are updated. In general it should be acceptable to drop old keys after a few weeks. Users that have not been active in the period between the new keys where added and the old keys removed will have to re-authenticate.
This also applies to offline tokens. To make sure they are updated the applications need to refresh the tokens before the old keys are removed.
As a guideline, it may be a good idea to create new keys every 3-6 months and delete old keys 1-2 months after the new keys were created.
11.4.2. Adding a generated keypair
To add a new generated keypair select Providers and choose rsa-generated from the dropdown. You can change the priority to make sure the new keypair becomes the active keypair. You can also change the keysize if you want smaller or larger keys (default is 2048, supported values are 1024, 2048 and 4096).
Click Save to add the new keys. This will generated a new keypair including a self-signed certificate.
Changing the priority for a provider will not cause the keys to be re-generated, but if you want to change the keysize you can edit the provider and new keys will be generated.
11.4.3. Adding an existing keypair and certificate
To add a keypair and certificate obtained elsewhere select Providers and choose rsa from the dropdown. You can change the priority to make sure the new keypair becomes the active keypair.
Click on Select file for Private RSA Key to upload your private key. The file should be encoded in PEM format. You don’t need to upload the public key as it is automatically extracted from the private key.
If you have a signed certificate for the keys click on Select file next to X509 Certificate. If you don’t have one you can skip this and a self-signed certificate will be generated.
11.4.4. Loading keys from a Java Keystore
To add a keypair and certificate stored in a Java Keystore file on the host select Providers and choose java-keystore from the dropdown. You can change the priority to make sure the new keypair becomes the active keypair.
Fill in the values for Keystore, Keystore Password, Key Alias and Key Password and click on Save.
11.4.5. Making keys passive
Locate the keypair in Active then click on the provider in the Provider column. This will take you to the configuration screen for the key provider for the keys. Click on Active to turn it OFF, then click on Save. The keys will no longer be active and can only be used for verifying signatures.
11.4.6. Disabling keys
Locate the keypair in Active then click on the provider in the Provider column. This will take you to the configuration screen for the key provider for the keys. Click on Enabled to turn it OFF, then click on Save. The keys will no longer be enabled.
Alternatively, you can delete the provider from the Providers table.
11.4.7. Compromised keys
Red Hat Single Sign-On has the signing keys stored just locally and they are never shared with the client applications, users or other entities. However if you think that your realm signing key was compromised, you should first generate new keypair as described above and then immediately remove the compromised keypair.
Then to ensure that client applications won’t accept the tokens signed by the compromised key, you should update and push not-before policy for the realm, which is doable from the admin console. Pushing new policy will ensure that client applications won’t accept the existing tokens signed by the compromised key, but also the client application will be forced to download new keypair from the Red Hat Single Sign-On, hence the tokens signed by the compromised key won’t be valid anymore. Note that your REST and confidential clients must have set Admin URL, so that Red Hat Single Sign-On is able to send them the request about pushed not-before policy.
Chapter 12. Identity Brokering
An Identity Broker is an intermediary service that connects multiple service providers with different identity providers. As an intermediary service, the identity broker is responsible for creating a trust relationship with an external identity provider in order to use its identities to access internal services exposed by service providers.
From a user perspective, an identity broker provides a user-centric and centralized way to manage identities across different security domains or realms. An existing account can be linked with one or more identities from different identity providers or even created based on the identity information obtained from them.
An identity provider is usually based on a specific protocol that is used to authenticate and communicate authentication and authorization information to their users. It can be a social provider such as Facebook, Google or Twitter. It can be a business partner whose users need to access your services. Or it can be a cloud-based identity service that you want to integrate with.
Usually, identity providers are based on the following protocols:
-
SAML v2.0 -
OpenID Connect v1.0 -
OAuth v2.0
In the next sections we’ll see how to configure and use Red Hat Single Sign-On as an identity broker, covering some important aspects such as:
-
Social Authentication -
OpenID Connect v1.0 Brokering -
SAML v2.0 Brokering -
Identity Federation
12.1. Brokering Overview
When using Red Hat Single Sign-On as an identity broker, users are not forced to provide their credentials in order to authenticate in a specific realm. Instead, they are presented with a list of identity providers from which they can authenticate.
You can also configure a default identity provider. In this case the user will not be given a choice, but will instead be redirected directly to the default provider.
The following diagram demonstrates the steps involved when using Red Hat Single Sign-On to broker an external identity provider:
Identity Broker Flow
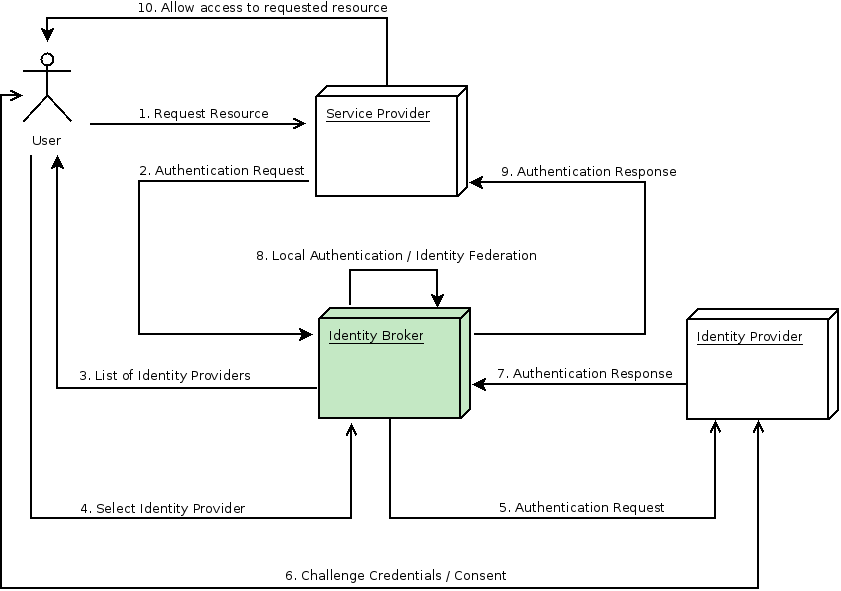
- User is not authenticated and requests a protected resource in a client application.
- The client applications redirects the user to Red Hat Single Sign-On to authenticate.
- At this point the user is presented with the login page where there is a list of identity providers configured in a realm.
- User selects one of the identity providers by clicking on its respective button or link.
- Red Hat Single Sign-On issues an authentication request to the target identity provider asking for authentication and the user is redirected to the login page of the identity provider. The connection properties and other configuration options for the identity provider were previously set by the administrator in the Admin Console.
- User provides his credentials or consent in order to authenticate with the identity provider.
- Upon a successful authentication by the identity provider, the user is redirected back to Red Hat Single Sign-On with an authentication response. Usually this response contains a security token that will be used by Red Hat Single Sign-On to trust the authentication performed by the identity provider and retrieve information about the user.
- Now Red Hat Single Sign-On is going to check if the response from the identity provider is valid. If valid, it will import and create a new user or just skip that if the user already exists. If it is a new user, Red Hat Single Sign-On may ask the identity provider for information about the user if that info doesn’t already exist in the token. This is what we call identity federation. If the user already exists Red Hat Single Sign-On may ask him to link the identity returned from the identity provider with the existing account. We call this process account linking. What exactly is done is configurable and can be specified by setup of First Login Flow. At the end of this step, Red Hat Single Sign-On authenticates the user and issues its own token in order to access the requested resource in the service provider.
- Once the user is locally authenticated, Red Hat Single Sign-On redirects the user to the service provider by sending the token previously issued during the local authentication.
- The service provider receives the token from Red Hat Single Sign-On and allows access to the protected resource.
There are some variations of this flow that we will talk about later. For instance, instead of presenting a list of identity providers, the client application can request a specific one. Or you can tell Red Hat Single Sign-On to force the user to provide additional information before federating his identity.
Different protocols may require different authentication flows. At this moment, all the identity providers supported by Red Hat Single Sign-On use a flow just like described above. However, regardless of the protocol in use, user experience should be pretty much the same.
As you may notice, at the end of the authentication process Red Hat Single Sign-On will always issue its own token to client applications. What this means is that client applications are completely decoupled from external identity providers. They don’t need to know which protocol (eg.: SAML, OpenID Connect, OAuth, etc) was used or how the user’s identity was validated. They only need to know about Red Hat Single Sign-On.
12.2. Default Identity Provider
It is possible to automatically redirect to a identity provider instead of displaying the login form. To enable this go to the Authentication page in the administration console and select the Browser flow. Then click on config for the Identity Provider Redirector authenticator. Set Default Identity Provider to the alias of the identity provider you want to automatically redirect users to.
If the configured default identity provider is not found the login form will be displayed instead.
This authenticator is also responsible for dealing with the kc_idp_hint query parameter. See client suggested identity provider section for more details.
12.3. General Configuration
The identity broker configuration is all based on identity providers. Identity providers are created for each realm and by default they are enabled for every single application. That means that users from a realm can use any of the registered identity providers when signing in to an application.
In order to create an identity provider click the Identity Providers left menu item.
Identity Providers

In the drop down list box, choose the identity provider you want to add. This will bring you to the configuration page for that identity provider type.
Add Identity Provider
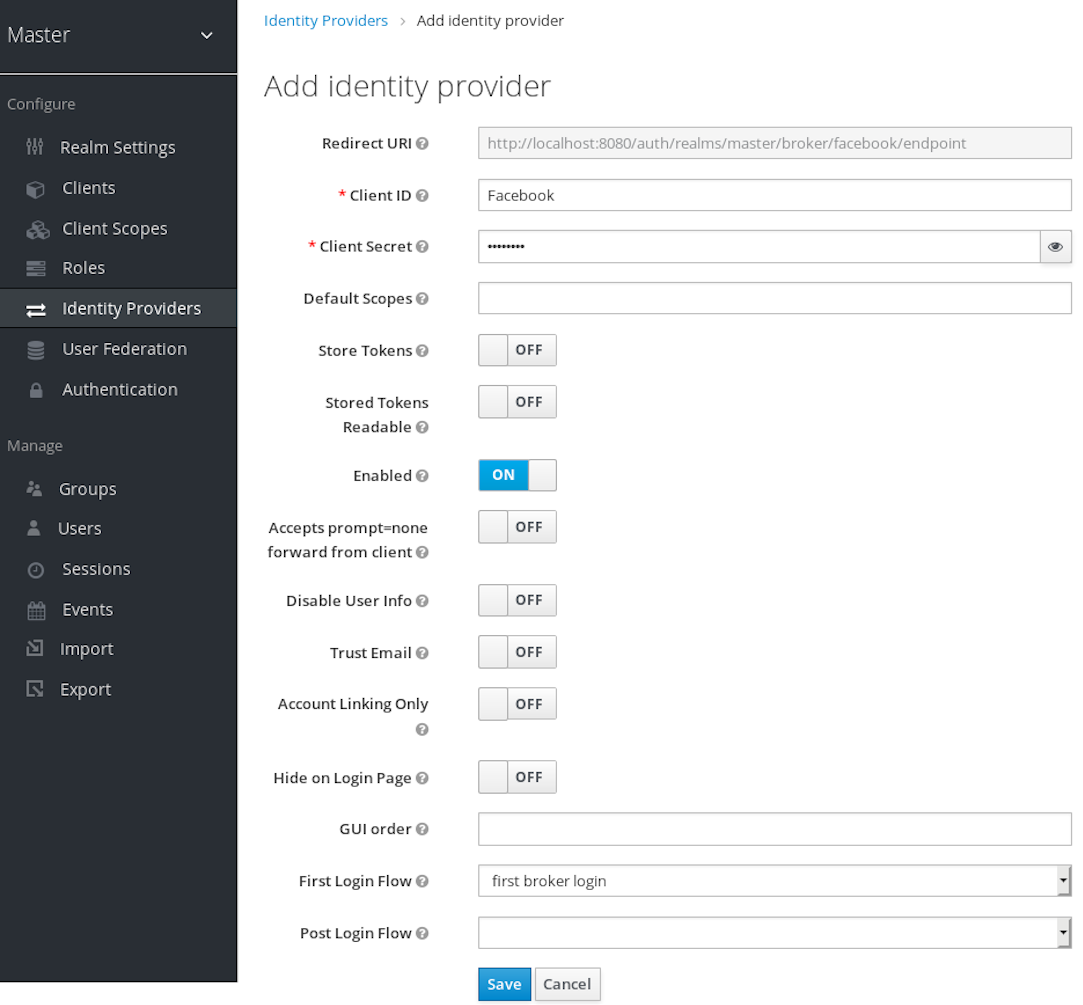
Above is an example of configuring a Google social login provider. Once you configure an IDP, it will appear on the Red Hat Single Sign-On login page as an option.
IDP login page

- Social
- Social providers allow you to enable social authentication in your realm. Red Hat Single Sign-On makes it easy to let users log in to your application using an existing account with a social network. Currently supported providers include: Twitter, Facebook, Google, LinkedIn, Instagram, Microsoft, PayPal, Openshift v3, GitHub, GitLab, Bitbucket, and Stack Overflow.
- Protocol-based
- Protocol-based providers are those that rely on a specific protocol in order to authenticate and authorize users. They allow you to connect to any identity provider compliant with a specific protocol. Red Hat Single Sign-On provides support for SAML v2.0 and OpenID Connect v1.0 protocols. It makes it easy to configure and broker any identity provider based on these open standards.
Although each type of identity provider has its own configuration options, all of them share some very common configuration. Regardless of which identity provider you are creating, you’ll see the following configuration options available:
| Configuration | Description |
|---|---|
| Alias |
The alias is a unique identifier for an identity provider. It is used to reference an identity provider internally. Some protocols such as OpenID Connect require a redirect URI or callback url in order to communicate with an identity provider. In this case, the alias is used to build the redirect URI. Every single identity provider must have an alias. Examples are |
| Enabled | Turn the provider on/off. |
| Hide on Login Page | When this switch is on, this provider will not be shown as a login option on the login page. Clients can still request to use this provider by using the 'kc_idp_hint' parameter in the URL they use to request a login. |
| Account Linking Only | When this switch is on, this provider cannot be used to login users and will not be shown as an option on the login page. Existing accounts can still be linked with this provider though. |
| Store Tokens | Whether or not to store the token received from the identity provider. |
| Stored Tokens Readable | Whether or not users are allowed to retrieve the stored identity provider token. This also applies to the broker client-level role read token. |
| Trust Email | If the identity provider supplies an email address this email address will be trusted. If the realm required email validation, users that log in from this IDP will not have to go through the email verification process. |
| GUI Order | The order number that sorts how the available IDPs are listed on the login page. |
| First Login Flow | This is the authentication flow that will be triggered for users that log into Red Hat Single Sign-On through this IDP for the first time ever. |
| Post Login Flow | Authentication flow that is triggered after the user finishes logging in with the external identity provider. |
12.5. OpenID Connect v1.0 Identity Providers
Red Hat Single Sign-On can broker identity providers based on the OpenID Connect protocol. These IDPs must support the Authorization Code Flow as defined by the specification in order to authenticate the user and authorize access.
To begin configuring an OIDC provider, go to the Identity Providers left menu item and select OpenID Connect v1.0 from the Add provider drop down list. This will bring you to the Add identity provider page.
Add Identity Provider
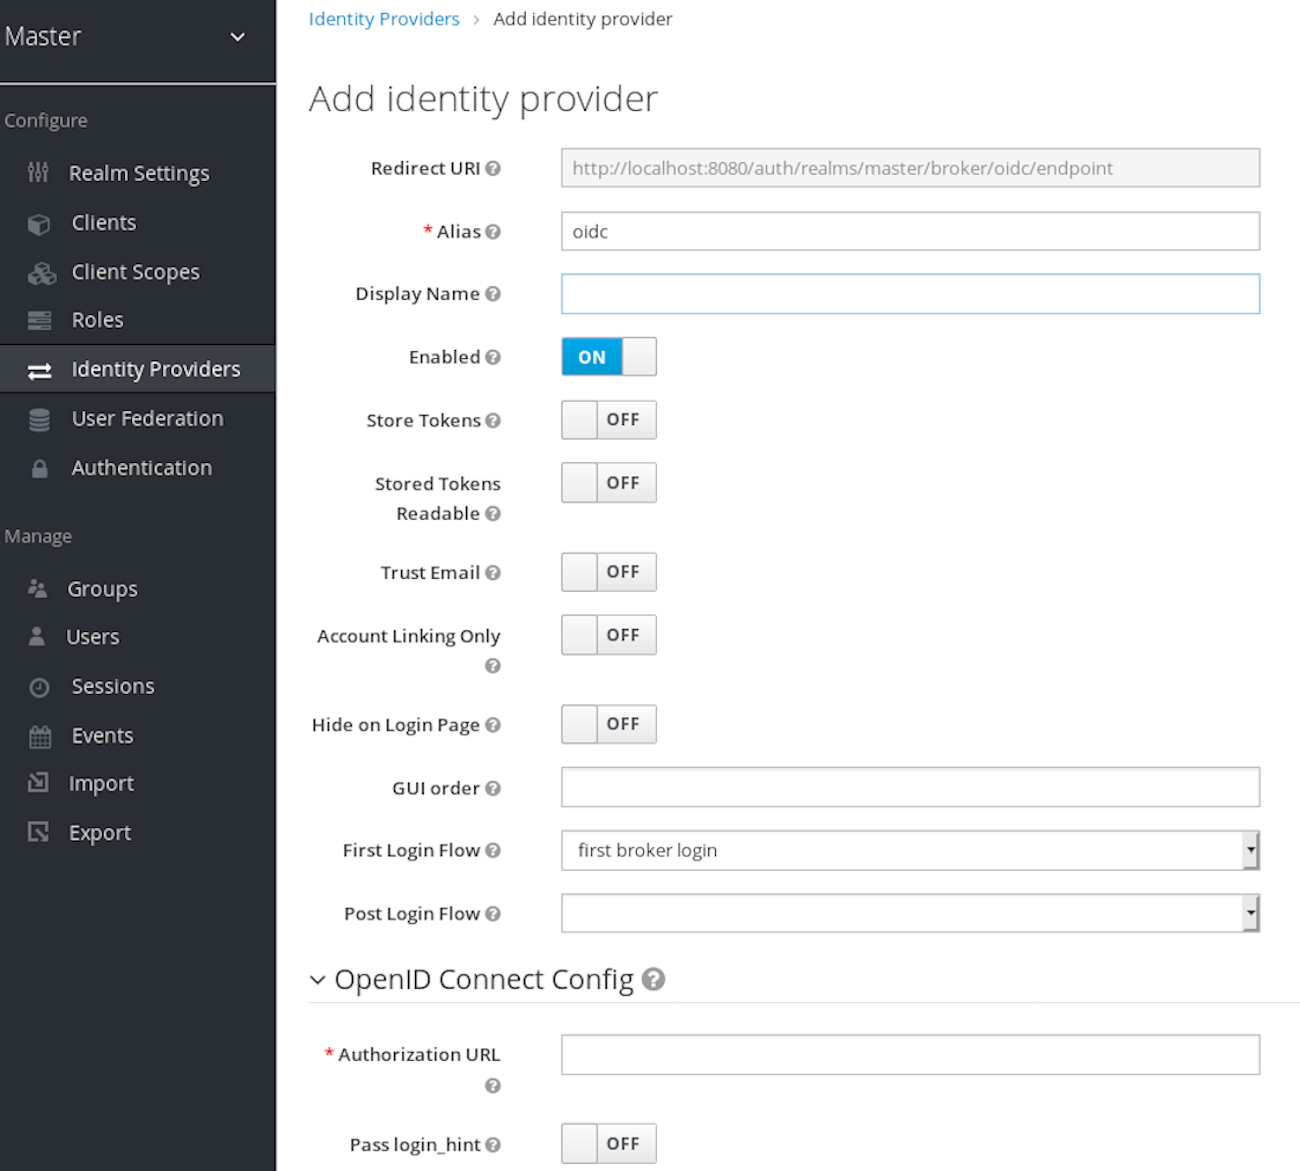
The initial configuration options on this page are described in General IDP Configuration. You must define the OpenID Connect configuration options as well. They basically describe the OIDC IDP you are communicating with.
| Configuration | Description |
|---|---|
| Authorization URL | Authorization URL endpoint required by the OIDC protocol. |
| Token URL | Token URL endpoint required by the OIDC protocol. |
| Logout URL | Logout URL endpoint defined in the OIDC protocol. This value is optional. |
| Backchannel Logout | Backchannel logout is a background, out-of-band, REST invocation to the IDP to logout the user. Some IDPs can only perform logout through browser redirects as they may only be able to identity sessions via a browser cookie. |
| User Info URL | User Info URL endpoint defined by the OIDC protocol. This is an endpoint from which user profile information can be downloaded. |
| Client Authentication | Switch to define the Client Authentication method to be used with the Authorization Code Flow. In the case of JWT signed with private key, the realm private key is used. In the other cases, a client secret has to be defined. For more details, see the Client Authentication specifications. |
| Client ID | This realm will act as an OIDC client to the external IDP. Your realm will need an OIDC client ID when using the Authorization Code Flow to interact with the external IDP. |
| Client Secret | This realm will need a client secret to use when using the Authorization Code Flow. The value of this field can refer a value from an external vault. |
| Issuer | Responses from the IDP may contain an issuer claim. This config value is optional. If specified, this claim will be validated against the value you provide. |
| Default Scopes |
Space-separated list of OIDC scopes to send with the authentication request. The default is |
| Prompt | Another optional switch. This is the prompt parameter defined by the OIDC specification. Through it you can force re-authentication and other options. See the specification for more details. |
| Accepts prompt=none forward from client |
Specifies whether the IDP accepts forwarded authentication requests that contain the prompt=none query parameter or not. When a realm receives an auth request with
It is important to note that if the user is not authenticated in the IDP, the client will still get a |
| Validate Signatures | Another optional switch. This is to specify if Red Hat Single Sign-On will verify the signatures on the external ID Token signed by this identity provider. If this is on, the Red Hat Single Sign-On will need to know the public key of the external OIDC identity provider. See below for how to set it up. WARNING: For the performance purposes, Red Hat Single Sign-On caches the public key of the external OIDC identity provider. If you think that private key of your identity provider was compromised, it is obviously good to update your keys, but it’s also good to clear the keys cache. See Clearing the cache section for more details. |
| Use JWKS URL |
Applicable if |
| JWKS URL |
URL where the identity provider JWK keys are stored. See the JWK specification for more details. If you use an external Red Hat Single Sign-On as an identity provider, then you can use URL like http://broker-keycloak:8180/auth/realms/test/protocol/openid-connect/certs assuming your brokered Red Hat Single Sign-On is running on http://broker-keycloak:8180 and it’s realm is |
| Validating Public Key |
Applicable if |
| Validating Public Key Id |
Applicable if |
You can also import all this configuration data by providing a URL or file that points to OpenID Provider Metadata (see OIDC Discovery specification). If you are connecting to a Red Hat Single Sign-On external IDP, you can import the IDP settings from the url <root>/auth/realms/{realm-name}/.well-known/openid-configuration. This link is a JSON document describing metadata about the IDP.
12.6. SAML v2.0 Identity Providers
Red Hat Single Sign-On can broker identity providers based on the SAML v2.0 protocol.
To begin configuring an SAML v2.0 provider, go to the Identity Providers left menu item and select SAML v2.0 from the Add provider drop down list. This will bring you to the Add identity provider page.
Add Identity Provider
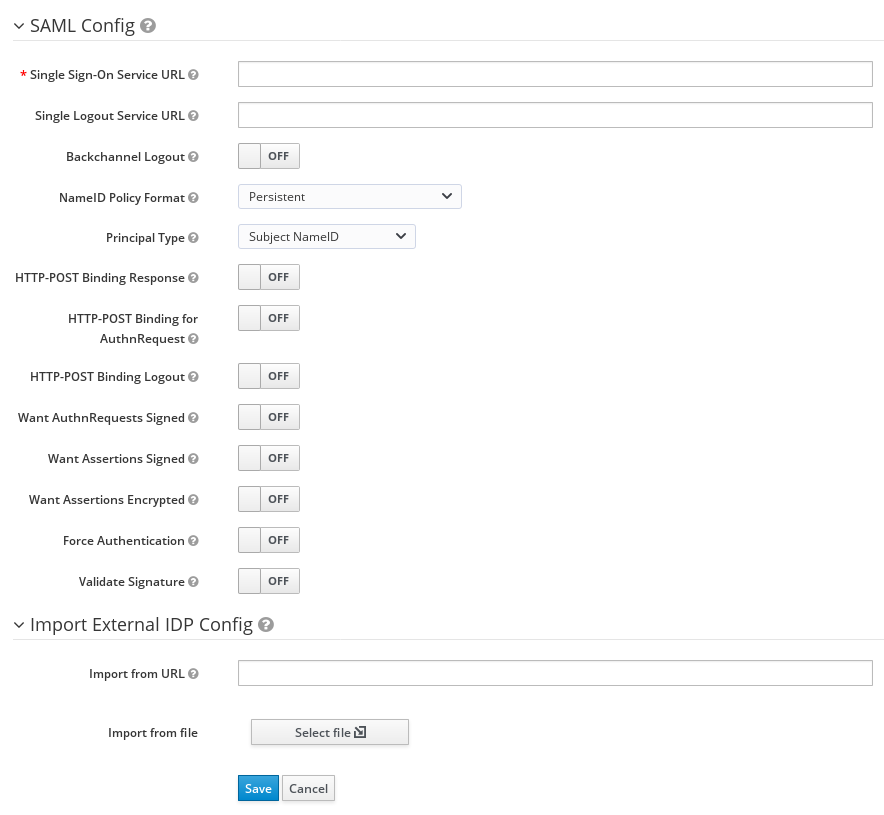
The initial configuration options on this page are described in General IDP Configuration. You must define the SAML configuration options as well. They basically describe the SAML IDP you are communicating with.
| Configuration | Description |
|---|---|
| Service Provider Entity ID |
This is a required field and specifies the SAML Entity ID that the remote Identity Provider will use to identify requests coming from this Service Provider. By default it is set to the realm base URL |
| Single Sign-On Service URL | This is a required field and specifies the SAML endpoint to start the authentication process. If your SAML IDP publishes an IDP entity descriptor, the value of this field will be specified there. |
| Single Logout Service URL | This is an optional field that specifies the SAML logout endpoint. If your SAML IDP publishes an IDP entity descriptor, the value of this field will be specified there. |
| Backchannel Logout | Enable if your SAML IDP supports backchannel logout. |
| NameID Policy Format |
Specifies the URI reference corresponding to a name identifier format. Defaults to |
| Principal Type | Specifies which part of the SAML assertion will be used to identify and track external user identities. Can be either Subject NameID or SAML attribute (either by name or by friendly name). |
| Principal Attribute | If Principal is set to either "Attribute [Name]" or "Attribute [Friendly Name]", this field will specify the name or the friendly name of the identifying attribute, respectively. |
| HTTP-POST Binding Response |
When this realm responds to any SAML requests sent by the external IDP, which SAML binding should be used? If set to |
| HTTP-POST Binding for AuthnRequest |
When this realm requests authentication from the external SAML IDP, which SAML binding should be used? If set to |
| Want AuthnRequests Signed | If true, it will use the realm’s keypair to sign requests sent to the external SAML IDP. |
| Signature Algorithm |
If |
| SAML Signature Key Name |
Signed SAML documents sent via POST binding contain identification of signing key in |
| Force Authentication | Indicates that the user will be forced to enter their credentials at the external IDP even if they are already logged in. |
| Validate Signature | Whether or not the realm should expect that SAML requests and responses from the external IDP to be digitally signed. It is highly recommended you turn this on! |
| Validating X509 Certificate | The public certificate that will be used to validate the signatures of SAML requests and responses from the external IDP. |
You can also import all this configuration data by providing a URL or file that points to the SAML IDP entity descriptor of the external IDP. If you are connecting to a Red Hat Single Sign-On external IDP, you can import the IDP settings from the URL <root>/auth/realms/{realm-name}/protocol/saml/descriptor. This link is an XML document describing metadata about the IDP.
You can also import all this configuration data by providing a URL or XML file that points to the entity descriptor of the external SAML IDP you want to connect to.
12.6.1. SP Descriptor
Once you create a SAML provider, there is an EXPORT button that appears when viewing that provider. Clicking this button will export a SAML SP entity descriptor which you can use to import into the external SP.
This metadata is also available publicly by going to the URL.
http[s]://{host:port}/auth/realms/{realm-name}/broker/{broker-alias}/endpoint/descriptor12.7. Client-suggested Identity Provider
OIDC applications can bypass the Red Hat Single Sign-On login page by specifying a hint on which identity provider they want to use.
This is done by setting the kc_idp_hint query parameter in the Authorization Code Flow authorization endpoint.
Red Hat Single Sign-On OIDC client adapters also allow you to specify this query parameter when you access a secured resource at the application.
For example:
GET /myapplication.com?kc_idp_hint=facebook HTTP/1.1
Host: localhost:8080
In this case, it is expected that your realm has an identity provider with an alias facebook. If this provider doesn’t exist the login form will be displayed.
If you are using keycloak.js adapter, you can also achieve the same behavior:
var keycloak = new Keycloak('keycloak.json');

keycloak.createLoginUrl({
	idpHint: 'facebook'
});
The kc_idp_hint query parameter also allows the client to override the default identity provider if one is configured for the Identity Provider Redirector authenticator. The client can also disable the automatic redirecting by setting the kc_idp_hint query parameter to an empty value.
12.8. Mapping Claims and Assertions
You can import the SAML and OpenID Connect metadata provided by the external IDP you are authenticating with into the environment of the realm. This allows you to extract user profile metadata and other information so that you can make it available to your applications.
Each new user that logs into your realm via an external identity provider will have an entry for them created in the local Red Hat Single Sign-On database, based on the metadata from the SAML or OIDC assertions and claims.
If you click on an identity provider listed in the Identity Providers page for your realm, you will be brought to the IDPs Settings tab. On this page there is also a Mappers tab. Click on that tab to start mapping your incoming IDP metadata.
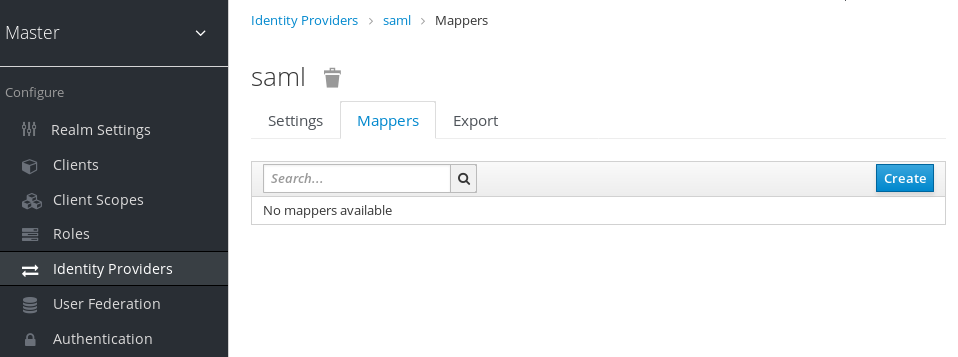
There is a Create button on this page. Clicking on this create button allows you to create a broker mapper. Broker mappers can import SAML attributes or OIDC ID/Access token claims into user attributes and user role mappings.
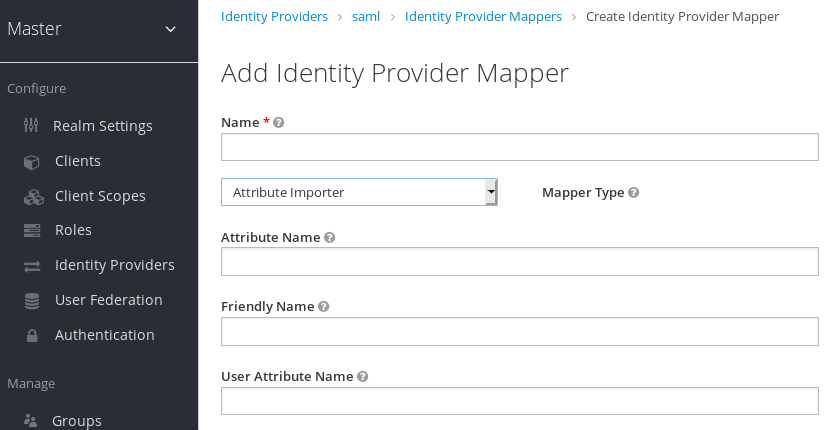
Select a mapper from the Mapper Type list. Hover over the tooltip to see a description of what the mapper does. The tooltips also describe what configuration information you need to enter. Click Save and your new mapper will be added.
For JSON based claims, you can use dot notation for nesting and square brackets to access array fields by index. For example 'contact.address[0].country'.
To investigate the structure of user profile JSON data provided by social providers you can enable the DEBUG level logger org.keycloak.social.user_profile_dump. This is done in the server’s app-server configuration file (domain.xml or standalone.xml).
12.9. Available User Session Data
After a user logs in from the external IDP, there is some additional user session note data that Red Hat Single Sign-On stores that you can access. This data can be propagated to the client requesting a login via the token or SAML assertion being passed back to it by using an appropriate client mapper.
- identity_provider
- This is the IDP alias of the broker used to perform the login.
- identity_provider_identity
-
This is the IDP username of the currently authenticated user. This is often the same as the Red Hat Single Sign-On username, but doesn’t necessarily needs to be. For example Red Hat Single Sign-On user
johncan be linked to the Facebook userjohn123@gmail.com, so in that case value of user session note will bejohn123@gmail.com.
You can use a Protocol Mapper of type User Session Note to propagate this information to your clients.
12.10. First Login Flow
When a user logs in through identity brokering some aspects of the user are imported and linked within the realm’s local database. When Red Hat Single Sign-On successfully authenticates users through an external identity provider there can be two situations:
- There is already a Red Hat Single Sign-On user account imported and linked with the authenticated identity provider account. In this case, Red Hat Single Sign-On will just authenticate as the existing user and redirect back to application.
- There is not yet an existing Red Hat Single Sign-On user account imported and linked for this external user. Usually you just want to register and import the new account into Red Hat Single Sign-On database, but what if there is an existing Red Hat Single Sign-On account with the same email? Automatically linking the existing local account to the external identity provider is a potential security hole as you can’t always trust the information you get from the external identity provider.
Different organizations have different requirements when dealing with some of the conflicts and situations listed above. For this, there is a First Login Flow option in the IDP settings which allows you to choose a workflow that will be used after a user logs in from an external IDP the first time. By default it points to first broker login flow, but you can configure and use your own flow and use different flows for different identity providers.
The flow itself is configured in admin console under Authentication tab. When you choose First Broker Login flow, you will see what authenticators are used by default. You can re-configure the existing flow. (For example you can disable some authenticators, mark some of them as required, configure some authenticators, etc).
12.10.1. Default First Login Flow
Let’s describe the default behavior provided by First Broker Login flow.
- Review Profile
-
This authenticator might display the profile info page, where the user can review their profile retrieved from an identity provider. The authenticator is configurable. You can set the
Update Profile On First Loginoption. WhenOn, users will be always presented with the profile page asking for additional information in order to federate their identities. Whenmissing, users will be presented with the profile page only if some mandatory information (email, first name, last name) is not provided by the identity provider. IfOff, the profile page won’t be displayed, unless user clicks in later phase onReview profile infolink (page displayed in later phase byConfirm Link Existing Accountauthenticator). - Create User If Unique
-
This authenticator checks if there is already an existing Red Hat Single Sign-On account with the same email or username like the account from the identity provider. If it’s not, then the authenticator just creates a new local Red Hat Single Sign-On account and links it with the identity provider and the whole flow is finished. Otherwise it goes to the next
Handle Existing Accountsubflow. If you always want to ensure that there is no duplicated account, you can mark this authenticator asREQUIRED. In this case, the user will see the error page if there is an existing Red Hat Single Sign-On account and the user will need to link his identity provider account through Account management. - Confirm Link Existing Account
-
On the info page, the user will see that there is an existing Red Hat Single Sign-On account with the same email. They can review their profile again and use different email or username (flow is restarted and goes back to
Review Profileauthenticator). Or they can confirm that they want to link their identity provider account with their existing Red Hat Single Sign-On account. Disable this authenticator if you don’t want users to see this confirmation page, but go straight to linking identity provider account by email verification or re-authentication. - Verify Existing Account By Email
-
This authenticator is
ALTERNATIVEby default, so it’s used only if the realm has SMTP setup configured. It will send email to the user, where they can confirm that they want to link the identity provider with their Red Hat Single Sign-On account. Disable this if you don’t want to confirm linking by email, but instead you always want users to reauthenticate with their password (and alternatively OTP). - Verify Existing Account By Re-authentication
- This authenticator is used if email authenticator is disabled or not available (SMTP not configured for realm). It will display a login screen where the user needs to authenticate to link their Red Hat Single Sign-On account with the Identity provider. User can also re-authenticate with some different identity provider, which is already linked to their Red Hat Single Sign-On account. You can also force users to use OTP. Otherwise it’s optional and used only if OTP is already set for the user account.
12.10.2. Automatically Link Existing First Login Flow
The AutoLink authenticator would be dangerous in a generic environment where users can register themselves using arbitrary usernames/email addresses. Do not use this authenticator unless registration of users is carefully curated and usernames/email addresses are assigned, not requested.
In order to configure a first login flow in which users are automatically linked without being prompted, create a new flow with the following two authenticators:
- Create User If Unique
- This authenticator ensures that unique users are handled. Set the authenticator requirement to "Alternative".
- Automatically Set Existing User
- Automatically sets an existing user to the authentication context without any verification. Set the authenticator requirement to "Alternative".
The described setup uses two authenticators. This setup is the simplest one, but it is possible to use other authenticators according to your needs. For example, you can add the Review Profile authenticator to the beginning of the flow if you still want end users to confirm their profile information. You can also add authentication mechanisms to this flow, forcing a user to verify his credentials. This would require a more complex flow, for example setting the "Automatically Set Existing User" and "Password Form" as "Required" in an "Alternative" sub-flow.
12.10.3. Disabling Automatic User Creation
The Default first login flow will look up a Keycloak account matching the external identity, and will then offer to link them; if there is no matching Keycloak account, it will automatically create one. This default behavior may be unsuitable for some setups, for example, when using read-only LDAP user store (which means all users are pre-created). In this case, automatic user creation should be turned off. To disable user creation:
-
open the
First Broker Loginflow configuration; -
set
Create User If UniquetoDISABLED; -
set
Confirm Link Existing AccounttoDISABLED.
This configuration also implies that Keycloak itself won’t be able to determine which internal account would correspond to the external identity. Therefore, the Verify Existing Account By Re-authentication authenticator will ask the user to provide both username and password.
12.11. Retrieving External IDP Tokens
Red Hat Single Sign-On allows you to store tokens and responses from the authentication process with the external IDP. For that, you can use the Store Token configuration option on the IDP’s settings page.
Application code can retrieve these tokens and responses to pull in extra user information, or to securely invoke requests on the external IDP. For example, an application might want to use the Google token to invoke on other Google services and REST APIs. To retrieve a token for a particular identity provider you need to send a request as follows:
GET /auth/realms/{realm}/broker/{provider_alias}/token HTTP/1.1
Host: localhost:8080
Authorization: Bearer <KEYCLOAK ACCESS TOKEN>
An application must have authenticated with Red Hat Single Sign-On and have received an access token. This access token will need to have the broker client-level role read-token set. This means that the user must have a role mapping for this role and the client application must have that role within its scope. In this case, given that you are accessing a protected service in Red Hat Single Sign-On, you need to send the access token issued by Red Hat Single Sign-On during the user authentication. In the broker configuration page you can automatically assign this role to newly imported users by turning on the Stored Tokens Readable switch.
These external tokens can be re-established by either logging in again through the provider, or using the client-initiated account linking API.
12.12. Identity broker logout
When logout from Red Hat Single Sign-On is triggered, Red Hat Single Sign-On will send a request to the external identity provider that was used to login to Keycloak, and the user will be logged out from this identity provider as well. It is possible to skip this behavior and avoid logout at the external identity provider. See adapter logout documentation for more details.
Chapter 13. User Session Management
When a user logs into a realm, Red Hat Single Sign-On maintains a user session for them and remembers each and every client they have visited within the session. There are a lot of administrative functions that realm admins can perform on these user sessions. They can view login stats for the entire realm and dive down into each client to see who is logged in and where. Admins can logout a user or a set of users from the Admin Console. They can revoke tokens and set up all the token and session timeouts there too.
13.1. Administering Sessions
If you go to the Sessions left menu item you can see a top level view of the number of sessions that are currently active in the realm.
Sessions
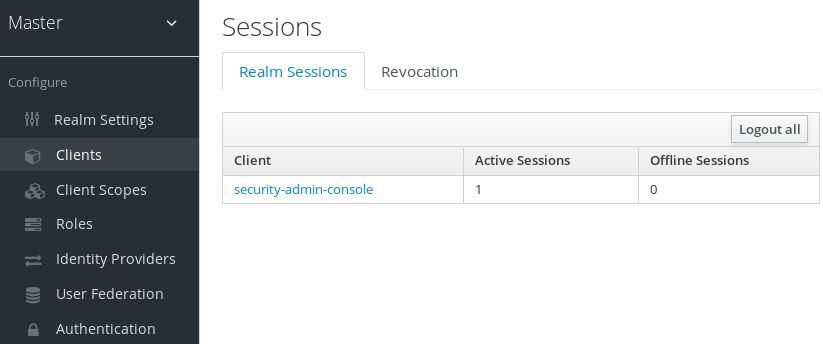
A list of clients is given and how many active sessions there currently are for that client. You can also log out all users in the realm by clicking the Logout all button on the right side of this list.
13.1.1. Limitations of the Logout all Operation
Any SSO cookies set will now be invalid and clients that request authentication in active browser sessions will now have to re-login. Only certain clients are notified of this logout event, specifically clients that are using the Red Hat Single Sign-On OIDC client adapter. Other client types, such as SAML, will not receive a backchannel logout request.
It is important to note that any outstanding access tokens are not revoked by clicking Logout all. They have to expire naturally. You have to push a revocation policy out to clients, but that also only works with clients using the Red Hat Single Sign-On OIDC client adapter.
13.1.2. Application Drilldown
On the Sessions page, you can also drill down to each client. This will bring you to the Sessions tab of that client. Clicking on the Show Sessions button there allows you to see which users are logged into that application.
Application Sessions

13.1.3. User Drilldown
If you go to the Sessions tab of an individual user, you can also view the session information.
User Sessions
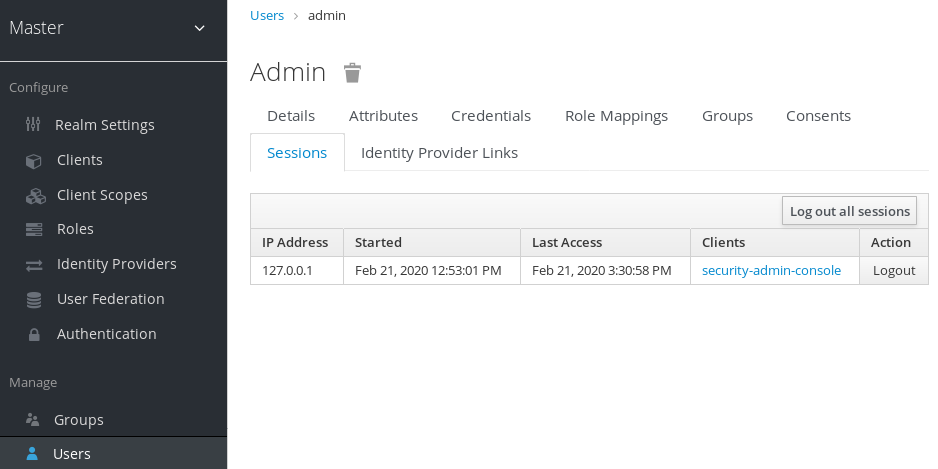
13.2. Revocation Policies
If your system is compromised you will want a way to revoke all sessions and access tokens that have been handed out. You can do this by going to the Revocation tab of the Sessions screen.
Revocation
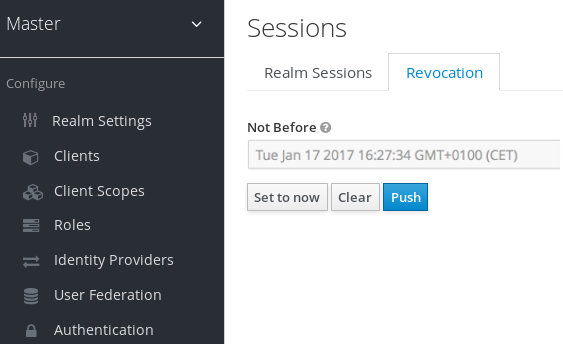
You can only set a time-based revocation policy. The console allows you to specify a time and date where any session or token issued before that time and date is invalid. The Set to now will set the policy to the current time and date. The Push button will push this revocation policy to any registered OIDC client that has the Red Hat Single Sign-On OIDC client adapter installed.
13.3. Session and Token Timeouts
Red Hat Single Sign-On gives you fine grain control of session, cookie, and token timeouts. This is all done on the Tokens tab in the Realm Settings left menu item.
Tokens Tab
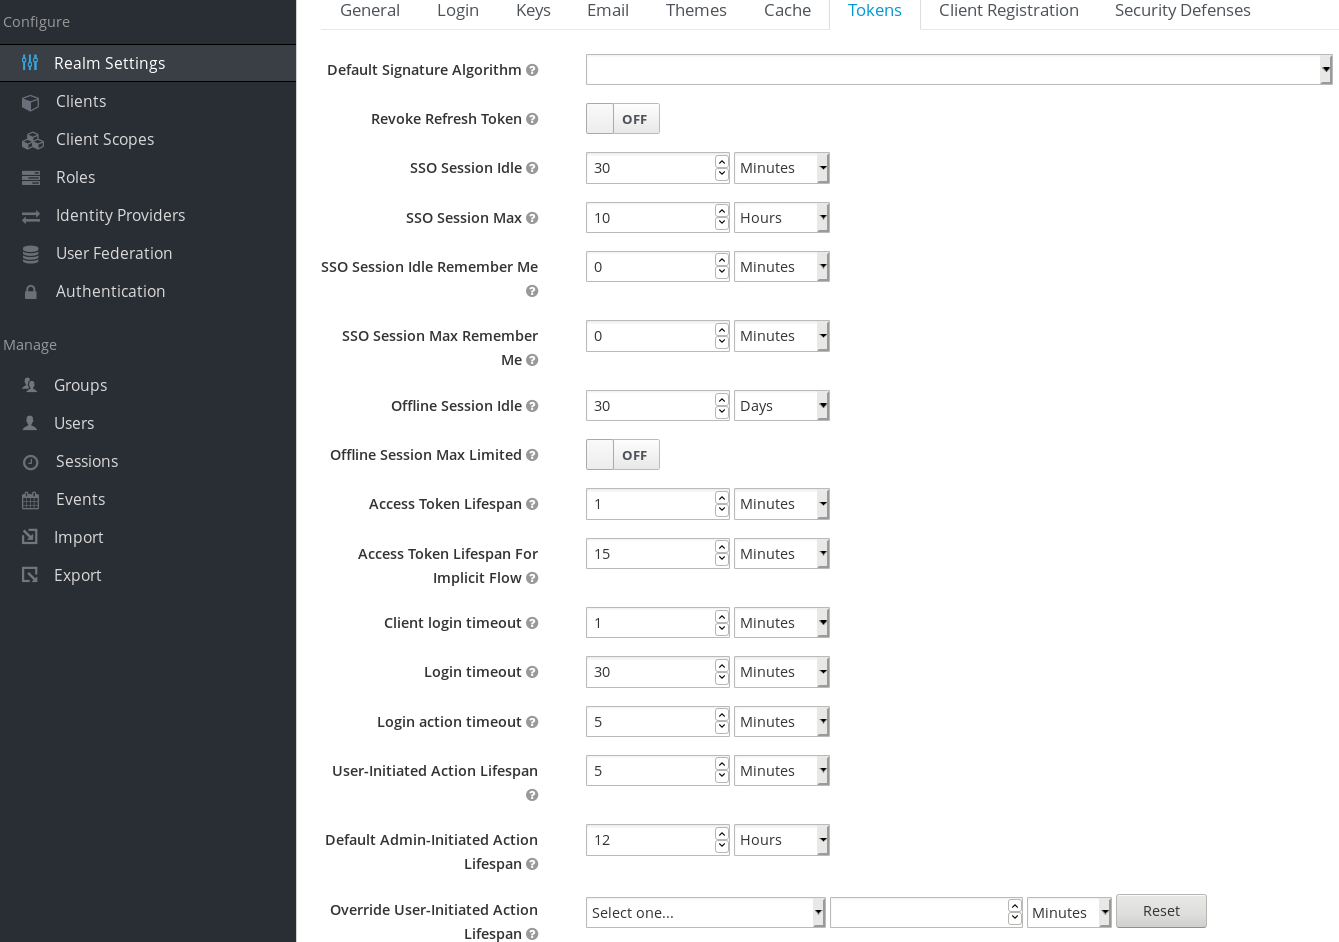
Let’s walk through each of the items on this page.
| Configuration | Description |
|---|---|
| Default Signature Algorithm | The default algorithm that is used to assign tokens for this realm. |
| Revoke Refresh Token | For OIDC clients that are doing the refresh token flow, this flag, if on, will revoke that refresh token and issue another token with the request that the client has to use. The result is that each refresh token is used only once. |
| SSO Session Idle | Also pertains to OIDC clients. If the user is not active for longer than this timeout, the user session will be invalidated. The idle timeout is reset by a client requesting authentication or by a refresh token request. There is a small window of time that is always added to the idle timeout before the session invalidation takes effect. See the note below. |
| SSO Session Max | Maximum time before a user session is expired and invalidated. This option controls the maximum time that a user session can remain active, regardless of user activity. |
| SSO Session Idle Remember Me | Same as the standard SSO Session Idle configuration but specific to logins with Remember Me enabled. It allows for the specification of longer session idle timeouts when Remember Me is selected during the login process. It is an optional configuration and if not set to a value greater than 0 it uses the same idle timeout as set in the SSO Session Idle configuration. |
| SSO Session Max Remember Me | Same as the standard SSO Session Max but specific to logins with Remember Me enabled. It allows for the specification of longer lived sessions when Remember Me is selected during the login process. It is an optional configuration and if not set to a value greater than 0 it uses the same session lifespan as set in the SSO Session Max configuration. |
| Offline Session Idle | For offline access, this is the time the session is allowed to remain idle before the offline token is revoked. There is a small window of time that is always added to the idle timeout before the session invalidation takes effect. See the note below. |
| Offline Session Max Limited | For offline access, if this flag is on, Offline Session Max is enabled to control the maximum time the offline token can remain active, regardless of user activity. |
| Offline Session Max | For offline access, this is the maximum time before the corresponding offline token is revoked. This option controls the maximum time the offline token can remain active, regardless of user activity. |
| Access Token Lifespan | When an OIDC access token is created, this value affects the expiration. |
| Access Token Lifespan For Implicit Flow | With the Implicit Flow no refresh token is provided. For this reason there’s a separate timeout for access tokens created with the Implicit Flow. |
| Client login timeout | This is the maximum time that a client has to finish the Authorization Code Flow in OIDC. |
| Login timeout | Total time a login must take. If authentication takes longer than this time then the user will have to start the authentication process over. |
| Login action timeout | Maximum time a user can spend on any one page in the authentication process. |
| User-Initiated Action Lifespan | Maximum time before an action permit sent by a user (e.g. forgot password e-mail) is expired. This value is recommended to be short because it is expected that the user would react to self-created action quickly. |
| Default Admin-Initiated Action Lifespan | Maximum time before an action permit sent to a user by an admin is expired. This value is recommended to be long to allow admins send e-mails for users that are currently offline. The default timeout can be overridden right before issuing the token. |
| Override User-Initiated Action Lifespan | Permits the possibility of having independent timeouts per operation (for example, e-mail verification, forgot password, user actions and Identity Provider E-mail Verification). This field is optional. If nothing is specified, it defaults to the value configured at User-Initiated Action Lifespan. |
For idle timeouts, there is a small window of time (2 minutes) during which the session is kept unexpired. For example, when you have timeout set to 30 minutes, it will be actually 32 minutes before the session is expired. This is needed for some corner-case scenarios in cluster and cross-datacenter environments, in cases where the token was refreshed on one cluster node for a very short time before the expiration and the other cluster nodes would in the meantime incorrectly consider the session as expired, because they had not yet received the message about successful refresh from the node which did the refresh.
13.4. Offline Access
Offline access is a feature described in OpenID Connect specification . The idea is that during login, your client application will request an Offline token instead of a classic Refresh token. The application can save this offline token in a database or on disk and can use it later even if user is logged out. This is useful if your application needs to do some "offline" actions on behalf of user even when the user is not online. An example is a periodic backup of some data every night.
Your application is responsible for persisting the offline token in some storage (usually a database) and then using it to retrieve new access token from Red Hat Single Sign-On server.
The difference between a classic Refresh token and an Offline token is, that an offline token will never expire by default and is not subject of the SSO Session Idle timeout and SSO Session Max lifespan. The offline token is valid even after a user logout or server restart. However by default you do need to use the offline token for a refresh token action at least once per 30 days (this value, Offline Session Idle timeout, can be changed in the administration console in the Tokens tab under Realm Settings). Moreover, if you enable the option Offline Session Max Limited, then the offline token expires after 60 days regardless of using the offline token for a refresh token action (this value, Offline Session Max, can also be changed in the administration console in the Tokens tab under Realm Settings). Also if you enable the option Revoke refresh tokens, then each offline token can be used just once. So after refresh, you always need to store the new offline token from refresh response into your DB instead of the previous one.
Users can view and revoke offline tokens that have been granted by them in the User Account Service. The admin user can revoke offline tokens for individual users in admin console in the Consents tab of a particular user. The admin can also view all the offline tokens issued in the Offline Access tab of each client. Offline tokens can also be revoked by setting a revocation policy.
To be able to issue an offline token, users need to have the role mapping for the realm-level role offline_access. Clients also need to have that role in their scope. Finally, the client needs to have an offline_access client scope added as an Optional client scope to it, which is done by default.
The client can request an offline token by adding the parameter scope=offline_access when sending authorization request to Red Hat Single Sign-On. The Red Hat Single Sign-On OIDC client adapter automatically adds this parameter when you use it to access secured URL of your application (i.e. http://localhost:8080/customer-portal/secured?scope=offline_access). The Direct Access Grant and Service Accounts also support offline tokens if you include scope=offline_access in the body of the authentication request.
13.5. Transient sessions
Red Hat Single Sign-On has the concept of transient sessions. When transient sessions are used, no real user session is created after successful authentication. Only a temporary transient session is created for the scope of the current request that successfully authenticated the user. This transient session allows Red Hat Single Sign-On to run protocol mappers after the authentication.
When transient sessions are used, the client application has no way to refresh or introspect the token or check if a specific session is valid. In some situations, these actions are not needed, so you can avoid the additional overhead for persistence of user sessions. This would improve performance and save memory and network communication (in case of cluster and cross-datacenter environments).
Chapter 14. User Storage Federation
Many companies have existing user databases that hold information about users and their passwords or other credentials. In many cases, it is just not possible to migrate off of those existing stores to a pure Red Hat Single Sign-On deployment. Red Hat Single Sign-On can federate existing external user databases. By default, we support LDAP and Active Directory, but you can also code your own extension for any custom user database using our User Storage SPI.
The way it works is that when a user logs in, Red Hat Single Sign-On will look into its own internal user store to find the user. If it cannot find it there, it will iterate over every User Storage provider you have configured for the realm until it finds a match. Data from the external store is mapped into a common user model that is consumed by the Red Hat Single Sign-On runtime. This common user model can then be mapped to OIDC token claims and SAML assertion attributes.
External user databases rarely have every piece of data needed to support all the features that Red Hat Single Sign-On has. Therefore, the User Storage Provider can opt to store some things locally in the Red Hat Single Sign-On user store. Some providers even import the user locally and sync periodically with the external store. This approach depends on the capabilities of the provider and how it is configured. For example, your external user store may not support OTP. Depending on the provider, this OTP can be handled and stored by Red Hat Single Sign-On.
14.1. Adding a Provider
To add a storage provider go to the User Federation left menu item in the Admin Console.
User Federation

On the center, there is an Add Provider list box. Choose the provider type you want to add and you will be brought to the configuration page of that provider.
14.2. Dealing with Provider Failures
If a User Storage Provider fails (for example, your LDAP server is down), you may have trouble logging in and may not be able to view users in the admin console. Red Hat Single Sign-On does not catch failures when using a Storage Provider to lookup a user. It will abort the invocation. So, if you have a Storage Provider with a higher priority that fails during user lookup, the login or user query will fail entirely with an exception and abort. It will not fail over to the next configured provider.
The local Red Hat Single Sign-On user database is always searched first to resolve users before any LDAP or custom User Storage Provider. You may want to consider creating an admin account that is stored in the local Red Hat Single Sign-On user database just in case any problems come up in connecting to your LDAP and custom back ends.
Each LDAP and custom User Storage Provider has an enable switch on its admin console page. Disabling the User Storage Provider will skip the provider when doing user queries so that you can view and login with users that might be stored in a different provider with lower priority. If your provider is using an import strategy and you disable it, imported users are still available for lookup, but only in read only mode. You will not be able to modify these users until you re-enable the provider.
The reason why Red Hat Single Sign-On does not fail over if a Storage Provider lookup fails is that user databases often have duplicate usernames or duplicate emails between them. This can cause security issues and unforeseen problems as the user may be loaded from one external store when the admin is expecting the user to be loaded from another.
14.3. LDAP and Active Directory
Red Hat Single Sign-On comes with a built-in LDAP/AD provider. It is possible to federate multiple different LDAP servers in the same Red Hat Single Sign-On realm. You can map LDAP user attributes into the Red Hat Single Sign-On common user model. By default, it maps username, email, first name, and last name, but you are free to configure additional mappings. The LDAP provider also supports password validation via LDAP/AD protocols and different storage, edit, and synchronization modes.
To configure a federated LDAP store go to the Admin Console. Click on the User Federation left menu option. When you get to this page there is an Add Provider select box. You should see ldap within this list. Selecting ldap will bring you to the LDAP configuration page.
14.3.1. Storage Mode
By default, Red Hat Single Sign-On will import users from LDAP into the local Red Hat Single Sign-On user database. This copy of the user is either synchronized on demand, or through a periodic background task. The single exception to this is the synchronization of passwords. Passwords are never imported. Their validation is always delegated to the LDAP server. The benefits of this approach is that all Red Hat Single Sign-On features will work as any extra per-user data that is needed can be stored locally. The downside of this approach is that each time that a specific user is queried for the first time, a corresponding Red Hat Single Sign-On database insert is performed. The import may also have to be synchronized with your LDAP server. However, import synchronization is not necessary in the case that the LDAP mappers are configured to always read particular attributes from the LDAP rather than from the database.
Alternatively, you can choose not to import users into the Red Hat Single Sign-On user database. In this case, the common user model that the Red Hat Single Sign-On runtime uses is backed only by the LDAP server. This means that if LDAP doesn’t support a piece of data that a Red Hat Single Sign-On feature needs that feature will not work. The benefit to this approach is that you do not have the overhead of importing and synchronizing a copy of the LDAP user into the Red Hat Single Sign-On user database.
This storage mode is controled by the Import Users switch. Set to On to import users.
If user import is disabled, you cannot save user profile attributes into the Red Hat Single Sign-On database. Also you cannot save metadata except for user profile metadata that are mapped to the LDAP. The single exception to this are user profile metadata, which are mapped to the LDAP. This possibly includes role mappings, group mappings and other metadata based on the configuration of your LDAP mappers. When the attempt is made to change some of the non-LDAP mapped user data, the update of the user will not be possible. For example you will not be able to disable the LDAP mapped user unless the enabled flag of the user is mapped to some LDAP attribute (which is usually not the case).
14.3.2. Edit Mode
Users, through the User Account Service, and admins through the Admin Console have the ability to modify user metadata. Depending on your setup you may or may not have LDAP update privileges. The Edit Mode configuration option defines the edit policy you have with your LDAP store.
- READONLY
- Username, email, first name, last name, and other mapped attributes will be unchangeable. Red Hat Single Sign-On will show an error anytime anybody tries to update these fields. Also, password updates will not be supported.
- WRITABLE
- Username, email, first name, last name, and other mapped attributes and passwords can all be updated and will be synchronized automatically with your LDAP store.
- UNSYNCED
- Any changes to username, email, first name, last name, and passwords will be stored in Red Hat Single Sign-On local storage. It is up to you to figure out how to synchronize back to LDAP. This allows Red Hat Single Sign-On deployments to support updates of user metadata on a read-only LDAP server. This option only applies when you are importing users from LDAP into the local Red Hat Single Sign-On user database.
When the LDAP provider is created, the set of initial LDAP mappers is created. The mappers are configured on a "best-effort" basis based on the chosen combination of the Vendor, Edit Mode, and Import Users switches. For example in case of UNSYNCED edit mode, the mappers are pre-configured in a way that a particular user attribute is preferably read from the database instead of from the LDAP. However when you later change the edit mode, the mappers configuration will not be changed as it is not easily possible to detect if they were manually changed in the meantime. This means that it is recommended NOT to update the Edit Mode switch, but rather always decide on Edit Mode when creating the LDAP provider. This applies for Import Users switch as well.
14.3.3. Other config options
- Console Display Name
- Name used when this provider is referenced in the admin console
- Priority
- The priority of this provider when looking up users or adding a user.
- Sync Registrations
- Does your LDAP support adding new users? Click this switch if you want new users created by Red Hat Single Sign-On in the admin console or the registration page to be added to LDAP.
- Allow Kerberos authentication
- Enable Kerberos/SPNEGO authentication in realm with users data provisioned from LDAP. More info in Kerberos section.
- Other options
- The rest of the configuration options should be self explanatory. You can hover the mouse pointer over the tooltips in the Admin Console to see some more details about them.
14.3.4. Connect to LDAP over SSL
When you configure a secured connection URL to your LDAP store (for example,`ldaps://myhost.com:636'), Red Hat Single Sign-On will use SSL for communication with the LDAP server. The important thing is to properly configure a truststore on the Red Hat Single Sign-On server side, otherwise Red Hat Single Sign-On can’t trust the SSL connection to LDAP.
The global truststore for the Red Hat Single Sign-On can be configured with the Truststore SPI. Please check out the Server Installation and Configuration Guide for more details. If you do not figure the truststore SPI, the truststore will fall back on the default mechanism provided by Java (either the file provided by system property javax.net.ssl.trustStore or the cacerts file from the JDK if the system property is not set).
There is a configuration property Use Truststore SPI in the LDAP federation provider configuration, where you can choose whether the Truststore SPI is used. By default, the value is Only for ldaps, which is fine for most deployments. The Truststore SPI will only be used if the connection URL to LDAP starts with ldaps.
14.3.5. Sync of LDAP users to Red Hat Single Sign-On
If you enable the Import Users option, the LDAP Provider will automatically take care of synchronization (import) of needed LDAP users into the Red Hat Single Sign-On local database. As users log in, the LDAP provider will import the LDAP user into the Red Hat Single Sign-On database and then authenticate against the LDAP password. This is the only time users will be imported. If you go to the Users left menu item in the Admin Console and click the View all users button, you will only see those LDAP users that have been authenticated at least once by Red Hat Single Sign-On. It is implemented this way so that this operation does not trigger an import of the entire LDAP user database.
If you want to sync all LDAP users into the Red Hat Single Sign-On database, you may configure and enable the Sync Settings on the LDAP provider configuration page. Two types of synchronization exist:
- Periodic Full sync
-
This type will synchronize all LDAP users into the Red Hat Single Sign-On database. Those LDAP users, which already exist in Red Hat Single Sign-On and were changed in LDAP directly will be updated in the Red Hat Single Sign-On database. For example, the user
Mary Kellywas changed in LDAP toMary Smith. - Periodic Changed users sync
- When syncing occurs, only those users that were created or updated after the last sync will be updated and/or imported.
The best way to handle syncing is to click the Synchronize all users button when you first create the LDAP provider, then set up a periodic sync of changed users.
14.3.6. LDAP Mappers
LDAP mappers are listeners, which are triggered by the LDAP Provider at various points and provide another extension point to LDAP integration. They are triggered when a user logs in via LDAP and needs to be imported, during Red Hat Single Sign-On initiated registration, or when a user is queried from the Admin Console. When you create an LDAP Federation provider, Red Hat Single Sign-On will automatically provide set of built-in mappers for this provider. You are free to change this set and create a new mapper or update/delete existing ones.
- User Attribute Mapper
-
This allows you to specify which LDAP attribute is mapped to which attribute of Red Hat Single Sign-On user. So, for example, you can configure that LDAP attribute
mailto the attributeemailin the Red Hat Single Sign-On database. For this mapper implementation, there is always a one-to-one mapping (one LDAP attribute is mapped to one Red Hat Single Sign-On attribute) - FullName Mapper
-
This allows you to specify that the full name of the user, which is saved in some LDAP attribute (usually
cn) will be mapped tofirstNameandlastnameattributes in the Red Hat Single Sign-On database. Havingcnto contain full name of user is a common case for some LDAP deployments. - Hardcoded Attribute Mapper
-
This mapper adds a hardcoded attribute value to each Red Hat Single Sign-On user linked with LDAP. This mapper can also force the values for the
enabledoremailVerifieduser properties. - Role Mapper
-
This allows you to configure role mappings from LDAP into Red Hat Single Sign-On role mappings. One Role mapper can be used to map LDAP roles (usually groups from a particular branch of LDAP tree) into roles corresponding to either realm roles or client roles of a specified client. It’s not a problem to configure more Role mappers for the same LDAP provider. So for example you can specify that role mappings from groups under
ou=main,dc=example,dc=orgwill be mapped to realm role mappings and role mappings from groups underou=finance,dc=example,dc=orgwill be mapped to client role mappings of clientfinance. - Hardcoded Role Mapper
- This mapper will grant a specified Red Hat Single Sign-On role to each Red Hat Single Sign-On user from the LDAP provider.
- Group Mapper
- This allows you to map LDAP groups from a particular branch of an LDAP tree into groups in Red Hat Single Sign-On. It will also propagate user-group mappings from LDAP into user-group mappings in Red Hat Single Sign-On.
- MSAD User Account Mapper
-
This mapper is specific to Microsoft Active Directory (MSAD). It’s able to tightly integrate the MSAD user account state into the Red Hat Single Sign-On account state (account enabled, password is expired, and so on). It is using the
userAccountControlandpwdLastSetLDAP attributes, which are both specific to MSAD and are not LDAP standard. For example ifpwdLastSetis0, the Red Hat Single Sign-On user is required to update their password and there will be an UPDATE_PASSWORD required action added to the user. IfuserAccountControlis514(disabled account) the Red Hat Single Sign-On user is disabled as well. - Certificate Mapper
-
This mapper is specific for mapping X.509 certificates. It will generally be used in conjunction with X.509 authentication and
Full certificate in PEM formatas an identity source. It behaves the same way as theUser Attribute Mapper, but allows Red Hat Single Sign-On to filter for an LDAP attribute which stores a certificate in either PEM or DER format. It is generally advised to enableAlways Read Value From LDAPwith this mapper.
By default, there are User Attribute mappers that map basic Red Hat Single Sign-On user attributes like username, firstname, lastname, and email to corresponding LDAP attributes. You are free to extend these and provide additional attribute mappings. Admin console provides tooltips, which should help with configuring the corresponding mappers.
14.3.7. Password Hashing
When the password of user is updated from Red Hat Single Sign-On and sent to LDAP, it is always sent in plain-text. This is different from updating the password to built-in Red Hat Single Sign-On database, when the hashing and salting is applied to the password before it is sent to DB. In the case of LDAP, the Red Hat Single Sign-On relies on the LDAP server to provide hashing and salting of passwords.
LDAP servers such as Microsoft Active Directory, RHDS or FreeIPA provide this by default. Others such as OpenLDAP or ApacheDS may store the passwords in plain-text by default unless you use the LDAPv3 Password Modify Extended Operation as per RFC3062. The LDAPv3 Password Modify Extended Operation must be enabled explicitly in the LDAP configuration page. See the documentation of your LDAP server for more details.
Always verify that user passwords are properly hashed and not stored as plaintext by inspecting a changed directory entry using ldapsearch and base64 decode the userPassword attribute value.
14.4. SSSD and FreeIPA Identity Management Integration
Red Hat Single Sign-On also comes with a built-in SSSD (System Security Services Daemon) plugin. SSSD is part of the latest Fedora or Red Hat Enterprise Linux and provides access to multiple identity and authentication providers. It provides benefits such as failover and offline support. To see configuration options and for more information see the Red Hat Enterprise Linux Identity Management documentation.
SSSD also integrates with the FreeIPA identity management (IdM) server, providing authentication and access control. For Red Hat Single Sign-On, we benefit from this integration authenticating against PAM services and retrieving user data from SSSD. For more information about using Red Hat Identity Management in Linux environments, see the Red Hat Enterprise Linux Identity Management documentation.
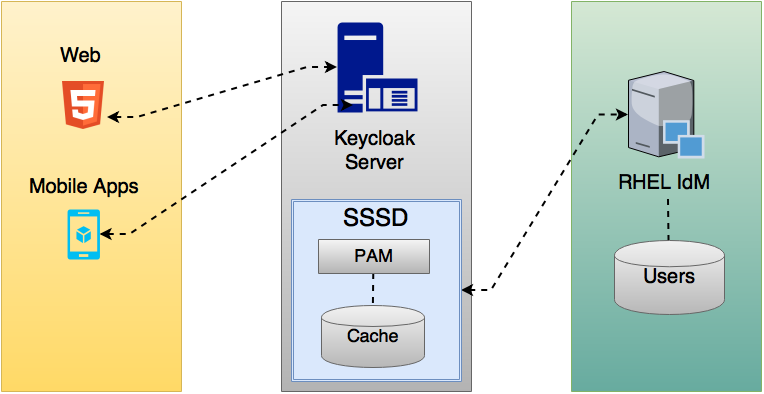
Most of the communication between Red Hat Single Sign-On and SSSD occurs through read-only D-Bus interfaces. For this reason, the only way to provision and update users is to use the FreeIPA/IdM administration interface. By default, like the LDAP federation provider, it is set up only to import username, email, first name, and last name.
Groups and roles are automatically registered, but not synchronized, so any changes made by the Red Hat Single Sign-On administrator directly in Red Hat Single Sign-On are not synchronized with SSSD.
Information on how to configure the FreeIPA/IdM server follows.
14.4.1. FreeIPA/IdM Server
For the sake of simplicity, a FreeIPA Docker image already available is used. To set up a server, see the FreeIPA documentation.
Running a FreeIPA server with Docker requires this command:
docker run --name freeipa-server-container -it \
-h server.freeipa.local -e PASSWORD=YOUR_PASSWORD \
-v /sys/fs/cgroup:/sys/fs/cgroup:ro \
-v /var/lib/ipa-data:/data:Z freeipa/freeipa-server
The parameter -h with server.freeipa.local represents the FreeIPA/IdM server hostname. Be sure to change YOUR_PASSWORD to a password of your choosing.
After the container starts, change /etc/hosts to:
x.x.x.x server.freeipa.local
If you do not make this change, you must set up a DNS server.
You must enroll your Linux machine in the IPA domain so that the SSSD federation provider is started and running on Red Hat Single Sign-On:
ipa-client-install --mkhomedir -p admin -w password
To ensure that everything is working as expected, on the client machine, run:
kinit admin
You should be prompted for the password. After that, you can add users to the IPA server using this command:
$ ipa user-add john --first=John --last=Smith --email=john@smith.com --phone=042424242 --street="Testing street" \ --city="Testing city" --state="Testing State" --postalcode=0000000000 --password
To force setting the user’s password, use kinit. Given the user john, you would enter this command:
kinit john
To restore normal IPA operation, you would enter these commands:
kdestroy -A
kinit admin
14.4.2. SSSD and D-Bus
As mentioned previously, the federation provider obtains the data from SSSD using D-BUS and authentication occurs using PAM.
First, you have to install the sssd-dbus RPM, which allows information from SSSD to be transmitted over the system bus.
$ sudo yum install sssd-dbus
You must run this provisioning script:
$ .../bin/federation-sssd-setup.sh
This script makes the necessary changes to /etc/sssd/sssd.conf:
[domain/your-hostname.local]
...
ldap_user_extra_attrs = mail:mail, sn:sn, givenname:givenname, telephoneNumber:telephoneNumber
...
[sssd]
services = nss, sudo, pam, ssh, ifp
...
[ifp]
allowed_uids = root, yourOSUsername
user_attributes = +mail, +telephoneNumber, +givenname, +sn
Also, a keycloak file is included under /etc/pam.d/:
auth    required   pam_sss.so
account required   pam_sss.so
Ensure everything is working as expected by running dbus-send:
sudo dbus-send --print-reply --system --dest=org.freedesktop.sssd.infopipe /org/freedesktop/sssd/infopipe org.freedesktop.sssd.infopipe.GetUserGroups string:john
You should be able to see the user’s group. If this command returns a timeout or an error, it means that the federation provider running on Red Hat Single Sign-On will also be unable to retrieve anything.
Most of the time this occurs because the machine was not enrolled in the FreeIPA IdM server or you do not have permission to access the SSSD service.
If you do not have permission, ensure that the user running the Red Hat Single Sign-On server is included in the /etc/sssd/sssd.conf file in the following section:
[ifp]
allowed_uids = root, your_username
14.4.3. Enabling the SSSD Federation Provider
Red Hat Single Sign-On uses DBus-Java to communicate at a low level with D-Bus, which depends on the Unix Sockets Library.
Before enabling the SSSD Federation provider, you must install the RPM for this library:
$ sudo yum install rh-sso7-libunix-dbus-java
For authentication with PAM Red Hat Single Sign-On uses JNA. Be sure you have this package installed:
$ sudo yum install jna
Use sssctl user-checks command to validate your setup:
$ sudo sssctl user-checks admin -s keycloak
14.5. Configuring a Federated SSSD Store
After the installation, you need to configure a federated SSSD store.
To configure a federated SSSD store, complete the following steps:
- Navigate to the Administration Console.
- From the left menu, select User Federation.
- From the Add Provider dropdown list, select sssd. The sssd configuration page opens.
- Click Save.
Now you can authenticate against Red Hat Single Sign-On using FreeIPA/IdM credentials.
14.6. Custom Providers
Red Hat Single Sign-On does have an SPI for User Storage Federation that you can use to write your own custom providers. You can find documentation for this in our Server Developer Guide.
Chapter 15. Auditing and Events
Red Hat Single Sign-On provides a rich set of auditing capabilities. Every single login action can be recorded and stored in the database and reviewed in the Admin Console. All admin actions can also be recorded and reviewed. There is also a Listener SPI with which plugins can listen for these events and perform some action. Built-in listeners include a simple log file and the ability to send an email if an event occurs.
15.1. Login Events
Login events occur for things like when a user logs in successfully, when somebody enters in a bad password, or when a user account is updated. Every single event that happens to a user can be recorded and viewed. By default, no events are stored or viewed in the Admin Console. Only error events are logged to the console and the server’s log file. To start persisting you’ll need to enable storage. Go to the Events left menu item and select the Config tab.
Event Configuration
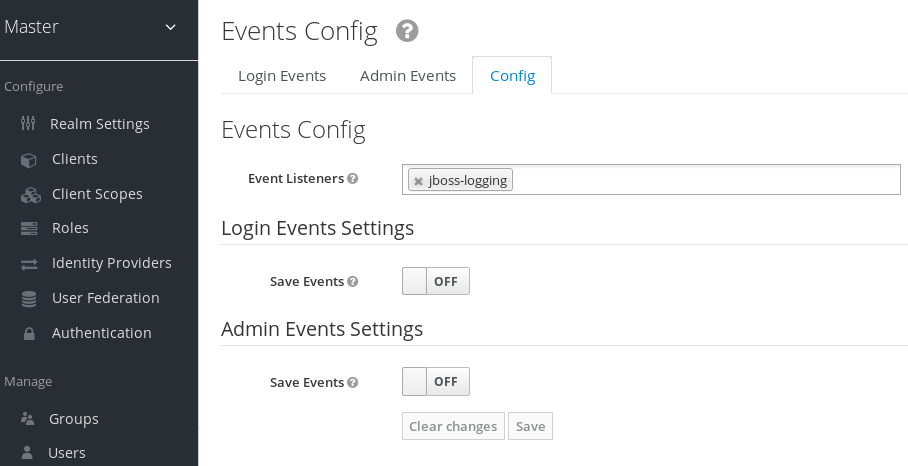
To start storing events you’ll need to turn the Save Events switch to on under the Login Events Settings.
Save Events

The Saved Types field allows you to specify which event types you want to store in the event store. The Clear events button allows you to delete all the events in the database. The Expiration field allows you to specify how long you want to keep events stored. Once you’ve enabled storage of login events and decided on your settings, don’t forget to click the Save button on the bottom of this page.
To view events, go to the Login Events tab.
Login Events

As you can see, there’s a lot of information stored and, if you are storing every event, there are a lot of events stored for each login action. The Filter button on this page allows you to filter which events you are actually interested in.
Login Event Filter

In this screenshot, we’re filtering only Login events. Clicking the Update button runs the filter.
15.1.1. Event Types
Login events:
- Login - A user has logged in.
- Register - A user has registered.
- Logout - A user has logged out.
- Code to Token - An application/client has exchanged a code for a token.
- Refresh Token - An application/client has refreshed a token.
Account events:
- Social Link - An account has been linked to a social provider.
- Remove Social Link - A social provider has been removed from an account.
- Update Email - The email address for an account has changed.
- Update Profile - The profile for an account has changed.
- Send Password Reset - A password reset email has been sent.
- Update Password - The password for an account has changed.
- Update TOTP - The TOTP settings for an account have changed.
- Remove TOTP - TOTP has been removed from an account.
- Send Verify Email - An email verification email has been sent.
- Verify Email - The email address for an account has been verified.
For all events there is a corresponding error event.
15.1.2. Event Listener
Event listeners listen for events and perform an action based on that event. There are two built-in listeners that come with Red Hat Single Sign-On: Logging Event Listener and Email Event Listener.
The Logging Event Listener writes to a log file whenever an error event occurs and is enabled by default. Here’s an example log message:
11:36:09,965 WARN  [org.keycloak.events] (default task-51) type=LOGIN_ERROR, realmId=master,
                    clientId=myapp,
                    userId=19aeb848-96fc-44f6-b0a3-59a17570d374, ipAddress=127.0.0.1,
                    error=invalid_user_credentials, auth_method=openid-connect, auth_type=code,
                    redirect_uri=http://localhost:8180/myapp,
                    code_id=b669da14-cdbb-41d0-b055-0810a0334607, username=admin
This logging is very useful if you want to use a tool like Fail2Ban to detect if there is a hacker bot somewhere that is trying to guess user passwords. You can parse the log file for LOGIN_ERROR and pull out the IP Address. Then feed this information into Fail2Ban so that it can help prevent attacks.
The Logging Event Listener logs events to the org.keycloak.events logger category. By default debug log events are not included in server logs.
To include debug log events in server logs, edit the standalone.xml file and change the log level used by the Logging Event listener. Alternately, you can configure the log level for org.keycloak.events.
For example, to change the log level add the following:
<subsystem xmlns="urn:jboss:domain:logging:...">
    ...
    <logger category="org.keycloak.events">
        <level name="DEBUG"/>
    </logger>
</subsystem>
To change the log level used by the Logging Event listener, add the following:
<subsystem xmlns="urn:jboss:domain:keycloak-server:...">
    ...
    <spi name="eventsListener">
      <provider name="jboss-logging" enabled="true">
        <properties>
          <property name="success-level" value="info"/>
          <property name="error-level" value="error"/>
        </properties>
      </provider>
    </spi>
</subsystem>
Valid values for the log levels are debug, info, warn, error, and fatal.
The Email Event Listener sends an email to the user’s account when an event occurs.
Currently, the Email Event Listener supports the following events:
- Login Error
- Update Password
- Update TOTP
- Remove TOTP
To enable the Email Listener go to the Config tab and click on the Event Listeners field. This will show a drop down list box where you can select email.
You can exclude one or more events by editing the standalone.xml, standalone-ha.xml, or domain.xml that comes with your distribution and adding for example:
<spi name="eventsListener">
<provider name="email" enabled="true">
<properties>
<property name="exclude-events" value="["UPDATE_TOTP","REMOVE_TOTP"]"/>
</properties>
</provider>
</spi>
You can also set up a maximum length of the Event detail stored in the database by editing standalone.xml, standalone-ha.xml, or domain.xml. This setting can be useful in case some field (e.g. redirect_uri) is very long. Here is an example of defining the maximum length.:
<spi name="eventsStore">
    <provider name="jpa" enabled="true">
        <properties>
            <property name="max-detail-length" value="1000"/>
        </properties>
    </provider>
</spi>
See the Server Installation and Configuration Guide for more details on where the standalone.xml, standalone-ha.xml, or domain.xml file lives.
15.2. Admin Events
Any action an admin performs within the admin console can be recorded for auditing purposes. The Admin Console performs administrative functions by invoking on the Red Hat Single Sign-On REST interface. Red Hat Single Sign-On audits these REST invocations. The resulting events can then be viewed in the Admin Console.
To enable auditing of Admin actions, go to the Events left menu item and select the Config tab.
Event Configuration
In the Admin Events Settings section, turn on the Save Events switch.
Admin Event Configuration

The Include Representation switch will include any JSON document that is sent through the admin REST API. This allows you to view exactly what an admin has done, but can lead to a lot of information stored in the database. The Clear admin events button allows you to wipe out the current information stored.
To view the admin events go to the Admin Events tab.
Admin Events

If the Details column has a Representation box, you can click on that to view the JSON that was sent with that operation.
Admin Representation
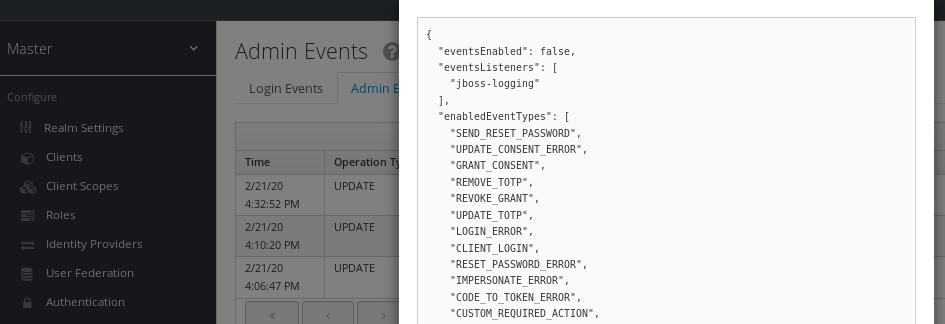
You can also filter for the events you are interested in by clicking the Filter button.
Admin Event Filter
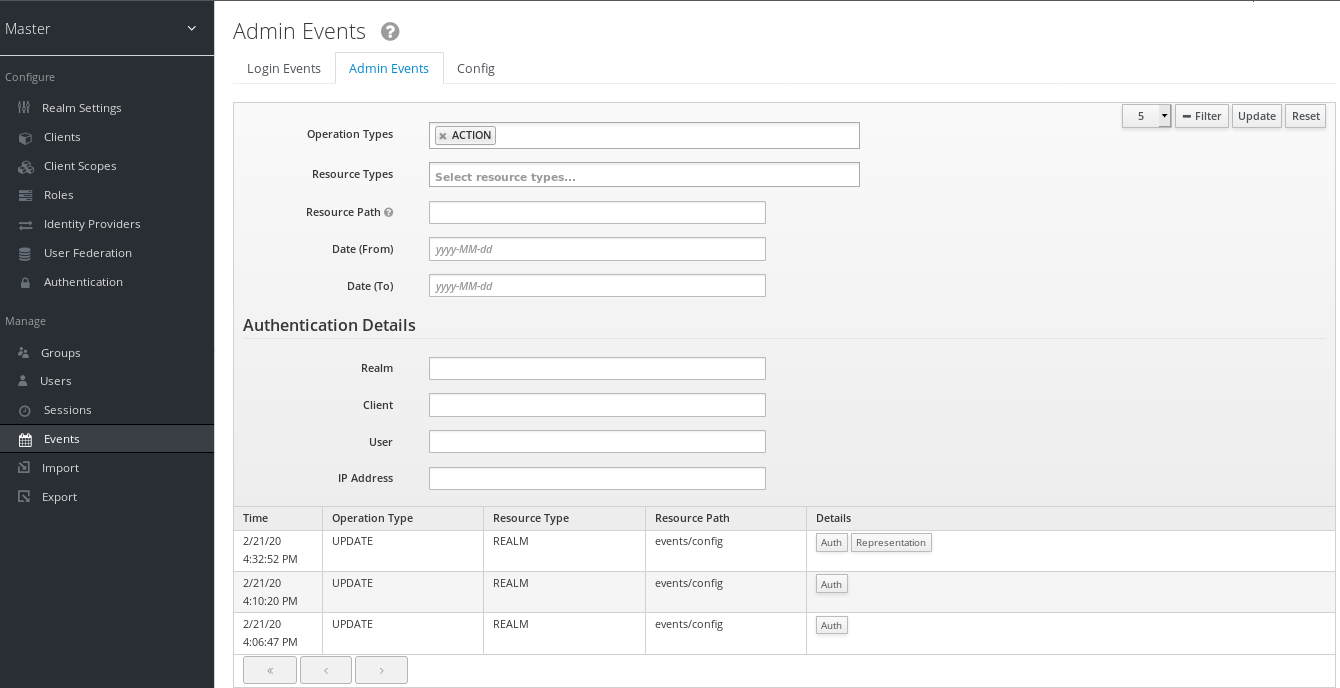
Chapter 16. Export and Import
Red Hat Single Sign-On has the ability to export and import the entire database. This can be especially useful if you want to migrate your whole Red Hat Single Sign-On database from one environment to another or migrate to a different database (for example from MySQL to Oracle). Export and import is triggered at server boot time and its parameters are passed in via Java system properties. It is important to note that because import and export happens at server startup, no other actions should be taken on the server or the database while this happens.
You can export/import your database either to:
- Directory on local filesystem
- Single JSON file on your filesystem
When importing using the directory strategy, note that the files need to follow the naming convention specified below. If you are importing files which were previously exported, the files already follow this convention.
- <REALM_NAME>-realm.json, such as "acme-roadrunner-affairs-realm.json" for the realm named "acme-roadrunner-affairs"
- <REALM_NAME>-users-<INDEX>.json, such as "acme-roadrunner-affairs-users-0.json" for the first users file of the realm named "acme-roadrunner-affairs"
If you export to a directory, you can also specify the number of users that will be stored in each JSON file.
If you have bigger amount of users in your database (500 or more), it’s highly recommended to export into directory rather than to single file. Exporting into single file may lead to the very big file. Also the directory provider is using separate transaction for each "page" (file with users), which leads to much better performance. Default count of users per file (and transaction) is 50, which showed us best performance, but you have possibility to override (See below). Exporting to single file is using one transaction per whole export and one per whole import, which results in bad performance with large amount of users.
To export into unencrypted directory you can use:
bin/standalone.sh -Dkeycloak.migration.action=export
-Dkeycloak.migration.provider=dir -Dkeycloak.migration.dir=<DIR TO EXPORT TO>
To export into single JSON file you can use:
bin/standalone.sh -Dkeycloak.migration.action=export
-Dkeycloak.migration.provider=singleFile -Dkeycloak.migration.file=<FILE TO EXPORT TO>
And similarly for import just use -Dkeycloak.migration.action=import instead of export . Here’s an example of importing:
bin/standalone.sh -Dkeycloak.migration.action=import
-Dkeycloak.migration.provider=singleFile -Dkeycloak.migration.file=<FILE TO IMPORT>
-Dkeycloak.migration.strategy=OVERWRITE_EXISTING
Other available options are:
- -Dkeycloak.migration.realmName
- This property is used if you want to export just one specified realm instead of all. If not specified, then all realms will be exported.
- -Dkeycloak.migration.usersExportStrategy
This property is used to specify where users are exported. Possible values are:
- DIFFERENT_FILES - Users will be exported into different files according to the maximum number of users per file. This is default value.
- SKIP - Exporting of users will be skipped completely.
- REALM_FILE - All users will be exported to same file with the realm settings. (The result will be a file like "foo-realm.json" with both realm data and users.)
- SAME_FILE - All users will be exported to same file but different from the realm file. (The result will be a file like "foo-realm.json" with realm data and "foo-users.json" with users.)
- -Dkeycloak.migration.usersPerFile
- This property is used to specify the number of users per file (and also per DB transaction). It’s 50 by default. It’s used only if usersExportStrategy is DIFFERENT_FILES
- -Dkeycloak.migration.strategy
This property is used during import. It can be used to specify how to proceed if a realm with same name already exists in the database where you are going to import data. Possible values are:
- IGNORE_EXISTING - Ignore importing if a realm of this name already exists.
- OVERWRITE_EXISTING - Remove existing realm and import it again with new data from the JSON file. If you want to fully migrate one environment to another and ensure that the new environment will contain the same data as the old one, you can specify this.
When importing realm files that weren’t exported before, the option keycloak.import can be used. If more than one realm file needs to be imported, a comma separated list of file names can be specified. This is more appropriate than the cases before, as this will happen only after the master realm has been initialized. Examples:
- -Dkeycloak.import=/tmp/realm1.json
- -Dkeycloak.import=/tmp/realm1.json,/tmp/realm2.json
16.1. Admin console export/import
Import of most resources can be performed from the admin console as well as export of most resources. Export of users is not supported.
Attributes containing secrets or private information will be masked in export file. Export files obtained via Admin Console are thus not appropriate for backups or data transfer between servers. Only boot-time exports are appropriate for that.
The files created during a "startup" export can also be used to import from the admin UI. This way, you can export from one realm and import to another realm. Or, you can export from one server and import to another.
The admin console export/import allows just one realm per file.
The admin console import allows you to "overwrite" resources if you choose. Use this feature with caution, especially on a production system. Export .json files from Admin Console Export operation are generally not appropriate for data import since they contain invalid values for secrets.
The admin console export allows you to export clients, groups, and roles. If there is a great number of any of these assets in your realm, the operation may take some time to complete. During that time server may not be responsive to user requests. Use this feature with caution, especially on a production system.
Chapter 17. Using a Vault to Obtain Secrets
Several fields in the administration support obtaining the value of a secret from an external vault.
To obtain a secret from a vault instead of entering it directly, enter the following specially crafted string into the appropriate field: ${vault.key} where you replace the key with the name of the secret as recognized by the vault.
In order to prevent secrets from leaking across realms, implementations may combine the realm name with the key obtained from the vault expression. This means that the key won’t directly map to an entry in the vault, but rather be used to create the final entry name according to the algorithm used to combine it with the realm name.
Currently, the secret can be obtained from the vault in the following fields:
- SMTP password
- In realm SMTP settings
- LDAP bind credential
- In LDAP settings of LDAP-based user federation.
- OIDC identity provider secret
- In Client Secret inside identity provider OpenID Connect Config
To use a vault, a vault provider must be registered within Red Hat Single Sign-On. It is possible to either use a built-in provider described below or implement your own provider. See the Server Developer Guide for more information.
There is at most one vault provider active per Red Hat Single Sign-On instance at any given time, and the vault provider in each instance within the cluster has to be configured consistently.
17.1. Kubernetes / OpenShift Files Plaintext Vault Provider
Red Hat Single Sign-On supports vault implementation for Kubernetes secrets. These secrets can be mounted as data volumes, and they appear as a directory with a flat file structure, where each secret is represented by a file whose name is the secret name, and contents of that file is the secret value.
The files within this directory have to be named as secret name prefixed by realm name and an underscore. All underscores within the secret name or the realm name have to be doubled in the file name. For example, for a field within a realm called sso_realm, a reference to a secret with name secret-name would be written as ${vault.secret-name}, and the file name looked up would be sso__realm_secret-name (note the underscore doubled in realm name).
To use this type of secret store, you have to declare the files-plaintext vault provider in standalone.xml, and set its parameter for the directory that contains the mounted volume. The following example shows the files-plaintext provider with the directory where vault files are searched for set to standalone/configuration/vault relative to Red Hat Single Sign-On base directory:
<spi name="vault">
    <default-provider>files-plaintext</default-provider>
    <provider name="files-plaintext" enabled="true">
        <properties>
            <property name="dir" value="${jboss.home.dir}/standalone/configuration/vault/" />
        </properties>
    </provider>
</spi>
Here is the equivalent configuration using CLI commands:
/subsystem=keycloak-server/spi=vault/:add
/subsystem=keycloak-server/spi=vault/provider=files-plaintext/:add(enabled=true,properties={dir => "${jboss.home.dir}/standalone/configuration/vault"})
17.2. Elytron Credential Store Vault Provider
Red Hat Single Sign-On also provides support for reading secrets stored in an Elytron credential store. The elytron-cs-keystore vault provider is capable of retrieving secrets from the keystore-based implementation of the credential store, which is also the default implementation provided by Elytron.
This credential store is backed by a keystore (JCEKS is the default format, but it is possible to use other formats such as PKCS12) and users can create and manage the store contents using either the elytron subsystem in WildFly/JBoss EAP, or using the elytron-tool.sh script.
To use this provider, you have to declare the elytron-cs-keystore in the keycloak-server subsystem and set the location and master secret of the keystore that was created by Elytron. An example of the minimal configuration for the provider follows:
<spi name="vault">
    <default-provider>elytron-cs-keystore</default-provider>
    <provider name="elytron-cs-keystore" enabled="true">
        <properties>
            <property name="location" value="${jboss.home.dir}/standalone/configuration/vault/credential-store.jceks" />
            <property name="secret" value="secretpw1!"/>
        </properties>
    </provider>
</spi>
If the underlying keystore has a format other than JCEKS, this format has to be informed using the keyStoreType:
<spi name="vault">
    <default-provider>elytron-cs-keystore</default-provider>
    <provider name="elytron-cs-keystore" enabled="true">
        <properties>
            <property name="location" value="${jboss.home.dir}/standalone/configuration/vault/credential-store.p12" />
            <property name="secret" value="secretpw1!"/>
            <property name="keyStoreType" value="PKCS12"/>
        </properties>
    </provider>
</spi>
For the secret, the elytron-cs-keystore provider supports both clear-text values (as shown above) and also values that were masked using the elytron-tool.sh script:
<spi name="vault">
   ...
            <property name="secret" value="MASK-3u2HNQaMogJJ8VP7J6gRIl;12345678;321"/>
   ...
</spi>
For more detailed information on how to create/manage elytron credential stores, as well as how to mask keystore secrets, please refer to the Elytron documentation.
The elytron-cs-keystore vault provider has been implemented as a WildFly extension and as such is only available if the Red Hat Single Sign-On server runs on WildFly/JBoss EAP.
17.3. Key Resolvers
All built-in providers support the configuration of one or more key resolvers. A key resolver essentially implements the algorithm or strategy for combining the realm name with the key (as obtained from the ${vault.key} expression} into the final entry name that will be used to retrieve the secret from the vault. The keyResolvers property is used to configure the resolvers that are to be used by the provider. The value is a comma-separated list of resolver names. An example of configuration for the files-plaintext provider follows:
<spi name="vault">
    <default-provider>files-plaintext</default-provider>
    <provider name="files-plaintext" enabled="true">
        <properties>
            <property name="dir" value="${jboss.home.dir}/standalone/configuration/vault/" />
            <property name="keyResolvers" value="REALM_UNDERSCORE_KEY, KEY_ONLY"/>
        </properties>
    </provider>
</spi>
The resolvers are executed in the same order that they are declared in the configuration. For each resolver, the final entry name produced by the resolver that combines the realm with the vault key is used to search for the secret in the vault. If a secret is found, it is immediately returned. If not, the next resolver is used and this continues until a non-empty secret is found or all resolvers have been tried, in which case an empty secret is returned. In the example above, first the REALM_UNDERSCORE_KEY resolver is used. If an entry is found in the vault with the name it produces, it is returned. If not, then the KEY_ONLY resolver is used. Again, if an entry is found in the vault with the name it produces, it is returned. If not, an empty secret is returned since there are no more resolvers to be used.
A list of the currently available resolvers follows:
-
KEY_ONLY: the realm name is ignored and the key from the vault expression is used as is. -
REALM_UNDERSCORE_KEY: the realm and key are combined using an underscore_character. Occurrences of underscore in either the realm or key are escaped by another underscore character. So if the realm is calledmaster_realmand the key issmtp_key, the combined key will bemaster__realm_smtp__key. -
REALM_FILESEPARATOR_KEY: the realm and key are combined using the platform file separator character. This is useful in situations where the keys are grouped by realm using a directory structure.
If no resolver is configured for the built-in providers, the REALM_UNDERSCORE_KEY is selected by default.
17.4. Sample Configuration
The following is an example of configuring a vault and credential store. The procedure involves two parts:
- Creating the credential store and a vault, where the credential store and vault passwords are in plain text.
-
Updating the credential store and vault to have the password use a mask provided by
elytron-tool.sh.
In this example, the test target used is an LDAP instance with BIND DN credential: secret12. The target is mapped using user federation in the realm ldaptest.
17.4.1. Configuring the credential store and vault without a mask
You create the credential store and a vault where the credential store and vault passwords are in plain text.
Prerequisites
-
A running LDAP instance has
BIND DN credential: secret12. -
The alias uses the format <realm-name>_< key-value> when using the default key resolver. In this case, the instance is running in the realm
ldaptestandldaptest_ldap_secretis the alias that corresponds to the valueldap_secretin that realm.
The resolver replaces underscore characters with double underscore characters in the realm and key names. For example, for the key ldaptest_ldap_secret, the final key will be ldaptest_ldap__secret.
Procedure
Create the Elytron credential store.
[standalone@localhost:9990 /] /subsystem=elytron/credential-store=test-store:add(create=true, location=/home/test/test-store.p12, credential-reference={clear-text=testpwd1!},implementation-properties={keyStoreType=PKCS12})Add an alias to the credential store.
/subsystem=elytron/credential-store=test-store:add-alias(alias=ldaptest_ldap__secret,secret-value=secret12)
Notice how the resolver causes the key
ldaptest_ldap__secretto use double underscores.List the aliases from the credential store to inspect the contents of the keystore that is produced by Elytron.
keytool -list -keystore /home/test/test-store.p12 -storetype PKCS12 -storepass testpwd1!
Keystore type: PKCS12
Keystore provider: SUN

Your keystore contains 1 entries

ldaptest_ldap__secret/passwordcredential/clear/, Oct 12, 2020, SecretKeyEntry,
Configure the vault SPI in Red Hat Single Sign-On.
/subsystem=keycloak-server/spi=vault:add(default-provider=elytron-cs-keystore)

/subsystem=keycloak-server/spi=vault/provider=elytron-cs-keystore:add(enabled=true, properties={location=>/home/test/test-store.p12, secret=>testpwd1!, keyStoreType=>PKCS12})
At this point, the vault and credentials store passwords are not masked.
<spi name="vault"> <default-provider>elytron-cs-keystore</default-provider> <provider name="elytron-cs-keystore" enabled="true"> <properties> <property name="location" value="/home/test/test-store.p12"/> <property name="secret" value="testpwd1!"/> <property name="keyStoreType" value="PKCS12"/> </properties> </provider> </spi> <credential-stores> <credential-store name="test-store" location="/home/test/test-store.p12" create="true"> <implementation-properties> <property name="keyStoreType" value="PKCS12"/> </implementation-properties> <credential-reference clear-text="testpwd1!"/> </credential-store> </credential-stores>-
In the LDAP provider, replace
binDN credentialwith${vault.ldap_secret}. Test your LDAP connection.
LDAP Vault

17.4.2. Masking the password in the credential store and vault
You can now update the credential store and vault to have passwords that use a mask provided by elytron-tool.sh.
Create a masked password using values for the
saltand theiterationparameters:$ EAP_HOME/bin/elytron-tool.sh mask --salt SALT --iteration ITERATION_COUNT --secret PASSWORD
For example:
elytron-tool.sh mask --salt 12345678 --iteration 123 --secret testpwd1!
MASK-3BUbFEyWu0lRAu8.fCqyUk;12345678;123
Update the Elytron credential store configuration to use the masked password.
/subsystem=elytron/credential-store=cs-store:write-attribute(name=credential-reference.clear-text,value="MASK-3BUbFEyWu0lRAu8.fCqyUk;12345678;123")
Update the Red Hat Single Sign-On vault configuration to use the masked password.
/subsystem=keycloak-server/spi=vault/provider=elytron-cs-keystore:remove()
/subsystem=keycloak-server/spi=vault/provider=elytron-cs-keystore:add(enabled=true, properties={location=>/home/test/test-store.p12, secret=>”MASK-3BUbFEyWu0lRAu8.fCqyUk;12345678;123”, keyStoreType=>PKCS12})
The vault and credential store are now masked:
<spi name="vault"> <default-provider>elytron-cs-keystore</default-provider> <provider name="elytron-cs-keystore" enabled="true"> <properties> <property name="location" value="/home/test/test-store.p12"/> <property name="secret" value="MASK-3BUbFEyWu0lRAu8.fCqyUk;12345678;123"/> <property name="keyStoreType" value="PKCS12"/> </properties> </provider> </spi> .... ..... <credential-stores> <credential-store name="test-store" location="/home/test/test-store.p12" create="true"> <implementation-properties> <property name="keyStoreType" value="PKCS12"/> </implementation-properties> <credential-reference clear-text="MASK-3BUbFEyWu0lRAu8.fCqyUk;12345678;123"/> </credential-store> </credential-stores>-
You can now test the connection to the LDAP using
${vault.ldap_secret}.
Additional resources
For more information about the Elytron tool, see Using Credential Stores with Elytron Client.
Chapter 18. User Account Service
Red Hat Single Sign-On has a built-in User Account Service which every user has access to. This service allows users to manage their account, change their credentials, update their profile, and view their login sessions. The URL to this service is <server-root>/auth/realms/{realm-name}/account.
Account Service
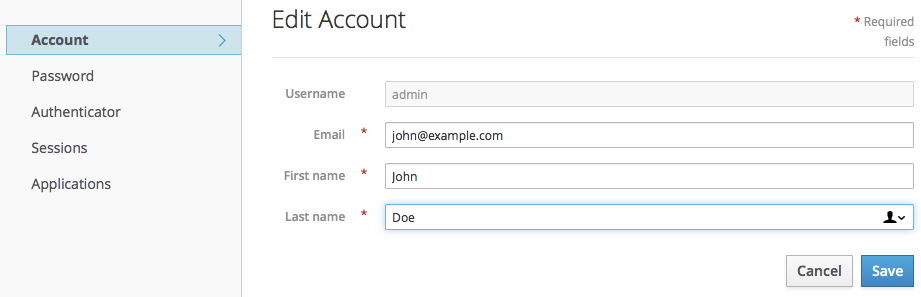
The initial page is the user’s profile, which is the Account left menu item. This is where they specify basic data about themselves. This screen can be extended to allow the user to manage additional attributes. See the Server Developer Guide for more details.
The Password left menu item allows the user to change their password.
Password Update

The Authenticator menu item allows the user to set up OTP if they desire. This will only show up if OTP is a valid authentication mechanism for your realm. Users are given directions to install FreeOTP or Google Authenticator on their mobile device to be their OTP generator. The QR code you see in the screen shot can be scanned into the FreeOTP or Google Authenticator mobile application for nice and easy setup.
OTP Authenticator

The Federated Identity menu item allows the user to link their account with an identity broker (this is usually used to link social provider accounts together). This will show the list of external identity providers you have configured for your realm.
Federated Identity
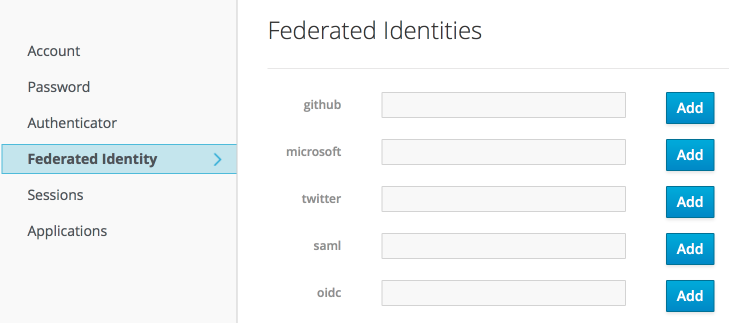
The Sessions menu item allows the user to view and manage which devices are logged in and from where. They can perform logout of these sessions from this screen too.
Sessions
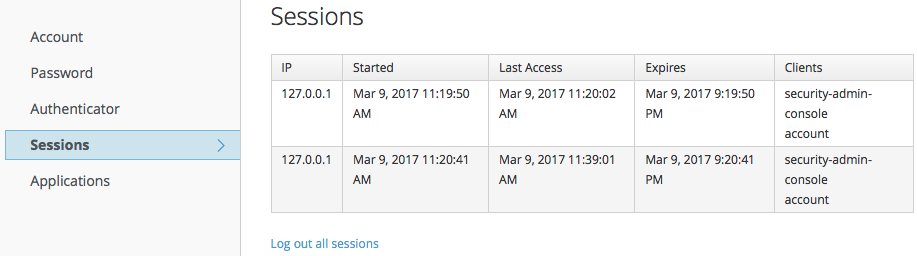
The Applications menu item shows users which applications they have access to.
Applications
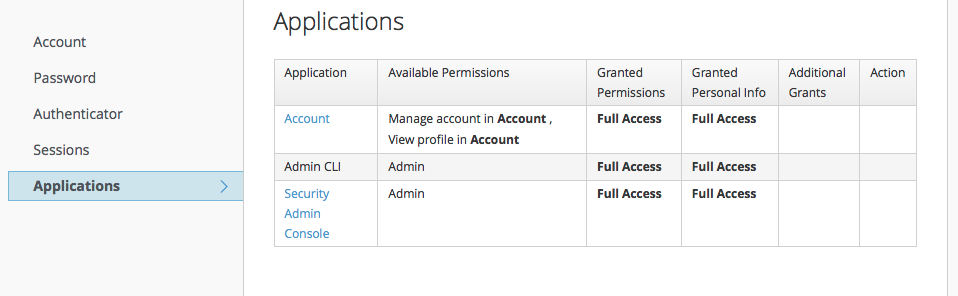
18.1. Themeable
Like all UIs in Red Hat Single Sign-On, the User Account Service is completely themeable and internationalizable. See the Server Developer Guide for more details.
Chapter 19. Threat Model Mitigation
This chapter discusses possible security vulnerabilities any authentication server could have and how Red Hat Single Sign-On mitigates those vulnerabilities. A good list of potential vulnerabilities and what security implementations should do to mitigate them can be found in the OAuth 2.0 Threat Model document put out by the IETF. Many of those vulnerabilities are discussed here.
19.1. Host
Red Hat Single Sign-On uses the public hostname for a number of things. For example, in the token issuer fields and URLs sent in password reset emails.
By default, the hostname is based on the request headers and there is no check to make sure this hostname is valid.
If you are not using a load balancer or proxy in front of Red Hat Single Sign-On that prevents invalid host headers, you must explicitly configure what hostnames should be accepted.
The Hostname SPI provides a way to configure the hostname for a request. The out of the box provider allows setting a fixed URL for frontend requests, while allowing backend requests to be based on the request URI. It is also possible to develop your own provider in the case the built-in provider does not provide the functionality needed.
19.2. Admin Endpoints and Console
The Red Hat Single Sign-On administrative REST API and the web console are exposed by default on the same port as non-admin usage. If access to the admin console is not needed externally, we recommend not exposing the admin endpoints on the Internet.
This can be achieved either directly in Red Hat Single Sign-On or with a proxy such as Apache or nginx.
For the proxy option please follow the documentation for the proxy. You need to control access to any requests to /auth/admin.
To achieve this directly in Red Hat Single Sign-On there are a few options. This document covers two options, IP restriction and separate ports.
Once the admin console is no longer accessible on the frontend URL of Keycloak, you need to configure a fixed admin URL in the default hostname provider.
19.2.1. IP Restriction
It is possible to restrict access to /auth/admin to only specific IP addresses.
The following example restricts access to /auth/admin to IP addresses in the range 10.0.0.1 to 10.0.0.255.
<subsystem xmlns="urn:jboss:domain:undertow:10.0">
    ...
    <server name="default-server">
        ...
        <host name="default-host" alias="localhost">
            ...
            <filter-ref name="ipAccess"/>
        </host>
    </server>
    <filters>
        <expression-filter name="ipAccess" expression="path-prefix('/auth/admin') -> ip-access-control(acl={'10.0.0.0/24 allow'})"/>
    </filters>
    ...
</subsystem>
Equivalent configuration using CLI commands:
/subsystem=undertow/configuration=filter/expression-filter=ipAccess:add(,expression="path-prefix[/auth/admin] -> ip-access-control(acl={'10.0.0.0/24 allow'})")
/subsystem=undertow/server=default-server/host=default-host/filter-ref=ipAccess:add()For IP restriction if you are using a proxy it is important to configure it correctly to make sure Red Hat Single Sign-On receives the client IP address and not the proxy IP address
19.2.2. Port Restriction
It is possible to expose /auth/admin to a different port that is not exposed on the Internet.
The following example exposes /auth/admin on port 8444 while not permitting access with the default port 8443.
<subsystem xmlns="urn:jboss:domain:undertow:10.0">
    ...
    <server name="default-server">
        ...
        <https-listener name="https" socket-binding="https" security-realm="ApplicationRealm" enable-http2="true"/>
        <https-listener name="https-admin" socket-binding="https-admin" security-realm="ApplicationRealm" enable-http2="true"/>
        <host name="default-host" alias="localhost">
            ...
            <filter-ref name="portAccess"/>
        </host>
    </server>
    <filters>
        <expression-filter name="portAccess" expression="path-prefix('/auth/admin') and not equals(%p, 8444) -> response-code(403)"/>
    </filters>
    ...
</subsystem>

...

<socket-binding-group name="standard-sockets" default-interface="public" port-offset="${jboss.socket.binding.port-offset:0}">
    ...
    <socket-binding name="https" port="${jboss.https.port:8443}"/>
    <socket-binding name="https-admin" port="${jboss.https.port:8444}"/>
    ...
</socket-binding-group>
Equivalent configuration using CLI commands:
/socket-binding-group=standard-sockets/socket-binding=https-admin/:add(port=8444)

/subsystem=undertow/server=default-server/https-listener=https-admin:add(socket-binding=https-admin, security-realm=ApplicationRealm, enable-http2=true)

/subsystem=undertow/configuration=filter/expression-filter=portAccess:add(,expression="path-prefix('/auth/admin') and not equals(%p, 8444) -> response-code(403)")
/subsystem=undertow/server=default-server/host=default-host/filter-ref=portAccess:add()
19.3. Password guess: brute force attacks
A brute force attack happens when an attacker is trying to guess a user’s password. Red Hat Single Sign-On has some limited brute force detection capabilities. If turned on, a user account will be temporarily disabled if a threshold of login failures is reached. To enable this feature go to the Realm Settings left menu item, click on the Security Defenses tab, then additional go to the Brute Force Detection sub-tab.
Brute Force Detection is disabled by default. Enabling this feature is highly recommended to protect against this type of attack.
Brute Force Detection
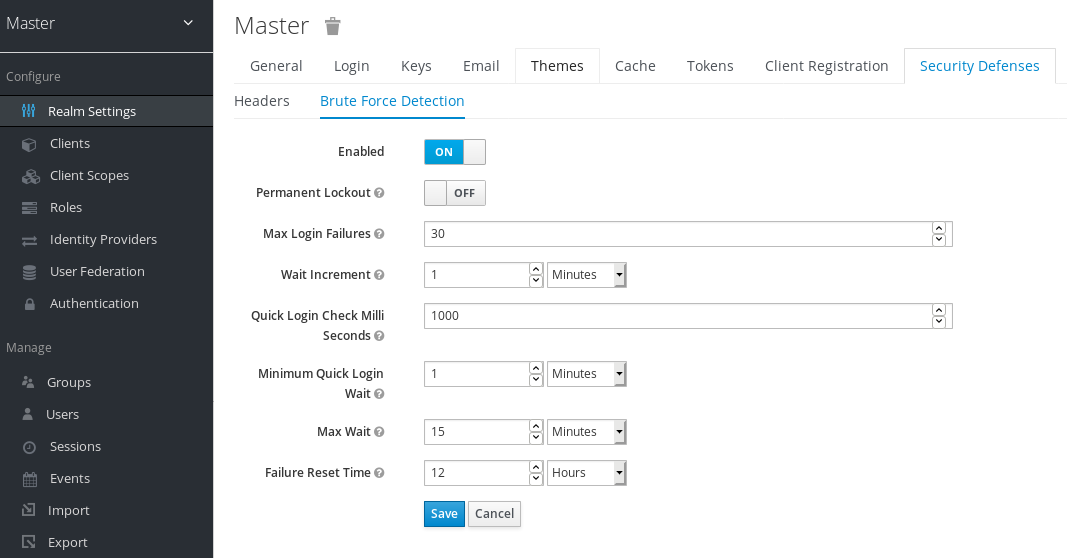
There are 2 different configurations for brute force detection; permanent lockout and temporary lockout. Permanent lockout will disable a user’s account after an attack is detected; the account will be disabled until an administrator renables it. Temporary lockout will disable a user’s account for a time period after an attack is detected; the time period for which the account is disabled increases the longer the attack continues.
Common Parameters
- Max Login Failures
- Maximum number of login failures permitted. Default value is 30.
- Quick Login Check Milli Seconds
- Minimum time required between login attempts. Default is 1000.
- Minimum Quick Login Wait
- Minimum amount of time the user will be temporarily disabled if logins attempts are quicker than Quick Login Check Milli Seconds. Default is 1 minute.
Temporary Lockout Parameters
- Wait Increment
- Amount of time added to the time a user is temporarily disabled after each time Max Login Failures is reached. Default is 1 minute.
- Max Wait
- The maximum amount of time for which a user will be temporarily disabled. Default is 15 minutes.
- Failure Reset Time
- Time after which the failure count will be reset; timer runs from the last failed login. Default is 12 hours.
Permanent Lockout Algorithm
On successful login
-
Reset
count
-
Reset
On failed login
-
Increment
count If
countgreater than Max Login Failures- Permanently disable user
Else if time between this failure and the last failure is less than Quick Login Check Milli Seconds
- Temporarily disable user for Minimum Quick Login Wait
-
Increment
When a user is disabled they can not login until an administrator enables the user; enabling an account resets count.
Temporary Lockout Algorithm
On successful login
-
Reset
count
-
Reset
On failed login
If time between this failure and the last failure is greater than Failure Reset Time
-
Reset
count
-
Reset
-
Increment
count -
Calculate
waitusing Wait Increment * (count/ Max Login Failures). The division is an integer division so will always be rounded down to a whole number If
waitequals 0 and time between this failure and the last failure is less than Quick Login Check Milli Seconds then setwaitto Minimum Quick Login Wait instead-
Temporarily disable the user for the smaller of
waitand Max Wait seconds
-
Temporarily disable the user for the smaller of
Login failures when a user is temporarily disabled do not increment count.
The downside of Red Hat Single Sign-On brute force detection is that the server becomes vulnerable to denial of service attacks. An attacker can simply try to guess passwords for any accounts it knows and these account will be disabled. Eventually we will expand this functionality to take client IP address into account when deciding whether to block a user.
A better option might be a tool like Fail2Ban. You can point this service at the Red Hat Single Sign-On server’s log file. Red Hat Single Sign-On logs every login failure and client IP address that had the failure. Fail2Ban can be used to modify firewalls after it detects an attack to block connections from specific IP addresses.
19.3.1. Password Policies
Another thing you should do to prevent password guess is to have a complex enough password policy to ensure that users pick hard to guess passwords. See the Password Policies chapter for more details.
The best way to prevent password guessing though is to set up the server to use a one-time-password (OTP).
19.4. Clickjacking
With clickjacking, a malicious site loads the target site in a transparent iFrame overlaid on top of a set of dummy buttons that are carefully constructed to be placed directly under important buttons on the target site. When a user clicks a visible button, they are actually clicking a button (such as a "login" button) on the hidden page. An attacker can steal a user’s authentication credentials and access their resources.
By default, every response by Red Hat Single Sign-On sets some specific browser headers that can prevent this from happening. Specifically, it sets X-FRAME_OPTIONS and Content-Security-Policy. You should take a look at the definition of both of these headers as there is a lot of fine-grain browser access you can control. In the admin console you can specify the values these headers will have. Go to the Realm Settings left menu item and click the Security Defenses tab and make sure you are on the Headers sub-tab.
By default, Red Hat Single Sign-On only sets up a same-origin policy for iframes.
19.5. SSL/HTTPS Requirement
If you do not use SSL/HTTPS for all communication between the Red Hat Single Sign-On auth server and the clients it secures, you will be very vulnerable to man in the middle attacks. OAuth 2.0/OpenID Connect uses access tokens for security. Without SSL/HTTPS, attackers can sniff your network and obtain an access token. Once they have an access token they can do any operation that the token has been given permission for.
Red Hat Single Sign-On has three modes for SSL/HTTPS. SSL can be hard to set up, so out of the box, Red Hat Single Sign-On allows non-HTTPS communication over private IP addresses like localhost, 192.168.x.x, and other private IP addresses. In production, you should make sure SSL is enabled and required across the board.
On the adapter/client side, Red Hat Single Sign-On allows you to turn off the SSL trust manager. The trust manager ensures identity the client is talking to. It checks the DNS domain name against the server’s certificate. In production you should make sure that each of your client adapters is configured to use a truststore. Otherwise you are vulnerable to DNS man in the middle attacks.
19.6. CSRF Attacks
Cross-site request forgery (CSRF) is a web-based attack whereby HTTP requests are transmitted from a user that the web site trusts or has authenticated with(e.g. via HTTP redirects or HTML forms). Any site that uses cookie based authentication is vulnerable to these types of attacks. These attacks are mitigated by matching a state cookie against a posted form or query parameter.
The OAuth 2.0 login specification requires that a state cookie be used and matched against a transmitted state parameter. Red Hat Single Sign-On fully implements this part of the specification so all logins are protected.
The Red Hat Single Sign-On Admin Console is a pure JavaScript/HTML5 application that makes REST calls to the backend Red Hat Single Sign-On admin REST API. These calls all require bearer token authentication and are made via JavaScript Ajax calls. CSRF does not apply here. The admin REST API can also be configured to validate the CORS origins as well.
The only part of Red Hat Single Sign-On that really falls into CSRF is the user account management pages. To mitigate this Red Hat Single Sign-On sets a state cookie and also embeds the value of this state cookie within hidden form fields or query parameters in action links. This query or form parameter is checked against the state cookie to verify that the call was made by the user.
19.7. Unspecific Redirect URIs
For the Authorization Code Flow, if you register redirect URIs that are too general, then it would be possible for a rogue client to impersonate a different client that has a broader scope of access. This could happen for instance if two clients live under the same domain. So, it’s a good idea to make your registered redirect URIs as specific as feasible.
19.8. Compromised Access and Refresh Tokens
There are a few things you can do to mitigate access tokens and refresh tokens from being stolen. The most important thing is to enforce SSL/HTTPS communication between Red Hat Single Sign-On and its clients and applications. It might seem obvious, but since Red Hat Single Sign-On does not have SSL enabled by default, an administrator might not realize that it is necessary.
Another thing you can do to mitigate leaked access tokens is to shorten their lifespans. You can specify this within the timeouts page. Short lifespans (minutes) for access tokens for clients and applications to refresh their access tokens after a short amount of time. If an admin detects a leak, they can logout all user sessions to invalidate these refresh tokens or set up a revocation policy. Making sure refresh tokens always stay private to the client and are never transmitted ever is very important as well.
You can also mitigate against leaked access tokens and refresh tokens by issuing these tokens as holder-of-key tokens. See OAuth 2.0 Mutual TLS Client Certificate Bound Access Token to learn how.
If an access token or refresh token is compromised, the first thing you should do is go to the admin console and push a not-before revocation policy to all applications. This will enforce that any tokens issued prior to that date are now invalid. Pushing new not-before policy will also ensure that application will be forced to download new public keys from Red Hat Single Sign-On, hence it is also useful for the case, when you think that realm signing key was compromised. More info in the keys chapter.
You can also disable specific applications, clients, and users if you feel that any one of those entities is completely compromised.
19.9. Compromised Authorization Code
For the OIDC Auth Code Flow, it would be very hard for an attacker to compromise Red Hat Single Sign-On authorization codes. Red Hat Single Sign-On generates a cryptographically strong random value for its authorization codes so it would be very hard to guess an access token. An authorization code can only be used once to obtain an access token. In the admin console you can specify how long an authorization code is valid for on the timeouts page. This value should be really short, as short as a few seconds and just long enough for the client to make the request to obtain a token from the code.
You can also mitigate against leaked autorization codes by applying PKCE to clients. See Proof Key for Code Exchange (PKCE) to learn how.
19.10. Open redirectors
An attacker could use the end-user authorization endpoint and the redirect URI parameter to abuse the authorization server as an open redirector. An open redirector is an endpoint using a parameter to automatically redirect a user agent to the location specified by the parameter value without any validation. An attacker could utilize a user’s trust in an authorization server to launch a phishing attack.
Red Hat Single Sign-On requires that all registered applications and clients register at least one redirection URI pattern. Any time a client asks Red Hat Single Sign-On to perform a redirect (on login or logout for example), Red Hat Single Sign-On will check the redirect URI vs. the list of valid registered URI patterns. It is important that clients and applications register as specific a URI pattern as possible to mitigate open redirector attacks.
19.11. Password database compromised
Red Hat Single Sign-On does not store passwords in raw text. It stores a hash of them using the PBKDF2 algorithm. It actually uses a default of 20,000 hashing iterations! This is the security community’s recommended number of iterations. This can be a rather large performance hit on your system as PBKDF2, by design, gobbles up a significant amount of CPU. It is up to you to decide how serious you want to be to protect your password database.
19.12. Limiting Scope
By default, each new client application has an unlimited role scope mappings. This means that every access token that is created for that client will contain all the permissions the user has. If the client gets compromised and the access token is leaked, then each system that the user has permission to access is now also compromised. It is highly suggested that you limit the roles an access token is assigned by using the Scope menu for each client. Or alternatively, you can set role scope mappings at the Client Scope level and assign Client Scopes to your client by using the Client Scope menu.
19.13. Limit Token Audience
In environments where the level of trust among services is low, it is a good practice to limit the audiences on the token. The motivation behind this is described in the OAuth2 Threat Model document and more details are in the Audience Support section.
19.14. SQL Injection Attacks
At this point in time, there is no knowledge of any SQL injection vulnerabilities in Red Hat Single Sign-On.
Chapter 20. The Admin CLI
In previous chapters, we described how to use the Red Hat Single Sign-On Admin Console to perform administrative tasks. You can also perform those tasks from the command-line interface (CLI) by using the Admin CLI command-line tool.
20.1. Installing the Admin CLI
The Admin CLI is packaged inside Red Hat Single Sign-On Server distribution. You can find execution scripts inside the bin directory.
The Linux script is called kcadm.sh, and the script for Windows is called kcadm.bat.
You can add the Red Hat Single Sign-On server directory to your PATH to use the client from any location on your file system.
For example, on:
- Linux:
$ export PATH=$PATH:$KEYCLOAK_HOME/bin
$ kcadm.sh
- Windows:
c:\> set PATH=%PATH%;%KEYCLOAK_HOME%\bin
c:\> kcadm
We assume the KEYCLOAK_HOME environment (env) variable is set to the path where you extracted the Red Hat Single Sign-On Server distribution.
To avoid repetition, the rest of this document only gives Windows examples in places where the difference in the CLI is more than just in the kcadm command name.
20.2. Using the Admin CLI
The Admin CLI works by making HTTP requests to Admin REST endpoints. Access to them is protected and requires authentication.
Consult the Admin REST API documentation for details about JSON attributes for specific endpoints.
Start an authenticated session by providing credentials, that is, logging in. You are ready to perform create, read, update, and delete (CRUD) operations.
For example, on
Linux:
$ kcadm.sh config credentials --server http://localhost:8080/auth --realm demo --user admin --client admin
$ kcadm.sh create realms -s realm=demorealm -s enabled=true -o
$ CID=$(kcadm.sh create clients -r demorealm -s clientId=my_client -s 'redirectUris=["http://localhost:8980/myapp/*"]' -i)
$ kcadm.sh get clients/$CID/installation/providers/keycloak-oidc-keycloak-json
Windows:
c:\> kcadm config credentials --server http://localhost:8080/auth --realm demo --user admin --client admin
c:\> kcadm create realms -s realm=demorealm -s enabled=true -o
c:\> kcadm create clients -r demorealm -s clientId=my_client -s "redirectUris=[\"http://localhost:8980/myapp/*\"]" -i > clientid.txt
c:\> set /p CID=<clientid.txt
c:\> kcadm get clients/%CID%/installation/providers/keycloak-oidc-keycloak-json
In a production environment, you must access Red Hat Single Sign-On with
https:to avoid exposing tokens to network sniffers. If a server’s certificate is not issued by one of the trusted certificate authorities (CAs) that are included in Java’s default certificate truststore, prepare atruststore.jksfile and instruct the Admin CLI to use it.For example, on:
Linux:
$ kcadm.sh config truststore --trustpass $PASSWORD ~/.keycloak/truststore.jks
Windows:
c:\> kcadm config truststore --trustpass %PASSWORD% %HOMEPATH%\.keycloak\truststore.jks
20.3. Authenticating
When you log in with the Admin CLI, you specify a server endpoint URL and a realm, and then you specify a user name. Another option is to specify only a clientId, which results in using a special "service account". When you log in using a user name, you must use a password for the specified user. When you log in using a clientId, you only need the client secret, not the user password. You could also use Signed JWT instead of the client secret.
Make sure the account used for the session has the proper permissions to invoke Admin REST API operations. For example, the realm-admin role of the realm-management client allows the user to administer the realm within which the user is defined.
There are two primary mechanisms for authentication. One mechanism uses kcadm config credentials to start an authenticated session.
$ kcadm.sh config credentials --server http://localhost:8080/auth --realm master --user admin --password admin
This approach maintains an authenticated session between the kcadm command invocations by saving the obtained access token and the associated refresh token. It may also maintain other secrets in a private configuration file. See next chapter for more information on the configuration file.
The second approach only authenticates each command invocation for the duration of that invocation. This approach increases the load on the server and the time spent with roundtrips obtaining tokens. The benefit of this approach is not needing to save any tokens between invocations, which means nothing is saved to disk. This mode is used when the --no-config argument is specified.
For example, when performing an operation, we specify all the information required for authentication.
$ kcadm.sh get realms --no-config --server http://localhost:8080/auth --realm master --user admin --password admin
Run the kcadm.sh help command for more information on using the Admin CLI.
Run the kcadm.sh config credentials --help command for more information about starting an authenticated session.
20.4. Working with alternative configurations
By default, the Admin CLI automatically maintains a configuration file called kcadm.config located under the user’s home directory. In Linux-based systems, the full path name is $HOME/.keycloak/kcadm.config. On Windows, the full path name is %HOMEPATH%\.keycloak\kcadm.config. You can use the --config option to point to a different file or location so you can maintain multiple authenticated sessions in parallel.
It is best to perform operations tied to a single configuration file from a single thread.
Make sure you do not make the configuration file visible to other users on the system. It contains access tokens and secrets that should be kept private. By default, the ~/.keycloak directory and its content are created automatically with proper access limits. If the directory already exists, its permissions are not updated.
If your unique circumstances require you to avoid storing secrets inside a configuration file, you can do so. It will be less convenient and you will have to make more token requests. To not store secrets, use the --no-config option with all your commands and specify all the authentication information needed by the config credentials command with each kcadm invocation.
20.5. Basic operations and resource URIs
The Admin CLI allows you to generically perform CRUD operations against Admin REST API endpoints with additional commands that simplify performing certain tasks.
The main usage pattern is listed below, where the create, get, update, and delete commands are mapped to the HTTP verbs POST, GET, PUT, and DELETE, respectively.
$ kcadm.sh create ENDPOINT [ARGUMENTS]
$ kcadm.sh get ENDPOINT [ARGUMENTS]
$ kcadm.sh update ENDPOINT [ARGUMENTS]
$ kcadm.sh delete ENDPOINT [ARGUMENTS]
ENDPOINT is a target resource URI and can either be absolute (starting with http: or https:) or relative, used to compose an absolute URL of the following format:
SERVER_URI/admin/realms/REALM/ENDPOINT
For example, if you authenticate against the server http://localhost:8080/auth and realm is master, then using users as ENDPOINT results in the resource URL http://localhost:8080/auth/admin/realms/master/users.
If you set ENDPOINT to clients, the effective resource URI would be http://localhost:8080/auth/admin/realms/master/clients.
There is a realms endpoint that is treated slightly differently because it is the container for realms. It resolves to:
SERVER_URI/admin/realms
There is also a serverinfo endpoint, which is treated the same way because it is independent of realms.
When you authenticate as a user with realm-admin powers, you might need to perform commands on multiple realms. In that case, specify the -r option to tell explicitly which realm the command should be executed against. Instead of using REALM as specified via the --realm option of kcadm.sh config credentials, the TARGET_REALM is used.
SERVER_URI/admin/realms/TARGET_REALM/ENDPOINT
For example,
$ kcadm.sh config credentials --server http://localhost:8080/auth --realm master --user admin --password admin
$ kcadm.sh create users -s username=testuser -s enabled=true -r demorealm
In this example, you start a session authenticated as the admin user in the master realm. You then perform a POST call against the resource URL http://localhost:8080/auth/admin/realms/demorealm/users.
The create and update commands send a JSON body to the server by default. You can use -f FILENAME to read a premade document from a file. When you can use -f - option, the message body is read from standard input. You can also specify individual attributes and their values as seen in the previous create users example. They are composed into a JSON body and sent to the server.
There are several ways to update a resource using the update command. You can first determine the current state of a resource and save it to a file, and then edit that file and send it to the server for updating.
For example:
$ kcadm.sh get realms/demorealm > demorealm.json
$ vi demorealm.json
$ kcadm.sh update realms/demorealm -f demorealm.json
This method updates the resource on the server with all the attributes in the sent JSON document.
Another option is to perform an on-the-fly update using the -s, --set options to set new values.
For example:
$ kcadm.sh update realms/demorealm -s enabled=false
That method only updates the enabled attribute to false.
By default, the update command first performs a get and then merges the new attribute values with existing values. This is the preferred behavior. In some cases, the endpoint may support the PUT command but not the GET command. You can use the -n option to perform a "no-merge" update, which performs a PUT command without first running a GET command.
20.6. Realm operations
Creating a new realm
Use the create command on the realms endpoint to create a new enabled realm, and set the attributes to realm and enabled.
$ kcadm.sh create realms -s realm=demorealm -s enabled=true
A realm is not enabled by default. By enabling it, you can use a realm immediately for authentication.
A description for a new object can also be in a JSON format.
$ kcadm.sh create realms -f demorealm.json
You can send a JSON document with realm attributes directly from a file or piped to a standard input.
For example, on:
- Linux:
$ kcadm.sh create realms -f - << EOF
{ "realm": "demorealm", "enabled": true }
EOF- Windows:
c:\> echo { "realm": "demorealm", "enabled": true } | kcadm create realms -f -Listing existing realms
The following command returns a list of all realms.
$ kcadm.sh get realms
A list of realms is additionally filtered on the server to return only realms a user can see.
Returning the entire realm description often provides too much information. Most users are interested only in a subset of attributes, such as realm name and whether the realm is enabled. You can specify which attributes to return by using the --fields option.
$ kcadm.sh get realms --fields realm,enabled
You can also display the result as comma separated values.
$ kcadm.sh get realms --fields realm --format csv --noquotes
Getting a specific realm
You append a realm name to a collection URI to get an individual realm.
$ kcadm.sh get realms/master
Updating a realm
Use the
-soption to set new values for the attributes when you want to change only some of the realm’s attributes.For example:
$ kcadm.sh update realms/demorealm -s enabled=false
If you want to set all writable attributes with new values, run a
getcommand, edit the current values in the JSON file, and resubmit.For example:
$ kcadm.sh get realms/demorealm > demorealm.json
$ vi demorealm.json
$ kcadm.sh update realms/demorealm -f demorealm.json
Deleting a realm
Run the following command to delete a realm.
$ kcadm.sh delete realms/demorealm
Turning on all login page options for the realm
Set the attributes controlling specific capabilities to true.
For example:
$ kcadm.sh update realms/demorealm -s registrationAllowed=true -s registrationEmailAsUsername=true -s rememberMe=true -s verifyEmail=true -s resetPasswordAllowed=true -s editUsernameAllowed=true
Listing the realm keys
Use the get operation on the keys endpoint of the target realm.
$ kcadm.sh get keys -r demorealm
Generating new realm keys
Get the ID of the target realm before adding a new RSA-generated key pair.
For example:
$ kcadm.sh get realms/demorealm --fields id --format csv --noquotes
Add a new key provider with a higher priority than the existing providers as revealed by
kcadm.sh get keys -r demorealm.For example, on:
Linux:
$ kcadm.sh create components -r demorealm -s name=rsa-generated -s providerId=rsa-generated -s providerType=org.keycloak.keys.KeyProvider -s parentId=959844c1-d149-41d7-8359-6aa527fca0b0 -s 'config.priority=["101"]' -s 'config.enabled=["true"]' -s 'config.active=["true"]' -s 'config.keySize=["2048"]'
Windows:
c:\> kcadm create components -r demorealm -s name=rsa-generated -s providerId=rsa-generated -s providerType=org.keycloak.keys.KeyProvider -s parentId=959844c1-d149-41d7-8359-6aa527fca0b0 -s "config.priority=[\"101\"]" -s "config.enabled=[\"true\"]" -s "config.active=[\"true\"]" -s "config.keySize=[\"2048\"]"
Set the
parentIdattribute to the value of the target realm’s ID.The newly added key should now become the active key as revealed by
kcadm.sh get keys -r demorealm.
Adding new realm keys from a Java Key Store file
Add a new key provider to add a new key pair already prepared as a JKS file on the server.
For example, on:
Linux:
$ kcadm.sh create components -r demorealm -s name=java-keystore -s providerId=java-keystore -s providerType=org.keycloak.keys.KeyProvider -s parentId=959844c1-d149-41d7-8359-6aa527fca0b0 -s 'config.priority=["101"]' -s 'config.enabled=["true"]' -s 'config.active=["true"]' -s 'config.keystore=["/opt/keycloak/keystore.jks"]' -s 'config.keystorePassword=["secret"]' -s 'config.keyPassword=["secret"]' -s 'config.alias=["localhost"]'
Windows:
c:\> kcadm create components -r demorealm -s name=java-keystore -s providerId=java-keystore -s providerType=org.keycloak.keys.KeyProvider -s parentId=959844c1-d149-41d7-8359-6aa527fca0b0 -s "config.priority=[\"101\"]" -s "config.enabled=[\"true\"]" -s "config.active=[\"true\"]" -s "config.keystore=[\"/opt/keycloak/keystore.jks\"]" -s "config.keystorePassword=[\"secret\"]" -s "config.keyPassword=[\"secret\"]" -s "config.alias=[\"localhost\"]"
-
Make sure to change the attribute values for
keystore,keystorePassword,keyPassword, andaliasto match your specific keystore. -
Set the
parentIdattribute to the value of the target realm’s ID.
Making the key passive or disabling the key
Identify the key you want to make passive
$ kcadm.sh get keys -r demorealm
-
Use the key’s
providerIdattribute to construct an endpoint URI, such ascomponents/PROVIDER_ID. Perform an
update.For example, on:
Linux:
$ kcadm.sh update components/PROVIDER_ID -r demorealm -s 'config.active=["false"]'
Windows:
c:\> kcadm update components/PROVIDER_ID -r demorealm -s "config.active=[\"false\"]"
You can update other key attributes.
-
Set a new
enabledvalue to disable the key, for example,config.enabled=["false"]. -
Set a new
priorityvalue to change the key’s priority, for example,config.priority=["110"].
Deleting an old key
- Make sure the key you are deleting has been passive and disabled to prevent any existing tokens held by applications and users from abruptly failing to work.
Identify the key you want to make passive.
$ kcadm.sh get keys -r demorealm
Use the
providerIdof that key to perform a delete.$ kcadm.sh delete components/PROVIDER_ID -r demorealm
Configuring event logging for a realm
Use the update command on the events/config endpoint.
The eventsListeners attribute contains a list of EventListenerProviderFactory IDs that specify all event listeners receiving events. Separately, there are attributes that control a built-in event storage, which allows querying past events via the Admin REST API. There is separate control over logging of service calls (eventsEnabled) and auditing events triggered during Admin Console or Admin REST API (adminEventsEnabled). You may want to set up expiry of old events so that your database does not fill up; eventsExpiration is set to time-to-live expressed in seconds.
Here is an example of setting up a built-in event listener that receives all the events and logs them through jboss-logging. (Using a logger called org.keycloak.events, error events are logged as WARN, and others are logged as DEBUG.)
For example, on:
- Linux:
$ kcadm.sh update events/config -r demorealm -s 'eventsListeners=["jboss-logging"]'
- Windows:
c:\> kcadm update events/config -r demorealm -s "eventsListeners=[\"jboss-logging\"]"
Here is an example of turning on storage of all available ERROR events—not including auditing events—for 2 days so they can be retrieved via Admin REST.
For example, on:
- Linux:
$ kcadm.sh update events/config -r demorealm -s eventsEnabled=true -s 'enabledEventTypes=["LOGIN_ERROR","REGISTER_ERROR","LOGOUT_ERROR","CODE_TO_TOKEN_ERROR","CLIENT_LOGIN_ERROR","FEDERATED_IDENTITY_LINK_ERROR","REMOVE_FEDERATED_IDENTITY_ERROR","UPDATE_EMAIL_ERROR","UPDATE_PROFILE_ERROR","UPDATE_PASSWORD_ERROR","UPDATE_TOTP_ERROR","VERIFY_EMAIL_ERROR","REMOVE_TOTP_ERROR","SEND_VERIFY_EMAIL_ERROR","SEND_RESET_PASSWORD_ERROR","SEND_IDENTITY_PROVIDER_LINK_ERROR","RESET_PASSWORD_ERROR","IDENTITY_PROVIDER_FIRST_LOGIN_ERROR","IDENTITY_PROVIDER_POST_LOGIN_ERROR","CUSTOM_REQUIRED_ACTION_ERROR","EXECUTE_ACTIONS_ERROR","CLIENT_REGISTER_ERROR","CLIENT_UPDATE_ERROR","CLIENT_DELETE_ERROR"]' -s eventsExpiration=172800
- Windows:
c:\> kcadm update events/config -r demorealm -s eventsEnabled=true -s "enabledEventTypes=[\"LOGIN_ERROR\",\"REGISTER_ERROR\",\"LOGOUT_ERROR\",\"CODE_TO_TOKEN_ERROR\",\"CLIENT_LOGIN_ERROR\",\"FEDERATED_IDENTITY_LINK_ERROR\",\"REMOVE_FEDERATED_IDENTITY_ERROR\",\"UPDATE_EMAIL_ERROR\",\"UPDATE_PROFILE_ERROR\",\"UPDATE_PASSWORD_ERROR\",\"UPDATE_TOTP_ERROR\",\"VERIFY_EMAIL_ERROR\",\"REMOVE_TOTP_ERROR\",\"SEND_VERIFY_EMAIL_ERROR\",\"SEND_RESET_PASSWORD_ERROR\",\"SEND_IDENTITY_PROVIDER_LINK_ERROR\",\"RESET_PASSWORD_ERROR\",\"IDENTITY_PROVIDER_FIRST_LOGIN_ERROR\",\"IDENTITY_PROVIDER_POST_LOGIN_ERROR\",\"CUSTOM_REQUIRED_ACTION_ERROR\",\"EXECUTE_ACTIONS_ERROR\",\"CLIENT_REGISTER_ERROR\",\"CLIENT_UPDATE_ERROR\",\"CLIENT_DELETE_ERROR\"]" -s eventsExpiration=172800
Here is an example of how to reset stored event types to all available event types; setting to empty list is the same as enumerating all.
$ kcadm.sh update events/config -r demorealm -s enabledEventTypes=[]
Here is an example of how to enable storage of auditing events.
$ kcadm.sh update events/config -r demorealm -s adminEventsEnabled=true -s adminEventsDetailsEnabled=true
Here is an example of how to get the last 100 events; they are ordered from newest to oldest.
$ kcadm.sh get events --offset 0 --limit 100
Here is an example of how to delete all saved events.
$ kcadm delete events
Flushing the caches
-
Use the
createcommand and one of the following endpoints:clear-realm-cache,clear-user-cache, orclear-keys-cache. Set
realmto the same value as the target realm.For example:
$ kcadm.sh create clear-realm-cache -r demorealm -s realm=demorealm
$ kcadm.sh create clear-user-cache -r demorealm -s realm=demorealm
$ kcadm.sh create clear-keys-cache -r demorealm -s realm=demorealm
Importing a realm from exported .json file
-
Use the
createcommand on thepartialImportendpoint. -
Set
ifResourceExiststo one ofFAIL,SKIP,OVERWRITE. Use
-fto submit the exported realm.jsonfileFor example:
$ kcadm.sh create partialImport -r demorealm2 -s ifResourceExists=FAIL -o -f demorealm.json
If realm does not yet exist, you first have to create it.
For example:
$ kcadm.sh create realms -s realm=demorealm2 -s enabled=true
20.7. Role operations
Creating a realm role
Use the roles endpoint to create a realm role.
$ kcadm.sh create roles -r demorealm -s name=user -s 'description=Regular user with limited set of permissions'
Creating a client role
Identify the client first and then use the
getcommand to list available clients when creating a client role.$ kcadm.sh get clients -r demorealm --fields id,clientId
Create a new role by using the
clientIdattribute to construct an endpoint URI, such asclients/ID/roles.For example:
$ kcadm.sh create clients/a95b6af3-0bdc-4878-ae2e-6d61a4eca9a0/roles -r demorealm -s name=editor -s 'description=Editor can edit, and publish any article'
Listing realm roles
Use the get command on the roles endpoint to list existing realm roles.
$ kcadm.sh get roles -r demorealm
You can also use the get-roles command.
$ kcadm.sh get-roles -r demorealm
Listing client roles
There is a dedicated get-roles command to simplify listing realm and client roles. It is an extension of the get command and behaves the same with additional semantics for listing roles.
Use the get-roles command, passing it either the clientId attribute (via the --cclientid option) or id (via the --cid option) to identify the client to list client roles.
For example:
$ kcadm.sh get-roles -r demorealm --cclientid realm-management
Getting a specific realm role
Use the get command and the role name to construct an endpoint URI for a specific realm role: roles/ROLE_NAME, where user is the name of the existing role.
For example:
$ kcadm.sh get roles/user -r demorealm
You can also use the special get-roles command, passing it a role name (via the --rolename option) or ID (via the --roleid option).
For example:
$ kcadm.sh get-roles -r demorealm --rolename user
Getting a specific client role
Use a dedicated get-roles command, passing it either the clientId attribute (via the --cclientid option) or ID (via the --cid option) to identify the client, and passing it either the role name (via the --rolename option) or ID (via the --roleid) to identify a specific client role.
For example:
$ kcadm.sh get-roles -r demorealm --cclientid realm-management --rolename manage-clients
Updating a realm role
Use the update command with the same endpoint URI that you used to get a specific realm role.
For example:
$ kcadm.sh update roles/user -r demorealm -s 'description=Role representing a regular user'
Updating a client role
Use the update command with the same endpoint URI that you used to get a specific client role.
For example:
$ kcadm.sh update clients/a95b6af3-0bdc-4878-ae2e-6d61a4eca9a0/roles/editor -r demorealm -s 'description=User that can edit, and publish articles'
Deleting a realm role
Use the delete command with the same endpoint URI that you used to get a specific realm role.
For example:
$ kcadm.sh delete roles/user -r demorealm
Deleting a client role
Use the delete command with the same endpoint URI that you used to get a specific client role.
For example:
$ kcadm.sh delete clients/a95b6af3-0bdc-4878-ae2e-6d61a4eca9a0/roles/editor -r demorealm
Listing assigned, available, and effective realm roles for a composite role
Use a dedicated get-roles command to list assigned, available, and effective realm roles for a composite role.
To list assigned realm roles for the composite role, you can specify the target composite role by either name (via the
--rnameoption) or ID (via the--ridoption).For example:
$ kcadm.sh get-roles -r demorealm --rname testrole
Use the additional
--effectiveoption to list effective realm roles.For example:
$ kcadm.sh get-roles -r demorealm --rname testrole --effective
Use the
--availableoption to list realm roles that can still be added to the composite role.For example:
$ kcadm.sh get-roles -r demorealm --rname testrole --available
Listing assigned, available, and effective client roles for a composite role
Use a dedicated get-roles command to list assigned, available, and effective client roles for a composite role.
To list assigned client roles for the composite role, you can specify the target composite role by either name (via the
--rnameoption) or ID (via the--ridoption) and client by either the clientId attribute (via the--cclientidoption) or ID (via the--cidoption).For example:
$ kcadm.sh get-roles -r demorealm --rname testrole --cclientid realm-management
Use the additional
--effectiveoption to list effective realm roles.For example:
$ kcadm.sh get-roles -r demorealm --rname testrole --cclientid realm-management --effective
Use the
--availableoption to list realm roles that can still be added to the target composite role.For example:
$ kcadm.sh get-roles -r demorealm --rname testrole --cclientid realm-management --available
Adding realm roles to a composite role
There is a dedicated add-roles command that can be used for adding realm roles and client roles.
The following example adds the user role to the composite role testrole.
$ kcadm.sh add-roles --rname testrole --rolename user -r demorealm
Removing realm roles from a composite role
There is a dedicated remove-roles command that can be used to remove realm roles and client roles.
The following example removes the user role from the target composite role testrole.
$ kcadm.sh remove-roles --rname testrole --rolename user -r demorealm
Adding client roles to a realm role
Use a dedicated add-roles command that can be used for adding realm roles and client roles.
The following example adds the roles defined on the client realm-management - create-client role and the view-users role to the testrole composite role.
$ kcadm.sh add-roles -r demorealm --rname testrole --cclientid realm-management --rolename create-client --rolename view-users
Adding client roles to a client role
Determine the ID of the composite client role by using the
get-rolescommand.For example:
$ kcadm.sh get-roles -r demorealm --cclientid test-client --rolename operations
-
Assume that there is a client with a clientId attribute of
test-client, a client role calledsupport, and another client role calledoperations, which becomes a composite role, that has an ID of "fc400897-ef6a-4e8c-872b-1581b7fa8a71". Use the following example to add another role to the composite role.
$ kcadm.sh add-roles -r demorealm --cclientid test-client --rid fc400897-ef6a-4e8c-872b-1581b7fa8a71 --rolename support
List the roles of a composite role by using the
get-roles --allcommand.For example:
$ kcadm.sh get-roles --rid fc400897-ef6a-4e8c-872b-1581b7fa8a71 --all
Removing client roles from a composite role
Use a dedicated remove-roles command to remove client roles from a composite role.
Use the following example to remove two roles defined on the client realm-management - create-client role and the view-users role from the testrole composite role.
$ kcadm.sh remove-roles -r demorealm --rname testrole --cclientid realm-management --rolename create-client --rolename view-users
Adding client roles to a group
Use a dedicated add-roles command that can be used for adding realm roles and client roles.
The following example adds the roles defined on the client realm-management - create-client role and the view-users role to the Group group (via the --gname option). The group can alternatively be specified by ID (via the --gid option).
See Group operations for more operations that can be performed to groups.
$ kcadm.sh add-roles -r demorealm --gname Group --cclientid realm-management --rolename create-client --rolename view-users
Removing client roles from a group
Use a dedicated remove-roles command to remove client roles from a group.
Use the following example to remove two roles defined on the client realm management - create-client role and the view-users role from the Group group.
See Group operations for more operations that can be performed to groups.
$ kcadm.sh remove-roles -r demorealm --gname Group --cclientid realm-management --rolename create-client --rolename view-users
20.8. Client operations
Creating a client
Run the
createcommand on aclientsendpoint to create a new client.For example:
$ kcadm.sh create clients -r demorealm -s clientId=myapp -s enabled=true
Specify a secret if you want to set a secret for adapters to authenticate.
For example:
$ kcadm.sh create clients -r demorealm -s clientId=myapp -s enabled=true -s clientAuthenticatorType=client-secret -s secret=d0b8122f-8dfb-46b7-b68a-f5cc4e25d000
Listing clients
Use the get command on the clients endpoint to list clients.
For example:
$ kcadm.sh get clients -r demorealm --fields id,clientId
This example filters the output to list only the id and clientId attributes.
Getting a specific client
Use a client’s ID to construct an endpoint URI that targets a specific client, such as clients/ID.
For example:
$ kcadm.sh get clients/c7b8547f-e748-4333-95d0-410b76b3f4a3 -r demorealm
Getting the current secret for a specific client
Use a client’s ID to construct an endpoint URI, such as clients/ID/client-secret.
For example:
$ kcadm.sh get clients/$CID/client-secret
Getting an adapter configuration file (keycloak.json) for a specific client
Use a client’s ID to construct an endpoint URI that targets a specific client, such as clients/ID/installation/providers/keycloak-oidc-keycloak-json.
For example:
$ kcadm.sh get clients/c7b8547f-e748-4333-95d0-410b76b3f4a3/installation/providers/keycloak-oidc-keycloak-json -r demorealm
Getting a WildFly subsystem adapter configuration for a specific client
Use a client’s ID to construct an endpoint URI that targets a specific client, such as clients/ID/installation/providers/keycloak-oidc-jboss-subsystem.
For example:
$ kcadm.sh get clients/c7b8547f-e748-4333-95d0-410b76b3f4a3/installation/providers/keycloak-oidc-jboss-subsystem -r demorealm
Getting a Docker-v2 example configuration for a specific client
Use a client’s ID to construct an endpoint URI that targets a specific client, such as clients/ID/installation/providers/docker-v2-compose-yaml.
Note that response will be in .zip format.
For example:
$ kcadm.sh get http://localhost:8080/auth/admin/realms/demorealm/clients/8f271c35-44e3-446f-8953-b0893810ebe7/installation/providers/docker-v2-compose-yaml -r demorealm > keycloak-docker-compose-yaml.zip
Updating a client
Use the update command with the same endpoint URI that you used to get a specific client.
For example, on:
- Linux:
$ kcadm.sh update clients/c7b8547f-e748-4333-95d0-410b76b3f4a3 -r demorealm -s enabled=false -s publicClient=true -s 'redirectUris=["http://localhost:8080/myapp/*"]' -s baseUrl=http://localhost:8080/myapp -s adminUrl=http://localhost:8080/myapp
- Windows:
c:\> kcadm update clients/c7b8547f-e748-4333-95d0-410b76b3f4a3 -r demorealm -s enabled=false -s publicClient=true -s "redirectUris=[\"http://localhost:8080/myapp/*\"]" -s baseUrl=http://localhost:8080/myapp -s adminUrl=http://localhost:8080/myapp
Deleting a client
Use the delete command with the same endpoint URI that you used to get a specific client.
For example:
$ kcadm.sh delete clients/c7b8547f-e748-4333-95d0-410b76b3f4a3 -r demorealm
Adding or removing roles for client’s service account
Service account for the client is just a special kind of user account with username service-account-CLIENT_ID. You can perform user operations on this account as if it was a regular user.
20.9. User operations
Creating a user
Run the create command on the users endpoint to create a new user.
For example:
$ kcadm.sh create users -r demorealm -s username=testuser -s enabled=true
Listing users
Use the users endpoint to list users. The target user will have to change the password the next time they log in.
For example:
$ kcadm.sh get users -r demorealm --offset 0 --limit 1000
You can filter users by username, firstName, lastName, or email.
For example:
$ kcadm.sh get users -r demorealm -q email=google.com
$ kcadm.sh get users -r demorealm -q username=testuser
Filtering does not use exact matching. For example, the above example would match the value of the username attribute against the *testuser* pattern.
You can also filter across multiple attributes by specifying multiple -q options, which return only users that match the condition for all the attributes.
Getting a specific user
Use a user’s ID to compose an endpoint URI, such as users/USER_ID.
For example:
$ kcadm.sh get users/0ba7a3fd-6fd8-48cd-a60b-2e8fd82d56e2 -r demorealm
Updating a user
Use the update command with the same endpoint URI that you used to get a specific user.
For example, on:
- Linux:
$ kcadm.sh update users/0ba7a3fd-6fd8-48cd-a60b-2e8fd82d56e2 -r demorealm -s 'requiredActions=["VERIFY_EMAIL","UPDATE_PROFILE","CONFIGURE_TOTP","UPDATE_PASSWORD"]'
- Windows:
c:\> kcadm update users/0ba7a3fd-6fd8-48cd-a60b-2e8fd82d56e2 -r demorealm -s "requiredActions=[\"VERIFY_EMAIL\",\"UPDATE_PROFILE\",\"CONFIGURE_TOTP\",\"UPDATE_PASSWORD\"]"
Deleting a user
Use the delete command with the same endpoint URI that you used to get a specific user.
For example:
$ kcadm.sh delete users/0ba7a3fd-6fd8-48cd-a60b-2e8fd82d56e2 -r demorealm
Resetting a user’s password
Use the dedicated set-password command to reset a user’s password.
For example:
$ kcadm.sh set-password -r demorealm --username testuser --new-password NEWPASSWORD --temporary
That command sets a temporary password for the user. The target user will have to change the password the next time they log in.
You can use --userid if you want to specify the user by using the id attribute.
You can achieve the same result using the update command on an endpoint constructed from the one you used to get a specific user, such as users/USER_ID/reset-password.
For example:
$ kcadm.sh update users/0ba7a3fd-6fd8-48cd-a60b-2e8fd82d56e2/reset-password -r demorealm -s type=password -s value=NEWPASSWORD -s temporary=true -n
The last parameter (-n) ensures that only the PUT command is performed without a prior GET command. It is necessary in this instance because the reset-password endpoint does not support GET.
Listing assigned, available, and effective realm roles for a user
You can use a dedicated get-roles command to list assigned, available, and effective realm roles for a user.
Specify the target user by either user name or ID to list assigned realm roles for the user.
For example:
$ kcadm.sh get-roles -r demorealm --uusername testuser
Use the additional
--effectiveoption to list effective realm roles.For example:
$ kcadm.sh get-roles -r demorealm --uusername testuser --effective
Use the
--availableoption to list realm roles that can still be added to the user.For example:
$ kcadm.sh get-roles -r demorealm --uusername testuser --available
Listing assigned, available, and effective client roles for a user
Use a dedicated get-roles command to list assigned, available, and effective client roles for a user.
Specify the target user by either a user name (via the
--uusernameoption) or an ID (via the--uidoption) and client by either a clientId attribute (via the--cclientidoption) or an ID (via the--cidoption) to list assigned client roles for the user.For example:
$ kcadm.sh get-roles -r demorealm --uusername testuser --cclientid realm-management
Use the additional
--effectiveoption to list effective realm roles.For example:
$ kcadm.sh get-roles -r demorealm --uusername testuser --cclientid realm-management --effective
Use the
--availableoption to list realm roles that can still be added to the user.For example:
$ kcadm.sh get-roles -r demorealm --uusername testuser --cclientid realm-management --available
Adding realm roles to a user
Use a dedicated add-roles command to add realm roles to a user.
Use the following example to add the user role to user testuser.
$ kcadm.sh add-roles --uusername testuser --rolename user -r demorealm
Removing realm roles from a user
Use a dedicated remove-roles command to remove realm roles from a user.
Use the following example to remove the user role from the user testuser.
$ kcadm.sh remove-roles --uusername testuser --rolename user -r demorealm
Adding client roles to a user
Use a dedicated add-roles command to add client roles to a user.
Use the following example to add two roles defined on the client realm management - create-client role and the view-users role to the user testuser.
$ kcadm.sh add-roles -r demorealm --uusername testuser --cclientid realm-management --rolename create-client --rolename view-users
Removing client roles from a user
Use a dedicated remove-roles command to remove client roles from a user.
Use the following example to remove two roles defined on the realm management client.
$ kcadm.sh remove-roles -r demorealm --uusername testuser --cclientid realm-management --rolename create-client --rolename view-users
Listing a user’s sessions
-
Identify the user’s ID, and then use it to compose an endpoint URI, such as
users/ID/sessions. Use the
getcommand to retrieve a list of the user’s sessions.For example:
$kcadm get users/6da5ab89-3397-4205-afaa-e201ff638f9e/sessions
Logging out a user from a specific session
- Determine the session’s ID as described above.
-
Use the session’s ID to compose an endpoint URI, such as
sessions/ID. Use the
deletecommand to invalidate the session.For example:
$ kcadm.sh delete sessions/d0eaa7cc-8c5d-489d-811a-69d3c4ec84d1
Logging out a user from all sessions
You need a user’s ID to construct an endpoint URI, such as users/ID/logout.
Use the create command to perform POST on that endpoint URI.
For example:
$ kcadm.sh create users/6da5ab89-3397-4205-afaa-e201ff638f9e/logout -r demorealm -s realm=demorealm -s user=6da5ab89-3397-4205-afaa-e201ff638f9e
20.10. Group operations
Creating a group
Use the create command on the groups endpoint to create a new group.
For example:
$ kcadm.sh create groups -r demorealm -s name=Group
Listing groups
Use the get command on the groups endpoint to list groups.
For example:
$ kcadm.sh get groups -r demorealm
Getting a specific group
Use the group’s ID to construct an endpoint URI, such as groups/GROUP_ID.
For example:
$ kcadm.sh get groups/51204821-0580-46db-8f2d-27106c6b5ded -r demorealm
Updating a group
Use the update command with the same endpoint URI that you used to get a specific group.
For example:
$ kcadm.sh update groups/51204821-0580-46db-8f2d-27106c6b5ded -s 'attributes.email=["group@example.com"]' -r demorealm
Deleting a group
Use the delete command with the same endpoint URI that you used to get a specific group.
For example:
$ kcadm.sh delete groups/51204821-0580-46db-8f2d-27106c6b5ded -r demorealm
Creating a subgroup
Find the ID of the parent group by listing groups, and then use that ID to construct an endpoint URI, such as groups/GROUP_ID/children.
For example:
$ kcadm.sh create groups/51204821-0580-46db-8f2d-27106c6b5ded/children -r demorealm -s name=SubGroup
Moving a group under another group
- Find the ID of an existing parent group and of an existing child group.
-
Use the parent group’s ID to construct an endpoint URI, such as
groups/PARENT_GROUP_ID/children. -
Run the
createcommand on this endpoint and pass the child group’s ID as a JSON body.
For example:
$ kcadm.sh create groups/51204821-0580-46db-8f2d-27106c6b5ded/children -r demorealm -s id=08d410c6-d585-4059-bb07-54dcb92c5094
Get groups for a specific user
Use a user’s ID to determine a user’s membership in groups to compose an endpoint URI, such as users/USER_ID/groups.
For example:
$ kcadm.sh get users/b544f379-5fc4-49e5-8a8d-5cfb71f46f53/groups -r demorealm
Adding a user to a group
Use the update command with an endpoint URI composed from user’s ID and a group’s ID, such as users/USER_ID/groups/GROUP_ID, to add a user to a group.
For example:
$ kcadm.sh update users/b544f379-5fc4-49e5-8a8d-5cfb71f46f53/groups/ce01117a-7426-4670-a29a-5c118056fe20 -r demorealm -s realm=demorealm -s userId=b544f379-5fc4-49e5-8a8d-5cfb71f46f53 -s groupId=ce01117a-7426-4670-a29a-5c118056fe20 -n
Removing a user from a group
Use the delete command on the same endpoint URI as used for adding a user to a group, such as users/USER_ID/groups/GROUP_ID, to remove a user from a group.
For example:
$ kcadm.sh delete users/b544f379-5fc4-49e5-8a8d-5cfb71f46f53/groups/ce01117a-7426-4670-a29a-5c118056fe20 -r demorealm
Listing assigned, available, and effective realm roles for a group
Use a dedicated get-roles command to list assigned, available, and effective realm roles for a group.
Specify the target group by name (via the
--gnameoption), path (via the [command]--gpathoption), or ID (via the--gidoption) to list assigned realm roles for the group.For example:
$ kcadm.sh get-roles -r demorealm --gname Group
Use the additional
--effectiveoption to list effective realm roles.For example:
$ kcadm.sh get-roles -r demorealm --gname Group --effective
Use the
--availableoption to list realm roles that can still be added to the group.For example:
$ kcadm.sh get-roles -r demorealm --gname Group --available
Listing assigned, available, and effective client roles for a group
Use a dedicated get-roles command to list assigned, available, and effective client roles for a group.
Specify the target group by either name (via the
--gnameoption) or ID (via the--gidoption), and client by either the clientId attribute (via the [command]--cclientidoption) or ID (via the--idoption) to list assigned client roles for the user.For example:
$ kcadm.sh get-roles -r demorealm --gname Group --cclientid realm-management
Use the additional
--effectiveoption to list effective realm roles.For example:
$ kcadm.sh get-roles -r demorealm --gname Group --cclientid realm-management --effective
Use the
--availableoption to list realm roles that can still be added to the group.For example:
$ kcadm.sh get-roles -r demorealm --gname Group --cclientid realm-management --available
20.11. Identity provider operations
Listing available identity providers
Use the serverinfo endpoint to list available identity providers.
For example:
$ kcadm.sh get serverinfo -r demorealm --fields 'identityProviders(*)'
The serverinfo endpoint is handled similarly to the realms endpoint in that it is not resolved relative to a target realm because it exists outside any specific realm.
Listing configured identity providers
Use the identity-provider/instances endpoint.
For example:
$ kcadm.sh get identity-provider/instances -r demorealm --fields alias,providerId,enabled
Getting a specific configured identity provider
Use the alias attribute of the identity provider to construct an endpoint URI, such as identity-provider/instances/ALIAS, to get a specific identity provider.
For example:
$ kcadm.sh get identity-provider/instances/facebook -r demorealm
Removing a specific configured identity provider
Use the delete command with the same endpoint URI that you used to get a specific configured identity provider to remove a specific configured identity provider.
For example:
$ kcadm.sh delete identity-provider/instances/facebook -r demorealm
Configuring a Keycloak OpenID Connect identity provider
-
Use
keycloak-oidcas theproviderIdwhen creating a new identity provider instance. Provide the
configattributes:authorizationUrl,tokenUrl,clientId, andclientSecret.For example:
$ kcadm.sh create identity-provider/instances -r demorealm -s alias=keycloak-oidc -s providerId=keycloak-oidc -s enabled=true -s 'config.useJwksUrl="true"' -s config.authorizationUrl=http://localhost:8180/auth/realms/demorealm/protocol/openid-connect/auth -s config.tokenUrl=http://localhost:8180/auth/realms/demorealm/protocol/openid-connect/token -s config.clientId=demo-oidc-provider -s config.clientSecret=secret
Configuring an OpenID Connect identity provider
Configure the generic OpenID Connect provider the same way you configure the Keycloak OpenID Connect provider, except that you set the providerId attribute value to oidc.
Configuring a SAML 2 identity provider
-
Use
samlas theproviderId. -
Provide the
configattributes:singleSignOnServiceUrl,nameIDPolicyFormat, andsignatureAlgorithm.
For example:
$ kcadm.sh create identity-provider/instances -r demorealm -s alias=saml -s providerId=saml -s enabled=true -s 'config.useJwksUrl="true"' -s config.singleSignOnServiceUrl=http://localhost:8180/auth/realms/saml-broker-realm/protocol/saml -s config.nameIDPolicyFormat=urn:oasis:names:tc:SAML:2.0:nameid-format:persistent -s config.signatureAlgorithm=RSA_SHA256
Configuring a Facebook identity provider
-
Use
facebookas theproviderId. Provide the
configattributes:clientIdandclientSecret. You can find these attributes in the Facebook Developers application configuration page for your application.For example:
$ kcadm.sh create identity-provider/instances -r demorealm -s alias=facebook -s providerId=facebook -s enabled=true -s 'config.useJwksUrl="true"' -s config.clientId=FACEBOOK_CLIENT_ID -s config.clientSecret=FACEBOOK_CLIENT_SECRET
Configuring a Google identity provider
-
Use
googleas theproviderId. Provide the
configattributes:clientIdandclientSecret. You can find these attributes in the Google Developers application configuration page for your application.For example:
$ kcadm.sh create identity-provider/instances -r demorealm -s alias=google -s providerId=google -s enabled=true -s 'config.useJwksUrl="true"' -s config.clientId=GOOGLE_CLIENT_ID -s config.clientSecret=GOOGLE_CLIENT_SECRET
Configuring a Twitter identity provider
-
Use
twitteras theproviderId. Provide the
configattributesclientIdandclientSecret. You can find these attributes in the Twitter Application Management application configuration page for your application.For example:
$ kcadm.sh create identity-provider/instances -r demorealm -s alias=google -s providerId=google -s enabled=true -s 'config.useJwksUrl="true"' -s config.clientId=TWITTER_API_KEY -s config.clientSecret=TWITTER_API_SECRET
Configuring a GitHub identity provider
-
Use
githubas theproviderId. Provide the
configattributesclientIdandclientSecret. You can find these attributes in the GitHub Developer Application Settings page for your application.For example:
$ kcadm.sh create identity-provider/instances -r demorealm -s alias=github -s providerId=github -s enabled=true -s 'config.useJwksUrl="true"' -s config.clientId=GITHUB_CLIENT_ID -s config.clientSecret=GITHUB_CLIENT_SECRET
Configuring a LinkedIn identity provider
-
Use
linkedinas theproviderId. Provide the
configattributesclientIdandclientSecret. You can find these attributes in the LinkedIn Developer Console application page for your application.For example:
$ kcadm.sh create identity-provider/instances -r demorealm -s alias=linkedin -s providerId=linkedin -s enabled=true -s 'config.useJwksUrl="true"' -s config.clientId=LINKEDIN_CLIENT_ID -s config.clientSecret=LINKEDIN_CLIENT_SECRET
Configuring a Microsoft Live identity provider
-
Use
microsoftas theproviderId. Provide the
configattributesclientIdandclientSecret. You can find these attributes in the Microsoft Application Registration Portal page for your application.For example:
$ kcadm.sh create identity-provider/instances -r demorealm -s alias=microsoft -s providerId=microsoft -s enabled=true -s 'config.useJwksUrl="true"' -s config.clientId=MICROSOFT_APP_ID -s config.clientSecret=MICROSOFT_PASSWORD
Configuring a Stack Overflow identity provider
-
Use
stackoverflowcommand as theproviderId. Provide the
configattributesclientId,clientSecret, andkey. You can find these attributes in the Stack Apps OAuth page for your application.For example:
$ kcadm.sh create identity-provider/instances -r demorealm -s alias=stackoverflow -s providerId=stackoverflow -s enabled=true -s 'config.useJwksUrl="true"' -s config.clientId=STACKAPPS_CLIENT_ID -s config.clientSecret=STACKAPPS_CLIENT_SECRET -s config.key=STACKAPPS_KEY
20.12. Storage provider operations
Configuring a Kerberos storage provider
-
Use the
createcommand against thecomponentsendpoint. -
Specify realm id as a value of the
parentIdattribute. -
Specify
kerberosas the value of theproviderIdattribute, andorg.keycloak.storage.UserStorageProvideras the value of theproviderTypeattribute. For example:
$ kcadm.sh create components -r demorealm -s parentId=demorealmId -s id=demokerberos -s name=demokerberos -s providerId=kerberos -s providerType=org.keycloak.storage.UserStorageProvider -s 'config.priority=["0"]' -s 'config.debug=["false"]' -s 'config.allowPasswordAuthentication=["true"]' -s 'config.editMode=["UNSYNCED"]' -s 'config.updateProfileFirstLogin=["true"]' -s 'config.allowKerberosAuthentication=["true"]' -s 'config.kerberosRealm=["KEYCLOAK.ORG"]' -s 'config.keyTab=["http.keytab"]' -s 'config.serverPrincipal=["HTTP/localhost@KEYCLOAK.ORG"]' -s 'config.cachePolicy=["DEFAULT"]'
Configuring an LDAP user storage provider
-
Use the
createcommand against thecomponentsendpoint. -
Specify
ldapas a value of theproviderIdattribute, andorg.keycloak.storage.UserStorageProvideras the value of theproviderTypeattribute. -
Provide the realm ID as the value of the
parentIdattribute. Use the following example to create a Kerberos-integrated LDAP provider.
$ kcadm.sh create components -r demorealm -s name=kerberos-ldap-provider -s providerId=ldap -s providerType=org.keycloak.storage.UserStorageProvider -s parentId=3d9c572b-8f33-483f-98a6-8bb421667867 -s 'config.priority=["1"]' -s 'config.fullSyncPeriod=["-1"]' -s 'config.changedSyncPeriod=["-1"]' -s 'config.cachePolicy=["DEFAULT"]' -s config.evictionDay=[] -s config.evictionHour=[] -s config.evictionMinute=[] -s config.maxLifespan=[] -s 'config.batchSizeForSync=["1000"]' -s 'config.editMode=["WRITABLE"]' -s 'config.syncRegistrations=["false"]' -s 'config.vendor=["other"]' -s 'config.usernameLDAPAttribute=["uid"]' -s 'config.rdnLDAPAttribute=["uid"]' -s 'config.uuidLDAPAttribute=["entryUUID"]' -s 'config.userObjectClasses=["inetOrgPerson, organizationalPerson"]' -s 'config.connectionUrl=["ldap://localhost:10389"]' -s 'config.usersDn=["ou=People,dc=keycloak,dc=org"]' -s 'config.authType=["simple"]' -s 'config.bindDn=["uid=admin,ou=system"]' -s 'config.bindCredential=["secret"]' -s 'config.searchScope=["1"]' -s 'config.useTruststoreSpi=["ldapsOnly"]' -s 'config.connectionPooling=["true"]' -s 'config.pagination=["true"]' -s 'config.allowKerberosAuthentication=["true"]' -s 'config.serverPrincipal=["HTTP/localhost@KEYCLOAK.ORG"]' -s 'config.keyTab=["http.keytab"]' -s 'config.kerberosRealm=["KEYCLOAK.ORG"]' -s 'config.debug=["true"]' -s 'config.useKerberosForPasswordAuthentication=["true"]'
Removing a user storage provider instance
-
Use the storage provider instance’s
idattribute to compose an endpoint URI, such ascomponents/ID. Run the
deletecommand against this endpoint.For example:
$ kcadm.sh delete components/3d9c572b-8f33-483f-98a6-8bb421667867 -r demorealm
Triggering synchronization of all users for a specific user storage provider
-
Use the storage provider’s
idattribute to compose an endpoint URI, such asuser-storage/ID_OF_USER_STORAGE_INSTANCE/sync. Add the
action=triggerFullSyncquery parameter and run thecreatecommand.For example:
$ kcadm.sh create user-storage/b7c63d02-b62a-4fc1-977c-947d6a09e1ea/sync?action=triggerFullSync
Triggering synchronization of changed users for a specific user storage provider
-
Use the storage provider’s
idattribute to compose an endpoint URI, such asuser-storage/ID_OF_USER_STORAGE_INSTANCE/sync. Add the
action=triggerChangedUsersSyncquery parameter and run thecreatecommand.For example:
$ kcadm.sh create user-storage/b7c63d02-b62a-4fc1-977c-947d6a09e1ea/sync?action=triggerChangedUsersSync
Test LDAP user storage connectivity
-
Run the
getcommand on thetestLDAPConnectionendpoint. Provide query parameters
bindCredential,bindDn,connectionUrl, anduseTruststoreSpi, and then set theactionquery parameter totestConnection.For example:
$ kcadm.sh create testLDAPConnection -s action=testConnection -s bindCredential=secret -s bindDn=uid=admin,ou=system -s connectionUrl=ldap://localhost:10389 -s useTruststoreSpi=ldapsOnly
Test LDAP user storage authentication
-
Run the
getcommand on thetestLDAPConnectionendpoint. Provide the query parameters
bindCredential,bindDn,connectionUrl, anduseTruststoreSpi, and then set theactionquery parameter totestAuthentication.For example:
$ kcadm.sh create testLDAPConnection -s action=testAuthentication -s bindCredential=secret -s bindDn=uid=admin,ou=system -s connectionUrl=ldap://localhost:10389 -s useTruststoreSpi=ldapsOnly
20.13. Adding mappers
Adding a hardcoded role LDAP mapper
-
Run the
createcommand on thecomponentsendpoint. -
Set the
providerTypeattribute toorg.keycloak.storage.ldap.mappers.LDAPStorageMapper. -
Set the
parentIdattribute to the ID of the LDAP provider instance. Set the
providerIdattribute tohardcoded-ldap-role-mapper. Make sure to provide a value ofroleconfiguration parameter.For example:
$ kcadm.sh create components -r demorealm -s name=hardcoded-ldap-role-mapper -s providerId=hardcoded-ldap-role-mapper -s providerType=org.keycloak.storage.ldap.mappers.LDAPStorageMapper -s parentId=b7c63d02-b62a-4fc1-977c-947d6a09e1ea -s 'config.role=["realm-management.create-client"]'
Adding an MS Active Directory mapper
-
Run the
createcommand on thecomponentsendpoint. -
Set the
providerTypeattribute toorg.keycloak.storage.ldap.mappers.LDAPStorageMapper. -
Set the
parentIdattribute to the ID of the LDAP provider instance. Set the
providerIdattribute tomsad-user-account-control-mapper.For example:
$ kcadm.sh create components -r demorealm -s name=msad-user-account-control-mapper -s providerId=msad-user-account-control-mapper -s providerType=org.keycloak.storage.ldap.mappers.LDAPStorageMapper -s parentId=b7c63d02-b62a-4fc1-977c-947d6a09e1ea
Adding a user attribute LDAP mapper
-
Run the
createcommand on thecomponentsendpoint. -
Set the
providerTypeattribute toorg.keycloak.storage.ldap.mappers.LDAPStorageMapper. -
Set the
parentIdattribute to the ID of the LDAP provider instance. Set the
providerIdattribute touser-attribute-ldap-mapper.For example:
$ kcadm.sh create components -r demorealm -s name=user-attribute-ldap-mapper -s providerId=user-attribute-ldap-mapper -s providerType=org.keycloak.storage.ldap.mappers.LDAPStorageMapper -s parentId=b7c63d02-b62a-4fc1-977c-947d6a09e1ea -s 'config."user.model.attribute"=["email"]' -s 'config."ldap.attribute"=["mail"]' -s 'config."read.only"=["false"]' -s 'config."always.read.value.from.ldap"=["false"]' -s 'config."is.mandatory.in.ldap"=["false"]'
Adding a group LDAP mapper
-
Run the
createcommand on thecomponentsendpoint. -
Set the
providerTypeattribute toorg.keycloak.storage.ldap.mappers.LDAPStorageMapper. -
Set the
parentIdattribute to the ID of the LDAP provider instance. Set the
providerIdattribute togroup-ldap-mapper.For example:
$ kcadm.sh create components -r demorealm -s name=group-ldap-mapper -s providerId=group-ldap-mapper -s providerType=org.keycloak.storage.ldap.mappers.LDAPStorageMapper -s parentId=b7c63d02-b62a-4fc1-977c-947d6a09e1ea -s 'config."groups.dn"=[]' -s 'config."group.name.ldap.attribute"=["cn"]' -s 'config."group.object.classes"=["groupOfNames"]' -s 'config."preserve.group.inheritance"=["true"]' -s 'config."membership.ldap.attribute"=["member"]' -s 'config."membership.attribute.type"=["DN"]' -s 'config."groups.ldap.filter"=[]' -s 'config.mode=["LDAP_ONLY"]' -s 'config."user.roles.retrieve.strategy"=["LOAD_GROUPS_BY_MEMBER_ATTRIBUTE"]' -s 'config."mapped.group.attributes"=["admins-group"]' -s 'config."drop.non.existing.groups.during.sync"=["false"]' -s 'config.roles=["admins"]' -s 'config.groups=["admins-group"]' -s 'config.group=[]' -s 'config.preserve=["true"]' -s 'config.membership=["member"]'
Adding a full name LDAP mapper
-
Run the
createcommand on thecomponentsendpoint. -
Set the
providerTypeattribute toorg.keycloak.storage.ldap.mappers.LDAPStorageMapper. -
Set the
parentIdattribute to the ID of the LDAP provider instance. Set the
providerIdattribute tofull-name-ldap-mapper.For example:
$ kcadm.sh create components -r demorealm -s name=full-name-ldap-mapper -s providerId=full-name-ldap-mapper -s providerType=org.keycloak.storage.ldap.mappers.LDAPStorageMapper -s parentId=b7c63d02-b62a-4fc1-977c-947d6a09e1ea -s 'config."ldap.full.name.attribute"=["cn"]' -s 'config."read.only"=["false"]' -s 'config."write.only"=["true"]'
20.14. Authentication operations
Setting a password policy
-
Set the realm’s
passwordPolicyattribute to an enumeration expression that includes the specific policy provider ID and optional configuration. Use the following example to set a password policy to default values. The default values include:
- 27,500 hashing iterations
- at least one special character
- at least one uppercase character
- at least one digit character
-
not be equal to a user’s
username be at least eight characters long
$ kcadm.sh update realms/demorealm -s 'passwordPolicy="hashIterations and specialChars and upperCase and digits and notUsername and length"'
- If you want to use values different from defaults, pass the configuration in brackets.
Use the following example to set a password policy to:
- 25,000 hash iterations
- at least two special characters
- at least two uppercase characters
- at least two lowercase characters
- at least two digits
- be at least nine characters long
-
not be equal to a user’s
username not repeat for at least four changes back
$ kcadm.sh update realms/demorealm -s 'passwordPolicy="hashIterations(25000) and specialChars(2) and upperCase(2) and lowerCase(2) and digits(2) and length(9) and notUsername and passwordHistory(4)"'
Getting the current password policy
Get the current realm configuration and filter everything but the passwordPolicy attribute.
Use the following example to display passwordPolicy for demorealm.
$ kcadm.sh get realms/demorealm --fields passwordPolicy
Listing authentication flows
Run the get command on the authentication/flows endpoint.
For example:
$ kcadm.sh get authentication/flows -r demorealm
Getting a specific authentication flow
Run the get command on the authentication/flows/FLOW_ID endpoint.
For example:
$ kcadm.sh get authentication/flows/febfd772-e1a1-42fb-b8ae-00c0566fafb8 -r demorealm
Listing executions for a flow
Run the get command on the authentication/flows/FLOW_ALIAS/executions endpoint.
For example:
$ kcadm.sh get authentication/flows/Copy%20of%20browser/executions -r demorealm
Adding configuration to an execution
- Get execution for a flow, and take note of its ID
-
Run the
createcommand on theauthentication/executions/{executionId}/configendpoint.
For example:
$ kcadm create "authentication/executions/a3147129-c402-4760-86d9-3f2345e401c7/config" -r examplerealm -b '{"config":{"x509-cert-auth.mapping-source-selection":"Match SubjectDN using regular expression","x509-cert-auth.regular-expression":"(.*?)(?:$)","x509-cert-auth.mapper-selection":"Custom Attribute Mapper","x509-cert-auth.mapper-selection.user-attribute-name":"usercertificate","x509-cert-auth.crl-checking-enabled":"","x509-cert-auth.crldp-checking-enabled":false,"x509-cert-auth.crl-relative-path":"crl.pem","x509-cert-auth.ocsp-checking-enabled":"","x509-cert-auth.ocsp-responder-uri":"","x509-cert-auth.keyusage":"","x509-cert-auth.extendedkeyusage":"","x509-cert-auth.confirmation-page-disallowed":""},"alias":"my_otp_config"}'Getting configuration for an execution
-
Get execution for a flow, and get its
authenticationConfigattribute, containing the config ID. -
Run the
getcommand on theauthentication/config/IDendpoint.
For example:
$ kcadm get "authentication/config/dd91611a-d25c-421a-87e2-227c18421833" -r examplerealm
Updating configuration for an execution
-
Get execution for a flow, and get its
authenticationConfigattribute, containing the config ID. -
Run the
updatecommand on theauthentication/config/IDendpoint.
For example:
$ kcadm update "authentication/config/dd91611a-d25c-421a-87e2-227c18421833" -r examplerealm -b '{"id":"dd91611a-d25c-421a-87e2-227c18421833","alias":"my_otp_config","config":{"x509-cert-auth.extendedkeyusage":"","x509-cert-auth.mapper-selection.user-attribute-name":"usercertificate","x509-cert-auth.ocsp-responder-uri":"","x509-cert-auth.regular-expression":"(.*?)(?:$)","x509-cert-auth.crl-checking-enabled":"true","x509-cert-auth.confirmation-page-disallowed":"","x509-cert-auth.keyusage":"","x509-cert-auth.mapper-selection":"Custom Attribute Mapper","x509-cert-auth.crl-relative-path":"crl.pem","x509-cert-auth.crldp-checking-enabled":"false","x509-cert-auth.mapping-source-selection":"Match SubjectDN using regular expression","x509-cert-auth.ocsp-checking-enabled":""}}'Deleting configuration for an execution
-
Get execution for a flow, and get its
authenticationConfigattribute, containing the config ID. -
Run the
deletecommand on theauthentication/config/IDendpoint.
For example:
$ kcadm delete "authentication/config/dd91611a-d25c-421a-87e2-227c18421833" -r examplerealm
12.4. Social Identity Providers
For Internet facing applications, it is quite burdensome for users to have to register at your site to obtain access. It requires them to remember yet another username and password combination. Social identity providers allow you to delegate authentication to a semi-trusted and respected entity where the user probably already has an account. Red Hat Single Sign-On provides built-in support for the most common social networks out there, such as Google, Facebook, Twitter, GitHub, LinkedIn, Microsoft and Stack Overflow.
12.4.1. Bitbucket
There are a number of steps you have to complete to be able to enable login with Bitbucket.
First, open the
Identity Providersleft menu item and selectBitbucketfrom theAdd providerdrop down list. This will bring you to theAdd identity providerpage.Add Identity Provider
Before you can click
Save, you must obtain aClient IDandClient Secretfrom Bitbucket.You will use the
Redirect URIfrom this page in a later step, which you will provide to Bitbucket when you register Red Hat Single Sign-On as a client there.Add a New App
To enable login with Bitbucket you must first register an application project in OAuth on Bitbucket Cloud.
Bitbucket often changes the look and feel of application registration, so what you see on the Bitbucket site may differ. If in doubt, see the Bitbucket documentation.
Click the
Add consumerbutton.Register App
Copy the
Redirect URIfrom the Red Hat Single Sign-OnAdd Identity Providerpage and enter it into the Callback URL field on the Bitbucket Add OAuth Consumer page.On the same page, mark the
EmailandReadboxes underAccountto allow your application to read user email.Bitbucket App Page
When you are done registering, click
Save. This will open the application management page in Bitbucket. Find the client ID and secret from this page so you can enter them into the Red Hat Single Sign-OnAdd identity providerpage. ClickSave.12.4.2. Facebook
There are a number of steps you have to complete to be able to enable login with Facebook. First, go to the
Identity Providersleft menu item and selectFacebookfrom theAdd providerdrop down list. This will bring you to theAdd identity providerpage.Add Identity Provider
You can’t click save yet, as you’ll need to obtain a
Client IDandClient Secretfrom Facebook. One piece of data you’ll need from this page is theRedirect URI. You’ll have to provide that to Facebook when you register Red Hat Single Sign-On as a client there, so copy this URI to your clipboard.To enable login with Facebook you first have to create a project and a client in the Facebook Developer Console.
Facebook often changes the look and feel of the Facebook Developer Console, so these directions might not always be up to date and the configuration steps might be slightly different.
Once you’ve logged into the console there is a pull down menu in the top right corner of the screen that says
My Apps. Select theAdd a New Appmenu item.Add a New App
Select the
Websiteicon. Click theSkip and Create App IDbutton.Create a New App ID
The email address and app category are required fields. Once you’re done with that, you will be brought to the dashboard for the application. Click the
Settingsleft menu item.Create a New App ID
Click on the
+ Add Platformbutton at the end of this page and select theWebsiteicon. Copy and paste theRedirect URIfrom the Red Hat Single Sign-OnAdd identity providerpage into theSite URLof the FacebookWebsitesettings block.Specify Website
After this it is necessary to make the Facebook app public. Click
App Reviewleft menu item and switch button to "Yes".You will need also to obtain the App ID and App Secret from this page so you can enter them into the Red Hat Single Sign-On
Add identity providerpage. To obtain this click on theDashboardleft menu item and click onShowunderApp Secret. Go back to Red Hat Single Sign-On and specify those items and finally save your Facebook Identity Provider.One config option to note on the
Add identity providerpage for Facebook is theDefault Scopesfield. This field allows you to manually specify the scopes that users must authorize when authenticating with this provider. For a complete list of scopes, please take a look at https://developers.facebook.com/docs/graph-api. By default, Red Hat Single Sign-On uses the following scopes:email.12.4.3. GitHub
There are a number of steps you have to complete to be able to enable login with GitHub. First, go to the
Identity Providersleft menu item and selectGitHubfrom theAdd providerdrop down list. This will bring you to theAdd identity providerpage.Add Identity Provider
You can’t click save yet, as you’ll need to obtain a
Client IDandClient Secretfrom GitHub. One piece of data you’ll need from this page is theRedirect URI. You’ll have to provide that to GitHub when you register Red Hat Single Sign-On as a client there, so copy this URI to your clipboard.To enable login with GitHub you first have to register an application project in GitHub Developer applications.
GitHub often changes the look and feel of application registration, so these directions might not always be up to date and the configuration steps might be slightly different.
Add a New App
Click the
Register a new applicationbutton.Register App
You’ll have to copy the
Redirect URIfrom the Red Hat Single Sign-OnAdd Identity Providerpage and enter it into theAuthorization callback URLfield on the GitHubRegister a new OAuth applicationpage. Once you’ve completed this page you will be brought to the application’s management page.GitHub App Page
You will need to obtain the client ID and secret from this page so you can enter them into the Red Hat Single Sign-On
Add identity providerpage. Go back to Red Hat Single Sign-On and specify those items.12.4.4. GitLab
There are a number of steps you have to complete to be able to enable login with GitLab.
First, go to the
Identity Providersleft menu item and selectGitLabfrom theAdd providerdrop down list. This will bring you to theAdd identity providerpage.Add Identity Provider
Before you can click
Save, you must obtain aClient IDandClient Secretfrom GitLab.You will use the
Redirect URIfrom this page in a later step, which you will provide to GitLab when you register Red Hat Single Sign-On as a client there.To enable login with GitLab you first have to register an application in GitLab as OAuth2 authentication service provider.
GitLab often changes the look and feel of application registration, so what you see on the GitLab site may differ. If in doubt, see the GitLab documentation.
Add a New App
Copy the
Redirect URIfrom the Red Hat Single Sign-OnAdd Identity Providerpage and enter it into the Redirect URI field on the GitLab Add new application page.GitLab App Page
When you are done registering, click
Save application. This will open the application management page in GitLab. Find the client ID and secret from this page so you can enter them into the Red Hat Single Sign-OnAdd identity providerpage.To finish, return to Red Hat Single Sign-On and enter them. Click
Save.12.4.5. Google
There are a number of steps you have to complete to be able to enable login with Google. First, go to the
Identity Providersleft menu item and selectGooglefrom theAdd providerdrop down list. This will bring you to theAdd identity providerpage.Add Identity Provider
You can’t click save yet, as you’ll need to obtain a
Client IDandClient Secretfrom Google. One piece of data you’ll need from this page is theRedirect URI. You’ll have to provide that to Google when you register Red Hat Single Sign-On as a client there, so copy this URI to your clipboard.To enable login with Google you first have to create a project and a client in the Google Developer Console. Then you need to copy the client ID and secret into the Red Hat Single Sign-On Admin Console.
Google often changes the look and feel of the Google Developer Console, so these directions might not always be up to date and the configuration steps might be slightly different.
Let’s see first how to create a project with Google.
Log in to the Google Developer Console.
Google Developer Console
Click the
Create Projectbutton. Use any value forProject nameandProject IDyou want, then click theCreatebutton. Wait for the project to be created (this may take a while). Once created you will be brought to the project’s dashboard.Dashboard
Then navigate to the
APIs & Servicessection in the Google Developer Console. On that screen, navigate toCredentialsadministration.When users log into Google from Red Hat Single Sign-On they will see a consent screen from Google which will ask the user if Red Hat Single Sign-On is allowed to view information about their user profile. Thus Google requires some basic information about the product before creating any secrets for it. For a new project, you have first to configure
OAuth consent screen.For the very basic setup, filling in the Application name is sufficient. You can also set additional details like scopes for Google APIs in this page.
Fill in OAuth consent screen details
The next step is to create OAuth client ID and client secret. Back in
Credentialsadministration, navigate toCredentialstab and selectOAuth client IDunder theCreate credentialsbutton.Create credentials
You will then be brought to the
Create OAuth client IDpage. SelectWeb applicationas the application type. Specify the name you want for your client. You’ll also need to copy and paste theRedirect URIfrom the Red Hat Single Sign-OnAdd Identity Providerpage into theAuthorized redirect URIsfield. After you do this, click theCreatebutton.Create OAuth client ID
After you click
Createyou will be brought to theCredentialspage. Click on your new OAuth 2.0 Client ID to view the settings of your new Google Client.Google Client Credentials
You will need to obtain the client ID and secret from this page so you can enter them into the Red Hat Single Sign-On
Add identity providerpage. Go back to Red Hat Single Sign-On and specify those items.One config option to note on the
Add identity providerpage for Google is theDefault Scopesfield. This field allows you to manually specify the scopes that users must authorize when authenticating with this provider. For a complete list of scopes, please take a look at https://developers.google.com/oauthplayground/ . By default, Red Hat Single Sign-On uses the following scopes:openidprofileemail.If your organization uses the G Suite and you want to restrict access to only members of your organization, you must enter the domain that is used for the G Suite into the
Hosted Domainfield to enable it.12.4.6. LinkedIn
There are a number of steps you have to complete to be able to enable login with LinkedIn. First, go to the
Identity Providersleft menu item and selectLinkedInfrom theAdd providerdrop down list. This will bring you to theAdd identity providerpage.Add Identity Provider
You can’t click save yet, as you’ll need to obtain a
Client IDandClient Secretfrom LinkedIn. One piece of data you’ll need from this page is theRedirect URI. You’ll have to provide that to LinkedIn when you register Red Hat Single Sign-On as a client there, so copy this URI to your clipboard.To enable login with LinkedIn you first have to create an application in LinkedIn Developer Network.
LinkedIn may change the look and feel of application registration, so these directions may not always be up to date.
Developer Network
Click on the
Create Applicationbutton. This will bring you to theCreate a New ApplicationPage.Create App
Fill in the form with the appropriate values, then click the
Submitbutton. This will bring you to the new application’s settings page.App Settings
Select
r_basicprofileandr_emailaddressin theDefault Application Permissionssection. You’ll have to copy theRedirect URIfrom the Red Hat Single Sign-OnAdd Identity Providerpage and enter it into theOAuth 2.0Authorized Redirect URLsfield on the LinkedIn app settings page. Don’t forget to click theUpdatebutton after you do this!You will then need to obtain the client ID and secret from this page so you can enter them into the Red Hat Single Sign-On
Add identity providerpage. Go back to Red Hat Single Sign-On and specify those items.12.4.7. Microsoft
There are a number of steps you have to complete to be able to enable login with Microsoft. First, go to the
Identity Providersleft menu item and selectMicrosoftfrom theAdd providerdrop down list. This will bring you to theAdd identity providerpage.Add Identity Provider
You can’t click save yet, as you’ll need to obtain a
Client IDandClient Secretfrom Microsoft. One piece of data you’ll need from this page is theRedirect URI. You’ll have to provide that to Microsoft when you register Red Hat Single Sign-On as a client there, so copy this URI to your clipboard.To enable login with Microsoft account you first have to register an OAuth application at Microsoft. Go to the Microsoft Application Registration url.
Microsoft often changes the look and feel of application registration, so these directions might not always be up to date and the configuration steps might be slightly different.
Register Application
Enter in the application name and click
Create application. This will bring you to the application settings page of your new application.Settings
You’ll have to copy the
Redirect URIfrom the Red Hat Single Sign-OnAdd Identity Providerpage and add it to theRedirect URIsfield on the Microsoft application page. Be sure to click theAdd Urlbutton andSaveyour changes.Finally, you will need to obtain the Application ID and secret from this page so you can enter them back on the Red Hat Single Sign-On
Add identity providerpage. Go back to Red Hat Single Sign-On and specify those items.From November 2018 onwards, Microsoft is removing support for the Live SDK API in favor of the new Microsoft Graph API. The Red Hat Single Sign-On Microsoft identity provider has been updated to use the new endpoints so make sure to upgrade to Red Hat Single Sign-On version 7.2.5 or later in order to use this provider. Furthermore, client applications registered with Microsoft under "Live SDK applications" will need to be re-registered in the Microsoft Application Registration portal to obtain an application id that is compatible with the Microsoft Graph API.
12.4.8. OpenShift 3
OpenShift Online is currently in the developer preview mode. This documentation has been based on on-premise installations and local
minishiftdevelopment environment.There are a just a few steps you have to complete to be able to enable login with OpenShift. First, go to the
Identity Providersleft menu item and selectOpenShiftfrom theAdd providerdrop down list. This will bring you to theAdd identity providerpage.Add Identity Provider
Registering OAuth client
You can register your client using
occommand line tool.nameof your OAuth client. Passed asclient_idrequest parameter when making requests to<openshift_master>/oauth/authorizeand<openshift_master>/oauth/token.secretis used as theclient_secretrequest parameter.redirect_uriparameter specified in requests to<openshift_master>/oauth/authorizeand<openshift_master>/oauth/tokenmust be equal to (or prefixed by) one of the URIs inredirectURIs.grantMethodis used to determine what action to take when this client requests tokens and has not yet been granted access by the user.Use client ID and secret defined by
oc createcommand to enter them back on the Red Hat Single Sign-OnAdd identity providerpage. Go back to Red Hat Single Sign-On and specify those items.Please refer to official OpenShift documentation for more detailed guides.
12.4.9. OpenShift 4
Prior to configuring OpenShift 4 Identity Provider, please locate the correct OpenShift 4 API URL up. In some scenarios, that URL might be hidden from users. The easiest way to obtain it is to invoke the following command (this might require installing
jqcommand separately)curl -s -k -H "Authorization: Bearer $(oc whoami -t)" https://<openshift-user-facing-api-url>/apis/config.openshift.io/v1/infrastructures/cluster | jq ".status.apiServerURL". In most cases, the address will be protected by HTTPS. Therefore, it is essential to configureX509_CA_BUNDLEin the container and set it to/var/run/secrets/kubernetes.io/serviceaccount/ca.crt. Otherwise, Red Hat Single Sign-On won’t be able to communicate with the API Server.There are a just a few steps you have to complete to be able to enable login with OpenShift 4. First, go to the
Identity Providersleft menu item and selectOpenShift v4from theAdd providerdrop down list. This will bring you to theAdd identity providerpage.Add Identity Provider
Registering OAuth client
You can register your client using
occommand line tool.nameof your OAuth client. Passed asclient_idrequest parameter when making requests to<openshift_master>/oauth/authorizeand<openshift_master>/oauth/token. Thenameparameter needs to be the same inOAuthClientobject as well as in Red Hat Single Sign-On configuration.secretis used as theclient_secretrequest parameter.redirect_uriparameter specified in requests to<openshift_master>/oauth/authorizeand<openshift_master>/oauth/tokenmust be equal to (or prefixed by) one of the URIs inredirectURIs. The easiest way to configure it correctly is to copy-paste it from Red Hat Single Sign-On OpenShift 4 Identity Provider configuration page (Redirect URIfield).grantMethodis used to determine what action to take when this client requests tokens and has not yet been granted access by the user.Use the client ID and secret defined by
oc createcommand to enter them back on the Red Hat Single Sign-OnAdd identity providerpage. Go back to Red Hat Single Sign-On and specify those items.The OpenShift API server returns
The client is not authorized to request a token using this methodwheneverOAuthClientname,secretorredirectURIsis incorrect. Make sure you copy-pasted them into Red Hat Single Sign-On OpenShift 4 Identity Provider page correctly.Please refer to official OpenShift documentation for more detailed guides.
12.4.10. PayPal
There are a number of steps you have to complete to be able to enable login with PayPal. First, go to the
Identity Providersleft menu item and selectPayPalfrom theAdd providerdrop down list. This will bring you to theAdd identity providerpage.Add Identity Provider
You can’t click save yet, as you’ll need to obtain a
Client IDandClient Secretfrom PayPal. One piece of data you’ll need from this page is theRedirect URI. You’ll have to provide that to PayPal when you register Red Hat Single Sign-On as a client there, so copy this URI to your clipboard.To enable login with PayPal you first have to register an application project in PayPal Developer applications.
Add a New App
Click the
Create Appbutton.Register App
You will now be brought to the app settings page.
Do the following changes
Target Sandboxswitch on theAdd identity providerpage)Add identity providerpage.App SettingsRedirect URIfrom the Red Hat Single Sign-OnAdd Identity Providerpage and enter it into theReturn URLfield.Log In with PayPalcheckbox.Full namecheckbox under the personal information section.Email addresscheckbox under the address information section.12.4.11. Stack Overflow
There are a number of steps you have to complete to be able to enable login with Stack Overflow. First, go to the
Identity Providersleft menu item and selectStack Overflowfrom theAdd providerdrop down list. This will bring you to theAdd identity providerpage.Add Identity Provider
To enable login with Stack Overflow you first have to register an OAuth application on StackApps. Go to registering your application on Stack Apps URL and login.
Stack Overflow often changes the look and feel of application registration, so these directions might not always be up to date and the configuration steps might be slightly different.
Register Application
Enter in the application name and the OAuth Domain Name of your application and click
Register your Application. Type in anything you want for the other items.Settings
Finally, you will need to obtain the client ID, secret, and key from this page so you can enter them back on the Red Hat Single Sign-On
Add identity providerpage. Go back to Red Hat Single Sign-On and specify those items.12.4.12. Twitter
There are a number of steps you have to complete to be able to enable login with Twitter. First, go to the
Identity Providersleft menu item and selectTwitterfrom theAdd providerdrop down list. This will bring you to theAdd identity providerpage.Add Identity Provider
You can’t click save yet, as you’ll need to obtain a
Client IDandClient Secretfrom Twitter. One piece of data you’ll need from this page is theRedirect URI. You’ll have to provide that to Twitter when you register Red Hat Single Sign-On as a client there, so copy this URI to your clipboard.To enable login with Twtter you first have to create an application in the Twitter Application Management.
Register Application
Click on the
Create New Appbutton. This will bring you to theCreate an Applicationpage.Register Application
Enter in a Name and Description. The Website can be anything, but cannot have a
localhostaddress. For theCallback URLyou must copy theRedirect URIfrom the Red Hat Single Sign-OnAdd Identity Providerpage.You cannot use
localhostin theCallback URL. Instead replace it with127.0.0.1if you are trying to test drive Twitter login on your laptop.After clicking save you will be brought to the
Detailspage.App Details
Next go to the
Keys and Access Tokenstab.Keys and Access Tokens
Finally, you will need to obtain the API Key and secret from this page and copy them back into the
Client IDandClient Secretfields on the Red Hat Single Sign-OnAdd identity providerpage.12.4.13. Instagram
There are a number of steps you have to complete to be able to enable login with Instagram. First, go to the
Identity Providersleft menu item and selectInstagramfrom theAdd providerdrop down list. This will bring you to theAdd identity providerpage.Add Identity Provider
You can’t click save yet, as you’ll need to obtain a
Client IDandClient Secretfrom Instagram. One piece of data you’ll need from this page is theRedirect URI. You’ll have to provide that to Instagram when you register Red Hat Single Sign-On as a client there, so copy this URI to your clipboard.To enable login with Instagram you first have to create a project and a client. Instagram API is managed through the Facebook Developer Console.
Facebook often changes the look and feel of the Facebook Developer Console, so these directions might not always be up to date and the configuration steps might be slightly different.
Once you’ve logged into the console there is a menu in the top right corner of the screen that says
My Apps. Select theAdd a New Appmenu item.Add a New App
Select
For Everything Else.Create a New App ID
Fill all required fields. Once you’re done with that, you will be brought to the dashboard for the application. In the menu in the left navigation panel select
BasicunderSettings.Add Platform
Select
+ Add Platformat the bottom and then click[Website]with the globe icon. Specify URL of your site.Add a Product
Select
Dashboardfrom the left menu and clickSet Upin the Instagram box. In the left menu then selectBasic DisplayunderInstagramand clickCreate New App.Create a New Instagram App ID
Specify
Display Name.Setup the App
Copy and paste the
Redirect URIfrom the Red Hat Single Sign-OnAdd identity providerpage into theValid OAuth Redirect URIsof the InstagramClient OAuth Settingssettings block.You can use this URL also for
Deauthorize Callback URLandData Deletion Request URL. Red Hat Single Sign-On currently doesn’t support either of them, but the Facebook Developer Console requires both of them to be filled.You will need also to obtain the App ID and App Secret from this page so you can enter them into the Red Hat Single Sign-On
Add identity providerpage. To obtain this click onShowunderApp Secret. Go back to Red Hat Single Sign-On and specify those items and finally save your Instagram Identity Provider.After this it is necessary to make the Instagram app public. Click
App Reviewleft menu item and thenRequests. After that follow the instructions on screen.