Chapter 7. Clair for Red Hat Quay
Clair v4 (Clair) is an open source application that leverages static code analyses for parsing image content and reporting vulnerabilities affecting the content. Clair is packaged with Red Hat Quay and can be used in both standalone and Operator deployments. It can be run in highly scalable configurations, where components can be scaled separately as appropriate for enterprise environments.
7.1. Clair vulnerability databases
Clair uses the following vulnerability databases to report for issues in your images:
- Ubuntu Oval database
- Debian Oval database
- Red Hat Enterprise Linux (RHEL) Oval database
- SUSE Oval database
- Oracle Oval database
- Alpine SecDB database
- VMWare Photon OS database
- Amazon Web Services (AWS) UpdateInfo
- Pyup.io (Python) database
For information about how Clair does security mapping with the different databases, see ClairCore Severity Mapping.
7.2. Setting up Clair on standalone Red Hat Quay deployments
For standalone Red Hat Quay deployments, you can set up Clair manually.
Procedure
In your Red Hat Quay installation directory, create a new directory for the Clair database data:
$ mkdir /home/<user-name>/quay-poc/postgres-clairv4
Set the appropriate permissions for the
postgres-clairv4file by entering the following command:$ setfacl -m u:26:-wx /home/<user-name>/quay-poc/postgres-clairv4
Deploy a Clair Postgres database by entering the following command:
$ sudo podman run -d --name postgresql-clairv4 \
  -e POSTGRESQL_USER=clairuser \
  -e POSTGRESQL_PASSWORD=clairpass \
  -e POSTGRESQL_DATABASE=clair \
  -e POSTGRESQL_ADMIN_PASSWORD=adminpass \
  -p 5433:5433 \
  -v /home/<user-name>/quay-poc/postgres-clairv4:/var/lib/pgsql/data:Z \
  {postgresimage}
Install the Postgres
uuid-osspmodule for your Clair deployment:$ podman exec -it postgresql-clairv4 /bin/bash -c 'echo "CREATE EXTENSION IF NOT EXISTS \"uuid-ossp\"" | psql -d clair -U postgres'
Example output
CREATE EXTENSION
NoteClair requires the
uuid-osspextension to be added to its Postgres database. For users with proper privileges, creating the extension will automatically be added by Clair. If users do not have the proper privileges, the extension must be added before start Clair.If the extension is not present, the following error will be displayed when Clair attempts to start:
ERROR: Please load the "uuid-ossp" extension. (SQLSTATE 42501).Stop the
Quaycontainer if it is running and restart it in configuration mode, loading the existing configuration as a volume:$ sudo podman run --rm -it --name quay_config \ -p 80:8080 -p 443:8443 \ -v $QUAY/config:/conf/stack:Z \ {productrepo}/{quayimage}:{productminv} config secret- Log in to the configuration tool and click Enable Security Scanning in the Security Scanner section of the UI.
-
Set the HTTP endpoint for Clair using a port that is not already in use on the
quay-serversystem, for example,8081. Create a pre-shared key (PSK) using the Generate PSK button.
Security Scanner UI

-
Validate and download the
config.yamlfile for Red Hat Quay, and then stop theQuaycontainer that is running the configuration editor. Extract the new configuration bundle into your Red Hat Quay installation directory, for example:
$ tar xvf quay-config.tar.gz -d /home/<user-name>/quay-poc/
Create a folder for your Clair configuration file, for example:
$ mkdir /etc/opt/clairv4/config/
Change into the Clair configuration folder:
$ cd /etc/opt/clairv4/config/
Create a Clair configuration file, for example:
http_listen_addr: :8081
introspection_addr: :8088
log_level: debug
indexer:
  connstring: host=quay-server.example.com port=5433 dbname=clair user=clairuser password=clairpass sslmode=disable
  scanlock_retry: 10
  layer_scan_concurrency: 5
  migrations: true
matcher:
  connstring: host=quay-server.example.com port=5433 dbname=clair user=clairuser password=clairpass sslmode=disable
  max_conn_pool: 100
  run: ""
  migrations: true
  indexer_addr: clair-indexer
notifier:
  connstring: host=quay-server.example.com port=5433 dbname=clair user=clairuser password=clairpass sslmode=disable
  delivery_interval: 1m
  poll_interval: 5m
  migrations: true
auth:
  psk:
    key: "MTU5YzA4Y2ZkNzJoMQ=="
    iss: ["quay"]
# tracing and metrics
trace:
  name: "jaeger"
  probability: 1
  jaeger:
    agent_endpoint: "localhost:6831"
    service_name: "clair"
metrics:
  name: "prometheus"
For more information about Clair’s configuration format, see Clair configuration reference.
Start Clair by using the container image, mounting in the configuration from the file you created:
$ sudo podman run -d --name clairv4 \
-p 8081:8081 -p 8088:8088 \
-e CLAIR_CONF=/clair/config.yaml \
-e CLAIR_MODE=combo \
-v /etc/opt/clairv4/config:/clair:Z \
registry.redhat.io/quay/clair-rhel8:v3.8.15
NoteRunning multiple Clair containers is also possible, but for deployment scenarios beyond a single container the use of a container orchestrator like Kubernetes or OpenShift Container Platform is strongly recommended.
7.3. Clair on OpenShift Container Platform
To set up Clair v4 (Clair) on a Red Hat Quay deployment on OpenShift Container Platform, it is recommended to use the Red Hat Quay Operator. By default, the Red Hat Quay Operator will install or upgrade a Clair deployment along with your Red Hat Quay deployment and configure Clair automatically.
7.4. Testing Clair
Use the following procedure to test Clair on either a standalone Red Hat Quay deployment, or on an OpenShift Container Platform Operator-based deployment.
Prerequisites
- You have deployed the Clair container image.
Procedure
Pull a sample image by entering the following command:
$ podman pull ubuntu:20.04
Tag the image to your registry by entering the following command:
$ sudo podman tag docker.io/library/ubuntu:20.04 <quay-server.example.com>/<user-name>/ubuntu:20.04
Push the image to your Red Hat Quay registry by entering the following command:
$ sudo podman push --tls-verify=false quay-server.example.com/quayadmin/ubuntu:20.04
- Log in to your Red Hat Quay deployment through the UI.
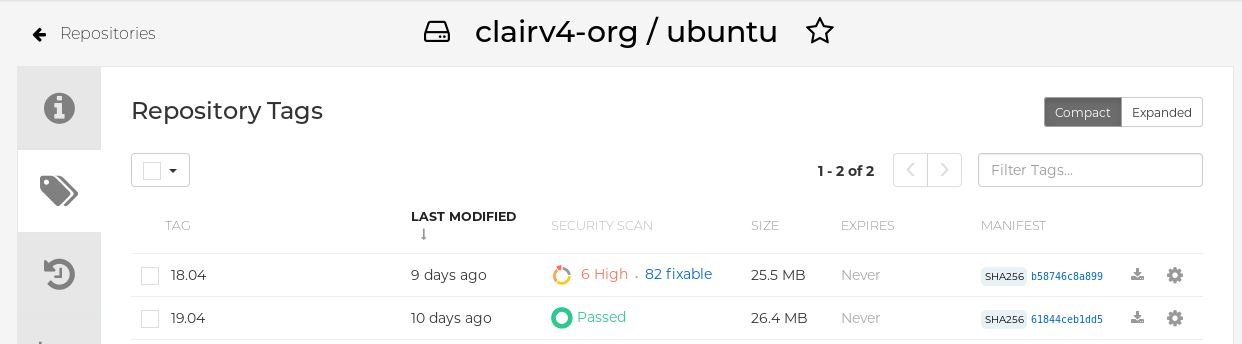
- Click the repository name, for example, quayadmin/ubuntu.
In the navigation pane, click Tags.
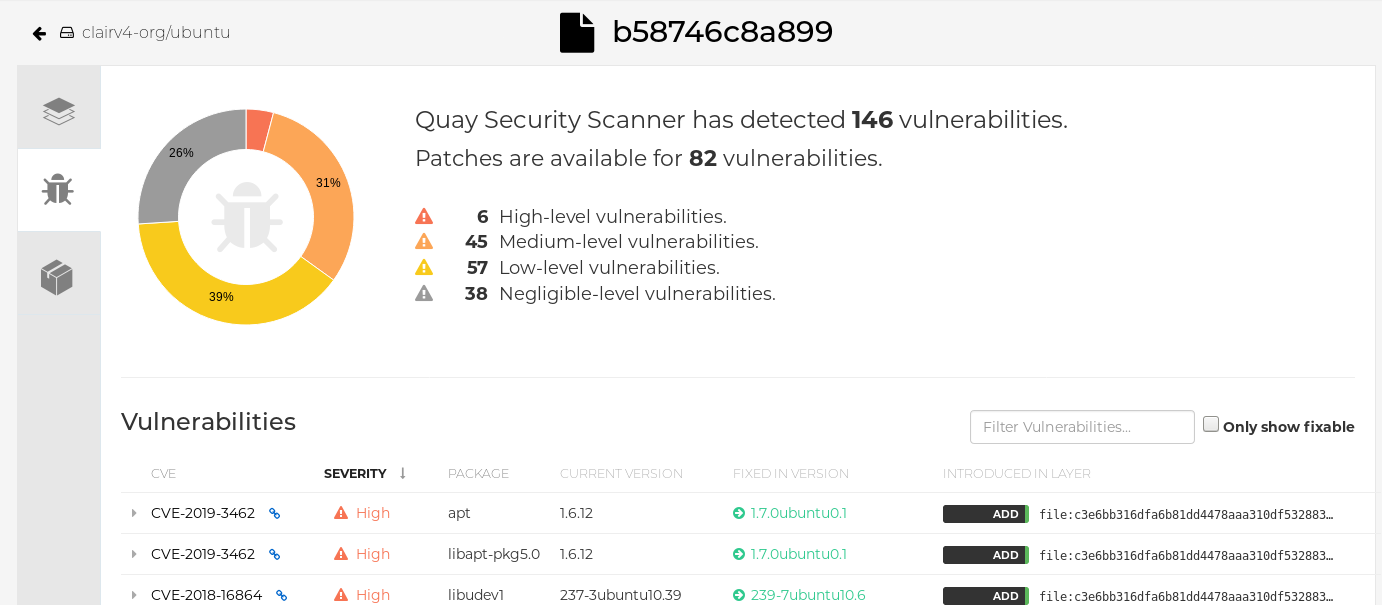
Report summary
Click the image report, for example, 45 medium, to show a more detailed report:
Report details