Instances and Images Guide
Managing Instances and Images
Abstract
Preface
Red Hat OpenStack Platform (Red Hat OpenStack Platform) provides the foundation to build a private or public Infrastructure-as-a-Service (IaaS) cloud on top of Red Hat Enterprise Linux. It offers a massively scalable, fault-tolerant platform for the development of cloud-enabled workloads.
This guide discusses procedures for creating and managing images, and instances. It also mentions the procedure for configuring the storage for instances for Red Hat OpenStack Platform.
You can manage the cloud using either the OpenStack dashboard or the command-line clients. Most procedures can be carried out using either method; some of the more advanced procedures can only be executed on the command line. This guide provides procedures for the dashboard where possible.
For the complete suite of documentation for Red Hat OpenStack Platform, see Red Hat OpenStack Platform Documentation Suite.
Chapter 1. Image Service
This chapter discusses the steps you can follow to manage images and storage in Red Hat OpenStack Platform.
A virtual machine image is a file that contains a virtual disk which has a bootable operating system installed on it. Virtual machine images are supported in different formats. The following are the formats available on Red Hat OpenStack Platform:
-
RAW- Unstructured disk image format. -
QCOW2- Disk format supported by QEMU emulator. -
ISO- Sector-by-sector copy of the data on a disk, stored in a binary file. -
AKI- Indicates an Amazon Kernel Image. -
AMI- Indicates an Amazon Machine Image. -
ARI- Indicates an Amazon RAMDisk Image. -
VDI- Disk format supported by VirtualBox virtual machine monitor and the QEMU emulator. -
VHD- Common disk format used by virtual machine monitors from VMware, VirtualBox, and others. -
VMDK- Disk format supported by many common virtual machine monitors.
While ISO is not normally considered a virtual machine image format, since ISOs contain bootable filesystems with an installed operating system, you can treat them the same as you treat other virtual machine image files.
To download the official Red Hat Enterprise Linux cloud images, your account must have a valid Red Hat Enterprise Linux subscription:
You will be prompted to enter your Red Hat account credentials if you are not logged in to the Customer Portal.
1.1. Understanding the Image Service
The following notable OpenStack Image service (glance) features are available.
1.1.1. Image conversion
Image conversion converts images by calling the task API while importing an image.
As part of the import workflow, a plugin provides the image conversion. This plugin can be activated or deactivated based on the deployer configuration. Therefore, the deployer needs to specify the preferred format of images for the deployment.
Internally, the Image service receives the bits of the image in a particular format. These bits are stored in a temporary location. The plugin is then triggered to convert the image to the target format, and moved to a final destination. When the task is finished, the temporary location is deleted. As a result, the format uploaded initially is not retained by the Image service.
The conversion can be triggered only when importing an image (the old copy-from). It does not run when uploading an image. For example:
$ glance task-create --type import --input '{"import_from_format": "qcow2", "import_from": "http://127.0.0.1:8000/test.qcow2", "image_properties": {"disk_format": "qcow2", "container_format": "bare"}}'1.1.2. Image introspection
Every image format comes with a set of metadata embedded inside the image itself. For example, a stream optimized vmdk would contain the following parameters:
$ head -20 so-disk.vmdk

# Disk DescriptorFile
version=1
CID=d5a0bce5
parentCID=ffffffff
createType="streamOptimized"

# Extent description
RDONLY 209714 SPARSE "generated-stream.vmdk"

# The Disk Data Base
#DDB

ddb.adapterType = "buslogic"
ddb.geometry.cylinders = "102"
ddb.geometry.heads = "64"
ddb.geometry.sectors = "32"
ddb.virtualHWVersion = "4"
By introspecting this vmdk, you can easily know that the disk_type is streamOptimized, and the adapter_type is buslogic. These metadata parameters are useful for the consumer of the image. In Compute, the workflow to instantiate a streamOptimized disk is different from the one to instantiate a flat disk. This feature allows metadata extraction. You can achieve image introspection by calling the task API while importing the image. An administrator can override metadata settings.
1.1.3. Harden the Image Service
The copy_from feature in the Image Service API v1 allows an attacker to perform masked network port scans. It is possible to create images with a URL such as http://localhost:22. This could allow an attacker to enumerate internal network details, because the scan appears to originate from the Image Service. This is classified as a Server-Side Request Forgery (SSRF).
1.1.3.1. Diagnose Vulnerability
All copy_from calls are logged by the Image Service. This makes it possible to link the abuser of this vulnerability to the cloud user exploiting it. For this flaw to be exploited, image creation must be enabled and non-admin users must be able to use the copy_from function.
To diagnose this vulnerability, review the /etc/glance/policy.json file. If the file has the following settings, your deployment is vulnerable:
 "add_image": "",
 "copy_from": "",
1.1.3.2. Mitigate Vulnerability
To prevent attackers from exploiting this flaw, restrict the policy for the copy_from function to the admin role.
Add the following setting to the copy_from line of the /etc/glance/policy.json file:
"copy_from": "role:admin",
Limiting the copy_from function to admin users impacts Orchestration and dashboard usage. For example: Any Orchestration stacks for non-admin users that create images will break. Non-admin users will not be able to create images in the dashboard by providing an image-data URI.
1.1.3.2.1. Partial Mitigation
Optionally, instead of restricting the copy_from function, you can partially mitigate the vulnerability by:
- Rate-limiting calls to the Image Service, which makes network probing extremely slow and may deter attacks.
- Limiting connections from the control-plane node that runs the glance-api server to the ports required for the services and ports 80 and 443 towards the external network. This action would significantly limit the scope of an attack without affecting the majority of users.
1.2. Managing images
The OpenStack Image service (glance) provides discovery, registration, and delivery services for disk and server images. It provides the ability to copy or snapshot a server image, and immediately store it away. Stored images can be used as a template to get new servers up and running quickly and more consistently, than installing a server operating system and individually configuring additional services.
1.2.1. Creating an image
This section provides you with the steps to manually create OpenStack-compatible images in the QCOW2 format using Red Hat Enterprise Linux 7 ISO files, Red Hat Enterprise Linux 6 ISO files, or Windows ISO files.
1.2.1.1. Using a KVM guest image with Red Hat OpenStack Platform
You can use a ready RHEL KVM guest QCOW2 image:
These images are configured with cloud-init and must take advantage of ec2-compatible metadata services for provisioning SSH keys in order to function properly.
Ready Windows KVM guest QCOW2 images are not available.
For the KVM guest images:
-
The
rootaccount in the image is disabled, butsudoaccess is granted to a special user namedcloud-user. -
There is no
rootpassword set for this image.
The root password is locked in /etc/shadow by placing !! in the second field.
For an OpenStack instance, it is recommended that you generate an ssh keypair from the OpenStack dashboard or command line and use that key combination to perform an SSH public authentication to the instance as root.
When the instance is launched, this public key will be injected to it. You can then authenticate using the private key downloaded while creating the keypair.
If you do not want to use keypairs, you can use the admin password that has been set using the Inject an admin Password Into an Instance procedure.
If you want to create custom Red Hat Enterprise Linux or Windows images, see Create a Red Hat Enterprise Linux 7 Image, Create a Red Hat Enterprise Linux 6 Image, or Create a Windows Image.
1.2.1.2. Creating custom Red Hat Enterprise Linux or Windows images
Prerequisites:
- Linux host machine to create an image. This can be any machine on which you can install and run the Linux packages.
-
libvirt, virt-manager (run command
yum groupinstall -y @virtualization). This installs all packages necessary for creating a guest operating system. -
Libguestfs tools (run command
yum install -y libguestfs-tools-c). This installs a set of tools for accessing and modifying virtual machine images. - A Red Hat Enterprise Linux 7 or 6 ISO file (see RHEL 7.2 Binary DVD or RHEL 6.8 Binary DVD) or a Windows ISO file. If you do not have a Windows ISO file, visit the Microsoft TechNet Evaluation Center and download an evaluation image.
-
Text editor, if you want to change the
kickstartfiles (RHEL only).
In the following procedures, all commands with the [root@host]# prompt should be run on your host machine.
1.2.1.2.1. Creating a Red Hat Enterprise Linux 7 image
This section provides you with the steps to manually create an OpenStack-compatible image in the QCOW2 format using a Red Hat Enterprise Linux 7 ISO file.
Start the installation using
virt-installas shown below:[root@host]# qemu-img create -f qcow2 rhel7.qcow2 8G [root@host]# virt-install --virt-type kvm --name rhel7 --ram 2048 \ --cdrom /tmp/rhel-server-7.2-x86_64-dvd.iso \ --disk rhel7.qcow2,format=qcow2 \ --network=bridge:virbr0 --graphics vnc,listen=0.0.0.0 \ --noautoconsole --os-type=linux --os-variant=rhel7
This launches an instance and starts the installation process.
NoteIf the instance does not launch automatically, run the
virt-viewercommand to view the console:[root@host]# virt-viewer rhel7
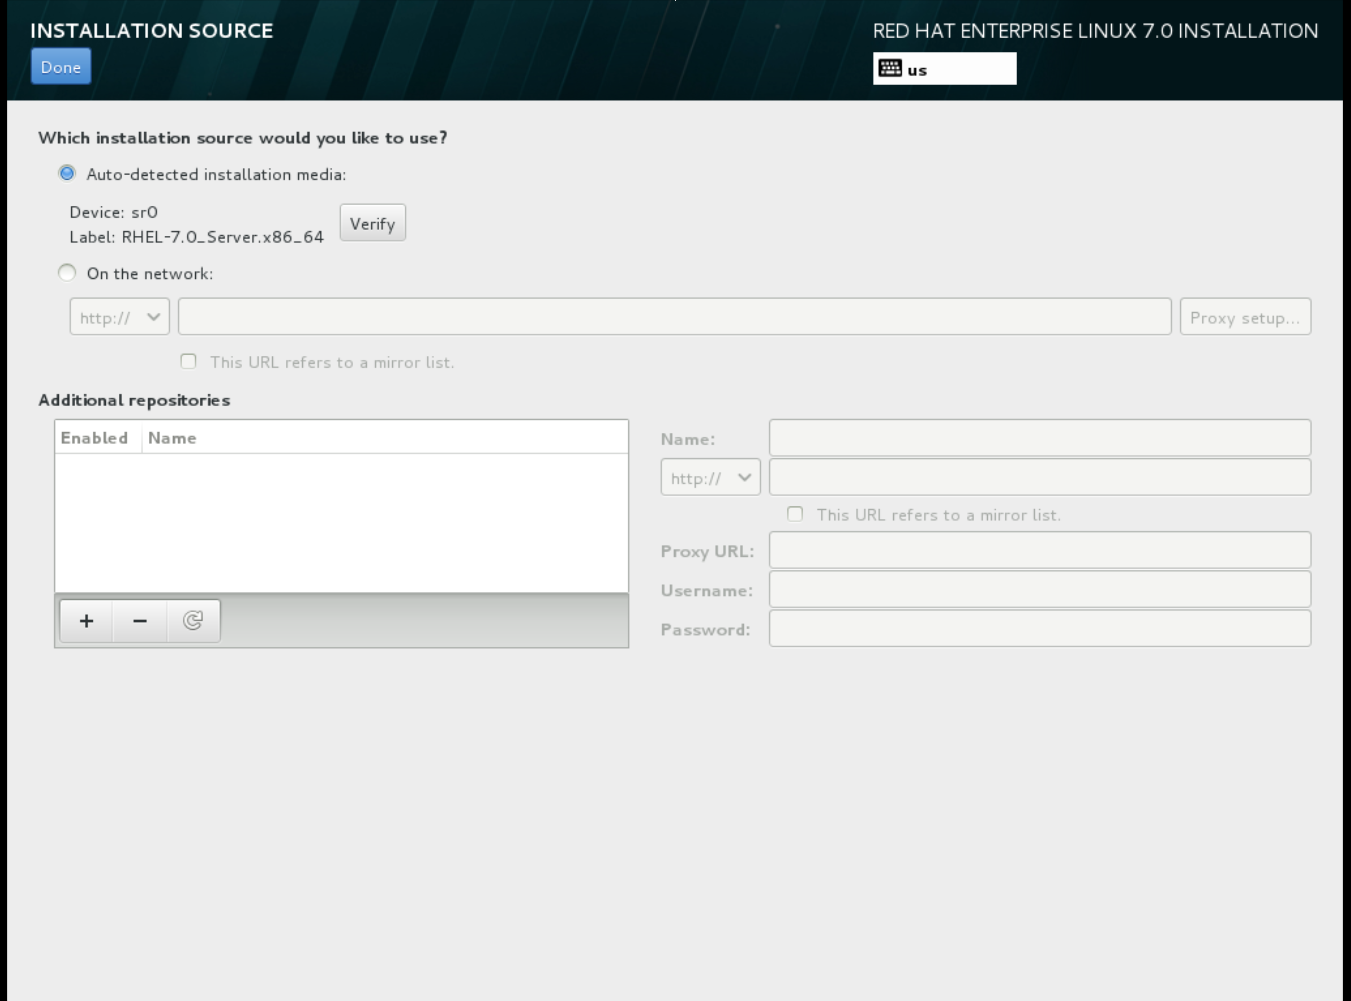
Set up the virtual machine as follows:
-
At the initial Installer boot menu, choose the
Install Red Hat Enterprise Linux 7.X option.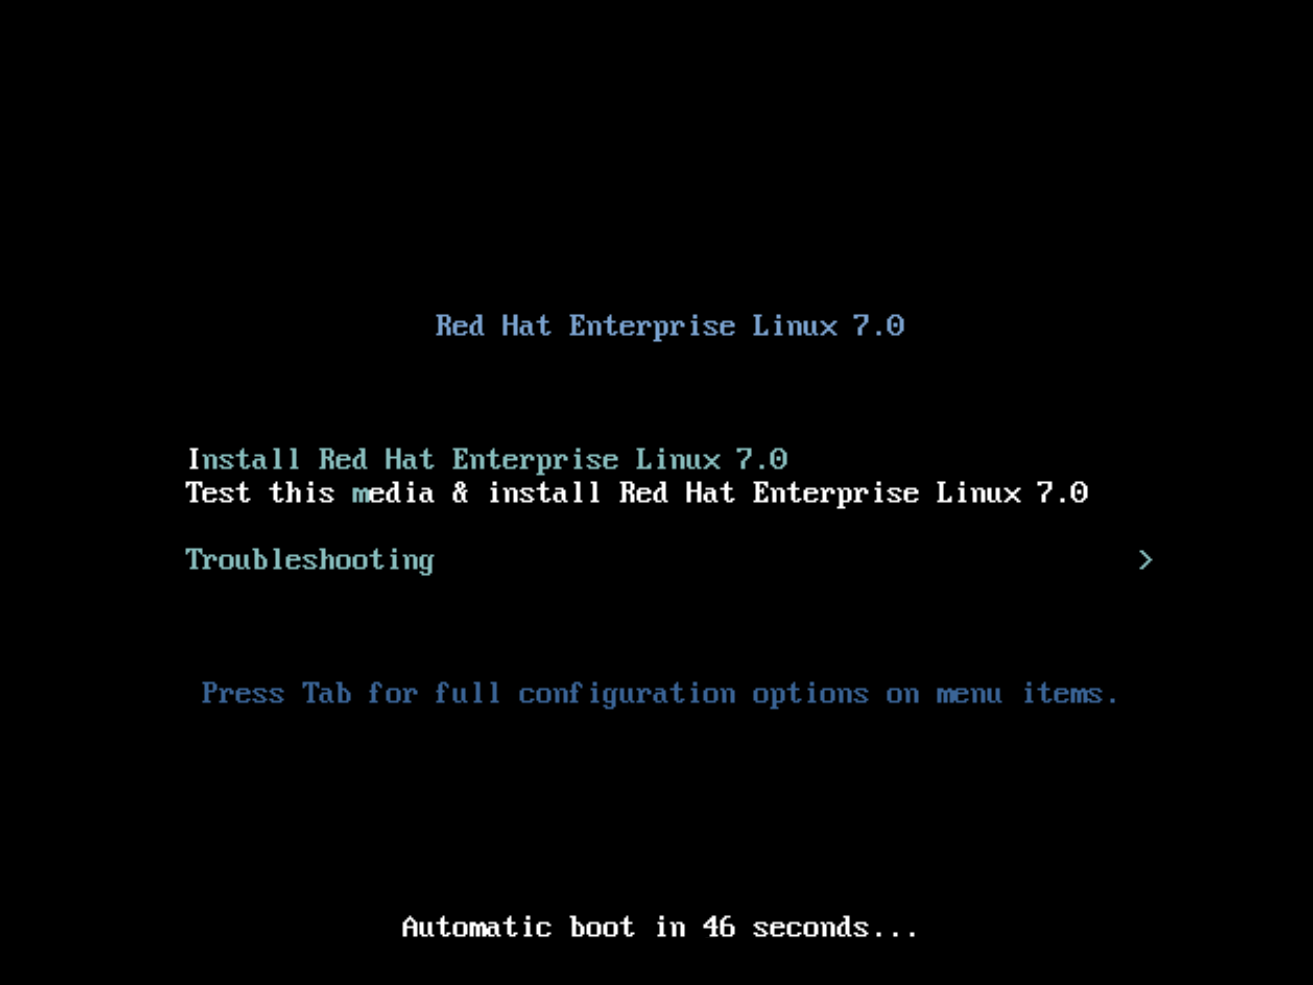
- Choose the appropriate Language and Keyboard options.
-
When prompted about which type of devices your installation uses, choose Auto-detected installation media.
-
When prompted about which type of installation destination, choose Local Standard Disks.
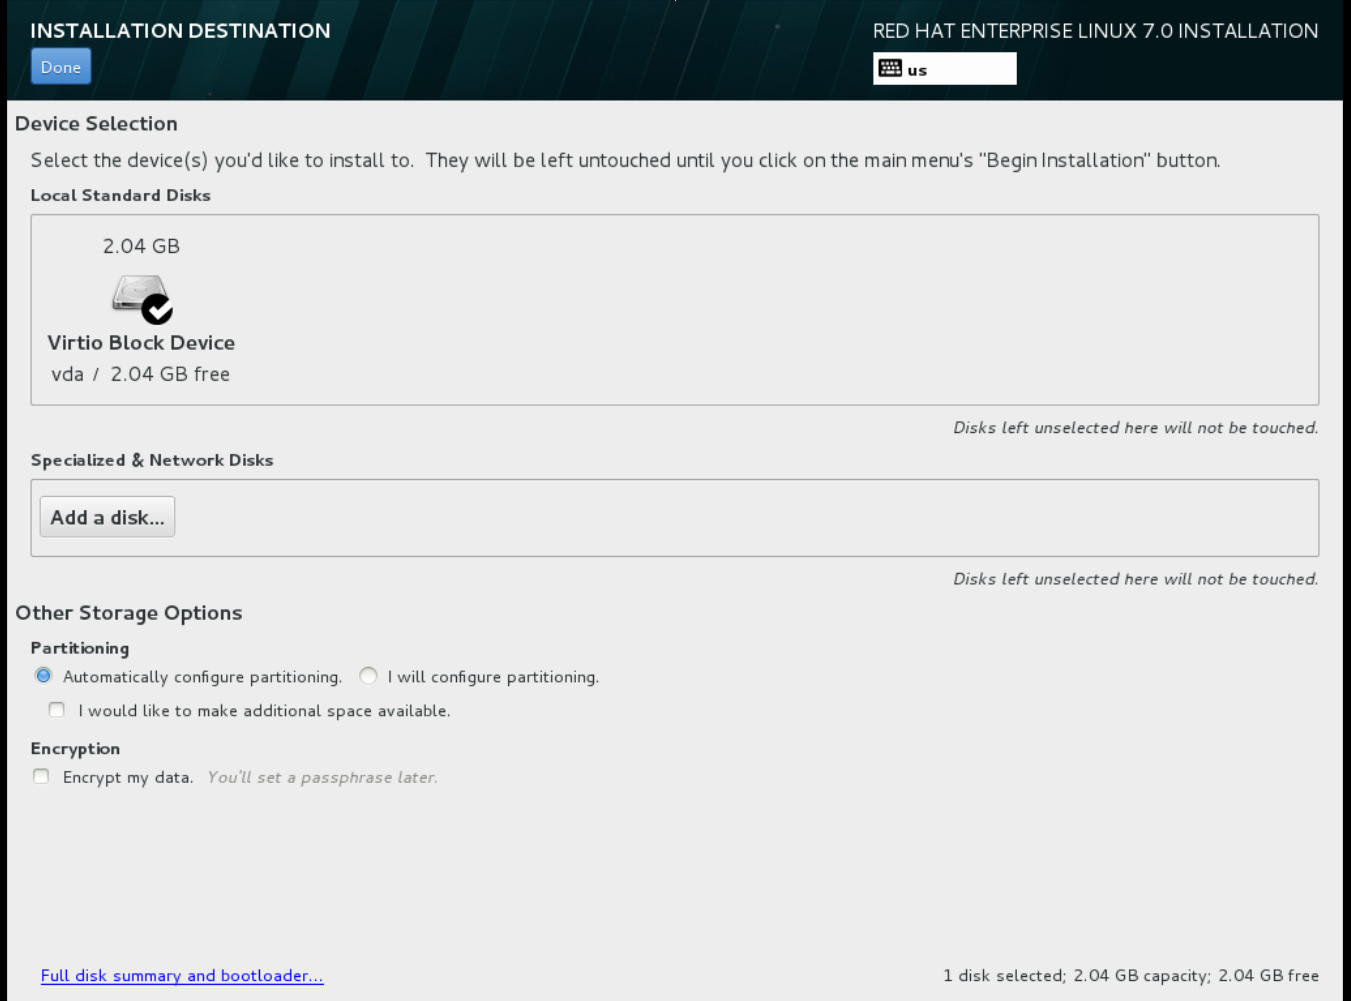 For other storage options, choose Automatically configure partitioning.
- For software selection, choose Minimal Install.
-
For network and host name, choose
eth0for network and choose ahostnamefor your device. The default host name islocalhost.localdomain. -
Choose the
rootpassword. The installation process completes and the Complete! screen appears.
-
At the initial Installer boot menu, choose the
- After the installation is complete, reboot the instance and log in as the root user.
Update the
/etc/sysconfig/network-scripts/ifcfg-eth0file so it only contains the following values:TYPE=Ethernet DEVICE=eth0 ONBOOT=yes BOOTPROTO=dhcp NM_CONTROLLED=no
- Reboot the machine.
- Register the machine with the Content Delivery Network. For details, see Subscribe to the Required Channels in Manual Installation Procedures.
Update the system:
# yum -y update
Install the
cloud-initpackages:# yum install -y cloud-utils-growpart cloud-init
Edit the
/etc/cloud/cloud.cfgconfiguration file and undercloud_init_modulesadd:- resolv-conf
The
resolv-confoption automatically configures theresolv.confwhen an instance boots for the first time. This file contains information related to the instance such asnameservers,domainand other options.Add the following line to
/etc/sysconfig/networkto avoid problems accessing the EC2 metadata service:NOZEROCONF=yes
To ensure the console messages appear in the
Logtab on the dashboard and thenova console-logoutput, add the following boot option to the/etc/default/grubfile:GRUB_CMDLINE_LINUX_DEFAULT="console=tty0 console=ttyS0,115200n8"
Run the
grub2-mkconfigcommand:# grub2-mkconfig -o /boot/grub2/grub.cfg
The output is as follows:
Generating grub configuration file ...
Found linux image: /boot/vmlinuz-3.10.0-229.7.2.el7.x86_64
Found initrd image: /boot/initramfs-3.10.0-229.7.2.el7.x86_64.img
Found linux image: /boot/vmlinuz-3.10.0-121.el7.x86_64
Found initrd image: /boot/initramfs-3.10.0-121.el7.x86_64.img
Found linux image: /boot/vmlinuz-0-rescue-b82a3044fb384a3f9aeacf883474428b
Found initrd image: /boot/initramfs-0-rescue-b82a3044fb384a3f9aeacf883474428b.img
done
Un-register the virtual machine so that the resulting image does not contain the same subscription details for every instance cloned based on it:
# subscription-manager repos --disable=*
# subscription-manager unregister
# yum clean all
Power off the instance:
# poweroff
Reset and clean the image using the
virt-sysprepcommand so it can be used to create instances without issues:[root@host]# virt-sysprep -d rhel7
Reduce image size using the
virt-sparsifycommand. This command converts any free space within the disk image back to free space within the host:[root@host]# virt-sparsify --compress /tmp/rhel7.qcow2 rhel7-cloud.qcow2
This creates a new
rhel7-cloud.qcow2file in the location from where the command is run.
The rhel7-cloud.qcow2 image file is ready to be uploaded to the Image service. For more information on uploading this image to your OpenStack deployment using the dashboard, see Upload an Image.
1.2.1.2.2. Creating a Red Hat Enterprise Linux 6 image
This section provides you with the steps to manually create an OpenStack-compatible image in the QCOW2 format using a Red Hat Enterprise Linux 6 ISO file.
Start the installation using
virt-install:[root@host]# qemu-img create -f qcow2 rhel6.qcow2 4G [root@host]# virt-install --connect=qemu:///system --network=bridge:virbr0 \ --name=rhel6 --os-type linux --os-variant rhel6 \ --disk path=rhel6.qcow2,format=qcow2,size=10,cache=none \ --ram 4096 --vcpus=2 --check-cpu --accelerate \ --hvm --cdrom=rhel-server-6.8-x86_64-dvd.iso
This launches an instance and starts the installation process.
NoteIf the instance does not launch automatically, run the
virt-viewercommand to view the console:[root@host]# virt-viewer rhel6
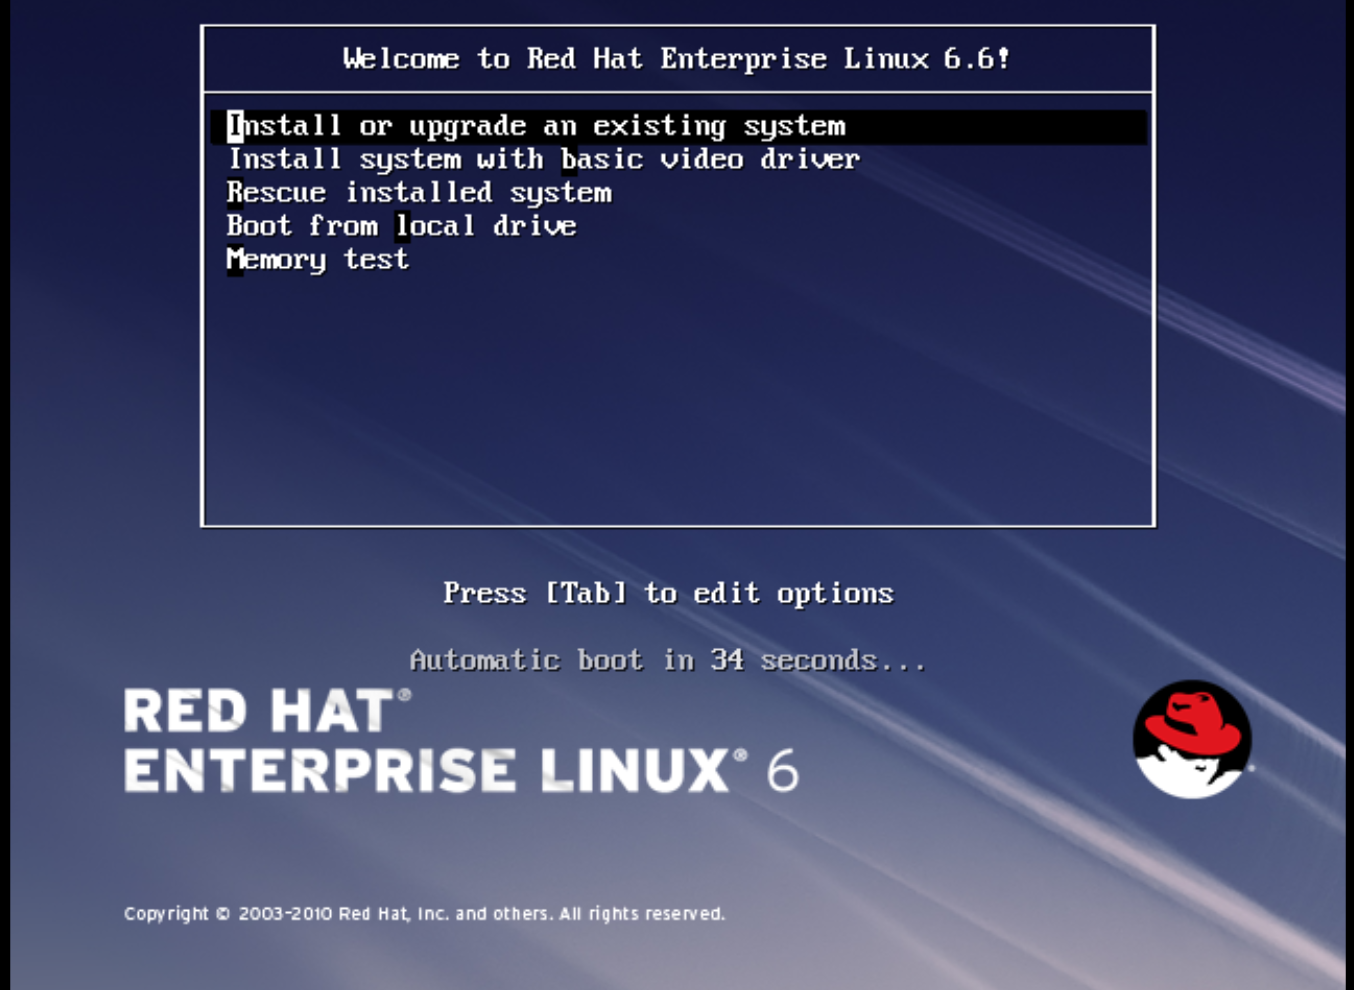
Set up the virtual machines as follows:
At the initial Installer boot menu, choose the Install or upgrade an existing system option.
 Step through the installation prompts. Accept the defaults.
The installer checks for the disc and lets you decide whether you want to test your installation media before installation. Select OK to run the test or Skip to proceed without testing.
- Choose the appropriate Language and Keyboard options.
-
When prompted about which type of devices your installation uses, choose Basic Storage Devices.

-
Choose a
hostnamefor your device. The default host name islocalhost.localdomain. -
Set timezone and
rootpassword. -
Based on the space on the disk, choose the type of installation.
-
Choose the Basic Server install, which installs an SSH server.

- The installation process completes and Congratulations, your Red Hat Enterprise Linux installation is complete screen appears.
-
Reboot the instance and log in as the
rootuser. Update the
/etc/sysconfig/network-scripts/ifcfg-eth0file so it only contains the following values:TYPE=Ethernet DEVICE=eth0 ONBOOT=yes BOOTPROTO=dhcp NM_CONTROLLED=no
- Reboot the machine.
- Register the machine with the Content Delivery Network. For details, see Subscribe to the Required Channels in the Manual Installation Procedures guide.
Update the system:
# yum -y update
Install the
cloud-initpackages:# yum install -y cloud-utils-growpart cloud-init
Edit the
/etc/cloud/cloud.cfgconfiguration file and undercloud_init_modulesadd:- resolv-conf
The
resolv-confoption automatically configures theresolv.confconfiguration file when an instance boots for the first time. This file contains information related to the instance such asnameservers,domain, and other options.To prevent network issues, create the
/etc/udev/rules.d/75-persistent-net-generator.rulesfile as follows:# echo "#" > /etc/udev/rules.d/75-persistent-net-generator.rules
This prevents
/etc/udev/rules.d/70-persistent-net.rulesfile from being created. If/etc/udev/rules.d/70-persistent-net.rulesis created, networking may not function properly when booting from snapshots (the network interface is created as "eth1" rather than "eth0" and IP address is not assigned).Add the following line to
/etc/sysconfig/networkto avoid problems accessing the EC2 metadata service:NOZEROCONF=yes
To ensure the console messages appear in the
Logtab on the dashboard and thenova console-logoutput, add the following boot option to the/etc/grub.conf:console=tty0 console=ttyS0,115200n8
Un-register the virtual machine so that the resulting image does not contain the same subscription details for every instance cloned based on it:
# subscription-manager repos --disable=*
# subscription-manager unregister
# yum clean all
Power off the instance:
# poweroff
Reset and clean the image using the
virt-sysprepcommand so it can be used to create instances without issues:[root@host]# virt-sysprep -d rhel6
Reduce image size using the
virt-sparsifycommand. This command converts any free space within the disk image back to free space within the host:[root@host]# virt-sparsify --compress rhel6.qcow2 rhel6-cloud.qcow2
This creates a new
rhel6-cloud.qcow2file in the location from where the command is run.NoteYou will need to manually resize the partitions of instances based on the image in accordance with the disk space in the flavor that is applied to the instance.
The rhel6-cloud.qcow2 image file is ready to be uploaded to the Image service. For more information on uploading this image to your OpenStack deployment using the dashboard, see Upload an Image
1.2.1.2.3. Creating a Windows image
This section provides you with the steps to manually create an OpenStack-compatible image in the QCOW2 format using a Windows ISO file.
Start the installation using
virt-installas shown below:[root@host]# virt-install --name=name \ --disk size=size \ --cdrom=path \ --os-type=windows \ --network=bridge:virbr0 \ --graphics spice \ --ram=RAM
Replace the values of the
virt-installparameters as follows:- name — the name that the Windows guest should have.
- size — disk size in GB.
- path — the path to the Windows installation ISO file.
RAM — the requested amount of RAM in MB.
NoteThe
--os-type=windowsparameter ensures that the clock is set up correctly for the Windows guest, and enables its Hyper-V enlightenment features.Note that
virt-installsaves the guest image as/var/lib/libvirt/images/name.qcow2by default. If you want to keep the guest image elsewhere, change the parameter of the--diskoption as follows:--disk path=filename,size=size
Replace filename with the name of the file which should store the guest image (and optionally its path); for example
path=win8.qcow2,size=8creates an 8 GB file namedwin8.qcow2in the current working directory.TipIf the guest does not launch automatically, run the
virt-viewercommand to view the console:[root@host]# virt-viewer name
- Installation of Windows systems is beyond the scope of this document. For instructions on how to install Windows, see the relevant Microsoft documentation.
-
To allow the newly installed Windows system to use the virtualized hardware, you may need to install virtio drivers in it. To so do, first install the
virtio-winpackage on the host system. This package contains the virtio ISO image, which is to be attached as a CD-ROM drive to the Windows guest. See Chapter 8. KVM Para-virtualized (virtio) Drivers in the Virtualization Deployment and Administration Guide for detailed instructions on how to install thevirtio-winpackage, add the virtio ISO image to the guest, and install the virtio drivers. To complete the setup, download and execute Cloudbase-Init on the Windows system. At the end of the installation of Cloudbase-Init, select the
Run SysprepandShutdowncheck boxes. TheSyspreptool makes the guest unique by generating an OS ID, which is used by certain Microsoft services.ImportantRed Hat does not provide technical support for Cloudbase-Init. If you encounter an issue, contact Cloudbase Solutions.
When the Windows system shuts down, the name.qcow2 image file is ready to be uploaded to the Image service. For more information on uploading this image to your OpenStack deployment using the dashboard or the command line, see Upload an Image.
1.2.1.3. Using libosinfo
Image Service (glance) can process libosinfo data for images, making it easier to configure the optimal virtual hardware for an instance. This can be done by adding the libosinfo-formatted operating system name to the glance image.
This example specifies that the image with ID
654dbfd5-5c01-411f-8599-a27bd344d79buses the libosinfo value ofrhel7.2:$ openstack image set 654dbfd5-5c01-411f-8599-a27bd344d79b --property os_name=rhel7.2
As a result, Compute will supply virtual hardware optimized for
rhel7.2whenever an instance is built using the654dbfd5-5c01-411f-8599-a27bd344d79bimage.NoteFor a complete list of
libosinfovalues, refer to the libosinfo project: https://gitlab.com/libosinfo/osinfo-db/tree/master/data/os
1.2.2. Uploading an image
- In the dashboard, select Project > Compute > Images.
- Click Create Image.
- Fill out the values, and click Create Image when finished.
| Field | Notes |
|---|---|
| Name | Name for the image. The name must be unique within the project. |
| Description | Brief description to identify the image. |
| Image Source | Image source: Image Location or Image File. Based on your selection, the next field is displayed. |
| Image Location or Image File |
|
| Format | Image format (for example, qcow2). |
| Architecture | Image architecture. For example, use i686 for a 32-bit architecture or x86_64 for a 64-bit architecture. |
| Minimum Disk (GB) | Minimum disk size required to boot the image. If this field is not specified, the default value is 0 (no minimum). |
| Minimum RAM (MB) | Minimum memory size required to boot the image. If this field is not specified, the default value is 0 (no minimum). |
| Public | If selected, makes the image public to all users with access to the project. |
| Protected | If selected, ensures only users with specific permissions can delete this image. |
When the image has been successfully uploaded, its status is changed to active, which indicates that the image is available for use. Note that the Image service can handle even large images that take a long time to upload — longer than the lifetime of the Identity service token which was used when the upload was initiated. This is due to the fact that the Image service first creates a trust with the Identity service so that a new token can be obtained and used when the upload is complete and the status of the image is to be updated.
You can also use the glance image-create command with the property option to upload an image. More values are available on the command line. For a complete listing, see Image Configuration Parameters.
1.2.3. Updating an image
- In the dashboard, select Project > Compute > Images.
Click Edit Image from the dropdown list.
NoteThe Edit Image option is available only when you log in as an
adminuser. When you log in as ademouser, you have the option to Launch an instance or Create Volume.- Update the fields and click Update Image when finished. You can update the following values - name, description, kernel ID, ramdisk ID, architecture, format, minimum disk, minimum RAM, public, protected.
- Click the drop-down menu and select Update Metadata option.
- Specify metadata by adding items from the left column to the right one. In the left column, there are metadata definitions from the Image Service Metadata Catalog. Select Other to add metadata with the key of your choice and click Save when finished.
You can also use the glance image-update command with the property option to update an image. More values are available on the command line; for a complete listing, see Image Configuration Parameters.
1.2.4. Deleting an image
- In the dashboard, select Project > Compute > Images.
- Select the image you want to delete and click Delete Images.
1.2.5. Converting an image to RAW format
Red Hat Ceph can store, but does not support using, QCOW2 images to host virtual machine (VM) disks.
When you upload a QCOW2 image and create a VM from it, the compute node downloads the image, converts the image to RAW, and uploads it back into Ceph, which can then use it. This process affects the time it takes to create VMs, especially during parallel VM creation.
For example, when you create multiple VMs simultaneously, uploading the converted image to the Ceph cluster may impact already running workloads. The upload process can starve those workloads of IOPS and impede storage responsiveness.
To boot VMs in Ceph more efficiently (ephemeral back end or boot from volume), the glance image format must be RAW.
Converting an image to RAW may yield an image that is larger in size than the original QCOW2 image file. Run the following command before the conversion to determine the final RAW image size:
qemu-img info <image>.qcow2
To convert an image from QCOW2 to RAW format, do the following:
qemu-img convert -p -f qcow2 -O raw <original qcow2 image>.qcow2 <new raw image>.raw
1.2.5.1. Configuring Image Service to accept RAW and ISO only
Optionally, to configure the Image Service to accept only RAW and ISO image formats, deploy using an additional environment file that contains the following:
parameter_defaults:
  ExtraConfig:
    glance::config::api_config:
      image_format/disk_formats:
        value: "raw,iso"
Chapter 2. Configuring OpenStack Compute Storage
This chapter describes the architecture for the back-end storage of images in OpenStack Compute (nova), and provides basic configuration options.
2.1. Architecture overview
In Red Hat OpenStack Platform, the OpenStack Compute service uses the KVM hypervisor to execute compute workloads. The libvirt driver handles all interactions with KVM, and enables the creation of virtual machines.
Two types of libvirt storage must be considered for Compute:
- Base image, which is a cached and formatted copy of the Image service image.
-
Instance disk, which is created using the
libvirtbase and is the back end for the virtual machine instance. Instance disk data can be stored either in Compute’s ephemeral storage (using thelibvirtbase) or in persistent storage (for example, using Block Storage).
The steps that Compute takes to create a virtual machine instance are:
-
Cache the Image service’s backing image as the
libvirtbase. - Convert the base image to the raw format (if configured).
- Resize the base image to match the VM’s flavor specifications.
- Use the base image to create the libvirt instance disk.
In the diagram above, the #1 instance disk uses ephemeral storage; the #2 disk uses a block-storage volume.
Ephemeral storage is an empty, unformatted, additional disk available to an instance. This storage value is defined by the instance flavor. The value provided by the user must be less than or equal to the ephemeral value defined for the flavor. The default value is 0, meaning no ephemeral storage is created.
The ephemeral disk appears in the same way as a plugged-in hard drive or thumb drive. It is available as a block device which you can check using the lsblk command. You can format it, mount it, and use it however you normally would a block device. There is no way to preserve or reference that disk beyond the instance it is attached to.
Block storage volume is persistant storage available to an instance regardless of the state of the running instance.
2.2. Configuration
Compute configuration for handling the libvirt base and instance disks can determine both performance and security aspects of your environment; parameters are configured in the /etc/nova/nova.conf file.
| Section | Parameter | Description | Default |
|---|---|---|---|
| [DEFAULT] |
|
Whether to convert a
Converting the base to raw uses more space for any image that could have been used directly by the hypervisor (for example, a qcow2 image). If you have a system with slower I/O or less available space, you might want to specify 'false', trading the higher CPU requirements of compression for that of minimized input bandwidth.
Raw base images are always used with |
|
| [DEFAULT] |
|
Whether to use CoW (Copy on Write) images for
| true |
| [DEFAULT] |
|
Preallocation mode for
Even when not using CoW instance disks, the copy each VM gets is sparse and so the VM may fail unexpectedly at run time with ENOSPC. By running | none |
| [DEFAULT] |
|
Whether to enable direct resizing of the base image by accessing the image over a block device (boolean). This is only necessary for images with older versions of Because this parameter enables the direct mounting of images which might otherwise be disabled for security reasons, it is not enabled by default. |
|
| [DEFAULT] |
|
The default format that is used for a new ephemeral volume. Value can be: |
|
| [DEFAULT] |
|
Number of seconds to wait between runs of the image cache manager, which impacts base caching on libvirt compute nodes. This period is used in the auto removal of unused cached images (see |
|
| [DEFAULT] |
|
Whether to enable the automatic removal of unused base images (checked every |
|
| [DEFAULT] |
|
How old an unused base image must be before being removed from the |
|
|
[ |
|
Image type to use for |
|
Chapter 3. Virtual machine instances
OpenStack Compute is the central component that provides virtual machines on demand. Compute interacts with the Identity service for authentication, Image service for images (used to launch instances), and the dashboard service for the user and administrative interface.
Red Hat OpenStack Platform allows you to easily manage virtual machine instances in the cloud. The Compute service creates, schedules, and manages instances, and exposes this functionality to other OpenStack components. This chapter discusses these procedures along with procedures to add components like key pairs, security groups, host aggregates and flavors. The term instance is used by OpenStack to mean a virtual machine instance.
3.1. Managing instances
Before you can create an instance, you need to ensure certain other OpenStack components (for example, a network, key pair and an image or a volume as the boot source) are available for the instance.
This section discusses the procedures to add these components, create and manage an instance. Managing an instance refers to updating, and logging in to an instance, viewing how the instances are being used, resizing or deleting them.
3.1.1. Adding components
Use the following sections to create a network, key pair and upload an image or volume source. These components are used in the creation of an instance and are not available by default. You will also need to create a new security group to allow SSH access to the user.
- In the dashboard, select Project.
- Select Network > Networks, and ensure there is a private network to which you can attach the new instance (to create a network, see Create a Network section in the Networking Guide).
- Select Compute > Access & Security > Key Pairs, and ensure there is a key pair (to create a key pair, see Section 3.3.1.1, “Creating a key pair”).
Ensure that you have either an image or a volume that can be used as a boot source:
- To view boot-source images, select the Images tab (to create an image, see Section 1.2.1, “Creating an image”).
- To view boot-source volumes, select the Volumes tab (to create a volume, see Create a Volume in the Storage Guide).
- Select Compute > Access & Security > Security Groups, and ensure you have created a security group rule (to create a security group, see Project Security Management in the Users and Identity Management Guide).
3.1.2. Creating an instance
- In the dashboard, select Project > Compute > Instances.
- Click Launch Instance.
- Fill out instance fields (those marked with '* ' are required), and click Launch when finished.
| Tab | Field | Notes |
|---|---|---|
| Project and User | Project | Select the project from the dropdown list. |
| User | Select the user from the dropdown list. | |
| Details | Availability Zone | Zones are logical groupings of cloud resources in which your instance can be placed. If you are unsure, use the default zone (for more information, see Section 3.5, “Managing host aggregates”). |
| Instance Name | A name to identify your instance. | |
| Flavor | The flavor determines what resources the instance is given (for example, memory). For default flavor allocations and information on creating new flavors, see Section 3.4, “Managing flavors”. | |
| Instance Count | The number of instances to create with these parameters. "1" is preselected. | |
| Instance Boot Source | Depending on the item selected, new fields are displayed allowing you to select the source:
| |
| Access and Security | Key Pair | The specified key pair is injected into the instance and is used to remotely access the instance using SSH (if neither a direct login information or a static key pair is provided). Usually one key pair per project is created. |
| Security Groups | Security groups contain firewall rules which filter the type and direction of the instance’s network traffic (for more information on configuring groups, see Project Security Management in the Users and Identity Management Guide). | |
| Networking | Selected Networks | You must select at least one network. Instances are typically assigned to a private network, and then later given a floating IP address to enable external access. |
| Post-Creation | Customization Script Source | You can provide either a set of commands or a script file, which will run after the instance is booted (for example, to set the instance host name or a user password). If 'Direct Input' is selected, write your commands in the Script Data field; otherwise, specify your script file. Note Any script that starts with '#cloud-config' is interpreted as using the cloud-config syntax (for information on the syntax, see http://cloudinit.readthedocs.org/en/latest/topics/examples.html). |
| Advanced Options | Disk Partition | By default, the instance is built as a single partition and dynamically resized as needed. However, you can choose to manually configure the partitions yourself. |
| Configuration Drive | If selected, OpenStack writes metadata to a read-only configuration drive that is attached to the instance when it boots (instead of to Compute’s metadata service). After the instance has booted, you can mount this drive to view its contents (enables you to provide files to the instance). |
3.1.3. Updating an instance
You can update an instance by selecting Project > Compute > Instances, and selecting an action for that instance in the Actions column. Actions allow you to manipulate the instance in a number of ways:
| Action | Description |
|---|---|
| Create Snapshot | Snapshots preserve the disk state of a running instance. You can create a snapshot to migrate the instance, as well as to preserve backup copies. |
| Associate/Disassociate Floating IP | You must associate an instance with a floating IP (external) address before it can communicate with external networks, or be reached by external users. Because there are a limited number of external addresses in your external subnets, it is recommended that you disassociate any unused addresses. |
| Edit Instance | Update the instance’s name and associated security groups. |
| Edit Security Groups | Add and remove security groups to or from this instance using the list of available security groups (for more information on configuring groups, see Project Security Management in the Users and Identity Management Guide). |
| Console | View the instance’s console in the browser (allows easy access to the instance). |
| View Log | View the most recent section of the instance’s console log. Once opened, you can view the full log by clicking View Full Log. |
| Pause/Resume Instance | Immediately pause the instance (you are not asked for confirmation); the state of the instance is stored in memory (RAM). |
| Suspend/Resume Instance | Immediately suspend the instance (you are not asked for confirmation); like hibernation, the state of the instance is kept on disk. |
| Resize Instance | Bring up the Resize Instance window (see Section 3.1.4, “Resizing an instance”). |
| Soft Reboot | Gracefully stop and restart the instance. A soft reboot attempts to gracefully shut down all processes before restarting the instance. |
| Hard Reboot | Stop and restart the instance. A hard reboot effectively just shuts down the instance’s power and then turns it back on. |
| Shut Off Instance | Gracefully stop the instance. |
| Rebuild Instance | Use new image and disk-partition options to rebuild the image (shut down, re-image, and re-boot the instance). If encountering operating system issues, this option is easier to try than terminating the instance and starting over. |
| Terminate Instance | Permanently destroy the instance (you are asked for confirmation). |
You can create and allocate an external IP address, see Section 3.3.3, “Creating, assigning, and releasing floating IP addresses”
3.1.4. Resizing an instance
To resize an instance (memory or CPU count), you must select a new flavor for the instance that has the correct capacity. Before you increase the size of an instance, ensure that there is at least one compute node with the requested capacity (based on the new flavor).
Ensure communication between hosts by setting up each host with SSH key authentication so that Compute can use SSH to move disks to other hosts (for example, compute nodes can share the same SSH key).
For more information about setting up SSH key authentication, see Configure SSH Tunneling Between Nodes in the Migrating Instances guide.
Enable resizing on the original host by setting the following parameter in the
/etc/nova/nova.conffile:[DEFAULT] allow_resize_to_same_host = True
NoteThe allow_resize_to_same_host parameter does not resize the instance on the same host. Even if the parameter equals true on all compute nodes, the scheduler does not force the instance to resize on the same host. This is the expected behavior.
- In the dashboard, select Project > Compute > Instances.
- Click the instance’s Actions arrow, and select Resize Instance.
- Select a new flavor in the New Flavor field.
If you want to manually partition the instance when it launches (results in a faster build time):
- Select Advanced Options.
- In the Disk Partition field, select Manual.
- Click Resize.
3.1.5. Connecting to an instance
This section discusses the different methods you can use to access an instance console using the dashboard or the command-line interface. You can also directly connect to an instance’s serial port allowing you to debug even if the network connection fails.
3.1.5.1. Accessing an instance console using the dashboard
The console allows you a way to directly access your instance within the dashboard.
- In the dashboard, select Compute > Instances.
-
Click the instance’s More button and select Console.
- Log in using the image’s user name and password (for example, a CirrOS image uses cirros/cubswin:)).
3.1.5.2. Connecting directly to a VNC console
You can directly access an instance’s VNC console using a URL returned by nova get-vnc-console command.
- Browser
To obtain a browser URL, use:
$ nova get-vnc-console INSTANCE_ID novnc- Java Client
To obtain a Java-client URL, use:
$ nova get-vnc-console INSTANCE_ID xvpvnc
nova-xvpvncviewer provides a simple example of a Java client. To download the client, use:
# git clone https://github.com/cloudbuilders/nova-xvpvncviewer
# cd nova-xvpvncviewer/viewer
# make
Run the viewer with the instance’s Java-client URL:
# java -jar VncViewer.jar URLThis tool is provided only for customer convenience, and is not officially supported by Red Hat.
3.1.5.3. Connecting directly to a serial console
You can directly access an instance’s serial port using a websocket client. Serial connections are typically used as a debugging tool (for example, instances can be accessed even if the network configuration fails). To obtain a serial URL for a running instance, use:
$ nova get-serial-console INSTANCE_IDnovaconsole provides a simple example of a websocket client. To download the client, use:
# git clone https://github.com/larsks/novaconsole/
# cd novaconsole
Run the client with the instance’s serial URL:
# python console-client-poll.py
This tool is provided only for customer convenience, and is not officially supported by Red Hat.
However, depending on your installation, the administrator may need to first set up the nova-serialproxy service. The proxy service is a websocket proxy that allows connections to OpenStack Compute serial ports.
3.1.5.3.1. Installing and configuring nova-serialproxy
Install the
nova-serialproxyservice:# yum install openstack-nova-serialproxy
Update the
serial_consolesection in/etc/nova/nova.conf:Enable the
nova-serialproxyservice:$ openstack-config --set /etc/nova/nova.conf serial_console enabled true
Specify the string used to generate URLS provided by the
nova get-serial-consolecommand.$ openstack-config --set /etc/nova/nova.conf serial_console base_url ws://PUBLIC_IP:6083/Where
PUBLIC_IPis the public IP address of the host running thenova-serialproxyservice.Specify the IP address on which the instance serial console should listen (string).
$ openstack-config --set /etc/nova/nova.conf serial_console listen 0.0.0.0
Specify the address to which proxy clients should connect (string).
$ openstack-config --set /etc/nova/nova.conf serial_console proxyclient_address ws://HOST_IP:6083/Where
HOST_IPis the IP address of your Compute host. For example, an enablednova-serialproxyservice is as following:[serial_console] enabled=true base_url=ws://192.0.2.0:6083/ listen=0.0.0.0 proxyclient_address=192.0.2.3
Restart Compute services:
# openstack-service restart nova
Start the
nova-serialproxyservice:# systemctl enable openstack-nova-serialproxy # systemctl start openstack-nova-serialproxy
- Restart any running instances, to ensure that they are now listening on the right sockets.
Open the firewall for serial-console port connections. Serial ports are set using
[serial_console]port_range in/etc/nova/nova.conf; by default, the range is 10000:20000. Update iptables with:# iptables -I INPUT 1 -p tcp --dport 10000:20000 -j ACCEPT
3.1.6. Viewing instance usage
The following usage statistics are available:
Per Project
To view instance usage per project, select Project > Compute > Overview. A usage summary is immediately displayed for all project instances.
You can also view statistics for a specific period of time by specifying the date range and clicking Submit.
Per Hypervisor
If logged in as an administrator, you can also view information for all projects. Click Admin > System and select one of the tabs. For example, the Resource Usage tab offers a way to view reports for a distinct time period. You might also click Hypervisors to view your current vCPU, memory, or disk statistics.
NoteThe
vCPU Usagevalue (x of y) reflects the number of total vCPUs of all virtual machines (x) and the total number of hypervisor cores (y).
3.1.7. Deleting an instance
- In the dashboard, select Project > Compute > Instances, and select your instance.
- Click Terminate Instance.
Deleting an instance does not delete its attached volumes; you must do this separately (see Delete a Volume in the Storage Guide).
3.1.8. Managing multiple instances simultaneously
If you need to start multiple instances at the same time (for example, those that were down for compute or controller maintenance) you can do so easily at Project > Compute > Instances:
- Click the check boxes in the first column for the instances that you want to start. If you want to select all of the instances, click the check box in the first row in the table.
- Click More Actions above the table and select Start Instances.
Similarly, you can shut off or soft reboot multiple instances by selecting the respective actions.
3.2. Customizing an instance using cloud-init
The cloud-init package uses the user data file from the metadata service to perform an action based on the metadata. For example, you can configure the virtual machine image to create instances on boot. The cloud-init package also provides other functionality, such as copying a public key to an account. The process changes based on the format of the information in the user data file.
cloud-init supports different input formats for the user data file. The most commonly used are shell scripts beginning with #! and cloud configuration files beginning with #cloud-config. The cloud-config files use special scripts that cloud-init runs at first boot of a server.
You can pass information in a local file or a shell script using the user-data configuration file.
The following section describes the procedure to create a virtual machine in Red Hat OpenStack Platform using a script at the first boot with the user data file. This allows you to automate the configuration of virtual machine instances. For example, installing packages, starting certain services or managing an instance using the puppet service.
Make sure you install the cloud-init package and that the service is running on the image.
This section includes an example script that you can use with cloud-init to create instances using the command line.
Example
The following example uses the contents of the user_data.file to launch an instance using a cirros image:
# nova boot --image cirros --key-name key-osp10 --flavor m1.small \ --availability-zone internal --user-data user_data.file "Test instance"
A sample user_data.file contents are as follows:
#!/bin/bash
# Example script to run at first boot via OpenStack
# using the user_data and cloud-init.
KEY="key-osp10.pem"
BOOTIMG="d79afca0-ecae-4015-9255-8606bf86a3ec"
ZONE="internal"
FLAVOR="m1.small"

source ~/keystonerc_admin

for RUN in {1..2}; do
    echo "Creating VM ${RUN}""
    VMUUID=$(nova boot \
        --image "${BOOTIMG}" \
        --flavor "${FLAVOR}" \
        --availability-zone "${ZONE}" \
        --nic net-id=00000000-0000-0000-0000-000000000000 \
        --key-name "${KEY}" \
        --user-data user_data.file \
        "VPS-${RUN}-${ZONE}" | awk '/id/ {print $4}' | head -n 1);

    until [[ "$(nova show ${VMUUID} | awk '/status/ {print $4}')" == "ACTIVE" ]]; do
        :
    done

    echo "VM ${RUN} (${VMUUID}) is active."
done
3.2.1. Example user-data files
The following section provides examples of common user-data files that you can use with the cloud-init package.
3.2.1.1. Example user-data file to manage users and groups
To define new users on a server, use the users option as follows:
#cloud-config
users:
  - name: first_user_name
    groups: first_user_group
    passwd: first_user_password
    ...
    ...
  - name: second_user_name
    groups: second_user_group
    passwd: second_user_password
    ...
    ...
Each new user begins with a dash. Each user defines parameters in key-value pairs.
To define groups, use the groups directive:
#cloud-config
groups:
  - group1
  - group2: [user1, user2]
This directive lists a group of users you can create. You can add a sub-list of the users you want to add to a group.
Example
The following example creates two groups - rhel and cloud-users. The rhel group includes the root and sys users.
#cloud-config
groups:
  - rhel: [root,sys]
  - cloud-users
3.2.1.2. Example user-data file to configure SSH keys for user accounts
To configure SSH keys, use the users directive or specify the keys in the ssh_authorized_keys section of your cloud config file as shown in the following example. The general format is as follows:
#cloud-config
ssh_authorized_keys:
  - ssh_key_1
  - ssh_key_2
You can also generate SSH keys by using the ssh_keys parameter and place them on the file system. Using the ssh_keys parameter allows the client machine to trust a server as soon as it comes online. The ssh_keys parameter accepts the key pairs for Rivest–Shamir–Adleman (RSA), Digital Signature Algorithm (DSA), or Elliptic Curve Digital Signature Algorithm (ECDSA) keys using the rsa_private, rsa_public, dsa_private, dsa_public, ecdsa_private, and ecdsa_public sub-items. For example:
#cloud-config
ssh_authorized_keys:
  - ssh-rsa your_example_key1
  - ssh-rsa your_example_key2

ssh_keys:
  rsa_private: |
    -----BEGIN RSA PRIVATE KEY-----
    your_rsa_private_key
    -----END RSA PRIVATE KEY-----

  rsa_public: your_rsa_public_key

  dsa_private: |
   -----BEGIN DSA PRIVATE KEY-----
   your_dsa_private_key
   -----END DSA PRIVATE KEY-----

 dsa_public: your_dsa_public_key
Formatting and line breaks are important in a private key. Make sure to use a block with a pipe key when specifying the values. You must include the BEGIN and END key lines for the keys to be valid.
For more examples on using Cloud config, see Cloud config examples.
3.3. Managing instance security
You can manage access to an instance by assigning it the correct security group (set of firewall rules) and key pair (enables SSH user access). Further, you can assign a floating IP address to an instance to enable external network access. The sections below outline how to create and manage key pairs, security groups, floating IP addresses and logging in to an instance using SSH. There is also a procedure for injecting an admin password into an instance.
For information on managing security groups, see Project Security Management in the Users and Identity Management Guide.
3.3.1. Managing key pairs
Key pairs provide SSH access to the instances. Each time a key pair is generated, its certificate is downloaded to the local machine and can be distributed to users. Typically, one key pair is created for each project (and used for multiple instances).
You can also import an existing key pair into OpenStack.
3.3.1.1. Creating a key pair
- In the dashboard, select Project > Compute > Access & Security.
- On the Key Pairs tab, click Create Key Pair.
- Specify a name in the Key Pair Name field, and click Create Key Pair.
When the key pair is created, a key pair file is automatically downloaded through the browser. Save this file for later connections from external machines. For command-line SSH connections, you can load this file into SSH by executing:
# ssh-add ~/.ssh/os-key.pem
3.3.1.2. Importing a key pair
- In the dashboard, select Project > Compute > Access & Security.
- On the Key Pairs tab, click Import Key Pair.
- Specify a name in the Key Pair Name field, and copy and paste the contents of your public key into the Public Key field.
- Click Import Key Pair.
3.3.1.3. Deleting a key pair
- In the dashboard, select Project > Compute > Access & Security.
- On the Key Pairs tab, click the key’s Delete Key Pair button.
3.3.2. Creating a security group
Security groups are sets of IP filter rules that can be assigned to project instances, and which define networking access to the instance. Security group are project specific; project members can edit the default rules for their security group and add new rule sets.
- In the dashboard, select the Project tab, and click Compute > Access & Security.
- On the Security Groups tab, click + Create Security Group.
- Provide a name and description for the group, and click Create Security Group.
For more information on managing project security, see Project Security Management in the Users and Identity Management Guide.
3.3.3. Creating, assigning, and releasing floating IP addresses
By default, an instance is given an internal IP address when it is first created. However, you can enable access through the public network by creating and assigning a floating IP address (external address). You can change an instance’s associated IP address regardless of the instance’s state.
Projects have a limited range of floating IP address that can be used (by default, the limit is 50), so you should release these addresses for reuse when they are no longer needed. Floating IP addresses can only be allocated from an existing floating IP pool, see Create Floating IP Pools in the Networking Guide.
3.3.3.1. Allocating a floating IP to the project
- In the dashboard, select Project > Compute > Access & Security.
- On the Floating IPs tab, click Allocate IP to Project.
- Select a network from which to allocate the IP address in the Pool field.
- Click Allocate IP.
3.3.3.2. Assigning a floating IP
- In the dashboard, select Project > Compute > Access & Security.
- On the Floating IPs tab, click the address' Associate button.
Select the address to be assigned in the IP address field.
NoteIf no addresses are available, you can click the
+button to create a new address.- Select the instance to be associated in the Port to be Associated field. An instance can only be associated with one floating IP address.
- Click Associate.
3.3.3.3. Releasing a floating IP
- In the dashboard, select Project > Compute > Access & Security.
- On the Floating IPs tab, click the address' menu arrow (next to the Associate/Disassociate button).
- Select Release Floating IP.
3.3.4. Logging in to an instance
Prerequisites:
- Ensure that the instance’s security group has an SSH rule (see Project Security Management in the Users and Identity Management Guide).
- Ensure the instance has a floating IP address (external address) assigned to it (see Section 3.3.3, “Creating, assigning, and releasing floating IP addresses”).
- Obtain the instance’s key-pair certificate. The certificate is downloaded when the key pair is created; if you did not create the key pair yourself, ask your administrator (see Section 3.3.1, “Managing key pairs”).
To first load the key pair file into SSH, and then use ssh without naming it:
Change the permissions of the generated key-pair certificate.
$ chmod 600 os-key.pem
Check whether
ssh-agentis already running:# ps -ef | grep ssh-agent
If not already running, start it up with:
# eval `ssh-agent`
On your local machine, load the key-pair certificate into SSH. For example:
$ ssh-add ~/.ssh/os-key.pem
- You can now SSH into the file with the user supplied by the image.
The following example command shows how to SSH into the Red Hat Enterprise Linux guest image with the user cloud-user:
$ ssh cloud-user@192.0.2.24
You can also use the certificate directly. For example:
$ ssh -i /myDir/os-key.pem cloud-user@192.0.2.24
3.3.5. Injecting an admin password into an instance
You can inject an admin (root) password into an instance using the following procedure.
In the
/etc/openstack-dashboard/local_settingsfile, set thechange_set_passwordparameter value toTrue.can_set_password: True
In the
/etc/nova/nova.conffile, set theinject_passwordparameter toTrue.inject_password=true
Restart the Compute service.
# service nova-compute restart
When you use the nova boot command to launch a new instance, the output of the command displays an adminPass parameter. You can use this password to log into the instance as the root user.
The Compute service overwrites the password value in the /etc/shadow file for the root user. This procedure can also be used to activate the root account for the KVM guest images. For more information on how to use KVM guest images, see Section 1.2.1.1, “Using a KVM guest image with Red Hat OpenStack Platform”
You can also set a custom password from the dashboard. To enable this, run the following command after you have set can_set_password parameter to true.
# systemctl restart httpd.service
The newly added admin password fields are as follows:
These fields can be used when you launch or rebuild an instance.
3.4. Managing flavors
Each created instance is given a flavor (resource template), which determines the instance’s size and capacity. Flavors can also specify secondary ephemeral storage, swap disk, metadata to restrict usage, or special project access (none of the default flavors have these additional attributes defined).
| Name | vCPUs | RAM | Root Disk Size |
|---|---|---|---|
| m1.tiny | 1 | 512 MB | 1 GB |
| m1.small | 1 | 2048 MB | 20 GB |
| m1.medium | 2 | 4096 MB | 40 GB |
| m1.large | 4 | 8192 MB | 80 GB |
| m1.xlarge | 8 | 16384 MB | 160 GB |
The majority of end users will be able to use the default flavors. However, you can create and manage specialized flavors. For example, you can:
- Change default memory and capacity to suit the underlying hardware needs.
- Add metadata to force a specific I/O rate for the instance or to match a host aggregate.
Behavior set using image properties overrides behavior set using flavors (for more information, see Section 1.2, “Managing images”).
3.4.1. Updating configuration permissions
By default, only administrators can create flavors or view the complete flavor list (select Admin > System > Flavors). To allow all users to configure flavors, specify the following in the /etc/nova/policy.json file (nova-api server):
"compute_extension:flavormanage": "",
3.4.2. Creating a flavor
- As an admin user in the dashboard, select Admin > System > Flavors.
Click Create Flavor, and specify the following fields:
Table 3.4. Flavor Options Tab Field Description Flavor Information
Name
Unique name.
ID
Unique ID. The default value,
auto, generates a UUID4 value, but you can also manually specify an integer or UUID4 value.VCPUs
Number of virtual CPUs.
RAM (MB)
Memory (in megabytes).
Root Disk (GB)
Ephemeral disk size (in gigabytes); to use the native image size, specify
0. This disk is not used if Instance Boot Source=Boot from Volume.Epehemeral Disk (GB)
Secondary ephemeral disk size (in gigabytes) available to an instance. This disk is destroyed when an instance is deleted.
The default value is
0, which implies that no ephemeral disk is created.Swap Disk (MB)
Swap disk size (in megabytes).
Flavor Access
Selected Projects
Projects which can use the flavor. If no projects are selected, all projects have access (
Public=Yes).- Click Create Flavor.
3.4.3. Updating general attributes
- As an admin user in the dashboard, select Admin > System > Flavors.
- Click the flavor’s Edit Flavor button.
- Update the values, and click Save.
3.4.4. Updating flavor metadata
In addition to editing general attributes, you can add metadata to a flavor (extra_specs), which can help fine-tune instance usage. For example, you might want to set the maximum-allowed bandwidth or disk writes.
- Pre-defined keys determine hardware support or quotas. Pre-defined keys are limited by the hypervisor you are using (for libvirt, see Table 3.5, “Libvirt Metadata”).
-
Both pre-defined and user-defined keys can determine instance scheduling. For example, you might specify
SpecialComp=True; any instance with this flavor can then only run in a host aggregate with the same key-value combination in its metadata (see Section 3.5, “Managing host aggregates”).
3.4.4.1. Viewing metadata
- As an admin user in the dashboard, select Admin > System > Flavors.
-
Click the flavor’s Metadata link (
YesorNo). All current values are listed on the right-hand side under Existing Metadata.
3.4.4.2. Adding metadata
You specify a flavor’s metadata using a key/value pair.
- As an admin user in the dashboard, select Admin > System > Flavors.
-
Click the flavor’s Metadata link (
YesorNo). All current values are listed on the right-hand side under Existing Metadata. - Under Available Metadata, click on the Other field, and specify the key you want to add (see Table 3.5, “Libvirt Metadata”).
- Click the + button; you can now view the new key under Existing Metadata.
Fill in the key’s value in its right-hand field.
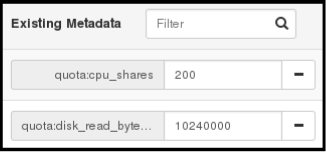
- When finished with adding key-value pairs, click Save.
| Key | Description |
|---|---|
|
| Action that configures support limits per instance. Valid actions are:
Example: |
|
| Definition of NUMA topology for the instance. For flavors whose RAM and vCPU allocations are larger than the size of NUMA nodes in the compute hosts, defining NUMA topology enables hosts to better utilize NUMA and improve performance of the guest OS. NUMA definitions defined through the flavor override image definitions. Valid definitions are:
Note
If the values of Example when the instance has 8 vCPUs and 4GB RAM:
The scheduler looks for a host with 2 NUMA nodes with the ability to run 6 CPUs + 3072 MB, or 3 GB, of RAM on one node, and 2 CPUS + 1024 MB, or 1 GB, of RAM on another node. If a host has a single NUMA node with capability to run 8 CPUs and 4 GB of RAM, it will not be considered a valid match. The same logic is applied in the scheduler regardless of the |
|
| An instance watchdog device can be used to trigger an action if the instance somehow fails (or hangs). Valid actions are:
Example: |
|
|
A random-number generator device can be added to an instance using its image properties (see If the device has been added, valid actions are:
Example: |
|
| Maximum permitted RAM to be allowed for video devices (in MB).
Example: |
|
| Enforcing limit for the instance. Valid options are:
Example: In addition, the VMware driver supports the following quota options, which control upper and lower limits for CPUs, RAM, disks, and networks, as well as shares, which can be used to control relative allocation of available resources among tenants:
|
3.5. Managing host aggregates
A single Compute deployment can be partitioned into logical groups for performance or administrative purposes. OpenStack uses the following terms:
Host aggregates - A host aggregate creates logical units in a OpenStack deployment by grouping together hosts. Aggregates are assigned Compute hosts and associated metadata; a host can be in more than one host aggregate. Only administrators can see or create host aggregates.
An aggregate’s metadata is commonly used to provide information for use with the Compute scheduler (for example, limiting specific flavors or images to a subset of hosts). Metadata specified in a host aggregate will limit the use of that host to any instance that has the same metadata specified in its flavor.
Administrators can use host aggregates to handle load balancing, enforce physical isolation (or redundancy), group servers with common attributes, or separate out classes of hardware. When you create an aggregate, a zone name must be specified, and it is this name which is presented to the end user.
Availability zones - An availability zone is the end-user view of a host aggregate. An end user cannot view which hosts make up the zone, nor see the zone’s metadata; the user can only see the zone’s name.
End users can be directed to use specific zones which have been configured with certain capabilities or within certain areas.
3.5.1. Enabling host aggregate scheduling
By default, host-aggregate metadata is not used to filter instance usage. You must update the Compute scheduler’s configuration to enable metadata usage:
-
Edit the
/etc/nova/nova.conffile (you must have either root or nova user permissions). Ensure that the
scheduler_default_filtersparameter contains:AggregateInstanceExtraSpecsFilterfor host aggregate metadata. For example:scheduler_default_filters=AggregateInstanceExtraSpecsFilter,RetryFilter,RamFilter,ComputeFilter,ComputeCapabilitiesFilter,ImagePropertiesFilter,CoreFilter
NoteScoped specifications must be used for setting flavor
extra_specswhen specifying bothAggregateInstanceExtraSpecsFilterandComputeCapabilitiesFilterfilters as values of the samescheduler_default_filtersparameter, otherwise theComputeCapabilitiesFilterwill fail to select a suitable host. See Table 3.7, “Scheduling Filters” for further details.AvailabilityZoneFilterfor availability zone host specification when launching an instance. For example:scheduler_default_filters=AvailabilityZoneFilter,RetryFilter,RamFilter,ComputeFilter,ComputeCapabilitiesFilter,ImagePropertiesFilter,CoreFilter
- Save the configuration file.
3.5.2. Viewing availability zones or host aggregates
As an admin user in the dashboard, select Admin > System > Host Aggregates. All currently defined aggregates are listed in the Host Aggregates section; all zones are in the Availability Zones section.
3.5.3. Adding a host aggregate
- As an admin user in the dashboard, select Admin > System > Host Aggregates. All currently defined aggregates are listed in the Host Aggregates section.
- Click Create Host Aggregate.
- Add a name for the aggregate in the Name field, and a name by which the end user should see it in the Availability Zone field.
- Click Manage Hosts within Aggregate.
- Select a host for use by clicking its + icon.
- Click Create Host Aggregate.
3.5.4. Updating a host aggregate
- As an admin user in the dashboard, select Admin > System > Host Aggregates. All currently defined aggregates are listed in the Host Aggregates section.
To update the instance’s Name or Availability zone:
- Click the aggregate’s Edit Host Aggregate button.
- Update the Name or Availability Zone field, and click Save.
To update the instance’s Assigned hosts:
- Click the aggregate’s arrow icon under Actions.
- Click Manage Hosts.
- Change a host’s assignment by clicking its + or - icon.
- When finished, click Save.
To update the instance’s Metatdata:
- Click the aggregate’s arrow icon under Actions.
- Click the Update Metadata button. All current values are listed on the right-hand side under Existing Metadata.
- Under Available Metadata, click on the Other field, and specify the key you want to add. Use predefined keys (see Table 3.6, “Host Aggregate Metadata”) or add your own (which will only be valid if exactly the same key is set in an instance’s flavor).
Click the + button; you can now view the new key under Existing Metadata.
NoteRemove a key by clicking its - icon.
Click Save.
Table 3.6. Host Aggregate Metadata Key Description cpu_allocation_ratioSets allocation ratio of virtual CPU to physical CPU. Depends on the
AggregateCoreFilterfilter being set for the Compute scheduler.disk_allocation_ratioSets allocation ratio of Virtual disk to physical disk. Depends on the
AggregateDiskFilterfilter being set for the Compute scheduler.filter_tenant_idIf specified, the aggregate only hosts this tenant (project). Depends on the
AggregateMultiTenancyIsolationfilter being set for the Compute scheduler.ram_allocation_ratioSets allocation ratio of virtual RAM to physical RAM. Depends on the
AggregateRamFilterfilter being set for the Compute scheduler.
3.5.5. Deleting a host aggregate
- As an admin user in the dashboard, select Admin > System > Host Aggregates. All currently defined aggregates are listed in the Host Aggregates section.
Remove all assigned hosts from the aggregate:
- Click the aggregate’s arrow icon under Actions.
- Click Manage Hosts.
- Remove all hosts by clicking their - icon.
- When finished, click Save.
- Click the aggregate’s arrow icon under Actions.
- Click Delete Host Aggregate in this and the next dialog screen.
3.6. Scheduling hosts and cells
The Compute scheduling service determines on which cell or host (or host aggregate), an instance will be placed. As an administrator, you can influence where the scheduler will place an instance. For example, you might want to limit scheduling to hosts in a certain group or with the right RAM.
You can configure the following components:
- Filters - Determine the initial set of hosts on which an instance might be placed (see Section 3.6.1, “Configuring scheduling filters”).
- Weights - When filtering is complete, the resulting set of hosts are prioritized using the weighting system. The highest weight has the highest priority (see Section 3.6.2, “Configuring scheduling weights”).
-
Scheduler service - There are a number of configuration options in the
/etc/nova/nova.conffile (on the scheduler host), which determine how the scheduler executes its tasks, and handles weights and filters. There is both a host and a cell scheduler. For a list of these options, see the Configuration Reference guide.
In the following diagram, both host 1 and 3 are eligible after filtering. Host 1 has the highest weight and therefore has the highest priority for scheduling.

3.6.1. Configuring scheduling filters
You define which filters you would like the scheduler to use in the scheduler_default_filters option (/etc/nova/nova.conf file; you must have either root or nova user permissions). Filters can be added or removed.
By default, the following filters are configured to run in the scheduler:
scheduler_default_filters=RetryFilter,AvailabilityZoneFilter,RamFilter,ComputeFilter,ComputeCapabilitiesFilter,ImagePropertiesFilter,ServerGroupAntiAffinityFilter,ServerGroupAffinityFilter
Some filters use information in parameters passed to the instance in:
-
The
nova bootcommand, see Command-Line Interface Reference guide. - The instance’s flavor (see Section 3.4.4, “Updating flavor metadata”)
- The instance’s image (see Appendix A, Image Configuration Parameters).
The following table lists all the available filters.
| Filter | Description |
|---|---|
| AggregateCoreFilter |
Uses the host-aggregate metadata key |
|
If this ratio is not set, the filter uses the | |
| AggregateDiskFilter |
Uses the host-aggregate metadata key |
|
If this ratio is not set, the filter uses the | |
| AggregateImagePropertiesIsolation | Only passes hosts in host aggregates whose metadata matches the instance’s image metadata; only valid if a host aggregate is specified for the instance. For more information, see Section 1.2.1, “Creating an image”. |
| AggregateInstanceExtraSpecsFilter | Metadata in the host aggregate must match the host’s flavor metadata. For more information, see Section 3.4.4, “Updating flavor metadata”.
This filter can only be specified in the same
|
| AggregateMultiTenancyIsolation |
A host with the specified Note The tenant can still place instances on other hosts. |
| AggregateRamFilter |
Uses the host-aggregate metadata key |
|
If this ratio is not set, the filter uses the | |
| AllHostsFilter | Passes all available hosts (however, does not disable other filters). |
| AvailabilityZoneFilter | Filters using the instance’s specified availability zone. |
| ComputeCapabilitiesFilter |
Ensures Compute metadata is read correctly. Anything before the |
| ComputeFilter | Passes only hosts that are operational and enabled. |
| CoreFilter |
Uses the |
| DifferentHostFilter |
Enables an instance to build on a host that is different from one or more specified hosts. Specify |
| DiskFilter |
Uses disk_allocation_ratio in the |
| ImagePropertiesFilter | Only passes hosts that match the instance’s image properties. For more information, see Section 1.2.1, “Creating an image”. |
| IsolatedHostsFilter |
Passes only isolated hosts running isolated images that are specified in the |
| JsonFilter | Recognises and uses an instance’s custom JSON filters:
|
|
The filter is specfied as a query hint in the
| |
| MetricFilter | Filters out hosts with unavailable metrics. |
| NUMATopologyFilter | Filters out hosts based on its NUMA topology; if the instance has no topology defined, any host can be used. The filter tries to match the exact NUMA topology of the instance to those of the host (it does not attempt to pack the instance onto the host). The filter also looks at the standard over-subscription limits for each NUMA node, and provides limits to the compute host accordingly. |
| RamFilter |
Uses |
| RetryFilter |
Filters out hosts that have failed a scheduling attempt; valid if |
| SameHostFilter |
Passes one or more specified hosts; specify hosts for the instance using the |
| ServerGroupAffinityFilter | Only passes hosts for a specific server group:
|
| ServerGroupAntiAffinityFilter | Only passes hosts in a server group that do not already host an instance:
|
| SimpleCIDRAffinityFilter |
Only passes hosts on the specified IP subnet range specified by the instance’s cidr and
|
3.6.2. Configuring scheduling weights
Both cells and hosts can be weighted for scheduling; the host or cell with the largest weight (after filtering) is selected. All weighers are given a multiplier that is applied after normalising the node’s weight. A node’s weight is calculated as:
w1_multiplier * norm(w1) + w2_multiplier * norm(w2) + ...
You can configure weight options in the scheduler host’s /etc/nova/nova.conf file (must have either root or nova user permissions).
3.6.2.1. Configure Weight Options for Hosts
You can define the host weighers you would like the scheduler to use in the [DEFAULT] scheduler_weight_classes option. Valid weighers are:
-
nova.scheduler.weights.ram- Weighs the host’s available RAM. -
nova.scheduler.weights.metrics- Weighs the host’s metrics. -
nova.scheduler.weights.affinity- Weighs the host’s proximity to other hosts in the given server group. -
nova.scheduler.weights.all_weighers- Uses all host weighers (default).
| Weigher | Option | Description |
|---|---|---|
| All | [DEFAULT] scheduler_host_subset_size |
Defines the subset size from which a host is selected (integer); must be at least |
| affinity |
[default] |
Used for weighing hosts for group soft-affinity. Should be a positive floating-point number, because a negative value results in the opposite behavior, which is normally controlled by |
| affinity |
[default] |
Used for weighing hosts for group soft-anti-affinity. Should be a positive floating-point number, because a negative value results in the opposite behavior, which is normally controlled by |
| metrics | [metrics] required |
Specifies how to handle metrics in [metrics]
|
| metrics |
[metrics] |
Used as the weight if any metric in [metrics] |
| metrics |
[metrics] |
Mulitplier used for weighing metrics. By default, |
| metrics |
[metrics] |
Specifies metrics and the ratio with which they are weighed; use a comma-separated list of
Example: |
| ram |
[DEFAULT] |
Multiplier for RAM (floating point). By default, |
3.6.2.2. Configure Weight Options for Cells
You define which cell weighers you would like the scheduler to use in the [cells] scheduler_weight_classes option (/etc/nova/nova.conf file; you must have either root or nova user permissions).
The use of cells is available in this release as a Technology Preview, and therefore is not fully supported by Red Hat. It should only be used for testing, and should not be deployed in a production environment. For more information about Technology Preview features, see Scope of Coverage Details.
Valid weighers are:
-
nova.cells.weights.all_weighers- Uses all cell weighers(default). -
nova.cells.weights.mute_child- Weighs whether a child cell has not sent capacity or capability updates for some time. -
nova.cells.weights.ram_by_instance_type- Weighs the cell’s available RAM. nova.cells.weights.weight_offset- Evaluates a cell’s weight offset.NoteA cell’s weight offset is specified using
--woffset `in the `nova-manage cell createcommand.
| Weighers | Option | Description |
|---|---|---|
|
|
[cells] |
Multiplier for hosts which have been silent for some time (negative floating point). By default, this value is |
|
|
[cells] |
Weight value given to silent hosts (positive floating point). By default, this value is |
|
|
[cells] |
Multiplier for weighing RAM (floating point). By default, this value is |
|
|
[cells] |
Multiplier for weighing cells (floating point). Enables the instance to specify a preferred cell (floating point) by setting its weight offset to |
3.7. Evacuating instances
If you want to move an instance from a dead or shut-down compute node to a new host server in the same environment (for example, because the server needs to be swapped out), you can evacuate it using nova evacuate.
- An evacuation is only useful if the instance disks are on shared storage or if the instance disks are Block Storage volumes. Otherwise, the disks will not be accessible and cannot be accessed by the new compute node.
-
An instance can only be evacuated from a server if the server is shut down; if the server is not shut down, the
evacuatecommand will fail.
If you have a functioning compute node, and you want to:
-
Make a static copy (not running) of an instance for backup purposes or to copy the instance to a different environment, make a snapshot using
nova image-create(see Chapter 2. How to Migrate a Static Instance). Images created usingnova image-createare only usable by nova (and not glance). -
Move an instance in a static state (not running) to a host in the same environment (shared storage not needed), migrate it using
nova migrate(see Migrate a Static Instance). -
Move an instance in a live state (running) to a host in the same environment, migrate it using
nova live-migration(see Migrate a Live (running) Instance).
3.7.1. Evacuating one instance
Evacuate an instance using:
# nova evacuate [--password pass] instance_name [target_host]
Where:
-
--password- Admin password to set for the evacuated instance. If a password is not specified, a random password is generated and output when evacuation is complete. -
instance_name- Name of the instance to be evacuated. target_host- Host to which the instance is evacuated; if you do not specify the host, the Compute scheduler selects one for you. You can find possible hosts using:# nova host-list | grep compute
For example:
# nova evacuate myDemoInstance Compute2_OnEL7.myDomain
-
3.7.2. Evacuating all instances
Evacuate all instances on a specified host using:
# nova host-evacuate [--target_host <target_host>] [--force] <host>
Where:
<target_host>- The host the instance is evacuated to. If you do not specify the host, the Compute scheduler selects one for you. You can find possible hosts using the following command:# nova host-list | grep compute
-
<host>- Name of the host to be evacuated.
For example:
# nova host-evacuate --target_host Compute2_OnEL7.localdomain myDemoHost.localdomain
3.8. Managing instance snapshots
An instance snapshot allows you to create a new image from an instance. This is very convenient for upgrading base images or for taking a published image and customizing it for local use.
The difference between an image that you upload directly to the Image Service and an image that you create by snapshot is that an image created by snapshot has additional properties in the Image Service database. These properties are found in the image_properties table and include the following parameters:
| Name | Value |
|---|---|
| image_type | snapshot |
| instance_uuid | <uuid of instance that was snapshotted> |
| base_image_ref | <uuid of original image of instance that was snapshotted> |
| image_location | snapshot |
Snapshots allow you to create new instances based on that snapshot, and potentially restore an instance to that state. Moreover, this can be performed while the instance is running.
By default, a snapshot is accessible to the users and projects that were selected while launching an instance that the snapshot is based on.
3.8.1. Creating an instance snapshot
If you intend to use an instance snapshot as a template to create new instances, you must ensure that the disk state is consistent. Before you create a snapshot, set the snapshot image metadata property os_require_quiesce=yes. For example,
$ glance image-update IMAGE_ID --property os_require_quiesce=yes
For this to work, the guest should have the qemu-guest-agent package installed, and the image should be created with the metadata property parameter hw_qemu_guest_agent=yes set. For example,
$ glance image-create --name NAME \
--disk-format raw \
--container-format bare \
--file FILE_NAME \
--is-public True \
--property hw_qemu_guest_agent=yes \
--progress
If you unconditionally enable the hw_qemu_guest_agent=yes parameter, then you are adding another device to the guest. This consumes a PCI slot, and will limit the number of other devices you can allocate to the guest. It also causes Windows guests to display a warning message about an unknown hardware device.
For these reasons, setting the hw_qemu_guest_agent=yes parameter is optional, and the parameter should be used for only those images that require the QEMU guest agent.
- In the dashboard, select Project > Compute > Instances.
- Select the instance from which you want to create a snapshot.
- In the Actions column, click Create Snapshot.
In the Create Snapshot dialog, enter a name for the snapshot and click Create Snapshot.
The Images category now shows the instance snapshot.
To launch an instance from a snapshot, select the snapshot and click Launch.
3.8.2. Managing a snapshot
- In the dashboard, select Project > Images.
- All snapshots you created, appear under the Project option.
For every snapshot you create, you can perform the following functions, using the dropdown list:
- Use the Create Volume option to create a volume and entering the values for volume name, description, image source, volume type, size and availability zone. For more information, see Create a Volume in the Storage Guide.
- Use the Edit Image option to update the snapshot image by updating the values for name, description, Kernel ID, Ramdisk ID, Architecture, Format, Minimum Disk (GB), Minimum RAM (MB), public or private. For more information, see Section 1.2.3, “Updating an image”.
- Use the Delete Image option to delete the snapshot.
3.8.3. Rebuilding an instance to a state in a snapshot
In an event that you delete an instance on which a snapshot is based, the snapshot still stores the instance ID. You can check this information using the nova image-list command and use the snapshot to restore the instance.
- In the dashboard, select Project > Compute > Images.
- Select the snapshot from which you want to restore the instance.
- In the Actions column, click Launch Instance.
- In the Launch Instance dialog, enter a name and the other details for the instance and click Launch.
For more information on launching an instance, see Section 3.1.2, “Creating an instance”.
3.8.4. Consistent Snapshots
Previously, file systems had to be quiesced manually (fsfreeze) before taking a snapshot of active instances for consistent backups.
Compute’s libvirt driver automatically requests the QEMU Guest Agent to freeze the file systems (and applications if fsfreeze-hook is installed) during an image snapshot. Support for quiescing file systems enables scheduled, automatic snapshots at the block device level.
This feature is only valid if the QEMU Guest Agent is installed (qemu-ga) and the image metadata enables the agent (hw_qemu_guest_agent=yes)
Snapshots should not be considered a substitute for an actual system backup.
3.9. Using rescue mode for instances
Compute has a method to reboot a virtual machine in rescue mode. Rescue mode provides a mechanism for access when the virtual machine image renders the instance inaccessible. A rescue virtual machine allows a user to fix their virtual machine by accessing the instance with a new root password. This feature is useful if an instance’s filesystem is corrupted. By default, rescue mode starts an instance from the initial image attaching the current boot disk as a secondary one.
3.9.1. Preparing an image for a rescue mode instance
Due to the fact that both the boot disk and the disk for rescue mode have same UUID, sometimes the virtual machine can be booted from the boot disk instead of the disk for rescue mode.
To avoid this issue, you should create a new image as rescue image based on the procedure in Section 1.2.1, “Creating an image”:
The rescue image is stored in glance and configured in the nova.conf as a default, or you can select when you do the rescue.
3.9.1.1. Rescuing image if using ext4 filesystem
When the base image uses ext4 filesystem, you can create a rescue image from it using the following procedure:
Change the UUID to a random value using the
tune2fscommand:# tune2fs -U random /dev/DEVICE_NODE
Here DEVICE_NODE is the root device node (for example,
sda,vda, and so on).Verify the details of the filesystem, including the new UUID:
# tune2fs -l
-
Update the
/etc/fstabto use the new UUID. You may need to repeat this for any additional partitions you have, that are mounted in thefstabby UUID. -
Update the
/boot/grub2/grub.conffile and update the UUID parameter with the new UUID of the root disk. - Shut down and use this image as your rescue image. This will cause the rescue image to have a new random UUID that will not conflict with the instance that you are rescuing.
The XFS filesystem cannot change the UUID of the root device on the running virtual machine. Reboot the virtual machine until the virtual machine is launched from the disk for rescue mode.
3.9.2. Adding the rescue image to the OpenStack Image Service
When you have completed modifying the UUID of your image, use the following commands to add the generated rescue image to the OpenStack Image service:
Add the rescue image to the Image service:
# glance image-create --name IMAGE_NAME --disk-format qcow2 \
  --container-format bare --is-public True --file IMAGE_PATH
Here IMAGE_NAME is the name of the image, IMAGE_PATH is the location of the image.
Use the
image-listcommand to obtain the IMAGE_ID required for launching an instace in the rescue mode.# glance image-list
You can also upload an image using the OpenStack Dashboard, see Section 1.2.2, “Uploading an image”.
3.9.3. Launching an instance in rescue mode
Since you need to rescue an instance with a specific image, rather than the default one, use the
--imageparameter:# nova rescue --image IMAGE_ID VIRTUAL_MACHINE_ID
Here IMAGE_ID is the ID of the image you want to use and VIRTUAL_MACHINE_ID is ID of a virtual machine that you want to rescue.
NoteThe
nova rescuecommand allows an instance to perform a soft shut down. This allows the guest operating system to perform a controlled shutdown before the instance is powered off. The shut down behavior is configured by theshutdown_timeoutparameter that can be set in thenova.conffile. The value stands for the overall period (in seconds) a guest operation system is allowed to complete the shutdown. The default timeout is 60 seconds.The timeout value can be overridden on a per image basis by means of
os_shutdown_timeoutthat is an image metadata setting allowing different types of operating systems to specify how much time they need to shut down cleanly.- Reboot the virtual machine.
-
Confirm the status of the virtual machine is RESCUE on the controller node by using
nova listcommand or by using dashboard. - Log in to the new virtual machine dashboard by using the password for rescue mode.
You can now make the necessary changes to your instance to fix any issues.
3.9.4. Unrescuing an instance
You can unrescue the fixed instance to restart it from the boot disk.
Execute the following commands on the controller node.
# nova unrescue VIRTUAL_MACHINE_ID
Here VIRTUAL_MACHINE_ID is ID of a virtual machine that you want to unrescue.
The status of your instance returns to ACTIVE once the unrescue operation has completed successfully.
3.10. Setting a configuration drive for instances
You can use the config-drive parameter to present a read-only drive to your instances. This drive can contain selected files that are then accessible to the instance. The configuration drive is attached to the instance at boot, and is presented to the instance as a partition. Configuration drives are useful when combined with cloud-init (for server bootstrapping), and when you want to pass large files to your instances.
3.10.1. Configuration drive options
Set the initial configuration drive options under [DEFAULT] in nova.conf:
-
config_drive_format- sets the format of the drive, and accepts the optionsiso9660andvfat. By default, it usesiso9660. -
force_config_drive=true- this forces the configuration drive to be presented to all instances. -
mkisofs_cmd=genisoimage- specifies the command to use for ISO file creation. This value must not be changed, as only genisoimage is supported.
3.10.2. Using a configuration drive
An instance attaches its configuration drive at boot time. This is enabled by the --config-drive option. For example, this command creates a new instance named test-instance01 and attaches a drive containing a file named /root/user-data.txt:
# nova boot --flavor m1.tiny --config-drive true --file /root/user-data.txt=/root/user-data.txt --image cirros test-instance01
Once the instance has booted, you can log in to it and see a file named /root/user-data.txt.
You can use the configuration drive as a source for cloud-init information. During the initial instance boot, cloud-init can automatically mount the configuration drive and run the setup scripts.
Chapter 4. Configuring CPU pinning with NUMA
This chapter concerns NUMA topology awareness and the configuration of an OpenStack environment on systems supporting this technology. With this setup, virtual machine instances are pinned to dedicated CPU cores, which enables smarter scheduling and therefore improves guest performance.
Background information about NUMA is available in the following article: What is NUMA and how does it work on Linux ?
The following diagram provides an example of a two-node NUMA system and the way the CPU cores and memory pages are made available:
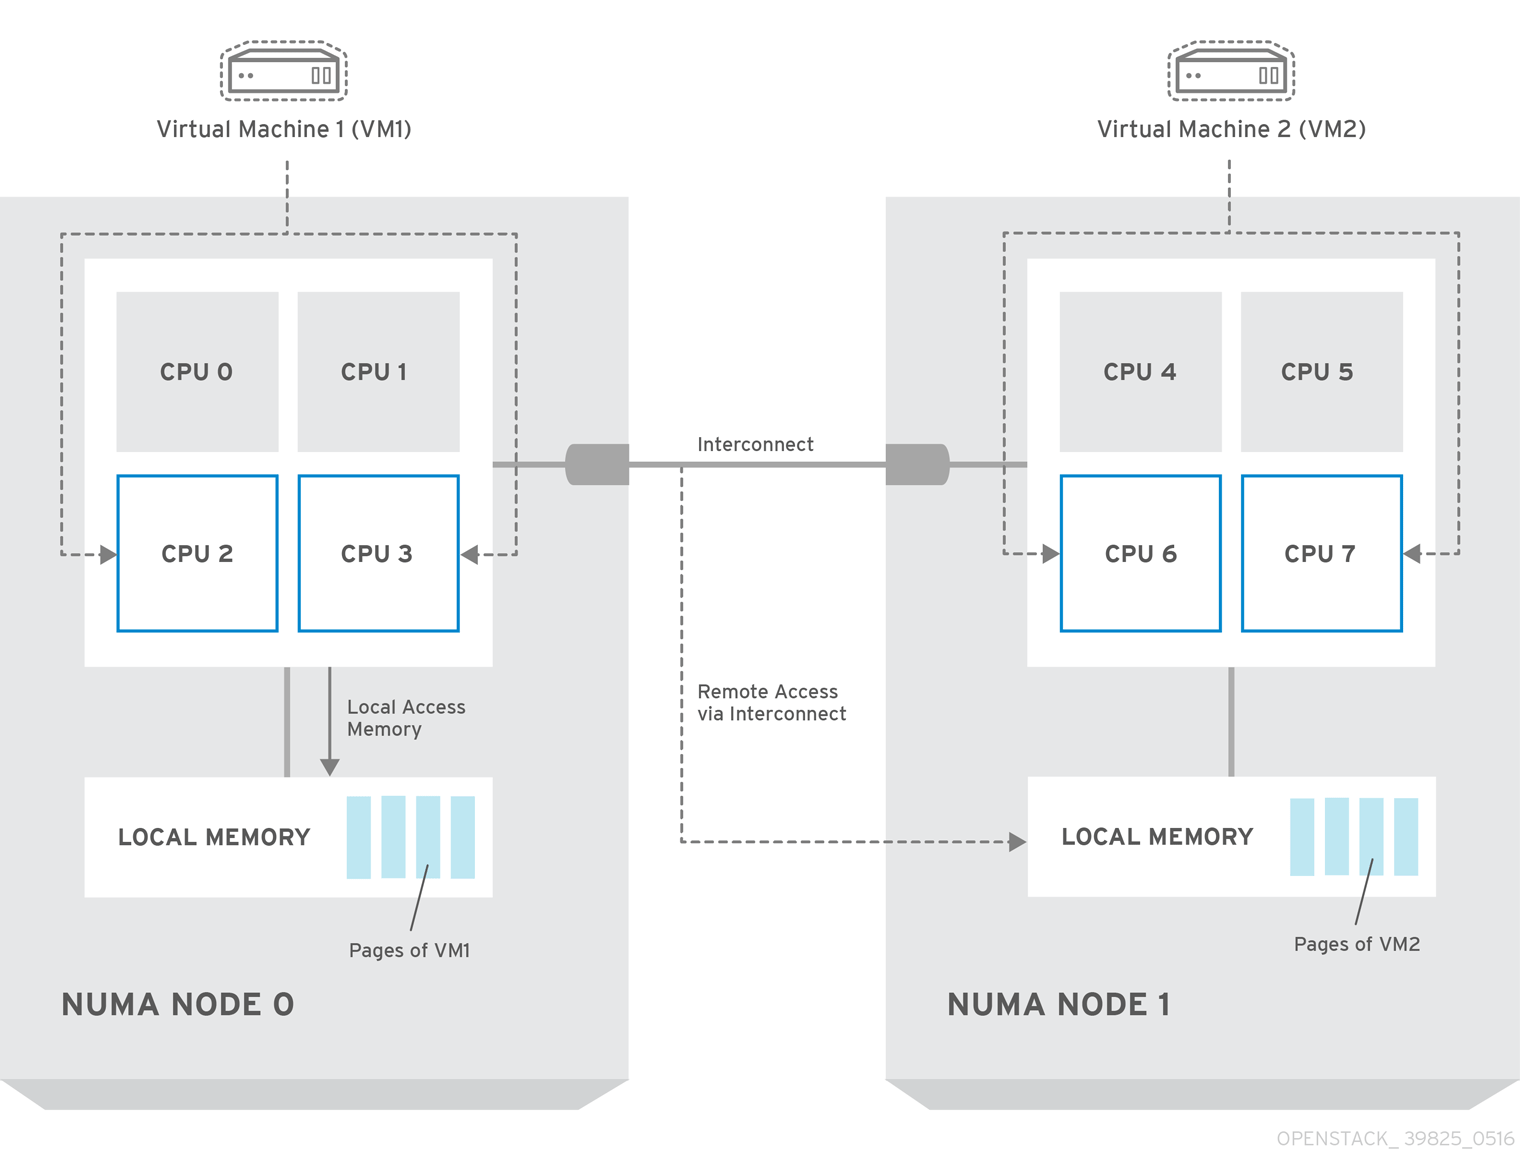
Remote memory available via Interconnect is accessed only if VM1 from NUMA node 0 has a CPU core in NUMA node 1. In this case, the memory of NUMA node 1 will act as local for the third CPU core of VM1 (for example, if VM1 is allocated with CPU 4 in the diagram above), but at the same time, it will act as remote memory for the other CPU cores of the same VM.
For more details on NUMA tuning with libvirt, see the Virtualization Tuning and Optimization Guide.
At present, it is impossible to migrate an instance which has been configured to use CPU pinning. For more information about this issue, see the following solution: Instance migration fails when using cpu-pinning from a numa-cell and flavor-property "hw:cpu_policy=dedicated".
4.1. Compute Node Configuration
The exact configuration depends on the NUMA topology of your host system; however, you must reserve some CPU cores across all the NUMA nodes for host processes and let the rest of the CPU cores handle your guest virtual machine instances. For example, with eight CPU cores evenly spread across two NUMA nodes, the layout can be illustrated as follows:
| Node 0 | Node 1 | |||
| Host processes | Core 0 | Core 1 | Core 4 | Core 5 |
| Guest processes | Core 2 | Core 3 | Core 6 | Core 7 |
The number of cores to reserve for host processes should be determined by observing the performance of the host under typical workloads.
The configuration of the Compute nodes consists of the following steps:
Set the
vcpu_pin_setoption in the/etc/nova/nova.conffile to the list of CPU cores reserved for guest processes. Using the example above, you would set:vcpu_pin_set=2,3,6,7
The
vcpu_pin_setoption will also ensure that acpusetattribute similar to the following will be added to the XML configuration file for libvirt:<vcpu placement='static' cpuset='2-3,6-7'>1</vcpu>
This will pin the guest vCPUs to the listed physical CPU cores and allow the scheduler to see only these cores.
Set the
reserved_host_memory_mboption in the same file to the amount of RAM to reserve for host processes. If you want to reserve 512 MB, use:reserved_host_memory_mb=512
Restart the Compute service on the Compute nodes by running the following command:
systemctl restart openstack-nova-compute.service
Ensure that host processes do not run on the CPU cores reserved for guest processes by adding the
isolcpusargument to the system’s boot configuration. Use the list of CPU cores reserved for guest processes as a parameter of this argument. Using the topology from the example above, you would run the following command:grubby --update-kernel=ALL --args="isolcpus=2,3,6,7"
NoteThe
cpusetoption along with theisolcpuskernel argument will ensure that the underlying compute node will not be able to use the corresponding pCPUs for itself. The pCPUs will be dedicated to instances.WarningThe
isolcpusargument is not fully functional on Red Hat Enterprise Linux 7.1. There is a bug which allows kernel processes to use CPUs that have been isolated. This bug was fixed in Red Hat Enterprise Linux 7.2, however some users have experienced performance problems.Because of this, the
isolcpussolution has been deprecated and there is a replacement solution which relies onsystemd. However, this solution is still a work-in-progress, since it currently cannot isolate all of the kernel threads.To use the systemd solution, edit the
/etc/systemd/system.conffile and uncomment the following line:CPUAffinity=1 2
The
CPUAffinityoption takes a list of CPU indices or ranges separated by a whitespace.Update the boot record for this change to take effect:
grub2-install /dev/deviceReplace device with the name of the device that contains the boot record, usually sda.
- Reboot the system.
4.2. Scheduler Configuration
Edit the
/etc/nova/nova.conffile on each system running the OpenStack Compute Scheduler. Find thescheduler_default_filtersoption, uncomment it if commented out, and addAggregateInstanceExtraSpecFilterandNUMATopologyFilterto the list of filters. The whole line can look like this:scheduler_default_filters=RetryFilter,AvailabilityZoneFilter,RamFilter, ComputeFilter,ComputeCapabilitiesFilter,ImagePropertiesFilter,CoreFilter, NUMATopologyFilter,AggregateInstanceExtraSpecsFilter
Restart the openstack-nova-scheduler service:
systemctl restart openstack-nova-scheduler.service
4.3. Aggregate and Flavor Configuration
Prepare your OpenStack environment for running virtual machine instances pinned to specific resources by completing the following steps on a system with the Compute command-line interface:
Load the
admincredentials:source ~/keystonerc_admin
Create an aggregate for the hosts that will receive pinning requests:
nova aggregate-create nameReplace name with a suitable name, such as performance or cpu_pinning.
Enable the pinning by editing the metadata for the aggregate:
nova aggregate-set-metadata 1 pinned=trueIn this command, number 1 matches the ID of the aggregate created in the previous step.
Create an aggregate for other hosts:
nova aggregate-create nameReplace name with another suitable name, such as normal.
Edit the metadata for this aggregate accordingly:
nova aggregate-set-metadata 2 pinned=falseHere, number 2 is used because it comes after 1, which is the ID of the first aggregate.
Change your existing flavors' specifications to this one:
for i in $(nova flavor-list | cut -f 2 -d ' ' | grep -o '[0-9]*'); do nova flavor-key $i set "aggregate_instance_extra_specs:pinned"="false"; done
Create a flavor for the hosts that will receive pinning requests:
nova flavor-create name ID RAM disk vCPUs
Replace name with an appropriate name, such as m1.small.performance or pinned.small, ID with the identifier for the new flavor (
6if you have five standard flavors, orautoif you wantnovato generate a UUID), RAM with the desired amount of RAM in MB, disk with the desired disk size in GB, and vCPUs with the number of virtual CPUs that you want to reserve.Set the
hw:cpu_policyspecification of this flavor todedicatedso as to require dedicated resources, which enables CPU pinning, and also thehw:cpu_thread_policyspecification torequire, which places each vCPU on thread siblings:nova flavor-key ID set hw:cpu_policy=dedicated nova flavor-key ID set hw:cpu_thread_policy=require
Replace ID with the ID of the flavor created in the previous step.
NoteIf the host does not have an SMT architecture or enough CPU cores with free thread siblings, scheduling will fail. If such behavior is undesired, or if your hosts simply do not have an SMT architecture, do not use the
hw:cpu_thread_policyspecification, or set it topreferinstead ofrequire. The (default)preferpolicy ensures that thread siblings are used when available.Set the
aggregate_instance_extra_specs:pinnedspecification to true so as to ensure that instances based on this flavor have this specification in their aggregate metadata:nova flavor-key ID set aggregate_instance_extra_specs:pinned=trueAgain, replace ID with the ID of the flavor.
Add some hosts to the new aggregates:
nova aggregate-add-host ID_1 host_1
Replace ID_1 with the ID of the first ("performance"/"pinning") aggregate and host_1 with the host name of the host that you want to add to the aggregate.
nova aggregate-add-host ID_2 host_2
Replace ID_2 with the ID of the second ("normal") aggregate and host_2 with the host name of the host that you want to add to it.
You can now boot an instance using the new flavor:
nova boot --image image --flavor flavor server_name
Replace image with a saved VM image name (see nova image-list), flavor with the name of the flavor (m1.small.performance, pinned.small, or any other name that you used), and server_name with the name for the new server.
To verify that the new server has been placed correctly, run the following command and check for OS-EXT-SRV-ATTR:hypervisor_hostname in the output:
nova show server_nameAppendix A. Image Configuration Parameters
The following keys can be used with the property option for both the glance image-update and glance image-create commands.
$ glance image-update IMG-UUID --property architecture=x86_64
Behavior set using image properties overrides behavior set using flavors. For more information, see Section 3.4, “Managing flavors”.
| Specific to | Key | Description | Supported values |
|---|---|---|---|
| All | architecture |
The CPU architecture that must be supported by the hypervisor. For example, |
|
| All | hypervisor_type | The hypervisor type. |
|
| All | instance_uuid | For snapshot images, this is the UUID of the server used to create this image. | Valid server UUID |
| All | kernel_id | The ID of an image stored in the Image Service that should be used as the kernel when booting an AMI-style image. | Valid image ID |
| All | os_distro | The common name of the operating system distribution in lowercase (uses the same data vocabulary as the libosinfo project). Specify only a recognized value for this field. Deprecated values are listed to assist you in searching for the recognized value. |
|
| All | os_version | The operating system version as specified by the distributor. | Version number (for example, "11.10") |
| All | ramdisk_id | The ID of image stored in the Image Service that should be used as the ramdisk when booting an AMI-style image. | Valid image ID |
| All | vm_mode | The virtual machine mode. This represents the host/guest ABI (application binary interface) used for the virtual machine. |
|
| libvirt API driver | hw_disk_bus | Specifies the type of disk controller to attach disk devices to. |
|
| libvirt API driver | hw_numa_nodes | Number of NUMA nodes to expose to the instance (does not override flavor definition). | Integer. For a detailed example of NUMA-topology definition, see the hw:NUMA_def key in Add Metadata. |
| libvirt API driver | hw_numa_mempolicy | NUMA memory allocation policy (does not override flavor definition). | strict - Mandatory for the instance’s RAM allocations to come from the NUMA nodes to which it is bound (default if numa_nodes is specified). preferred - The kernel can fall back to using an alternative node. Useful when the 'hw:numa_nodes' parameter is set to '1'. |
| libvirt API driver | hw_numa_cpus.0 | Mapping of vCPUs N-M to NUMA node 0 (does not override flavor definition). | Comma-separated list of integers. |
| libvirt API driver | hw_numa_cpus.1 | Mapping of vCPUs N-M to NUMA node 1 (does not override flavor definition). | Comma-separated list of integers. |
| libvirt API driver | hw_numa_mem.0 | Mapping N MB of RAM to NUMA node 0 (does not override flavor definition). | Integer |
| libvirt API driver | hw_numa_mem.1 | Mapping N MB of RAM to NUMA node 1 (does not override flavor definition). | Integer |
| libvirt API driver | hw_qemu_guest_agent |
Guest agent support. If set to |
|
| libvirt API driver | hw_rng_model | Adds a random-number generator device to the image’s instances. The cloud administrator can enable and control device behavior by configuring the instance’s flavor. By default:
|
|
| libvirt API driver | hw_scsi_model | Enables the use of VirtIO SCSI (virtio-scsi) to provide block device access for compute instances; by default, instances use VirtIO Block (virtio-blk). VirtIO SCSI is a para-virtualized SCSI controller device that provides improved scalability and performance, and supports advanced SCSI hardware. |
|
| libvirt API driver | hw_video_model | The video image driver used. |
|
| libvirt API driver | hw_video_ram |
Maximum RAM for the video image. Used only if a | Integer in MB (for example, '64') |
| libvirt API driver | hw_watchdog_action |
Enables a virtual hardware watchdog device that carries out the specified action if the server hangs. The watchdog uses the i6300esb device (emulating a PCI Intel 6300ESB). If |
|
| libvirt API driver | os_command_line | The kernel command line to be used by the libvirt driver, instead of the default. For Linux Containers (LXC), the value is used as arguments for initialization. This key is valid only for Amazon kernel, ramdisk, or machine images (aki, ari, or ami). | |
| libvirt API driver and VMware API driver | hw_vif_model | Specifies the model of virtual network interface device to use. | The valid options depend on the configured hypervisor.
|
| VMware API driver | vmware_adaptertype | The virtual SCSI or IDE controller used by the hypervisor. |
|
| VMware API driver | vmware_ostype |
A VMware GuestID which describes the operating system installed in the image. This value is passed to the hypervisor when creating a virtual machine. If not specified, the key defaults to | See thinkvirt.com. |
| VMware API driver | vmware_image_version | Currently unused. |
|
| XenAPI driver | auto_disk_config |
If true, the root partition on the disk is automatically resized before the instance boots. This value is only taken into account by the Compute service when using a Xen-based hypervisor with the XenAPI driver. The Compute service will only attempt to resize if there is a single partition on the image, and only if the partition is in |
|
| XenAPI driver | os_type |
The operating system installed on the image. The XenAPI driver contains logic that takes different actions depending on the value of the |
|