
Red Hat Training
A Red Hat training course is available for Red Hat Enterprise Linux
6.3. Creating Guests with virt-manager
virt-manager, also known as Virtual Machine Manager, is a graphical tool for creating and managing guest virtual machines.
Procedure 6.1. Creating a guest virtual machine with virt-manager
Open virt-manager
Startvirt-manager. Launch the application from the menu and submenu. Alternatively, run thevirt-managercommand as root.Optional: Open a remote hypervisor
Select the hypervisor and click the button to connect to the remote hypervisor.Create a new virtual machine
The virt-manager window allows you to create a new virtual machine. Click the button (Figure 6.1, “Virtual Machine Manager window”) to open the wizard.
Figure 6.1. Virtual Machine Manager window
The wizard breaks down the virtual machine creation process into five steps:- Naming the guest virtual machine and choosing the installation type
- Locating and configuring the installation media
- Configuring memory and CPU options
- Configuring the virtual machine's storage
- Configuring networking, architecture, and other hardware settings
Ensure thatvirt-managercan access the installation media (whether locally or over the network) before you continue.Specify name and installation type
The guest virtual machine creation process starts with the selection of a name and installation type. Virtual machine names can have underscores (_), periods (.), and hyphens (-).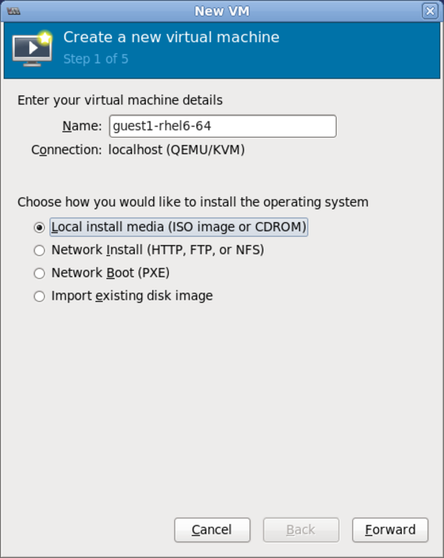
Figure 6.2. Name virtual machine and select installation method
Type in a virtual machine name and choose an installation type:- Local install media (ISO image or CDROM)
- This method uses a CD-ROM, DVD, or image of an installation disk (for example,
.iso). - Network Install (HTTP, FTP, or NFS)
- This method involves the use of a mirrored Red Hat Enterprise Linux or Fedora installation tree to install a guest. The installation tree must be accessible through either HTTP, FTP, or NFS.
- Network Boot (PXE)
- This method uses a Preboot eXecution Environment (PXE) server to install the guest virtual machine. Setting up a PXE server is covered in the Deployment Guide. To install using network boot, the guest must have a routable IP address or shared network device. For information on the required networking configuration for PXE installation, refer to Section 6.4, “Creating Guests with PXE”.
- Import existing disk image
- This method allows you to create a new guest virtual machine and import a disk image (containing a pre-installed, bootable operating system) to it.
Click to continue.Configure installation
Next, configure the and of the installation. Ensure that you select the appropriate OS type for your virtual machine. Depending on the method of installation, provide the install URL or existing storage path.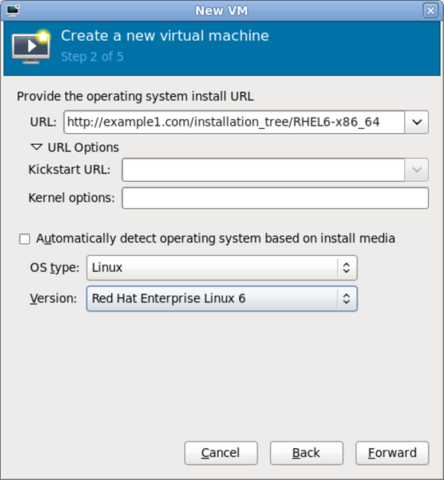
Figure 6.3. Remote installation URL

Figure 6.4. Local ISO image installation
Configure CPU and memory
The next step involves configuring the number of CPUs and amount of memory to allocate to the virtual machine. The wizard shows the number of CPUs and amount of memory you can allocate; configure these settings and click .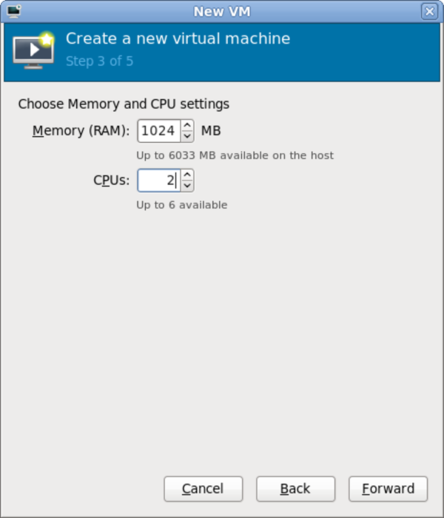
Figure 6.5. Configuring CPU and memory
Configure storage
Assign storage to the guest virtual machine.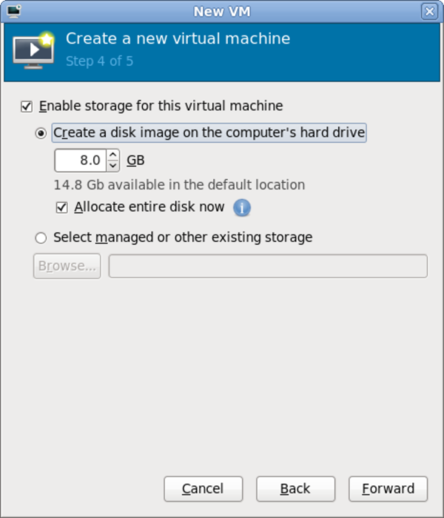
Figure 6.6. Configuring virtual storage
If you chose to import an existing disk image during the first step,virt-managerwill skip this step.Assign sufficient space for your virtual machine and any applications it requires, then click to continue.Final configuration
Verify the settings of the virtual machine and click when you are satisfied; doing so will create the virtual machine with default networking settings, virtualization type, and architecture.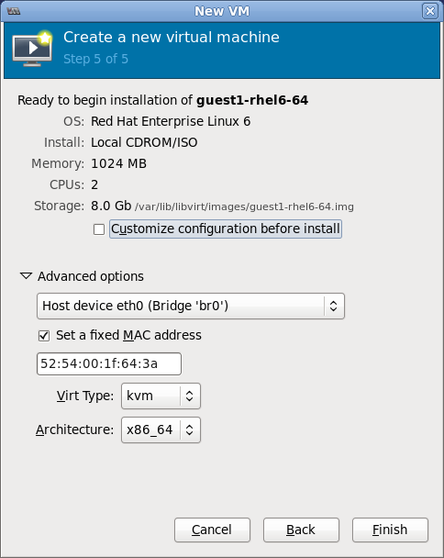
Figure 6.7. Verifying the configuration
If you prefer to further configure the virtual machine's hardware first, check the box first before clicking . Doing so will open another wizard that will allow you to add, remove, and configure the virtual machine's hardware settings.After configuring the virtual machine's hardware, click .virt-managerwill then create the virtual machine with your specified hardware settings.- After the installation completes, you can connect to the guest operating system. For more information, see Section 6.5, “Connecting to Virtual Machines”