
Red Hat Training
A Red Hat training course is available for Red Hat Enterprise Linux
9.3. Managing Public SSH Keys for Users
OpenSSH uses public-private key pairs to authenticate users. A user attempts to access some network resource and presents its key pair. The first time the user authenticates, the administrator on the target machine has to approve the request manually. The machine then stores the user's public key in an
authorized_keys file. Any time that the user attempts to access the resource again, the machine simply checks its authorized_keys file and then grants access automatically to approved users.
There are a couple of problems with this system:
- SSH keys have to be distributed manually and separately to all machines in an environment.
- Administrators have to approve user keys to add them to the configuration, but it is difficult to verify either the user or key issuer properly, which can create security problems.
On Red Hat Enterprise Linux, the System Security Services Daemon (SSSD) can be configured to cache and retrieve user SSH keys so that applications and services only have to look in one location for user keys. Because SSSD can use Identity Management as one of its identity information providers, Identity Management provides a universal and centralized repository of keys. Administrators do not need to worry about distributing, updating, or verifying user SSH keys.
9.3.1. About the SSH Key Format
When keys are uploaded to the IdM entry, the key format can be either an OpenSSH-style key or a raw RFC 4253-style blob. Any RFC 4253-style key is automatically converted into an OpenSSH-style key before it is imported and saved into the IdM LDAP server.
The IdM server can identify the type of key, such as an RSA or DSA key, from the uploaded key blob. However, in a key file such as
id_rsa.pub, a key entry is identified by its type, then the key itself, and then an additional comment or identifier. For example, for an RSA key associated with a specific hostname:
"ssh-rsa ABCD1234...== ipaclient.example.com"
All three parts from the key file can be uploaded to and viewed for the user entry, or only the key itself can be uploaded.
9.3.2. Uploading User SSH Keys Through the Web UI
- Generate a user key. For example, using the OpenSSH tools:
[jsmith@server ~]$ ssh-keygen -t rsa -C jsmith@example.com
Generating public/private rsa key pair.
Enter file in which to save the key (/home/jsmith/.ssh/id_rsa):
Created directory '/home/jsmith/.ssh'.
Enter passphrase (empty for no passphrase):
Enter same passphrase again:
Your identification has been saved in /home/jsmith/.ssh/id_rsa.
Your public key has been saved in /home/jsmith/.ssh/id_rsa.pub.
The key fingerprint is:
a5:fd:ac:d3:9b:39:29:d0:ab:0e:9a:44:d1:78:9c:f2 jsmith@example.com
The key's randomart image is:
+--[ RSA 2048]----+
|                 |
|     + .         |
|    + =   .      |
|     =   +       |
|    . E S..      |
|   .    . .o     |
|    . .  . oo.   |
|   . o .  +.+o   |
|    o  .o..o+o   |
+-----------------+
- Copy the public key from the key file. The full key entry has the form type key== comment. Only the key== is required, but the entire entry can be stored.
[jsmith@server ~]$ cat  /home/jsmith/.ssh/id_rsa.pub

ssh-rsa AAAAB3NzaC1yc2E...tJG1PK2Mq++wQ== jsmith@example.com
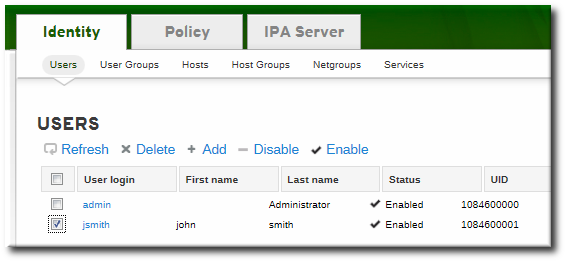
- Open the Identity tab, and select the Users subtab.
- Click the name of the user to edit.
- In the Account Settings area of the Settings tab, click the SSH public keys: Add link.
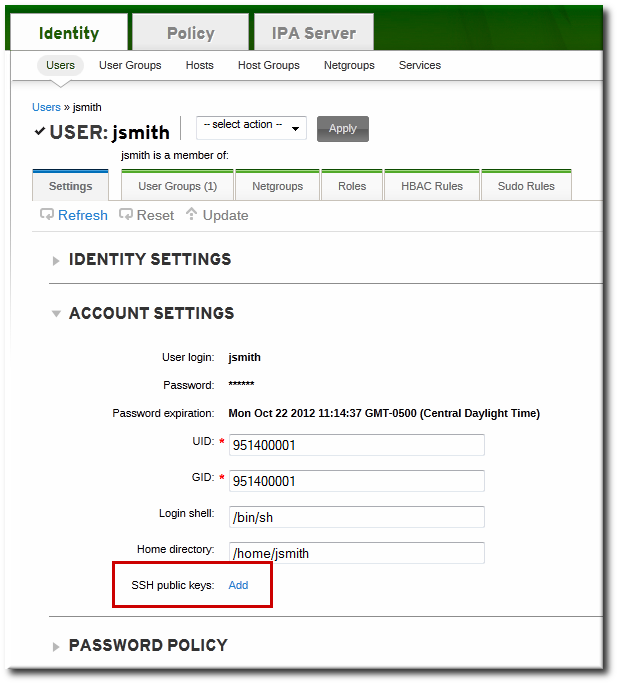
- Click the Add link by the SSH public keys field.

- Paste in the public key for the user, and click the button.
 The SSH public keys field now shows New: key set. Clicking the Show/Set key link opens the submitted key.
 - To upload multiple keys, click the Add link below the list of public keys, and upload the other keys.
- When all the keys have been submitted, click the Update link at the top of the user's page to save the changes.
When the public key is saved, the entry is displayed as the key fingerprint, the comment (if one was included), and the key type[2].
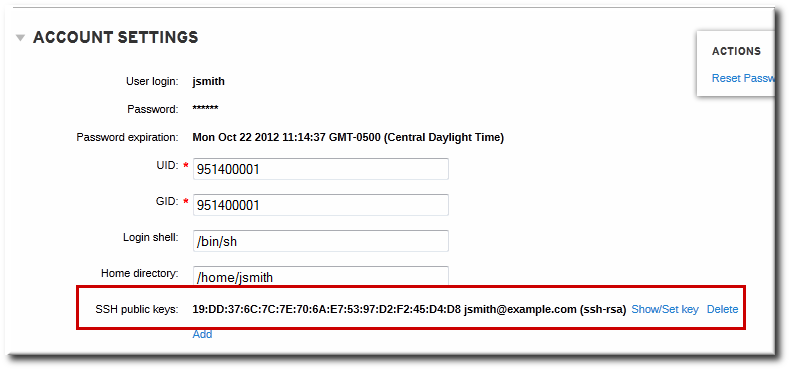
Figure 9.1. Saved Public Key
After uploading the user keys, configure SSSD to use Identity Management as one of its identity domains and set up OpenSSH to use SSSD for managing user keys. This is covered in the Deployment Guide.
9.3.3. Uploading User SSH Keys Through the Command Line
The
--sshpubkey option uploads the 64 bit-encoded public key to the user entry. For example:
[jsmith@server ~]$ ipa user-mod jsmith --sshpubkey="ssh-rsa 12345abcde= ipaclient.example.com"
With a real key, the key is longer and usually ends with an equals sign (=).
To upload multiple keys, pass a comma-separated list of keys with a single
--sshpubkey option:
--sshpubkey="12345abcde==,key2==,key3=="
After uploading the user keys, configure SSSD to use Identity Management as one of its identity domains and set up OpenSSH to use SSSD for managing user keys. This is covered in the Red Hat Enterprise Linux Deployment Guide.
9.3.4. Deleting User Keys
- Open the Identity tab, and select the Users subtab.
- Click the name of the user to edit.
- Open the Account Settings area of the Settings tab.
- Click the Delete link by the fingerprint of the key to remove.
- Click the Update link at the top of the user's page to save the changes.
The command-line tools can be used to remove all keys. This is done by running
ipa user-mod with the --sshpubkey= set to a blank value; this removes all public keys for the user. For example:
[jsmith@server ~]$ kinit admin
[jsmith@server ~]$ ipa user-mod --sshpubkey= jsmith
[2]
The key type is determined automatically from the key itself, if it is not included in the uploaded key.