
Red Hat Training
A Red Hat training course is available for Red Hat Enterprise Linux
21.3.8. Selecting the Printer Model and Finishing
Once you have properly selected a printer connection type, the system attempts to acquire a driver. If the process fails, you can locate or search for the driver resources manually.
Follow this procedure to provide the printer driver and finish the installation:
- In the window displayed after the automatic driver detection has failed, select one of the following options:
- Select a Printer from database — the system chooses a driver based on the selected make of your printer from the list of Makes. If your printer model is not listed, choose Generic.
- Provide PPD file — the system uses the provided PostScript Printer Description (PPD) file for installation. A PPD file may also be delivered with your printer as being normally provided by the manufacturer. If the PPD file is available, you can choose this option and use the browser bar below the option description to select the PPD file.
- Search for a printer driver to download — enter the make and model of your printer into the Make and model field to search on OpenPrinting.org for the appropriate packages.

Figure 21.9. Selecting a printer brand
- Depending on your previous choice provide details in the area displayed below:
- Printer brand for the Select printer from database option.
- PPD file location for the Provide PPD file option.
- Printer make and model for the Search for a printer driver to download option.
- Click to continue.
- If applicable for your option, window shown in Figure 21.10, “Selecting a printer model” appears. Choose the corresponding model in the Models column on the left.
Note
On the right, the recommended printer driver is automatically selected; however, you can select another available driver. The print driver processes the data that you want to print into a format the printer can understand. Since a local printer is attached directly to your computer, you need a printer driver to process the data that is sent to the printer.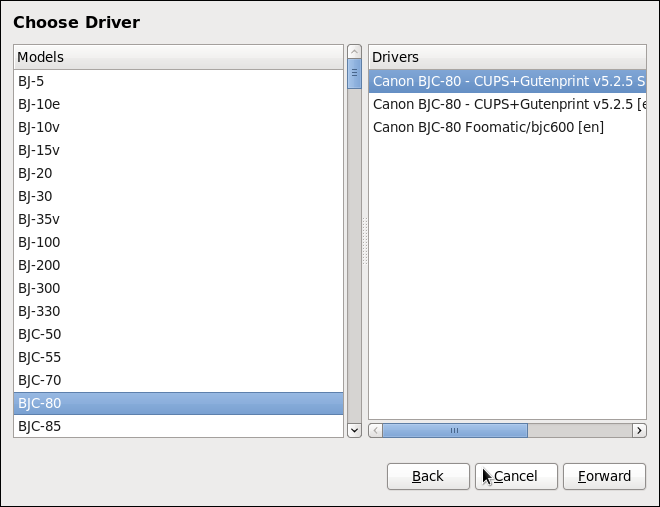
Figure 21.10. Selecting a printer model
- Click .
- Under the
Describe Printerenter a unique name for the printer in the Printer Name field. The printer name can contain letters, numbers, dashes (-), and underscores (_); it must not contain any spaces. You can also use the Description and Location fields to add further printer information. Both fields are optional, and may contain spaces.
Figure 21.11. Printer setup
- Click to confirm your printer configuration and add the print queue if the settings are correct. Click to modify the printer configuration.
- After the changes are applied, a dialog box appears allowing you to print a test page. Click to print a test page now. Alternatively, you can print a test page later as described in Section 21.3.9, “Printing a Test Page”.