
Red Hat Training
A Red Hat training course is available for Red Hat JBoss Enterprise Application Platform
起步指南
适用于 Red Hat JBoss Enterprise Application Platform 7.1
摘要
第 1 章 简介
1.1. 关于 Red Hat JBoss EAP 7
Red Hat JBoss Enterprise Application Platform 7(JBoss EAP)是一个构建在开放标准上并和 Java Enterprise Edition 7 规格兼容的中间件平台。
JBoss EAP 使用了模块化结构,允许在有需要时才启用服务,从而提高了启动速度。
管理控制台和管理命令行界面(Command-line Interface,CLI)使您不需要再编辑 XML 配置文件并增添了使用脚本和自动化任务的能力。
JBoss EAP 提供了两种操作模式:独立服务器和受管域。独立服务器操作模式代表 JBoss EAP 作为单个服务器实例运行。受管域模式则允许通过单个控制点管理多个 JBoss EAP 实例。
此外,JBoss EAP 包含了 API 和开放框架以用于快速开发安全和可扩充的 Java EE 应用程序。
1.2. 关于起步指南
本指南的目的是让您尽快地运行 JBoss EAP。它涵盖了管理性任务如基本安装、管理和 JBoss EAP 的配置。本指南也能帮助开发人员开始用 JBoss EAP Quickstarts 编写应用程序。
如需了解更多,请参考完整的 JBoss EAP documentation suite。
第 2 章 管理 JBoss EAP
2.1. 下载和安装 JBoss EAP
本指南提供了平台独立的用 ZIP 安装方式下载和安装 JBoss EAP 的基本说明。
其他的细节,如用图形化安装程序或 PRM 软件包安装方式安装 JBoss EAP 的说明,请参考 《安装指南》 。
2.1.1. 安装前提条件
在安装 JBoss EAP 之前请检验是否已满足下列预备条件。
共同的预备条件
- 按照 JBoss EAP 7 所支持的配置,您的系统不被支持。
- 您的系统已从 Red Hat 获得了最新的更新和勘误。
ZIP 安装的预备条件
- 运行 JBoss EAP 的用户必须具有对安装目录的读和写权限。
- 所需的 Java 开发工具(JDK)已安装。
-
对于 Hewlett-Packard HP-UX,
unzip工具已经安装。 -
对于 Windows 服务器,
JAVA_HOME和PATH环境变量已经设置。
2.1.2. 下载 JBoss EAP
JBoss EAP Zip 文件可以在 Red Hat 客户门户网站下载。这个 ZIP 文件是平台独立的。
- 登录 Red Hat 客户门户。
- 点击 Downloads。
- 点击 Product Downloads 列表里的 Red Hat JBoss Enterprise Application Platform。
- 在 Version 下拉菜单中,选择 7.1。
- 在列表里找到 Red Hat JBoss Enterprise Application Platform 7.1.0 并点击 Download 链接。
2.1.3. 安装 JBoss EAP
下载了 JBoss EAP ZIP 安装文件后,您可以解压软件包内容来进行安装。
如果有必要,请将 ZIP 文件移至服务器里 JBoss EAP 应该安装的位置。
注意运行 JBoss EAP 的用户必须具有对该目录的读和写权限。
解压 ZIP 归档文件。
$ unzip jboss-eap-7.1.0.zip
注意对于 Windows 服务器,右击 ZIP 文件并选择 Extract All。
解压 ZIP 归档创建的目录是 JBoss EAP 的顶层目录,通常被称为 EAP_HOME。
2.2. 启动和停止 JBoss EAP
2.2.1. 启动 JBoss EAP
JBoss EAP 受 Red Hat Enterprise Linux、Windows Server、Oracle Solaris 和 Hewlett-Packard HP-UX 支持,以独立服务器或受管域操作模式运行。启动 JBoss EAP 的具体命令取决于底层的平台及所需操作模式。
服务器最初启动时处于暂停状态,不会接受任何请求,直到所需的服务全部启用,此时服务器进入正常运行状态并开始接受请求。
将 JBoss EAP 作为独立服务器启动
$ EAP_HOME/bin/standalone.sh
对于 Windows Server,请使用 EAP_HOME\bin\standalone.bat 脚本。
这个启动脚本使用了 EAP_HOME/bin/standalone.conf 文件(Windows Server 则使用 standalone.conf.bat)来设置某些默认首选项,如 JVM 选项。您可以在这个文件里自定义这些设置。
JBoss EAP 默认使用 standalone.xml 配置文件,但也可以使用其他配置启动。关于可用的独立模式配置文件的细节及如何使用它们,请参考 Standalone Server Configuration Files 章节。
关于所有可用的启动脚本参数及其用途的完整列表,请使用 --help 参数查看或者参考 Server Runtime Arguments 章节。
将 JBoss EAP 作为受管域启动
域控制器必须在域中服务器组里的任何服务器之前启动。使用这个脚本会首先启动域控制器,然后是每个关联的主机控制器。
$ EAP_HOME/bin/domain.sh
对于 Windows Server,请使用 EAP_HOME\bin\domain.bat 脚本。
这个启动脚本使用了 EAP_HOME/bin/domain.conf 文件(Windows Server 则使用 domain.conf.bat )来设置某些默认首选项,如 JVM 选项。您可以在这个文件里自定义这些设置。
JBoss EAP 默认使用 host.xml 主机配置文件,但也可以使用其他配置启动。关于可用的受管域模式配置文件的细节及如何使用它们,请参考 Managed Domain Configuration Files 章节。
当设立受管域时,也需要将其他参数传入启动脚本。关于可用启动脚本参数和用途的完整列表,请使用 --help 参数或参阅服务器运行时参数章节。
2.2.2. 停止 JBoss EAP
停止 JBoss EAP 的方式取决于它是如何启动的。
停止 JBoss EAP 的交互式实例
在启动 JBoss EAP 的终端窗口里按 Ctrl+C。
停止 JBoss EAP 的后台实例
使用管理 CLI 来连接运行中的实例并关闭服务器。
启动管理 CLI。
$ EAP_HOME/bin/jboss-cli.sh --connect执行
shutdown命令。shutdown
当运行在受管域里时,您必须在 shutdown 命令里用 --host 参数指定主机名来关闭服务器。
2.3. JBoss EAP 管理
JBoss EAP 使用了简化的配置,对每个独立服务器或受管域使用一个配置文件。独立服务器的默认配置存储在 EAP_HOME/standalone/configuration/standalone.xml 文件里,而受管域的默认配置存储在 EAP_HOME/domain/configuration/domain.xml 文件里。此外,主机控制器的默认配置存储在 EAP_HOME/domain/configuration/host.xml 文件里。
JBoss EAP 可以用命令行管理 CLI、基于 Web 的管理控制台、Java API 或 HTTP API 来配置。用这些管理界面进行的修改会自动持久化,XML 配置文件会被 Management API 覆盖。管理 CLI 和管理控制台是较好的方法,我们不推荐手动编辑 XML 配置文件。
2.3.1. 管理性用户
默认的 JBoss EAP 配置提供了本地身份验证功能,因此,用户可以在不需要身份验证的情况下访问本地主机上的管理 CLI。
但是,如果您需要远程访问管理 CLI 或使用管理控制台(使用管理控制台被认为是一个远程访问,即使它的网络数据是由本地产生的),则需要添加一个管理用户。如果您在添加管理用户前试图访问管理控制台,则会收到一个错误信息。
如果使用图形化安装程序安装 JBoss EAP,则在安装过程中会创建一个管理用户。
本指南涵盖了使用 add-user 脚本的简单 JBoss EAP 用户管理,它是一个添加新用户至属性文件并可以立即身份验证的工具。
For more advanced authentication and authorization options, such as LDAP or Role-Based Access Control (RBAC), see the Core Management Authentication section of the JBoss EAP Security Architecture.
2.3.1.1. 添加管理性用户
运行
add-user脚本并按下列提示进行。$ EAP_HOME/bin/add-user.sh注意对于 Windows Server,请使用
EAP_HOME\bin\add-user.bat脚本。按
ENTER选择默认的选项a来添加管理性用户。这个用户将被添加至 ManagementRealm 并被授权用管理控制台或管理 CLI 执行管理操作。另外一个选项(
b)添加用户至用于应用程序的 ApplicationRealm 且不提供特殊的权限。输入用户名和密码,系统会提示您确认密码。
注意用户名只能包含以下字符,数字和顺序不限:
- 字母数字字符(a-z、A-Z、0-9)
- 连字符 (-)、句号 (.)、逗号 (,)、at 符号 (@)
- 反斜杠 (\)
- 等号 (=)
在默认情况下,JBoss EAP 允许弱密码,但会发出警告。
关于更改此默认行为的详情,请参考《JBoss EAP 配置指南》中的 设置添加用户密码限制章节。
-
输入用逗号隔开的用户所属的组。如果您不希望用户属于任何组,请按
ENTER留空。 -
复核这些信息并输入
yes确认。 确定这个用户是否代表远程的 JBoss EAP 服务器实例。对于基本的管理性用户,请输入
no。需要添加至 ManagementRealm 的一种用户类型是代表另外一个 JBoss EAP 实例的用户,它必须能够通过验证以成员身份加入群集。如果是这样,选择
yes,您将看到一个代表用户密码的哈希加密值,它需要添加到不同的配置文件里。
您也可以在 add-user 脚本里传入参数来非交互式地创建用户。我们不推荐在共享系统上使用这个方法,因为密码将出现在日志和历史文件里。更多信息请参考 Running the Add-User Utility Non-Interactively。
2.3.1.2. 以非交互式运行 Add-User 工具
您可以通过传入参数至命令行非交互式地运行 add-user 脚本。您必须至少提供用户名和密码。
我们不推荐在共享系统上使用这个方法,因为密码可以在日志或历史文件里看到。
创建属于多个组的用户
下面的命令添加一个属于 guest 和 mgmtgroup 组的管理性用户(mgmtuser1)。
$ EAP_HOME/bin/add-user.sh -u 'mgmtuser1' -p 'password1!' -g 'guest,mgmtgroup'指定替代属性文件
在默认情况下,用 add-user 基本创建的用户和组信息存储在服务器配置目录里的属性文件里。
用户信息存储在下列属性文件里:
-
EAP_HOME/standalone/configuration/mgmt-users.properties -
EAP_HOME/domain/configuration/mgmt-users.properties
组信息存储在下列属性文件里:
-
EAP_HOME/standalone/configuration/mgmt-groups.properties -
EAP_HOME/domain/configuration/mgmt-groups.properties
这些默认的目录和属性文件名都可以被覆盖。下列命令添加一个新的用户,为用户属性文件指定不同的名称和位置。
$ EAP_HOME/bin/add-user.sh -u 'mgmtuser2' -p 'password1!' -sc '/path/to/standaloneconfig/' -dc '/path/to/domainconfig/' -up 'newname.properties'
新用户添加至位于 /path/to/standaloneconfig/newname.properties 和 /path/to/domainconfig/newname.properties 的用户属性文件。请注意这些文件必须已经存在,否则您会看到错误信息。
关于所有可用的 add-user 脚本参数及其用途的完整列表,请使用 --help 参数查看或者参考 Add-User Utility Arguments 章节。
2.3.2. 管理界面
2.3.2.1. 管理 CLI
管理命令行接口(management command-line interface,CLI)是一个 JBoss EAP 的命令行管理工具。
使用管理 CLI 启动和停止服务器、部署和卸载应用程序、配置系统设置并执行其他管理任务。操作可以批量模式进行,将多个任务作为一个组来运行。
它还有许多常用的终端命令,如 ls、cd 和 pwd。管理 CLI 也支持 Tab Completion。
关于使用管理 CLI,包括命令和操作、语法和批处理模式运行的详情,请参考《JBoss EAP 管理 CLI 指南》。
启动管理 CLI
$ EAP_HOME/bin/jboss-cli.sh
对于 Windows Server,请使用 EAP_HOME\bin\jboss-cli.bat 脚本。
连接至运行的服务器
connect
或者您可以启动管理 CLI 并使用 EAP_HOME/bin/jboss-cli.sh --connect 命令一步完成连接。
显示帮助
使用下列命令获取普通帮助信息。
help
使用命令上的 --help 标志来接收有关使用这个特定命令的说明。例如,要接收有关使用部署的信息,则会执行以下命令。
deploy --help
退出管理 CLI
quit
查看系统设置
下列命令使用 read-attribute 操作来显示示例数据源是否已启用。
/subsystem=datasources/data-source=ExampleDS:read-attribute(name=enabled)
{
    "outcome" => "success",
    "result" => true
}
在受管域里运行时,您必须在命令前加 /profile=PROFILE_NAME 指定要更新的配置集。
/profile=default/subsystem=datasources/data-source=ExampleDS:read-attribute(name=enabled)
更新系统设置
下列命令使用 write-attribute 操作来禁用示例数据源。
/subsystem=datasources/data-source=ExampleDS:write-attribute(name=enabled,value=false)
启动服务器
管理 CLI 也可以用来启动和停止受管域里运行的服务器。
/host=HOST_NAME/server-config=server-one:start2.3.2.2. 管理控制台
管理控制台是用于 JBoss EAP 6 的基于 Web 的管理工具。
您可以使用管理控制台来启动和停止服务器、部署和卸载应用程序、调整系统设置并对服务器配置进行持久性修改。管理控制台也可以执行管理任务,并在修改需要服务器实例重启或重载时进行实时通知。
在受管域里,相同域里的服务器实例和服务器组可以通过域控制器的管理控制台进行集中管理。
对于使用默认管理端口运行在本地主机上的 JBoss EAP 实例,管理控制台可以通过浏览器访问:http://localhost:9990/console/App.html。用户需要验证是否具有访问管理控制台的权限。
管理控制台下列标签页来导航和管理您的 JBoss EAP 独立服务器(standalone server)或受管域(managed domain)。
- 主页
- 学习如何完成常见的配置和管理任务。请进行体验以熟悉 JBoss EAP 管理控制台。
- 部署
- 添加、删除和启用部署。在受管域里,为服务器组分配部署。
- 配置
- 配置提供 Web Service、消息、高可用性等功能的子系统。在受管域里,管理包含不同子系统配置的配置集。
- Runtime
- 查看 runtime 信息,如服务器状态、JVM 使用和服务器日志。在受管域里,管理您的主机、服务器组和服务器。
- 访问控制
- 在使用基于角色的访问控制时分配角色给用户和组。
- 补丁
- 应用补丁到您的 JBoss EAP 实例。
要体验管理控制台,请点击管理控制台主页上的 Take a Tour! 链接。
2.3.3. 配置文件
2.3.3.1. 独立服务器的配置文件
独立配置文件位于 EAP_HOME/standalone/configuration/ 目录。五个预定义的配置集 (default、ha、full、full-ha、load-balancer)都对应一个单独的文件。
表 2.1. 独立配置文件
| 配置文件 | 用途 |
|---|---|
|
|
这个独立配置文件是您启动独立服务器时的默认配置。它包含关于服务器的所有信息,如子系统、网络、部署、套接字绑定和其他的可配置细节。它不提供消息系统或高可用性所需的子系统。 |
|
|
这个独立配置文件包括所有的默认子系统并添加了用于高可用性的 |
|
|
这个独立配置文件包括所有的默认子系统并添加了 |
|
|
这个独立配置文件包含对每种可能的子系统的支持,包括用于消息和高可用性的子系统。 |
|
|
这个独立配置文件包含使用内建 mod_cluster 前端负载均衡器对其他 JBoss EAP 实例进行负载均衡所需的最少子系统。 |
在默认情况下,以独立服务器方式启动 JBoss EAP 将使用 standalone.xml 文件。要用不同的配置集启动 JBoss EAP,请使用 --server-config 选项。例如:
$ EAP_HOME/bin/standalone.sh --server-config=standalone-full.xml2.3.3.2. 受管域配置文件
受管域配置文件位于 EAP_HOME/domain/configuration/ 目录。
表 2.2. 受管域配置文件
| 配置文件 | 用途 |
|---|---|
|
|
这是用于受管域的主要配置文件。只有域主控制器会读取这个文件。它包含所有配置集的配置(default、ha、full、full-ha、load-balancer)。 |
|
|
这个文件包含了受管域里的物理主机专有的配置细节,如网络接口、套接字绑定、主机名称和其他主机专有的细节。 |
|
|
这个文件只包含将服务器作为主域控制器运行所需的配置细节。 |
|
|
这个文件只包含将服务器作为受管域主机控制器运行所需的配置细节。 |
在默认情况下,以受管域方式启动 JBoss EAP 将使用 host.xml 文件。要用不同的配置集启动 JBoss EAP,请使用 --host-config 选项。例如:
$ EAP_HOME/bin/domain.sh --host-config=host-master.xml2.3.3.3. 备份配置数据
为了以后能恢复 JBoss EAP 服务器配置,下列位置里的内容应该进行备份:
EAP_HOME/standalone/configuration/- 备份整个目录以保存用户数据、服务器配置和独立服务器的日志设置。
EAP_HOME/domain/configuration/- 备份整个目录以保存用户和配置集数据、域和主机配置、受管域的日志设置。
EAP_HOME/modules/- 备份自定义的模块。
EAP_HOME/welcome-content/- 备份任何自定义的欢迎内容。
EAP_HOME/bin/- 备份任何自定义脚本或启动配置文件。
2.3.3.4. 配置文件快照
为了协助维护和管理服务器实例,JBoss EAP 在启动时创建了一个原始配置文件的带时间戳的版本。管理操作导致的任何其他的配置修改都会让原始文件自动备份,而实例的一个工作备份会保留以供引用或回滚。此外,您可以获取服务器配置当前时间点的配置快照。而管理员可以保存和加载这些快照。
下面的例子使用了 standalone.xml 配置文件,但相同的过程适用于 domain.xml 和 host.xml 配置文件。
创建快照
请用管理 CLI 来获取当前配置的快照。
:take-snapshot
{
    "outcome" => "success",
    "result" => "EAP_HOME/standalone/configuration/standalone_xml_history/snapshot/20151022-133109702standalone.xml"
}
列出快照
使用管理 CLI 来列出所有已创建的快照。
:list-snapshots
{
    "outcome" => "success",
    "result" => {
        "directory" => "EAP_HOME/standalone/configuration/standalone_xml_history/snapshot",
        "names" => [
            "20151022-133109702standalone.xml",
            "20151022-132715958standalone.xml"
        ]
    }
}
删除快照
使用管理 CLI 来删除快照。
:delete-snapshot(name=20151022-133109702standalone.xml)
用快照启动服务器
服务器可以用快照或自动保存的配置版本启动。
-
进入
EAP_HOME/standalone/configuration/standalone_xml_history目录并确认要加载的快照或保存的配置文件。 启动服务器并指向所选的配置文件。传入相对于配置目录(
EAP_HOME/standalone/configuration/)的文件路径。$ EAP_HOME/bin/standalone.sh --server-config=standalone_xml_history/snapshot/20151022-133109702standalone.xml
如果服务器运行在受管域里,请使用 --host-config 参数来指定配置文件。
2.3.3.5. 属性替换
JBoss EAP 允许您使用表达式来定义代替配置中字面值的可替换属性。表达式使用 ${PARAMETER:DEFAULT_VALUE} 格式。如果已设置指定的参数,那么将使用参数值,否则将使用提供的默认值。
解析表达式所支持的来源是系统属性、环境变量和库。仅对于部署,来源可以是部署归档中 META-INF/jboss.properties 文件里列出的属性。对于支持子部署的部署类型,如果属性文件位于外部部署(如 EAR),解析的作用域是全部子部署。如果属性文件位于某个子部署里,那么解析的作用域只是该子部署。
下面的 standalone.xml 配置文件里的示例设置 public 接口的 inet-address 为 127.0.0.1,除非 jboss.bind.address 参数已被设置。
<interface name="public">
    <inet-address value="${jboss.bind.address:127.0.0.1}"/>
</interface>
当用下列命令以独立服务器方式启动 JBoss EAP 时可以设置 jboss.bind.address 参数:
$ EAP_HOME/bin/standalone.sh -Djboss.bind.address=IP_ADDRESS
嵌套表达式
表达式可以嵌套,这允许使用高级表达式来替代固定值。嵌套表达式的格式和普通表达式类似,但表达式是内嵌的,例如:
${SYSTEM_VALUE_1${SYSTEM_VALUE_2}}嵌套表达式是递归地评估的,所以首先会评估 inner 表达式,然后是 outer 表达式。表达式也可以是递归的,表达式解析另外一个表达式,从而完成整个解析。允许表达式的地方就允许嵌套表达式,例外是管理 CLI 命令。
使用嵌套表达式的一个例子是,如果数据源定义里使用的密码是掩盖的,我们可以使用嵌套表达式。数据源配置可能有下列的内容:
<password>${VAULT::ds_ExampleDS::password::1}</password>
ds_ExampleDS 的值可用使用嵌套表达式的系统属性(datasource_name)替换。数据眼的配置可以有下列内容:
<password>${VAULT::${datasource_name}::password::1}</password>
JBoss EAP 首先将评估表达式 ${datasource_name},然后将它放入更大的表达式并评估结果表达式。这种配置的优势是数据源的名称会从固定配置抽象出来。
基于描述符的属性替换
应用程序配置(如数据源连接参数)在部署、测试和产品环境里通常是不一样的。这种变化有时是通过构建系统脚本来处理,因为 Java EE 规格没有包含外部化这些配置的方法。在 JBoss EAP 里,您可以使用基于描述符的属性替换以在外部管理配置。
基于描述符的属性替换(Descriptor-based property replacement)基于描述符替换属性,允许您从应用程序和构建链里删除关于环境的假设。您可以在部署描述符而不是应用程序或构建系统脚本里指定环境专有的配置。您可以在文件里或作为命令行参数提供配置。
ee 子系统里有几个标记(flag)用来控制是否应用属性替换。
JBoss 专有描述符替换是由 jboss-descriptor-property-replacement 标记控制的,它的默认值是 enabled。启用后可以替换下列属性描述符文件里的属性:
-
jboss-ejb3.xml -
jboss-app.xml -
jboss-web.xml -
*-jms.xml -
*-ds.xml
下列管理 CLI 命令可用来启用或禁用 JBoss 专有描述符文件里的属性替换:
/subsystem=ee:write-attribute(name="jboss-descriptor-property-replacement",value=VALUE)
Java EE 描述符替换是由 spec-descriptor-property-replacement 标记控制的,它的默认值是 disabled。启用后可以替换下列属性描述符文件里的属性:
-
ejb-jar.xml -
persistence.xml -
application.xml -
web.xml
下列管理 CLI 命令可用来启用或禁用 Java EE 描述符文件里的属性替换:
/subsystem=ee:write-attribute(name="spec-descriptor-property-replacement",value=VALUE)2.4. 网络和端口配置
2.4.1. 接口
JBoss EAP 在整个配置里都引用命名接口。这允许配置引用具有逻辑名称的单独的接口声明,而不是每次使用时都要求完整的接口细节。
这使得受管域里的配置更为容易,而多台主机的网络接口细节可以不同。每个服务器实例可以对应一个逻辑名组。
standalone.xml、domain.xml 和 host.xml 文件都包含接口声明。系统里有几个预配置的接口名称,这取决于使用哪个默认配置,management 接口可以用于要求管理层的所有组件和服务,其中包括 HTTP 管理端点。public 接口可用于所有和应用程序相关的网络通讯。unsecure 接口可用于标准配置里的 IIOP 套接字。private 接口用于标准配置里的 JGroups 套接字。
2.4.1.1. 默认的接口配置
<interfaces>
  <interface name="management">
    <inet-address value="${jboss.bind.address.management:127.0.0.1}"/>
  </interface>
  <interface name="public">
    <inet-address value="${jboss.bind.address:127.0.0.1}"/>
  </interface>
  <interface name="private">
    <inet-address value="${jboss.bind.address.private:127.0.0.1}"/>
  </interface>
  <interface name="unsecure">
    <inet-address value="${jboss.bind.address.unsecure:127.0.0.1}"/>
  </interface>
</interfaces>
在默认情况下,JBoss EAP 绑定这些接口到 127.0.0.1,但这些值可以在运行时通过设置合适的属性来覆盖。例如,当用下列命令将 JBoss EAP 作为独立服务器启动时,您可以设置 public 接口的 inet-address。
$ EAP_HOME/bin/standalone.sh -Djboss.bind.address=IP_ADDRESS
或者,您可以在服务器启动命令行里使用 -b 参数。关于服务器启动选项的更多信息,请参考 Server Runtime Arguments。
如果您修改了 JBoss EAP 使用的默认网络接口或端口,您必须也要记得更改任何使用这些修改接口或端口的脚本,这包含 JBoss EAP 服务脚本,而且记得在访问管理控制台或管理 CLI 时指定正确的接口和端口。
2.4.1.2. 配置接口
网络接口是通过指定逻辑名和物理接口的选择标准来声明的。这个选择标准可以引用通配符地址或指定接口或地址必须具有的一系列特征以进行有效匹配。关于所有可用的接口选择标准的列表,请参考 Interface Attributes 章节。
接口可以用管理控制台或管理 CLI 来配置。下面是几个添加和更新接口的例子。它们首先显示管理 CLI 命令,然后是对应的配置 XML 内容。
添加具有 NIC 值的接口
添加 NIC 值为 eth0 的新接口。
/interface=external:add(nic=eth0)
<interface name="external">
   <nic name="eth0"/>
</interface>
添加带有几个条件值的接口
添加匹配正确子网的任何接口/地址的新接口,且它已上线、支持多点传送且不是点对点的。
/interface=default:add(subnet-match=192.168.0.0/16,up=true,multicast=true,not={point-to-point=true})<interface name="default">
<subnet-match value="192.168.0.0/16"/>
<up/>
<multicast/>
<not>
<point-to-point/>
</not>
</interface>更新接口属性
更新 public 接口的默认 inet-address 值,保留 jboss.bind.address 属性以允许在运行时设置这个值。
/interface=public:write-attribute(name=inet-address,value="${jboss.bind.address:192.168.0.0}")<interface name="public">
<inet-address value="${jboss.bind.address:192.168.0.0}"/>
</interface>添加接口至受管域里的服务器
/host=HOST_NAME/server-config=SERVER_NAME/interface=INTERFACE_NAME:add(inet-address=127.0.0.1)
<servers>
   <server name="SERVER_NAME" group="main-server-group">
      <interfaces>
         <interface name="INTERFACE_NAME">
            <inet-address value="127.0.0.1"/>
         </interface>
      </interfaces>
   </server>
</servers>
2.4.2. 套接字绑定
套接字绑定和绑定组允许您定义网络接口及它们和 JBoss EAP 配置要求的网络接口的关系。套接字绑定是用于套接字的命名配置。套接字绑定组是一个套接字绑定声明的集合,它们按逻辑名分组。
这允许配置的其他部分通过逻辑名引用套接字绑定,而不是每次使用都要求套接字配置的完整细节。
您可以在 standalone.xml 和 domain.xml 配置文件里找到这些命名配置的声明。独立服务器只包含一个套接字绑定组,而受管域可以包含多个组。您可以为受管域里的每个服务器组创建一个套接字绑定组,或者在多个服务器组间共享一个套接字绑定组。
JBoss EAP 默认使用的端口取决于使用哪个套接字绑定组和您的部署要求。
There are three types of socket bindings that can be defined in a socket binding group in the JBoss EAP configuration:
- Inbound Socket Bindings
The
socket-bindingelement is used to configure inbound socket bindings for the JBoss EAP server. The default JBoss EAP configurations provide several preconfiguredsocket-bindingelements, for example, for HTTP and HTTPS traffic. Another example can be found in the Broadcast Groups section of Configuring Messaging for JBoss EAP.Attributes for this element can be found in the Inbound Socket Binding Attributes table.
- Remote Outbound Socket Bindings
The
remote-destination-outbound-socket-bindingelement is used to configure outbound socket bindings for destinations that are remote to the JBoss EAP server. The default JBoss EAP configurations provide an example remote destination socket binding that can be used for a mail server. Another example can be found in the Using the Integrated Artemis Resource Adapter for Remote Connections section of Configuring Messaging for JBoss EAP.Attributes for this element can be found in the Remote Outbound Socket Binding Attributes table.
- Local Outbound Socket Bindings
The
local-destination-outbound-socket-bindingelement is used to configure outbound socket bindings for destinations that are local to the JBoss EAP server. This type of socket binding is not expected to be commonly used.Attributes for this element can be found in the Local Outbound Socket Binding Attributes table.
2.4.2.1. 管理端口
JBoss EAP 7 合并了管理端口。在默认情况下,JBoss EAP 7 对于原生管理(被管理 CLI 使用)和 HTTP 管理(被基于 Web 的管理控制台使用)使用端口 9990。在 JBoss EAP 6 里用作原生管理端口的 9999 端口不再使用,但仍可以在需要时启用。
如果管理控制台启用了 HTTPS,默认将使用端口 9993。
2.4.2.2. 默认的套接字绑定
JBoss EAP 为五个预定义的配置集(default、ha、full、full-ha、load-balancer)各附带了一个套接字绑定组。
关于默认套接字绑定的详情,如默认端口和描述,请参考 Default Socket Bindings 章节。
如果您修改了 JBoss EAP 使用的默认网络接口或端口,您必须也要记得更改任何使用这些修改接口或端口的脚本,这包含 JBoss EAP 服务脚本,而且记得在访问管理控制台或管理 CLI 时指定正确的接口和端口。
独立服务器
当作为独立服务器运行时,每个配置文件只定义一个套接字绑定组。每个独立配置文件(standalone.xml、standalone-ha.xml、standalone-full.xml、standalone-full-ha.xml、standalone-load-balancer.xml)都为对应的配置集使用的技术定义套接字绑定。
例如,默认的独立配置文件(standalone.xml)指定下面的套接字绑定。
<socket-binding-group name="standard-sockets" default-interface="public" port-offset="${jboss.socket.binding.port-offset:0}">
    <socket-binding name="management-http" interface="management" port="${jboss.management.http.port:9990}"/>
    <socket-binding name="management-https" interface="management" port="${jboss.management.https.port:9993}"/>
    <socket-binding name="ajp" port="${jboss.ajp.port:8009}"/>
    <socket-binding name="http" port="${jboss.http.port:8080}"/>
    <socket-binding name="https" port="${jboss.https.port:8443}"/>
    <socket-binding name="txn-recovery-environment" port="4712"/>
    <socket-binding name="txn-status-manager" port="4713"/>
    <outbound-socket-binding name="mail-smtp">
        <remote-destination host="localhost" port="25"/>
    </outbound-socket-binding>
</socket-binding-group>
受管域
在受管域中运行时,所有的套接字绑定组都在 domain.xml 文件里定义。有五个预定义的套接字绑定组:
-
standard-sockets -
ha-sockets -
full-sockets -
full-ha-sockets -
load-balancer-sockets
每个套接字组都为它对应的配置集使用的技术指定套接字绑定。例如,full-ha-sockets 套接字绑定组定义了几个 jgroups 套接字绑定,而用于高可用性的 full-ha 配置集使用它们。
<socket-binding-groups>
  <socket-binding-group name="standard-sockets" default-interface="public">
    <!-- Needed for server groups using the 'default' profile  -->
    <socket-binding name="ajp" port="${jboss.ajp.port:8009}"/>
    <socket-binding name="http" port="${jboss.http.port:8080}"/>
    <socket-binding name="https" port="${jboss.https.port:8443}"/>
    <socket-binding name="txn-recovery-environment" port="4712"/>
    <socket-binding name="txn-status-manager" port="4713"/>
    <outbound-socket-binding name="mail-smtp">
      <remote-destination host="localhost" port="25"/>
    </outbound-socket-binding>
  </socket-binding-group>
  <socket-binding-group name="ha-sockets" default-interface="public">
    <!-- Needed for server groups using the 'ha' profile  -->
    ...
  </socket-binding-group>
  <socket-binding-group name="full-sockets" default-interface="public">
    <!-- Needed for server groups using the 'full' profile  -->
    ...
  </socket-binding-group>
  <socket-binding-group name="full-ha-sockets" default-interface="public">
    <!-- Needed for server groups using the 'full-ha' profile  -->
    <socket-binding name="ajp" port="${jboss.ajp.port:8009}"/>
    <socket-binding name="http" port="${jboss.http.port:8080}"/>
    <socket-binding name="https" port="${jboss.https.port:8443}"/>
    <socket-binding name="iiop" interface="unsecure" port="3528"/>
    <socket-binding name="iiop-ssl" interface="unsecure" port="3529"/>
    <socket-binding name="jgroups-mping" interface="private" port="0" multicast-address="${jboss.default.multicast.address:230.0.0.4}" multicast-port="45700"/>
    <socket-binding name="jgroups-tcp" interface="private" port="7600"/>
    <socket-binding name="jgroups-udp" interface="private" port="55200" multicast-address="${jboss.default.multicast.address:230.0.0.4}" multicast-port="45688"/>
    <socket-binding name="modcluster" port="0" multicast-address="224.0.1.105" multicast-port="23364"/>
    <socket-binding name="txn-recovery-environment" port="4712"/>
    <socket-binding name="txn-status-manager" port="4713"/>
    <outbound-socket-binding name="mail-smtp">
      <remote-destination host="localhost" port="25"/>
    </outbound-socket-binding>
  </socket-binding-group>
  <socket-binding-group name="load-balancer-sockets" default-interface="public">
    <!-- Needed for server groups using the 'load-balancer' profile  -->
    ...
  </socket-binding-group>
</socket-binding-groups>
域控制器的 host.xml 文件定义了管理接口的套接字配置。
2.4.2.3. 配置套接字绑定
当定义套接字绑定时,您可以配置port 和 interface 属性,以及多点传送设置,如 multicast-address 和 multicast-port。关于所有可用的套接字绑定属性的细节,请参考 Socket Binding Attributes 章节。
套接字绑定可以用管理控制台或管理 CLI 来配置。下面的步骤会添加一个套接字绑定组、添加一个套接字绑定且用管理 CLI 配置套接字绑定设置。
添加一个新的套接字绑定组。请注意以独立服务器运行时不能执行这个步骤。
/socket-binding-group=new-sockets:add(default-interface=public)
添加套接字绑定。
/socket-binding-group=new-sockets/socket-binding=new-socket-binding:add(port=1234)
修改套接字绑定来使用非默认的接口,这是通过设置套接字绑定组来完成的。
/socket-binding-group=new-sockets/socket-binding=new-socket-binding:write-attribute(name=interface,value=unsecure)
下面的例子展示了完成上述步骤后 的 XML 配置。
<socket-binding-groups>
    ...
    <socket-binding-group name="new-sockets" default-interface="public">
        <socket-binding name="new-socket-binding" interface="unsecure" port="1234"/>
    </socket-binding-group>
</socket-binding-groups>
2.4.2.4. 端口偏移
端口偏移是添加到服务器的套接字组里指定的所有端口值的数字偏移量。这允许单个服务器继承服务器组的套接字绑定,并用偏移量来确保它和相同主机上其他服务器不冲突。例如,如果套接字绑定组的 HTTP 端口是 8080,而你的服务器使用了端口偏移量为 100,那么它的 HTTP 端口是 8180。
下面的例子用管理 CLI 设置受管域里的服务器的端口偏移量为 250。
/host=master/server-config=server-two/:write-attribute(name=socket-binding-port-offset,value=250)
端口偏移可以用于受管域里的服务器以及相同主机上运行的多台独立服务器。
在用 jboss.socket.binding.port-offset 属性启动独立服务器时,您可以传入一个端口偏移量。
$ EAP_HOME/bin/standalone.sh -Djboss.socket.binding.port-offset=1002.4.3. IPv6 地址
在默认情况下,JBoss EAP 运行时使用 IPv4 地址。下面的步骤展示了如何配置 JBoss EAP 以 IPv6 地址运行。
配置 IPv6 地址的 JVM Stack
更新启动配置以首选 IPv6 地址。
打开启动配置文件。
-
当作为独立服务器运行时,请编辑
EAP_HOME/bin/standalone.conf文件或standalone.conf.bat(Windows Server)。 -
当在受管域中运行时,请编辑
EAP_HOME/bin/domain.conf文件或domain.conf.bat(Windows Server)。
-
当作为独立服务器运行时,请编辑
设置
java.net.preferIPv4Stack属性为false。-Djava.net.preferIPv4Stack=false
附加
java.net.preferIPv6Addresses属性并设置其为true。-Djava.net.preferIPv6Addresses=true
下面的例子展示了在进行上述修改后启动配置文件里的 JVM 选项。
# Specify options to pass to the Java VM.
#
if [ "x$JAVA_OPTS" = "x" ]; then
   JAVA_OPTS="-Xms1303m -Xmx1303m -Djava.net.preferIPv4Stack=false"
   JAVA_OPTS="$JAVA_OPTS -Djboss.modules.system.pkgs=$JBOSS_MODULES_SYSTEM_PKGS -Djava.awt.headless=true"
   JAVA_OPTS="$JAVA_OPTS -Djava.net.preferIPv6Addresses=true"
else
更新 IPv6 地址的接口声明
配置里的默认接口值可以修改为 IPv6 地址。例如,下面的管理 CLI 命令将 management 接口设置为 IPv6 回路地址(::1)。
/interface=management:write-attribute(name=inet-address,value="${jboss.bind.address.management:[::1]}")下面的例子展示了执行上述命令后 的 XML 配置。
<interfaces>
    <interface name="management">
        <inet-address value="${jboss.bind.address.management:[::1]}"/>
    </interface>
    ....
</interfaces>
2.5. Optimizing the JBoss EAP Server Configuration
Once you have installed the JBoss EAP server, and you have created a management user, Red Hat recommends that you optimize your server configuration.
Make sure you review information in the Performance Tuning Guide for information about how to optimize the server configuration to avoid common problems when deploying applications in a production environment. Common optimizations include setting ulimits, enabling garbage collection, creating Java heap dumps, and adjusting the thread pool size.
It is also a good idea to apply any existing patches for your release of the product. Each patch for EAP contains numerous bug fixes. For more information, see Patching JBoss EAP in the Patching and Upgrading Guide for JBoss EAP.
第 3 章 用 JBoss EAP 开发应用程序
3.1. 概述
本指南提供了使用 Red Hat JBoss Developer Studio 和 JBoss EAP 7 quickstart 例程开发应用程序的信息。
Red Hat JBoss Developer Studio 是一个基于 Eclipse 的集成开发环境(IDE),它集成了 JBoss 应用程序开发插件。JBoss Developer Studio 可以使用 JBoss 专有的向导并帮助您部署应用程序至 JBoss EAP 服务器。JBoss EAP 7 提供了许多 Quickstarts 例程来帮助用户使用不同的 Java EE 7 技术编写应用程序。
3.2. 设置开发环境
我们推荐您使用 JBoss Developer Studio 11.0 或采用 JBoss EAP 7.1 的更新版本。
下载和安装 JBoss Developer Studio。
相关的说明,请参考《JBoss Developer Studio 安装指南》中的使用安装程序安装 JBoss Developer Studio Stand-alone。
在 JBoss Developer Studio 中设置 JBoss EAP 服务器。
相关的说明,请参考《JBoss Developer Studio 工具入门指南》中的使用运行时检测从 IDE 内部设置 JBoss EAP。
3.3. 使用 Quickstart 例程
JBoss EAP 里包含的 Quickstart 例程是 Maven 项目。
3.3.1. 关于 Maven
Maven 是一个在 Java 开发中创建、构建和管理软件项目的分布式自动构建工具。Maven 使用标准的配置文件(Project Object Model 或称为 POM)来定义项目和管理构建过程。POM 使用 XML 文件描述了模块和组件的依赖关系、构建顺序和结果项目软件包的目标及输出。这确保了项目以正确和统一的方式进行构建。
Maven 是通过资料库实现这一点的。Maven 资料库保存 Java 库、插件和其他的构建构件。默认的公共资料库是 Maven 2 Central Repository,但资料库可以是机构私有和内部的,在开发团队间共享公用的构件。资料库也可来自第三方。更多信息请参考 Apache Maven 项目和 Introduction to Repositories 。
JBoss EAP 附带的 Maven 资料库包含了 Java EE 开发人员构建 JBoss EAP 应用程序所常用的内容。
关于在 JBoss EAP 里使用 Maven 的更多信息,请参考《JBoss EAP 开发指南》中的在 JBoss EAP 里使用 Maven。
3.3.2. 在 Quickstarts 里使用 Maven
构建和部署应用程序到 JBoss EAP 7 的构件和依赖关系存放在公用资料库。从 JBoss EAP 7 开始,构建 quickstarts 不再需要配置 settings.xml 来使用这些资料库。现在是通过 Quickstart 项目的 POM 文件来配置 Maven 资料库。这种方式让 Quickstart 更易于使用,然而,我们通常不建议将其用于产品项目,因为这会拖慢构建过程。
Red Hat JBoss Developer Studio 包含了 Maven,所以不需要单独下载和安装。我们推荐您使用 JBoss Developer Studio version 11.0 或更新的版本。
如果您计划用 Maven 命令行来构建和部署应用程序,您必须先从 Apache Maven 项目下载 Maven 并根据 Maven 文档里的说明安装它。
3.3.3. 下载和运行 Quickstarts
3.3.3.1. 下载 Quickstarts
JBoss EAP 带有详尽的 quickstart 示例代码以帮助用户开始用不同的 Java EE 7 技术编写应用程序。您可以从 Red Hat 客户门户网站下载 Quickstarts 例程。
- 登录 Red Hat 客户门户。
- 点击 Downloads。
- 在 Product Downloads 列表里,点击 Red Hat JBoss Enterprise Application Platform。
- 从 Version 下拉菜单里选择 7.1。
- 在表里找到 Red Hat JBoss Enterprise Application Platform 7.1.0 Quickstarts 条目并点击 Download。
- 将 ZIP 保存到想要的位置。
- 解压 ZIP 归档文件。
3.3.3.2. 在 Red Hat JBoss Developer Studio 里运行 Quickstarts
在下载了 Quickstarts 例程后,它们可以导入到 JBoss Developer Studio 并部署至 JBoss EAP。
将 Quickstarts 导入至 JBoss Developer Studio
每个 Quickstart 都附带一个 POM(Project Object Model)文件,它包含这个 Quickstart 的项目和配置信息。用这个 POM 文件,您可以轻松地将 Quickstart 导入到 Red Hat JBoss Developer Studio 里。
在导入到 Red Hat JBoss Developer Studio 时,如果您的 Quickstart 项目文件夹位于 IDE 工作区里,IDE 会生成一个无效的项目名及 WAR 归档名。在开始导入之前,请确定您的 Quickstart 项目文件夹在 IDE 工作区之外。
- 启动 JBoss Developer Studio。
- 选择 File → Import。
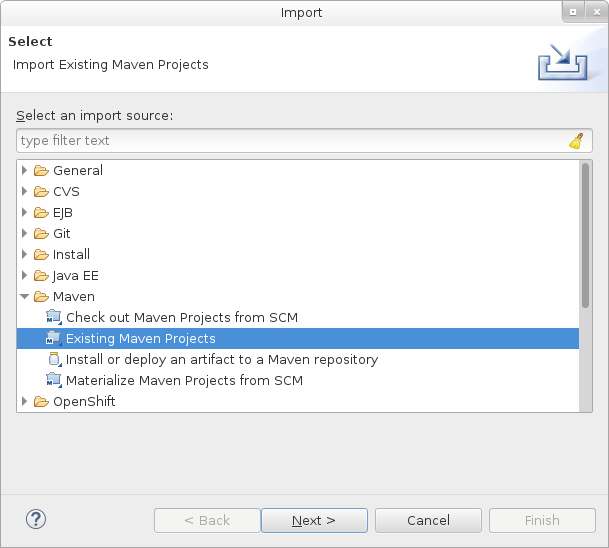
选择 Maven → Existing Maven Projects,然后点击 Next。
图 3.1. 导入现有的 Maven 项目
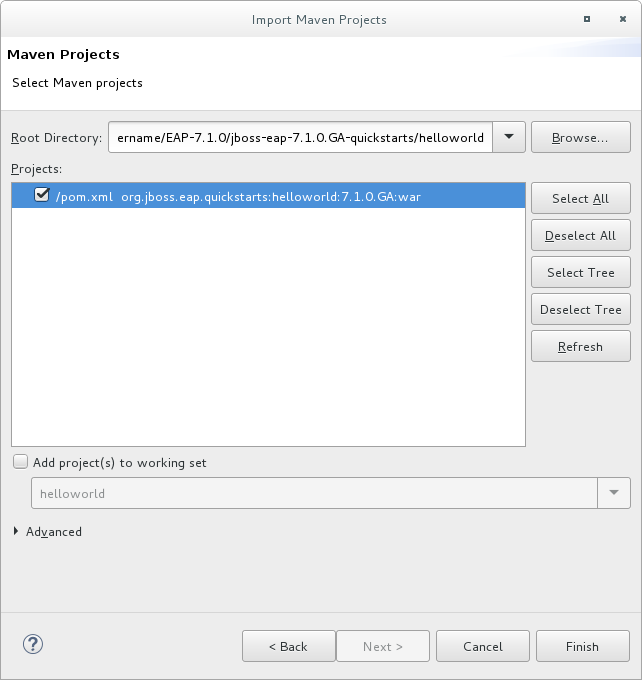
浏览要操作的 Quickstart 目录(例如
helloworldquickstart),然后点击 OK。 Projects 列表框将用所选的 Quickstart 项目的pom.xml文件填充。图 3.2. 选择 Maven 项目
- 点击 Finish。
运行 helloworld Quickstart
运行 helloworld quickstart 是检验 JBoss EAP 服务器是否配置和运行正常的简易方法。
- 如果您还没有定义服务器,请添加 JBoss EAP 服务器至 JBoss Developer Studio。请参考《JBoss Developer Studio 工具入门指南》中的使用运行时检测从 IDE 内部设置 JBoss EAP。
右击 Project Explorer 标签页里的 helloworld 项目并选择 Run As → Run on Server。
图 3.3. Run As - Run on Server

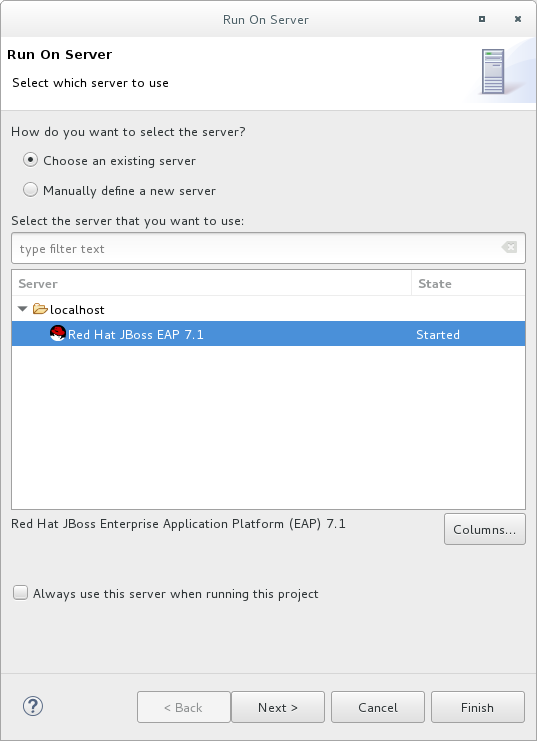
从服务器列表选择 JBoss EAP 7.1 服务器并点击 Next。
图 3.4. 在服务器上运行
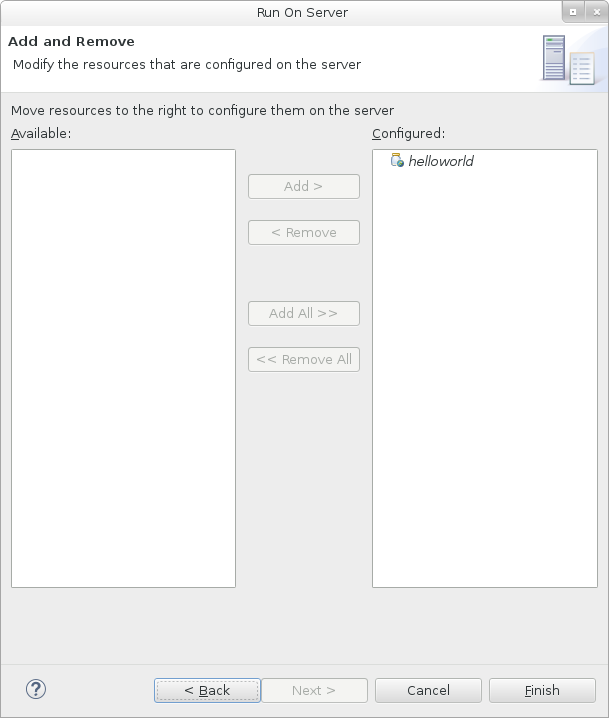
helloworld quickstart 已经列出在服务器进行配置。点击 Finish 部署这个 quickstart。
图 3.5. 修改服务器上配置的资源
检验结果。
-
在 Server 标签页里,JBoss EAP 7.1 服务器的状态已改为
Started。 Console 标签页显示了详述 JBoss EAP 服务器启动和
helloworldquickstart 部署的信息。WFLYUT0021: Registered web context: /helloworld WFLYSRV0010: Deployed "helloworld.war" (runtime-name : "helloworld.war")
-
helloworld应用程序可通过 http://localhost:8080/helloworld 访问,它会显示文本Hello World!。
-
在 Server 标签页里,JBoss EAP 7.1 服务器的状态已改为
有关 helloworld quickstart 的更多信息,请参考探讨 helloworld Quickstart 例程。
运行 bean-validation Quickstart
某些 Quickstarts 例程,如 bean-validation,不会提供用户界面层而是用 Arquillian 测试来演示功能。
-
导入
bean-validationquickstart 至 JBoss Developer Studio。 - 在 Servers 标签页,右击服务器并选择 Start 以启动 JBoss EAP 服务器。如果您没有看到 Servers 标签页或还没有定义服务器,请添加 JBoss EAP 服务器至 JBoss Developer Studio。请参考《JBoss Developer Studio 工具入门指南》中的使用运行时检测从 IDE 内部设置 JBoss EAP。
-
右击 Project Explorer 标签页里的
bean-validation项目并选择 Run As → Maven Build。 在 Goals 字段输入下列内容并点击 Run。
clean verify -Parq-remote
图 3.6. 编辑配置
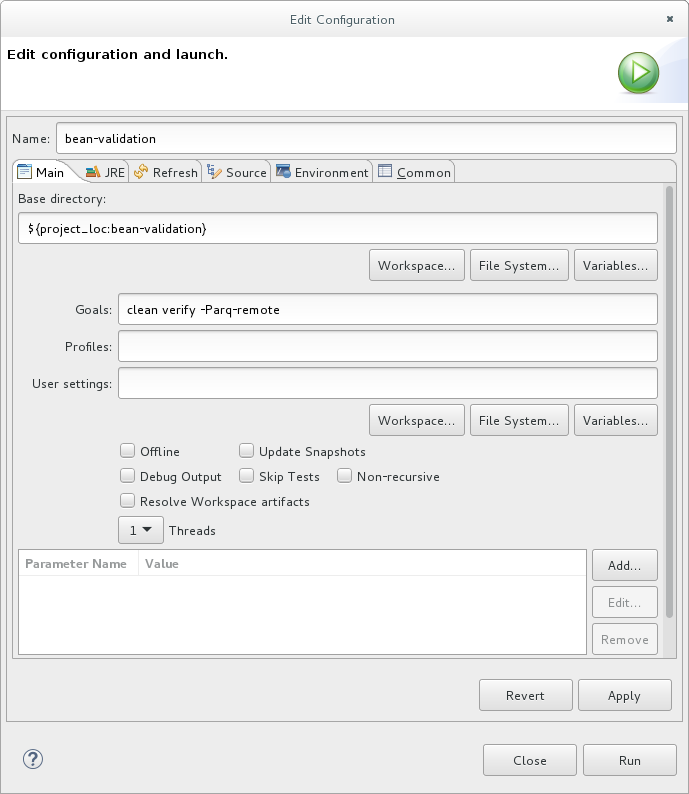
检验结果。
Console 标签页显示了
bean-validationArquillian 测试的结果:------------------------------------------------------- T E S T S ------------------------------------------------------- Running org.jboss.as.quickstarts.bean_validation.test.MemberValidationTest Tests run: 5, Failures: 0, Errors: 0, Skipped: 0, Time elapsed: 2.189 sec Results : Tests run: 5, Failures: 0, Errors: 0, Skipped: 0 [INFO] ------------------------------------------------------------------------ [INFO] BUILD SUCCESS [INFO] ------------------------------------------------------------------------
3.3.3.3. 用命令行运行 Quickstarts
您可以轻易地从命令行用 Maven 构建和部署 Quickstarts。如果您还没有安装 Maven,请参考 Apache Maven 项目来下载并安装它。
Quickstarts 的根目录提供了一个 README.md 文件,它包含关于系统要求、配置 Maven、添加用户和运行 Quickstarts 的普通信息。
每个 Quickstart 也包含自己的 README.md 文件,它提供运行这个 Quickstart 的专门的说明及 Maven 命令。
从命令行运行 helloworld Quickstart
-
复查 helloworld quickstart 根目录里的
README.md文件。 启动 JBoss EAP 服务器。
$ EAP_HOME/bin/standalone.sh- 进入 helloworld quickstart 目录。
用
README.md文件里提供的 Maven 命令构建和部署 Quickstart。$ mvn clean install wildfly:deploy
-
helloworld 应用程序可通过 http://localhost:8080/helloworld 访问并显示文本
Hello World!。
3.4. 检查 Quickstart 例程
3.4.1. 探讨 helloworld Quickstart 例程
helloworld quickstart 显示了如何将简单的 servlet 部署至 JBoss EAP。业务逻辑被涵盖在服务之中,作为 Contexts and Dependency Injection (CDI) bean 提供,并被注入 Servlet。此 quickstart 是确保正确配置和启动服务器的起点。
有关使用命令行来构建和部署此 quickstart 的详细说明,请参考 helloworld quickstart 根目录中的 README.html 文件。本主题介绍如何使用 Red Hat JBoss Developer Studio 来运行 quickstart,并假定您已安装 Red Hat JBoss Developer Studio、配置 Maven、导入并成功运行 helloworld quickstart。
前提条件
- 安装 JBoss Developer Studio。有关说明,请参考《JBoss Developer Studio 安装指南》中的使用安装程序安装 JBoss Developer Studio Stand-alone 。
-
运行
helloworldquickstart。有关说明,请参考在 JBoss Developer Studio 里运行 Quickstarts。 -
打开 web 浏览器,访问 http://localhost:8080/helloworld 中的应用程序来验证
helloworldquickstart 是否已成功部署至 JBoss EAP。
检查目录结构
helloworld quickstart 的代码可在 QUICKSTART_HOME/helloworld/ 目录中找到。helloworld quickstart 由一个 Servlet 和一个 CDI bean 构成。它还包括一个 beans.xml 文件(位于应用程序的 WEB-INF/ 目录中),版本号为 1.1,以及一个 bean-discovery-mode(模式为 all)。这个标记文件将 WAR 识别为 bean 归档,指示 JBoss EAP 在本应用程序中查找 bean 和激活 CDI。
src/main/webapp/ 目录中包含 quickstart 文件。本示例的所有配置文件都位于 src/main/webapp/ 中 WEB-INF/ 目录中,其中包括 beans.xml 文件。src/main/webapp/ 目录中还包含 index.html 文件,它使用简单的 meta 刷新将用户的浏览器重定向到 Servlet,位于 http://localhost:8080/helloworld/HelloWorld。quickstart 不需要 web.xml 文件。
检查代码
这些列表里已经排除了软件包声明和导入。Quickstart 源代码里有完整的列表。
检查
HelloWorldServlet代码。HelloWorldServlet.java文件位于src/main/java/org/jboss/as/quickstarts/helloworld/目录。这个 servlet 发送信息至浏览器。示例:HelloWorldServlet 类别代码
42 @SuppressWarnings("serial")
43 @WebServlet("/HelloWorld")
44 public class HelloWorldServlet extends HttpServlet {
45
46     static String PAGE_HEADER = "<html><head><title>helloworld</title></head><body>";
47
48     static String PAGE_FOOTER = "</body></html>";
49
50     @Inject
51	   HelloService helloService;
52
53     @Override
54     protected void doGet(HttpServletRequest req, HttpServletResponse resp) throws ServletException, IOException {
55         resp.setContentType("text/html");
56         PrintWriter writer = resp.getWriter();
57         writer.println(PAGE_HEADER);
58         writer.println("<h1>" + helloService.createHelloMessage("World") + "</h1>");
59         writer.println(PAGE_FOOTER);
60         writer.close();
61     }
62
63 }
表 3.1. HelloWorldServlet 的细节
行数 备注 43
您只需要添加
@WebServlet注解,并提供一个映射到用于访问 servlet 的 URL。46-48
每个网页都需要正确的 HTML 格式。这个 Quickstart 使用了静态字符串编写最小的页头和页尾输出。
50-51
这些行会注入生成实际消息的 HelloService CDI bean。只要我们不更改 HelloService 的 API,此方法可让我们日后在不更改视图层的情况下更改 HelloService 实现。
58
这一行调用服务以生成 "Hello World" 信息,然后写入 HTTP 请求。
检查
HelloService代码。HelloService.java文件位于src/main/java/org/jboss/as/quickstarts/helloworld/目录中。此服务只是返回消息。无需 XML 或注解注册。示例:HelloService 类别代码
公共类 HelloService {

    String createHelloMessage(String name) {
        return "Hello " + name + "!";
    }
}
3.4.2. 探讨 numberguess Quickstart 例程
numberguess quickstart 显示了如何创建简单的非持久性应用程序并将其部署到 JBoss EAP。信息通过 JSF 视图显示,业务逻辑被涵盖在两个 CDI bean 中。在 numberguess quickstart 中,您拥有 10 次机会,可以猜选 1 到 100 之间的数字。每次猜选之后,系统会告知您数字是过高还是过低。
numberguess quickstart 的代码位于 QUICKSTART_HOME/numberguess/ 目录中,QUICKSTART_HOME 目录是您下载和解压 JBoss EAP quickstart 的位置。numberguess quickstart 由多个 bean、配置文件和 Facelets (JSF) 视图组成,封装成为 WAR 模块。
有关使用命令行来构建和部署此 quickstart 的详细说明,请参考 numberguess quickstart 根目录中的 README.html 文件。以下示例使用 Red Hat JBoss Developer Studio 来运行 quickstart。
前提条件
- 安装 JBoss Developer Studio。有关说明,请参考《JBoss Developer Studio 安装指南》中的使用安装程序安装 JBoss Developer Studio Stand-alone 。
-
运行
numberguessquickstart。有关说明,请参考在 JBoss Developer Studio 里运行 Quickstarts,并用说明中的numberguess代替helloworld。 -
打开 web 浏览器,访问在此 URL: http://localhost:8080/numberguess 中的应用程序来验证
numberguessquickstart 是否已成功部署至 JBoss EAP。
检查配置文件
本示例的所有配置文件都位于 quickstart 的 QUICKSTART_HOME/numberguess/src/main/webapp/WEB-INF/ 目录中。
检查
faces-config.xml文件。这个 quickstart 使用 JSF 2.2 版本的
faces-config.xml文件名。标准版 Facelets 是 JSF 2.2 中默认的视图处理程序,因此无需配置。本文件只包含根元素,仅作为标记文件,用于指示应当在应用程序中启用 JSF。<faces-config version="2.2" xmlns="http://xmlns.jcp.org/xml/ns/javaee" xmlns:xsi="http://www.w3.org/2001/XMLSchema-instance" xsi:schemaLocation=" http://xmlns.jcp.org/xml/ns/javaee http://xmlns.jcp.org/xml/ns/javaee/web-facesconfig_2_2.xsd"> </faces-config>检查
beans.xml文件。beans.xml文件包含 1.1 版本号和bean-discovery-mode(模式为all)。这个文件是标记文件,将 WAR 识别为 bean 归档,指示 JBoss EAP 在本应用程序中查找 bean 和激活 CDI。<beans xmlns="http://xmlns.jcp.org/xml/ns/javaee" xmlns:xsi="http://www.w3.org/2001/XMLSchema-instance" xsi:schemaLocation=" http://xmlns.jcp.org/xml/ns/javaee http://xmlns.jcp.org/xml/ns/javaee/beans_1_1.xsd" bean-discovery-mode="all"> </beans>
这个 quickstart 不需要 web.xml 文件。
3.4.2.1. 检查 JSF 代码
JSF 将 .xhtml 文件扩展应用于源文件,但使用 .jsf 扩展来提供渲染视图。home.xhtml 文件位于 src/main/webapp/ 目录中。
示例:JSF 源代码
19<html xmlns="http://www.w3.org/1999/xhtml"
20	xmlns:ui="http://java.sun.com/jsf/facelets"
21	xmlns:h="http://java.sun.com/jsf/html"
22	xmlns:f="http://java.sun.com/jsf/core">
23
24	<head>
25	<meta http-equiv="Content-Type" content="text/html; charset=iso-8859-1" />
26	<title>Numberguess</title>
27	</head>
28
29	<body>
30	<div id="content">
31		<h1>Guess a number...</h1>
32		<h:form id="numberGuess">
33
34		<!-- Feedback for the user on their guess -->
35	<div style="color: red">
36		<h:messages id="messages" globalOnly="false" />
37		<h:outputText id="Higher" value="Higher!"
38 		  rendered="#{game.number gt game.guess and game.guess ne 0}" />
39		<h:outputText id="Lower" value="Lower!"
40		   rendered="#{game.number lt game.guess and game.guess ne 0}" />
41	</div>
42
43	<!-- Instructions for the user -->
44	<div>
45	I'm thinking of a number between <span
46	id="numberGuess:smallest">#{game.smallest}</span> and <span
47	id="numberGuess:biggest">#{game.biggest}</span>. You have
48	#{game.remainingGuesses} guesses remaining.
49	</div>
50
51	<!-- Input box for the users guess, plus a button to submit, and reset -->
52	<!-- These are bound using EL to our CDI beans -->
53	<div>
54	Your guess:
55	<h:inputText id="inputGuess" value="#{game.guess}"
56		required="true" size="3"
57		disabled="#{game.number eq game.guess}"
58		validator="#{game.validateNumberRange}" />
59		<h:commandButton id="guessButton" value="Guess"
60			action="#{game.check}"
61			disabled="#{game.number eq game.guess}" />
62	</div>
63	<div>
64	<h:commandButton id="restartButton" value="Reset"
65	action="#{game.reset}" immediate="true" />
66	</div>
67	</h:form>
68
69	</div>
70
71	<br style="clear: both" />
72
73	</body>
74</html>
下列行编号与在 JBoss Developer Studio 中查看文件时显示的编号对应。
表 3.2. JSF 详情
| 行数 | 备注 |
|---|---|
|
36-40 |
这是发送给用户的信息:"Higher!" 和 "Lower!" |
|
45-48 |
随着用户不断猜选,他们能够猜选的数字范围会逐渐缩小。本句更改以确保他们知道有效的数字猜选范围。 |
|
55-58 |
这个输入字段绑定一个使用值表达式的 Bean 属性。 |
|
58 |
使用验证程序绑定,确保用户不会意外输入猜选范围以外的数字。如果未采用验证程序,用户可能使用猜选范围外的数值。 |
|
59-61 |
必须为用户提供将猜选值发送至服务器的方法。此处我们绑定 bean 上的操作方法。 |
3.4.2.2. 检查类文件
所有的 numberguess quickstart 源文件都可在 QUICKSTART_HOME/numberguess/src/main/java/org/jboss/as/quickstarts/numberguess/ 目录中找到。这些列表中已经排除了软件包声明和导入。quickstart 源代码中有完整的列表。
检查
Random.java限定词码限定词用于消除两个 bean 之间的歧义,这两个 bean 都能基于其类型进行注入。有关限定词的详细信息,请参考《JBoss EAP 开发指南》中的使用限定词解析模糊注入。
@Random限定词用于注入随机数。@Target({ TYPE, METHOD, PARAMETER, FIELD }) @Retention(RUNTIME) @Documented @Qualifier public @interface Random { }检查
MaxNumber.java限定词码@MaxNumber限定词用于注入允许的最大数。@Target({ TYPE, METHOD, PARAMETER, FIELD }) @Retention(RUNTIME) @Documented @Qualifier public @interface MaxNumber { }检查
Generator.java代码Generator类别通过生产方法创建随机数,以同样的方式给出可能的最大数值。此类别属于应用程序范围,所以您不会每次得到不同的随机数。@SuppressWarnings("serial") @ApplicationScoped public class Generator implements Serializable { private java.util.Random random = new java.util.Random(System.currentTimeMillis()); private int maxNumber = 100; java.util.Random getRandom() { return random; } @Produces @Random int next() { // a number between 1 and 100 return getRandom().nextInt(maxNumber - 1) + 1; } @Produces @MaxNumber int getMaxNumber() { return maxNumber; } }检查
Game.java代码属于会话范围的
Game类别是该应用程序的主要入口点。它负责设置或重新设置游戏、获取和验证用户的猜选,并利用FacesMessage向用户提供反馈。它使用构建后生命周期方法初始化游戏,从@Random Instance<Integer>bean 检索随机数。注意此类别中的
@Named注解。只有在您想要使用表达式语言 (EL)(本例中为#{game})使 bean 可由 JSF 视图访问时,才会需要此注解。@SuppressWarnings("serial") @Named @SessionScoped public class Game implements Serializable { /** * The number that the user needs to guess */ private int number; /** * The users latest guess */ private int guess; /** * The smallest number guessed so far (so we can track the valid guess range). */ private int smallest; /** * The largest number guessed so far */ private int biggest; /** * The number of guesses remaining */ private int remainingGuesses; /** * The maximum number we should ask them to guess */ @Inject @MaxNumber private int maxNumber; /** * The random number to guess */ @Inject @Random Instance<Integer> randomNumber; public Game() { } public int getNumber() { return number; } public int getGuess() { return guess; } public void setGuess(int guess) { this.guess = guess; } public int getSmallest() { return smallest; } public int getBiggest() { return biggest; } public int getRemainingGuesses() { return remainingGuesses; } /** * Check whether the current guess is correct, and update the biggest/smallest guesses as needed. Give feedback to the user * if they are correct. */ public void check() { if (guess > number) { biggest = guess - 1; } else if (guess < number) { smallest = guess + 1; } else if (guess == number) { FacesContext.getCurrentInstance().addMessage(null, new FacesMessage("Correct!")); } remainingGuesses--; } /** * Reset the game, by putting all values back to their defaults, and getting a new random number. We also call this method * when the user starts playing for the first time using {@linkplain PostConstruct @PostConstruct} to set the initial * values. */ @PostConstruct public void reset() { this.smallest = 0; this.guess = 0; this.remainingGuesses = 10; this.biggest = maxNumber; this.number = randomNumber.get(); } /** * A JSF validation method which checks whether the guess is valid. It might not be valid because there are no guesses left, * or because the guess is not in range. * */ public void validateNumberRange(FacesContext context, UIComponent toValidate, Object value) { if (remainingGuesses <= 0) { FacesMessage message = new FacesMessage("No guesses left!"); context.addMessage(toValidate.getClientId(context), message); ((UIInput) toValidate).setValid(false); return; } int input = (Integer) value; if (input < smallest || input > biggest) { ((UIInput) toValidate).setValid(false); FacesMessage message = new FacesMessage("Invalid guess"); context.addMessage(toValidate.getClientId(context), message); } } }
附录 A. 参考资料
A.1. 服务器 Runtime 参数
应用服务器的启动脚本可在运行时接受参数和开关。这允许服务器使用 standalone.xml、domain.xml 和 host.xml 之外的其他配置启动。
其他配置可能包括用其他的套接字绑定集或从属配置启动服务器。
在启动时使用帮助开关 -h 或 --help 可以访问可用的参数列表。
表 A.1. 运行时开关和参数表
| 参数或开关 | 操作模式 | 描述 |
|---|---|---|
|
--admin-only |
独立模式 |
设置服务器的运行类型为 |
|
--admin-only |
域模式 |
设置主机控制器的运行类型为 |
|
-b=<value>, -b <value> |
独立服务器模式,域模式 |
设置系统属性 |
|
-b<interface>=<value> |
独立服务器模式,域模式 |
设置系统属性 |
|
--backup |
域模式 |
保留持久性域配置的备份,即使这个主机不是域控制器。 |
|
-c=<config>, -c <config> |
独立模式 |
要使用的服务器配置文件的名称。默认值是 |
|
-c=<config>, -c <config> |
域模式 |
要使用的服务器配置文件的名称。默认值是 |
|
--cached-dc |
域模式 |
如果主机不是域控制器且无法在引导时联系域控制器,则使用域配置的本地缓存备份进行引导。 |
|
--debug [<port>] |
独立模式 |
激活调试模式并用可选参数来指定端口。只有启动脚本支持才可以使用。 |
|
-D<name>[=<value>] |
独立服务器模式,域模式 |
设置系统属性。 |
|
--domain-config=<config> |
域模式 |
要使用的服务器配置文件的名称。默认值是 |
|
-h, --help |
独立服务器模式,域模式 |
显示帮助信息并退出。 |
|
--host-config=<config> |
域模式 |
要使用的主机配置文件的名称。默认是 |
|
--interprocess-hc-address=<address> |
域模式 |
主机控制器侦听的与进程控制器通讯的地址。 |
|
--interprocess-hc-port=<port> |
域模式 |
主机控制器侦听的与进程控制器通讯的端口。 |
|
--master-address=<address> |
域模式 |
设置系统属性 |
|
--master-port=<port> |
域模式 |
设置系统属性 |
|
--read-only-server-config=<config> |
独立模式 |
要使用的服务器配置文件的名称。它和 |
|
--read-only-domain-config=<config> |
域模式 |
要使用的域配置文件的名称。这和 |
|
--read-only-host-config=<config> |
域模式 |
要使用的主机配置文件的名称。这和 |
|
-P=<url>, -P <url>, --properties=<url> |
独立服务器模式,域模式 |
从给定的 URL 加载系统属性。 |
|
--pc-address=<address> |
域模式 |
进程控制器与其控制的进程通讯时侦听的地址。 |
|
--pc-port=<port> |
域模式 |
进程控制器与其控制的进程通讯时侦听的端口。 |
|
-S<name>[=<value>] |
独立模式 |
设置安全属性。 |
|
-secmgr |
独立服务器模式,域模式 |
用安装的安全管理者运行服务器。 |
|
--server-config=<config> |
独立模式 |
要使用的服务器配置文件的名称。默认值是 |
|
--start-mode=<mode> |
独立模式 |
设置服务器的启动模式。此选项不能与
|
|
-u=<value>, -u <value> |
独立服务器模式,域模式 |
设置系统属性 |
|
-v, -V, --version |
独立服务器模式,域模式 |
显示应用服务器的版本并退出。 |
JBoss EAP 附带的配置文件被用来处理选项的行为(如 -b、-u)。如果您把配置文件修改为不再使用受这些选项控制的系统属性,那么在启动命令里添加它就不会起作用。
A.2. Add-User 工具参数
下表描述了 add-user.sh 或 add-user.bat 脚本的可用参数,这两个脚本是在配置文件里添加开箱即用验证的新用户的工具。
表 A.2. Add-user 命令行参数
| 命令行参数 | 描述 |
|---|---|
|
-a |
在应用程序域(realm)里创建用户。如果没有使用,默认是在管理域里创建一个用户。 |
|
-dc <value> |
包含属性文件的域配置目录。如果没有使用,默认目录是 |
|
-sc <value> |
包含属性文件的替代独立服务器配置目录。如果没有使用,默认目录是 |
|
-up, --user-properties <value> |
替代的用户属性文件的名称。它可以是绝对路径,也可以是和指定替代配置目录的 |
|
-g, --group <value> |
分配给这个用户的用逗号隔开的组。 |
|
-gp, --group-properties <value> |
替代的组属性文件的名称。它可以是绝对路径,也可以是和指定替代配置目录的 |
|
-p, --password <value> |
该用户的密码。 |
|
-u, --user <value> |
用户名称。用户名只能包含以下字符,长度和顺序不限:
|
|
-r, --realm <value> |
用来保护管理接口的区名。如果忽略,默认值是 |
|
-s, --silent |
运行 |
|
-e, --enable |
启用用户。 |
|
-d, --disable |
禁用用户。 |
|
-cw, --confirm-warning |
自动确认交互模式里的警告。 |
|
-h, --help |
显示 |
|
-ds, --display-secret |
在非交互模式下打印加密值。 |
A.3. 接口属性
本表中列出的属性名称与它们在管理模型中的名称一致,例如,使用管理 CLI 时。请参考位于 EAP_HOME/docs/schema/wildfly-config_5_0.xsd 的 schema 定义文件,查看它们在 XML 中出现时的元素,因为这可能与管理模型中的有所不同。
表 A.3. 接口属性和值
| 接口元素 | 描述 |
|---|---|
|
any |
表示接口的选择标准的一部分应该匹配至少一个、但不需要全部的嵌套标准集。 |
|
any-address |
空元素表示使用这个接口的套接字应该绑定到通配符地址。除非设置 |
|
inet-address |
请输入 IPv6 格式的 IP 地址或者用小数点隔开的 IPv4 地址,或者可以解析为 IP 地址的主机名。 |
|
link-local-address |
空元素表示接口的部分选择标准应该是或不是和 link-local 关联的地址。 |
|
loopback |
空元素表示接口的部分选择标准应该是或不是 loopback 接口。 |
|
loopback-address |
可能实际上不会在主机的 loopback 接口上配置的 loopback 地址。和 inet-addressType 不同的是,即使没有找到和 IP 地址相关的 NIC,给定的值也将被使用。 |
|
multicast |
空元素表示接口的部分选择标准应该支持或不支持多点传送。 |
|
name |
接口的名称。 |
|
nic |
网络接口的名称(如 eth0, eth1, lo) 。 |
|
nic-match |
常规表达式,表示主机上可以映射可接受的接口的网络接口的名称。 |
|
not |
表示接口的选择标准的一部分应该不匹配任何嵌套标准集。 |
|
point-to-point |
空元素表示接口的部分选择标准是是否为 point-to-point 接口。 |
|
public-address |
空元素表示接口的部分选择标准应该有或没有公共路由的地址。 |
|
site-local-address |
空元素表示接口的部分选择标准应该是或不是和 site-local 关联的地址。 |
|
subnet-match |
网络 IP 地址,以及地址的网络前缀的位数(以斜杠格式表示,如: |
|
up |
空元素表示接口的部分选择标准应该是或不是正在运行。 |
|
virtual |
空元素表示接口的部分选择标准应该是或不是虚拟接口。 |
A.4. 套接字绑定属性
Attribute names in these tables are listed as they appear in the management model, for example, when using the management CLI. See the schema definition file located at EAP_HOME/docs/schema/wildfly-config_5_0.xsd to view the elements as they appear in the XML, as there may be differences from the management model.
The following tables show the attributes that can be configured for each of the three types of socket bindings.
表 A.4. Inbound Socket Binding (socket-binding) Attributes
| 属性 | 描述 |
|---|---|
|
client-mappings |
指定这个套接字绑定的客户映射。这个套接字的客户连接应该使用匹配转出接口的映射里指定的目的地地址。这允许使用网络地址转换或绑定多个网络接口的高级网络拓扑结构。每个映射都应该以声明的顺序评估,第一个匹配成功的用来确定目的地。 |
|
fixed-port |
端口值是否保持不变,即使套接字组里的其他套接字应用了数字偏移量。 |
|
interface |
套接字应该绑定的接口的名称,或者对于多点传送,它应该侦听的接口的名称。这应该是声明的接口之一。如果没有定义,附属的套接字绑定组的 |
|
multicast-address |
套接字应该接收多点传送流量的多点传送地址。如果没有指定,套接字将不会接收多点传送信息。 |
|
multicast-port |
套接字应该接收多点传送流量的端口。如果配置了 |
|
name |
套接字的名称。需要访问套接字配置信息的服务将用这个名称进行查找。这个属性是必需指定的。 |
|
port |
套接字应该绑定的端口。请注意,如果服务器在所有端口的增量或减量上应用偏移量,这个值可以被覆盖。 |
表 A.5. Remote Outbound Socket Binding (remote-destination-outbound-socket-binding) Attributes
| 属性 | 描述 |
|---|---|
|
fixed-source-port |
Whether the port value should remain fixed even if numeric offsets are applied to the other outbound sockets in the socket group. |
|
host |
The host name or IP address of the remote destination to which this outbound socket will connect. |
|
port |
The port number of the remote destination to which the outbound socket should connect. |
|
source-interface |
The name of the interface that will be used for the source address of the outbound socket. |
|
source-port |
The port number that will be used as the source port of the outbound socket. |
表 A.6. Local Outbound Socket Binding (local-destination-outbound-socket-binding) Attributes
| 属性 | 描述 |
|---|---|
|
fixed-source-port |
Whether the port value should remain fixed even if numeric offsets are applied to the other outbound sockets in the socket group. |
|
socket-binding-ref |
The name of the local socket binding that will be used to determine the port to which this outbound socket connects. |
|
source-interface |
The name of the interface that will be used for the source address of the outbound socket. |
|
source-port |
The port number that will be used as the source port of the outbound socket. |
A.5. 默认的套接字绑定
下表显示了各套接字绑定组的默认套接字绑定。
表 A.7. standard-sockets
| 套接字绑定 | 端口 | 描述 |
|---|---|---|
|
ajp |
8009 |
Apache JServ 协议,用于 HTTP 群集和负载平衡。 |
|
http |
8080 |
用于已部署应用程序的默认端口。 |
|
https |
8443 |
已部署的应用程序和客户间的用 SSL 加密的连接。 |
|
management-http |
9990 |
用于管理层的 HTTP 通讯。 |
|
management-https |
9993 |
用于管理层的 HTTPS 通讯。 |
|
txn-recovery-environment |
4712 |
JTA 事务恢复管理者。 |
|
txn-status-manager |
4713 |
JTA / JTS 事务管理者。 |
表 A.8. ha-sockets
| 套接字绑定 | 端口 | 多点传送端口 | 描述 |
|---|---|---|---|
|
ajp |
8009 |
Apache JServ 协议,用于 HTTP 群集和负载平衡。 | |
|
http |
8080 |
用于已部署应用程序的默认端口。 | |
|
https |
8443 |
已部署的应用程序和客户间的用 SSL 加密的连接。 | |
|
jgroups-mping |
45700 |
多点传送。用于在 HA 群集里发现初始成员资格。 | |
|
jgroups-tcp |
7600 |
HA 群集里使用 TCP 的多点传送 Peer 发现。 | |
|
jgroups-udp |
55200 |
45688 |
HA 群集里使用 UDP 的多点传送 Peer 发现。 |
|
management-http |
9990 |
用于管理层的 HTTP 通讯。 | |
|
management-https |
9993 |
用于管理层的 HTTPS 通讯。 | |
|
modcluster |
23364 |
用于 JBoss EAP 和 HTTP 加载平衡器之间通讯的多点传送端口。 | |
|
txn-recovery-environment |
4712 |
JTA 事务恢复管理者。 | |
|
txn-status-manager |
4713 |
JTA / JTS 事务管理者。 |
表 A.9. full-sockets
| 套接字绑定 | 端口 | 描述 |
|---|---|---|
|
ajp |
8009 |
Apache JServ 协议,用于 HTTP 群集和负载平衡。 |
|
http |
8080 |
用于已部署应用程序的默认端口。 |
|
https |
8443 |
已部署的应用程序和客户间的用 SSL 加密的连接。 |
|
iiop |
3528 |
用于 JTS 事务的 CORBA 服务和其他依赖于 ORB 的服务。 |
|
iiop-ssl |
3529 |
SSL 加密的 CORBA 服务。 |
|
management-http |
9990 |
用于管理层的 HTTP 通讯。 |
|
management-https |
9993 |
用于管理层的 HTTPS 通讯。 |
|
txn-recovery-environment |
4712 |
JTA 事务恢复管理者。 |
|
txn-status-manager |
4713 |
JTA / JTS 事务管理者。 |
表 A.10. full-ha-sockets
| 名称 | 端口 | 多点传送端口 | 描述 |
|---|---|---|---|
|
ajp |
8009 |
Apache JServ 协议,用于 HTTP 群集和负载平衡。 | |
|
http |
8080 |
用于已部署应用程序的默认端口。 | |
|
https |
8443 |
已部署的应用程序和客户间的用 SSL 加密的连接。 | |
|
iiop |
3528 |
用于 JTS 事务的 CORBA 服务和其他依赖于 ORB 的服务。 | |
|
iiop-ssl |
3529 |
SSL 加密的 CORBA 服务。 | |
|
jgroups-mping |
45700 |
多点传送。用于在 HA 群集里发现初始成员资格。 | |
|
jgroups-tcp |
7600 |
HA 群集里使用 TCP 的多点传送 Peer 发现。 | |
|
jgroups-udp |
55200 |
45688 |
HA 群集里使用 UDP 的多点传送 Peer 发现。 |
|
management-http |
9990 |
用于管理层的 HTTP 通讯。 | |
|
management-https |
9993 |
用于管理层的 HTTPS 通讯。 | |
|
modcluster |
23364 |
用于 JBoss EAP 和 HTTP 加载平衡器之间通讯的多点传送端口。 | |
|
txn-recovery-environment |
4712 |
JTA 事务恢复管理者。 | |
|
txn-status-manager |
4713 |
JTA / JTS 事务管理者。 |
表 A.11. load-balancer-sockets
| 名称 | 端口 | 多点传送端口 | 描述 |
|---|---|---|---|
|
http |
8080 |
用于已部署应用程序的默认端口。 | |
|
https |
8443 |
已部署的应用程序和客户间的用 SSL 加密的连接。 | |
|
management-http |
9990 |
用于管理层的 HTTP 通讯。 | |
|
management-https |
9993 |
用于管理层的 HTTPS 通讯。 | |
|
mcmp-management |
8090 |
Mod-Cluster 管理协议(MCMP)连接用于传输生命周期事件的端口。 | |
|
modcluster |
23364 |
用于 JBoss EAP 和 HTTP 加载平衡器之间通讯的多点传送端口。 |
Revised on 2018-07-09 08:55:18 EDT