Red Hat Training
A Red Hat training course is available for RHEL 8
5.3. 웹 UI에 액세스
다음 절차에서는 암호를 사용하여 IdM(Identity Management) 웹 UI에 처음 로그인하는 방법을 설명합니다.
처음 로그인한 후 인증할 IdM 서버를 구성할 수 있습니다.
Kerberos 티켓
자세한 내용은 ID 관리에서 Kerberos 인증을 참조하십시오.
스마트 카드
자세한 내용은 스마트 카드 인증을 위한 IdM 서버 구성을 참조하십시오.
한 번만 암호(OTP) 메세지-암호 및 Kerberos 인증과 결합될 수 있습니다.
자세한 내용은 Identity Management에서 하나의 OTP(time password) 인증을 참조하십시오.
절차
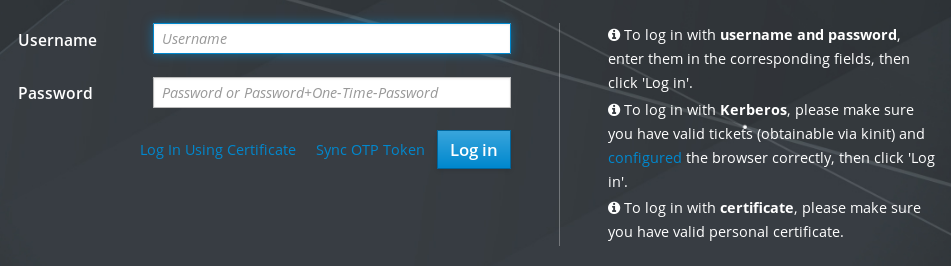
IdM 서버 URL을 브라우저 주소 표시줄에 입력합니다. 이름은 다음 예와 유사하게 표시됩니다.
https://server.example.com
IdM 서버의 DNS 이름을 사용하여
server.example.com을 변경하면 됩니다.그러면 브라우저에서 IdM 웹 UI 로그인 화면이 열립니다.
- 서버가 응답하지 않거나 로그인 화면이 열려 있지 않으면 연결 중인 IdM 서버의 DNS 설정을 확인합니다.
자체 서명 인증서를 사용하는 경우 브라우저에서 경고를 발행합니다. 인증서를 확인하고 로그인을 진행하기 위해 보안 예외를 수락합니다.
보안 예외를 방지하려면 인증 기관에서 서명한 인증서를 설치합니다.
웹 UI 로그인 화면에서 IdM 서버 설치 중에 추가한 관리자 계정 자격 증명을 입력합니다.
자세한 내용은 Identity Management 서버 설치를 참조하십시오. 통합 DNS를 사용하여 CA 를 통합했습니다.
개인 계정 자격 증명을 입력하거나 IdM 서버에 이미 입력한 경우에도 입력할 수 있습니다.

- (로그인)을 클릭합니다.
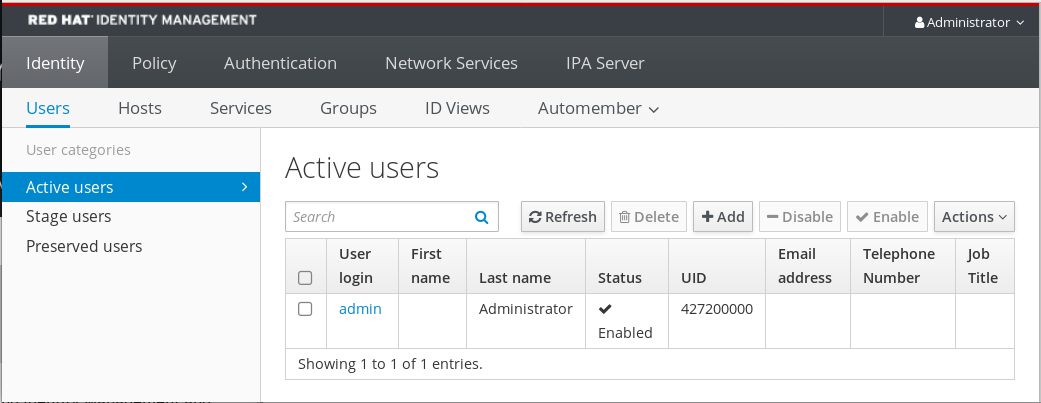
로그인에 성공한 후 IdM 서버 구성을 시작할 수 있습니다.