
CLI 툴
OpenShift Container Platform 명령줄 툴 사용 방법 알아보기
초록
1장. OpenShift Container Platform CLI 툴 개요
사용자는 다음과 같은 OpenShift Container Platform에서 작업하는 동안 다양한 작업을 수행합니다.
- 클러스터 관리
- 애플리케이션 구축, 배포 및 관리
- 배포 프로세스 관리
- Operator 개발
- Operator 카탈로그 생성 및 유지 관리
OpenShift Container Platform은 사용자가 터미널에서 다양한 관리 및 개발 작업을 수행할 수 있도록 하여 이러한 작업을 간소화하는 CLI(명령줄 인터페이스) 툴 세트를 제공합니다. 이러한 툴을 사용하면 간단한 명령을 사용하여 애플리케이션을 관리할 수 있을 뿐 아니라 시스템의 각 구성 요소와 상호 작용할 수 있습니다.
1.1. CLI 툴 목록
OpenShift Container Platform에서는 다음 CLI 툴 세트를 사용할 수 있습니다.
- OpenShift CLI (oc): OpenShift Container Platform 사용자가 가장 일반적으로 사용하는 CLI 툴입니다. 클러스터 관리자와 개발자가 터미널을 사용하여 OpenShift Container Platform에서 포괄적인 작업을 수행할 수 있습니다. 웹 콘솔과 달리 사용자는 명령 스크립트를 사용하여 프로젝트 소스 코드와 직접 작업할 수 있습니다.
-
개발자 CLI (odo):
odoCLI 툴을 사용하면 개발자가 복잡한 Kubernetes 및 OpenShift Container Platform 개념을 추상화하여 OpenShift Container Platform에서 애플리케이션을 생성하고 유지 관리하는 기본 목표에 집중할 수 있습니다. 개발자가 클러스터를 관리할 필요 없이 터미널에서 클러스터에서 애플리케이션을 작성, 빌드 및 디버깅할 수 있습니다. -
Knative CLI(kn): Knative(
kn) CLI 툴은 Knative Serving 및 Eventing과 같은 OpenShift Serverless 구성 요소와 상호 작용하는 데 사용할 수 있는 간단하고 직관적인 터미널 명령을 제공합니다. -
Pipeline CLI(tkn): OpenShift Pipelines는 OpenShift Container Platform의 CI/CD(지속적 통합 및 연속 제공) 솔루션으로, 내부적으로 Tekton을 사용합니다.
tknCLI 툴은 터미널을 사용하여 OpenShift Pipelines와 상호 작용할 수 있는 간단하고 직관적인 명령을 제공합니다. -
opm CLI:
opmCLI 툴을 사용하면 Operator 개발자와 클러스터 관리자가 터미널에서 Operator 카탈로그를 생성하고 유지 관리할 수 있습니다. - Operator SDK: Operator 프레임워크의 구성 요소인 Operator SDK는 Operator 개발자가 터미널에서 Operator를 빌드, 테스트 및 배포하는 데 사용할 수 있는 CLI 툴을 제공합니다. Kubernetes 네이티브 애플리케이션을 구축하는 프로세스를 간소화하며, 이를 위해서는 애플리케이션별 운영 지식이 필요할 수 있습니다.
2장. OpenShift CLI(oc)
2.1. OpenShift CLI 시작하기
2.1.1. OpenShift CLI 정보
OpenShift CLI(명령줄 인터페이스) 즉, oc 명령을 사용하면 터미널에서 애플리케이션을 생성하고 OpenShift Container Platform 프로젝트를 관리할 수 있습니다. OpenShift CLI를 사용하기에 적합한 경우는 다음과 같습니다.
- 직접 프로젝트 소스 코드로 작업하는 경우
- OpenShift Container Platform 작업 스크립트를 작성하는 경우
- 대역폭 리소스가 제한되고 웹 콘솔을 사용할 수 없는 상태에서 프로젝트를 관리하는 경우
2.1.2. OpenShift CLI 설치
OpenShift CLI(oc)는 바이너리를 다운로드하거나 RPM을 사용하여 설치할 수 있습니다.
2.1.2.1. 바이너리를 다운로드하여 OpenShift CLI 설치
명령줄 인터페이스를 사용하여 OpenShift Container Platform과 상호 작용하기 위해 OpenShift CLI(oc)를 설치할 수 있습니다. Linux, Windows 또는 macOS에 oc를 설치할 수 있습니다.
이전 버전의 oc를 설치한 경우, OpenShift Container Platform 4.8의 모든 명령을 완료하는 데 해당 버전을 사용할 수 없습니다. 새 버전의 oc를 다운로드하여 설치합니다.
Linux에서 OpenShift CLI 설치
다음 절차를 사용하여 Linux에서 OpenShift CLI(oc) 바이너리를 설치할 수 있습니다.
프로세스
- Red Hat 고객 포털에서 OpenShift Container Platform 다운로드 페이지로 이동합니다.
- 버전 드롭다운 메뉴에서 적절한 버전을 선택합니다.
- OpenShift v4.8 Linux Client 항목 옆에 있는 지금 다운로드를 클릭하고 파일을 저장합니다.
아카이브의 압축을 풉니다.
$ tar xvzf <file>
oc바이너리를PATH에 있는 디렉터리에 배치합니다.PATH를 확인하려면 다음 명령을 실행합니다.$ echo $PATH
OpenShift CLI를 설치한 후 oc 명령을 사용할 수 있습니다.
$ oc <command>
Windows에서 OpenSfhit CLI 설치
다음 절차에 따라 Windows에 OpenShift CLI(oc) 바이너리를 설치할 수 있습니다.
프로세스
- Red Hat 고객 포털에서 OpenShift Container Platform 다운로드 페이지로 이동합니다.
- 버전 드롭다운 메뉴에서 적절한 버전을 선택합니다.
- OpenShift v4.8 Windows Client 항목 옆에 있는 지금 다운로드를 클릭하고 파일을 저장합니다.
- ZIP 프로그램으로 아카이브의 압축을 풉니다.
oc바이너리를PATH에 있는 디렉터리로 이동합니다.PATH를 확인하려면 명령 프롬프트를 열고 다음 명령을 실행합니다.C:\> path
OpenShift CLI를 설치한 후 oc 명령을 사용할 수 있습니다.
C:\> oc <command>
macOS에 OpenShift CLI 설치
다음 절차에 따라 macOS에서 OpenShift CLI(oc) 바이너리를 설치할 수 있습니다.
프로세스
- Red Hat 고객 포털에서 OpenShift Container Platform 다운로드 페이지로 이동합니다.
- 버전 드롭다운 메뉴에서 적절한 버전을 선택합니다.
- OpenShift v4.8 MacOSX Client 항목 옆에 있는 지금 다운로드를 클릭하고 파일을 저장합니다.
- 아카이브의 압축을 해제하고 압축을 풉니다.
oc바이너리 PATH의 디렉터리로 이동합니다.PATH를 확인하려면 터미널을 열고 다음 명령을 실행합니다.$ echo $PATH
OpenShift CLI를 설치한 후 oc 명령을 사용할 수 있습니다.
$ oc <command>
2.1.2.2. 웹 콘솔을 사용하여 OpenShift CLI 설치
웹 콘솔에서 OpenShift Container Platform과 상호 작용하기 위해 OpenShift CLI(oc)를 설치할 수 있습니다. Linux, Windows 또는 macOS에 oc를 설치할 수 있습니다.
이전 버전의 oc를 설치한 경우, OpenShift Container Platform 4.8의 모든 명령을 완료하는 데 해당 버전을 사용할 수 없습니다. 새 버전의 oc를 다운로드하여 설치합니다.
2.1.2.2.1. 웹 콘솔을 사용하여 Linux에 OpenShift CLI 설치
다음 절차를 사용하여 Linux에서 OpenShift CLI(oc) 바이너리를 설치할 수 있습니다.
절차
웹 콘솔에서 ? 를 클릭합니다.
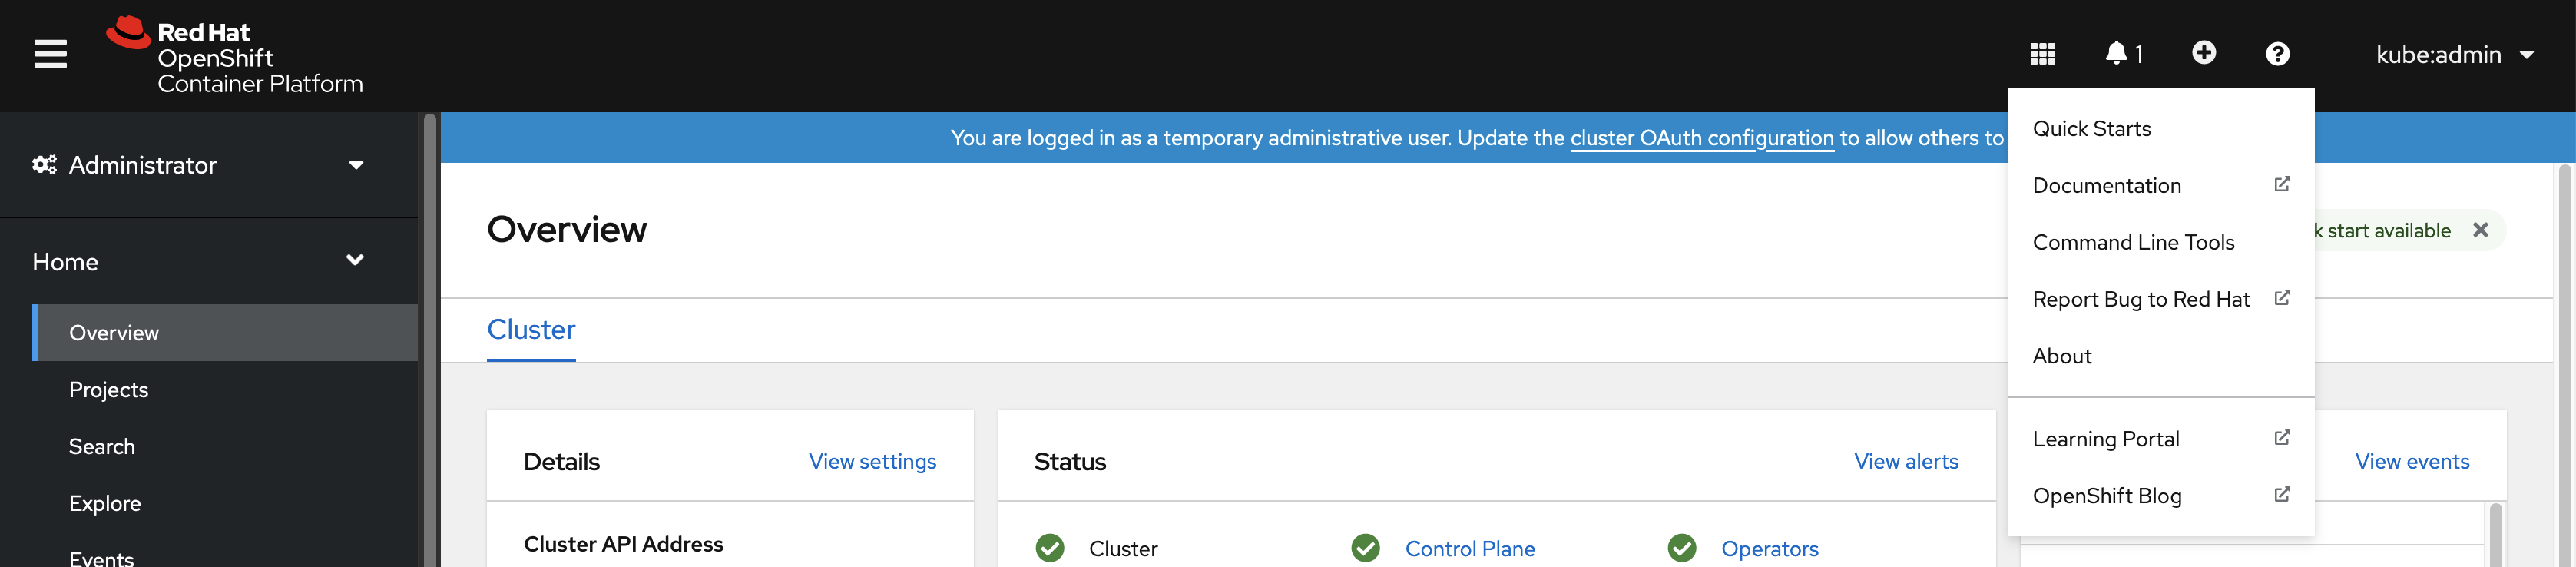
명령줄 툴 을 클릭합니다.

-
Linux 플랫폼에 적합한
oc바이너리를 선택한 다음 Download oc for Linux(Linux 용 oc 다운로드)를 클릭합니다. - 파일을 저장합니다.
아카이브의 압축을 풉니다.
$ tar xvzf <file>
oc바이너리를PATH에 있는 디렉터리로 이동합니다.PATH를 확인하려면 다음 명령을 실행합니다.$ echo $PATH
OpenShift CLI를 설치한 후 oc 명령을 사용할 수 있습니다.
$ oc <command>
2.1.2.2.2. 웹 콘솔을 사용하여 Windows에서 OpenShift CLI 설치
다음 절차를 사용하여 Winndows에 OpenShift CLI(oc) 바이너리를 설치할 수 있습니다.
절차
웹 콘솔에서 ? 를 클릭합니다.
명령줄 툴 을 클릭합니다.
-
Windows용
oc바이너리를 선택한 다음 x86_64용 Windows용 oc 다운로드를 클릭합니다. - 파일을 저장합니다.
- ZIP 프로그램으로 아카이브의 압축을 풉니다.
oc바이너리를PATH에 있는 디렉터리로 이동합니다.PATH를 확인하려면 명령 프롬프트를 열고 다음 명령을 실행합니다.C:\> path
OpenShift CLI를 설치한 후 oc 명령을 사용할 수 있습니다.
C:\> oc <command>
2.1.2.2.3. 웹 콘솔을 사용하여 macOS에 OpenShift CLI 설치
다음 절차에 따라 macOS에서 OpenShift CLI(oc) 바이너리를 설치할 수 있습니다.
절차
웹 콘솔에서 ? 를 클릭합니다.
명령줄 툴 을 클릭합니다.
-
macOS용
oc바이너리를 선택한 다음 x86_64용 Mac용 oc 다운로드를 클릭합니다. - 파일을 저장합니다.
- 아카이브의 압축을 해제하고 압축을 풉니다.
oc바이너리 PATH의 디렉터리로 이동합니다.PATH를 확인하려면 터미널을 열고 다음 명령을 실행합니다.$ echo $PATH
OpenShift CLI를 설치한 후 oc 명령을 사용할 수 있습니다.
$ oc <command>
2.1.2.3. RPM을 사용하여 OpenShift CLI 설치
RHEL(Red Hat Enterprise Linux)의 경우 Red Hat 계정에 활성 OpenShift Container Platform 서브스크립션이 있으면 OpenShift CLI(oc)를 RPM으로 설치할 수 있습니다.
사전 요구 사항
- root 또는 sudo 권한이 있어야 합니다.
절차
Red Hat Subscription Manager에 등록합니다.
# subscription-manager register
최신 서브스크립션 데이터를 가져옵니다.
# subscription-manager refresh
사용 가능한 서브스크립션을 나열하십시오.
# subscription-manager list --available --matches '*OpenShift*'
이전 명령의 출력에서 OpenShift Container Platform 서브스크립션의 풀 ID를 찾아서 이 서브스크립션을 등록된 시스템에 연결합니다.
# subscription-manager attach --pool=<pool_id>
OpenShift Container Platform 4.8에 필요한 리포지터리를 활성화합니다.
Red Hat Enterprise Linux 8의 경우:
# subscription-manager repos --enable="rhocp-4.8-for-rhel-8-x86_64-rpms"
Red Hat Enterprise Linux 7의 경우:
# subscription-manager repos --enable="rhel-7-server-ose-4.8-rpms"
openshift-clients패키지를 설치합니다.# yum install openshift-clients
CLI를 설치한 후 oc 명령을 사용할 수 있습니다.
$ oc <command>
2.1.2.4. Homebrew를 사용하여 OpenShift CLI 설치
macOS의 경우 Homebrew 패키지 관리자를 사용하여 OpenShift CLI(oc)를 설치할 수 있습니다.
사전 요구 사항
-
Homebrew(
brew)가 설치되어 있어야 합니다.
절차
다음 명령을 실행하여 openshift-cli 패키지를 설치합니다.
$ brew install openshift-cli
2.1.3. OpenShift CLI에 로그인
OpenShift CLI (oc) 에 로그인하면 클러스터에 액세스하여 관리할 수 있습니다.
사전 요구 사항
- OpenShift Container Platform 클러스터에 대한 액세스 권한이 있어야 합니다.
-
OpenShift CLI(
oc)가 설치되어 있어야 합니다.
HTTP 프록시 서버를 통해서만 액세스할 수 있는 클러스터에 액세스하려면 HTTP_PROXY, HTTPS_PROXY 및 NO_PROXY 변수를 설정할 수 있습니다. oc CLI에서는 이러한 환경 변수를 준수하므로 클러스터와의 모든 통신이 HTTP 프록시를 통해 이루어집니다.
인증 헤더는 HTTPS 전송을 사용하는 경우에만 전송됩니다.
절차
oc login명령을 입력하고 사용자 이름을 전달합니다.$ oc login -u user1
프롬프트가 표시되면 필요한 정보를 입력합니다.
출력 예
Server [https://localhost:8443]: https://openshift.example.com:6443 1
The server uses a certificate signed by an unknown authority.
You can bypass the certificate check, but any data you send to the server could be intercepted by others.
Use insecure connections? (y/n): y 2

Authentication required for https://openshift.example.com:6443 (openshift)
Username: user1
Password: 3
Login successful.

You don't have any projects. You can try to create a new project, by running

    oc new-project <projectname>

Welcome! See 'oc help' to get started.
웹 콘솔에 로그인한 경우 토큰 및 서버 정보를 포함하는 oc login 명령을 생성할 수 있습니다. 명령을 사용하여 대화형 프롬프트 없이 OpenShift Container Platform CLI에 로그인할 수 있습니다. 명령을 생성하려면 웹 콘솔의 오른쪽 상단에 있는 사용자 이름 드롭다운 메뉴에서 로그인 복사 명령을 선택합니다.
이제 클러스터를 관리하기 위한 프로젝트를 생성하거나 다른 명령을 실행할 수 있습니다.
2.1.4. OpenShift CLI 사용
다음 섹션을 검토하여 CLI로 일반적인 작업을 완료하는 방법을 알아봅니다.
2.1.4.1. 프로젝트 생성
oc new-project 명령을 사용하여 새 프로젝트를 생성합니다.
$ oc new-project my-project
출력 예
Now using project "my-project" on server "https://openshift.example.com:6443".
2.1.4.2. 새 애플리케이션 생성
oc new-app 명령을 사용하여 새 애플리케이션을 생성합니다.
$ oc new-app https://github.com/sclorg/cakephp-ex
출력 예
--> Found image 40de956 (9 days old) in imagestream "openshift/php" under tag "7.2" for "php"

...

    Run 'oc status' to view your app.
2.1.4.3. Pod 보기
oc get pods 명령을 사용하여 현재 프로젝트의 Pod를 봅니다.
Pod 내부에서 oc 를 실행하고 네임스페이스를 지정하지 않으면 기본적으로 Pod의 네임스페이스가 사용됩니다.
$ oc get pods -o wide
출력 예
NAME                  READY   STATUS      RESTARTS   AGE     IP            NODE                           NOMINATED NODE
cakephp-ex-1-build    0/1     Completed   0          5m45s   10.131.0.10   ip-10-0-141-74.ec2.internal    <none>
cakephp-ex-1-deploy   0/1     Completed   0          3m44s   10.129.2.9    ip-10-0-147-65.ec2.internal    <none>
cakephp-ex-1-ktz97    1/1     Running     0          3m33s   10.128.2.11   ip-10-0-168-105.ec2.internal   <none>
2.1.4.4. Pod 로그 보기
oc logs 명령을 사용하여 특정 Pod의 로그를 봅니다.
$ oc logs cakephp-ex-1-deploy
출력 예
--> Scaling cakephp-ex-1 to 1
--> Success
2.1.4.5. 현재 프로젝트 보기
oc project 명령을 사용하여 현재 프로젝트를 봅니다.
$ oc project
출력 예
Using project "my-project" on server "https://openshift.example.com:6443".
2.1.4.6. 현재 프로젝트의 상태 보기
oc status 명령을 사용하여 서비스, 배포, 빌드 구성 등 현재 프로젝트에 대한 정보를 봅니다.
$ oc status
출력 예
In project my-project on server https://openshift.example.com:6443

svc/cakephp-ex - 172.30.236.80 ports 8080, 8443
  dc/cakephp-ex deploys istag/cakephp-ex:latest <-
    bc/cakephp-ex source builds https://github.com/sclorg/cakephp-ex on openshift/php:7.2
    deployment #1 deployed 2 minutes ago - 1 pod

3 infos identified, use 'oc status --suggest' to see details.
2.1.4.7. 지원되는 API 리소스 나열
oc api-resources 명령을 사용하여 서버에서 지원되는 API 리소스 목록을 봅니다.
$ oc api-resources
출력 예
NAME                                  SHORTNAMES       APIGROUP                              NAMESPACED   KIND
bindings                                                                                     true         Binding
componentstatuses                     cs                                                     false        ComponentStatus
configmaps                            cm                                                     true         ConfigMap
...
2.1.5. 도움말 가져오기
CLI 명령 및 OpenShift Container Platform 리소스에 대한 도움말을 가져올 수 있는 방법은 다음과 같습니다.
oc help를 사용하여 모든 사용 가능한 CLI 명령 목록 및 설명을 가져옵니다.예제: CLI에 대한 일반적인 도움말 가져오기
$ oc help
출력 예
OpenShift Client

This client helps you develop, build, deploy, and run your applications on any OpenShift or Kubernetes compatible
platform. It also includes the administrative commands for managing a cluster under the 'adm' subcommand.

Usage:
  oc [flags]

Basic Commands:
  login           Log in to a server
  new-project     Request a new project
  new-app         Create a new application

...
--help플래그를 사용하여 특정 CLI 명령에 대한 도움말을 가져옵니다.예제:
oc create명령에 대한 도움말 가져오기$ oc create --help
출력 예
Create a resource by filename or stdin

JSON and YAML formats are accepted.

Usage:
  oc create -f FILENAME [flags]

...
oc explain명령을 사용하여 특정 리소스에 대한 설명 및 필드를 봅니다.예제:
Pod리소스에 대한 문서 보기$ oc explain pods
출력 예
KIND:     Pod
VERSION:  v1

DESCRIPTION:
     Pod is a collection of containers that can run on a host. This resource is
     created by clients and scheduled onto hosts.

FIELDS:
   apiVersion	<string>
     APIVersion defines the versioned schema of this representation of an
     object. Servers should convert recognized schemas to the latest internal
     value, and may reject unrecognized values. More info:
     https://git.k8s.io/community/contributors/devel/api-conventions.md#resources

...
2.1.6. OpenShift CLI에서 로그아웃
OpenShift CLI에서 로그아웃하여 현재 세션을 종료할 수 있습니다.
oc logout명령을 사용합니다.$ oc logout
출력 예
Logged "user1" out on "https://openshift.example.com"
이렇게 하면 저장된 인증 토큰이 서버에서 삭제되고 구성 파일에서 제거됩니다.
2.2. OpenShift CLI 구성
2.2.1. 탭 완료 활성화
Bash 또는 Zsh 쉘의 탭 완료를 활성화할 수 있습니다.
2.2.1.1. Bash의 탭 완료 활성화
OpenShift CLI(oc)를 설치한 후 탭 완료를 활성화하여 oc 명령을 자동으로 완료하거나 탭을 누를 때 옵션을 제안할 수 있습니다. 다음 절차에서는 Bash 쉘에 대한 탭 완료를 활성화합니다.
사전 요구 사항
-
OpenShift CLI(
oc)가 설치되어 있어야 합니다. -
bash-completion패키지가 설치되어 있어야 합니다.
절차
Bash 완료 코드를 파일에 저장합니다.
$ oc completion bash > oc_bash_completion
파일을
/etc/bash_completion.d/에 복사합니다.$ sudo cp oc_bash_completion /etc/bash_completion.d/
파일을 로컬 디렉터리에 저장하고
.bashrc파일에서 소싱할 수도 있습니다.
새 터미널을 열면 탭 완료가 활성화됩니다.
2.2.1.2. Zsh에 대한 탭 완료 활성화
OpenShift CLI(oc)를 설치한 후 탭 완료를 활성화하여 oc 명령을 자동으로 완료하거나 탭을 누를 때 옵션을 제안할 수 있습니다. 다음 절차에서는 Zsh 쉘에 대한 탭 완료를 활성화합니다.
사전 요구 사항
-
OpenShift CLI(
oc)가 설치되어 있어야 합니다.
절차
oc에 대한 탭 완료를.zshrc파일에 추가하려면 다음 명령을 실행합니다.$ cat >>~/.zshrc<<EOF if [ $commands[oc] ]; then source <(oc completion zsh) compdef _oc oc fi EOF
새 터미널을 열면 탭 완료가 활성화됩니다.
2.3. CLI 프로필 관리
CLI 구성 파일을 사용하면 CLI 툴 개요 와 함께 사용할 다양한 프로필 또는 컨텍스트를 구성할 수 있습니다. 컨텍스트는 nickname 과 관련된 사용자 인증 및 OpenShift Container Platform 서버 정보로 구성됩니다.
2.3.1. CLI 프로필 간 전환 정보
컨텍스트를 사용하면 CLI 작업을 사용할 때 여러 OpenShift Container Platform 서버 또는 클러스터에서 여러 사용자 간에 쉽게 전환할 수 있습니다. nickname은 컨텍스트, 사용자 인증 정보 및 클러스터 세부 정보에 대한 간단한 참조를 제공하여 CLI 구성을 보다 쉽게 관리할 수 있습니다. CLI로 처음으로 로그인한 후 OpenShift Container Platform은 아직 존재하지 않는 경우 ~/.kube/config 파일을 생성합니다. oc login 작업 중에 자동으로 또는 CLI 프로필을 수동으로 구성하여 CLI에 인증 및 연결 세부 정보가 제공되면 구성 파일에 업데이트된 정보가 저장됩니다.
CLI 구성 파일
apiVersion: v1
clusters: 1
- cluster:
    insecure-skip-tls-verify: true
    server: https://openshift1.example.com:8443
  name: openshift1.example.com:8443
- cluster:
    insecure-skip-tls-verify: true
    server: https://openshift2.example.com:8443
  name: openshift2.example.com:8443
contexts: 2
- context:
    cluster: openshift1.example.com:8443
    namespace: alice-project
    user: alice/openshift1.example.com:8443
  name: alice-project/openshift1.example.com:8443/alice
- context:
    cluster: openshift1.example.com:8443
    namespace: joe-project
    user: alice/openshift1.example.com:8443
  name: joe-project/openshift1/alice
current-context: joe-project/openshift1.example.com:8443/alice 3
kind: Config
preferences: {}
users: 4
- name: alice/openshift1.example.com:8443
  user:
    token: xZHd2piv5_9vQrg-SKXRJ2Dsl9SceNJdhNTljEKTb8k
- 1
- cluster
섹션은마스터 서버의 주소를 포함하여 OpenShift Container Platform 클러스터에 대한 연결 세부 정보를 정의합니다. 이 예에서는 하나의 클러스터 이름이openshift1.example.com:8443이고 다른 클러스터는 이름이openshift2.example.com:8443입니다. - 2
- 이
context섹션은alice-project프로젝트,openshift1.example.com:8443클러스터,alice사용자, 다른 nick 이름의joe-project/openshift1.example.com:8443/alice, 즉 하나의 컨텍스트 이름을alice-project/openshift1.example.com:8443/alice, 즉 하나의 컨텍스트를 정의합니다.joe-project프로젝트,openshift1.example.com:8443클러스터 및alice사용자 사용. - 3
current-context매개변수는joe-project/openshift1.example.com:8443/alice컨텍스트가 현재 사용 중이며,alice사용자가openshift1.example.com:8443클러스터의joe-project프로젝트에서 작업할 수 있음을 보여줍니다.- 4
users섹션은 사용자 자격 증명을 정의합니다. 이 예에서 사용자 nicknamealice/openshift1.example.com:8443은 액세스 토큰을 사용합니다.
CLI는 런타임 시 로드되고 명령줄에서 지정된 덮어쓰기 옵션과 함께 병합되는 여러 구성 파일을 지원할 수 있습니다. 로그인한 후 oc status 또는 oc project 명령을 사용하여 현재 작업 환경을 확인할 수 있습니다.
현재 작업 중인 환경 확인
$ oc status
출력 예
oc status
In project Joe's Project (joe-project)

service database (172.30.43.12:5434 -> 3306)
  database deploys docker.io/openshift/mysql-55-centos7:latest
    #1 deployed 25 minutes ago - 1 pod

service frontend (172.30.159.137:5432 -> 8080)
  frontend deploys origin-ruby-sample:latest <-
    builds https://github.com/openshift/ruby-hello-world with joe-project/ruby-20-centos7:latest
    #1 deployed 22 minutes ago - 2 pods

To see more information about a service or deployment, use 'oc describe service <name>' or 'oc describe dc <name>'.
You can use 'oc get all' to see lists of each of the types described in this example.
현재 프로젝트 나열
$ oc project
출력 예
Using project "joe-project" from context named "joe-project/openshift1.example.com:8443/alice" on server "https://openshift1.example.com:8443".
oc login 명령을 다시 실행하고 대화형 프로세스 중에 필요한 정보를 제공하여 사용자 인증 정보 및 클러스터 세부 정보의 다른 조합을 사용하여 로그인할 수 있습니다. 컨텍스트는 아직 존재하지 않는 경우 제공된 정보를 기반으로 구성됩니다. 이미 로그인한 후 현재 사용자가 이미 액세스할 수 있는 다른 프로젝트로 전환하려면 oc project 명령을 사용하여 프로젝트 이름을 입력합니다.
$ oc project alice-project
출력 예
Now using project "alice-project" on server "https://openshift1.example.com:8443".
출력에 표시된 대로 oc config view 명령을 사용하여 현재 CLI 구성을 볼 수 있습니다. 고급 사용을 위해 추가 CLI 구성 명령을 사용할 수도 있습니다.
관리자 자격 증명에 액세스할 수 있지만 더 이상 기본 시스템 사용자 system:admin 으로 로그인하지 않은 경우 CLI 구성 파일에 인증 정보가 계속 있는 한 언제든지 이 사용자로 다시 로그인할 수 있습니다. 다음 명령은 기본 프로젝트에 로그인하여 전환합니다.
$ oc login -u system:admin -n default
2.3.2. CLI 프로필 수동 구성
이 섹션에서는 CLI 구성의 고급 사용에 대해 설명합니다. 대부분의 경우 oc login 및 oc project 명령을 사용하여 컨텍스트와 프로젝트를 로그인하고 전환할 수 있습니다.
CLI 구성 파일을 수동으로 구성하려면 파일을 직접 수정하는 대신 oc config 명령을 사용할 수 있습니다. oc config 명령에는 다음과 같은 목적으로 유용한 여러 하위 명령이 포함되어 있습니다.
표 2.1. CLI 구성 하위 명령
| 하위 명령 | 사용법 |
|---|---|
|
| CLI 구성 파일에 클러스터 항목을 설정합니다. 참조된 클러스터 닉네임이 이미 존재하는 경우 지정된 정보가 에 병합됩니다. $ oc config set-cluster <cluster_nickname> [--server=<master_ip_or_fqdn>] [--certificate-authority=<path/to/certificate/authority>] [--api-version=<apiversion>] [--insecure-skip-tls-verify=true] |
|
| CLI 구성 파일에 컨텍스트 항목을 설정합니다. 참조된 컨텍스트 닉네임이 이미 있는 경우 지정된 정보가 에 병합됩니다. $ oc config set-context <context_nickname> [--cluster=<cluster_nickname>] [--user=<user_nickname>] [--namespace=<namespace>] |
|
| 지정된 컨텍스트 nickname을 사용하여 현재 컨텍스트를 설정합니다. $ oc config use-context <context_nickname> |
|
| CLI 구성 파일에서 개별 값을 설정합니다. $ oc config set <property_name> <property_value>
|
|
| CLI 구성 파일에서 개별 값을 설정 해제합니다. $ oc config unset <property_name>
|
|
| 현재 사용 중인 병합된 CLI 구성을 표시합니다. $ oc config view 지정된 CLI 구성 파일의 결과를 표시합니다. $ oc config view --config=<specific_filename> |
사용 예
-
액세스 토큰을 사용하는 사용자로 로그인합니다. 이 토큰은
alice사용자가 사용합니다.
$ oc login https://openshift1.example.com --token=ns7yVhuRNpDM9cgzfhhxQ7bM5s7N2ZVrkZepSRf4LC0
- 자동으로 생성된 클러스터 항목을 확인합니다.
$ oc config view
출력 예
apiVersion: v1
clusters:
- cluster:
    insecure-skip-tls-verify: true
    server: https://openshift1.example.com
  name: openshift1-example-com
contexts:
- context:
    cluster: openshift1-example-com
    namespace: default
    user: alice/openshift1-example-com
  name: default/openshift1-example-com/alice
current-context: default/openshift1-example-com/alice
kind: Config
preferences: {}
users:
- name: alice/openshift1.example.com
  user:
    token: ns7yVhuRNpDM9cgzfhhxQ7bM5s7N2ZVrkZepSRf4LC0
- 사용자가 원하는 네임스페이스에 로그인하도록 현재 컨텍스트를 업데이트합니다.
$ oc config set-context `oc config current-context` --namespace=<project_name>
- 현재 컨텍스트를 검사하여 변경 사항이 구현되었는지 확인합니다.
$ oc whoami -c
CLI 옵션을 재정의하거나 컨텍스트가 전환될 때까지 달리 지정하지 않는 한 모든 후속 CLI 작업은 새 컨텍스트를 사용합니다.
2.3.3. 규칙 로드 및 병합
CLI 구성에 대한 CLI 작업을 실행할 때 다음 규칙을 따를 수 있습니다.
CLI 구성 파일은 다음 계층 및 병합 규칙을 사용하여 워크스테이션에서 검색됩니다.
-
--config옵션이 설정되면 해당 파일만 로드됩니다. 플래그는 한 번 설정되고 병합이 수행되지 않습니다. -
$KUBECONFIG환경 변수가 설정되면 사용됩니다. 변수가 경로 목록일 수 있으며, 경로가 함께 병합되는 경우도 있습니다. 값을 수정하면 스탠자를 정의하는 파일에서 수정됩니다. 값이 생성되면 존재하는 첫 번째 파일에 생성됩니다. 체인에 파일이 없으면 목록에 마지막 파일을 만듭니다. -
그렇지 않으면
~/.kube/config파일이 사용되며 병합이 수행되지 않습니다.
-
사용할 컨텍스트는 다음 흐름의 첫 번째 일치에 따라 결정됩니다.
-
--context옵션의 값입니다. -
CLI 구성 파일의
current-context값입니다. - 이 단계에서는 빈 값이 허용됩니다.
-
사용할 사용자 및 클러스터가 결정됩니다. 이 시점에는 컨텍스트가 있거나 없을 수 있습니다. 다음 흐름에서 첫 번째 일치를 기반으로 빌드되며, 이는 사용자와 클러스터에 대해 한 번 실행됩니다.
-
클러스터 이름에 대한
--user및 사용자 이름에 대한--cluster옵션의 값입니다. -
context
옵션이 있는경우 컨텍스트의 값을 사용합니다. - 이 단계에서는 빈 값이 허용됩니다.
-
클러스터 이름에 대한
사용할 실제 클러스터 정보가 결정됩니다. 이 시점에서 클러스터 정보가 있거나 없을 수 있습니다. 클러스터 정보의 각 조각은 다음 흐름에서 첫 번째 일치를 기반으로 빌드됩니다.
다음 명령줄 옵션의 값:
-
--server, -
--api-version -
--certificate-authority -
--insecure-skip-tls-verify
-
- 클러스터 정보와 속성 값이 있는 경우 이를 사용합니다.
- 서버 위치가 없는 경우 오류가 발생합니다.
사용할 실제 사용자 정보가 결정됩니다. 사용자는 사용자당 하나의 인증 기술만 가질 수 있다는 점을 제외하고 클러스터와 동일한 규칙을 사용하여 빌드됩니다. 충돌하는 기술은 작업이 실패합니다. 명령줄 옵션이 구성 파일 값보다 우선합니다. 유효한 명령줄 옵션은 다음과 같습니다.
-
--auth-path -
--client-certificate -
--client-key -
--token
-
- 여전히 누락된 모든 정보에 대해 기본값이 사용되며 추가 정보를 입력하라는 메시지가 표시됩니다.
2.4. 플러그인을 사용하여 OpenShift CLI 확장
기본 oc 명령에 빌드할 플러그인을 작성하고 설치하여 OpenShift Container Platform CLI에서 새롭고 더 복잡한 작업을 수행할 수 있습니다.
2.4.1. CLI 플러그인 작성
명령줄 명령을 작성할 수 있는 모든 프로그래밍 언어 또는 스크립트로 OpenShift Container Platform CLI용 플러그인을 작성할 수 있습니다. 플러그인을 사용하여 기존 oc 명령을 덮어쓸 수 없습니다.
절차
이 절차에서는 oc foo 명령을 실행할 때 메시지를 터미널에 출력하는 간단한 Bash 플러그인을 생성합니다.
oc-foo라는 파일을 생성합니다.플러그인 파일의 이름을 지정할 때 다음 사항에 유의하십시오.
-
파일이 플러그인으로 인식되려면
oc-또는kubectl-로 시작되어야 합니다. -
파일 이름에 따라 플러그인을 호출하는 명령이 결정됩니다. 예를 들어 파일 이름이
oc-foo-bar인 플러그인은oc foo bar명령으로 호출할 수 있습니다. 명령에 대시를 포함하기 위해 밑줄을 사용할 수도 있습니다. 예를 들어 파일 이름이oc-foo_bar인 플러그인은oc foo-bar명령으로 호출할 수 있습니다.
-
파일이 플러그인으로 인식되려면
파일에 다음 콘텐츠를 추가합니다.
#!/bin/bash

# optional argument handling
if [[ "$1" == "version" ]]
then
    echo "1.0.0"
    exit 0
fi

# optional argument handling
if [[ "$1" == "config" ]]
then
    echo $KUBECONFIG
    exit 0
fi

echo "I am a plugin named kubectl-foo"
OpenShift Container Platform CLI용으로 이 플러그인을 설치한 후에는 oc foo 명령을 사용하여 호출할 수 있습니다.
추가 리소스
- Go에서 작성된 플러그인의 예를 보려면 Sample 플러그인 리포지토리 를 검토합니다.
- Go에서 플러그인을 작성하는 데 도움이 되는 유틸리티 세트는 CLI 런타임 리포지터리 를 검토하십시오.
2.4.2. CLI 플러그인 설치 및 사용
OpenShift Container Platform CLI용 사용자 정의 플러그인을 작성한 후에는 해당 플러그인을 설치하여 제공하는 기능을 사용해야 합니다.
사전 요구 사항
-
ocCLI 툴이 설치되어 있어야 합니다. -
oc-또는kubectl-로 시작하는 CLI 플러그인 파일이 있어야 합니다.
절차
필요한 경우 플러그인 파일을 실행 가능하게 업데이트합니다.
$ chmod +x <plugin_file>
파일을
PATH에 있는 임의의 위치(예:/usr/local/bin/)에 배치합니다.$ sudo mv <plugin_file> /usr/local/bin/.
oc plugin list를 실행하여 플러그인이 나열되었는지 확인합니다.$ oc plugin list
출력 예
The following compatible plugins are available:

/usr/local/bin/<plugin_file>
여기에 플러그인이 나열되지 않은 경우 파일이
oc-또는kubectl-로 시작하고 실행 가능하며PATH에 있는지 확인합니다.플러그인에서 도입한 새 명령 또는 옵션을 호출합니다.
예를 들어 샘플 플러그인 리포지토리 에서
kubectl-ns플러그인을 빌드하고 설치한 경우 다음 명령을 사용하여 현재 네임스페이스를 볼 수 있습니다.$ oc ns
플러그인을 호출하는 명령은 플러그인 파일 이름에 따라 다릅니다. 예를 들어 파일 이름이
oc-foo-bar인 플러그인은oc foo bar명령으로 호출합니다.
2.5. OpenShift CLI 개발자 명령 참조
이 참조는 OpenShift CLI (oc) developer 명령에 대한 설명 및 예제 명령을 제공합니다. 관리자 명령의 경우 OpenShift CLI 관리자 명령 참조에서 참조하십시오.
oc help를 실행하여 모든 명령을 나열하거나 oc <command> --help를 실행하여 특정 명령에 대한 추가 세부 정보를 가져옵니다.
2.5.1. OpenShift CLI (oc) 개발자 명령
2.5.1.1. oc annotate
리소스에서 주석을 업데이트
사용 예
  # Update pod 'foo' with the annotation 'description' and the value 'my frontend'.
  # If the same annotation is set multiple times, only the last value will be applied
  oc annotate pods foo description='my frontend'

  # Update a pod identified by type and name in "pod.json"
  oc annotate -f pod.json description='my frontend'

  # Update pod 'foo' with the annotation 'description' and the value 'my frontend running nginx', overwriting any existing value.
  oc annotate --overwrite pods foo description='my frontend running nginx'

  # Update all pods in the namespace
  oc annotate pods --all description='my frontend running nginx'

  # Update pod 'foo' only if the resource is unchanged from version 1.
  oc annotate pods foo description='my frontend running nginx' --resource-version=1

  # Update pod 'foo' by removing an annotation named 'description' if it exists.
  # Does not require the --overwrite flag.
  oc annotate pods foo description-
2.5.1.2. oc api-resources
서버에서 지원되는 API 리소스를 인쇄
사용 예
  # Print the supported API Resources
  oc api-resources

  # Print the supported API Resources with more information
  oc api-resources -o wide

  # Print the supported API Resources sorted by a column
  oc api-resources --sort-by=name

  # Print the supported namespaced resources
  oc api-resources --namespaced=true

  # Print the supported non-namespaced resources
  oc api-resources --namespaced=false

  # Print the supported API Resources with specific APIGroup
  oc api-resources --api-group=extensions
2.5.1.3. oc api-versions
"group/version" 형식으로 서버에서 지원되는 API 버전을 인쇄
사용 예
  # Print the supported API versions
  oc api-versions
2.5.1.4. oc apply
파일 이름 또는 stdin을 사용하여 리소스에 설정을 적용
사용 예
  # Apply the configuration in pod.json to a pod.
  oc apply -f ./pod.json

  # Apply resources from a directory containing kustomization.yaml - e.g. dir/kustomization.yaml.
  oc apply -k dir/

  # Apply the JSON passed into stdin to a pod.
  cat pod.json | oc apply -f -

  # Note: --prune is still in Alpha
  # Apply the configuration in manifest.yaml that matches label app=nginx and delete all the other resources that are not in the file and match label app=nginx.
  oc apply --prune -f manifest.yaml -l app=nginx

  # Apply the configuration in manifest.yaml and delete all the other configmaps that are not in the file.
  oc apply --prune -f manifest.yaml --all --prune-whitelist=core/v1/ConfigMap
2.5.1.5. oc apply edit-last-applied
리소스/오브젝트의 최신 last-applied-configuration 주석을 편집
사용 예
  # Edit the last-applied-configuration annotations by type/name in YAML.
  oc apply edit-last-applied deployment/nginx

  # Edit the last-applied-configuration annotations by file in JSON.
  oc apply edit-last-applied -f deploy.yaml -o json
2.5.1.6. oc apply set-last-applied
파일의 내용과 일치하도록 라이브 오브젝트에 last-applied-configuration 주석을 설정
사용 예
  # Set the last-applied-configuration of a resource to match the contents of a file.
  oc apply set-last-applied -f deploy.yaml

  # Execute set-last-applied against each configuration file in a directory.
  oc apply set-last-applied -f path/

  # Set the last-applied-configuration of a resource to match the contents of a file, will create the annotation if it does not already exist.
  oc apply set-last-applied -f deploy.yaml --create-annotation=true
2.5.1.7. oc apply view-last-applied
리소스/오브젝트의 최신 last-applied-configuration 주석을 확인
사용 예
  # View the last-applied-configuration annotations by type/name in YAML.
  oc apply view-last-applied deployment/nginx

  # View the last-applied-configuration annotations by file in JSON
  oc apply view-last-applied -f deploy.yaml -o json
2.5.1.8. oc attach
실행 중인 컨테이너에 연결
사용 예
  # Get output from running pod mypod, use the oc.kubernetes.io/default-container annotation
  # for selecting the container to be attached or the first container in the pod will be chosen
  oc attach mypod

  # Get output from ruby-container from pod mypod
  oc attach mypod -c ruby-container

  # Switch to raw terminal mode, sends stdin to 'bash' in ruby-container from pod mypod
  # and sends stdout/stderr from 'bash' back to the client
  oc attach mypod -c ruby-container -i -t

  # Get output from the first pod of a ReplicaSet named nginx
  oc attach rs/nginx
2.5.1.9. oc auth can-i
작업이 허용되는지 확인
사용 예
  # Check to see if I can create pods in any namespace
  oc auth can-i create pods --all-namespaces

  # Check to see if I can list deployments in my current namespace
  oc auth can-i list deployments.apps

  # Check to see if I can do everything in my current namespace ("*" means all)
  oc auth can-i '*' '*'

  # Check to see if I can get the job named "bar" in namespace "foo"
  oc auth can-i list jobs.batch/bar -n foo

  # Check to see if I can read pod logs
  oc auth can-i get pods --subresource=log

  # Check to see if I can access the URL /logs/
  oc auth can-i get /logs/

  # List all allowed actions in namespace "foo"
  oc auth can-i --list --namespace=foo
2.5.1.10. oc auth reconcile
RBAC Role, RoleBinding, ClusterRole 및 ClusterRoleBinding 오브젝트에 대한 규칙을 조정
사용 예
  # Reconcile rbac resources from a file
  oc auth reconcile -f my-rbac-rules.yaml
2.5.1.11. oc autoscale
배포 구성, 배포, 복제본 세트, 상태 저장 세트 또는 복제 컨트롤러를 자동 스케일링
사용 예
  # Auto scale a deployment "foo", with the number of pods between 2 and 10, no target CPU utilization specified so a default autoscaling policy will be used:
  oc autoscale deployment foo --min=2 --max=10

  # Auto scale a replication controller "foo", with the number of pods between 1 and 5, target CPU utilization at 80%:
  oc autoscale rc foo --max=5 --cpu-percent=80
2.5.1.12. oc cancel-build
실행 중이거나 보류 중인 빌드 또는 새 빌드를 취소
사용 예
  # Cancel the build with the given name
  oc cancel-build ruby-build-2

  # Cancel the named build and print the build logs
  oc cancel-build ruby-build-2 --dump-logs

  # Cancel the named build and create a new one with the same parameters
  oc cancel-build ruby-build-2 --restart

  # Cancel multiple builds
  oc cancel-build ruby-build-1 ruby-build-2 ruby-build-3

  # Cancel all builds created from the 'ruby-build' build config that are in the 'new' state
  oc cancel-build bc/ruby-build --state=new
2.5.1.13. oc cluster-info
클러스터 정보를 표시
사용 예
  # Print the address of the control plane and cluster services
  oc cluster-info
2.5.1.14. oc cluster-info dump
디버깅 및 진단을 위해 많은 관련 정보를 덤프
사용 예
  # Dump current cluster state to stdout
  oc cluster-info dump

  # Dump current cluster state to /path/to/cluster-state
  oc cluster-info dump --output-directory=/path/to/cluster-state

  # Dump all namespaces to stdout
  oc cluster-info dump --all-namespaces

  # Dump a set of namespaces to /path/to/cluster-state
  oc cluster-info dump --namespaces default,kube-system --output-directory=/path/to/cluster-state
2.5.1.15. oc completion
지정된 쉘에 대한 쉘 완료 코드를 출력 (bash 또는 zsh)
사용 예
  # Installing bash completion on macOS using homebrew
  ## If running Bash 3.2 included with macOS
  brew install bash-completion
  ## or, if running Bash 4.1+
  brew install bash-completion@2
  ## If oc is installed via homebrew, this should start working immediately.
  ## If you've installed via other means, you may need add the completion to your completion directory
  oc completion bash > $(brew --prefix)/etc/bash_completion.d/oc


  # Installing bash completion on Linux
  ## If bash-completion is not installed on Linux, please install the 'bash-completion' package
  ## via your distribution's package manager.
  ## Load the oc completion code for bash into the current shell
  source <(oc completion bash)
  ## Write bash completion code to a file and source it from .bash_profile
  oc completion bash > ~/.kube/completion.bash.inc
  printf "
  # Kubectl shell completion
  source '$HOME/.kube/completion.bash.inc'
  " >> $HOME/.bash_profile
  source $HOME/.bash_profile

  # Load the oc completion code for zsh[1] into the current shell
  source <(oc completion zsh)
  # Set the oc completion code for zsh[1] to autoload on startup
  oc completion zsh > "${fpath[1]}/_oc"
2.5.1.16. oc config current-context
current-context를 표시
사용 예
  # Display the current-context
  oc config current-context
2.5.1.17. oc config delete-cluster
kubeconfig에서 지정된 클러스터를 삭제
사용 예
  # Delete the minikube cluster
  oc config delete-cluster minikube
2.5.1.18. oc config delete-context
kubeconfig에서 지정된 컨텍스트를 삭제
사용 예
  # Delete the context for the minikube cluster
  oc config delete-context minikube
2.5.1.19. oc config delete-user
kubeconfig에서 지정된 사용자를 삭제
사용 예
  # Delete the minikube user
  oc config delete-user minikube
2.5.1.20. oc config get-clusters
kubeconfig에 정의된 클러스터를 표시
사용 예
  # List the clusters oc knows about
  oc config get-clusters
2.5.1.21. oc config get-contexts
하나 또는 여러 컨텍스트를 설명
사용 예
  # List all the contexts in your kubeconfig file
  oc config get-contexts

  # Describe one context in your kubeconfig file.
  oc config get-contexts my-context
2.5.1.22. oc config get-users
kubeconfig에 정의된 사용자를 표시
사용 예
  # List the users oc knows about
  oc config get-users
2.5.1.23. oc config rename-context
kubeconfig 파일에서 컨텍스트의 이름을 변경
사용 예
  # Rename the context 'old-name' to 'new-name' in your kubeconfig file
  oc config rename-context old-name new-name
2.5.1.24. oc config set
kubeconfig 파일에서 개별 값을 설정
사용 예
  # Set server field on the my-cluster cluster to https://1.2.3.4
  oc config set clusters.my-cluster.server https://1.2.3.4

  # Set certificate-authority-data field on the my-cluster cluster.
  oc config set clusters.my-cluster.certificate-authority-data $(echo "cert_data_here" | base64 -i -)

  # Set cluster field in the my-context context to my-cluster.
  oc config set contexts.my-context.cluster my-cluster

  # Set client-key-data field in the cluster-admin user using --set-raw-bytes option.
  oc config set users.cluster-admin.client-key-data cert_data_here --set-raw-bytes=true
2.5.1.25. oc config set-cluster
kubeconfig에서 클러스터 항목을 설정
사용 예
  # Set only the server field on the e2e cluster entry without touching other values.
  oc config set-cluster e2e --server=https://1.2.3.4

  # Embed certificate authority data for the e2e cluster entry
  oc config set-cluster e2e --embed-certs --certificate-authority=~/.kube/e2e/kubernetes.ca.crt

  # Disable cert checking for the dev cluster entry
  oc config set-cluster e2e --insecure-skip-tls-verify=true

  # Set custom TLS server name to use for validation for the e2e cluster entry
  oc config set-cluster e2e --tls-server-name=my-cluster-name
2.5.1.26. oc config set-context
kubeconfig에서 컨텍스트 항목을 설정
사용 예
  # Set the user field on the gce context entry without touching other values
  oc config set-context gce --user=cluster-admin
2.5.1.27. oc config set-credentials
kubeconfig에서 사용자 항목을 설정
사용 예
  # Set only the "client-key" field on the "cluster-admin"
  # entry, without touching other values:
  oc config set-credentials cluster-admin --client-key=~/.kube/admin.key

  # Set basic auth for the "cluster-admin" entry
  oc config set-credentials cluster-admin --username=admin --password=uXFGweU9l35qcif

  # Embed client certificate data in the "cluster-admin" entry
  oc config set-credentials cluster-admin --client-certificate=~/.kube/admin.crt --embed-certs=true

  # Enable the Google Compute Platform auth provider for the "cluster-admin" entry
  oc config set-credentials cluster-admin --auth-provider=gcp

  # Enable the OpenID Connect auth provider for the "cluster-admin" entry with additional args
  oc config set-credentials cluster-admin --auth-provider=oidc --auth-provider-arg=client-id=foo --auth-provider-arg=client-secret=bar

  # Remove the "client-secret" config value for the OpenID Connect auth provider for the "cluster-admin" entry
  oc config set-credentials cluster-admin --auth-provider=oidc --auth-provider-arg=client-secret-

  # Enable new exec auth plugin for the "cluster-admin" entry
  oc config set-credentials cluster-admin --exec-command=/path/to/the/executable --exec-api-version=client.authentication.k8s.io/v1beta1

  # Define new exec auth plugin args for the "cluster-admin" entry
  oc config set-credentials cluster-admin --exec-arg=arg1 --exec-arg=arg2

  # Create or update exec auth plugin environment variables for the "cluster-admin" entry
  oc config set-credentials cluster-admin --exec-env=key1=val1 --exec-env=key2=val2

  # Remove exec auth plugin environment variables for the "cluster-admin" entry
  oc config set-credentials cluster-admin --exec-env=var-to-remove-
2.5.1.28. oc config unset
kubeconfig 파일에서 개별 값 설정을 해제
사용 예
  # Unset the current-context.
  oc config unset current-context

  # Unset namespace in foo context.
  oc config unset contexts.foo.namespace
2.5.1.29. oc config use-context
kubeconfig 파일에서 current-context를 설정
사용 예
  # Use the context for the minikube cluster
  oc config use-context minikube
2.5.1.30. oc config view
병합된 kubeconfig 설정 또는 지정된 kubeconfig 파일을 표시
사용 예
  # Show merged kubeconfig settings.
  oc config view

  # Show merged kubeconfig settings and raw certificate data.
  oc config view --raw

  # Get the password for the e2e user
  oc config view -o jsonpath='{.users[?(@.name == "e2e")].user.password}'
2.5.1.31. oc cp
컨테이너 간에 파일 및 디렉터리를 복사
사용 예
  # !!!Important Note!!!
  # Requires that the 'tar' binary is present in your container
  # image.  If 'tar' is not present, 'oc cp' will fail.
  #
  # For advanced use cases, such as symlinks, wildcard expansion or
  # file mode preservation consider using 'oc exec'.

  # Copy /tmp/foo local file to /tmp/bar in a remote pod in namespace <some-namespace>
  tar cf - /tmp/foo | oc exec -i -n <some-namespace> <some-pod> -- tar xf - -C /tmp/bar

  # Copy /tmp/foo from a remote pod to /tmp/bar locally
  oc exec -n <some-namespace> <some-pod> -- tar cf - /tmp/foo | tar xf - -C /tmp/bar

  # Copy /tmp/foo_dir local directory to /tmp/bar_dir in a remote pod in the default namespace
  oc cp /tmp/foo_dir <some-pod>:/tmp/bar_dir

  # Copy /tmp/foo local file to /tmp/bar in a remote pod in a specific container
  oc cp /tmp/foo <some-pod>:/tmp/bar -c <specific-container>

  # Copy /tmp/foo local file to /tmp/bar in a remote pod in namespace <some-namespace>
  oc cp /tmp/foo <some-namespace>/<some-pod>:/tmp/bar

  # Copy /tmp/foo from a remote pod to /tmp/bar locally
  oc cp <some-namespace>/<some-pod>:/tmp/foo /tmp/bar
2.5.1.32. oc create
파일 또는 stdin에서 리소스를 생성
사용 예
  # Create a pod using the data in pod.json.
  oc create -f ./pod.json

  # Create a pod based on the JSON passed into stdin.
  cat pod.json | oc create -f -

  # Edit the data in docker-registry.yaml in JSON then create the resource using the edited data.
  oc create -f docker-registry.yaml --edit -o json
2.5.1.33. oc create build
새 빌드를 생성
사용 예
  # Create a new build
  oc create build myapp
2.5.1.34. oc create clusterresourcequota
클러스터 리소스 쿼터를 생성
사용 예
  # Create a cluster resource quota limited to 10 pods
  oc create clusterresourcequota limit-bob --project-annotation-selector=openshift.io/requester=user-bob --hard=pods=10
2.5.1.35. oc create clusterrole
클러스터 역할을 생성
사용 예
  # Create a ClusterRole named "pod-reader" that allows user to perform "get", "watch" and "list" on pods
  oc create clusterrole pod-reader --verb=get,list,watch --resource=pods

  # Create a ClusterRole named "pod-reader" with ResourceName specified
  oc create clusterrole pod-reader --verb=get --resource=pods --resource-name=readablepod --resource-name=anotherpod

  # Create a ClusterRole named "foo" with API Group specified
  oc create clusterrole foo --verb=get,list,watch --resource=rs.extensions

  # Create a ClusterRole named "foo" with SubResource specified
  oc create clusterrole foo --verb=get,list,watch --resource=pods,pods/status

  # Create a ClusterRole name "foo" with NonResourceURL specified
  oc create clusterrole "foo" --verb=get --non-resource-url=/logs/*

  # Create a ClusterRole name "monitoring" with AggregationRule specified
  oc create clusterrole monitoring --aggregation-rule="rbac.example.com/aggregate-to-monitoring=true"
2.5.1.36. oc create clusterrolebinding
특정 ClusterRole에 대한 ClusterRoleBinding을 생성
사용 예
  # Create a ClusterRoleBinding for user1, user2, and group1 using the cluster-admin ClusterRole
  oc create clusterrolebinding cluster-admin --clusterrole=cluster-admin --user=user1 --user=user2 --group=group1
2.5.1.37. oc create configmap
로컬 파일, 디렉토리 또는 리터럴 값에서 구성 맵을 생성
사용 예
  # Create a new configmap named my-config based on folder bar
  oc create configmap my-config --from-file=path/to/bar

  # Create a new configmap named my-config with specified keys instead of file basenames on disk
  oc create configmap my-config --from-file=key1=/path/to/bar/file1.txt --from-file=key2=/path/to/bar/file2.txt

  # Create a new configmap named my-config with key1=config1 and key2=config2
  oc create configmap my-config --from-literal=key1=config1 --from-literal=key2=config2

  # Create a new configmap named my-config from the key=value pairs in the file
  oc create configmap my-config --from-file=path/to/bar

  # Create a new configmap named my-config from an env file
  oc create configmap my-config --from-env-file=path/to/bar.env
2.5.1.38. oc create cronjob
지정된 이름으로 cronjob을 생성
사용 예
  # Create a cronjob
  oc create cronjob my-job --image=busybox --schedule="*/1 * * * *"

  # Create a cronjob with command
  oc create cronjob my-job --image=busybox --schedule="*/1 * * * *" -- date
2.5.1.39. oc create deployment
지정된 이름으로 배포를 생성
사용 예
  # Create a deployment named my-dep that runs the busybox image.
  oc create deployment my-dep --image=busybox

  # Create a deployment with command
  oc create deployment my-dep --image=busybox -- date

  # Create a deployment named my-dep that runs the nginx image with 3 replicas.
  oc create deployment my-dep --image=nginx --replicas=3

  # Create a deployment named my-dep that runs the busybox image and expose port 5701.
  oc create deployment my-dep --image=busybox --port=5701
2.5.1.40. oc create deploymentconfig
지정된 이미지를 사용하는 기본 옵션으로 배포 구성을 생성
사용 예
  # Create an nginx deployment config named my-nginx
  oc create deploymentconfig my-nginx --image=nginx
2.5.1.41. oc create identity
수동으로 ID를 생성 (자동 생성이 비활성화된 경우에만 필요)
사용 예
  # Create an identity with identity provider "acme_ldap" and the identity provider username "adamjones"
  oc create identity acme_ldap:adamjones
2.5.1.42. oc create imagestream
비어 있는 새 이미지 스트림을 생성
사용 예
  # Create a new image stream
  oc create imagestream mysql
2.5.1.43. oc create imagestreamtag
새 이미지 스트림 태그를 생성
사용 예
  # Create a new image stream tag based on an image in a remote registry
  oc create imagestreamtag mysql:latest --from-image=myregistry.local/mysql/mysql:5.0
2.5.1.44. oc create ingress
지정된 이름으로 수신을 생성
사용 예
  # Create a single ingress called 'simple' that directs requests to foo.com/bar to svc
  # svc1:8080 with a tls secret "my-cert"
  oc create ingress simple --rule="foo.com/bar=svc1:8080,tls=my-cert"

  # Create a catch all ingress of "/path" pointing to service svc:port and Ingress Class as "otheringress"
  oc create ingress catch-all --class=otheringress --rule="/path=svc:port"

  # Create an ingress with two annotations: ingress.annotation1 and ingress.annotations2
  oc create ingress annotated --class=default --rule="foo.com/bar=svc:port" \
  --annotation ingress.annotation1=foo \
  --annotation ingress.annotation2=bla

  # Create an ingress with the same host and multiple paths
  oc create ingress multipath --class=default \
  --rule="foo.com/=svc:port" \
  --rule="foo.com/admin/=svcadmin:portadmin"

  # Create an ingress with multiple hosts and the pathType as Prefix
  oc create ingress ingress1 --class=default \
  --rule="foo.com/path*=svc:8080" \
  --rule="bar.com/admin*=svc2:http"

  # Create an ingress with TLS enabled using the default ingress certificate and different path types
  oc create ingress ingtls --class=default \
  --rule="foo.com/=svc:https,tls" \
  --rule="foo.com/path/subpath*=othersvc:8080"

  # Create an ingress with TLS enabled using a specific secret and pathType as Prefix
  oc create ingress ingsecret --class=default \
  --rule="foo.com/*=svc:8080,tls=secret1"

  # Create an ingress with a default backend
  oc create ingress ingdefault --class=default \
  --default-backend=defaultsvc:http \
  --rule="foo.com/*=svc:8080,tls=secret1"
2.5.1.45. oc create job
지정된 이름으로 작업을 생성
사용 예
  # Create a job
  oc create job my-job --image=busybox

  # Create a job with command
  oc create job my-job --image=busybox -- date

  # Create a job from a CronJob named "a-cronjob"
  oc create job test-job --from=cronjob/a-cronjob
2.5.1.46. oc create namespace
지정된 이름으로 네임 스페이스를 생성
사용 예
  # Create a new namespace named my-namespace
  oc create namespace my-namespace
2.5.1.47. oc create poddisruptionbudget
지정된 이름으로 Pod 중단 예산을 생성
사용 예
  # Create a pod disruption budget named my-pdb that will select all pods with the app=rails label
  # and require at least one of them being available at any point in time.
  oc create poddisruptionbudget my-pdb --selector=app=rails --min-available=1

  # Create a pod disruption budget named my-pdb that will select all pods with the app=nginx label
  # and require at least half of the pods selected to be available at any point in time.
  oc create pdb my-pdb --selector=app=nginx --min-available=50%
2.5.1.48. oc create priorityclass
지정된 이름으로 priorityclass를 생성
사용 예
  # Create a priorityclass named high-priority
  oc create priorityclass high-priority --value=1000 --description="high priority"

  # Create a priorityclass named default-priority that considered as the global default priority
  oc create priorityclass default-priority --value=1000 --global-default=true --description="default priority"

  # Create a priorityclass named high-priority that can not preempt pods with lower priority
  oc create priorityclass high-priority --value=1000 --description="high priority" --preemption-policy="Never"
2.5.1.49. oc create quota
지정된 이름의 쿼터를 생성
사용 예
  # Create a new resourcequota named my-quota
  oc create quota my-quota --hard=cpu=1,memory=1G,pods=2,services=3,replicationcontrollers=2,resourcequotas=1,secrets=5,persistentvolumeclaims=10

  # Create a new resourcequota named best-effort
  oc create quota best-effort --hard=pods=100 --scopes=BestEffort
2.5.1.50. oc create role
단일 규칙을 사용하여 역할을 생성
사용 예
  # Create a Role named "pod-reader" that allows user to perform "get", "watch" and "list" on pods
  oc create role pod-reader --verb=get --verb=list --verb=watch --resource=pods

  # Create a Role named "pod-reader" with ResourceName specified
  oc create role pod-reader --verb=get --resource=pods --resource-name=readablepod --resource-name=anotherpod

  # Create a Role named "foo" with API Group specified
  oc create role foo --verb=get,list,watch --resource=rs.extensions

  # Create a Role named "foo" with SubResource specified
  oc create role foo --verb=get,list,watch --resource=pods,pods/status
2.5.1.51. oc create rolebinding
특정 역할 또는 ClusterRole에 대한 RoleBinding을 생성
사용 예
  # Create a RoleBinding for user1, user2, and group1 using the admin ClusterRole
  oc create rolebinding admin --clusterrole=admin --user=user1 --user=user2 --group=group1
2.5.1.52. oc create route edge
엣지 TLS 종료를 사용하는 경로를 생성
사용 예
  # Create an edge route named "my-route" that exposes the frontend service
  oc create route edge my-route --service=frontend

  # Create an edge route that exposes the frontend service and specify a path
  # If the route name is omitted, the service name will be used
  oc create route edge --service=frontend --path /assets
2.5.1.53. oc create route passthrough
패스스루 TLS 종료를 사용하는 경로를 생성
사용 예
  # Create a passthrough route named "my-route" that exposes the frontend service
  oc create route passthrough my-route --service=frontend

  # Create a passthrough route that exposes the frontend service and specify
  # a host name. If the route name is omitted, the service name will be used
  oc create route passthrough --service=frontend --hostname=www.example.com
2.5.1.54. oc create route reencrypt
재암호화 TLS 종료를 사용하는 경로를 생성
사용 예
  # Create a route named "my-route" that exposes the frontend service
  oc create route reencrypt my-route --service=frontend --dest-ca-cert cert.cert

  # Create a reencrypt route that exposes the frontend service, letting the
  # route name default to the service name and the destination CA certificate
  # default to the service CA
  oc create route reencrypt --service=frontend
2.5.1.55. oc create secret docker-registry
Docker 레지스트리와 함께 사용할 시크릿을 생성
사용 예
  # If you don't already have a .dockercfg file, you can create a dockercfg secret directly by using:
  oc create secret docker-registry my-secret --docker-server=DOCKER_REGISTRY_SERVER --docker-username=DOCKER_USER --docker-password=DOCKER_PASSWORD --docker-email=DOCKER_EMAIL

  # Create a new secret named my-secret from ~/.docker/config.json
  oc create secret docker-registry my-secret --from-file=.dockerconfigjson=path/to/.docker/config.json
2.5.1.56. oc create secret generic
로컬 파일, 디렉터리 또는 리터럴 값에서 시크릿을 생성
사용 예
  # Create a new secret named my-secret with keys for each file in folder bar
  oc create secret generic my-secret --from-file=path/to/bar

  # Create a new secret named my-secret with specified keys instead of names on disk
  oc create secret generic my-secret --from-file=ssh-privatekey=path/to/id_rsa --from-file=ssh-publickey=path/to/id_rsa.pub

  # Create a new secret named my-secret with key1=supersecret and key2=topsecret
  oc create secret generic my-secret --from-literal=key1=supersecret --from-literal=key2=topsecret

  # Create a new secret named my-secret using a combination of a file and a literal
  oc create secret generic my-secret --from-file=ssh-privatekey=path/to/id_rsa --from-literal=passphrase=topsecret

  # Create a new secret named my-secret from an env file
  oc create secret generic my-secret --from-env-file=path/to/bar.env
2.5.1.57. oc create secret tls
TLS 시크릿을 생성
사용 예
  # Create a new TLS secret named tls-secret with the given key pair:
  oc create secret tls tls-secret --cert=path/to/tls.cert --key=path/to/tls.key
2.5.1.58. oc create service clusterip
ClusterIP 서비스를 생성
사용 예
  # Create a new ClusterIP service named my-cs
  oc create service clusterip my-cs --tcp=5678:8080

  # Create a new ClusterIP service named my-cs (in headless mode)
  oc create service clusterip my-cs --clusterip="None"
2.5.1.59. oc create service externalname
ExternalName 서비스를 생성
사용 예
  # Create a new ExternalName service named my-ns
  oc create service externalname my-ns --external-name bar.com
2.5.1.60. oc create service loadbalancer
LoadBalancer 서비스를 생성
사용 예
  # Create a new LoadBalancer service named my-lbs
  oc create service loadbalancer my-lbs --tcp=5678:8080
2.5.1.61. oc create service nodeport
NodePort 서비스를 생성
사용 예
  # Create a new NodePort service named my-ns
  oc create service nodeport my-ns --tcp=5678:8080
2.5.1.62. oc create serviceaccount
지정된 이름으로 서비스 계정을 생성
사용 예
  # Create a new service account named my-service-account
  oc create serviceaccount my-service-account
2.5.1.63. oc create user
사용자를 수동으로 생성 (자동 생성이 비활성화된 경우에만 필요)
사용 예
  # Create a user with the username "ajones" and the display name "Adam Jones"
  oc create user ajones --full-name="Adam Jones"
2.5.1.64. oc create useridentitymapping
ID를 사용자에게 수동으로 매핑
사용 예
  # Map the identity "acme_ldap:adamjones" to the user "ajones"
  oc create useridentitymapping acme_ldap:adamjones ajones
2.5.1.65. oc debug
디버깅을 위해 Pod의 새 인스턴스를 시작
사용 예
  # Start a shell session into a pod using the OpenShift tools image
  oc debug

  # Debug a currently running deployment by creating a new pod
  oc debug deploy/test

  # Debug a node as an administrator
  oc debug node/master-1

  # Launch a shell in a pod using the provided image stream tag
  oc debug istag/mysql:latest -n openshift

  # Test running a job as a non-root user
  oc debug job/test --as-user=1000000

  # Debug a specific failing container by running the env command in the 'second' container
  oc debug daemonset/test -c second -- /bin/env

  # See the pod that would be created to debug
  oc debug mypod-9xbc -o yaml

  # Debug a resource but launch the debug pod in another namespace
  # Note: Not all resources can be debugged using --to-namespace without modification. For example,
  # volumes and service accounts are namespace-dependent. Add '-o yaml' to output the debug pod definition
  # to disk.  If necessary, edit the definition then run 'oc debug -f -' or run without --to-namespace
  oc debug mypod-9xbc --to-namespace testns
2.5.1.66. oc delete
파일 이름, stdin, 리소스 및 이름별 또는 리소스 및 레이블 선택기별 리소스를 삭제
사용 예
  # Delete a pod using the type and name specified in pod.json.
  oc delete -f ./pod.json

  # Delete resources from a directory containing kustomization.yaml - e.g. dir/kustomization.yaml.
  oc delete -k dir

  # Delete a pod based on the type and name in the JSON passed into stdin.
  cat pod.json | oc delete -f -

  # Delete pods and services with same names "baz" and "foo"
  oc delete pod,service baz foo

  # Delete pods and services with label name=myLabel.
  oc delete pods,services -l name=myLabel

  # Delete a pod with minimal delay
  oc delete pod foo --now

  # Force delete a pod on a dead node
  oc delete pod foo --force

  # Delete all pods
  oc delete pods --all
2.5.1.67. oc describe
특정 리소스 또는 리소스 그룹의 세부 정보를 표시
사용 예
  # Describe a node
  oc describe nodes kubernetes-node-emt8.c.myproject.internal

  # Describe a pod
  oc describe pods/nginx

  # Describe a pod identified by type and name in "pod.json"
  oc describe -f pod.json

  # Describe all pods
  oc describe pods

  # Describe pods by label name=myLabel
  oc describe po -l name=myLabel

  # Describe all pods managed by the 'frontend' replication controller (rc-created pods
  # get the name of the rc as a prefix in the pod the name).
  oc describe pods frontend
2.5.1.68. oc diff
적용될 버전에 대한 Diff 라이브 버전
사용 예
  # Diff resources included in pod.json.
  oc diff -f pod.json

  # Diff file read from stdin
  cat service.yaml | oc diff -f -
2.5.1.69. oc edit
서버에서 리소스를 편집
사용 예
  # Edit the service named 'docker-registry':
  oc edit svc/docker-registry

  # Use an alternative editor
  KUBE_EDITOR="nano" oc edit svc/docker-registry

  # Edit the job 'myjob' in JSON using the v1 API format:
  oc edit job.v1.batch/myjob -o json

  # Edit the deployment 'mydeployment' in YAML and save the modified config in its annotation:
  oc edit deployment/mydeployment -o yaml --save-config
2.5.1.70. oc ex dockergc
Docker 스토리지에서 공간을 확보하기 위해 가비지 컬렉션을 수행
사용 예
  # Perform garbage collection with the default settings
  oc ex dockergc
2.5.1.71. oc exec
컨테이너에서 명령을 실행
사용 예
  # Get output from running 'date' command from pod mypod, using the first container by default
  oc exec mypod -- date

  # Get output from running 'date' command in ruby-container from pod mypod
  oc exec mypod -c ruby-container -- date

  # Switch to raw terminal mode, sends stdin to 'bash' in ruby-container from pod mypod
  # and sends stdout/stderr from 'bash' back to the client
  oc exec mypod -c ruby-container -i -t -- bash -il

  # List contents of /usr from the first container of pod mypod and sort by modification time.
  # If the command you want to execute in the pod has any flags in common (e.g. -i),
  # you must use two dashes (--) to separate your command's flags/arguments.
  # Also note, do not surround your command and its flags/arguments with quotes
  # unless that is how you would execute it normally (i.e., do ls -t /usr, not "ls -t /usr").
  oc exec mypod -i -t -- ls -t /usr

  # Get output from running 'date' command from the first pod of the deployment mydeployment, using the first container by default
  oc exec deploy/mydeployment -- date

  # Get output from running 'date' command from the first pod of the service myservice, using the first container by default
  oc exec svc/myservice -- date
2.5.1.72. oc explain
리소스 문서
사용 예
  # Get the documentation of the resource and its fields
  oc explain pods

  # Get the documentation of a specific field of a resource
  oc explain pods.spec.containers
2.5.1.73. oc expose
복제된 애플리케이션을 서비스 또는 경로로 노출
사용 예
  # Create a route based on service nginx. The new route will reuse nginx's labels
  oc expose service nginx

  # Create a route and specify your own label and route name
  oc expose service nginx -l name=myroute --name=fromdowntown

  # Create a route and specify a host name
  oc expose service nginx --hostname=www.example.com

  # Create a route with a wildcard
  oc expose service nginx --hostname=x.example.com --wildcard-policy=Subdomain
  # This would be equivalent to *.example.com. NOTE: only hosts are matched by the wildcard; subdomains would not be included

  # Expose a deployment configuration as a service and use the specified port
  oc expose dc ruby-hello-world --port=8080

  # Expose a service as a route in the specified path
  oc expose service nginx --path=/nginx

  # Expose a service using different generators
  oc expose service nginx --name=exposed-svc --port=12201 --protocol="TCP" --generator="service/v2"
  oc expose service nginx --name=my-route --port=12201 --generator="route/v1"

  # Exposing a service using the "route/v1" generator (default) will create a new exposed route with the "--name" provided
  # (or the name of the service otherwise). You may not specify a "--protocol" or "--target-port" option when using this generator
2.5.1.74. oc extract
시크릿 또는 구성 맵을 디스크에 추출
사용 예
  # Extract the secret "test" to the current directory
  oc extract secret/test

  # Extract the config map "nginx" to the /tmp directory
  oc extract configmap/nginx --to=/tmp

  # Extract the config map "nginx" to STDOUT
  oc extract configmap/nginx --to=-

  # Extract only the key "nginx.conf" from config map "nginx" to the /tmp directory
  oc extract configmap/nginx --to=/tmp --keys=nginx.conf
2.5.1.75. oc get
리소스를 하나 이상 표시
사용 예
  # List all pods in ps output format.
  oc get pods

  # List all pods in ps output format with more information (such as node name).
  oc get pods -o wide

  # List a single replication controller with specified NAME in ps output format.
  oc get replicationcontroller web

  # List deployments in JSON output format, in the "v1" version of the "apps" API group:
  oc get deployments.v1.apps -o json

  # List a single pod in JSON output format.
  oc get -o json pod web-pod-13je7

  # List a pod identified by type and name specified in "pod.yaml" in JSON output format.
  oc get -f pod.yaml -o json

  # List resources from a directory with kustomization.yaml - e.g. dir/kustomization.yaml.
  oc get -k dir/

  # Return only the phase value of the specified pod.
  oc get -o template pod/web-pod-13je7 --template={{.status.phase}}

  # List resource information in custom columns.
  oc get pod test-pod -o custom-columns=CONTAINER:.spec.containers[0].name,IMAGE:.spec.containers[0].image

  # List all replication controllers and services together in ps output format.
  oc get rc,services

  # List one or more resources by their type and names.
  oc get rc/web service/frontend pods/web-pod-13je7
2.5.1.76. oc idle
확장 가능한 리소스를 유휴 상태로 설정
사용 예
  # Idle the scalable controllers associated with the services listed in to-idle.txt
  $ oc idle --resource-names-file to-idle.txt
2.5.1.77. oc image append
이미지에 레이어를 추가하고 레지스트리에 푸시
사용 예
  # Remove the entrypoint on the mysql:latest image
  oc image append --from mysql:latest --to myregistry.com/myimage:latest --image '{"Entrypoint":null}'

  # Add a new layer to the image
  oc image append --from mysql:latest --to myregistry.com/myimage:latest layer.tar.gz

  # Add a new layer to the image and store the result on disk
  # This results in $(pwd)/v2/mysql/blobs,manifests
  oc image append --from mysql:latest --to file://mysql:local layer.tar.gz

  # Add a new layer to the image and store the result on disk in a designated directory
  # This will result in $(pwd)/mysql-local/v2/mysql/blobs,manifests
  oc image append --from mysql:latest --to file://mysql:local --dir mysql-local layer.tar.gz

  # Add a new layer to an image that is stored on disk (~/mysql-local/v2/image exists)
  oc image append --from-dir ~/mysql-local --to myregistry.com/myimage:latest layer.tar.gz

  # Add a new layer to an image that was mirrored to the current directory on disk ($(pwd)/v2/image exists)
  oc image append --from-dir v2 --to myregistry.com/myimage:latest layer.tar.gz

  # Add a new layer to a multi-architecture image for an os/arch that is different from the system's os/arch
  # Note: Wildcard filter is not supported with append. Pass a single os/arch to append
  oc image append --from docker.io/library/busybox:latest --filter-by-os=linux/s390x --to myregistry.com/myimage:latest layer.tar.gz
2.5.1.78. oc image extract
이미지에서 파일 시스템으로 파일을 복사
사용 예
  # Extract the busybox image into the current directory
  oc image extract docker.io/library/busybox:latest

  # Extract the busybox image into a designated directory (must exist)
  oc image extract docker.io/library/busybox:latest --path /:/tmp/busybox

  # Extract the busybox image into the current directory for linux/s390x platform
  # Note: Wildcard filter is not supported with extract. Pass a single os/arch to extract
  oc image extract docker.io/library/busybox:latest --filter-by-os=linux/s390x

  # Extract a single file from the image into the current directory
  oc image extract docker.io/library/centos:7 --path /bin/bash:.

  # Extract all .repo files from the image's /etc/yum.repos.d/ folder into the current directory
  oc image extract docker.io/library/centos:7 --path /etc/yum.repos.d/*.repo:.

  # Extract all .repo files from the image's /etc/yum.repos.d/ folder into a designated directory (must exist)
  # This results in /tmp/yum.repos.d/*.repo on local system
  oc image extract docker.io/library/centos:7 --path /etc/yum.repos.d/*.repo:/tmp/yum.repos.d

  # Extract an image stored on disk into the current directory ($(pwd)/v2/busybox/blobs,manifests exists)
  # --confirm is required because the current directory is not empty
  oc image extract file://busybox:local --confirm

  # Extract an image stored on disk in a directory other than $(pwd)/v2 into the current directory
  # --confirm is required because the current directory is not empty ($(pwd)/busybox-mirror-dir/v2/busybox exists)
  oc image extract file://busybox:local --dir busybox-mirror-dir --confirm

  # Extract an image stored on disk in a directory other than $(pwd)/v2 into a designated directory (must exist)
  oc image extract file://busybox:local --dir busybox-mirror-dir --path /:/tmp/busybox

  # Extract the last layer in the image
  oc image extract docker.io/library/centos:7[-1]

  # Extract the first three layers of the image
  oc image extract docker.io/library/centos:7[:3]

  # Extract the last three layers of the image
  oc image extract docker.io/library/centos:7[-3:]
2.5.1.79. oc image info
이미지에 대한 정보 표시
사용 예
  # Show information about an image
  oc image info quay.io/openshift/cli:latest

  # Show information about images matching a wildcard
  oc image info quay.io/openshift/cli:4.*

  # Show information about a file mirrored to disk under DIR
  oc image info --dir=DIR file://library/busybox:latest

  # Select which image from a multi-OS image to show
  oc image info library/busybox:latest --filter-by-os=linux/arm64
2.5.1.80. oc image mirror
한 저장소에서 다른 저장소로 이미지를 미러링
사용 예
  # Copy image to another tag
  oc image mirror myregistry.com/myimage:latest myregistry.com/myimage:stable

  # Copy image to another registry
  oc image mirror myregistry.com/myimage:latest docker.io/myrepository/myimage:stable

  # Copy all tags starting with mysql to the destination repository
  oc image mirror myregistry.com/myimage:mysql* docker.io/myrepository/myimage

  # Copy image to disk, creating a directory structure that can be served as a registry
  oc image mirror myregistry.com/myimage:latest file://myrepository/myimage:latest

  # Copy image to S3 (pull from <bucket>.s3.amazonaws.com/image:latest)
  oc image mirror myregistry.com/myimage:latest s3://s3.amazonaws.com/<region>/<bucket>/image:latest

  # Copy image to S3 without setting a tag (pull via @<digest>)
  oc image mirror myregistry.com/myimage:latest s3://s3.amazonaws.com/<region>/<bucket>/image

  # Copy image to multiple locations
  oc image mirror myregistry.com/myimage:latest docker.io/myrepository/myimage:stable \
  docker.io/myrepository/myimage:dev

  # Copy multiple images
  oc image mirror myregistry.com/myimage:latest=myregistry.com/other:test \
  myregistry.com/myimage:new=myregistry.com/other:target

  # Copy manifest list of a multi-architecture image, even if only a single image is found
  oc image mirror myregistry.com/myimage:latest=myregistry.com/other:test \
  --keep-manifest-list=true

  # Copy specific os/arch manifest of a multi-architecture image
  # Run 'oc image info myregistry.com/myimage:latest' to see available os/arch for multi-arch images
  # Note that with multi-arch images, this results in a new manifest list digest that includes only
  # the filtered manifests
  oc image mirror myregistry.com/myimage:latest=myregistry.com/other:test \
  --filter-by-os=os/arch

  # Copy all os/arch manifests of a multi-architecture image
  # Run 'oc image info myregistry.com/myimage:latest' to see list of os/arch manifests that will be mirrored
  oc image mirror myregistry.com/myimage:latest=myregistry.com/other:test \
  --keep-manifest-list=true

  # Note the above command is equivalent to
  oc image mirror myregistry.com/myimage:latest=myregistry.com/other:test \
  --filter-by-os=.*
2.5.1.81. oc import-image
컨테이너 이미지 레지스트리에서 이미지를 가져옵니다
사용 예
  # Import tag latest into a new image stream
  oc import-image mystream --from=registry.io/repo/image:latest --confirm

  # Update imported data for tag latest in an already existing image stream
  oc import-image mystream

  # Update imported data for tag stable in an already existing image stream
  oc import-image mystream:stable

  # Update imported data for all tags in an existing image stream
  oc import-image mystream --all

  # Import all tags into a new image stream
  oc import-image mystream --from=registry.io/repo/image --all --confirm

  # Import all tags into a new image stream using a custom timeout
  oc --request-timeout=5m import-image mystream --from=registry.io/repo/image --all --confirm
2.5.1.82. oc kustomize
디렉터리 또는 URL에서 kustomization 대상을 빌드
사용 예
  # Build the current working directory
  oc kustomize

  # Build some shared configuration directory
  oc kustomize /home/config/production

  # Build from github
  oc kustomize https://github.com/kubernetes-sigs/kustomize.git/examples/helloWorld?ref=v1.0.6
2.5.1.83. oc label
리소스에서 레이블을 업데이트
사용 예
  # Update pod 'foo' with the label 'unhealthy' and the value 'true'.
  oc label pods foo unhealthy=true

  # Update pod 'foo' with the label 'status' and the value 'unhealthy', overwriting any existing value.
  oc label --overwrite pods foo status=unhealthy

  # Update all pods in the namespace
  oc label pods --all status=unhealthy

  # Update a pod identified by the type and name in "pod.json"
  oc label -f pod.json status=unhealthy

  # Update pod 'foo' only if the resource is unchanged from version 1.
  oc label pods foo status=unhealthy --resource-version=1

  # Update pod 'foo' by removing a label named 'bar' if it exists.
  # Does not require the --overwrite flag.
  oc label pods foo bar-
2.5.1.84. oc login
서버에 로그인
사용 예
  # Log in interactively
  oc login --username=myuser

  # Log in to the given server with the given certificate authority file
  oc login localhost:8443 --certificate-authority=/path/to/cert.crt

  # Log in to the given server with the given credentials (will not prompt interactively)
  oc login localhost:8443 --username=myuser --password=mypass
2.5.1.85. oc logout
현재 서버 세션을 종료
사용 예
  # Log out
  oc logout
2.5.1.86. oc logs
Pod에서 컨테이너의 로그를 출력
사용 예
  # Start streaming the logs of the most recent build of the openldap build config
  oc logs -f bc/openldap

  # Start streaming the logs of the latest deployment of the mysql deployment config
  oc logs -f dc/mysql

  # Get the logs of the first deployment for the mysql deployment config. Note that logs
  # from older deployments may not exist either because the deployment was successful
  # or due to deployment pruning or manual deletion of the deployment
  oc logs --version=1 dc/mysql

  # Return a snapshot of ruby-container logs from pod backend
  oc logs backend -c ruby-container

  # Start streaming of ruby-container logs from pod backend
  oc logs -f pod/backend -c ruby-container
2.5.1.87. oc new-app
새 애플리케이션을 생성
사용 예
  # List all local templates and image streams that can be used to create an app
  oc new-app --list

  # Create an application based on the source code in the current git repository (with a public remote) and a Docker image
  oc new-app . --docker-image=registry/repo/langimage

  # Create an application myapp with Docker based build strategy expecting binary input
  oc new-app  --strategy=docker --binary --name myapp

  # Create a Ruby application based on the provided [image]~[source code] combination
  oc new-app centos/ruby-25-centos7~https://github.com/sclorg/ruby-ex.git

  # Use the public Docker Hub MySQL image to create an app. Generated artifacts will be labeled with db=mysql
  oc new-app mysql MYSQL_USER=user MYSQL_PASSWORD=pass MYSQL_DATABASE=testdb -l db=mysql

  # Use a MySQL image in a private registry to create an app and override application artifacts' names
  oc new-app --docker-image=myregistry.com/mycompany/mysql --name=private

  # Create an application from a remote repository using its beta4 branch
  oc new-app https://github.com/openshift/ruby-hello-world#beta4

  # Create an application based on a stored template, explicitly setting a parameter value
  oc new-app --template=ruby-helloworld-sample --param=MYSQL_USER=admin

  # Create an application from a remote repository and specify a context directory
  oc new-app https://github.com/youruser/yourgitrepo --context-dir=src/build

  # Create an application from a remote private repository and specify which existing secret to use
  oc new-app https://github.com/youruser/yourgitrepo --source-secret=yoursecret

  # Create an application based on a template file, explicitly setting a parameter value
  oc new-app --file=./example/myapp/template.json --param=MYSQL_USER=admin

  # Search all templates, image streams, and Docker images for the ones that match "ruby"
  oc new-app --search ruby

  # Search for "ruby", but only in stored templates (--template, --image-stream and --docker-image
  # can be used to filter search results)
  oc new-app --search --template=ruby

  # Search for "ruby" in stored templates and print the output as YAML
  oc new-app --search --template=ruby --output=yaml
2.5.1.88. oc new-build
새 빌드 구성을 생성
사용 예
  # Create a build config based on the source code in the current git repository (with a public
  # remote) and a Docker image
  oc new-build . --docker-image=repo/langimage

  # Create a NodeJS build config based on the provided [image]~[source code] combination
  oc new-build centos/nodejs-8-centos7~https://github.com/sclorg/nodejs-ex.git

  # Create a build config from a remote repository using its beta2 branch
  oc new-build https://github.com/openshift/ruby-hello-world#beta2

  # Create a build config using a Dockerfile specified as an argument
  oc new-build -D $'FROM centos:7\nRUN yum install -y httpd'

  # Create a build config from a remote repository and add custom environment variables
  oc new-build https://github.com/openshift/ruby-hello-world -e RACK_ENV=development

  # Create a build config from a remote private repository and specify which existing secret to use
  oc new-build https://github.com/youruser/yourgitrepo --source-secret=yoursecret

  # Create a build config from a remote repository and inject the npmrc into a build
  oc new-build https://github.com/openshift/ruby-hello-world --build-secret npmrc:.npmrc

  # Create a build config from a remote repository and inject environment data into a build
  oc new-build https://github.com/openshift/ruby-hello-world --build-config-map env:config

  # Create a build config that gets its input from a remote repository and another Docker image
  oc new-build https://github.com/openshift/ruby-hello-world --source-image=openshift/jenkins-1-centos7 --source-image-path=/var/lib/jenkins:tmp
2.5.1.89. oc new-project
새 프로젝트를 요청
사용 예
  # Create a new project with minimal information
  oc new-project web-team-dev

  # Create a new project with a display name and description
  oc new-project web-team-dev --display-name="Web Team Development" --description="Development project for the web team."
2.5.1.90. oc observe
리소스에 대한 변경 사항을 관찰하고 이에 대응합니다(시험적)
사용 예
  # Observe changes to services
  oc observe services

  # Observe changes to services, including the clusterIP and invoke a script for each
  oc observe services --template '{ .spec.clusterIP }' -- register_dns.sh

  # Observe changes to services filtered by a label selector
  oc observe namespaces -l regist-dns=true --template '{ .spec.clusterIP }' -- register_dns.sh
2.5.1.91. oc patch
리소스 필드를 업데이트
사용 예
  # Partially update a node using a strategic merge patch. Specify the patch as JSON.
  oc patch node k8s-node-1 -p '{"spec":{"unschedulable":true}}'

  # Partially update a node using a strategic merge patch. Specify the patch as YAML.
  oc patch node k8s-node-1 -p $'spec:\n unschedulable: true'

  # Partially update a node identified by the type and name specified in "node.json" using strategic merge patch.
  oc patch -f node.json -p '{"spec":{"unschedulable":true}}'

  # Update a container's image; spec.containers[*].name is required because it's a merge key.
  oc patch pod valid-pod -p '{"spec":{"containers":[{"name":"kubernetes-serve-hostname","image":"new image"}]}}'

  # Update a container's image using a json patch with positional arrays.
  oc patch pod valid-pod --type='json' -p='[{"op": "replace", "path": "/spec/containers/0/image", "value":"new image"}]'
2.5.1.92. oc policy add-role-to-user
현재 프로젝트의 사용자 또는 서비스 계정에 역할을 추가
사용 예
  # Add the 'view' role to user1 for the current project
  oc policy add-role-to-user view user1

  # Add the 'edit' role to serviceaccount1 for the current project
  oc policy add-role-to-user edit -z serviceaccount1
2.5.1.93. oc policy scc-review
Pod를 생성할 수 있는 서비스 계정을 확인
사용 예
  # Check whether service accounts sa1 and sa2 can admit a pod with a template pod spec specified in my_resource.yaml
  # Service Account specified in myresource.yaml file is ignored
  oc policy scc-review -z sa1,sa2 -f my_resource.yaml

  # Check whether service accounts system:serviceaccount:bob:default can admit a pod with a template pod spec specified in my_resource.yaml
  oc policy scc-review -z system:serviceaccount:bob:default -f my_resource.yaml

  # Check whether the service account specified in my_resource_with_sa.yaml can admit the pod
  oc policy scc-review -f my_resource_with_sa.yaml

  # Check whether the default service account can admit the pod; default is taken since no service account is defined in myresource_with_no_sa.yaml
  oc policy scc-review -f myresource_with_no_sa.yaml
2.5.1.94. oc policy scc-subject-review
사용자 또는 서비스 계정의 Pod 생성 가능 여부 확인
사용 예
  # Check whether user bob can create a pod specified in myresource.yaml
  oc policy scc-subject-review -u bob -f myresource.yaml

  # Check whether user bob who belongs to projectAdmin group can create a pod specified in myresource.yaml
  oc policy scc-subject-review -u bob -g projectAdmin -f myresource.yaml

  # Check whether a service account specified in the pod template spec in myresourcewithsa.yaml can create the pod
  oc policy scc-subject-review -f myresourcewithsa.yaml
2.5.1.95. oc port-forward
Pod에 하나 이상의 로컬 포트를 전달
사용 예
  # Listen on ports 5000 and 6000 locally, forwarding data to/from ports 5000 and 6000 in the pod
  oc port-forward pod/mypod 5000 6000

  # Listen on ports 5000 and 6000 locally, forwarding data to/from ports 5000 and 6000 in a pod selected by the deployment
  oc port-forward deployment/mydeployment 5000 6000

  # Listen on port 8443 locally, forwarding to the targetPort of the service's port named "https" in a pod selected by the service
  oc port-forward service/myservice 8443:https

  # Listen on port 8888 locally, forwarding to 5000 in the pod
  oc port-forward pod/mypod 8888:5000

  # Listen on port 8888 on all addresses, forwarding to 5000 in the pod
  oc port-forward --address 0.0.0.0 pod/mypod 8888:5000

  # Listen on port 8888 on localhost and selected IP, forwarding to 5000 in the pod
  oc port-forward --address localhost,10.19.21.23 pod/mypod 8888:5000

  # Listen on a random port locally, forwarding to 5000 in the pod
  oc port-forward pod/mypod :5000
2.5.1.96. oc process
템플릿을 리소스 목록으로 처리
사용 예
  # Convert the template.json file into a resource list and pass to create
  oc process -f template.json | oc create -f -

  # Process a file locally instead of contacting the server
  oc process -f template.json --local -o yaml

  # Process template while passing a user-defined label
  oc process -f template.json -l name=mytemplate

  # Convert a stored template into a resource list
  oc process foo

  # Convert a stored template into a resource list by setting/overriding parameter values
  oc process foo PARM1=VALUE1 PARM2=VALUE2

  # Convert a template stored in different namespace into a resource list
  oc process openshift//foo

  # Convert template.json into a resource list
  cat template.json | oc process -f -
2.5.1.97. oc project
다른 프로젝트로 전환
사용 예
  # Switch to the 'myapp' project
  oc project myapp

  # Display the project currently in use
  oc project
2.5.1.98. oc projects
기존 프로젝트를 표시
사용 예
  # List all projects
  oc projects
2.5.1.99. oc proxy
Kubernetes API 서버에 대해 프록시를 실행
사용 예
  # To proxy all of the kubernetes api and nothing else.
  oc proxy --api-prefix=/

  # To proxy only part of the kubernetes api and also some static files.
  # You can get pods info with 'curl localhost:8001/api/v1/pods'
  oc proxy --www=/my/files --www-prefix=/static/ --api-prefix=/api/

  # To proxy the entire kubernetes api at a different root.
  # You can get pods info with 'curl localhost:8001/custom/api/v1/pods'
  oc proxy --api-prefix=/custom/

  # Run a proxy to kubernetes apiserver on port 8011, serving static content from ./local/www/
  oc proxy --port=8011 --www=./local/www/

  # Run a proxy to kubernetes apiserver on an arbitrary local port.
  # The chosen port for the server will be output to stdout.
  oc proxy --port=0

  # Run a proxy to kubernetes apiserver, changing the api prefix to k8s-api
  # This makes e.g. the pods api available at localhost:8001/k8s-api/v1/pods/
  oc proxy --api-prefix=/k8s-api
2.5.1.100. oc registry info
통합 레지스트리에 대한 정보를 인쇄
사용 예
  # Display information about the integrated registry
  oc registry info
2.5.1.101. oc registry login
통합 레지스트리에 로그인
사용 예
  # Log in to the integrated registry
  oc registry login

  # Log in as the default service account in the current namespace
  oc registry login -z default

  # Log in to different registry using BASIC auth credentials
  oc registry login --registry quay.io/myregistry --auth-basic=USER:PASS
2.5.1.102. oc replace
리소스를 파일 이름 또는 stdin으로 교체
사용 예
  # Replace a pod using the data in pod.json.
  oc replace -f ./pod.json

  # Replace a pod based on the JSON passed into stdin.
  cat pod.json | oc replace -f -

  # Update a single-container pod's image version (tag) to v4
  oc get pod mypod -o yaml | sed 's/\(image: myimage\):.*$/\1:v4/' | oc replace -f -

  # Force replace, delete and then re-create the resource
  oc replace --force -f ./pod.json
2.5.1.103. oc rollback
애플리케이션의 일부를 이전 배포로 되돌립니다
사용 예
  # Perform a rollback to the last successfully completed deployment for a deployment config
  oc rollback frontend

  # See what a rollback to version 3 will look like, but do not perform the rollback
  oc rollback frontend --to-version=3 --dry-run

  # Perform a rollback to a specific deployment
  oc rollback frontend-2

  # Perform the rollback manually by piping the JSON of the new config back to oc
  oc rollback frontend -o json | oc replace dc/frontend -f -

  # Print the updated deployment configuration in JSON format instead of performing the rollback
  oc rollback frontend -o json
2.5.1.104. oc rollout cancel
진행 중인 배포를 취소
사용 예
  # Cancel the in-progress deployment based on 'nginx'
  oc rollout cancel dc/nginx
2.5.1.105. oc rollout history
롤아웃 내역 보기
사용 예
  # View the rollout history of a deployment
  oc rollout history dc/nginx

  # View the details of deployment revision 3
  oc rollout history dc/nginx --revision=3
2.5.1.106. oc rollout latest
트리거의 최신 상태로 배포 구성에 대한 새 롤아웃 시작
사용 예
  # Start a new rollout based on the latest images defined in the image change triggers
  oc rollout latest dc/nginx

  # Print the rolled out deployment config
  oc rollout latest dc/nginx -o json
2.5.1.107. oc rollout pause
제공된 리소스를 일시 중지됨으로 표시
사용 예
  # Mark the nginx deployment as paused. Any current state of
  # the deployment will continue its function, new updates to the deployment will not
  # have an effect as long as the deployment is paused
  oc rollout pause dc/nginx
2.5.1.108. oc rollout restart
리소스를 다시 시작
사용 예
  # Restart a deployment
  oc rollout restart deployment/nginx

  # Restart a daemonset
  oc rollout restart daemonset/abc
2.5.1.109. oc rollout resume
일시 중지된 리소스 재개
사용 예
  # Resume an already paused deployment
  oc rollout resume dc/nginx
2.5.1.110. oc rollout retry
가장 최근에 실패한 롤아웃 재시도
사용 예
  # Retry the latest failed deployment based on 'frontend'
  # The deployer pod and any hook pods are deleted for the latest failed deployment
  oc rollout retry dc/frontend
2.5.1.111. oc rollout status
롤아웃 상태를 표시
사용 예
  # Watch the status of the latest rollout
  oc rollout status dc/nginx
2.5.1.112. oc rollout undo
이전 롤아웃 실행 취소
사용 예
  # Roll back to the previous deployment
  oc rollout undo dc/nginx

  # Roll back to deployment revision 3. The replication controller for that version must exist
  oc rollout undo dc/nginx --to-revision=3
2.5.1.113. oc rsh
컨테이너에서 쉘 세션 시작
사용 예
  # Open a shell session on the first container in pod 'foo'
  oc rsh foo

  # Open a shell session on the first container in pod 'foo' and namespace 'bar'
  # (Note that oc client specific arguments must come before the resource name and its arguments)
  oc rsh -n bar foo

  # Run the command 'cat /etc/resolv.conf' inside pod 'foo'
  oc rsh foo cat /etc/resolv.conf

  # See the configuration of your internal registry
  oc rsh dc/docker-registry cat config.yml

  # Open a shell session on the container named 'index' inside a pod of your job
  oc rsh -c index job/sheduled
2.5.1.114. oc rsync
로컬 파일 시스템과 Pod 간 파일 복사
사용 예
  # Synchronize a local directory with a pod directory
  oc rsync ./local/dir/ POD:/remote/dir

  # Synchronize a pod directory with a local directory
  oc rsync POD:/remote/dir/ ./local/dir
2.5.1.115. oc run
클러스터에서 특정 이미지 실행
사용 예
  # Start a nginx pod.
  oc run nginx --image=nginx

  # Start a hazelcast pod and let the container expose port 5701.
  oc run hazelcast --image=hazelcast/hazelcast --port=5701

  # Start a hazelcast pod and set environment variables "DNS_DOMAIN=cluster" and "POD_NAMESPACE=default" in the container.
  oc run hazelcast --image=hazelcast/hazelcast --env="DNS_DOMAIN=cluster" --env="POD_NAMESPACE=default"

  # Start a hazelcast pod and set labels "app=hazelcast" and "env=prod" in the container.
  oc run hazelcast --image=hazelcast/hazelcast --labels="app=hazelcast,env=prod"

  # Dry run. Print the corresponding API objects without creating them.
  oc run nginx --image=nginx --dry-run=client

  # Start a nginx pod, but overload the spec with a partial set of values parsed from JSON.
  oc run nginx --image=nginx --overrides='{ "apiVersion": "v1", "spec": { ... } }'

  # Start a busybox pod and keep it in the foreground, don't restart it if it exits.
  oc run -i -t busybox --image=busybox --restart=Never

  # Start the nginx pod using the default command, but use custom arguments (arg1 .. argN) for that command.
  oc run nginx --image=nginx -- <arg1> <arg2> ... <argN>

  # Start the nginx pod using a different command and custom arguments.
  oc run nginx --image=nginx --command -- <cmd> <arg1> ... <argN>
2.5.1.116. oc scale
배포, 복제 세트 또는 복제 컨트롤러의 새 크기 설정
사용 예
  # Scale a replicaset named 'foo' to 3.
  oc scale --replicas=3 rs/foo

  # Scale a resource identified by type and name specified in "foo.yaml" to 3.
  oc scale --replicas=3 -f foo.yaml

  # If the deployment named mysql's current size is 2, scale mysql to 3.
  oc scale --current-replicas=2 --replicas=3 deployment/mysql

  # Scale multiple replication controllers.
  oc scale --replicas=5 rc/foo rc/bar rc/baz

  # Scale statefulset named 'web' to 3.
  oc scale --replicas=3 statefulset/web
2.5.1.117. oc secrets link
서비스 계정에 시크릿 연결
사용 예
  # Add an image pull secret to a service account to automatically use it for pulling pod images
  oc secrets link serviceaccount-name pull-secret --for=pull

  # Add an image pull secret to a service account to automatically use it for both pulling and pushing build images
  oc secrets link builder builder-image-secret --for=pull,mount

  # If the cluster's serviceAccountConfig is operating with limitSecretReferences: True, secrets must be added to the pod's service account whitelist in order to be available to the pod
  oc secrets link pod-sa pod-secret
2.5.1.118. oc secrets unlink
서비스 계정에서 시크릿 분리
사용 예
  # Unlink a secret currently associated with a service account
  oc secrets unlink serviceaccount-name secret-name another-secret-name ...
2.5.1.119. oc serviceaccounts create-kubeconfig
서비스 계정에 대한 kubeconfig 파일 생성
사용 예
  # Create a kubeconfig file for service account 'default'
  oc serviceaccounts create-kubeconfig 'default' > default.kubeconfig
2.5.1.120. oc serviceaccounts get-token
서비스 계정에 할당된 토큰을 가져옵니다
사용 예
  # Get the service account token from service account 'default'
  oc serviceaccounts get-token 'default'
2.5.1.121. oc serviceaccounts new-token
서비스 계정에 대한 새 토큰을 생성
사용 예
  # Generate a new token for service account 'default'
  oc serviceaccounts new-token 'default'

  # Generate a new token for service account 'default' and apply
  # labels 'foo' and 'bar' to the new token for identification
  oc serviceaccounts new-token 'default' --labels foo=foo-value,bar=bar-value
2.5.1.122. oc set build-hook
빌드 구성에서 빌드 후크를 업데이트
사용 예
  # Clear post-commit hook on a build config
  oc set build-hook bc/mybuild --post-commit --remove

  # Set the post-commit hook to execute a test suite using a new entrypoint
  oc set build-hook bc/mybuild --post-commit --command -- /bin/bash -c /var/lib/test-image.sh

  # Set the post-commit hook to execute a shell script
  oc set build-hook bc/mybuild --post-commit --script="/var/lib/test-image.sh param1 param2 && /var/lib/done.sh"
2.5.1.123. oc set build-secret
빌드 구성에서 빌드 보안을 업데이트
사용 예
  # Clear the push secret on a build config
  oc set build-secret --push --remove bc/mybuild

  # Set the pull secret on a build config
  oc set build-secret --pull bc/mybuild mysecret

  # Set the push and pull secret on a build config
  oc set build-secret --push --pull bc/mybuild mysecret

  # Set the source secret on a set of build configs matching a selector
  oc set build-secret --source -l app=myapp gitsecret
2.5.1.124. oc set data
구성 맵 또는 시크릿 내의 데이터를 업데이트
사용 예
  # Set the 'password' key of a secret
  oc set data secret/foo password=this_is_secret

  # Remove the 'password' key from a secret
  oc set data secret/foo password-

  # Update the 'haproxy.conf' key of a config map from a file on disk
  oc set data configmap/bar --from-file=../haproxy.conf

  # Update a secret with the contents of a directory, one key per file
  oc set data secret/foo --from-file=secret-dir
2.5.1.125. oc set deployment-hook
배포 구성에서 배포 후크를 업데이트
사용 예
  # Clear pre and post hooks on a deployment config
  oc set deployment-hook dc/myapp --remove --pre --post

  # Set the pre deployment hook to execute a db migration command for an application
  # using the data volume from the application
  oc set deployment-hook dc/myapp --pre --volumes=data -- /var/lib/migrate-db.sh

  # Set a mid deployment hook along with additional environment variables
  oc set deployment-hook dc/myapp --mid --volumes=data -e VAR1=value1 -e VAR2=value2 -- /var/lib/prepare-deploy.sh
2.5.1.126. oc set env
Pod 템플릿에서 환경 변수를 업데이트
사용 예
  # Update deployment config 'myapp' with a new environment variable
  oc set env dc/myapp STORAGE_DIR=/local

  # List the environment variables defined on a build config 'sample-build'
  oc set env bc/sample-build --list

  # List the environment variables defined on all pods
  oc set env pods --all --list

  # Output modified build config in YAML
  oc set env bc/sample-build STORAGE_DIR=/data -o yaml

  # Update all containers in all replication controllers in the project to have ENV=prod
  oc set env rc --all ENV=prod

  # Import environment from a secret
  oc set env --from=secret/mysecret dc/myapp

  # Import environment from a config map with a prefix
  oc set env --from=configmap/myconfigmap --prefix=MYSQL_ dc/myapp

  # Remove the environment variable ENV from container 'c1' in all deployment configs
  oc set env dc --all --containers="c1" ENV-

  # Remove the environment variable ENV from a deployment config definition on disk and
  # update the deployment config on the server
  oc set env -f dc.json ENV-

  # Set some of the local shell environment into a deployment config on the server
  oc set env | grep RAILS_ | oc env -e - dc/myapp
2.5.1.127. oc set image
Pod 템플릿 이미지를 업데이트
사용 예
  # Set a deployment configs's nginx container image to 'nginx:1.9.1', and its busybox container image to 'busybox'.
  oc set image dc/nginx busybox=busybox nginx=nginx:1.9.1

  # Set a deployment configs's app container image to the image referenced by the imagestream tag 'openshift/ruby:2.3'.
  oc set image dc/myapp app=openshift/ruby:2.3 --source=imagestreamtag

  # Update all deployments' and rc's nginx container's image to 'nginx:1.9.1'
  oc set image deployments,rc nginx=nginx:1.9.1 --all

  # Update image of all containers of daemonset abc to 'nginx:1.9.1'
  oc set image daemonset abc *=nginx:1.9.1

  # Print result (in yaml format) of updating nginx container image from local file, without hitting the server
  oc set image -f path/to/file.yaml nginx=nginx:1.9.1 --local -o yaml
2.5.1.128. oc set image-lookup
애플리케이션을 배포할 때 이미지가 해결되는 방법 변경
사용 예
  # Print all of the image streams and whether they resolve local names
  oc set image-lookup

  # Use local name lookup on image stream mysql
  oc set image-lookup mysql

  # Force a deployment to use local name lookup
  oc set image-lookup deploy/mysql

  # Show the current status of the deployment lookup
  oc set image-lookup deploy/mysql --list

  # Disable local name lookup on image stream mysql
  oc set image-lookup mysql --enabled=false

  # Set local name lookup on all image streams
  oc set image-lookup --all
2.5.1.129. oc set probe
Pod 템플릿에서 프로브 업데이트
사용 예
  # Clear both readiness and liveness probes off all containers
  oc set probe dc/myapp --remove --readiness --liveness

  # Set an exec action as a liveness probe to run 'echo ok'
  oc set probe dc/myapp --liveness -- echo ok

  # Set a readiness probe to try to open a TCP socket on 3306
  oc set probe rc/mysql --readiness --open-tcp=3306

  # Set an HTTP startup probe for port 8080 and path /healthz over HTTP on the pod IP
  oc probe dc/webapp --startup --get-url=http://:8080/healthz

  # Set an HTTP readiness probe for port 8080 and path /healthz over HTTP on the pod IP
  oc probe dc/webapp --readiness --get-url=http://:8080/healthz

  # Set an HTTP readiness probe over HTTPS on 127.0.0.1 for a hostNetwork pod
  oc set probe dc/router --readiness --get-url=https://127.0.0.1:1936/stats

  # Set only the initial-delay-seconds field on all deployments
  oc set probe dc --all --readiness --initial-delay-seconds=30
2.5.1.130. oc set resources
Pod 템플릿을 사용하여 오브젝트에서 리소스 요청/제한 업데이트
사용 예
  # Set a deployments nginx container CPU limits to "200m and memory to 512Mi"
  oc set resources deployment nginx -c=nginx --limits=cpu=200m,memory=512Mi

  # Set the resource request and limits for all containers in nginx
  oc set resources deployment nginx --limits=cpu=200m,memory=512Mi --requests=cpu=100m,memory=256Mi

  # Remove the resource requests for resources on containers in nginx
  oc set resources deployment nginx --limits=cpu=0,memory=0 --requests=cpu=0,memory=0

  # Print the result (in YAML format) of updating nginx container limits locally, without hitting the server
  oc set resources -f path/to/file.yaml --limits=cpu=200m,memory=512Mi --local -o yaml
2.5.1.131. oc set route-backends
경로의 백엔드 업데이트
사용 예
  # Print the backends on the route 'web'
  oc set route-backends web

  # Set two backend services on route 'web' with 2/3rds of traffic going to 'a'
  oc set route-backends web a=2 b=1

  # Increase the traffic percentage going to b by 10%% relative to a
  oc set route-backends web --adjust b=+10%%

  # Set traffic percentage going to b to 10%% of the traffic going to a
  oc set route-backends web --adjust b=10%%

  # Set weight of b to 10
  oc set route-backends web --adjust b=10

  # Set the weight to all backends to zero
  oc set route-backends web --zero
2.5.1.132. oc set selector
리소스에 선택기 설정
사용 예
  # Set the labels and selector before creating a deployment/service pair.
  oc create service clusterip my-svc --clusterip="None" -o yaml --dry-run | oc set selector --local -f - 'environment=qa' -o yaml | oc create -f -
  oc create deployment my-dep -o yaml --dry-run | oc label --local -f - environment=qa -o yaml | oc create -f -
2.5.1.133. oc set serviceaccount
리소스의 서비스 계정 업데이트
사용 예
  # Set deployment nginx-deployment's service account to serviceaccount1
  oc set serviceaccount deployment nginx-deployment serviceaccount1

  # Print the result (in YAML format) of updated nginx deployment with service account from a local file, without hitting the API server
  oc set sa -f nginx-deployment.yaml serviceaccount1 --local --dry-run -o yaml
2.5.1.134. oc set subject
RoleBinding/ClusterRoleBinding에서 사용자, 그룹 또는 서비스 계정 업데이트
사용 예
  # Update a cluster role binding for serviceaccount1
  oc set subject clusterrolebinding admin --serviceaccount=namespace:serviceaccount1

  # Update a role binding for user1, user2, and group1
  oc set subject rolebinding admin --user=user1 --user=user2 --group=group1

  # Print the result (in YAML format) of updating role binding subjects locally, without hitting the server
  oc create rolebinding admin --role=admin --user=admin -o yaml --dry-run | oc set subject --local -f - --user=foo -o yaml
2.5.1.135. oc set triggers
하나 이상의 오브젝트에서 트리거 업데이트
사용 예
  # Print the triggers on the deployment config 'myapp'
  oc set triggers dc/myapp

  # Set all triggers to manual
  oc set triggers dc/myapp --manual

  # Enable all automatic triggers
  oc set triggers dc/myapp --auto

  # Reset the GitHub webhook on a build to a new, generated secret
  oc set triggers bc/webapp --from-github
  oc set triggers bc/webapp --from-webhook

  # Remove all triggers
  oc set triggers bc/webapp --remove-all

  # Stop triggering on config change
  oc set triggers dc/myapp --from-config --remove

  # Add an image trigger to a build config
  oc set triggers bc/webapp --from-image=namespace1/image:latest

  # Add an image trigger to a stateful set on the main container
  oc set triggers statefulset/db --from-image=namespace1/image:latest -c main
2.5.1.136. oc set volumes
Pod 템플릿에서 볼륨 업데이트
사용 예
  # List volumes defined on all deployment configs in the current project
  oc set volume dc --all

  # Add a new empty dir volume to deployment config (dc) 'myapp' mounted under
  # /var/lib/myapp
  oc set volume dc/myapp --add --mount-path=/var/lib/myapp

  # Use an existing persistent volume claim (pvc) to overwrite an existing volume 'v1'
  oc set volume dc/myapp --add --name=v1 -t pvc --claim-name=pvc1 --overwrite

  # Remove volume 'v1' from deployment config 'myapp'
  oc set volume dc/myapp --remove --name=v1

  # Create a new persistent volume claim that overwrites an existing volume 'v1'
  oc set volume dc/myapp --add --name=v1 -t pvc --claim-size=1G --overwrite

  # Change the mount point for volume 'v1' to /data
  oc set volume dc/myapp --add --name=v1 -m /data --overwrite

  # Modify the deployment config by removing volume mount "v1" from container "c1"
  # (and by removing the volume "v1" if no other containers have volume mounts that reference it)
  oc set volume dc/myapp --remove --name=v1 --containers=c1

  # Add new volume based on a more complex volume source (AWS EBS, GCE PD,
  # Ceph, Gluster, NFS, ISCSI, ...)
  oc set volume dc/myapp --add -m /data --source=<json-string>
2.5.1.137. oc start-build
새 빌드를 시작
사용 예
  # Starts build from build config "hello-world"
  oc start-build hello-world

  # Starts build from a previous build "hello-world-1"
  oc start-build --from-build=hello-world-1

  # Use the contents of a directory as build input
  oc start-build hello-world --from-dir=src/

  # Send the contents of a Git repository to the server from tag 'v2'
  oc start-build hello-world --from-repo=../hello-world --commit=v2

  # Start a new build for build config "hello-world" and watch the logs until the build
  # completes or fails
  oc start-build hello-world --follow

  # Start a new build for build config "hello-world" and wait until the build completes. It
  # exits with a non-zero return code if the build fails
  oc start-build hello-world --wait
2.5.1.138. oc status
현재 프로젝트의 개요를 표시
사용 예
  # See an overview of the current project
  oc status

  # Export the overview of the current project in an svg file
  oc status -o dot | dot -T svg -o project.svg

  # See an overview of the current project including details for any identified issues
  oc status --suggest
2.5.1.139. oc tag
기존 이미지를 이미지 스트림에 태깅
사용 예
  # Tag the current image for the image stream 'openshift/ruby' and tag '2.0' into the image stream 'yourproject/ruby with tag 'tip'
  oc tag openshift/ruby:2.0 yourproject/ruby:tip

  # Tag a specific image
  oc tag openshift/ruby@sha256:6b646fa6bf5e5e4c7fa41056c27910e679c03ebe7f93e361e6515a9da7e258cc yourproject/ruby:tip

  # Tag an external container image
  oc tag --source=docker openshift/origin-control-plane:latest yourproject/ruby:tip

  # Tag an external container image and request pullthrough for it
  oc tag --source=docker openshift/origin-control-plane:latest yourproject/ruby:tip --reference-policy=local

  # Remove the specified spec tag from an image stream
  oc tag openshift/origin-control-plane:latest -d
2.5.1.140. oc version
클라이언트 및 서버 버전 정보를 인쇄
사용 예
  # Print the OpenShift client, kube-apiserver, and openshift-apiserver version information for the current context
  oc version

  # Print the OpenShift client, kube-apiserver, and openshift-apiserver version numbers for the current context
  oc version --short

  # Print the OpenShift client version information for the current context
  oc version --client
2.5.1.141. oc wait
실험적: 하나 이상의 리소스에서 특정 조건을 기다립니다.
사용 예
  # Wait for the pod "busybox1" to contain the status condition of type "Ready".
  oc wait --for=condition=Ready pod/busybox1

  # The default value of status condition is true, you can set false.
  oc wait --for=condition=Ready=false pod/busybox1

  # Wait for the pod "busybox1" to be deleted, with a timeout of 60s, after having issued the "delete" command.
  oc delete pod/busybox1
  oc wait --for=delete pod/busybox1 --timeout=60s
2.5.1.142. oc whoami
현재 세션에 대한 정보를 반환
사용 예
  # Display the currently authenticated user
  oc whoami
2.5.2. 추가 리소스
2.6. OpenShift CLI 관리자 명령 참조
이 참조는 OpenShift CLI (oc) 관리자 명령에 대한 설명 및 예제 명령을 제공합니다. 이러한 명령을 사용하려면 cluster-admin 또는 이와 동등한 권한이 있어야 합니다.
개발자 명령의 경우 OpenShift CLI 개발자 명령 참조를 참조하십시오.
oc adm -h 를 실행하여 모든 관리자 명령을 나열하거나 oc <command> --help 를 실행하여 특정 명령에 대한 추가 세부 정보를 가져옵니다.
2.6.1. OpenShift CLI (oc) 관리자 명령
2.6.1.1. oc adm build-chain
빌드의 입력 및 종속 항목을 출력
사용 예
  # Build the dependency tree for the 'latest' tag in <image-stream>
  oc adm build-chain <image-stream>

  # Build the dependency tree for the 'v2' tag in dot format and visualize it via the dot utility
  oc adm build-chain <image-stream>:v2 -o dot | dot -T svg -o deps.svg

  # Build the dependency tree across all namespaces for the specified image stream tag found in the 'test' namespace
  oc adm build-chain <image-stream> -n test --all
2.6.1.2. oc adm catalog mirror
operator-registry 카탈로그 미러링
사용 예
  # Mirror an operator-registry image and its contents to a registry
  oc adm catalog mirror quay.io/my/image:latest myregistry.com

  # Mirror an operator-registry image and its contents to a particular namespace in a registry
  oc adm catalog mirror quay.io/my/image:latest myregistry.com/my-namespace

  # Mirror to an airgapped registry by first mirroring to files
  oc adm catalog mirror quay.io/my/image:latest file:///local/index
  oc adm catalog mirror file:///local/index/my/image:latest my-airgapped-registry.com

  # Configure a cluster to use a mirrored registry
  oc apply -f manifests/imageContentSourcePolicy.yaml

  # Edit the mirroring mappings and mirror with "oc image mirror" manually
  oc adm catalog mirror --manifests-only quay.io/my/image:latest myregistry.com
  oc image mirror -f manifests/mapping.txt

  # Delete all ImageContentSourcePolicies generated by oc adm catalog mirror
  oc delete imagecontentsourcepolicy -l operators.openshift.org/catalog=true
2.6.1.3. oc adm completion
지정된 쉘에 대한 쉘 완료 코드를 출력 (bash 또는 zsh)
사용 예
  # Installing bash completion on macOS using homebrew
  ## If running Bash 3.2 included with macOS
  brew install bash-completion
  ## or, if running Bash 4.1+
  brew install bash-completion@2
  ## If oc is installed via homebrew, this should start working immediately.
  ## If you've installed via other means, you may need add the completion to your completion directory
  oc completion bash > $(brew --prefix)/etc/bash_completion.d/oc


  # Installing bash completion on Linux
  ## If bash-completion is not installed on Linux, please install the 'bash-completion' package
  ## via your distribution's package manager.
  ## Load the oc completion code for bash into the current shell
  source <(oc completion bash)
  ## Write bash completion code to a file and source it from .bash_profile
  oc completion bash > ~/.kube/completion.bash.inc
  printf "
  # Kubectl shell completion
  source '$HOME/.kube/completion.bash.inc'
  " >> $HOME/.bash_profile
  source $HOME/.bash_profile

  # Load the oc completion code for zsh[1] into the current shell
  source <(oc completion zsh)
  # Set the oc completion code for zsh[1] to autoload on startup
  oc completion zsh > "${fpath[1]}/_oc"
2.6.1.4. oc adm config current-context
current-context를 표시
사용 예
  # Display the current-context
  oc config current-context
2.6.1.5. oc adm config delete-cluster
kubeconfig에서 지정된 클러스터를 삭제
사용 예
  # Delete the minikube cluster
  oc config delete-cluster minikube
2.6.1.6. oc adm config delete-context
kubeconfig에서 지정된 컨텍스트를 삭제
사용 예
  # Delete the context for the minikube cluster
  oc config delete-context minikube
2.6.1.7. oc adm config delete-user
kubeconfig에서 지정된 사용자를 삭제
사용 예
  # Delete the minikube user
  oc config delete-user minikube
2.6.1.8. oc adm config get-clusters
kubeconfig에 정의된 클러스터를 표시
사용 예
  # List the clusters oc knows about
  oc config get-clusters
2.6.1.9. oc adm config get-contexts
하나 또는 여러 컨텍스트를 설명
사용 예
  # List all the contexts in your kubeconfig file
  oc config get-contexts

  # Describe one context in your kubeconfig file.
  oc config get-contexts my-context
2.6.1.10. oc adm config get-users
kubeconfig에 정의된 사용자를 표시
사용 예
  # List the users oc knows about
  oc config get-users
2.6.1.11. oc adm config rename-context
kubeconfig 파일에서 컨텍스트의 이름을 변경
사용 예
  # Rename the context 'old-name' to 'new-name' in your kubeconfig file
  oc config rename-context old-name new-name
2.6.1.12. oc adm config set
kubeconfig 파일에서 개별 값을 설정
사용 예
  # Set server field on the my-cluster cluster to https://1.2.3.4
  oc config set clusters.my-cluster.server https://1.2.3.4

  # Set certificate-authority-data field on the my-cluster cluster.
  oc config set clusters.my-cluster.certificate-authority-data $(echo "cert_data_here" | base64 -i -)

  # Set cluster field in the my-context context to my-cluster.
  oc config set contexts.my-context.cluster my-cluster

  # Set client-key-data field in the cluster-admin user using --set-raw-bytes option.
  oc config set users.cluster-admin.client-key-data cert_data_here --set-raw-bytes=true
2.6.1.13. oc adm config set-cluster
kubeconfig에서 클러스터 항목을 설정
사용 예
  # Set only the server field on the e2e cluster entry without touching other values.
  oc config set-cluster e2e --server=https://1.2.3.4

  # Embed certificate authority data for the e2e cluster entry
  oc config set-cluster e2e --embed-certs --certificate-authority=~/.kube/e2e/kubernetes.ca.crt

  # Disable cert checking for the dev cluster entry
  oc config set-cluster e2e --insecure-skip-tls-verify=true

  # Set custom TLS server name to use for validation for the e2e cluster entry
  oc config set-cluster e2e --tls-server-name=my-cluster-name
2.6.1.14. oc adm config set-context
kubeconfig에서 컨텍스트 항목을 설정
사용 예
  # Set the user field on the gce context entry without touching other values
  oc config set-context gce --user=cluster-admin
2.6.1.15. oc adm config set-credentials
kubeconfig에서 사용자 항목을 설정
사용 예
  # Set only the "client-key" field on the "cluster-admin"
  # entry, without touching other values:
  oc config set-credentials cluster-admin --client-key=~/.kube/admin.key

  # Set basic auth for the "cluster-admin" entry
  oc config set-credentials cluster-admin --username=admin --password=uXFGweU9l35qcif

  # Embed client certificate data in the "cluster-admin" entry
  oc config set-credentials cluster-admin --client-certificate=~/.kube/admin.crt --embed-certs=true

  # Enable the Google Compute Platform auth provider for the "cluster-admin" entry
  oc config set-credentials cluster-admin --auth-provider=gcp

  # Enable the OpenID Connect auth provider for the "cluster-admin" entry with additional args
  oc config set-credentials cluster-admin --auth-provider=oidc --auth-provider-arg=client-id=foo --auth-provider-arg=client-secret=bar

  # Remove the "client-secret" config value for the OpenID Connect auth provider for the "cluster-admin" entry
  oc config set-credentials cluster-admin --auth-provider=oidc --auth-provider-arg=client-secret-

  # Enable new exec auth plugin for the "cluster-admin" entry
  oc config set-credentials cluster-admin --exec-command=/path/to/the/executable --exec-api-version=client.authentication.k8s.io/v1beta1

  # Define new exec auth plugin args for the "cluster-admin" entry
  oc config set-credentials cluster-admin --exec-arg=arg1 --exec-arg=arg2

  # Create or update exec auth plugin environment variables for the "cluster-admin" entry
  oc config set-credentials cluster-admin --exec-env=key1=val1 --exec-env=key2=val2

  # Remove exec auth plugin environment variables for the "cluster-admin" entry
  oc config set-credentials cluster-admin --exec-env=var-to-remove-
2.6.1.16. oc adm config unset
kubeconfig 파일에서 개별 값 설정을 해제
사용 예
  # Unset the current-context.
  oc config unset current-context

  # Unset namespace in foo context.
  oc config unset contexts.foo.namespace
2.6.1.17. oc adm config use-context
kubeconfig 파일에서 current-context를 설정
사용 예
  # Use the context for the minikube cluster
  oc config use-context minikube
2.6.1.18. oc adm config view
병합된 kubeconfig 설정 또는 지정된 kubeconfig 파일을 표시
사용 예
  # Show merged kubeconfig settings.
  oc config view

  # Show merged kubeconfig settings and raw certificate data.
  oc config view --raw

  # Get the password for the e2e user
  oc config view -o jsonpath='{.users[?(@.name == "e2e")].user.password}'
2.6.1.19. oc adm cordon
노드를 예약 불가로 표시
사용 예
  # Mark node "foo" as unschedulable.
  oc adm cordon foo
2.6.1.20. oc adm create-bootstrap-project-template
부트스트랩 프로젝트 템플릿을 생성
사용 예
  # Output a bootstrap project template in YAML format to stdout
  oc adm create-bootstrap-project-template -o yaml
2.6.1.21. oc adm create-error-template
오류 페이지 템플릿 생성
사용 예
  # Output a template for the error page to stdout
  oc adm create-error-template
2.6.1.22. oc adm create-login-template
로그인 템플릿 생성
사용 예
  # Output a template for the login page to stdout
  oc adm create-login-template
2.6.1.23. oc adm create-provider-selection-template
공급자 선택 템플릿 생성
사용 예
  # Output a template for the provider selection page to stdout
  oc adm create-provider-selection-template
2.6.1.24. oc adm drain
유지 관리를 위해 노드를 드레이닝
사용 예
  # Drain node "foo", even if there are pods not managed by a ReplicationController, ReplicaSet, Job, DaemonSet or StatefulSet on it.
  $ oc adm drain foo --force

  # As above, but abort if there are pods not managed by a ReplicationController, ReplicaSet, Job, DaemonSet or StatefulSet, and use a grace period of 15 minutes.
  $ oc adm drain foo --grace-period=900
2.6.1.25. oc adm groups add-users
그룹에 사용자 추가
사용 예
  # Add user1 and user2 to my-group
  oc adm groups add-users my-group user1 user2
2.6.1.26. oc adm groups new
새 그룹 생성
사용 예
  # Add a group with no users
  oc adm groups new my-group

  # Add a group with two users
  oc adm groups new my-group user1 user2

  # Add a group with one user and shorter output
  oc adm groups new my-group user1 -o name
2.6.1.27. oc adm groups prune
외부 공급자에서 누락된 레코드를 참조하는 이전 OpenShift 그룹 제거
사용 예
  # Prune all orphaned groups
  oc adm groups prune --sync-config=/path/to/ldap-sync-config.yaml --confirm

  # Prune all orphaned groups except the ones from the blacklist file
  oc adm groups prune --blacklist=/path/to/blacklist.txt --sync-config=/path/to/ldap-sync-config.yaml --confirm

  # Prune all orphaned groups from a list of specific groups specified in a whitelist file
  oc adm groups prune --whitelist=/path/to/whitelist.txt --sync-config=/path/to/ldap-sync-config.yaml --confirm

  # Prune all orphaned groups from a list of specific groups specified in a whitelist
  oc adm groups prune groups/group_name groups/other_name --sync-config=/path/to/ldap-sync-config.yaml --confirm
2.6.1.28. oc adm groups remove-users
그룹에서 사용자 제거
사용 예
  # Remove user1 and user2 from my-group
  oc adm groups remove-users my-group user1 user2
2.6.1.29. oc adm groups sync
외부 공급자에서 레코드와 OpenShift 그룹 동기화
사용 예
  # Sync all groups with an LDAP server
  oc adm groups sync --sync-config=/path/to/ldap-sync-config.yaml --confirm

  # Sync all groups except the ones from the blacklist file with an LDAP server
  oc adm groups sync --blacklist=/path/to/blacklist.txt --sync-config=/path/to/ldap-sync-config.yaml --confirm

  # Sync specific groups specified in a whitelist file with an LDAP server
  oc adm groups sync --whitelist=/path/to/whitelist.txt --sync-config=/path/to/sync-config.yaml --confirm

  # Sync all OpenShift groups that have been synced previously with an LDAP server
  oc adm groups sync --type=openshift --sync-config=/path/to/ldap-sync-config.yaml --confirm

  # Sync specific OpenShift groups if they have been synced previously with an LDAP server
  oc adm groups sync groups/group1 groups/group2 groups/group3 --sync-config=/path/to/sync-config.yaml --confirm
2.6.1.30. oc adm inspect
지정된 리소스에 대한 디버깅 데이터 수집
사용 예
  # Collect debugging data for the "openshift-apiserver" clusteroperator
  oc adm inspect clusteroperator/openshift-apiserver

  # Collect debugging data for the "openshift-apiserver" and "kube-apiserver" clusteroperators
  oc adm inspect clusteroperator/openshift-apiserver clusteroperator/kube-apiserver

  # Collect debugging data for all clusteroperators
  oc adm inspect clusteroperator

  # Collect debugging data for all clusteroperators and clusterversions
  oc adm inspect clusteroperators,clusterversions
2.6.1.31. oc adm migrate template-instances
최신 group-version-kinds를 가리키도록 템플릿 인스턴스를 업데이트
사용 예
  # Perform a dry-run of updating all objects
  oc adm migrate template-instances

  # To actually perform the update, the confirm flag must be appended
  oc adm migrate template-instances --confirm
2.6.1.32. oc adm must-gather
디버그 정보 수집을 위해 Pod의 새 인스턴스를 시작
사용 예
  # Gather information using the default plug-in image and command, writing into ./must-gather.local.<rand>
  oc adm must-gather

  # Gather information with a specific local folder to copy to
  oc adm must-gather --dest-dir=/local/directory

  # Gather audit information
  oc adm must-gather -- /usr/bin/gather_audit_logs

  # Gather information using multiple plug-in images
  oc adm must-gather --image=quay.io/kubevirt/must-gather --image=quay.io/openshift/origin-must-gather

  # Gather information using a specific image stream plug-in
  oc adm must-gather --image-stream=openshift/must-gather:latest

  # Gather information using a specific image, command, and pod-dir
  oc adm must-gather --image=my/image:tag --source-dir=/pod/directory -- myspecial-command.sh
2.6.1.33. oc adm new-project
새 프로젝트 만들기
사용 예
  # Create a new project using a node selector
  oc adm new-project myproject --node-selector='type=user-node,region=east'
2.6.1.34. oc adm node-logs
노드 로그를 표시하고 필터링
사용 예
  # Show kubelet logs from all masters
  oc adm node-logs --role master -u kubelet

  # See what logs are available in masters in /var/logs
  oc adm node-logs --role master --path=/

  # Display cron log file from all masters
  oc adm node-logs --role master --path=cron
2.6.1.35. oc adm pod-network isolate-projects
프로젝트 네트워크 격리
사용 예
  # Provide isolation for project p1
  oc adm pod-network isolate-projects <p1>

  # Allow all projects with label name=top-secret to have their own isolated project network
  oc adm pod-network isolate-projects --selector='name=top-secret'
2.6.1.36. oc adm pod-network join-projects
프로젝트 네트워크 참여
사용 예
  # Allow project p2 to use project p1 network
  oc adm pod-network join-projects --to=<p1> <p2>

  # Allow all projects with label name=top-secret to use project p1 network
  oc adm pod-network join-projects --to=<p1> --selector='name=top-secret'
2.6.1.37. oc adm pod-network make-projects-global
프로젝트 네트워크 글로벌 만들기
사용 예
  # Allow project p1 to access all pods in the cluster and vice versa
  oc adm pod-network make-projects-global <p1>

  # Allow all projects with label name=share to access all pods in the cluster and vice versa
  oc adm pod-network make-projects-global --selector='name=share'
2.6.1.38. oc adm policy add-role-to-user
현재 프로젝트의 사용자 또는 서비스 계정에 역할을 추가
사용 예
  # Add the 'view' role to user1 for the current project
  oc policy add-role-to-user view user1

  # Add the 'edit' role to serviceaccount1 for the current project
  oc policy add-role-to-user edit -z serviceaccount1
2.6.1.39. oc adm policy add-scc-to-group
그룹에 보안 컨텍스트 제한 조건 추가
사용 예
  # Add the 'restricted' security context constraint to group1 and group2
  oc adm policy add-scc-to-group restricted group1 group2
2.6.1.40. oc adm policy add-scc-to-user
사용자 또는 서비스 계정에 보안 컨텍스트 제약 조건 추가
사용 예
  # Add the 'restricted' security context constraint to user1 and user2
  oc adm policy add-scc-to-user restricted user1 user2

  # Add the 'privileged' security context constraint to serviceaccount1 in the current namespace
  oc adm policy add-scc-to-user privileged -z serviceaccount1
2.6.1.41. oc adm policy scc-review
Pod를 생성할 수 있는 서비스 계정을 확인
사용 예
  # Check whether service accounts sa1 and sa2 can admit a pod with a template pod spec specified in my_resource.yaml
  # Service Account specified in myresource.yaml file is ignored
  oc policy scc-review -z sa1,sa2 -f my_resource.yaml

  # Check whether service accounts system:serviceaccount:bob:default can admit a pod with a template pod spec specified in my_resource.yaml
  oc policy scc-review -z system:serviceaccount:bob:default -f my_resource.yaml

  # Check whether the service account specified in my_resource_with_sa.yaml can admit the pod
  oc policy scc-review -f my_resource_with_sa.yaml

  # Check whether the default service account can admit the pod; default is taken since no service account is defined in myresource_with_no_sa.yaml
  oc policy scc-review -f myresource_with_no_sa.yaml
2.6.1.42. oc adm policy scc-subject-review
사용자 또는 서비스 계정의 Pod 생성 가능 여부 확인
사용 예
# Check whether user bob can create a pod specified in myresource.yaml oc policy scc-subject-review -u bob -f myresource.yaml # Check whether user bob who belongs to projectAdmin group can create a pod specified in myresource.yaml oc policy scc-subject-review -u bob -g projectAdmin -f myresource.yaml # Check whether a service account specified in the pod template spec in myresourcewithsa.yaml can create the pod oc policy scc-subject-review -f myresourcewithsa.yaml
2.6.1.43. oc adm prune 빌드
이전 빌드 및 실패한 빌드 삭제
사용 예
# Dry run deleting older completed and failed builds and also including # all builds whose associated build config no longer exists oc adm prune builds --orphans # To actually perform the prune operation, the confirm flag must be appended oc adm prune builds --orphans --confirm
2.6.1.44. oc adm prune deployment
이전 완료 및 실패한 배포 구성 제거
사용 예
# Dry run deleting all but the last complete deployment for every deployment config oc adm prune deployments --keep-complete=1 # To actually perform the prune operation, the confirm flag must be appended oc adm prune deployments --keep-complete=1 --confirm
2.6.1.45. oc adm prune groups
외부 공급자에서 누락된 레코드를 참조하는 이전 OpenShift 그룹 제거
사용 예
# Prune all orphaned groups oc adm prune groups --sync-config=/path/to/ldap-sync-config.yaml --confirm # Prune all orphaned groups except the ones from the blacklist file oc adm prune groups --blacklist=/path/to/blacklist.txt --sync-config=/path/to/ldap-sync-config.yaml --confirm # Prune all orphaned groups from a list of specific groups specified in a whitelist file oc adm prune groups --whitelist=/path/to/whitelist.txt --sync-config=/path/to/ldap-sync-config.yaml --confirm # Prune all orphaned groups from a list of specific groups specified in a whitelist oc adm prune groups groups/group_name groups/other_name --sync-config=/path/to/ldap-sync-config.yaml --confirm
2.6.1.46. oc adm prune images
권장되지 않은 이미지 제거
사용 예
# See what the prune command would delete if only images and their referrers were more than an hour old
# and obsoleted by 3 newer revisions under the same tag were considered
oc adm prune images --keep-tag-revisions=3 --keep-younger-than=60m
# To actually perform the prune operation, the confirm flag must be appended
oc adm prune images --keep-tag-revisions=3 --keep-younger-than=60m --confirm
# See what the prune command would delete if we are interested in removing images
# exceeding currently set limit ranges ('openshift.io/Image')
oc adm prune images --prune-over-size-limit
# To actually perform the prune operation, the confirm flag must be appended
oc adm prune images --prune-over-size-limit --confirm
# Force the insecure http protocol with the particular registry host name
oc adm prune images --registry-url=http://registry.example.org --confirm
# Force a secure connection with a custom certificate authority to the particular registry host name
oc adm prune images --registry-url=registry.example.org --certificate-authority=/path/to/custom/ca.crt --confirm
2.6.1.47. oc adm release extract
업데이트 페이로드 내용을 디스크에 추출
사용 예
# Use git to check out the source code for the current cluster release to DIR oc adm release extract --git=DIR # Extract cloud credential requests for AWS oc adm release extract --credentials-requests --cloud=aws
2.6.1.48. oc adm release info
릴리스에 대한 정보 표시
사용 예
# Show information about the cluster's current release oc adm release info # Show the source code that comprises a release oc adm release info 4.2.2 --commit-urls # Show the source code difference between two releases oc adm release info 4.2.0 4.2.2 --commits # Show where the images referenced by the release are located oc adm release info quay.io/openshift-release-dev/ocp-release:4.2.2 --pullspecs
2.6.1.49. oc adm release mirror
다른 이미지 레지스트리 위치에 릴리스 미러링
사용 예
# Perform a dry run showing what would be mirrored, including the mirror objects oc adm release mirror 4.3.0 --to myregistry.local/openshift/release \ --release-image-signature-to-dir /tmp/releases --dry-run # Mirror a release into the current directory oc adm release mirror 4.3.0 --to file://openshift/release \ --release-image-signature-to-dir /tmp/releases # Mirror a release to another directory in the default location oc adm release mirror 4.3.0 --to-dir /tmp/releases # Upload a release from the current directory to another server oc adm release mirror --from file://openshift/release --to myregistry.com/openshift/release \ --release-image-signature-to-dir /tmp/releases # Mirror the 4.3.0 release to repository registry.example.com and apply signatures to connected cluster oc adm release mirror --from=quay.io/openshift-release-dev/ocp-release:4.3.0-x86_64 \ --to=registry.example.com/your/repository --apply-release-image-signature
2.6.1.50. oc adm release new
새 OpenShift 릴리스 생성
사용 예
# Create a release from the latest origin images and push to a DockerHub repo oc adm release new --from-image-stream=4.1 -n origin --to-image docker.io/mycompany/myrepo:latest # Create a new release with updated metadata from a previous release oc adm release new --from-release registry.svc.ci.openshift.org/origin/release:v4.1 --name 4.1.1 \ --previous 4.1.0 --metadata ... --to-image docker.io/mycompany/myrepo:latest # Create a new release and override a single image oc adm release new --from-release registry.svc.ci.openshift.org/origin/release:v4.1 \ cli=docker.io/mycompany/cli:latest --to-image docker.io/mycompany/myrepo:latest # Run a verification pass to ensure the release can be reproduced oc adm release new --from-release registry.svc.ci.openshift.org/origin/release:v4.1
2.6.1.51. oc adm taint
하나 이상의 노드에서 테인트를 업데이트
사용 예
# Update node 'foo' with a taint with key 'dedicated' and value 'special-user' and effect 'NoSchedule'. # If a taint with that key and effect already exists, its value is replaced as specified. oc adm taint nodes foo dedicated=special-user:NoSchedule # Remove from node 'foo' the taint with key 'dedicated' and effect 'NoSchedule' if one exists. oc adm taint nodes foo dedicated:NoSchedule- # Remove from node 'foo' all the taints with key 'dedicated' oc adm taint nodes foo dedicated- # Add a taint with key 'dedicated' on nodes having label mylabel=X oc adm taint node -l myLabel=X dedicated=foo:PreferNoSchedule # Add to node 'foo' a taint with key 'bar' and no value oc adm taint nodes foo bar:NoSchedule
2.6.1.52. oc adm top images
이미지에 대한 사용량 통계 표시
사용 예
# Show usage statistics for images oc adm top images
2.6.1.53. oc adm top imagestreams
이미지 스트림에 대한 사용량 통계 표시
사용 예
# Show usage statistics for image streams oc adm top imagestreams
2.6.1.54. oc adm top node
노드의 리소스 (CPU/Memory) 사용 표시
사용 예
# Show metrics for all nodes oc adm top node # Show metrics for a given node oc adm top node NODE_NAME
2.6.1.55. oc adm top pod
Pod의 리소스 (CPU/Memory) 사용 표시
사용 예
# Show metrics for all pods in the default namespace oc adm top pod # Show metrics for all pods in the given namespace oc adm top pod --namespace=NAMESPACE # Show metrics for a given pod and its containers oc adm top pod POD_NAME --containers # Show metrics for the pods defined by label name=myLabel oc adm top pod -l name=myLabel
2.6.1.56. oc adm uncordon
노드를 예약 가능으로 표시
사용 예
# Mark node "foo" as schedulable. $ oc adm uncordon foo
2.6.1.57. oc adm verify-image-signature
이미지 서명에 포함된 이미지 ID 확인
사용 예
# Verify the image signature and identity using the local GPG keychain oc adm verify-image-signature sha256:c841e9b64e4579bd56c794bdd7c36e1c257110fd2404bebbb8b613e4935228c4 \ --expected-identity=registry.local:5000/foo/bar:v1 # Verify the image signature and identity using the local GPG keychain and save the status oc adm verify-image-signature sha256:c841e9b64e4579bd56c794bdd7c36e1c257110fd2404bebbb8b613e4935228c4 \ --expected-identity=registry.local:5000/foo/bar:v1 --save # Verify the image signature and identity via exposed registry route oc adm verify-image-signature sha256:c841e9b64e4579bd56c794bdd7c36e1c257110fd2404bebbb8b613e4935228c4 \ --expected-identity=registry.local:5000/foo/bar:v1 \ --registry-url=docker-registry.foo.com # Remove all signature verifications from the image oc adm verify-image-signature sha256:c841e9b64e4579bd56c794bdd7c36e1c257110fd2404bebbb8b613e4935228c4 --remove-all
2.6.2. 추가 리소스
2.7. oc 및 kubectl 명령 사용
Kubernetes CLI(명령줄 인터페이스), kubectl은 Kubernetes 클러스터에 대해 명령을 실행하는 데 사용할 수 있습니다. OpenShift Container Platform은 인증된 Kubernetes 배포판이므로 OpenShift Container Platform과 함께 제공된 지원되는 kubectl 바이너리를 사용할 수도 있고 oc 바이너리를 사용하여 확장 기능을 받을 수도 있습니다.
2.7.1. oc 바이너리
oc 바이너리는 kubectl 바이너리와 동일한 기능을 제공하지만 다음을 비롯하여 추가 OpenShift Container Platform 기능을 지원하도록 기본적으로 확장됩니다.
OpenShift Container Platform 리소스 전체 지원
DeploymentConfig,BuildConfig,Route,ImageStream및ImageStreamTag오브젝트와 같은 리소스는 OpenShift Container Platform 배포판에 고유하며 표준 Kubernetes 프리미티브에 빌드됩니다.인증
oc바이너리에서 제공하는 기본login명령은 인증을 허용하며 Kubernetes 네임스페이스를 인증된 사용자에 매핑하는 OpenShift Container Platform 프로젝트 작업을 지원합니다. 자세한 내용은 인증 이해를 참조하십시오.추가 명령
예를 들어 추가 명령
oc new-app을 사용하면 기존 소스 코드 또는 미리 빌드된 이미지를 사용하여 새 애플리케이션을 보다 쉽게 시작할 수 있습니다. 마찬가지로, 추가 명령oc new-project를 사용하면 기본값으로 전환할 수 있는 프로젝트를 보다 쉽게 시작할 수 있습니다.
이전 버전의 oc 바이너리를 설치한 경우 OpenShift Container Platform 4.8의 모든 명령을 완료하는 데 사용할 수 없습니다. 최신 기능을 사용하려면 OpenShift Container Platform 서버 버전에 해당하는 최신 버전의 oc 바이너리를 다운로드하여 설치해야 합니다.
비보안 API 변경에는 이전 oc 바이너리를 업데이트할 수 있도록 최소한 두 개의 마이너 릴리스(예: 4.1-4.2 - 4.3)가 포함됩니다. 새 기능을 사용하려면 최신 oc 바이너리가 필요할 수 있습니다. 4.3 서버에는 4.2 oc 바이너리에서 사용할 수 없는 추가 기능이 있을 수 있으며 4.3 oc 바이너리에 4.2 서버에서 지원하지 않는 추가 기능이 있을 수 있습니다.
표 2.2. 호환성 목록
|
XY( |
X.Y+N footnote:versionpolicyn[Where N is a number greater than or equal to 1.] ( | |
| X.Y(서버) |
|
|
| X.Y+N footnote:versionpolicyn[](Server) |
|
|
 완전하게 호환됩니다.

oc 클라이언트에서 서버 기능에 액세스하지 못할 수 있습니다.

oc 클라이언트에서 액세스한 서버와 호환되지 않는 옵션 및 기능을 제공할 수 있습니다.
2.7.2. kubectl 바이너리
kubectl 바이너리는 표준 Kubernetes 환경의 새로운 OpenShift Container Platform 사용자 또는 kubectl CLI 사용을 선호하는 사용자를 위해 기존 워크플로우 및 스크립트를 지원하는 수단으로 제공됩니다. kubectl의 기존 사용자는 OpenShift Container Platform 클러스터를 변경할 필요 없이 이 바이너리를 사용하여 Kubernetes 프리미티브와 계속 상호 작용할 수 있습니다.
지원되는 kubectl 바이너리는 OpenShift CLI 설치 단계에 따라 설치할 수 있습니다. kubectl 바이너리는 바이너리를 다운로드한 경우 아카이브에 포함되어 있습니다. RPM을 사용하여 CLI를 설치할 때 이 바이너리가 설치됩니다.
자세한 내용은 kubectl 문서를 참조하십시오.
3장. 개발자 CLI(odo)
3.1. odo 릴리스 노트
3.1.1. odo 버전 2.5.0의 주요 변경 사항 및 개선 사항
-
adler32해시를 사용하여 각 구성 요소에 대해 고유한 경로를 만듭니다. 리소스 할당을 위해 devfile의 추가 필드를 지원합니다.
- cpuRequest
- cpuLimit
- memoryRequest
- memoryLimit
odo명령에 추가합니다.deploy 명령을 사용하여 배포된 구성 요소를 제거하려면delete--deploy플래그를 odo$ odo delete --deploy
-
odo link명령에 매핑 지원 추가 -
볼륨 구성 요소의
임시필드를 사용하여 임시볼륨지원 -
Telemetry 옵트인을 요청할 때 기본 답변을
yes로 설정합니다. - devfile 레지스트리로 추가 Telemetry 데이터를 전송하여 지표 개선
-
부트스트랩 이미지를
registry.access.redhat.com/ocp-tools-4/odo-init-container-rhel8:1.1.11로 업데이트합니다. - 업스트림 리포지토리는 https://github.com/redhat-developer/odo에서 사용할 수 있습니다.
3.1.2. 버그 수정
-
이전에는
.odo/env파일이 없으면odo deploy가 실패했습니다. 필요한 경우 이 명령은.odo/env파일을 생성합니다. -
이전에는 클러스터에서 연결을 끊으면
odo create명령을 사용한 대화형 구성 요소 생성에 실패했습니다. 이 문제는 최신 릴리스에서 해결되었습니다.
3.1.3. 지원 요청
제품의 경우
오류를 발견하거나, 버그가 발생하거나, odo의 기능 개선을 위한 제안 사항이 있는 경우 Bugzilla에 문제를 제출합니다. 제품 유형으로 OpenShift Developer Tools 및 Service를 구성 요소로 odo를 선택합니다.
문제 설명에 가능한 한 많은 세부 정보를 제공합니다.
문서의 경우
오류를 발견하거나 문서 개선을 위한 제안 사항이 있는 경우 가장 관련 있는 문서 구성 요소에 대한 Jira 문제를 제출하십시오.
3.2. odo 이해
Red Hat OpenShift Developer CLI(odo)는 OpenShift Container Platform 및 Kubernetes에서 애플리케이션을 생성하는 툴입니다. odo 를 사용하면 플랫폼을 깊이 이해하지 못해도 Kubernetes 클러스터에서 마이크로서비스 기반 애플리케이션을 개발, 테스트, 디버그, 배포할 수 있습니다.
odo 는 생성 및 푸시 워크플로를 따릅니다. 사용자가 를 생성할 때 정보(또는 매니페스트)가 구성 파일에 저장됩니다. 를 푸시 하면 Kubernetes 클러스터에 해당 리소스가 생성됩니다. 이 모든 구성은 원활한 접근성 및 기능을 위해 Kubernetes API에 저장됩니다.
odo 는 service 및 link 명령을 사용하여 구성 요소 및 서비스를 연결합니다. odo 는 클러스터의 Kubernetes Operator를 기반으로 서비스를 생성하고 배포하여 이를 수행합니다. Operator Hub에서 사용 가능한 Operator를 사용하여 서비스를 생성할 수 있습니다. 서비스를 연결한 후 odo 는 서비스 구성을 구성 요소에 삽입합니다. 그러면 애플리케이션에서 이 구성을 사용하여 Operator 지원 서비스와 통신할 수 있습니다.
3.2.1. odo 주요 기능
odo 는 다음과 같은 기능을 통해 개발자에게 친숙한 Kubernetes 인터페이스로 설계되었습니다.
- 새 매니페스트를 생성하거나 기존 매니페스트를 사용하여 Kubernetes 클러스터에 애플리케이션을 빠르게 배포합니다.
- Kubernetes 구성 파일을 이해하고 유지 관리할 필요 없이 명령을 사용하여 매니페스트를 쉽게 생성하고 업데이트합니다.
- Kubernetes 클러스터에서 실행되는 애플리케이션에 대한 보안 액세스 제공
- Kubernetes 클러스터에서 애플리케이션의 추가 스토리지 추가 및 제거
- Operator 지원 서비스를 생성하고 애플리케이션을 연결합니다.
-
odo구성 요소로 배포된 여러 마이크로 서비스 간 링크 생성 -
IDE에서
odo를 사용하여 배포한 원격 애플리케이션 디버깅 -
odo를 사용하여 Kubernetes에 배포된 애플리케이션을 쉽게 테스트
3.2.2. odo 핵심 개념
odo 는 Kubernetes 개념을 개발자에게 친숙한 용어로 요약합니다.
- 애플리케이션
특정 작업을 수행하는 데 사용되는 클라우드 네이티브 접근 방식으로 개발된 일반적인 애플리케이션입니다.
애플리케이션의 예로는 온라인 비디오 스트리밍, 온라인 구매 및 호텔 예약 시스템이 있습니다.
- 구성 요소
별도로 실행하고 배포할 수 있는 Kubernetes 리소스 집합입니다. 클라우드 네이티브 애플리케이션은 작고 독립적이며 느슨하게 연결된 구성 요소의 컬렉션입니다.
구성 요소의 예로는 API 백엔드, 웹 인터페이스, 결제 백엔드가 포함됩니다.
- 프로젝트
- 소스 코드, 테스트 및 라이브러리가 포함된 단일 단위입니다.
- 컨텍스트
-
단일 구성 요소에 대한 소스 코드, 테스트, 라이브러리 및
odo구성 파일이 포함된 디렉터리입니다. - URL
- 클러스터 외부에서 액세스할 수 있는 구성 요소를 노출하는 메커니즘입니다.
- 스토리지
- 클러스터의 영구 스토리지. 다시 시작해도 데이터를 유지하고 구성 요소를 다시 빌드합니다.
- Service
구성 요소에 추가 기능을 제공하는 외부 애플리케이션입니다.
서비스의 예로는 PostgreSQL, MySQL, Redis 및 RabbitMQ가 있습니다.
odo에서는 서비스가 OpenShift 서비스 카탈로그에서 프로비저닝되며, 클러스터 내에서 활성화되어야 합니다.- devfile
개발자 툴에서 워크플로를 단순화하고 가속화할 수 있도록 컨테이너화된 개발 환경을 정의하기 위한 오픈 표준입니다. 자세한 내용은 https://devfile.io 의 문서를 참조하십시오.
공개적으로 사용 가능한 devfile 레지스트리에 연결하거나 보안 레지스트리를 설치할 수 있습니다.
3.2.3. odo의 구성 요소 나열
odo 는 이식 가능한 devfile 형식을 사용하여 구성 요소 및 관련 URL, 스토리지 및 서비스를 설명합니다. odo 는 다양한 devfile 레지스트리에 연결하여 다양한 언어 및 프레임워크의 devfile을 다운로드할 수 있습니다. odo 에서 devfile 정보를 검색하는 데 사용하는 레지스트리를 관리하는 방법에 대한 자세한 내용은 odo registry 명령 설명서를 참조하십시오.
odo catalog list components 명령을 사용하여 다양한 레지스트리에서 사용할 수 있는 devfile 을 모두 나열할 수 있습니다.
절차
odo를 사용하여 클러스터에 로그인합니다.$ odo login -u developer -p developer
사용 가능한
odo구성 요소를 나열합니다.$ odo catalog list components
출력 예
Odo Devfile Components: NAME DESCRIPTION REGISTRY dotnet50 Stack with .NET 5.0 DefaultDevfileRegistry dotnet60 Stack with .NET 6.0 DefaultDevfileRegistry dotnetcore31 Stack with .NET Core 3.1 DefaultDevfileRegistry go Stack with the latest Go version DefaultDevfileRegistry java-maven Upstream Maven and OpenJDK 11 DefaultDevfileRegistry java-openliberty Java application Maven-built stack using the Open Liberty ru... DefaultDevfileRegistry java-openliberty-gradle Java application Gradle-built stack using the Open Liberty r... DefaultDevfileRegistry java-quarkus Quarkus with Java DefaultDevfileRegistry java-springboot Spring Boot® using Java DefaultDevfileRegistry java-vertx Upstream Vert.x using Java DefaultDevfileRegistry java-websphereliberty Java application Maven-built stack using the WebSphere Liber... DefaultDevfileRegistry java-websphereliberty-gradle Java application Gradle-built stack using the WebSphere Libe... DefaultDevfileRegistry java-wildfly Upstream WildFly DefaultDevfileRegistry java-wildfly-bootable-jar Java stack with WildFly in bootable Jar mode, OpenJDK 11 and... DefaultDevfileRegistry nodejs Stack with Node.js 14 DefaultDevfileRegistry nodejs-angular Stack with Angular 12 DefaultDevfileRegistry nodejs-nextjs Stack with Next.js 11 DefaultDevfileRegistry nodejs-nuxtjs Stack with Nuxt.js 2 DefaultDevfileRegistry nodejs-react Stack with React 17 DefaultDevfileRegistry nodejs-svelte Stack with Svelte 3 DefaultDevfileRegistry nodejs-vue Stack with Vue 3 DefaultDevfileRegistry php-laravel Stack with Laravel 8 DefaultDevfileRegistry python Python Stack with Python 3.7 DefaultDevfileRegistry python-django Python3.7 with Django DefaultDevfileRegistry
3.2.4. odo에서 Telemetry
는 운영 체제, RAM, CPU, 코어 수, odo odo 버전, 오류, 성공/실패, 완료하는 데 걸리는 기간을 포함하여 사용 중인 방법에 대한 정보를 수집합니다.
odo preference 명령을 사용하여 Telemetry 동의를 수정할 수 있습니다.
-
odo preference set ConsentTelemetry true로 Telemetry에 동의합니다. -
odo preference unset ConsentTelemetry는 Telemetry를 비활성화합니다. -
odo preference 뷰에는 현재 기본 설정이 표시됩니다.
3.3. odo 설치
바이너리를 다운로드하여 Linux, Windows 또는 macOS에 odo CLI를 설치할 수 있습니다. odo 및 oc 바이너리를 사용하여 OpenShift Container Platform 클러스터와 상호 작용하는 OpenShift VS Code 확장 기능을 설치할 수도 있습니다. RHEL(Red Hat Enterprise Linux)의 경우 odo CLI를 RPM으로 설치할 수 있습니다.
현재 제한된 네트워크 환경에서는 odo가 설치를 지원하지 않습니다.
3.3.1. Linux에 odo 설치
odo CLI는 다음을 포함하여 여러 운영 체제 및 아키텍처의 tarball로 다운로드할 수 있습니다.
| 운영 체제 | 바이너리 | tarball |
|---|---|---|
| Linux | ||
| Linux on IBM Power | ||
| Linux on IBM Z 및 LinuxONE |
절차
콘텐츠 게이트웨이로 이동하여 운영 체제 및 아키텍처에 적절한 파일을 다운로드합니다.
바이너리를 다운로드하는 경우
odo로 이름을 바꿉니다.$ curl -L https://developers.redhat.com/content-gateway/rest/mirror/pub/openshift-v4/clients/odo/latest/odo-linux-amd64 -o odo
tarball을 다운로드하는 경우 바이너리를 추출합니다.
$ curl -L https://developers.redhat.com/content-gateway/rest/mirror/pub/openshift-v4/clients/odo/latest/odo-linux-amd64.tar.gz -o odo.tar.gz $ tar xvzf odo.tar.gz
바이너리의 권한을 변경합니다.
$ chmod +x <filename>
odo바이너리를PATH에 있는 디렉터리에 배치합니다.PATH를 확인하려면 다음 명령을 실행합니다.$ echo $PATH
시스템에서
odo를 사용할 수 있는지 확인합니다.$ odo version
3.3.2. Windows에 odo 설치
Windows용 odo CLI는 바이너리 및 아카이브로 다운로드할 수 있습니다.
| 운영 체제 | 바이너리 | tarball |
|---|---|---|
| Windows |
절차
콘텐츠 게이트웨이로 이동하여 적절한 파일을 다운로드합니다.
-
바이너리를 다운로드하는 경우
odo.exe로 이름을 바꿉니다. -
아카이브를 다운로드하는 경우 ZIP 프로그램으로 바이너리의 압축을 풀고
odo.exe로 이름을 바꿉니다.
-
바이너리를 다운로드하는 경우
odo.exe바이너리를PATH에 있는 디렉터리로 이동합니다.PATH를 확인하려면 명령 프롬프트를 열고 다음 명령을 실행합니다.C:\> path
시스템에서
odo를 사용할 수 있는지 확인합니다.C:\> odo version
3.3.3. macOS에 odo 설치
macOS용 odo CLI는 바이너리 및 tarball로 다운로드할 수 있습니다.
| 운영 체제 | 바이너리 | tarball |
|---|---|---|
| macOS |
절차
콘텐츠 게이트웨이로 이동하여 적절한 파일을 다운로드합니다.
바이너리를 다운로드하는 경우
odo로 이름을 바꿉니다.$ curl -L https://developers.redhat.com/content-gateway/rest/mirror/pub/openshift-v4/clients/odo/latest/odo-darwin-amd64 -o odo
tarball을 다운로드하는 경우 바이너리를 추출합니다.
$ curl -L https://developers.redhat.com/content-gateway/rest/mirror/pub/openshift-v4/clients/odo/latest/odo-darwin-amd64.tar.gz -o odo.tar.gz $ tar xvzf odo.tar.gz
바이너리의 권한을 변경합니다.
# chmod +x odo
odo바이너리를PATH에 있는 디렉터리에 배치합니다.PATH를 확인하려면 다음 명령을 실행합니다.$ echo $PATH
시스템에서
odo를 사용할 수 있는지 확인합니다.$ odo version
3.3.4. VS Code에 odo 설치
OpenShift VS Code 확장에서는 OpenShift Container Platform 클러스터와 상호 작용하는 데 odo 및 oc 바이너리를 둘 다 사용합니다. 이러한 기능으로 작업하려면 VS Code에 OpenShift VS Code 확장을 설치하십시오.
사전 요구 사항
- VS Code가 설치되어 있어야 합니다.
절차
- VS Code를 엽니다.
-
Ctrl+P로 VS Code Quick Open을 시작합니다. 다음 명령을 실행합니다.
$ ext install redhat.vscode-openshift-connector
3.3.5. RPM을 사용하여 RHEL(Red Hat Enterprise Linux)에 odo 설치
RHEL(Red Hat Enterprise Linux)의 경우 odo CLI를 RPM으로 설치할 수 있습니다.
절차
Red Hat Subscription Manager에 등록합니다.
# subscription-manager register
최신 서브스크립션 데이터를 가져옵니다.
# subscription-manager refresh
사용 가능한 서브스크립션을 나열하십시오.
# subscription-manager list --available --matches '*OpenShift Developer Tools and Services*'
이전 명령의 출력에서 OpenShift Container Platform 서브스크립션의
Pool ID를 찾아서 이 서브스크립션을 등록된 시스템에 연결합니다.# subscription-manager attach --pool=<pool_id>
odo에 필요한 리포지토리를 활성화합니다.# subscription-manager repos --enable="ocp-tools-4.9-for-rhel-8-x86_64-rpms"
odo패키지를 설치합니다.# yum install odo
시스템에서
odo를 사용할 수 있는지 확인합니다.$ odo version
3.4. odo CLI 구성
기본적으로 $HOME/.odo 디렉터리에 있는 preference.yaml 파일에서 odo 의 글로벌 설정을 찾을 수 있습니다.
GLOBALODOCONFIG 변수를 내보내서 preference.yaml 파일의 다른 위치를 설정할 수 있습니다.
3.4.1. 현재 구성 보기
다음 명령을 사용하여 현재 odo CLI 구성을 볼 수 있습니다.
$ odo preference view
출력 예
PARAMETER CURRENT_VALUE UpdateNotification NamePrefix Timeout BuildTimeout PushTimeout Ephemeral ConsentTelemetry true
3.4.2. 값 설정
다음 명령을 사용하여 기본 키의 값을 설정할 수 있습니다.
$ odo preference set <key> <value>
기본 설정 키는 대소문자를 구분하지 않습니다.
명령 예
$ odo preference set updatenotification false
출력 예
Global preference was successfully updated
3.4.3. 값 설정 해제
다음 명령을 사용하여 기본 키의 값을 설정 해제할 수 있습니다.
$ odo preference unset <key>
-f 플래그를 사용하여 확인을 건너뛸 수 있습니다.
명령 예
$ odo preference unset updatenotification ? Do you want to unset updatenotification in the preference (y/N) y
출력 예
Global preference was successfully updated
3.4.4. 기본 설정 키 테이블
다음 표는 odo CLI에 기본 키를 설정하는 데 사용할 수 있는 옵션을 보여줍니다.
| 기본 설정 키 | Description | 기본값 |
|---|---|---|
|
|
| True |
|
|
| 현재 디렉터리 이름 |
|
| Kubernetes 서버 연결 확인에 대한 타임아웃입니다. | 1초 |
|
| git 구성 요소 빌드가 완료될 때까지 대기하는 시간 초과 | 300초 |
|
| 구성 요소가 시작될 때까지 대기하는 시간 초과입니다. | 240초 |
|
|
소스 코드를 저장하기 위해 | True |
|
|
odo가 사용자의 | False |
3.4.5. 파일 또는 패턴 무시
애플리케이션 root 디렉터리의 .odoignore 파일을 수정하여 무시할 파일 또는 패턴 목록을 구성할 수 있습니다. 이 파일은 odo push 및 odo watch 둘 다에 적용됩니다.
.odoignore 파일이 없으면 특정 파일 및 폴더를 무시하는 데 .gitignore 파일이 대신 사용됩니다.
.git 파일, .js 확장자가 있는 모든 파일 및 tests 폴더를 무시하려면 .odoignore 또는 .gitignore 파일에 다음을 추가합니다.
.git *.js tests/
.odoignore 파일에는 모든 glob 표현식을 사용할 수 있습니다.
3.5. odo CLI 참조
3.5.1. odo build-images
odo 는 Dockerfile을 기반으로 컨테이너 이미지를 빌드하고 이러한 이미지를 레지스트리에 푸시할 수 있습니다.
odo build-images 명령을 실행할 때 odo 는 이미지 유형을 사용하여 devfile.yaml 의 모든 구성 요소를 검색합니다. 예를 들면 다음과 같습니다.
components:
- image:
imageName: quay.io/myusername/myimage
dockerfile:
uri: ./Dockerfile 1
buildContext: ${PROJECTS_ROOT} 2
name: component-built-from-dockerfile
각 이미지 구성 요소에 대해 odo는 podman 또는 docker (이 순서대로 발견된 첫 번째)를 실행하여 지정된 Dockerfile, 빌드 컨텍스트 및 인수를 사용하여 이미지를 빌드합니다.
--push 플래그가 명령에 전달되면 이미지가 빌드 후 해당 레지스트리로 푸시됩니다.
3.5.2. odo catalog
odo 는 다양한 카탈로그 를 사용하여 구성 요소 및 서비스를 배포합니다.
3.5.2.1. components
odo 는 이식 가능한 devfile 형식을 사용하여 구성 요소를 설명합니다. 다양한 devfile 레지스트리에 연결하여 다양한 언어 및 프레임워크에 대한 devfile을 다운로드할 수 있습니다. 자세한 내용은 odo Registry를 참조하십시오.
3.5.2.1.1. 구성 요소 나열
다른 레지스트리에서 사용 가능한 모든 devfile 을 나열하려면 명령을 실행합니다.
$ odo catalog list components
출력 예
NAME DESCRIPTION REGISTRY go Stack with the latest Go version DefaultDevfileRegistry java-maven Upstream Maven and OpenJDK 11 DefaultDevfileRegistry nodejs Stack with Node.js 14 DefaultDevfileRegistry php-laravel Stack with Laravel 8 DefaultDevfileRegistry python Python Stack with Python 3.7 DefaultDevfileRegistry [...]
3.5.2.1.2. 구성 요소에 대한 정보 가져오기
특정 구성 요소에 대한 자세한 내용을 보려면 명령을 실행합니다.
$ odo catalog describe component
예를 들어 다음 명령을 실행합니다.
$ odo catalog describe component nodejs
출력 예
* Registry: DefaultDevfileRegistry 1 Starter Projects: 2 --- name: nodejs-starter attributes: {} description: "" subdir: "" projectsource: sourcetype: "" git: gitlikeprojectsource: commonprojectsource: {} checkoutfrom: null remotes: origin: https://github.com/odo-devfiles/nodejs-ex.git zip: null custom: null
starter 프로젝트에서 프로젝트를 생성하는 방법에 대한 자세한 내용은 odo create 를 참조하십시오.
3.5.2.2. 서비스
odo 는 Operator 의 도움을 받아 서비스를 배포할 수 있습니다.
Operator Lifecycle Manager 를 사용하여 배포된 Operator만 odo에서 지원됩니다.
3.5.2.2.1. 서비스 나열
사용 가능한 Operator 및 관련 서비스를 나열하려면 명령을 실행합니다.
$ odo catalog list services
출력 예
Services available through Operators NAME CRDs postgresql-operator.v0.1.1 Backup, Database redis-operator.v0.8.0 RedisCluster, Redis
이 예에서는 클러스터에 두 개의 Operator가 설치되어 있습니다. postgresql-operator.v0.1.1 Operator는 PostgreSQL과 관련된 서비스를 배포합니다. 백업 및 데이터베이스. redis-operator.v0.8.0 Operator는 Redis와 관련된 서비스를 배포합니다. RedisCluster 및 Redis.
사용 가능한 모든 Operator 목록을 가져오기 위해 odo 는 Succeeded 단계에 있는 현재 네임스페이스의 CSV(ClusterServiceVersion) 리소스를 가져옵니다. 클러스터 전체 액세스를 지원하는 Operator의 경우 새 네임스페이스가 생성되면 해당 리소스가 자동으로 추가됩니다. 그러나 성공 단계에 있을 때까지 다소 시간이 걸릴 수 있으며 odo 는 리소스가 준비될 때까지 빈 목록을 반환할 수 있습니다.
3.5.2.2.2. 서비스 검색
키워드로 특정 서비스를 검색하려면 명령을 실행합니다.
$ odo catalog search service
예를 들어 PostgreSQL 서비스를 검색하려면 명령을 실행합니다.
$ odo catalog search service postgres
출력 예
Services available through Operators NAME CRDs postgresql-operator.v0.1.1 Backup, Database
해당 이름에 searched 키워드가 포함된 Operator 목록이 표시됩니다.
3.5.2.2.3. 서비스에 대한 정보 얻기
특정 서비스에 대한 자세한 내용을 보려면 명령을 실행합니다.
$ odo catalog describe service
예를 들면 다음과 같습니다.
$ odo catalog describe service postgresql-operator.v0.1.1/Database
출력 예
KIND: Database
VERSION: v1alpha1
DESCRIPTION:
Database is the Schema for the the Database Database API
FIELDS:
awsAccessKeyId (string)
AWS S3 accessKey/token ID
Key ID of AWS S3 storage. Default Value: nil Required to create the Secret
with the data to allow send the backup files to AWS S3 storage.
[...]
서비스는 CRD(CustomResourceDefinition) 리소스로 클러스터로 표시됩니다. 이전 명령은 이 사용자 정의 리소스의 인스턴스를 정의하는 데 사용할 수 있는 종류,버전, 필드 목록과 같은 CRD에 대한 세부 정보를 표시합니다.
필드 목록은 CRD에 포함된 OpenAPI 스키마 에서 추출됩니다. 이 정보는 CRD에서 선택 사항이며, 없는 경우 서비스를 나타내는 CSV(ClusterServiceVersion) 리소스에서 추출됩니다.
CRD 유형 정보를 제공하지 않고 Operator 지원 서비스에 대한 설명을 요청할 수도 있습니다. CRD 없이 클러스터에서 Redis Operator를 설명하려면 다음 명령을 실행합니다.
$ odo catalog describe service redis-operator.v0.8.0
출력 예
NAME: redis-operator.v0.8.0 DESCRIPTION: A Golang based redis operator that will make/oversee Redis standalone/cluster mode setup on top of the Kubernetes. It can create a redis cluster setup with best practices on Cloud as well as the Bare metal environment. Also, it provides an in-built monitoring capability using ... (cut short for beverity) Logging Operator is licensed under [Apache License, Version 2.0](https://github.com/OT-CONTAINER-KIT/redis-operator/blob/master/LICENSE) CRDs: NAME DESCRIPTION RedisCluster Redis Cluster Redis Redis
3.5.3. odo create
odo 는 devfile 을 사용하여 구성 요소의 구성을 저장하고 스토리지 및 서비스와 같은 구성 요소의 리소스를 설명합니다. odo create 명령은 이 파일을 생성합니다.
3.5.3.1. 구성 요소 생성
기존 프로젝트에 대한 devfile 을 생성하려면 구성 요소의 이름 및 유형으로 odo create 명령을 실행합니다(예: nodejs 또는 go).
odo create nodejs mynodejs
예제에서 nodejs 는 구성 요소의 유형이며, mynodejs 는 odo 가 생성하는 구성 요소의 이름입니다.
지원되는 모든 구성 요소 유형 목록을 보려면 odo catalog list components 명령을 실행합니다.
소스 코드가 현재 디렉터리 외부에 있는 경우 --context 플래그를 사용하여 경로를 지정할 수 있습니다. 예를 들어 nodejs 구성 요소의 소스가 현재 작업 디렉터리를 기준으로 node-backend 라는 폴더에 있는 경우 명령을 실행합니다.
odo create nodejs mynodejs --context ./node-backend
--context 플래그는 상대 경로 및 절대 경로를 지원합니다.
구성 요소가 배포될 프로젝트 또는 앱을 지정하려면 --project 및 --app 플래그를 사용합니다. 예를 들어 backend 프로젝트 내의 myapp 앱의 일부인 구성 요소를 생성하려면 명령을 실행합니다.
odo create nodejs --app myapp --project backend
이러한 플래그를 지정하지 않으면 기본적으로 활성 앱 및 프로젝트로 설정됩니다.
3.5.3.2. 시작 프로젝트
기존 소스 코드가 없지만 devfile 및 구성 요소를 실험하기 위해 빠르게 실행하려는 경우 시작 프로젝트를 사용합니다. 시작 프로젝트를 사용하려면 --starter 플래그를 odo create 명령에 추가합니다.
구성 요소 유형에 사용 가능한 시작 프로젝트 목록을 가져오려면 odo catalog describe component 명령을 실행합니다. 예를 들어 nodejs 구성 요소 유형에 사용 가능한 모든 시작 프로젝트를 가져오려면 명령을 실행합니다.
odo catalog describe component nodejs
그런 다음 odo create 명령에서 --starter 플래그를 사용하여 원하는 프로젝트를 지정합니다.
odo create nodejs --starter nodejs-starter
이렇게 하면 선택한 구성 요소 유형(이 인스턴스에서 nodejs )에 해당하는 예제 템플릿이 다운로드됩니다. 템플릿은 현재 디렉터리 또는 --context 플래그로 지정된 위치로 다운로드됩니다. 시작 프로젝트에 자체 devfile이 있는 경우 이 devfile은 유지됩니다.
3.5.3.3. 기존 devfile 사용
기존 devfile에서 새 구성 요소를 생성하려면 --devfile 플래그를 사용하여 devfile에 대한 경로를 지정하여 이를 수행할 수 있습니다. 예를 들어 GitHub의 devfile을 기반으로 mynodejs 라는 구성 요소를 생성하려면 다음 명령을 사용합니다.
odo create mynodejs --devfile https://raw.githubusercontent.com/odo-devfiles/registry/master/devfiles/nodejs/devfile.yaml
3.5.3.4. 대화형 생성
odo create 명령을 대화식으로 실행하여 구성 요소를 생성하는 데 필요한 단계를 안내할 수도 있습니다.
$ odo create
? Which devfile component type do you wish to create go
? What do you wish to name the new devfile component go-api
? What project do you want the devfile component to be created in default
Devfile Object Validation
✓ Checking devfile existence [164258ns]
✓ Creating a devfile component from registry: DefaultDevfileRegistry [246051ns]
Validation
✓ Validating if devfile name is correct [92255ns]
? Do you want to download a starter project Yes
Starter Project
✓ Downloading starter project go-starter from https://github.com/devfile-samples/devfile-stack-go.git [429ms]
Please use odo push command to create the component with source deployed
구성 요소 유형, 이름 및 구성 요소에 대한 프로젝트를 선택하라는 메시지가 표시됩니다. starter 프로젝트를 다운로드할지 여부를 선택할 수도 있습니다. 완료되면 작업 디렉터리에 새 devfile.yaml 파일이 생성됩니다.
이러한 리소스를 클러스터에 배포하려면 odo push 명령을 실행합니다.
3.5.4. odo delete
odo delete 명령은 odo 에서 관리하는 리소스를 삭제하는 데 유용합니다.
3.5.4.1. 구성 요소 삭제
devfile 구성 요소를 삭제하려면 odo delete 명령을 실행합니다.
$ odo delete
구성 요소가 클러스터로 푸시되면 종속 스토리지, URL, 시크릿 및 기타 리소스와 함께 구성 요소가 클러스터에서 삭제됩니다. 구성 요소를 푸시하지 않은 경우 명령은 클러스터에서 리소스를 찾을 수 없다는 오류와 함께 종료됩니다.
확인 질문을 방지하려면 -f 또는 --force 플래그를 사용합니다.
3.5.4.2. devfile Kubernetes 구성 요소 배포
odo deploy 를 사용하여 배포된 devfile Kubernetes 구성 요소 배포를 취소하려면 --deploy 플래그를 사용하여 odo delete 명령을 실행합니다.
$ odo delete --deploy
확인 질문을 방지하려면 -f 또는 --force 플래그를 사용합니다.
3.5.4.3. 모두 삭제
다음 항목을 포함한 모든 아티팩트를 삭제하려면 --all 플래그를 사용하여 odo delete 명령을 실행합니다.
- devfile 구성 요소
-
odo deploy명령을 사용하여 배포된 devfile Kubernetes 구성 요소 - devfile
- 로컬 구성
$ odo delete --all
3.5.4.4. 사용 가능한 플래그
-f,--force- 확인 질문을 방지하려면 이 플래그를 사용합니다.
-w,--wait- 이 플래그를 사용하여 구성 요소를 삭제하고 종속성을 기다립니다. 이 플래그는 배포 취소 시 작동하지 않습니다.
Common Flags 에 대한 설명서는 명령에 사용 가능한 플래그에 대한 자세한 정보를 제공합니다.
3.5.5. odo deploy
odo 는 CI/CD 시스템을 사용하여 배포되는 방식과 유사한 방식으로 구성 요소를 배포하는 데 사용할 수 있습니다. 먼저 odo 는 컨테이너 이미지를 빌드한 다음 구성 요소를 배포하는 데 필요한 Kubernetes 리소스를 배포합니다.
odo deploy 명령을 실행할 때odo 는 devfile에서 deploy 의 기본 명령을 검색하고 이 명령을 실행합니다. kind deploy 는 버전 2.2.0부터 devfile 형식에서 지원됩니다.
deploy 명령은 일반적으로 몇 가지 apply 명령으로 구성된 복합 명령입니다.
-
이미지구성 요소를 참조하는 명령은 배포할 컨테이너 이미지를 빌드한 다음 해당 레지스트리로 내보냅니다. - Kubernetes 구성 요소를 참조하는 명령은 클러스터에 Kubernetes 리소스를 생성합니다.
다음 예제 devfile.yaml 파일을 사용하면 디렉터리에 있는 Dockerfile 을 사용하여 컨테이너 이미지가 빌드됩니다. 이미지는 레지스트리로 푸시된 다음 이 새로 빌드된 이미지를 사용하여 클러스터에 Kubernetes 배포 리소스가 생성됩니다.
schemaVersion: 2.2.0
[...]
variables:
CONTAINER_IMAGE: quay.io/phmartin/myimage
commands:
- id: build-image
apply:
component: outerloop-build
- id: deployk8s
apply:
component: outerloop-deploy
- id: deploy
composite:
commands:
- build-image
- deployk8s
group:
kind: deploy
isDefault: true
components:
- name: outerloop-build
image:
imageName: "{{CONTAINER_IMAGE}}"
dockerfile:
uri: ./Dockerfile
buildContext: ${PROJECTS_ROOT}
- name: outerloop-deploy
kubernetes:
inlined: |
kind: Deployment
apiVersion: apps/v1
metadata:
name: my-component
spec:
replicas: 1
selector:
matchLabels:
app: node-app
template:
metadata:
labels:
app: node-app
spec:
containers:
- name: main
image: {{CONTAINER_IMAGE}}3.5.6. odo link
odo link 명령은 odo 구성 요소를 Operator 지원 서비스 또는 다른 odo 구성 요소에 연결하는 데 도움이 됩니다. Service Binding Operator 를 사용하여 이 작업을 수행합니다. 현재 odo 는 Service Binding 라이브러리를 사용하며 Operator 자체가 원하는 기능을 수행하지 않습니다.
3.5.6.1. 다양한 연결 옵션
odo 는 구성 요소를 Operator 지원 서비스 또는 다른 odo 구성 요소와 연결하는 다양한 옵션을 제공합니다. 이러한 모든 옵션(또는 플래그)은 구성 요소를 서비스 또는 다른 구성 요소에 연결하는지 여부에 관계없이 사용할 수 있습니다.
3.5.6.1.1. 기본 동작
기본적으로 odo link 명령은 구성 요소 디렉터리에 kubernetes/ 라는 디렉터리를 생성하고 서비스 및 링크에 대한 정보(YAML 매니페스트)를 저장합니다. odo push 를 사용하는 경우odo 는 이러한 매니페스트를 Kubernetes 클러스터의 리소스 상태와 비교하고 사용자가 지정한 내용과 일치하도록 리소스를 생성, 수정 또는 삭제해야 하는지 결정합니다.
3.5.6.1.2. --inlined 플래그
--inlined 플래그를 odo link 명령에 지정하는 경우 odo 는 kubernetes/ 디렉터리에 파일을 생성하는 대신 devfile.yaml 의 devfile.yaml에 링크 정보를 저장합니다. --inlined 플래그의 동작은 odo link 및 odo service create 명령 모두에서 유사합니다. 이 플래그는 모든 항목을 단일 devfile.yaml 에 저장하려는 경우 유용합니다. 각 odo link 와 함께 --inlined 플래그를 사용하고 구성 요소에 대해 실행하는 odo service create 명령을 사용해야 합니다.
3.5.6.1.3. --map 플래그
기본적으로 사용 가능한 항목 외에도 구성 요소에 더 많은 바인딩 정보를 추가할 수 있습니다. 예를 들어 구성 요소를 서비스와 연결하고 서비스 사양의 일부 정보를 바인딩하려는 경우 --map 플래그를 사용할 수 있습니다. odo 는 연결 중인 서비스 또는 구성 요소의 사양에 대한 유효성 검사를 수행하지 않습니다. Kubernetes YAML 매니페스트를 편리하게 사용하는 경우에만 이 플래그를 사용하는 것이 좋습니다.
3.5.6.1.4. --bind-as-files 플래그
지금까지 논의된 모든 연결 옵션에 대해 odo 는 바인딩 정보를 환경 변수로 구성 요소에 삽입합니다. 이 정보를 파일로 마운트하려면 --bind-as-files 플래그를 사용할 수 있습니다. 이로 인해 odo 가 바인딩 정보를 구성 요소의 Pod 내의 /bindings 위치에 파일로 삽입합니다. 환경 변수 시나리오와 비교하여 --bind-as-files 를 사용할 때 파일의 이름은 키 뒤에 지정되며 이러한 키의 값은 이러한 파일의 콘텐츠로 저장됩니다.
3.5.6.2. 예제
3.5.6.2.1. 기본 odo link
다음 예에서 백엔드 구성 요소는 기본 odo link 명령을 사용하여 PostgreSQL 서비스와 연결됩니다. 백엔드 구성 요소의 경우 구성 요소 및 서비스가 클러스터로 푸시되었는지 확인합니다.
$ odo list
샘플 출력
APP NAME PROJECT TYPE STATE MANAGED BY ODO app backend myproject spring Pushed Yes
$ odo service list
샘플 출력
NAME MANAGED BY ODO STATE AGE PostgresCluster/hippo Yes (backend) Pushed 59m41s
이제 odo 링크를 실행하여 백엔드 구성 요소를 PostgreSQL 서비스와 연결합니다.
$ odo link PostgresCluster/hippo
출력 예
✓ Successfully created link between component "backend" and service "PostgresCluster/hippo" To apply the link, please use `odo push`
그런 다음 odo push 를 실행하여 실제로 Kubernetes 클러스터에 링크를 생성합니다.
odo push 가 성공하면 다음과 같은 몇 가지 결과가 나타납니다.
백엔드 구성 요소에서 배포한 애플리케이션의 URL을 열면 데이터베이스에 할 일
항목목록이 표시됩니다. 예를 들어odo url list명령의 출력에서 polkit이나열되는경로가 포함됩니다.$ odo url list
샘플 출력
Found the following URLs for component backend NAME STATE URL PORT SECURE KIND 8080-tcp Pushed http://8080-tcp.192.168.39.112.nip.io 8080 false ingress
URL의 올바른 경로는 http://8080-tcp.192.168.39.112.nip.io/api/v1/todos입니다. 정확한 URL은 설정에 따라 다릅니다. 또한 일부 항목을 추가하지 않는 한 데이터베이스에
todos가 없으므로 URL에 빈 JSON 오브젝트만 표시될 수 있습니다.백엔드 구성 요소에 삽입된 Postgres 서비스와 관련된 바인딩 정보를 확인할 수 있습니다. 이 바인딩 정보는 기본적으로 환경 변수로 삽입됩니다. backend 구성 요소의 디렉터리에서
odo describe명령을 사용하여 확인할 수 있습니다.$ odo describe
출력 예:
Component Name: backend Type: spring Environment Variables: · PROJECTS_ROOT=/projects · PROJECT_SOURCE=/projects · DEBUG_PORT=5858 Storage: · m2 of size 3Gi mounted to /home/user/.m2 URLs: · http://8080-tcp.192.168.39.112.nip.io exposed via 8080 Linked Services: · PostgresCluster/hippo Environment Variables: · POSTGRESCLUSTER_PGBOUNCER-EMPTY · POSTGRESCLUSTER_PGBOUNCER.INI · POSTGRESCLUSTER_ROOT.CRT · POSTGRESCLUSTER_VERIFIER · POSTGRESCLUSTER_ID_ECDSA · POSTGRESCLUSTER_PGBOUNCER-VERIFIER · POSTGRESCLUSTER_TLS.CRT · POSTGRESCLUSTER_PGBOUNCER-URI · POSTGRESCLUSTER_PATRONI.CRT-COMBINED · POSTGRESCLUSTER_USER · pgImage · pgVersion · POSTGRESCLUSTER_CLUSTERIP · POSTGRESCLUSTER_HOST · POSTGRESCLUSTER_PGBACKREST_REPO.CONF · POSTGRESCLUSTER_PGBOUNCER-USERS.TXT · POSTGRESCLUSTER_SSH_CONFIG · POSTGRESCLUSTER_TLS.KEY · POSTGRESCLUSTER_CONFIG-HASH · POSTGRESCLUSTER_PASSWORD · POSTGRESCLUSTER_PATRONI.CA-ROOTS · POSTGRESCLUSTER_DBNAME · POSTGRESCLUSTER_PGBOUNCER-PASSWORD · POSTGRESCLUSTER_SSHD_CONFIG · POSTGRESCLUSTER_PGBOUNCER-FRONTEND.KEY · POSTGRESCLUSTER_PGBACKREST_INSTANCE.CONF · POSTGRESCLUSTER_PGBOUNCER-FRONTEND.CA-ROOTS · POSTGRESCLUSTER_PGBOUNCER-HOST · POSTGRESCLUSTER_PORT · POSTGRESCLUSTER_ROOT.KEY · POSTGRESCLUSTER_SSH_KNOWN_HOSTS · POSTGRESCLUSTER_URI · POSTGRESCLUSTER_PATRONI.YAML · POSTGRESCLUSTER_DNS.CRT · POSTGRESCLUSTER_DNS.KEY · POSTGRESCLUSTER_ID_ECDSA.PUB · POSTGRESCLUSTER_PGBOUNCER-FRONTEND.CRT · POSTGRESCLUSTER_PGBOUNCER-PORT · POSTGRESCLUSTER_CA.CRT이러한 변수 중 일부는 백엔드 구성 요소의
src/main/resources/application.properties파일에서 사용되어 Java Spring Boot 애플리케이션이 PostgreSQL 데이터베이스 서비스에 연결할 수 있습니다.마지막으로
odo는 다음 파일이 포함된 백엔드 구성 요소의 디렉터리에kubernetes/라는 디렉터리를 생성했습니다.$ ls kubernetes odo-service-backend-postgrescluster-hippo.yaml odo-service-hippo.yaml
이러한 파일에는 두 리소스에 대한 정보(YAML 매니페스트)가 포함되어 있습니다.
-
odo-service-hippo.yaml-odo service create --from-file ../postgrescluster.yaml명령을 사용하여 생성된 Postgres 서비스입니다. -
odo-service-backend-postgrescluster-hippo.yaml-odo link명령을 사용하여 생성된 링크입니다.
-
3.5.6.2.2. --inlined 플래그로 odo 링크 사용
--inlined 플래그를 odo link 명령과 함께 사용하면 바인딩 정보를 삽입하는 플래그 없이 odo link 명령과 동일한 효과가 있습니다. 그러나 미묘한 차이점은 위의 경우 kubernetes/ 디렉터리에는 두 개의 매니페스트 파일이 있습니다. 하나는 Postgres 서비스용이고 다른 하나는 백엔드 구성 요소와 이 서비스 간의 링크에 대한 것입니다. 그러나 --inlined 플래그를 전달할 때 odo 는 YAML 매니페스트를 저장하기 위해 kubernetes/ 디렉터리에 파일을 생성하지 않고 devfile.yaml 파일에 인라인을 저장합니다.
이를 확인하려면 먼저 PostgreSQL 서비스에서 구성 요소를 연결 해제합니다.
$ odo unlink PostgresCluster/hippo
출력 예:
✓ Successfully unlinked component "backend" from service "PostgresCluster/hippo" To apply the changes, please use `odo push`
클러스터에서 연결을 해제하려면 odo push 를 실행합니다. 이제 kubernetes/ 디렉터리를 검사하면 하나의 파일만 표시됩니다.
$ ls kubernetes odo-service-hippo.yaml
다음으로 --inlined 플래그를 사용하여 링크를 생성합니다.
$ odo link PostgresCluster/hippo --inlined
출력 예:
✓ Successfully created link between component "backend" and service "PostgresCluster/hippo" To apply the link, please use `odo push`
--inlined 플래그를 생략하는 절차와 같이 클러스터에서 생성되려면 odo push 를 실행해야 합니다. odo 는 devfile.yaml 에 구성을 저장합니다. 이 파일에서 다음과 같은 항목을 볼 수 있습니다.
kubernetes:
inlined: |
apiVersion: binding.operators.coreos.com/v1alpha1
kind: ServiceBinding
metadata:
creationTimestamp: null
name: backend-postgrescluster-hippo
spec:
application:
group: apps
name: backend-app
resource: deployments
version: v1
bindAsFiles: false
detectBindingResources: true
services:
- group: postgres-operator.crunchydata.com
id: hippo
kind: PostgresCluster
name: hippo
version: v1beta1
status:
secret: ""
name: backend-postgrescluster-hippo
이제 odo unlink PostgresCluster/hippo 를 실행하는 경우odo 는 먼저 devfile.yaml 에서 링크 정보를 제거한 다음 후속 odo push 는 클러스터에서 링크를 삭제합니다.
3.5.6.2.3. 사용자 정의 바인딩
odo link 는 구성 요소에 사용자 정의 바인딩 정보를 삽입할 수 있는 --map 플래그를 허용합니다. 이러한 바인딩 정보는 구성 요소에 연결하는 리소스의 매니페스트에서 가져옵니다. 예를 들어 백엔드 구성 요소 및 PostgreSQL 서비스의 컨텍스트에서 PostgreSQL 서비스의 매니페스트 postgrescluster.yaml 파일의 정보를 백엔드 구성 요소에 삽입할 수 있습니다.
PostgresCluster 서비스의 이름이 hippo (또는 PostgresCluster 서비스 의 이름이 다르게 지정되는 경우)인 경우 해당 YAML 정의의 postgresVersion 값을 백엔드 구성 요소에 삽입하려면 명령을 실행합니다.
$ odo link PostgresCluster/hippo --map pgVersion='{{ .hippo.spec.postgresVersion }}'
Postgres 서비스의 이름이 hippo 와 다른 경우, pgVersion 값으로 .hippo 대신 위의 명령에 해당 이름을 지정해야 합니다.
링크 작업 후 odo push 를 정상적으로 실행합니다. 푸시 작업이 완료되면 백엔드 구성 요소 디렉터리에서 다음 명령을 실행하여 사용자 정의 매핑이 올바르게 삽입되었는지 확인할 수 있습니다.
$ odo exec -- env | grep pgVersion
출력 예:
pgVersion=13
사용자 정의 바인딩 정보를 두 개 이상 삽입하려는 경우 odo link 는 여러 개의 키-값 쌍의 매핑을 허용합니다. 유일한 제약 조건은 이러한 값을 --map <key>=<value>로 지정해야 한다는 것입니다. 예를 들어, PostgreSQL 이미지 정보를 버전과 함께 삽입하려면 다음을 실행할 수 있습니다.
$ odo link PostgresCluster/hippo --map pgVersion='{{ .hippo.spec.postgresVersion }}' --map pgImage='{{ .hippo.spec.image }}'
odo push 를 실행합니다. 두 매핑이 모두 올바르게 삽입되었는지 확인하려면 다음 명령을 실행합니다.
$ odo exec -- env | grep -e "pgVersion\|pgImage"
출력 예:
pgVersion=13 pgImage=registry.developers.crunchydata.com/crunchydata/crunchy-postgres-ha:centos8-13.4-0
3.5.6.2.3.1. 인라인으로, 또는 아니오?
odo 링크가 대한 매니페스트 파일을 생성하는 기본 동작을 허용할 수 있습니다. 또는 모든 것을 단일 kubernetes/ 디렉터리에 링크에devfile.yaml 파일에 저장하려는 경우 --inlined 플래그를 사용할 수 있습니다.
3.5.6.3. 파일로 바인딩
odo link 에서 제공하는 또 다른 유용한 플래그는 --bind-as-files 입니다. 이 플래그를 전달하면 바인딩 정보가 구성 요소의 포드에 삽입되지 않지만 파일 시스템으로 마운트됩니다.
백엔드 구성 요소와 PostgreSQL 서비스 사이에 기존 링크가 없는지 확인합니다. 백엔드 구성 요소의 디렉터리에서 odo describe 를 실행하고 다음과 유사한 출력이 표시되는지 확인하여 이 작업을 수행할 수 있습니다.
Linked Services: · PostgresCluster/hippo
다음을 사용하여 구성 요소에서 서비스를 끊습니다.
$ odo unlink PostgresCluster/hippo $ odo push
3.5.6.4. --bind-as-files 예제
3.5.6.4.1. 기본 odo 링크 사용
기본적으로 odo 는 링크 정보를 저장하기 위해 kubernetes/ 디렉터리에 매니페스트 파일을 생성합니다. 다음을 사용하여 백엔드 구성 요소 및 PostgreSQL 서비스를 연결합니다.
$ odo link PostgresCluster/hippo --bind-as-files $ odo push
예제 odo describe 출력:
$ odo describe
Component Name: backend
Type: spring
Environment Variables:
· PROJECTS_ROOT=/projects
· PROJECT_SOURCE=/projects
· DEBUG_PORT=5858
· SERVICE_BINDING_ROOT=/bindings
· SERVICE_BINDING_ROOT=/bindings
Storage:
· m2 of size 3Gi mounted to /home/user/.m2
URLs:
· http://8080-tcp.192.168.39.112.nip.io exposed via 8080
Linked Services:
· PostgresCluster/hippo
Files:
· /bindings/backend-postgrescluster-hippo/pgbackrest_instance.conf
· /bindings/backend-postgrescluster-hippo/user
· /bindings/backend-postgrescluster-hippo/ssh_known_hosts
· /bindings/backend-postgrescluster-hippo/clusterIP
· /bindings/backend-postgrescluster-hippo/password
· /bindings/backend-postgrescluster-hippo/patroni.yaml
· /bindings/backend-postgrescluster-hippo/pgbouncer-frontend.crt
· /bindings/backend-postgrescluster-hippo/pgbouncer-host
· /bindings/backend-postgrescluster-hippo/root.key
· /bindings/backend-postgrescluster-hippo/pgbouncer-frontend.key
· /bindings/backend-postgrescluster-hippo/pgbouncer.ini
· /bindings/backend-postgrescluster-hippo/uri
· /bindings/backend-postgrescluster-hippo/config-hash
· /bindings/backend-postgrescluster-hippo/pgbouncer-empty
· /bindings/backend-postgrescluster-hippo/port
· /bindings/backend-postgrescluster-hippo/dns.crt
· /bindings/backend-postgrescluster-hippo/pgbouncer-uri
· /bindings/backend-postgrescluster-hippo/root.crt
· /bindings/backend-postgrescluster-hippo/ssh_config
· /bindings/backend-postgrescluster-hippo/dns.key
· /bindings/backend-postgrescluster-hippo/host
· /bindings/backend-postgrescluster-hippo/patroni.crt-combined
· /bindings/backend-postgrescluster-hippo/pgbouncer-frontend.ca-roots
· /bindings/backend-postgrescluster-hippo/tls.key
· /bindings/backend-postgrescluster-hippo/verifier
· /bindings/backend-postgrescluster-hippo/ca.crt
· /bindings/backend-postgrescluster-hippo/dbname
· /bindings/backend-postgrescluster-hippo/patroni.ca-roots
· /bindings/backend-postgrescluster-hippo/pgbackrest_repo.conf
· /bindings/backend-postgrescluster-hippo/pgbouncer-port
· /bindings/backend-postgrescluster-hippo/pgbouncer-verifier
· /bindings/backend-postgrescluster-hippo/id_ecdsa
· /bindings/backend-postgrescluster-hippo/id_ecdsa.pub
· /bindings/backend-postgrescluster-hippo/pgbouncer-password
· /bindings/backend-postgrescluster-hippo/pgbouncer-users.txt
· /bindings/backend-postgrescluster-hippo/sshd_config
· /bindings/backend-postgrescluster-hippo/tls.crt
이전 odo describe 출력의 key=value 형식의 환경 변수가 모두 이제 파일로 마운트됩니다. cat 명령을 사용하여 다음 파일의 일부 내용을 봅니다.
예제 명령:
$ odo exec -- cat /bindings/backend-postgrescluster-hippo/password
출력 예:
q({JC:jn^mm/Bw}eu+j.GX{k
예제 명령:
$ odo exec -- cat /bindings/backend-postgrescluster-hippo/user
출력 예:
hippo
예제 명령:
$ odo exec -- cat /bindings/backend-postgrescluster-hippo/clusterIP
출력 예:
10.101.78.56
3.5.6.4.2. --inlined사용
--bind-as-files 및 --inlined 를 함께 사용한 결과는 odo link --inlined 를 사용하는 것과 유사합니다. 링크의 매니페스트는 kubernetes/ 디렉터리에 별도의 파일에 저장하는 대신 devfile.yaml 에 저장됩니다. 그 외에는 odo describe 출력이 이전과 동일합니다.
3.5.6.4.3. 사용자 정의 바인딩
PostgreSQL 서비스와 백엔드 구성 요소를 연결하는 동안 사용자 정의 바인딩을 전달하면 이러한 사용자 지정 바인딩이 환경 변수가 아닌 파일로 삽입됩니다. 예를 들면 다음과 같습니다.
$ odo link PostgresCluster/hippo --map pgVersion='{{ .hippo.spec.postgresVersion }}' --map pgImage='{{ .hippo.spec.image }}' --bind-as-files
$ odo push이러한 사용자 정의 바인딩은 환경 변수로 삽입되는 대신 파일로 마운트됩니다. 이 작업이 완료되었는지 확인하려면 다음 명령을 실행합니다.
예제 명령:
$ odo exec -- cat /bindings/backend-postgrescluster-hippo/pgVersion
출력 예:
13
예제 명령:
$ odo exec -- cat /bindings/backend-postgrescluster-hippo/pgImage
출력 예:
registry.developers.crunchydata.com/crunchydata/crunchy-postgres-ha:centos8-13.4-0
3.5.7. odo 레지스트리
odo 는 이식 가능한 devfile 형식을 사용하여 구성 요소를 설명합니다. odo 는 다양한 devfile 레지스트리에 연결하여 다양한 언어 및 프레임워크에 대한 devfile을 다운로드할 수 있습니다.
공개적으로 사용 가능한 devfile 레지스트리에 연결하거나 자체 보안 레지스트리를 설치할 수 있습니다.
odo registry 명령을 사용하여 odo 에서 devfile 정보를 검색하는 데 사용하는 레지스트리를 관리할 수 있습니다.
3.5.7.1. 레지스트리 나열
현재 odo 에서 연결하는 레지스트리를 나열하려면 다음 명령을 실행합니다.
$ odo registry list
출력 예:
NAME URL SECURE DefaultDevfileRegistry https://registry.devfile.io No
DefaultDevfileRegistry 는 odo에서 사용하는 기본 레지스트리이며 devfile.io 프로젝트에서 제공합니다.
3.5.7.2. 레지스트리 추가
레지스트리를 추가하려면 명령을 실행합니다.
$ odo registry add
출력 예:
$ odo registry add StageRegistry https://registry.stage.devfile.io New registry successfully added
자체 보안 레지스트리를 배포하는 경우 개인 액세스 토큰을 지정하여 --token 플래그를 사용하여 보안 레지스트리에 인증할 수 있습니다.
$ odo registry add MyRegistry https://myregistry.example.com --token <access_token> New registry successfully added
3.5.7.3. 레지스트리 삭제
레지스트리를 삭제하려면 명령을 실행합니다.
$ odo registry delete
출력 예:
$ odo registry delete StageRegistry ? Are you sure you want to delete registry "StageRegistry" Yes Successfully deleted registry
--force (또는 -f) 플래그를 사용하여 확인 없이 레지스트리를 강제로 삭제합니다.
3.5.7.4. 레지스트리 업데이트
이미 등록된 레지스트리의 URL 또는 개인 액세스 토큰을 업데이트하려면 명령을 실행합니다.
$ odo registry update
출력 예:
$ odo registry update MyRegistry https://otherregistry.example.com --token <other_access_token> ? Are you sure you want to update registry "MyRegistry" Yes Successfully updated registry
--force (또는 -f) 플래그를 사용하여 확인 없이 레지스트리 업데이트를 강제 적용합니다.
3.5.8. odo 서비스
odo 는 Operator 의 도움을 받아 서비스를 배포할 수 있습니다.
설치에 사용 가능한 Operator 및 서비스 목록은 odo catalog 명령을 사용하여 확인할 수 있습니다.
서비스는 구성 요소 의 컨텍스트에서 생성되므로 서비스를 배포하기 전에 odo create 명령을 실행합니다.
서비스는 다음 두 단계를 사용하여 배포됩니다.
- 서비스를 정의하고 해당 정의를 devfile에 저장합니다.
-
odo push명령을 사용하여 정의된 서비스를 클러스터에 배포합니다.
3.5.8.1. 새 서비스 생성
새 서비스를 생성하려면 명령을 실행합니다.
$ odo service create
예를 들어 my-redis-service 라는 Redis 서비스의 인스턴스를 생성하려면 다음 명령을 실행합니다.
출력 예
$ odo catalog list services Services available through Operators NAME CRDs redis-operator.v0.8.0 RedisCluster, Redis $ odo service create redis-operator.v0.8.0/Redis my-redis-service Successfully added service to the configuration; do 'odo push' to create service on the cluster
이 명령은 서비스 정의가 포함된 kubernetes/ 디렉터리에 Kubernetes 매니페스트를 생성하고 이 파일은 devfile.yaml 파일에서 참조합니다.
$ cat kubernetes/odo-service-my-redis-service.yaml
출력 예
apiVersion: redis.redis.opstreelabs.in/v1beta1
kind: Redis
metadata:
name: my-redis-service
spec:
kubernetesConfig:
image: quay.io/opstree/redis:v6.2.5
imagePullPolicy: IfNotPresent
resources:
limits:
cpu: 101m
memory: 128Mi
requests:
cpu: 101m
memory: 128Mi
serviceType: ClusterIP
redisExporter:
enabled: false
image: quay.io/opstree/redis-exporter:1.0
storage:
volumeClaimTemplate:
spec:
accessModes:
- ReadWriteOnce
resources:
requests:
storage: 1Gi
명령 예
$ cat devfile.yaml
출력 예
[...]
components:
- kubernetes:
uri: kubernetes/odo-service-my-redis-service.yaml
name: my-redis-service
[...]
생성된 인스턴스의 이름은 선택 사항입니다. 이름을 지정하지 않으면 서비스의 소문자가 됩니다. 예를 들어 다음 명령은 redis 라는 Redis 서비스의 인스턴스를 생성합니다.
$ odo service create redis-operator.v0.8.0/Redis
3.5.8.1.1. 매니페스트 간소화
기본적으로 devfile.yaml 파일에서 참조하는 kubernetes/ 디렉터리에 새 매니페스트가 생성됩니다. --inlined 플래그를 사용하여 devfile.yaml 파일 내의 매니페스트를 인라인할 수 있습니다.
$ odo service create redis-operator.v0.8.0/Redis my-redis-service --inlined Successfully added service to the configuration; do 'odo push' to create service on the cluster
명령 예
$ cat devfile.yaml
출력 예
[...]
components:
- kubernetes:
inlined: |
apiVersion: redis.redis.opstreelabs.in/v1beta1
kind: Redis
metadata:
name: my-redis-service
spec:
kubernetesConfig:
image: quay.io/opstree/redis:v6.2.5
imagePullPolicy: IfNotPresent
resources:
limits:
cpu: 101m
memory: 128Mi
requests:
cpu: 101m
memory: 128Mi
serviceType: ClusterIP
redisExporter:
enabled: false
image: quay.io/opstree/redis-exporter:1.0
storage:
volumeClaimTemplate:
spec:
accessModes:
- ReadWriteOnce
resources:
requests:
storage: 1Gi
name: my-redis-service
[...]
3.5.8.1.2. 서비스 구성
특정 사용자 지정이 없으면 기본 구성으로 서비스가 생성됩니다. 명령줄 인수 또는 파일을 사용하여 고유한 구성을 지정할 수 있습니다.
3.5.8.1.2.1. 명령줄 인수 사용
--parameters (또는 -p) 플래그를 사용하여 고유한 구성을 지정합니다.
다음 예제에서는 세 가지 매개 변수를 사용하여 Redis 서비스를 구성합니다.
$ odo service create redis-operator.v0.8.0/Redis my-redis-service \
-p kubernetesConfig.image=quay.io/opstree/redis:v6.2.5 \
-p kubernetesConfig.serviceType=ClusterIP \
-p redisExporter.image=quay.io/opstree/redis-exporter:1.0
Successfully added service to the configuration; do 'odo push' to create service on the cluster명령 예
$ cat kubernetes/odo-service-my-redis-service.yaml
출력 예
apiVersion: redis.redis.opstreelabs.in/v1beta1
kind: Redis
metadata:
name: my-redis-service
spec:
kubernetesConfig:
image: quay.io/opstree/redis:v6.2.5
serviceType: ClusterIP
redisExporter:
image: quay.io/opstree/redis-exporter:1.0
odo catalog describe service 명령을 사용하여 특정 서비스에 사용 가능한 매개변수를 가져올 수 있습니다.
3.5.8.1.2.2. 파일 사용
YAML 매니페스트를 사용하여 자체 사양을 구성합니다. 다음 예에서 Redis 서비스는 세 개의 매개 변수로 구성됩니다.
매니페스트를 생성합니다.
$ cat > my-redis.yaml <<EOF apiVersion: redis.redis.opstreelabs.in/v1beta1 kind: Redis metadata: name: my-redis-service spec: kubernetesConfig: image: quay.io/opstree/redis:v6.2.5 serviceType: ClusterIP redisExporter: image: quay.io/opstree/redis-exporter:1.0 EOF매니페스트에서 서비스를 생성합니다.
$ odo service create --from-file my-redis.yaml Successfully added service to the configuration; do 'odo push' to create service on the cluster
3.5.8.2. 서비스 삭제
서비스를 삭제하려면 명령을 실행합니다.
$ odo service delete
출력 예
$ odo service list NAME MANAGED BY ODO STATE AGE Redis/my-redis-service Yes (api) Deleted locally 5m39s
$ odo service delete Redis/my-redis-service ? Are you sure you want to delete Redis/my-redis-service Yes Service "Redis/my-redis-service" has been successfully deleted; do 'odo push' to delete service from the cluster
--force (또는 -f) 플래그를 사용하여 확인 없이 서비스를 강제로 삭제합니다.
3.5.8.3. 서비스 나열
구성 요소용으로 생성된 서비스를 나열하려면 다음 명령을 실행합니다.
$ odo service list
출력 예
$ odo service list NAME MANAGED BY ODO STATE AGE Redis/my-redis-service-1 Yes (api) Not pushed Redis/my-redis-service-2 Yes (api) Pushed 52s Redis/my-redis-service-3 Yes (api) Deleted locally 1m22s
각 서비스에 대해 STATE 는 odo push 명령을 사용하여 서비스가 클러스터로 푸시되었는지 또는 서비스가 여전히 클러스터에서 실행 중이지만 odo service delete 명령을 사용하여 로컬에서 devfile에서 제거되었는지를 나타냅니다.
3.5.8.4. 서비스에 대한 정보 얻기
구성된 매개 변수의 종류, 버전, 이름 및 목록과 같은 서비스의 세부 정보를 얻으려면 명령을 실행합니다.
$ odo service describe
출력 예
$ odo service describe Redis/my-redis-service Version: redis.redis.opstreelabs.in/v1beta1 Kind: Redis Name: my-redis-service Parameters: NAME VALUE kubernetesConfig.image quay.io/opstree/redis:v6.2.5 kubernetesConfig.serviceType ClusterIP redisExporter.image quay.io/opstree/redis-exporter:1.0
3.5.9. odo 스토리지
odo 를 사용하면 구성 요소에 연결된 스토리지 볼륨을 관리할 수 있습니다. 스토리지 볼륨은 emptyDir Kubernetes 볼륨을 사용하는 임시 볼륨 또는 PVC( 영구 볼륨 클레임 )일 수 있습니다. PVC를 사용하면 특정 클라우드 환경의 세부 정보를 이해하지 않고도 영구 볼륨(예: GCE PersistentDisk 또는 iSCSI 볼륨)을 요청할 수 있습니다. 영구 스토리지 볼륨은 재시작 시 데이터를 유지하고 구성 요소를 다시 빌드하는 데 사용할 수 있습니다.
3.5.9.1. 스토리지 볼륨 추가
클러스터에 스토리지 볼륨을 추가하려면 명령을 실행합니다.
$ odo storage create
출력 예:
$ odo storage create store --path /data --size 1Gi ✓ Added storage store to nodejs-project-ufyy $ odo storage create tempdir --path /tmp --size 2Gi --ephemeral ✓ Added storage tempdir to nodejs-project-ufyy Please use `odo push` command to make the storage accessible to the component
위의 예에서 첫 번째 스토리지 볼륨이 /data 경로에 마운트되었으며 크기가 1Gi 로 설정되어 두 번째 볼륨이 /tmp 에 마운트되어 임시입니다.
3.5.9.2. 스토리지 볼륨 나열
현재 구성 요소에서 사용하는 스토리지 볼륨을 확인하려면 명령을 실행합니다.
$ odo storage list
출력 예:
$ odo storage list The component 'nodejs-project-ufyy' has the following storage attached: NAME SIZE PATH STATE store 1Gi /data Not Pushed tempdir 2Gi /tmp Not Pushed
3.5.9.3. 스토리지 볼륨 삭제
스토리지 볼륨을 삭제하려면 명령을 실행합니다.
$ odo storage delete
출력 예:
$ odo storage delete store -f Deleted storage store from nodejs-project-ufyy Please use `odo push` command to delete the storage from the cluster
위의 예에서 -f 플래그를 사용하면 사용자 권한을 요청하지 않고 스토리지를 강제로 삭제합니다.
3.5.9.4. 특정 컨테이너에 스토리지 추가
devfile에 여러 컨테이너가 있는 경우 odo storage create 명령에서 --container 플래그를 사용하여 스토리지를 연결할 컨테이너를 지정할 수 있습니다.
다음 예제는 여러 컨테이너가 있는 devfile에서 발췌한 것입니다.
components:
- name: nodejs1
container:
image: registry.access.redhat.com/ubi8/nodejs-12:1-36
memoryLimit: 1024Mi
endpoints:
- name: "3000-tcp"
targetPort: 3000
mountSources: true
- name: nodejs2
container:
image: registry.access.redhat.com/ubi8/nodejs-12:1-36
memoryLimit: 1024Mi
이 예제에는nodejs1 및 nodejs2 라는 두 개의 컨테이너가 있습니다. 스토리지를 nodejs2 컨테이너에 연결하려면 다음 명령을 사용합니다.
$ odo storage create --container
출력 예:
$ odo storage create store --path /data --size 1Gi --container nodejs2 ✓ Added storage store to nodejs-testing-xnfg Please use `odo push` command to make the storage accessible to the component
odo storage list 명령을 사용하여 스토리지 리소스를 나열할 수 있습니다.
$ odo storage list
출력 예:
The component 'nodejs-testing-xnfg' has the following storage attached: NAME SIZE PATH CONTAINER STATE store 1Gi /data nodejs2 Not Pushed
3.5.10. 공통 플래그
대부분의 odo 명령에서 다음 플래그를 사용할 수 있습니다.
표 3.1. odo 플래그
| 명령 | Description |
|---|---|
|
| 구성 요소가 정의된 컨텍스트 디렉터리를 설정합니다. |
|
| 구성 요소의 프로젝트를 설정합니다. 기본값은 로컬 구성에 정의된 프로젝트입니다. 사용할 수 없는 경우 클러스터의 현재 프로젝트입니다. |
|
| 구성 요소의 애플리케이션을 설정합니다. 기본값은 로컬 구성에 정의된 애플리케이션입니다. 사용할 수 없는 경우 앱. |
|
|
기본 구성을 사용하지 않는 경우 |
|
| 이 플래그를 사용하여 로그를 확인합니다. |
|
| 이 플래그를 사용하여 사용자에게 확인 메시지를 표시하지 않도록 명령에 알립니다. |
|
| 상세 수준을 설정합니다. 자세한 내용은 odo에서 로깅 을 참조하십시오. |
|
| 명령에 대한 도움말을 출력합니다. |
일부 명령에는 일부 플래그를 사용할 수 없습니다. --help 플래그와 함께 명령을 실행하여 사용 가능한 모든 플래그 목록을 가져옵니다.
3.5.11. JSON 출력
콘텐츠를 출력하는 odo 명령은 일반적으로 -o json 플래그를 수락하여 이 콘텐츠를 JSON 형식으로 출력하는 경우 다른 프로그램이 이 출력을 더 쉽게 구문 분석하는 데 적합합니다.
출력 구조는 kind,apiVersion,metadata,spec, status 필드와 함께 Kubernetes 리소스와 유사합니다.
나열 명령은 목록의 항목을 나열하는 항목 (또는 유사한) 필드를 포함하는 List 리소스를 반환하며 각 항목은 Kubernetes 리소스와 유사합니다.
삭제 명령은 상태 리소스를 반환합니다. Status Kubernetes 리소스 를 참조하십시오.
다른 명령은 명령과 관련된 리소스를 반환합니다(예: 애플리케이션 , 스토리지,URL 등).
현재 -o json 플래그를 수락하는 명령의 전체 목록은 다음과 같습니다.
| 명령 | 종류(버전) | 목록 항목의 종류(버전) | 완전한 콘텐츠입니까? |
|---|---|---|---|
| odo application describe | 애플리케이션(odo.dev/v1alpha1) | 해당 없음 | 제공되지 않음 |
| odo 애플리케이션 목록 | 목록 (odo.dev/v1alpha1) | 애플리케이션(odo.dev/v1alpha1) | ? |
| odo catalog list components | 목록 (odo.dev/v1alpha1) | 누락됨 | 제공됨 |
| odo catalog list services | 목록 (odo.dev/v1alpha1) | ClusterServiceVersion (operators.coreos.com/v1alpha1) | ? |
| odo catalog describe 구성 요소 | 누락됨 | 해당 없음 | 제공됨 |
| odo catalog describe service | CRDDescription(odo.dev/v1alpha1) | 해당 없음 | 제공됨 |
| odo 구성 요소 생성 | 구성 요소(odo.dev/v1alpha1) | 해당 없음 | 제공됨 |
| odo component describe | 구성 요소(odo.dev/v1alpha1) | 해당 없음 | 제공됨 |
| odo 구성 요소 목록 | 목록 (odo.dev/v1alpha1) | 구성 요소(odo.dev/v1alpha1) | 제공됨 |
| odo config view | DevfileConfiguration(odo.dev/v1alpha1) | 해당 없음 | 제공됨 |
| odo debug info | OdoDebugInfo (odo.dev/v1alpha1) | 해당 없음 | 제공됨 |
| odo env view | EnvInfo (odo.dev/v1alpha1) | 해당 없음 | 제공됨 |
| odo preference view | PreferenceList (odo.dev/v1alpha1) | 해당 없음 | 제공됨 |
| odo project create | 프로젝트(odo.dev/v1alpha1) | 해당 없음 | 제공됨 |
| odo project delete | 상태(v1) | 해당 없음 | 제공됨 |
| odo project get | 프로젝트(odo.dev/v1alpha1) | 해당 없음 | 제공됨 |
| odo 프로젝트 목록 | 목록 (odo.dev/v1alpha1) | 프로젝트(odo.dev/v1alpha1) | 제공됨 |
| odo 레지스트리 목록 | 목록 (odo.dev/v1alpha1) | 누락됨 | 제공됨 |
| odo service create | Service | 해당 없음 | 제공됨 |
| odo service describe | Service | 해당 없음 | 제공됨 |
| odo 서비스 목록 | 목록 (odo.dev/v1alpha1) | Service | 제공됨 |
| odo storage create | 스토리지(odo.dev/v1alpha1) | 해당 없음 | 제공됨 |
| odo storage delete | 상태(v1) | 해당 없음 | 제공됨 |
| odo 스토리지 목록 | 목록 (odo.dev/v1alpha1) | 스토리지(odo.dev/v1alpha1) | 제공됨 |
| odo url 목록 | 목록 (odo.dev/v1alpha1) | URL (odo.dev/v1alpha1) | 제공됨 |
4장. OpenShift Serverless에서 사용할 Knative CLI
Knative(kn) CLI를 사용하면 OpenShift Container Platform의 Knative 구성 요소와 간단한 상호 작용을 수행할 수 있습니다.
4.1. 주요 기능
Knative(kn) CLI는 서버리스 컴퓨팅 작업을 간단하고 간결하게 만들기 위해 설계되었습니다. Knative CLI의 주요 기능은 다음과 같습니다.
- 명령줄에서 서버리스 애플리케이션을 배포합니다.
- 서비스, 개정, 트래픽 분할 등 Knative Serving 기능을 관리합니다.
- 이벤트 소스 및 트리거와 같은 Knative 이벤트 구성 요소를 생성하고 관리합니다.
- 기존 Kubernetes 애플리케이션 및 Knative 서비스를 연결하는 싱크 바인딩을 생성합니다.
-
kubectlCLI와 유사하게 유연한 플러그인 아키텍처를 사용하여 Knative CLI를 확장합니다. - Knative 서비스에 대한 자동 스케일링 매개변수를 구성합니다.
- 작업 결과 대기나 사용자 정의 롤아웃 및 롤백 전략 배포와 같은 사용법을 스크립팅합니다.
4.2. Knative CLI 설치
Knative CLI 설치를 참조하십시오.
5장. Pipelines CLI(tkn)
5.1. tkn 설치
tkn CLI를 사용하여 터미널에서 Red Hat OpenShift Pipelines를 관리합니다. 다음 섹션에서는 다양한 플랫폼에 tkn을 설치하는 방법을 설명합니다.
오른쪽 상단에 있는 ? 아이콘을 클릭하고 명령줄 툴을 선택하여 OpenShift Container Platform 웹 콘솔의 최신 바이너리 URL을 찾을 수도 있습니다.
5.1.1. Linux에서 Red Hat OpenShift Pipelines CLI(tkn) 설치
Linux 배포판의 경우 tar.gz 아카이브로 직접 CLI를 다운로드할 수 있습니다.
절차
관련 CLI를 다운로드합니다.
아카이브의 압축을 풉니다.
$ tar xvzf <file>
-
tkn바이너리를PATH에 있는 디렉터리에 배치합니다. PATH를 확인하려면 다음을 실행합니다.$ echo $PATH
5.1.2. RPM을 사용하여 Linux에서 Red Hat OpenShift Pipelines CLI(tkn) 설치
RHEL(Red Hat Enterprise Linux) 버전 8의 경우 Red Hat OpenShift Pipelines CLI(tkn)를 RPM으로 설치할 수 있습니다.
사전 요구 사항
- Red Hat 계정에 활성 OpenShift Container Platform 서브스크립션이 있어야 합니다.
- 로컬 시스템에 root 또는 sudo 권한이 있어야 합니다.
절차
Red Hat Subscription Manager에 등록합니다.
# subscription-manager register
최신 서브스크립션 데이터를 가져옵니다.
# subscription-manager refresh
사용 가능한 서브스크립션을 나열하십시오.
# subscription-manager list --available --matches '*pipelines*'
이전 명령의 출력에서 OpenShift Container Platform 서브스크립션의 풀 ID를 찾아서 이 서브스크립션을 등록된 시스템에 연결합니다.
# subscription-manager attach --pool=<pool_id>
Red Hat OpenShift Pipelines에 필요한 리포지터리를 활성화합니다.
Linux (x86_64, amd64)
# subscription-manager repos --enable="pipelines-1.5-for-rhel-8-x86_64-rpms"
Linux on IBM Z 및 LinuxONE(s390x)
# subscription-manager repos --enable="pipelines-1.5-for-rhel-8-s390x-rpms"
Linux on IBM Power Systems(ppc64le)
# subscription-manager repos --enable="pipelines-1.5-for-rhel-8-ppc64le-rpms"
openshift-pipelines-client패키지를 설치합니다.# yum install openshift-pipelines-client
CLI를 설치한 후 tkn 명령을 사용할 수 있습니다.
$ tkn version
5.1.3. Windows에서 Red Hat OpenShift Pipelines CLI(tkn) 설치
Windows에서는 tkn CLI가 zip 아카이브로 제공됩니다.
절차
- CLI를 다운로드합니다.
- ZIP 프로그램으로 아카이브의 압축을 풉니다.
-
tkn.exe파일의 위치를PATH환경 변수에 추가합니다. PATH를 확인하려면 명령 프롬프트를 열고 다음 명령을 실행합니다.C:\> path
5.1.4. macOS에서 Red Hat OpenShift Pipelines CLI(tkn) 설치
macOS에서는 tkn CLI가 tar.gz 아카이브로 제공됩니다.
절차
- CLI를 다운로드합니다.
- 아카이브의 압축을 해제하고 압축을 풉니다.
-
tkn바이너리를 PATH에 있는 디렉터리로 이동합니다. PATH를 확인하려면 터미널 창을 열고 다음을 실행합니다.$ echo $PATH
5.2. OpenShift Pipelines tkn CLI 구성
탭 완료가 활성화되도록 Red Hat OpenShift Pipelines tkn CLI를 구성합니다.
5.2.1. 탭 완료 활성화
tkn CLI를 설치한 후에는 탭 완료를 활성화하여 자동으로 tkn 명령을 완료하거나 탭을 누를 때 옵션을 제안하도록 할 수 있습니다.
사전 요구 사항
-
tknCLI 툴이 설치되어 있어야 합니다. -
로컬 시스템에
bash-completion이 설치되어 있어야 합니다.
절차
Bash 탭 완료를 활성화하는 절차는 다음과 같습니다.
Bash 완료 코드를 파일에 저장합니다.
$ tkn completion bash > tkn_bash_completion
파일을
/etc/bash_completion.d/에 복사합니다.$ sudo cp tkn_bash_completion /etc/bash_completion.d/
또는 파일을 로컬 디렉터리에 저장하여
.bashrc파일에서 소싱할 수도 있습니다.
새 터미널을 열면 탭 완료가 활성화됩니다.
5.3. OpenShift Pipelines tkn 참조
이 섹션에는 기본 tkn CLI 명령이 나열됩니다.
5.3.1. 기본 구문
tkn [command or options] [arguments…]
5.3.2. 글로벌 옵션
--help, -h
5.3.3. 유틸리티 명령
5.3.3.1. tkn
tkn CLI의 상위 명령입니다.
예제: 모든 옵션 표시
$ tkn
5.3.3.2. completion [shell]
대화형 완료를 제공하려면 평가해야 하는 쉘 완료 코드를 출력합니다. 지원되는 쉘은 bash 및 zsh입니다.
예제: bash 쉘 완료 코드
$ tkn completion bash
5.3.3.3. version
tkn CLI의 버전 정보를 출력합니다.
예제: tkn 버전 확인
$ tkn version
5.3.4. 파이프라인 관리 명령
5.3.4.1. pipeline
파이프라인을 관리합니다.
예제: 도움말 표시
$ tkn pipeline --help
5.3.4.2. pipeline delete
파이프라인을 삭제합니다.
예제: 네임스페이스 에서 mypipeline 파이프라인 삭제
$ tkn pipeline delete mypipeline -n myspace
5.3.4.3. pipeline describe
파이프라인을 설명합니다.
예제: mypipeline 파이프라인 설명
$ tkn pipeline describe mypipeline
5.3.4.4. pipeline list
파이프라인 목록을 표시합니다.
예제: 파이프라인 목록 표시
$ tkn pipeline list
5.3.4.5. pipeline logs
특정 파이프라인의 로그를 표시합니다.
예제: mypipeline 파이프라인의 실시간 로그 스트리밍
$ tkn pipeline logs -f mypipeline
5.3.4.6. pipeline start
파이프라인을 시작합니다.
예제: mypipeline 파이프라인 시작
$ tkn pipeline start mypipeline
5.3.5. 파이프라인 실행 명령
5.3.5.1. pipelinerun
파이프라인 실행을 관리합니다.
예제: 도움말 표시
$ tkn pipelinerun -h
5.3.5.2. pipelinerun cancel
파이프라인 실행을 취소합니다.
예제: 네임스페이스 에서 mypipelinerun 파이프라인 실행 취소
$ tkn pipelinerun cancel mypipelinerun -n myspace
5.3.5.3. pipelinerun delete
파이프라인 실행을 삭제합니다.
예제: 네임스페이스에서 파이프라인 실행 삭제
$ tkn pipelinerun delete mypipelinerun1 mypipelinerun2 -n myspace
예제: 최근에 실행된 파이프라인 실행 5개를 제외하고 네임스페이스에서 모든 파이프라인 실행 삭제
$ tkn pipelinerun delete -n myspace --keep 5 1
- 1
5를 유지하려는 가장 최근 실행된 파이프라인 실행 수로 바꿉니다.
5.3.5.4. pipelinerun describe
파이프라인 실행에 대해 설명합니다.
예제: 네임스페이스 에서 mypipelinerun 파이프라인 실행 설명
$ tkn pipelinerun describe mypipelinerun -n myspace
5.3.5.5. pipelinerun list
파이프라인 실행을 나열합니다.
예제: 네임스페이스에서 파이프라인 실행 목록 표시
$ tkn pipelinerun list -n myspace
5.3.5.6. pipelinerun logs
파이프라인 실행 로그를 표시합니다.
예제: 네임스페이스의 모든 작업 및 단계와 함께 실행되는 mypipelinerun 파이프라인의 로그를 표시합니다.
$ tkn pipelinerun logs mypipelinerun -a -n myspace
5.3.6. 작업 관리 명령
5.3.6.1. task
작업을 관리합니다.
예제: 도움말 표시
$ tkn task -h
5.3.6.2. task delete
작업을 삭제합니다.
예제: 네임스페이스에서 mytask1 및 mytask2 작업 삭제
$ tkn task delete mytask1 mytask2 -n myspace
5.3.6.3. task describe
작업을 설명합니다.
예제: 네임스페이스의 mytask 작업을 설명합니다.
$ tkn task describe mytask -n myspace
5.3.6.4. task list
작업 나열.
예제: 네임스페이스의 모든 작업 나열
$ tkn task list -n myspace
5.3.6.5. task logs
작업 로그를 표시합니다.
예제: mytask 작업의 mytaskrun 작업 실행 로그 표시
$ tkn task logs mytask mytaskrun -n myspace
5.3.6.6. task start
작업을 시작합니다.
예제: 네임스페이스 에서 mytask 작업 시작
$ tkn task start mytask -s <ServiceAccountName> -n myspace
5.3.7. 작업 실행 명령
5.3.7.1. taskrun
작업 실행 관리.
예제: 도움말 표시
$ tkn taskrun -h
5.3.7.2. taskrun cancel
작업 실행을 취소합니다.
예제: 네임스페이스 에서 mytaskrun 작업을 취소합니다.
$ tkn taskrun cancel mytaskrun -n myspace
5.3.7.3. taskrun delete
TaskRun을 삭제합니다.
예제: 네임스페이스 에서 mytaskrun1 및 mytaskrun2 작업 실행을 삭제합니다.
$ tkn taskrun delete mytaskrun1 mytaskrun2 -n myspace
예제: 네임스페이스에서 최근에 실행된 5개의 작업을 제외한 모든 작업 삭제
$ tkn taskrun delete -n myspace --keep 5 1
- 1
5를 유지하려는 가장 최근 실행된 작업 실행 수로 바꿉니다.
5.3.7.4. taskrun describe
작업 실행을 설명합니다.
예제: 네임스페이스에서 실행되는 mytaskrun 작업 설명
$ tkn taskrun describe mytaskrun -n myspace
5.3.7.5. taskrun list
작업 실행 나열.
예제: 네임 스페이스에서 모든 작업 실행 나열
$ tkn taskrun list -n myspace
5.3.7.6. taskrun logs
작업 실행 로그를 표시합니다.
예제: 네임스페이스에서 mytaskrun 작업의 실시간 로그 표시
$ tkn taskrun logs -f mytaskrun -n myspace
5.3.8. 상태 관리 명령
5.3.8.1. condition
상태를 관리합니다.
예제: 도움말 표시
$ tkn condition --help
5.3.8.2. condition delete
상태를 삭제합니다.
예제: 네임스페이스에서 mycondition1 상태를 삭제합니다.
$ tkn condition delete mycondition1 -n myspace
5.3.8.3. condition describe
상태를 설명합니다.
예제: 네임스페이스의 mycondition1 상태 설명
$ tkn condition describe mycondition1 -n myspace
5.3.8.4. condition list
상태를 나열합니다.
예제: 네임스페이스의 상태 나열
$ tkn condition list -n myspace
5.3.9. 파이프라인 리소스 관리 명령
5.3.9.1. resource
파이프라인 리소스를 관리합니다.
예제: 도움말 표시
$ tkn resource -h
5.3.9.2. resource create
파이프라인 리소스를 생성합니다.
예제: 네임스페이스에서 파이프라인 리소스 생성
$ tkn resource create -n myspace
이 명령은 리소스 이름, 리소스 유형, 리소스 유형 기반 값 입력을 요청하는 대화형 명령입니다.
5.3.9.3. resource delete
파이프라인 리소스를 삭제합니다.
예제: 네임스페이스에서 myresource 파이프라인 리소스를 삭제합니다.
$ tkn resource delete myresource -n myspace
5.3.9.4. resource describe
파이프라인 리소스를 설명합니다.
예제: myresource 파이프라인 리소스 설명
$ tkn resource describe myresource -n myspace
5.3.9.5. resource list
파이프라인 리소스를 나열합니다.
예제: 네임스페이스의 모든 파이프라인 리소스 나열
$ tkn resource list -n myspace
5.3.10. ClusterTask 관리 명령
5.3.10.1. clustertask
ClusterTask를 관리합니다.
예제: 도움말 표시
$ tkn clustertask --help
5.3.10.2. clustertask delete
클러스터의 ClusterTask 리소스를 삭제합니다.
예제: mytask1 및 mytask2 ClusterTasks 삭제
$ tkn clustertask delete mytask1 mytask2
5.3.10.3. clustertask describe
ClusterTask를 설명합니다.
예제: mytask ClusterTask 설명
$ tkn clustertask describe mytask1
5.3.10.4. clustertask list
ClusterTask를 나열합니다.
예제: ClusterTask 나열
$ tkn clustertask list
5.3.10.5. clustertask start
ClusterTask를 시작합니다.
예제: mytask ClusterTask 시작
$ tkn clustertask start mytask
5.3.11. 트리거 관리 명령
5.3.11.1. eventlistener
EventListener를 관리합니다.
예제: 도움말 표시
$ tkn eventlistener -h
5.3.11.2. eventlistener delete
EventListener를 삭제합니다.
예제: 네임스페이스에서 mylistener1 및 mylistener2 EventListeners 삭제
$ tkn eventlistener delete mylistener1 mylistener2 -n myspace
5.3.11.3. eventlistener describe
EventListener를 설명합니다.
예제: 네임스페이스의 mylistener EventListener 설명
$ tkn eventlistener describe mylistener -n myspace
5.3.11.4. eventlistener list
EventListener를 나열합니다.
예제: 네임스페이스의 모든 EventListener 나열
$ tkn eventlistener list -n myspace
5.3.11.5. eventlistener logs
EventListener 로그 표시
예제: 네임스페이스에서 mylistener EventListener의 로그를 표시합니다.
$ tkn eventlistener logs mylistener -n myspace
5.3.11.6. triggerbinding
TriggerBinding을 관리합니다.
예제: TriggerBinding 도움말 표시
$ tkn triggerbinding -h
5.3.11.7. triggerbinding delete
TriggerBinding을 삭제합니다.
예제: 네임스페이스에서 mybinding1 및 mybinding2 TriggerBindings 삭제
$ tkn triggerbinding delete mybinding1 mybinding2 -n myspace
5.3.11.8. triggerbinding describe
TriggerBinding을 설명합니다.
예제: 네임스페이스의 mybinding TriggerBinding 설명
$ tkn triggerbinding describe mybinding -n myspace
5.3.11.9. triggerbinding list
TriggerBinding을 나열합니다.
예제: 네임스페이스의 모든 TriggerBinding 나열
$ tkn triggerbinding list -n myspace
5.3.11.10. triggertemplate
TriggerTemplate을 관리합니다.
예제: TriggerTemplate 도움말 표시
$ tkn triggertemplate -h
5.3.11.11. triggertemplate delete
TriggerTemplate을 삭제합니다.
예제: 네임스페이스에서 mytemplate1 및 mytemplate2 TriggerTemplates 삭제
$ tkn triggertemplate delete mytemplate1 mytemplate2 -n `myspace`
5.3.11.12. triggertemplate describe
TriggerTemplate을 설명합니다.
예제: 네임스페이스의 mytemplate TriggerTemplate 설명
$ tkn triggertemplate describe mytemplate -n `myspace`
5.3.11.13. triggertemplate list
TriggerTemplate을 나열합니다.
예제: 네임스페이스의 모든 TriggerTemplate 나열
$ tkn triggertemplate list -n myspace
5.3.11.14. clustertriggerbinding
Manage ClusterTriggerBindings.
예제: ClusterTriggerBinding 도움말 표시
$ tkn clustertriggerbinding -h
5.3.11.15. clustertriggerbinding delete
ClusterTriggerBinding을 삭제합니다.
예제: myclusterbinding1 및 myclusterbinding2 ClusterTriggerBindings 삭제
$ tkn clustertriggerbinding delete myclusterbinding1 myclusterbinding2
5.3.11.16. clustertriggerbinding describe
ClusterTriggerBinding을 설명합니다.
예제: myclusterbinding ClusterTriggerBinding 설명
$ tkn clustertriggerbinding describe myclusterbinding
5.3.11.17. clustertriggerbinding list
ClusterTriggerBinding을 나열합니다.
예제: 모든 ClusterTriggerBinding 나열
$ tkn clustertriggerbinding list
5.3.12. Hub 상호 작용 명령
작업 및 파이프라인과 같은 리소스에 대해 Tekton Hub와 상호 작용합니다.
5.3.12.1. hub
hub와 상호 작용.
예제: 도움말 표시
$ tkn hub -h
예제: 허브 API 서버와 상호 작용
$ tkn hub --api-server https://api.hub.tekton.dev
각 예에서는 해당 하위 명령 및 플래그를 가져오려면 tkn hub <command> --help를 실행합니다.
5.3.12.2. hub downgrade
설치된 리소스를 다운그레이드합니다.
예제: mynamespace 네임스페이스의 mytask 작업을 이전 버전으로 다운그레이드합니다.
$ tkn hub downgrade task mytask --to version -n mynamespace
5.3.12.3. hub get
이름, 종류, 카탈로그, 버전 별로 리소스 매니페스트를 가져옵니다.
예제: Tekton 카탈로그에서 특정 버전의 myresource 파이프라인 또는 작업에 대한 매니페스트를 가져옵니다.
$ tkn hub get [pipeline | task] myresource --from tekton --version version
5.3.12.4. hub info
이름, 종류, 카탈로그, 버전으로 리소스에 대한 정보를 표시합니다.
예제: tekton 카탈로그에서 특정 버전의 mytask 작업에 대한 정보 표시
$ tkn hub info task mytask --from tekton --version version
5.3.12.5. hub install
종류, 이름 및 버전으로 카탈로그에서 리소스를 설치합니다.
예제: mynamespace 네임스페이스의 작업을 설치합니다.tekton 카탈로그에서 특정 버전의 mytask
$ tkn hub install task mytask --from tekton --version version -n mynamespace
5.3.12.6. hub reinstall
리소스 종류와 이름을 사용하여 리소스를 다시 설치합니다.
예제: mynamespace 네임스페이스의 작업을 다시 설치합니다.tekton 카탈로그에서 특정 버전의 mytask
$ tkn hub reinstall task mytask --from tekton --version version -n mynamespace
5.3.12.7. hub search
이름, 종류 및 태그의 조합으로 리소스를 검색합니다.
예제: 태그 cli로 리소스 검색
$ tkn hub search --tags cli
5.3.12.8. hub upgrade
설치된 리소스를 업그레이드합니다.
예제: mynamespace 네임스페이스에 설치된 mytask 작업을 새 버전으로 업그레이드
$ tkn hub upgrade task mytask --to version -n mynamespace
6장. opm CLI
6.1. opm 정보
opm CLI 툴은 Operator 번들 형식과 함께 사용할 수 있도록 Operator 프레임워크에서 제공합니다. 이 툴을 사용하면 소프트웨어 리포지토리와 유사한 인덱스라는 번들 목록에서 Operator 카탈로그를 생성하고 유지 관리할 수 있습니다. 결과적으로 인덱스 이미지라는 컨테이너 이미지를 컨테이너 레지스트리에 저장한 다음 클러스터에 설치할 수 있습니다.
인덱스에는 컨테이너 이미지 실행 시 제공된 포함 API를 통해 쿼리할 수 있는 Operator 매니페스트 콘텐츠에 대한 포인터 데이터베이스가 포함되어 있습니다. OpenShift Container Platform에서 OLM(Operator Lifecycle Manager)은 CatalogSource 오브젝트에서 인덱스 이미지를 카탈로그로 참조할 수 있으며 주기적으로 이미지를 폴링하여 클러스터에 설치된 Operator를 자주 업데이트할 수 있습니다.
추가 리소스
- 번들 형식에 대한 자세한 내용은 Operator Framework 패키징 형식을 참조하십시오.
- Operator SDK를 사용하여 번들 이미지를 생성하려면 번들 이미지 작업을 참조하십시오.
6.2. opm 설치
Linux, macOS 또는 Windows 워크스테이션에 opm CLI 툴을 설치할 수 있습니다.
사전 요구 사항
Linux의 경우 다음 패키지를 제공해야 합니다. RHEL 8은 다음과 같은 요구 사항을 충족합니다.
-
podman버전 1.9.3 이상(버전 2.0 이상 권장) -
glibc버전 2.28 이상
-
프로세스
- OpenShift 미러 사이트로 이동하여 운영 체제와 일치하는 최신 tarball 버전을 다운로드합니다.
아카이브의 압축을 풉니다.
Linux 또는 macOS의 경우:
$ tar xvf <file>
- Windows의 경우 ZIP 프로그램으로 아카이브의 압축을 풉니다.
PATH에 있는 임의의 위치에 파일을 배치합니다.Linux 또는 macOS의 경우:
PATH를 확인합니다.$ echo $PATH
파일을 이동합니다. 예를 들면 다음과 같습니다.
$ sudo mv ./opm /usr/local/bin/
Windows의 경우:
PATH를 확인합니다.C:\> path
파일을 이동합니다.
C:\> move opm.exe <directory>
검증
opmCLI를 설치한 후 사용할 수 있는지 확인합니다.$ opm version
출력 예
Version: version.Version{OpmVersion:"v1.15.4-2-g6183dbb3", GitCommit:"6183dbb3567397e759f25752011834f86f47a3ea", BuildDate:"2021-02-13T04:16:08Z", GoOs:"linux", GoArch:"amd64"}
6.3. 추가 리소스
-
인덱스 이미지 생성, 업데이트, 정리를 비롯한
opm프로시저는 사용자 정의 카탈로그 관리를 참조하십시오.
7장. Operator SDK
7.1. Operator SDK CLI 설치
Operator SDK는 Operator 개발자가 Operator를 빌드, 테스트, 배포하는 데 사용할 수 있는 CLI(명령줄 인터페이스) 툴을 제공합니다. 워크스테이션에 Operator SDK CLI를 설치하여 자체 Operator 작성을 시작할 준비를 할 수 있습니다.
Operator SDK에 대한 자세한 내용은 Operators 개발에서 참조하십시오.
OpenShift Container Platform 4.8에서는 Operator SDK v1.8.0을 지원합니다.
7.1.1. Operator SDK CLI 설치
Linux에 OpenShift SDK CLI 툴을 설치할 수 있습니다.
사전 요구 사항
- Go v1.16+
-
dockerv17.03 이상,podmanv1.9.3 이상 또는buildahv1.7 이상
프로세스
- OpenShift 미러 사이트로 이동합니다.
-
4.8.4디렉토리에서 최신 버전의 Linux용 tarball을 다운로드합니다. 아카이브의 압축을 풉니다.
$ tar xvf operator-sdk-v1.8.0-ocp-linux-x86_64.tar.gz
파일을 실행 가능으로 설정합니다.
$ chmod +x operator-sdk
추출된
operator-sdk바이너리를PATH에 있는 디렉터리로 이동합니다.작은 정보PATH를 확인하려면 다음을 실행합니다.$ echo $PATH
$ sudo mv ./operator-sdk /usr/local/bin/operator-sdk
검증
Operator SDK CLI를 설치한 후 사용할 수 있는지 확인합니다.
$ operator-sdk version
출력 예
operator-sdk version: "v1.8.0-ocp", ...
7.2. Operator SDK CLI 참조
Operator SDK CLI(명령줄 인터페이스)는 Operator를 더 쉽게 작성할 수 있도록 설계된 개발 키트입니다.
Operator SDK CLI 구문
$ operator-sdk <command> [<subcommand>] [<argument>] [<flags>]
Kubernetes 기반 클러스터(예: OpenShift Container Platform)에 대한 클러스터 관리자 액세스 권한이 있는 Operator 작성자는 Operator SDK CLI를 사용하여 Go, Ansible 또는 Helm을 기반으로 자체 Operator를 개발할 수 있습니다. Kubebuilder는 Go 기반 Operator의 스캐폴딩 솔루션으로 Operator SDK에 포함되어 있습니다. 즉, 기존 Kubebuilder 프로젝트를 그대로 Operator SDK와 함께 사용할 수 있으며 계속 작업할 수 있습니다.
Operator SDK에 대한 자세한 내용은 Operators 개발에서 참조하십시오.
7.2.1. 번들
operator-sdk bundle 명령은 Operator 번들 메타데이터를 관리합니다.
7.2.1.1. 검증
bundle validate 하위 명령은 Operator 번들을 검증합니다.
표 7.1. bundle validate 플래그
| 플래그 | Description |
|---|---|
|
|
|
|
|
번들 이미지를 가져오고 압축 해제하는 툴입니다. 번들 이미지를 검증할 때만 사용됩니다. 사용 가능한 옵션은 |
|
| 사용 가능한 선택적 검증기를 모두 나열합니다. 이 플래그를 설정하면 검증기가 실행되지 않습니다. |
|
|
실행할 선택적 검증기를 선택하는 라벨 선택기입니다. |
7.2.2. cleanup
operator-sdk cleanup 명령은 run 명령을 사용하여 배포한 Operator용으로 생성된 리소스를 삭제하고 제거합니다.
표 7.2. cleanup 플래그
| 플래그 | Description |
|---|---|
|
|
|
|
|
CLI 요청에 사용할 |
|
| 이 플래그가 있는 경우 CLI 요청을 실행할 네임스페이스입니다. |
|
|
실패 전 명령이 완료될 때까지 대기하는 시간입니다. 기본값은 |
7.2.3. 완료
operator-sdk completion 명령은 CLI 명령을 더 신속하고 쉽게 실행할 수 있도록 쉘 완료를 생성합니다.
표 7.3. completion 하위 명령
| 하위 명령 | Description |
|---|---|
|
| bash 완료를 생성합니다. |
|
| zsh 완료를 생성합니다. |
표 7.4. completion 플래그
| 플래그 | Description |
|---|---|
|
| 사용법 도움말 출력입니다. |
예를 들면 다음과 같습니다.
$ operator-sdk completion bash
출력 예
# bash completion for operator-sdk -*- shell-script -*- ... # ex: ts=4 sw=4 et filetype=sh
7.2.4. create
operator-sdk create 명령은 Kubernetes API를 생성하거나 스캐폴드하는 데 사용됩니다.
7.2.4.1. api
create api 하위 명령은 Kubernetes API를 스캐폴드합니다. 하위 명령은 init 명령을 사용하여 초기화한 프로젝트에서 실행해야 합니다.
표 7.5. create api 플래그
| 플래그 | Description |
|---|---|
|
|
|
7.2.5. generate
operator-sdk generate 명령은 특정 생성기를 호출하여 코드 또는 매니페스트를 생성합니다.
7.2.5.1. 번들
generate bundle 하위 명령은 Operator 프로젝트에 대해 일련의 번들 매니페스트, 메타데이터, bundle.Dockerfile 파일을 생성합니다.
일반적으로 generate kustomize manifests 하위 명령을 먼저 실행하여 generate bundle 하위 명령에 사용되는 입력 Kustomize 베이스를 생성합니다. 그러나 초기화된 프로젝트에서 make bundle 명령을 사용하여 이러한 명령을 순서대로 실행하도록 자동화할 수 있습니다.
표 7.6. generate bundle 플래그
| 플래그 | Description |
|---|---|
|
|
번들이 속한 채널의 쉼표로 구분된 목록입니다. 기본값은 |
|
|
|
|
| 번들의 기본 채널입니다. |
|
|
배포 및 RBAC와 같은 Operator 매니페스트용 루트 디렉터리입니다. 이 디렉터리는 |
|
|
|
|
|
기존 번들을 읽을 디렉터리입니다. 이 디렉터리는 번들 |
|
|
번들 매니페스트용 Kustomize 베이스 및 |
|
| 번들 매니페스트를 생성합니다. |
|
| 번들 메타데이터 및 Dockerfile을 생성합니다. |
|
| 번들을 작성할 디렉터리입니다. |
|
|
번들 메타데이터 및 Dockerfile이 있는 경우 덮어씁니다. 기본값은 |
|
| 번들의 패키지 이름입니다. |
|
| 자동 모드로 실행됩니다. |
|
| 번들 매니페스트를 표준 출력에 작성합니다. |
|
| 생성된 번들에 있는 Operator의 의미 체계 버전입니다. 새 번들을 생성하거나 Operator를 업그레이드하는 경우에만 설정됩니다. |
추가 리소스
-
make bundle명령을 사용하여generate bundle하위 명령을 호출하는 작업을 비롯한 전체 프로시저를 보려면 Operator 번들링 및 Operator Lifecycle Manager를 사용한 배포를 참조하십시오.
7.2.5.2. kustomize
generate kustomize 하위 명령에는 Operator에 대한 Kustomize 데이터를 생성하는 하위 명령이 포함되어 있습니다.
7.2.5.2.1. 매니페스트
generate kustomize manifests 하위 명령은 다른 Operator SDK 명령에서 번들 매니페스트를 빌드하는 데 사용하는 Kustomize 베이스 및 kustomization.yaml 파일을 config/manifests 디렉터리에 생성하거나 다시 생성합니다. 베이스가 존재하지 않거나 --interactive=false 플래그를 설정하지 않은 경우 이 명령은 기본적으로 매니페스트 베이스의 중요한 구성 요소인 UI 메타데이터를 대화형으로 요청합니다.
표 7.7. generate kustomize manifests 플래그
| 플래그 | Description |
|---|---|
|
| API 유형 정의를 위한 루트 디렉터리입니다. |
|
|
|
|
| 기존 Kustomize 파일이 있는 디렉터리입니다. |
|
|
|
|
| Kustomize 파일을 작성할 디렉터리입니다. |
|
| 패키지 이름입니다. |
|
| 자동 모드로 실행됩니다. |
7.2.6. init
operator-sdk init 명령은 Operator 프로젝트를 초기화하고 지정된 플러그인 의 기본 프로젝트 디렉터리 레이아웃을 생성하거나 스캐폴드 합니다.
이 명령은 다음 파일을 작성합니다.
- 상용구 라이센스 파일
-
도메인 및 리포지토리가 있는
PROJECT파일 -
프로젝트를 빌드할
Makefile -
프로젝트 종속 항목이 있는
go.mod파일 -
매니페스트를 사용자 정의하는
kustomization.yaml파일 - 관리자 매니페스트용 이미지를 사용자 정의하는 패치 파일
- Prometheus 지표를 활성화하는 패치 파일
-
실행할
main.go파일
표 7.8. init 플래그
| 플래그 | Description |
|---|---|
|
|
|
|
|
프로젝트를 초기화할 플러그인의 이름 및 버전(선택 사항)입니다. 사용 가능한 플러그인은 |
|
|
프로젝트 버전입니다. 사용 가능한 값은 |
7.2.7. run
operator-sdk run 명령은 다양한 환경에서 Operator를 시작할 수 있는 옵션을 제공합니다.
7.2.7.1. 번들
run bundle 하위 명령은 OLM(Operator Lifecycle Manager)을 사용하여 번들 형식으로 Operator를 배포합니다.
표 7.9. run bundle 플래그
| 플래그 | Description |
|---|---|
|
|
번들을 삽입할 인덱스 이미지입니다. 기본 이미지는 |
|
|
Operator CSV(클러스터 서비스 버전)에서 지원되는 설치 모드(예: |
|
|
설치 제한 시간입니다. 기본값은 |
|
|
CLI 요청에 사용할 |
|
| 이 플래그가 있는 경우 CLI 요청을 실행할 네임스페이스입니다. |
|
|
|
추가 리소스
- 가능한 설치 모드에 대한 자세한 내용은 Operator group 멤버십을 참조하십시오.
7.2.7.2. bundle-upgrade
run bundle-upgrade 하위 명령은 이전에 OLM(Operator Lifecycle Manager)을 사용하여 번들 형식으로 설치한 Operator를 업그레이드합니다.
표 7.10. run bundle-upgrade 플래그
| 플래그 | Description |
|---|---|
|
|
업그레이드 제한 시간입니다. 기본값은 |
|
|
CLI 요청에 사용할 |
|
| 이 플래그가 있는 경우 CLI 요청을 실행할 네임스페이스입니다. |
|
|
|
7.2.8. scorecard
operator-sdk scorecard 명령은 스코어 카드 툴을 실행하여 Operator 번들을 검증하고 개선을 위해 제안 사항을 제공합니다. 이 명령은 하나의 인수를 사용하며, 인수는 번들 이미지이거나 매니페스트 및 메타데이터가 포함된 디렉터리입니다. 인수에 이미지 태그가 있으면 이미지가 원격으로 존재해야 합니다.
표 7.11. scorecard 플래그
| 플래그 | Description |
|---|---|
|
|
스코어 카드 구성 파일 경로입니다. 기본 경로는 |
|
|
|
|
|
|
|
| 실행할 수 있는 테스트를 나열합니다. |
|
| 테스트 이미지를 실행할 네임스페이스입니다. |
|
|
결과 출력 형식입니다. 사용 가능한 값은 |
|
| 실행할 테스트를 결정하는 라벨 선택기입니다. |
|
|
테스트에 사용할 서비스 계정입니다. 기본값은 |
|
| 테스트가 실행된 후 리소스 정리를 비활성화합니다. |
|
|
테스트가 완료될 때까지 대기할 시간(초)입니다(예: |
추가 리소스
- 스코어 카드 툴 실행에 대한 자세한 내용은 스코어 카드 툴을 사용하여 Operator 검증을 참조하십시오.