
3.3. Registering the JBoss EAP application
You can now define and register the client in the Red Hat Single Sign-On admin console.
Prerequisites
- You installed a client adapter to work with JBoss EAP.
Procedure
- Log in to the admin console with your admin account: http://localhost:8180/auth/admin/
-
In the top left drop-down list, select the
Demorealm. Click
Clientsin the left side menu to open the Clients page.Clients

- On the right side, click Create.
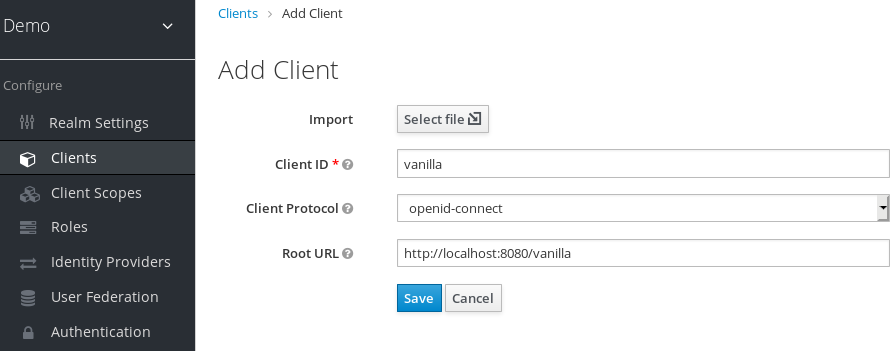
On the Add Client dialog, create a client called vanilla by completing the fields as shown below:
Add Client
- Click Save.
- On the Vanilla client page that appears, click the Installation tab.
Select Keycloak OIDC JSON to generate a file that you need in a later procedure.
Keycloak.json file
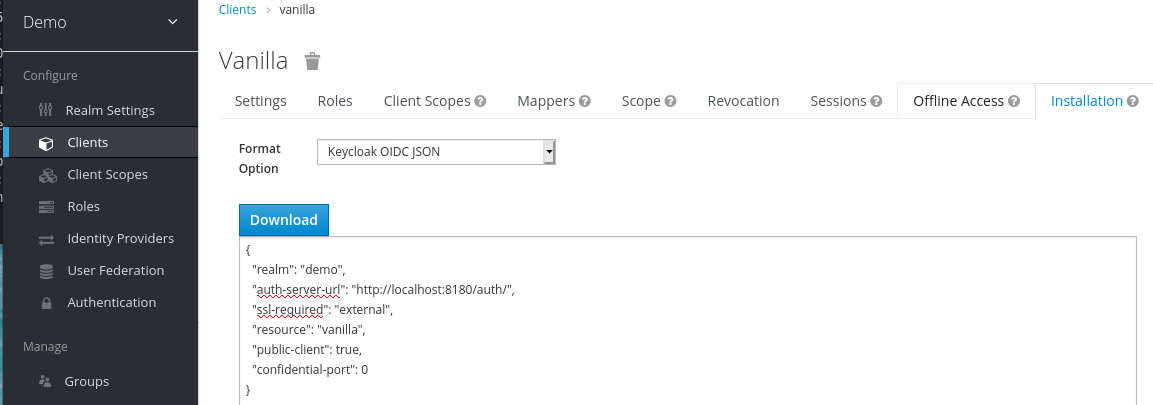
- Click Download to save Keycloak.json in a location that you can find later.
Select Keycloak OIDC JBoss Subsystem XML to generate an XML template.
Template XML
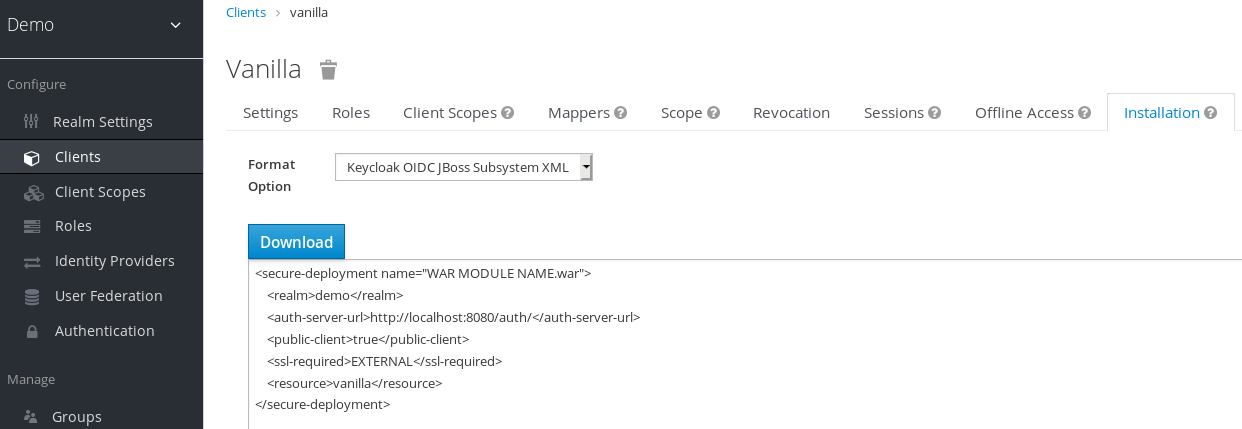
- Click Download to save a copy for use in the next procedure, which involves JBoss EAP configuration.