
Red Hat Training
A Red Hat training course is available for Red Hat Enterprise Linux
10.2. インストールされた Windows ゲスト仮想マシンへのドライバーのインストール
手順10.1 virt-manager を使用したドライバー CD-ROM イメージからのインストール
virt-manager およびゲスト仮想マシンを開きます。
virt-manager を開き、ゲスト名をダブルクリックしてリストからゲスト仮想マシンを開きます。ハードウェアウィンドウを開きます。
ウィンドウ上部のツールバーのライトバイザーアイコンをクリックして、仮想ハードウェアの詳細を表示します。図10.1 仮想ハードウェアの詳細ボタン
 次に、表示される新規ビューの下部にある ボタンをクリックします。これにより、新規デバイスを追加するためのウィザードが開きます。
select the device type - for Red Hat Enterprise Linux 6 versions before to 6.2
Red Hat Enterprise Linux 6.2 以降を使用している場合は、この手順を省略します。バージョン 6.2 よりも前の Red Hat Enterprise Linux 6 バージョンでは、追加するデバイスのタイプを選択する必要があります。この場合は、ドロップダウンメニューから Storage を選択します。図10.2 Red Hat Enterprise Linux 6.1 における Add new virtual hardware ウィザード
 ボタンをクリックして続行します。
ISO ファイルの選択
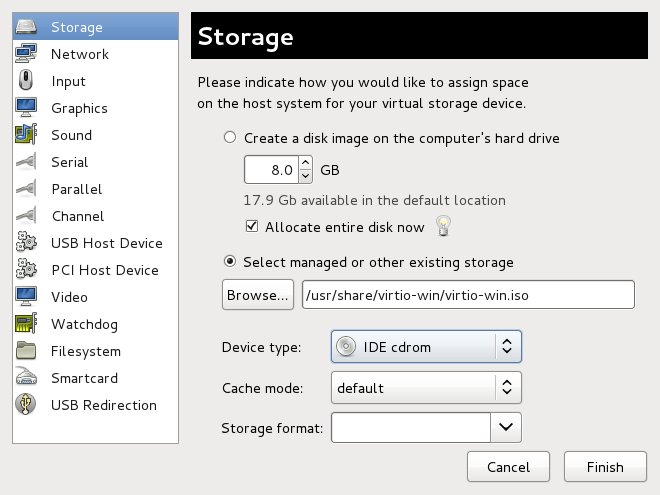
Select managed or other existing storage ラジオボタンが選択されていることを確認し、virtio ドライバーの.isoイメージファイルを参照します。ドライバーの最新版のデフォルトの場所は/usr/share/virtio-win/virtio-win.isoです。デバイスタイプ を IDE cdrom に変更し、 ボタンをクリックして続行します。図10.3 Add new virtual hardware ウィザード
仮想ハードウェアの追加を完了する - 6.2 より前の Red Hat Enterprise Linux 6 バージョン
Red Hat Enterprise Linux 6.2 以降を使用している場合は、この手順を省略します。バージョン 6.2 よりも前の Red Hat Enterprise Linux 6 バージョンでは、 ボタンをクリックして仮想ハードウェアの追加を終了し、ウィザードを閉じます。図10.4 Red Hat Enterprise Linux 6.1 における Add new virtual hardware ウィザード

再起動
仮想マシンを再起動または起動して、ドライバーディスクの使用を開始します。仮想化 IDE デバイスは、仮想マシンが新しいデバイスを認識するために再起動する必要があります。
手順10.2 Windows 7 仮想マシンへの Windows インストール
Computer Management ウィンドウを開きます。
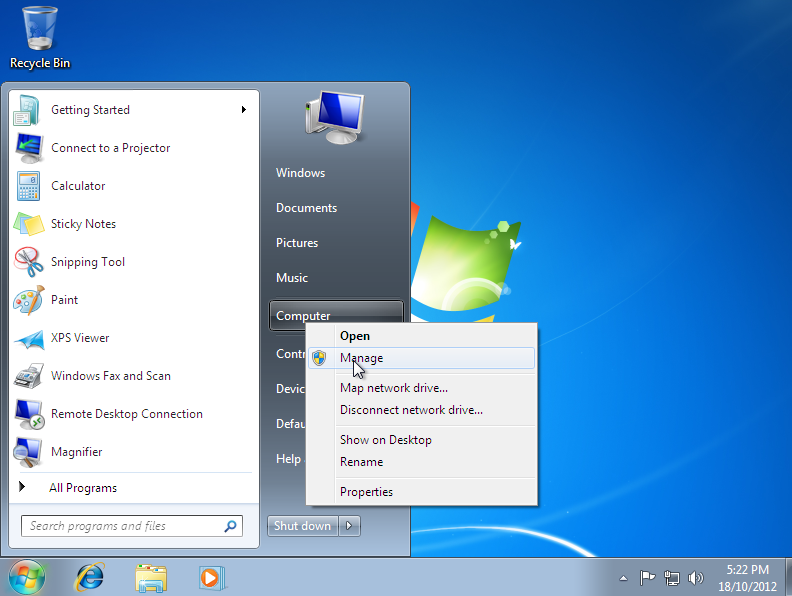
Windows 仮想マシンのデスクトップで、画面下部の アイコンをクリックして、Start メニューを開きます。Computer を右クリックし、ポップアップメニューから Manage を選択します。図10.5 Computer Management ウィンドウ
デバイスマネージャーを開きます。
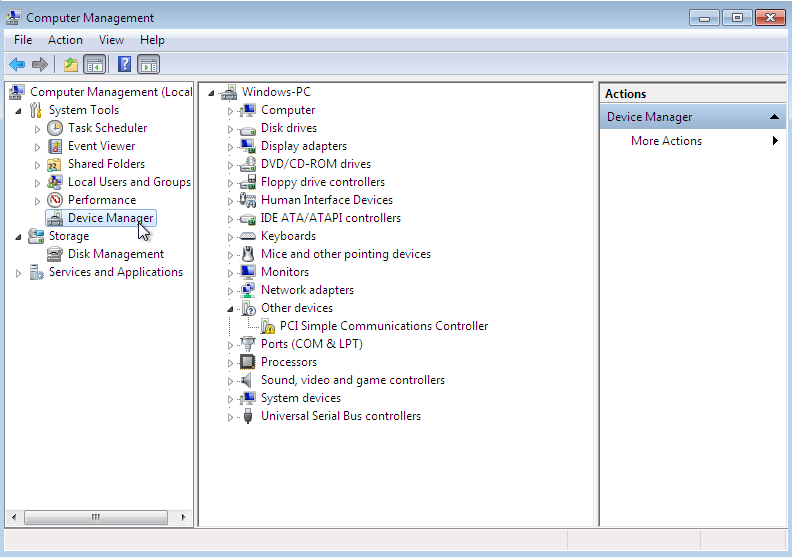
左側のペインから Device Manager を選択します。これは、Computer Management > System Tools にあります。図10.6 Computer Management ウィンドウ
ドライバー更新ウィザードの開始
利用可能なシステムデバイスの表示
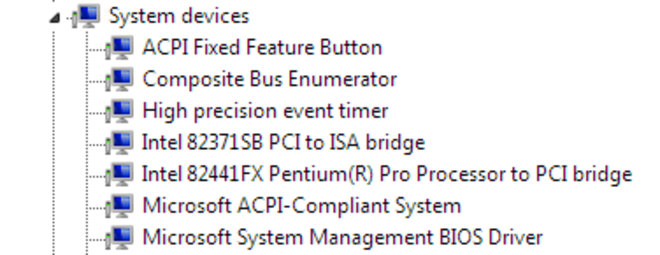
左側の矢印をクリックして、システムデバイス を展開します。図10.7 Computer Management ウィンドウで利用可能なシステムデバイスの表示
適切なデバイスを見つけます。
バルーンドライバー、シリアルドライバー、ネットワークドライバー、ブロックドライバーの 4 つのドライバーが利用可能です。- バルーンドライバーのバルーンは、System devices グループの PCI 標準 RAM Controller に影響します。
vioserial(シリアルドライバー)は、System devices グループの PCI Simple Communication Controller に影響します。NetKVM(ネットワークドライバー)は、Network アダプター グループに影響します。このドライバーは、virtio NIC が設定されている場合にのみ利用できます。このドライバーの設定可能なパラメーターは、付録A NetKVM ドライバーパラメーター に記載されています。viostor(ブロックドライバー)は ディスクドライブ グループに影響します。このドライバーは、virtio ディスクが設定されている場合にのみ利用できます。
更新するドライバーを右クリックし、ポップアップメニューから Update Driver... を選択します。この例では、バルーンドライバーをインストールするため、PCI 標準 RAM コントローラー を右クリックします。図10.8 Computer Management ウィンドウ

ドライバー更新ウィザードを開く
ドロップダウンメニューから Update Driver Software... を選択し、ドライバー更新ウィザードにアクセスします。図10.9 ドライバー更新ウィザードを開く

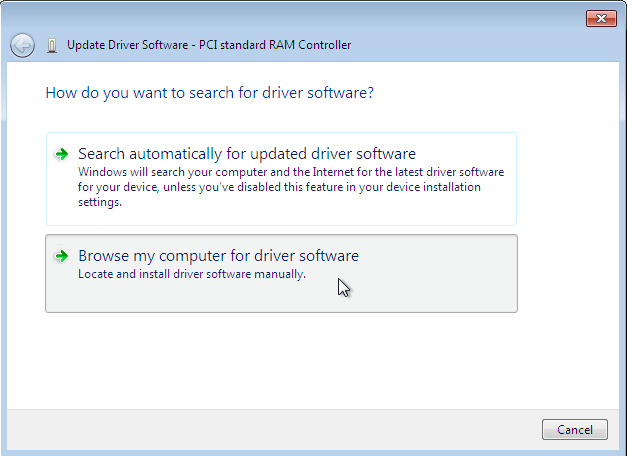
ドライバーの検索方法を指定します。
ドライバー更新ウィザードの最初のページでは、ドライバーソフトウェアを検索する方法を求めます。2 番目のオプション( Browse my computer for driver software )をクリックします。図10.10 ドライバー更新ウィザード
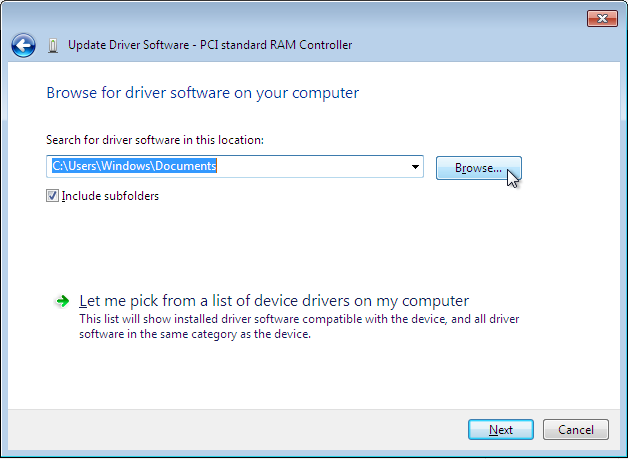
インストールするドライバーを選択します。
ファイルブラウザーを開きます。
Browse...をクリックします。図10.11 ドライバー更新ウィザード
ドライバーの場所を参照します。
オペレーティングシステムとアーキテクチャーの組み合わせごとに、個別のドライバーが提供されます。ドライバーは、ドライバーのタイプ、オペレーティングシステム、およびインストールされるアーキテクチャー(driver_type/os/arch/)に従って階層的に編成されます。たとえば、x86 (32 ビット)アーキテクチャーを備えた Windows 7 オペレーティングシステムの Balloon ドライバーはBalloon/w7/x86ディレクトリーにあります。図10.12 Browse for driver software ポップアップウィンドウ
 正しい場所に移動したら、OK をクリックします。
Next をクリックして続行します。
図10.13 Update Driver Software ウィザード
 ドライバーのインストール中に、以下の画面が表示されます。
図10.14 Update Driver Software ウィザード

インストーラーを閉じます。
インストールが完了すると、以下の画面が表示されます。図10.15 Update Driver Software ウィザード
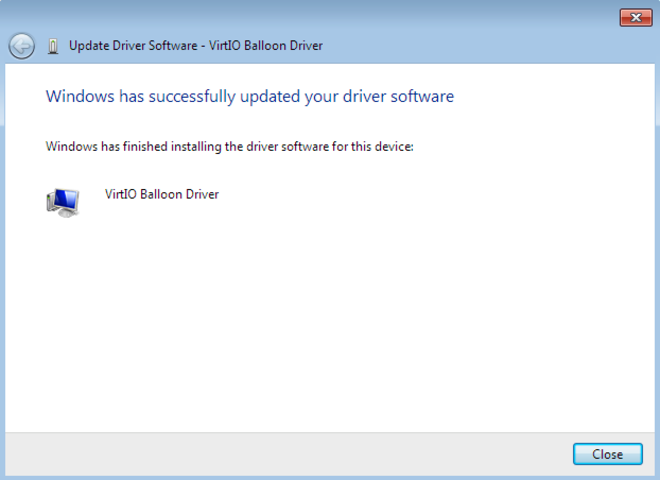 Close をクリックしてインストーラーを閉じます。
再起動
仮想マシンを再起動してドライバーのインストールを完了します。