
Red Hat Training
A Red Hat training course is available for RHEL 8
5.2. Uploading an AMI image to AWS
This section describes how to upload an AMI image to AWS.
Prerequisites
- Your system must be set up for uploading AWS images.
-
You must have an AWS image created by Image Builder. Use the
amioutput type in CLI or Amazon Machine Image Disk (.ami) in GUI when creating the image.
Procedure
Push the image to S3:
$ AMI=8db1b463-91ee-4fd9-8065-938924398428-disk.ami
$ aws s3 cp $AMI s3://$BUCKET
Completed 24.2 MiB/4.4 GiB (2.5 MiB/s) with 1 file(s) remaining
...
After the upload to S3 ends, import the image as a snapshot into EC2:
$ printf '{ "Description": "my-image", "Format": "raw", "UserBucket": { "S3Bucket": "%s", "S3Key": "%s" } }' $BUCKET $AMI > containers.json
$ aws ec2 import-snapshot --disk-container file://containers.json
Replace my-image with the name of the image.
To track progress of the import, run:
$ aws ec2 describe-import-snapshot-tasks --filters Name=task-state,Values=active
Create an image from the uploaded snapshot by selecting the snapshot in the EC2 console, right clicking on it and selecting
Create Image:
Select the
Virtualizationtype ofHardware-assisted virtualizationin the image you create: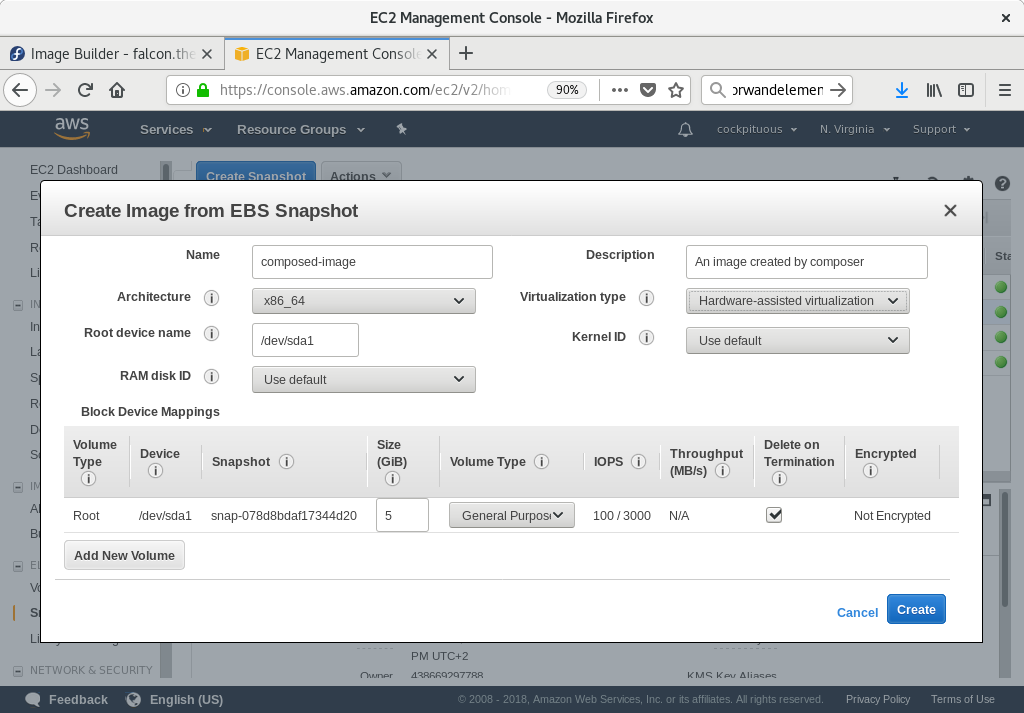
-
Now you can run an instance using whatever mechanism you like (CLI or AWS Console) from the snapshot. Use your private key via SSH to access the resulting EC2 instance. Log in as
ec2-user.