
Chapter 28. Delegating permissions to user groups to manage users using IdM WebUI
Delegation is one of the access control methods in IdM, along with self-service rules and role-based access control (RBAC). You can use delegation to assign permissions to one group of users to manage entries for another group of users.
This section covers the following topics:
28.1. Delegation rules
You can delegate permissions to user groups to manage users by creating delegation rules.
Delegation rules allow a specific user group to perform write (edit) operations on specific attributes for users in another user group. This form of access control rule is limited to editing the values of a subset of attributes you specify in a delegation rule; it does not grant the ability to add or remove whole entries or control over unspecified attributes.
Delegation rules grant permissions to existing user groups in IdM. You can use delegation to, for example, allow the managers user group to manage selected attributes of users in the employees user group.
28.2. Creating a delegation rule using IdM WebUI
Follow this procedure to create a delegation rule using the IdM WebUI.
Prerequisites
-
You are logged in to the IdM Web UI as a member of the
adminsgroup.
Procedure
- From the IPA Server menu, click Role-Based Access Control → Delegations.
Click Add.

In the Add delegation window, do the following:
- Name the new delegation rule.
- Set the permissions by selecting the check boxes that indicate whether users will have the right to view the given attributes (read) and add or change the given attributes (write).
- In the User group drop-down menu, select the group who is being granted permissions to view or edit the entries of users in the member group.
- In the Member user group drop-down menu, select the group whose entries can be edited by members of the delegation group.
In the attributes box, select the check boxes by the attributes to which you want to grant permissions.
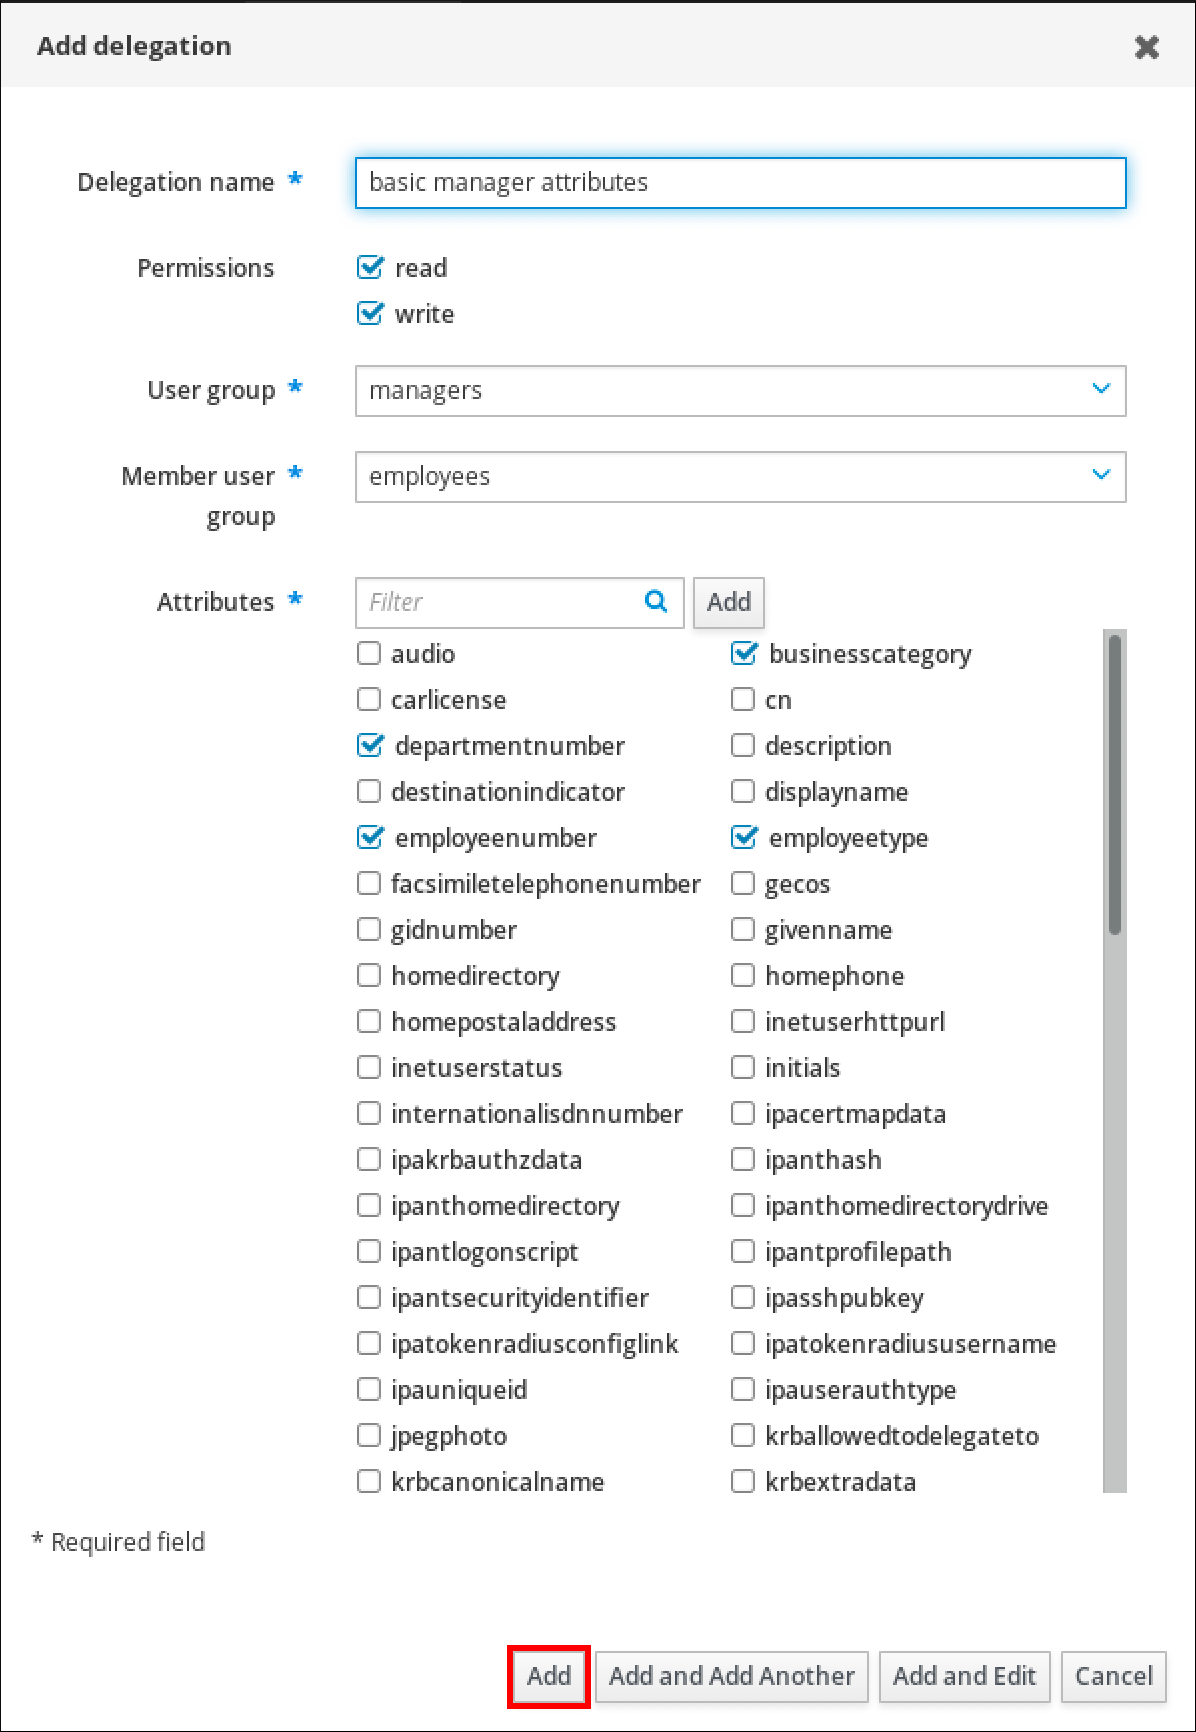
- Click the Add button to save the new delegation rule.
28.3. Viewing existing delegation rules using IdM WebUI
Follow this procedure to view existing delegation rules using the IdM WebUI.
Prerequisites
-
You are logged in to the IdM Web UI as a member of the
adminsgroup.
Procedure
From the IPA Server menu, click Role-Based Access Control → Delegations.

28.4. Modifying a delegation rule using IdM WebUI
Follow this procedure to modify an existing delegation rule using the IdM WebUI.
Prerequisites
-
You are logged in to the IdM Web UI as a member of the
adminsgroup.
Procedure
From the IPA Server menu, click Role-Based Access Control → Delegations.
- Click on the rule you want to modify.
Make the desired changes:
- Change the name of the rule.
- Change granted permissions by selecting the check boxes that indicate whether users will have the right to view the given attributes (read) and add or change the given attributes (write).
- In the User group drop-down menu, select the group who is being granted permissions to view or edit the entries of users in the member group.
- In the Member user group drop-down menu, select the group whose entries can be edited by members of the delegation group.
In the attributes box, select the check boxes by the attributes to which you want to grant permissions. To remove permissions to an attribute, uncheck the relevant check box.
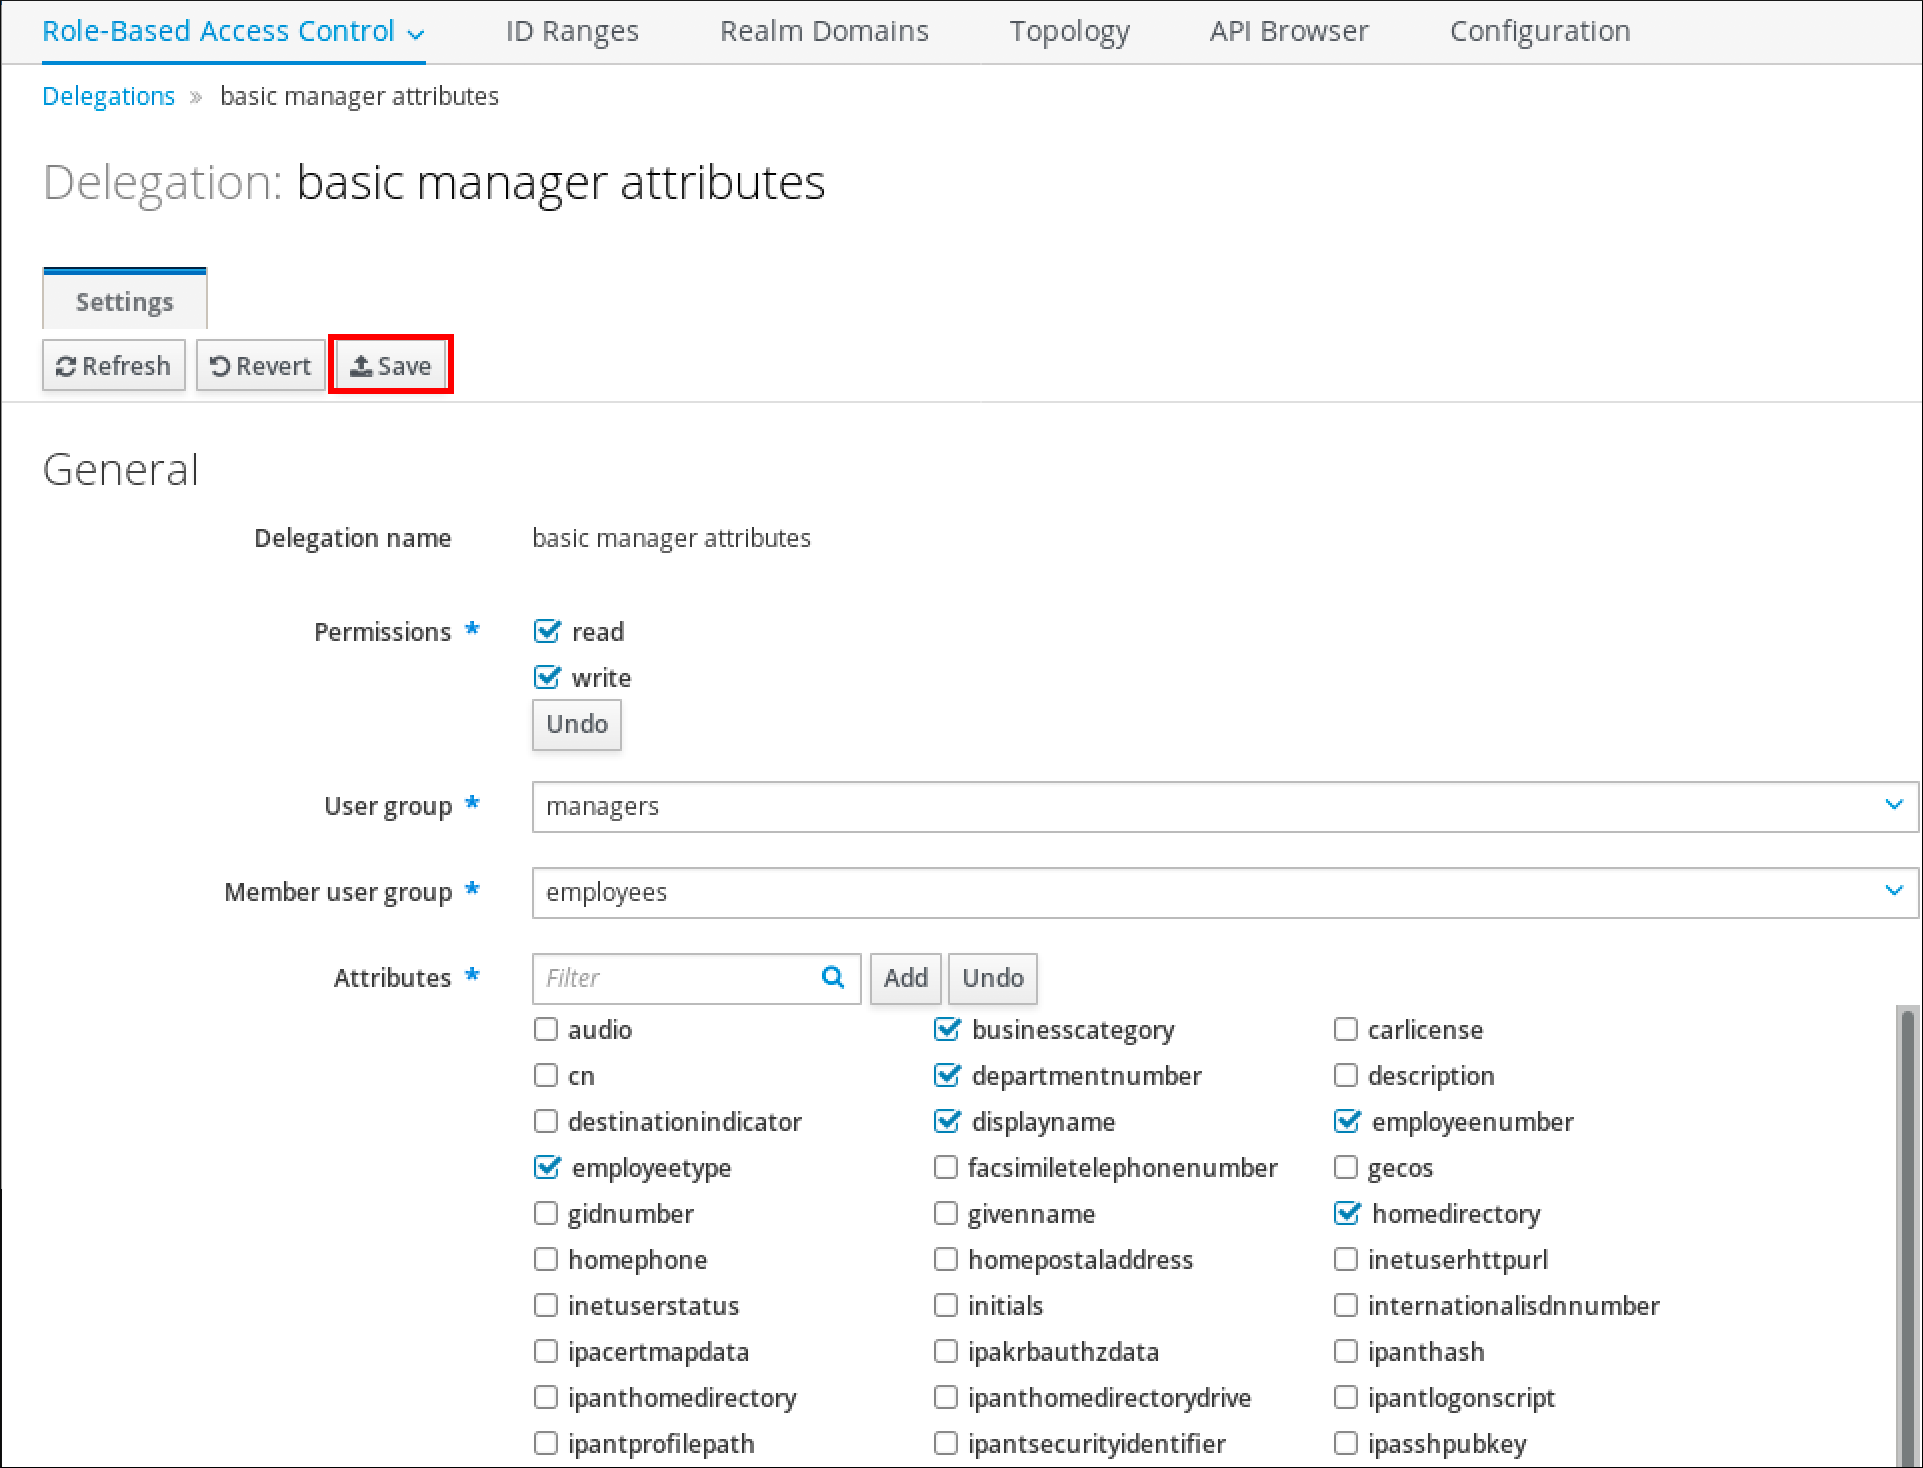
- Click the Save button to save the changes.
28.5. Deleting a delegation rule using IdM WebUI
Follow this procedure to delete an existing delegation rule using the IdM WebUI.
Prerequisites
-
You are logged in to the IdM Web UI as a member of the
adminsgroup.
Procedure
- From the IPA Server menu, click Role-Based Access Control → Delegations.
- Select the check box next to the rule you want to remove.
Click Delete.
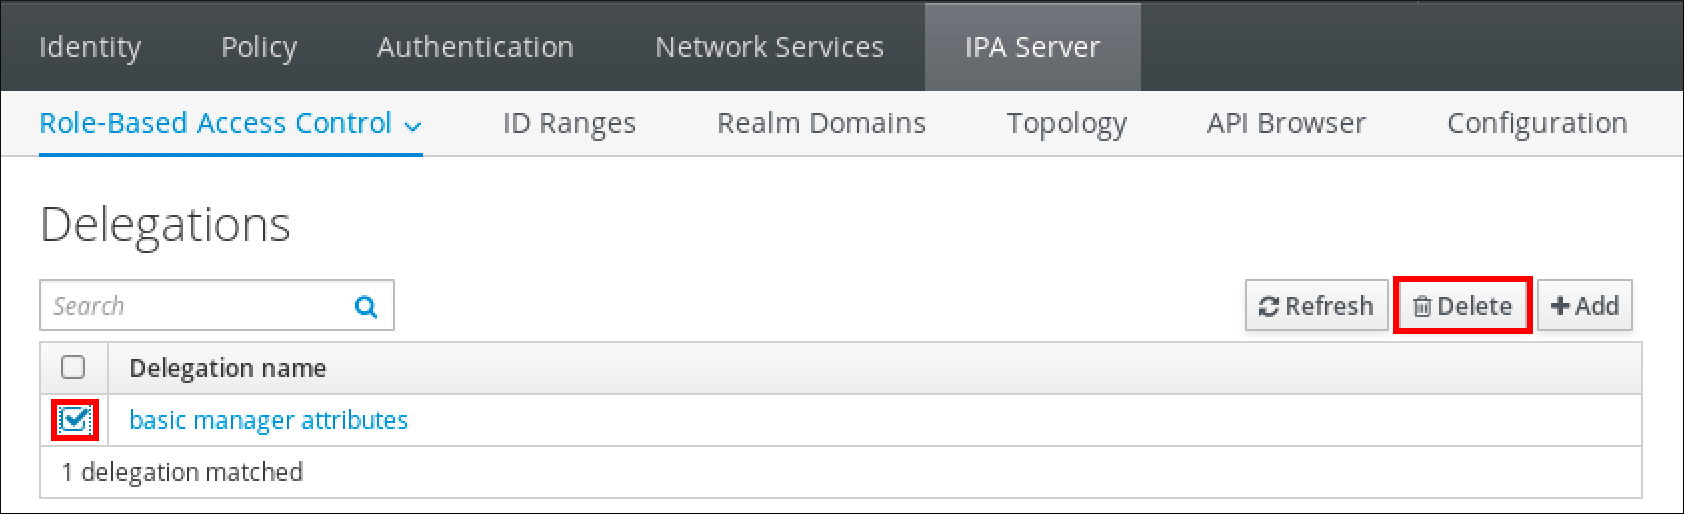
- Click Delete to confirm.