Red Hat Training
A Red Hat training course is available for RHEL 8
Chapter 18. Automating group membership using IdM Web UI
Using automatic group membership enables you to assign users and hosts to groups automatically based on their attributes. For example, you can:
- Divide employees' user entries into groups based on the employees' manager, location, or any other attribute.
- Divide hosts based on their class, location, or any other attribute.
- Add all users or all hosts to a single global group.
This chapter covers the following topics:
- Benefits of automatic group membership
- Automember rules
- Adding an automember rule using IdM Web UI
- Adding a condition to an automember rule using IdM Web UI
- Viewing existing automember rules and conditions using IdM Web UI
- Deleting an automember rule using IdM Web UI
- Removing a condition from an automember rule using IdM Web UI
- Applying automember rules to existing entries using IdM Web UI
- Configuring a default user group using IdM Web UI
- Configuring a default host group using IdM Web UI
18.1. Benefits of automatic group membership
Using automatic membership for users allows you to:
Reduce the overhead of manually managing group memberships
You no longer have to assign every user and host to groups manually.
Improve consistency in user and host management
Users and hosts are assigned to groups based on strictly defined and automatically evaluated criteria.
Simplify the management of group-based settings
Various settings are defined for groups and then applied to individual group members, for example
sudorules, automount, or access control. Adding users and hosts to groups automatically makes managing these settings easier.
18.2. Automember rules
When configuring automatic group membership, the administrator defines automember rules. An automember rule applies to a specific user or host target group. It cannot apply to more than one group at a time.
After creating a rule, the administrator adds conditions to it. These specify which users or hosts get included or excluded from the target group:
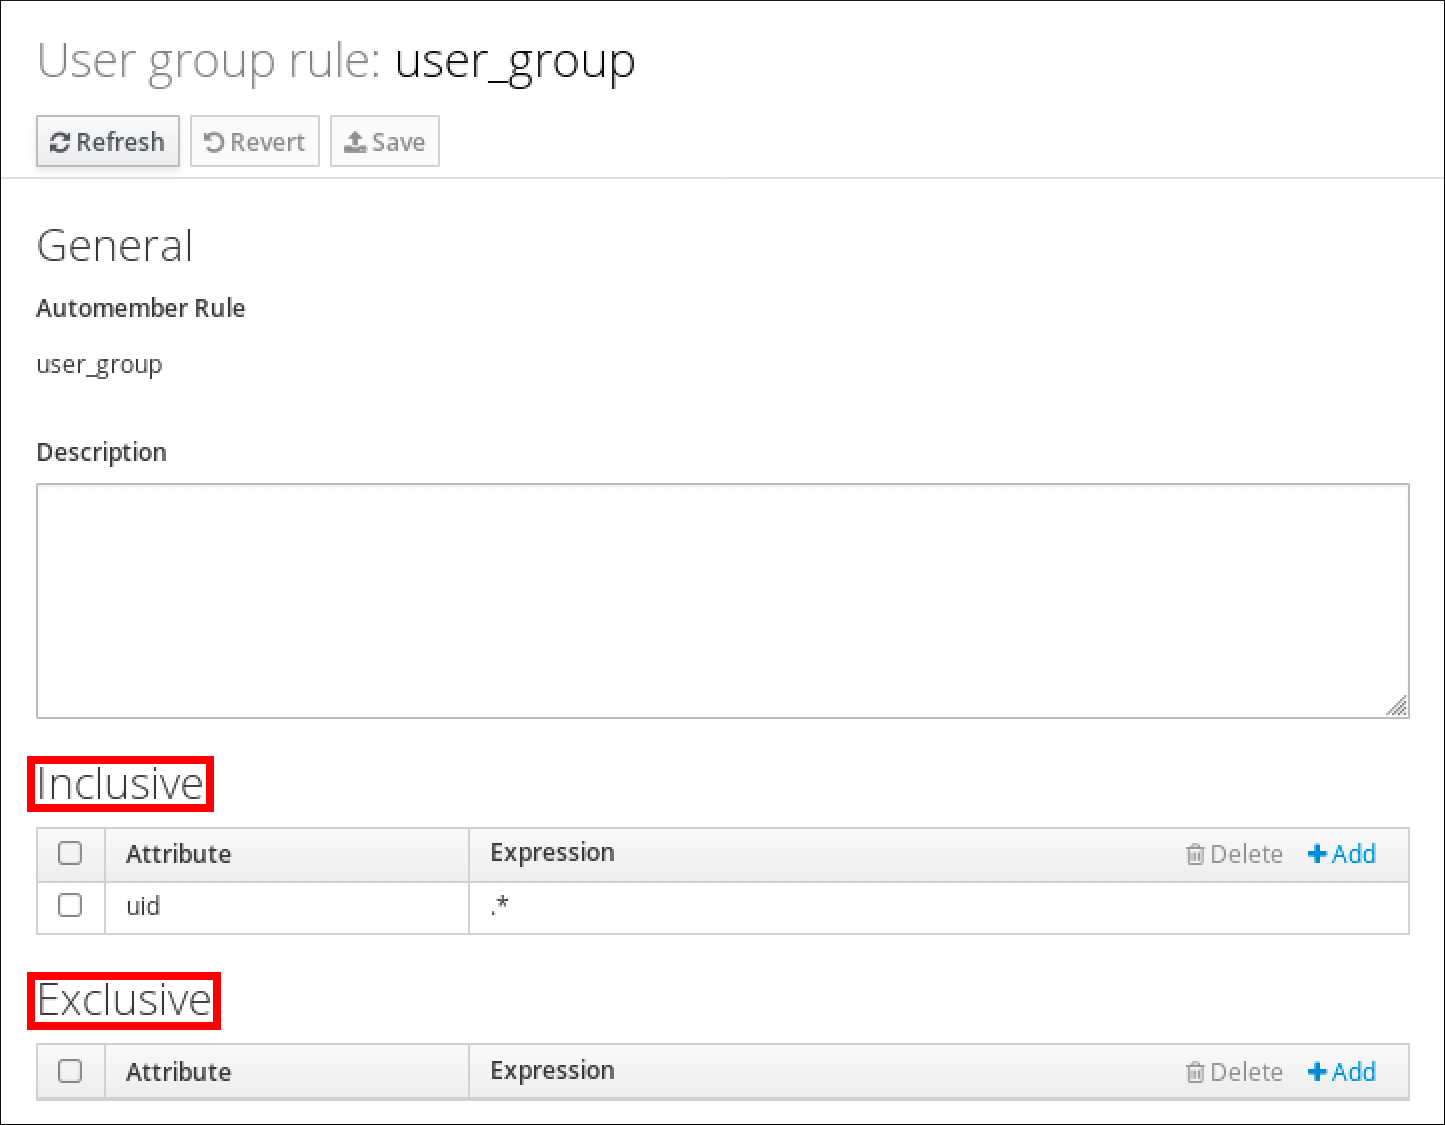
Inclusive conditions
When a user or host entry meets an inclusive condition, it will be included in the target group.
Exclusive conditions
When a user or host entry meets an exclusive condition, it will not be included in the target group.
The conditions are specified as regular expressions in the Perl-compatible regular expressions (PCRE) format. For more information about PCRE, see the pcresyntax(3) man page.
IdM evaluates exclusive conditions before inclusive conditions. In case of a conflict, exclusive conditions take precedence over inclusive conditions.
An automember rule applies to every entry created in the future. These entries will be automatically added to the specified target group. If an entry meets the conditions specified in multiple automember rules, it will be added to all the corresponding groups.
Existing entries are not affected by the new rule. If you want to change existing entries, see Applying automember rules to existing entries using IdM Web UI.
18.3. Adding an automember rule using IdM Web UI
Follow this procedure to add an automember rule using the IdM Web UI. For information about automember rules, see Automember rules.
Existing entries are not affected by the new rule. If you want to change existing entries, see Applying automember rules to existing entries using IdM Web UI.
Prerequisites
- You are logged in to the IdM Web UI.
-
You must be a member of the
adminsgroup. - The target group of the new rule exists in IdM.
Procedure
- Click Identity → Automember, and select either User group rules or Host group rules.
- Click Add.
In the Automember rule field, select the group to which the rule will apply. This is the target group name.
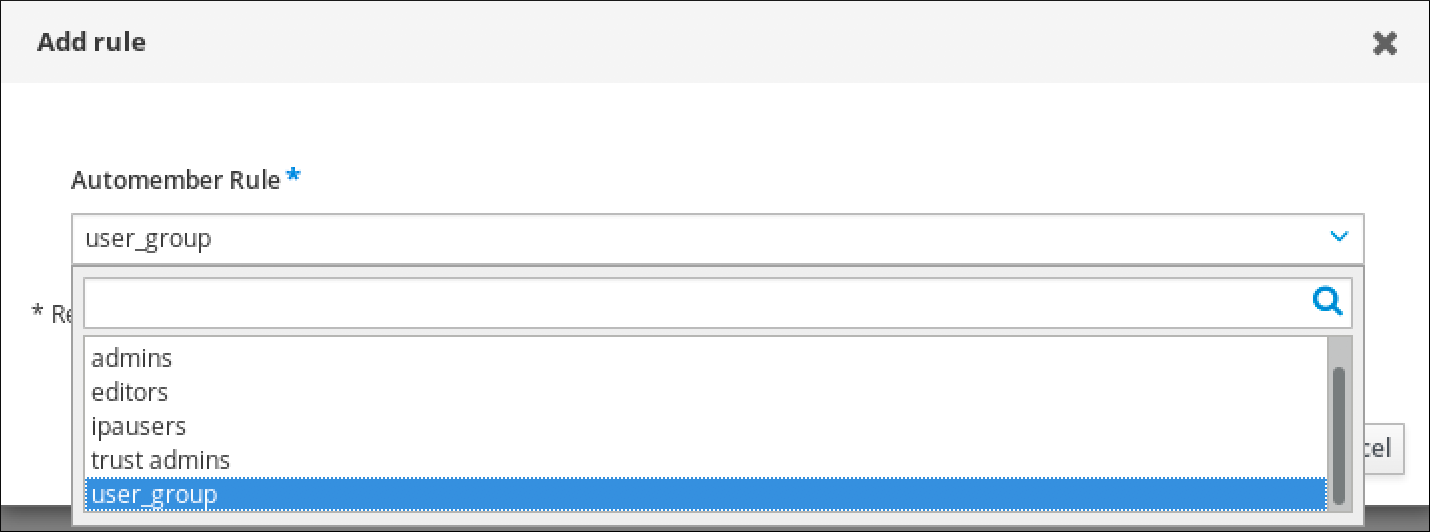
- Click Add to confirm.
- Optional: You can add conditions to the new rule using the procedure described in Adding a condition to an automember rule using IdM Web UI.
18.4. Adding a condition to an automember rule using IdM Web UI
After configuring automember rules, you can then add a condition to that automember rule using the IdM Web UI. For information about automember rules, see Automember rules.
Prerequisites
- You are logged in to the IdM Web UI.
-
You must be a member of the
adminsgroup. - The target rule exists in IdM.
Procedure
- Click Identity → Automember, and select either User group rules or Host group rules.
- Click on the rule to which you want to add a condition.
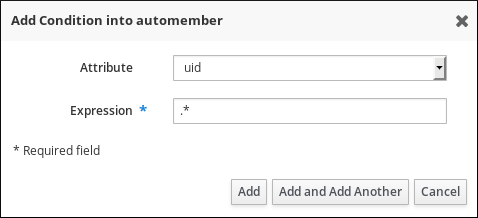
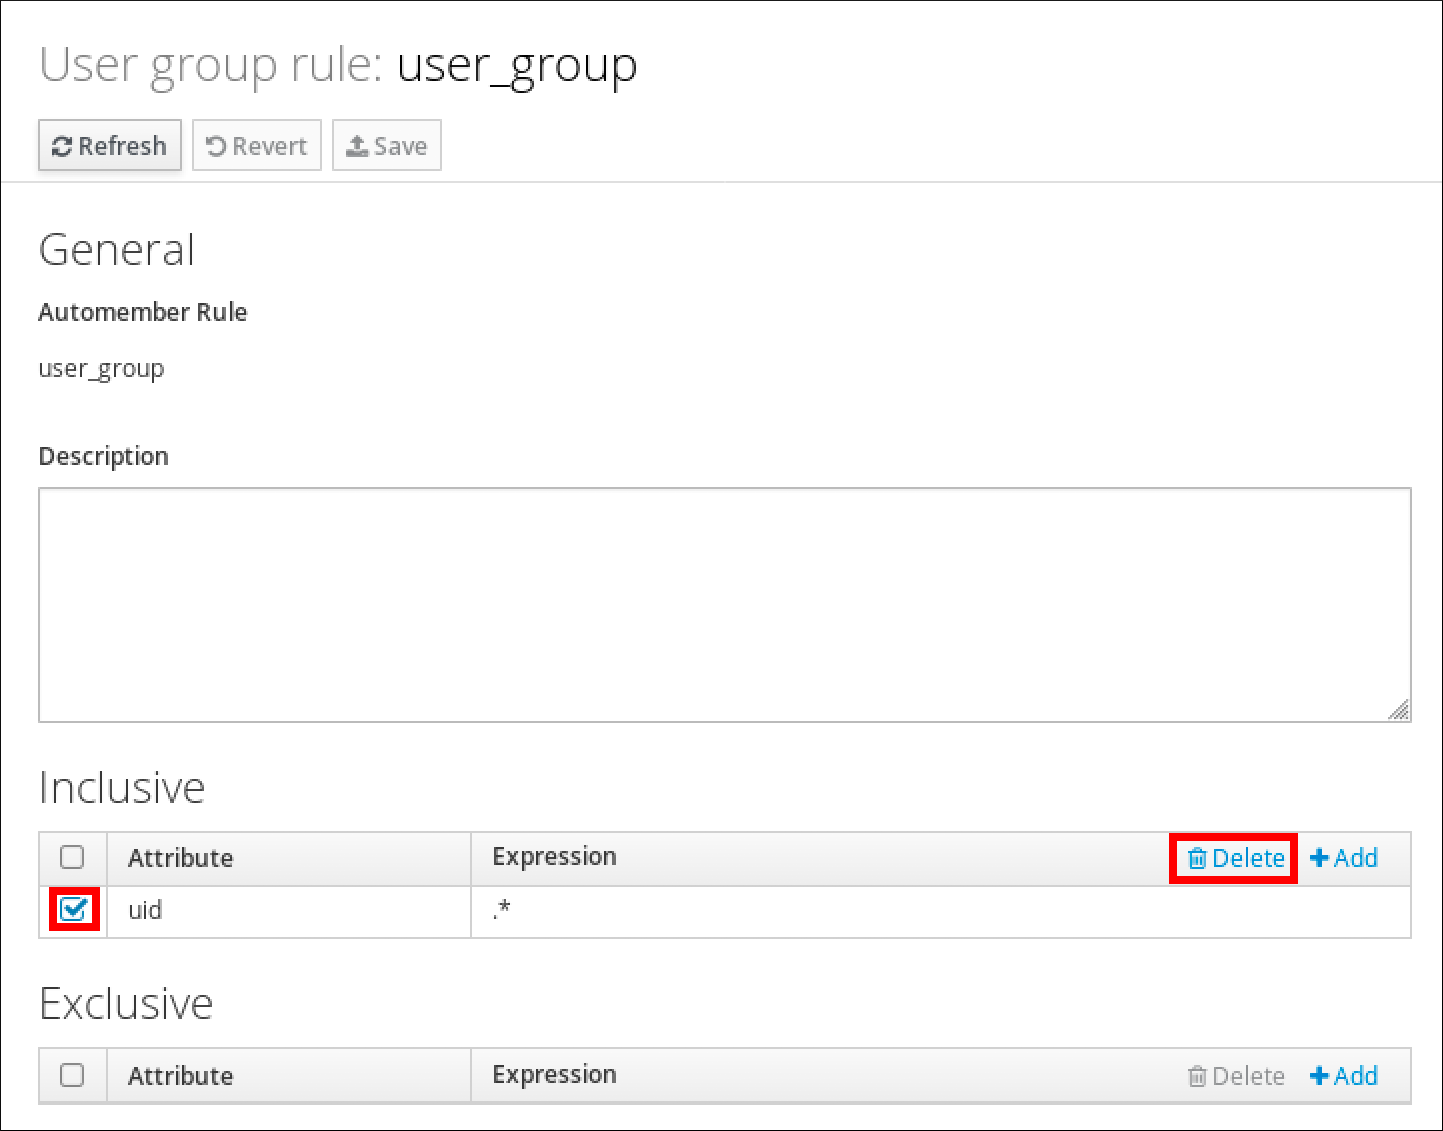
In the Inclusive or Exclusive sections, click Add.

- In the Attribute field, select the required attribute, for example uid.
- In the Expression field, define a regular expression.
Click Add.
For example, the following condition targets all users with any value (.*) in their user ID (uid) attribute.
18.5. Viewing existing automember rules and conditions using IdM Web UI
Follow this procedure to view existing automember rules and conditions using the IdM Web UI.
Prerequisites
- You are logged in to the IdM Web UI.
-
You must be a member of the
adminsgroup.
Procedure
- Click Identity → Automember, and select either User group rules or Host group rules to view the respective automember rules.
Optional: Click on a rule to see the conditions for that rule in the Inclusive or Exclusive sections.
18.6. Deleting an automember rule using IdM Web UI
Follow this procedure to delete an automember rule using the IdM Web UI.
Deleting an automember rule also deletes all conditions associated with the rule. To remove only specific conditions from a rule, see Removing a condition from an automember rule using IdM Web UI.
Prerequisites
- You are logged in to the IdM Web UI.
-
You must be a member of the
adminsgroup.
Procedure
- Click Identity → Automember, and select either User group rules or Host group rules to view the respective automember rules.
- Select the check box next to the rule you want to remove.
Click Delete.

- Click Delete to confirm.
18.7. Removing a condition from an automember rule using IdM Web UI
Follow this procedure to remove a specific condition from an automember rule using the IdM Web UI.
Prerequisites
- You are logged in to the IdM Web UI.
-
You must be a member of the
adminsgroup.
Procedure
- Click Identity → Automember, and select either User group rules or Host group rules to view the respective automember rules.
- Click on a rule to see the conditions for that rule in the Inclusive or Exclusive sections.
- Select the check box next to the conditions you want to remove.
Click Delete.
- Click Delete to confirm.
18.8. Applying automember rules to existing entries using IdM Web UI
Automember rules apply automatically to user and host entries created after the rules were added. They are not applied retroactively to entries that existed before the rules were added.
To apply automember rules to previously added entries, you have to manually rebuild automatic membership. Rebuilding automatic membership re-evaluates all existing automember rules and applies them either to all user or hosts entries, or to specific entries.
Rebuilding automatic membership does not remove user or host entries from groups, even if the entries no longer match the group’s inclusive conditions. To remove them manually, see Removing a member from a user group using IdM Web UI or Removing host group members in the IdM Web UI.
18.8.1. Rebuilding automatic membership for all users or hosts
Follow this procedure to rebuild automatic membership for all user or host entries.
Prerequisites
- You are logged in to the IdM Web UI.
-
You must be a member of the
adminsgroup.
Procedure
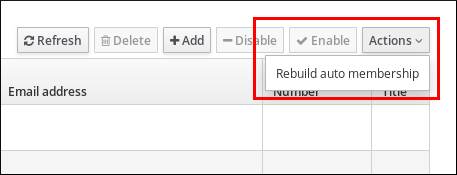
- Select Identity → Users or Hosts.
Click Actions → Rebuild auto membership.
18.8.2. Rebuilding automatic membership for a single user or host only
Follow this procedure to rebuild automatic membership for a specific user or host entry.
Prerequisites
- You are logged in to the IdM Web UI.
-
You must be a member of the
adminsgroup.
Procedure
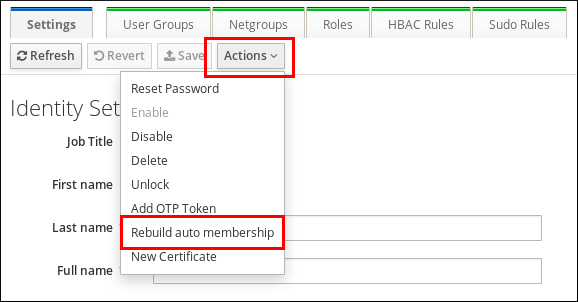
- Select Identity → Users or Hosts.
- Click on the required user or host name.
Click Actions → Rebuild auto membership.
18.9. Configuring a default user group using IdM Web UI
When you configure a default user group, new user entries that do not match any automember rule are automatically added to this default group.
Prerequisites
- You are logged in to the IdM Web UI.
-
You must be a member of the
adminsgroup. - The target user group you want to set as default exists in IdM.
Procedure
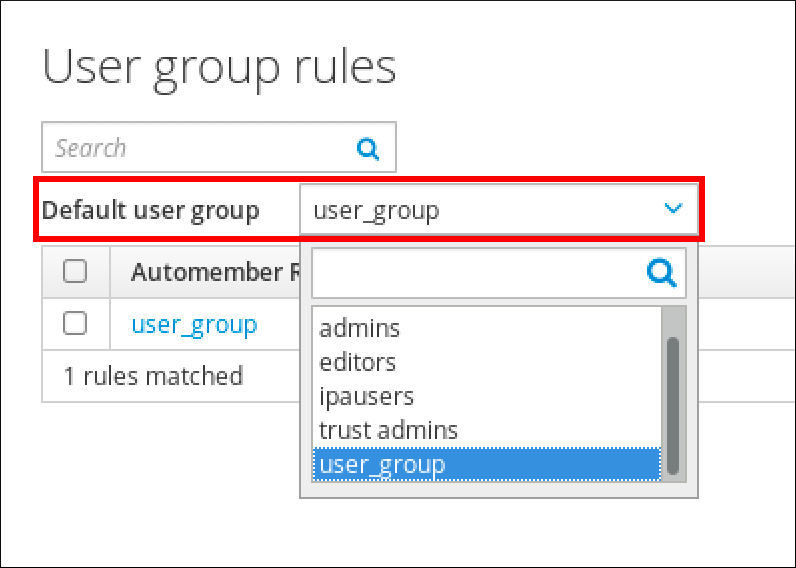
- Click Identity → Automember, and select User group rules.
In the Default user group field, select the group you want to set as the default user group.
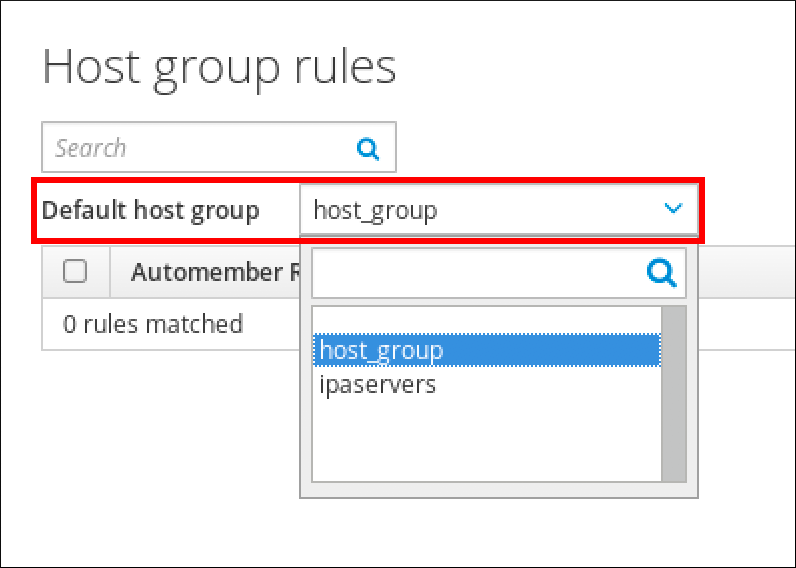
18.10. Configuring a default host group using IdM Web UI
When you configure a default host group, new host entries that do not match any automember rule are automatically added to this default group.
Prerequisites
- You are logged in to the IdM Web UI.
-
You must be a member of the
adminsgroup. - The target host group you want to set as default exists in IdM.
Procedure
- Click Identity → Automember, and select Host group rules.
In the Default host group field, select the group you want to set as the default host group.