
Spring Boot 2.1.x Runtime Guide
Use Spring Boot 2.1 to develop applications that run on OpenShift and on stand-alone RHEL
Abstract
Preface
This guide covers concepts as well as practical details needed by developers to use the Spring Boot runtime. It provides information governing the design of a Spring Boot application deployed as a Linux container on OpenShift.
Chapter 1. Introduction to Application Development with Spring Boot
This section explains the basic concepts of application development with Red Hat runtimes. It also provides an overview about the Spring Boot runtime.
1.1. Overview of Application Development with Red Hat Runtimes
Red Hat OpenShift is a container application platform, which provides a collection of cloud-native runtimes. You can use the runtimes to develop, build, and deploy Java or JavaScript applications on OpenShift.
Application development using Red Hat Runtimes for OpenShift includes:
- A collection of runtimes, such as, Eclipse Vert.x, Thorntail, Spring Boot, and so on, designed to run on OpenShift.
- A prescriptive approach to cloud-native development on OpenShift.
OpenShift helps you manage, secure, and automate the deployment and monitoring of your applications. You can break your business problems into smaller microservices and use OpenShift to deploy, monitor, and maintain the microservices. You can implement patterns such as circuit breaker, health check, and service discovery, in your applications.
Cloud-native development takes full advantage of cloud computing.
You can build, deploy, and manage your applications on:
- OpenShift Container Platform
- A private on-premise cloud by Red Hat.
- Red Hat Container Development Kit (Minishift)
- A local cloud that you can install and execute on your local machine. This functionality is provided by Red Hat Container Development Kit (CDK) or Minishift.
- Red Hat CodeReady Studio
- An integrated development environment (IDE) for developing, testing, and deploying applications.
To help you get started with application development, all the runtimes are available with example applications. These example applications are accessible from the Developer Launcher. You can use the examples as templates to create your applications. For more information on example applications, see the section Introduction to example applications.
This guide provides detailed information about the Spring Boot runtime. For more information on other runtimes, see the relevant runtime documentation.
1.2. Application Development on Red Hat OpenShift using Developer Launcher
You can get started with developing cloud-native applications on OpenShift using Developer Launcher (developers.redhat.com/launch). It is a service provided by Red Hat.
Developer Launcher is a stand-alone project generator. You can use it to build and deploy applications on OpenShift instances, such as, OpenShift Container Platform or Minishift or CDK.
For more information on how to download and deploy applications on Developer Launcher, see the section Downloading and deploying applications using Developer Launcher.
1.3. Overview of Spring Boot
Spring Boot lets you create stand-alone Spring-based applications. See Additional Resources for a list of documents about Spring Boot.
Spring Boot on OpenShift combines streamlined application development capabilities of Spring Boot with the infrastructure and container orchestration functionalities of the OpenShift, such as:
- rolling updates
- service discovery
- canary deployments
- ways to implement common microservice patterns: externalized configuration, health check, circuit breaker, and failover
1.3.1. Spring Boot features and frameworks summary
This guide covers the design of modern applications using Spring Boot. These concepts support developing Web or Websocket applications using either an HTTP connector or non-blocking HTTP connector. The applications can be packaged and deployed without modification or updated to use cloud native features on OpenShift.
The features in the table below are available as a collection of example applications that run on OpenShift. Some features are native to Kubernetes, others are available from Spring Cloud Kubernetes. Features such as Actuator are available directly in Spring Boot.
Table 1.1. Features and Frameworks Summary
| Feature | Problem Addressed | Cloud Native | Framework |
|---|---|---|---|
| Circuit Breaker | Switches between services and continues to process incoming requests without interruption in case of service failure. | Yes | Spring Cloud Netflix - Hystrix |
| Health Check | Checks readiness and liveness of the service. Service restarts automatically if probing fails. | Yes | Spring Boot Actuator |
| Service Discovery// include::modules/TEMPLATE_CONCEPT_explaining_a_concept.adoc[leveloffset=+1] | Discovers Service/Endpoint deployed on OpenShift and exposed behind a service or route using the service name matching a DNS entry. | Yes - using Kubernetes API | Spring Cloud Kubernetes - DiscoveryClient |
| Server Side Load Balancing | Handles load increases by deploying multiple service instances, and by transparently distributing the load across them. | Yes - Using internal Kubernetes Load Balancer | - |
| Externalize Parameters | Makes the application independent of the environment where it runs. | Yes - Kubernetes ConfigMap or Secret | Spring Cloud Kubernetes - ConfigMap |
1.3.2. Introduction to example applications
Examples are working applications that demonstrate how to build cloud native applications and services. They demonstrate prescriptive architectures, design patterns, tools, and best practices that should be used when you develop your applications. The example applications can be used as templates to create your cloud-native microservices. You can update and redeploy these examples using the deployment process explained in this guide.
The examples implement Microservice patterns such as:
- Creating REST APIs
- Interoperating with a database
- Implementing the health check pattern
- Externalizing the configuration of your applications to make them more secure and easier to scale
You can use the examples applications as:
- Working demonstration of the technology
- Learning tool or a sandbox to understand how to develop applications for your project
- Starting point for updating or extending your own use case
Each example application is implemented in one or more runtimes. For example, the REST API Level 0 example is available for the following runtimes:
The subsequent sections explain the example applications implemented for the Spring Boot runtime.
Chapter 2. Configuring your application to use Spring Boot
Reference the Spring Boot BOM (Bill of Materials) artifact in the pom.xml file at the root directory of your application.
Prerequisites
- A Maven-based application
Procedure
Open the
pom.xmlfile, add theme.snowdrop:spring-boot-bomartifact to the<dependencyManagement>section, and specify the<type>pom</type>and<scope>import</scope>:<project> ... <dependencyManagement> <dependencies> <dependency> <groupId>me.snowdrop</groupId> <artifactId>spring-boot-bom</artifactId> <version>2.1.15.Final-redhat-00001</version> <type>pom</type> <scope>import</scope> </dependency> </dependencies> </dependencyManagement> ... </project>Include the following properties to track the version of Spring Boot and the Spring Boot Maven Plugin you are using:
<project>
  ...
  <properties>
    <spring-boot.version>2.1.15.RELEASE</spring-boot.version>
    <spring-boot-maven-plugin.version>2.1.15.RELEASE</spring-boot-maven-plugin.version>
  </properties>
  ...
</project>
Specify the repositories containing Spring Boot Starters and the Spring Boot Maven Plugin:
  <!-- Specify the repositories containing Spring Boot artifacts. -->
  <repositories>
    <repository>
      <id>redhat-ga</id>
      <name>Red Hat GA Repository</name>
      <url>https://maven.repository.redhat.com/ga/</url>
    </repository>
  </repositories>

  <!-- Specify the repositories containing the plugins used to execute the build of your application. -->
  <pluginRepositories>
    <pluginRepository>
      <id>redhat-ga</id>
      <name>Red Hat GA Repository</name>
      <url>https://maven.repository.redhat.com/ga/</url>
    </pluginRepository>
  </pluginRepositories>
Reference
spring-boot-maven-pluginas the plugin used to package your application:<project> ... <build> <plugins> ... <plugin> <groupId>org.springframework.boot</groupId> <artifactId>spring-boot-maven-plugin</artifactId> <version>${spring-boot-maven-plugin.version}</version> <executions> <execution> <goals> <goal>repackage</goal> </goals> </execution> </executions> <configuration> <redeploy>true</redeploy> </configuration> </plugin> ... </plugins> </build> ... </project>
Additional resources
- For more information about packaging your Spring Boot application, see the Spring Boot Maven Plugin documentation.
Chapter 3. Downloading and deploying applications using Developer Launcher
This section shows you how to download and deploy example applications provided with the runtimes. The example applications are available on Developer Launcher.
3.1. Working with Developer Launcher
Developer Launcher (developers.redhat.com/launch) runs on OpenShift. When you deploy example applications, the Developer Launcher guides you through the process of:
- Selecting a runtime
- Building and executing the application
Based on your selection, Developer Launcher generates a custom project. You can either download a ZIP version of the project or directly launch the application on an OpenShift Online instance.
When you deploy your application on OpenShift using Developer Launcher, the Source-to-Image (S2I) build process is used. This build process handles all the configuration, build, and deployment steps that are required to run your application on OpenShift.
3.2. Downloading the example applications using Developer Launcher
Red Hat provides example applications that help you get started with the Spring Boot runtime. These examples are available on Developer Launcher (developers.redhat.com/launch).
You can download the example applications, build, and deploy them. This section explains how to download example applications.
You can use the example applications as templates to create your own cloud-native applications.
Procedure
- Go to Developer Launcher (developers.redhat.com/launch).
- Click Start.
- Click Deploy an Example Application.
- Click Select an Example to see the list of example applications available with the runtime.
- Select a runtime.
Select an example application.
NoteSome example applications are available for multiple runtimes. If you have not selected a runtime in the previous step, you can select a runtime from the list of available runtimes in the example application.
- Select the release version for the runtime. You can choose from the community or product releases listed for the runtime.
- Click Save.
Click Download to download the example application.
A ZIP file containing the source and documentation files is downloaded.
3.3. Deploying an example application on OpenShift Container Platform or CDK (Minishift)
You can deploy the example application to either OpenShift Container Platform or CDK (Minishift). Depending on where you want to deploy your application use the relevant web console for authentication.
Prerequisites
- An example application project created using Developer Launcher.
- If you are deploying your application on OpenShift Container Platform, you must have access to the OpenShift Container Platform web console.
- If you are deploying your application on CDK (Minishift), you must have access to the CDK (Minishift) web console.
-
occommand-line client installed.
Procedure
- Download the example application.
You can deploy the example application on OpenShift Container Platform or CDK (Minishift) using the
occommand-line client.You must authenticate the client using the token provided by the web console. Depending on where you want to deploy your application, use either the OpenShift Container Platform web console or CDK (Minishift) web console. Perform the following steps to get the authenticate the client:
- Login to the web console.
- Click the question mark icon, which is in the upper-right corner of the web console.
- Select Command Line Tools from the list.
-
Copy the
oc logincommand. Paste the command in a terminal to authenticate your
ocCLI client with your account.$ oc login OPENSHIFT_URL --token=MYTOKEN
Extract the contents of the ZIP file.
$ unzip MY_APPLICATION_NAME.zip
Create a new project in OpenShift.
$ oc new-project MY_PROJECT_NAME
-
Navigate to the root directory of
MY_APPLICATION_NAME. Deploy your example application using Maven.
$ mvn clean fabric8:deploy -Popenshift
NOTE: Some example applications may require additional setups. To build and deploy the example applications, follow the instructions provided in the
READMEfile.Check the status of your application and ensure your pod is running.
$ oc get pods -w
NAME                             READY     STATUS      RESTARTS   AGE
MY_APP_NAME-1-aaaaa               1/1       Running     0          58s
MY_APP_NAME-s2i-1-build           0/1       Completed   0          2m
The
MY_APP_NAME-1-aaaaapod has the statusRunningafter it is fully deployed and started. The pod name of your application may be different. The numeric value in the pod name is incremented for every new build. The letters at the end are generated when the pod is created.After your example application is deployed and started, determine its route.
Example Route Information
$ oc get routes
NAME                 HOST/PORT                                                     PATH      SERVICES        PORT      TERMINATION
MY_APP_NAME         MY_APP_NAME-MY_PROJECT_NAME.OPENSHIFT_HOSTNAME      MY_APP_NAME      8080
The route information of a pod gives you the base URL which you can use to access it. In this example, you can use
http://MY_APP_NAME-MY_PROJECT_NAME.OPENSHIFT_HOSTNAMEas the base URL to access the application.
Chapter 4. Developing and deploying a Spring Boot runtime application
In addition to using an example, you can create new Spring Boot applications from scratch and deploy them to OpenShift.
The recommended approach for specifying and using supported and tested Maven artifacts in a Spring Boot application is to use the OpenShift Application Runtimes Spring Boot BOM.
4.1. Developing Spring Boot application
For a basic Spring Boot application, you need to create the following:
- A Java class containing Spring Boot methods.
-
A
pom.xmlfile containing information required by Maven to build the application.
The following procedure creates a simple Greeting application that returns "{"content":"Greetings!"}" as response.
For building and deploying your applications to OpenShift, Spring Boot 2.1.x only supports builder images based on OpenJDK 8 and OpenJDK 11. Oracle JDK and OpenJDK 9 builder images are not supported.
Prerequisites
- Maven installed.
- OpenJDK 8 or OpenJDK 11 installed.
Procedure
Create a new directory
myApp, and navigate to it.$ mkdir myApp $ cd myApp
This is the root directory for the application.
Create directory structure
src/main/java/com/example/in the root directory, and navigate to it.$ mkdir -p src/main/java/com/example/ $ cd src/main/java/com/example/
Create a Java class file
MyApp.javacontaining the application code.package com.example; import org.springframework.boot.SpringApplication; import org.springframework.boot.autoconfigure.SpringBootApplication; import org.springframework.web.bind.annotation.RequestMapping; import org.springframework.web.bind.annotation.ResponseBody; import org.springframework.web.bind.annotation.RestController; @SpringBootApplication @RestController public class MyApp { public static void main(String[] args) { SpringApplication.run(MyApp.class, args); } @RequestMapping("/") @ResponseBody public Message displayMessage() { return new Message(); } static class Message { private String content = "Greetings!"; public String getContent() { return content; } public void setContent(String content) { this.content = content; } } }Create a
pom.xmlfile in the application root directorymyAppwith the following content:<?xml version="1.0" encoding="UTF-8"?> <project xmlns="http://maven.apache.org/POM/4.0.0" xmlns:xsi="http://www.w3.org/2001/XMLSchema-instance" xsi:schemaLocation="http://maven.apache.org/POM/4.0.0 http://maven.apache.org/xsd/maven-4.0.0.xsd"> <modelVersion>4.0.0</modelVersion> <groupId>com.example</groupId> <artifactId>my-app</artifactId> <version>1.0.0-SNAPSHOT</version> <name>MyApp</name> <description>My Application</description> <!-- Specify the JDK builder image used to build your application. --> <!-- Use OpenJDK 8 and OpenJDK 11-based images. OracleJDK-based images are not supported. --> <properties> <fabric8.generator.from>registry.access.redhat.com/redhat-openjdk-18/openjdk18-openshift:latest</fabric8.generator.from> </properties> <!-- Import dependencies from the Spring Boot BOM. --> <dependencyManagement> <dependencies> <dependency> <groupId>me.snowdrop</groupId> <artifactId>spring-boot-bom</artifactId> <version>2.1.15.Final-redhat-00001</version> <type>pom</type> <scope>import</scope> </dependency> </dependencies> </dependencyManagement> <dependencies> <dependency> <groupId>org.springframework.boot</groupId> <artifactId>spring-boot-starter-tomcat</artifactId> </dependency> <dependency> <groupId>org.springframework.boot</groupId> <artifactId>spring-boot-starter-actuator</artifactId> </dependency> <dependency> <groupId>org.springframework.boot</groupId> <artifactId>spring-boot-starter-web</artifactId> </dependency> </dependencies> <build> <plugins> <plugin> <groupId>org.springframework.boot</groupId> <artifactId>spring-boot-maven-plugin</artifactId> <version>2.1.15.RELEASE</version> </plugin> </plugins> </build> <!-- Specify the repositories containing Spring Boot artifacts --> <repositories> <repository> <id>redhat-ga</id> <name>Red Hat GA Repository</name> <url>https://maven.repository.redhat.com/ga/</url> </repository> </repositories> <pluginRepositories> <pluginRepository> <id>redhat-ga</id> <name>Red Hat GA Repository</name> <url>https://maven.repository.redhat.com/ga/</url> </pluginRepository> </pluginRepositories> </project>Build the application using Maven from the root directory of the application.
$ mvn spring-boot:run
Verify that the application is running.
Using
curlor your browser, verify your application is running athttp://localhost:8080.$ curl http://localhost:8080 {"content":"Greetings!"}
Additional information
- As a recommended practice, you can configure liveness and readiness probes to enable health monitoring for your application when running on OpenShift. To learn how application health monitoring on OpenShift works, try the Health Check example.
4.2. Deploying Spring Boot application to OpenShift
To deploy your Spring Boot application to OpenShift, configure the pom.xml file in your application and then use the Fabric8 Maven plugin. You can specify an OpenJDK image by replacing the fabric8.generator.from URL in the pom.xml file.
4.2.1. OpenJDK images for Red Hat Enterprise Linux
You can select the OpenJDK image used to build and deploy your application to OpenShift. OpenJDK images are available for RHEL 7 and RHEL 8 with OpenJDK 8 or OpenJDK 11.
Docker or podman authentication into the Red Hat Ecosystem Catalog is required to access RHEL 8 images. The authentication procedures are provided in the Red Hat Ecosystem Catalog links in the following table.
| OS | JDK | Red Hat Ecosystem Catalog |
|---|---|---|
| RHEL 7 | OpenJDK 8 | |
| RHEL 7 | OpenJDK 11 | |
| RHEL 8 | OpenJDK 8 | |
| RHEL 8 | OpenJDK 11 |
The use of a RHEL 8-based container on a RHEL 7 host, for example with OpenShift 3 or OpenShift 4, has limited support. For more information, see the Red Hat Enterprise Linux Container Compatibility Matrix.
4.2.2. Preparing Spring Boot application for OpenShift deployment
For deploying your Spring Boot application to OpenShift, it must contain:
-
Launcher profile information in the application’s
pom.xmlfile.
In the following procedure, a profile with Fabric8 Maven plugin is used for building and deploying the application to OpenShift.
Prerequisites
- Maven is installed.
- Docker or podman authentication into Red Hat Ecosystem Catalog to access RHEL 8 images.
Procedure
Add the following content to the
pom.xmlfile in the application root directory:... <profiles> <profile> <id>openshift</id> <build> <plugins> <plugin> <groupId>io.fabric8</groupId> <artifactId>fabric8-maven-plugin</artifactId> <version>4.4.1</version> <executions> <execution> <goals> <goal>resource</goal> <goal>build</goal> </goals> </execution> </executions> </plugin> </plugins> </build> </profile> </profiles>Replace the
fabric8.generator.fromproperty in thepom.xmlfile to specify OpenJDK image.RHEL 7 with OpenJDK 8
<fabric8.generator.from>registry.access.redhat.com/redhat-openjdk-18/openjdk18-openshift:latest</fabric8.generator.from>
RHEL 7 with OpenJDK 11
<fabric8.generator.from>registry.access.redhat.com/openjdk/openjdk-11-rhel7:latest</fabric8.generator.from>
RHEL 8 with OpenJDK 8
<fabric8.generator.from>registry.redhat.io/openjdk/openjdk-8-rhel8:latest</fabric8.generator.from>
RHEL 8 with OpenJDK 11
<fabric8.generator.from>registry.redhat.io/openjdk/openjdk-11-rhel8:latest</fabric8.generator.from>
4.2.3. Deploying Spring Boot application to OpenShift using Fabric8 Maven plugin
To deploy your Spring Boot application to OpenShift, you must perform the following:
- Log in to your OpenShift instance.
- Deploy the application to the OpenShift instance.
Prerequisites
-
ocCLI client installed. - Maven installed.
Procedure
Log in to your OpenShift instance with the
occlient.$ oc login ...
Create a new project in the OpenShift instance.
$ oc new-project MY_PROJECT_NAME
Deploy the application to OpenShift using Maven from the application’s root directory. The root directory of an application contains the
pom.xmlfile.$ mvn clean fabric8:deploy -Popenshift
This command uses the Fabric8 Maven Plugin to launch the S2I process on OpenShift and start the pod.
Verify the deployment.
Check the status of your application and ensure your pod is running.
$ oc get pods -w
NAME                             READY     STATUS      RESTARTS   AGE
MY_APP_NAME-1-aaaaa               1/1       Running     0          58s
MY_APP_NAME-s2i-1-build           0/1       Completed   0          2m
The
MY_APP_NAME-1-aaaaapod should have a status ofRunningonce it is fully deployed and started.Your specific pod name will vary.
Determine the route for the pod.
Example Route Information
$ oc get routes
NAME                 HOST/PORT                                                     PATH      SERVICES        PORT      TERMINATION
MY_APP_NAME         MY_APP_NAME-MY_PROJECT_NAME.OPENSHIFT_HOSTNAME      MY_APP_NAME      8080
The route information of a pod gives you the base URL which you use to access it.
In this example,
http://MY_APP_NAME-MY_PROJECT_NAME.OPENSHIFT_HOSTNAMEis the base URL to access the application.Verify that your application is running in OpenShift.
$ curl http://MY_APP_NAME-MY_PROJECT_NAME.OPENSHIFT_HOSTNAME
{"content":"Greetings!"}
4.3. Deploying Spring Boot application to stand-alone Red Hat Enterprise Linux
To deploy your Spring Boot application to stand-alone Red Hat Enterprise Linux, configure the pom.xml file in the application, package it using Maven and deploy using the java -jar command.
Prerequisites
- RHEL 7 or RHEL 8 installed.
4.3.1. Preparing Spring Boot application for stand-alone Red Hat Enterprise Linux deployment
For deploying your Spring Boot application to stand-alone Red Hat Enterprise Linux, you must first package the application using Maven.
Prerequisites
- Maven installed.
Procedure
Add the following content to the
pom.xmlfile in the application’s root directory:... <!-- Specify target artifact type for the repackage goal. --> <packaging>jar</packaging> ... <build> <plugins> <plugin> <groupId>org.springframework.boot</groupId> <artifactId>spring-boot-maven-plugin</artifactId> <version>${spring-boot.version}</version> <executions> <execution> <goals> <goal>repackage</goal> </goals> </execution> </executions> </plugin> </plugins> </build> ...Package your application using Maven.
$ mvn clean package
The resulting JAR file is in the
targetdirectory.
4.3.2. Deploying Spring Boot application to stand-alone Red Hat Enterprise Linux using jar
To deploy your Spring Boot application to stand-alone Red Hat Enterprise Linux, use java -jar command.
Prerequisites
- RHEL 7 or RHEL 8 installed.
- OpenJDK 8 or OpenJDK 11 installed.
- A JAR file with the application.
Procedure
Deploy the JAR file with the application.
$ java -jar my-project-1.0.0.jar
Verify the deployment.
Use
curlor your browser to verify your application is running athttp://localhost:8080:$ curl http://localhost:8080
Chapter 5. Developing reactive applications using Spring Boot with Eclipse Vert.x
Eclipse Vert.x reactive components for Spring Boot are provided as a Technology Preview.
This section provides an introduction to developing applications in a reactive way using Spring Boot starters based on Spring Boot and Eclipse Vert.x. The following examples demonstrate how you can use the starters to create reactive applications.
5.1. Introduction to Spring Boot with Eclipse Vert.x
The Spring reactive stack is build on Project Reactor, a reactive library that implements backpressure and is compliant with the Reactive Streams specification. It provides the Flux and Mono functional API types that enable asynchronous event stream processing.
On top of Project Reactor, Spring provides WebFlux, an asynchronous event-driven web application framework. While WebFlux is designed to work primarily with Reactor Netty, it can also operate with other reactive HTTP servers, such as Eclipse Vert.x.
Spring WebFlux and Reactor enable you to create applications that are:
- Non-blocking: The application continues to handle further requests when waiting for a response from a remote component or service that is required to complete the current request.
- Asynchronous: the application responds to events from an event stream by generating response events and publishing them back to the event stream where they can be picked up by other clients in the application.
- Event-driven: The application responds to events generated by the user or by another service, such as mouse clicks, HTTP requests, or new files being added to a storage.
- Scalable: Increasing the number of Publishers or Subscribers to match the required event processing capacity of an application only results in a slight increase in the complexity of routing requests between individual clients in the application. Reactive applications can handle large numbers of events using fewer computing and networking resources as compared to other application programming models.
- Resilient: The application can handle failure of services it depend on without a negative impact on its overall quality of service.
Additional advantages of using Spring WebFlux include:
- Similarity with SpringMVC
- The SpringMVC API types and WebFlux API types are similar, and it is easy for developers to apply knowledge of SpringMVC to programming applications with WebFlux.
The Spring Reactive offering by Red Hat brings the benefits of Reactor and WebFlux to OpenShift and stand-alone RHEL, and introduces a set of Eclipse Vert.x extensions for the WebFLux framework. This allows you to retain the level of abstraction and rapid prototyping capabilities of Spring Boot, and provides an asynchronous IO API that handles the network communications between the services in your application in a fully reactive manner.
- Annotated controllers support
- WebFlux retains the endpoint controller annotations introduced by SpringMVC (Both SpringMVC and WebFlux support reactive RxJava2 and Reactor return types).
- Functional programming support
-
Reactor interacts with the Java 8 Functional API, as well as
CompletablebFuture, andStreamAPIs. In addition to annotation-based endpoints, WebFlux also supports functional endpoints.
Additional resources
See the following resources for additional in-depth information on the implementation details of technologies that are part of the Spring Reactive stack:
- The Reactive Manifesto
- Reactive Streams specification
- Spring Framework reference documentation: Web Applications on Reactive Stack
- Reactor Netty documentation
-
API Reference page for the
Monoclass in Project Reactor Documentation -
API Reference page for the
Fluxclass in Project Reactor Documentation
5.2. Reactive Spring Web
The spring-web module provides the foundational elements of the reactive capabilities of Spring WebFlux, including:
-
HTTP abstractions provided by the
HttpHandlerAPI - Reactive Streams adapters for supported servers (Eclipse Vert.x, Undertow and others)
Codecs for encoding and decoding event stream data. This includes:
-
DataBuffer, an abstraction for different types of byte buffer representations (NettyByteBuf,java.nio.ByteBuffer, as well as others) - Low-level contracts to encode and decode content independent of HTTP
-
HttpMessageReaderandHTTPMessageWritercontracts to encode and decode HTTP message content
-
-
The
WebHandlerAPI (a counterpart to the Servlet 3.1 I/O API that uses non-blocking contracts).
When designing your web application, you can choose between 2 programming models that Spring WebFlux provides:
- Annotated Controllers
-
Annotated controllers in Spring WebFlux are consistent with Spring MVC, and are based on the same annotations from the
spring-webmodule. In addition to thespring-webmodule from SpringMVC, its WebFlux counterpart also supports reactive@RequestBodyarguments. - Functional Endpoints
- Functional endpoints provided by spring WebFlux on Java 8 Lambda expressions and functional APIs, this programming model relies on a dedicated library (Reactor, in this case) that routes and handles requests. As opposed to annotation-based endpoint controllers that rely on declaring Intent and using callbacks to complete an activity, the reactive model based on functional endpoints allows request handling to be fully controlled by the application.
5.3. Creating a reactive Spring Boot HTTP service with WebFlux
Create a basic reactive Hello World HTTP web service using Spring Boot and WebFlux.
Prerequisites
- JDK 8 or JDK 11 installed
- Maven installed
- A Maven-based application project configured to use Spring Boot
Procedure
Add
vertx-spring-boot-starter-httpas a dependency in thepom.xmlfile of your project.pom.xml<project> ... <dependencies> ... <dependency> <groupId>dev.snowdrop</groupId> <artifactId>vertx-spring-boot-starter-http</artifactId> </dependency> ... <dependencies> ... </project>Create a main class for your application and define the router and handler methods.
HttpSampleApplication.javapackage dev.snowdrop.vertx.sample.http; import org.springframework.boot.SpringApplication; import org.springframework.boot.autoconfigure.SpringBootApplication; import org.springframework.context.annotation.Bean; import org.springframework.web.reactive.function.server.RouterFunction; import org.springframework.web.reactive.function.server.ServerRequest; import org.springframework.web.reactive.function.server.ServerResponse; import reactor.core.publisher.Mono; import static org.springframework.web.reactive.function.BodyInserters.fromObject; import static org.springframework.web.reactive.function.server.RouterFunctions.route; import static org.springframework.web.reactive.function.server.ServerResponse.ok; @SpringBootApplication public class HttpSampleApplication { public static void main(String[] args) { SpringApplication.run(HttpSampleApplication.class, args); } @Bean public RouterFunction<ServerResponse> helloRouter() { return route() .GET("/hello", this::helloHandler) .build(); } private Mono<ServerResponse> helloHandler(ServerRequest request) { String name = request .queryParam("name") .orElse("World"); String message = String.format("Hello, %s!", name); return ok() .body(fromObject(message)); } }OPTIONAL: Run and test your application locally:
Navigate to the root directory of your Maven project:
$ cd myApp
Package your application:
$ mvn clean package
Start your application from the command line:
$ java -jar target/vertx-spring-boot-sample-http.jar
In a new terminal window, issue an HTTP request on the
/helloendpoint:$ curl localhost:8080/hello Hello, World!
Provide a custom name with your request to get a personalized response:
$ curl http://localhost:8080/hello?name=John
Hello, John!
Additional resources
- You can deploy your application to an OpenShift cluster using Fabric8 Maven Plugin.
- You can also configure your application for deployment on stand-alone Red Hat Enterprise Linux.
- For more detail on creating reactive web services with Spring Boot, see the reactive REST service development guide in the Spring community documentation.
5.4. Using basic authentication in a reactive Spring Boot WebFlux application.
Create a reactive Hello World HTTP web service with basic form-based authentication using Spring Security and WebFlux starters.
Prerequisites
- JDK 8 or JDK 11 installed
- Maven installed
- A Maven-based application project configured to use Spring Boot
Procedure
Add
vertx-spring-boot-starter-httpandspring-boot-starter-securityas dependencies in thepom.xmlfile of your project.pom.xml<project> ... <dependencies> ... <dependency> <groupId>dev.snowdrop</groupId> <artifactId>vertx-spring-boot-starter-http</artifactId> </dependency> <dependency> <groupId>org.springframework.boot</groupId> <artifactId>spring-boot-starter-security</artifactId> </dependency> ... <dependencies> ... </project>Create an endpoint controller class for your application:
HelloController.javapackage dev.snowdrop.vertx.sample.http.security; import java.security.Principal; import org.springframework.web.bind.annotation.GetMapping; import org.springframework.web.bind.annotation.RestController; import reactor.core.publisher.Mono; @RestController public class HelloController { @GetMapping("/") public Mono<String> hello(Mono<Principal> principal) { return principal .map(Principal::getName) .map(this::helloMessage); } private String helloMessage(String username) { return "Hello, " + username + "!"; } }Create the main class of your application:
HttpSecuritySampleApplication.javapackage dev.snowdrop.vertx.sample.http.security; import org.springframework.boot.SpringApplication; import org.springframework.boot.autoconfigure.SpringBootApplication; @SpringBootApplication public class HttpSecuritySampleApplication { public static void main(String[] args) { SpringApplication.run(HttpSecuritySampleApplication.class, args); } }Create a
SecurityConfigurationclass that stores the user credentials for accessing the/helloendpoint.SecurityConfiguration.javapackage dev.snowdrop.vertx.sample.http.security; import org.springframework.context.annotation.Bean; import org.springframework.security.config.annotation.web.reactive.EnableWebFluxSecurity; import org.springframework.security.core.userdetails.MapReactiveUserDetailsService; import org.springframework.security.core.userdetails.User; import org.springframework.security.core.userdetails.UserDetails; @EnableWebFluxSecurity public class SecurityConfiguration { @Bean public MapReactiveUserDetailsService userDetailsService() { UserDetails user = User.withDefaultPasswordEncoder() .username("user") .password("user") .roles("USER") .build(); return new MapReactiveUserDetailsService(user); } }OPTIONAL: Run and test your application locally:
Navigate to the root directory of your Maven project:
$ cd myApp
Package your application:
$ mvn clean package
Start your application from the command line:
$ java -jar target/vertx-spring-boot-sample-http-security.jar
-
Navigate to
http://localhost:8080using a browser to access the login screen. Log in using the credentials below:
- username: user
- password: user
You receive a customized greeting when you are logged in:
Hello, user!
-
Navigate to
http://localhost:8080/logoutusing a web browser and use the Log out button to log out of your application. Alternatively, use a terminal to make an unauthenticated HTTP request on
localhost:8080. You receive HTTP401 Unauthorizedresponse from your application.$ curl -I http://localhost:8080 HTTP/1.1 401 Unauthorized WWW-Authenticate: Basic realm="Realm" Cache-Control: no-cache, no-store, max-age=0, must-revalidate Pragma: no-cache Expires: 0 X-Content-Type-Options: nosniff X-Frame-Options: DENY X-XSS-Protection: 1 ; mode=block Referrer-Policy: no-referrer
Issue an authenticated request using the example user credentials. You receive a personalized response.
$ curl -u user:user http://localhost:8080
Hello, user!
Additional resources
- You can deploy your application to an OpenShift cluster using Fabric8 Maven Plugin.
- You can also configure your application for deployment on stand-alone Red Hat Enterprise Linux.
- For the full specification of the Basic HTTP authentication scheme, see document RFC-7617.
- For the full specification of HTTP authentication extensions for interactive clients, including form-based authentication, see document RFC-8053.
5.5. Using OAuth2 authentication in a reactive Spring Boot application.
Set up OAuth2 authentication for your reactive Spring Boot application and authenticate using your client ID and client secret.
Prerequisites
- JDK 8 or JDK 11 installed
- A GitHub account
- Maven installed
- A Maven-based application project configured to use Spring Boot
Procedure
Register a new OAuth 2 application on your Github account. Ensure that you provide the following values in the registration form:
-
Homepage URL:
http://localhost:8080 Authorization callback URL:
http://localhost:8080/login/oauth2/code/githubEnsure that you save the client ID and a client secret that you receive upon completing the registration.
-
Homepage URL:
Add the following dependencies in the
pom.xmlfile of your project:-
vertx-spring-boot-starter-http -
spring-boot-starter-security -
spring-boot-starter-oauth2-client reactor-nettyNote that the
reactor-nettyclient is required to ensure thatspring-boot-starter-oauth2-clientworks properly.pom.xml<project> ... <dependencies> ... <dependency> <groupId>dev.snowdrop</groupId> <artifactId>vertx-spring-boot-starter-http</artifactId> </dependency> <dependency> <groupId>org.springframework.boot</groupId> <artifactId>spring-boot-starter-security</artifactId> </dependency> <dependency> <groupId>org.springframework.boot</groupId> <artifactId>spring-boot-starter-oauth2-client</artifactId> </dependency> <!-- Spring OAuth2 client only works with Reactor Netty client --> <dependency> <groupId>io.projectreactor.netty</groupId> <artifactId>reactor-netty</artifactId> </dependency> ... <dependencies> ... </project>
-
Create an endpoint controller class for your application:
HelloController.javapackage dev.snowdrop.vertx.sample.http.oauth; import org.springframework.security.core.annotation.AuthenticationPrincipal; import org.springframework.security.oauth2.core.user.OAuth2User; import org.springframework.web.bind.annotation.GetMapping; import org.springframework.web.bind.annotation.RestController; import reactor.core.publisher.Mono; @RestController public class HelloController { @GetMapping public Mono<String> hello(@AuthenticationPrincipal OAuth2User oauth2User) { return Mono.just("Hello, " + oauth2User.getAttributes().get("name") + "!"); } }Create the main class of your application:
OAuthSampleApplication.javapackage dev.snowdrop.vertx.sample.http.oauth; import org.springframework.boot.SpringApplication; import org.springframework.boot.autoconfigure.SpringBootApplication; @SpringBootApplication public class OAuthSampleApplication { public static void main(String[] args) { SpringApplication.run(OAuthSampleApplication.class, args); } }Create a YAML configuration file to store the OAuth2 client ID and client secret you received from GitHub upon registering your application.
src/main/resources/application.ymlspring: security: oauth2: client: registration: github: client-id: YOUR_GITHUB_CLIENT_ID client-secret: YOUR_GITHUB_CLIENT_SECRETOPTIONAL: Run and test your application locally:
Navigate to the root directory of your Maven project:
$ cd myApp
Package your application:
$ mvn clean package
Start your application from the command line:
$ java -jar target/vertx-spring-boot-sample-http-oauth.jar
-
Navigate to
http://localhost:8080using a web browser. You are redirected to an OAuth2 application authorization screen on GitHub. If prompted, log in using your GitHub account credentials. - Click Authorize to confirm. You are redirected to a screen showing a personalized greeting message.
Additional resources
- You can deploy your application to an OpenShift cluster using Fabric8 Maven Plugin.
- You can also configure your application for deployment on stand-alone Red Hat Enterprise Linux.
- For more information, see the OAuth2 tutorial in the Spring community documentation. Alternatively, see the tutorial on using OAuth2 with Spring Security.
- For the full OAuth2 authentication framework specification, see document RFC-6749.
5.6. Creating a reactive Spring Boot SMTP mail application
Create a reactive SMTP email service with Spring Boot with Eclipse Vert.x.
Prerequisites
- JDK 8 or JDK 11 installed
- Maven installed
- A Maven-based application project configured to use Spring Boot
- A SMTP mail server configured on your machine
Procedure
Add
vertx-spring-boot-starter-httpandvertx-spring-boot-starter-mailas dependencies in thepom.xmlfile of your project.pom.xml<project> ... <dependencies> ... <dependency> <groupId>dev.snowdrop</groupId> <artifactId>vertx-spring-boot-starter-http</artifactId> </dependency> <dependency> <groupId>dev.snowdrop</groupId> <artifactId>vertx-spring-boot-starter-mail</artifactId> </dependency> ... <dependencies> ... </project>Create a mail handler class for your application:
MailHandler.javapackage dev.snowdrop.vertx.sample.mail; import dev.snowdrop.vertx.mail.MailClient; import dev.snowdrop.vertx.mail.MailMessage; import dev.snowdrop.vertx.mail.SimpleMailMessage; import org.springframework.stereotype.Component; import org.springframework.util.MultiValueMap; import org.springframework.web.reactive.function.server.ServerRequest; import org.springframework.web.reactive.function.server.ServerResponse; import reactor.core.publisher.Mono; import static org.springframework.web.reactive.function.server.ServerResponse.noContent; @Component public class MailHandler { private final MailClient mailClient; public MailHandler(MailClient mailClient) { this.mailClient = mailClient; } public Mono<ServerResponse> send(ServerRequest request) { return request.formData() .log() .map(this::formToMessage) .flatMap(mailClient::send) .flatMap(result -> noContent().build()); } private MailMessage formToMessage(MultiValueMap<String, String> form) { return new SimpleMailMessage() .setFrom(form.getFirst("from")) .setTo(form.get("to")) .setSubject(form.getFirst("subject")) .setText(form.getFirst("text")); } }Create the main class of your application:
MailSampleApplication.javapackage dev.snowdrop.vertx.sample.mail; import org.springframework.boot.SpringApplication; import org.springframework.boot.autoconfigure.SpringBootApplication; import org.springframework.context.annotation.Bean; import org.springframework.core.io.ClassPathResource; import org.springframework.web.reactive.function.server.RouterFunction; import org.springframework.web.reactive.function.server.ServerResponse; import static org.springframework.http.MediaType.APPLICATION_FORM_URLENCODED; import static org.springframework.web.reactive.function.server.RequestPredicates.accept; import static org.springframework.web.reactive.function.server.RouterFunctions.resources; import static org.springframework.web.reactive.function.server.RouterFunctions.route; @SpringBootApplication public class MailSampleApplication { public static void main(String[] args) { SpringApplication.run(MailSampleApplication.class, args); } @Bean public RouterFunction<ServerResponse> mailRouter(MailHandler mailHandler) { return route() .POST("/mail", accept(APPLICATION_FORM_URLENCODED), mailHandler::send) .build(); } @Bean public RouterFunction<ServerResponse> staticResourceRouter() { return resources("/**", new ClassPathResource("static/")); } }Create an
application.propertiesfile to store your SMTP server credentials:application.propertiesvertx.mail.host=YOUR_SMTP_SERVER_HOSTNAME vertx.mail.username=YOUR_SMTP_SERVER_USERNAME vertx.mail.password=YOUR_SMTP_SERVER_PASSWORD
-
Create a
src/main/resources/static/index.htmlfile that serves as the frontend of your application. Alternatively, use the example HTML email form available for this procedure. OPTIONAL: Run and test your application locally:
Navigate to the root directory of your Maven project:
$ cd myApp
Package your application:
$ mvn clean package
Start your application from the command line.
$ java -jar target/vertx-spring-boot-sample-mail.jar
-
Navigate to
http://localhost:8080/index.htmlusing a web browser to access the email form.
Additional resources
- For more information on setting up an SMTP mail server on RHEL 7, see the Mail Transport Agent Configuration section in the RHEL 7 documentation.
- You can deploy your application to an OpenShift cluster using Fabric8 Maven Plugin
- You can also configure your application for deployment on stand-alone Red Hat Enterprise Linux.
5.7. Server-sent events
Server-sent events (SSE) is a push technology allowing HTTP sever to send unidirectional updates to the client. SSE works by establishing a connection between the event source and the client. The event source uses this connection to push events to the client-side. After the server pushes the events, the connection remains open and can be used to push subsequent events. When the client terminates the request on the server, the connection is closed. SSE represents a more resource-efficient alternative to polling, where a new connection must be established each time the client polls the event source for updates. As opposed to WebSockets, SSE pushes events in one direction only (that is, from the source to the client). It does not handle bidirectional communication between the event source and the client.
The specification for SSE is incorporated into HTML5, and is widely supported by web browsers, including their legacy versions. SSE can be used from the command line, and is relatively simple to set up compared to other protocols.
SSE is suitable for use cases that require frequent updates from the server to the client, while updates from the client side to the server are expected to be less frequent. Updates form the client side to the server can then be handled over a different protocol, such as REST. Examples of such use cases include social media feed updates or notifications sent to a client when new files are uploaded to a file server.
5.8. Using Server-sent events in a reactive Spring Boot application
Create a simple service that accepts HTTP requests and returns a stream of server-sent events (SSE). When the client establishes a connection to the server and the streaming starts, the connection remains open. The server re-uses the connection to continuously push new events to the client. Canceling the request closes the connection and stops the stream, causing the client to stop receiving updates form the server.
Prerequisites
- JDK 8 or JDK 11 installed
- Maven installed
- A Maven-based application project configured to use Spring Boot
Procedure
Add
vertx-spring-boot-starter-httpas a dependency in thepom.xmlfile of your project.pom.xml<project> ... <dependencies> ... <dependency> <groupId>dev.snowdrop</groupId> <artifactId>vertx-spring-boot-starter-http</artifactId> </dependency> ... <dependencies> ... </project>Create the main class of your application:
SseExampleApplication.javapackage dev.snowdrop.vertx.sample.sse; import org.springframework.boot.SpringApplication; import org.springframework.boot.autoconfigure.SpringBootApplication; @SpringBootApplication public class SseSampleApplication { public static void main(String[] args) { SpringApplication.run(SseSampleApplication.class, args); } }Create a Server-sent Event controller class for your application. In this example, the class generates a stream of random integers and prints them to a terminal application.
SseController.javapackage dev.snowdrop.vertx.sample.sse; import java.time.Duration; import java.util.Random; import org.springframework.http.MediaType; import org.springframework.web.bind.annotation.GetMapping; import org.springframework.web.bind.annotation.RestController; import reactor.core.publisher.Flux; @RestController public class SseController { @GetMapping(produces = MediaType.TEXT_EVENT_STREAM_VALUE) public Flux<Integer> getRandomNumberStream() { Random random = new Random(); return Flux.interval(Duration.ofSeconds(1)) .map(i -> random.nextInt()) .log(); } }OPTIONAL: Run and test your application locally:
Navigate to the root directory of your Maven project:
$ cd myApp
Package your application:
$ mvn clean package
Start your application from the command line:
$ java -jar target/vertx-spring-boot-sample-sse.jar
In a new terminal window, issue a HTTP request to
localhost. You start receiving a continuous stream of random integers from the server-sent event controller:$ curl localhost:8080 data:-2126721954 data:-573499422 data:1404187823 data:1338766210 data:-666543077 ...
Press
Ctrl+Cto cancel your HTTP request and terminate the stream of responses.
Additional resources
- You can deploy your application to an OpenShift cluster using Fabric8 Maven Plugin.
- You can also configure your application for deployment on stand-alone Red Hat Enterprise Linux.
In addition to using an example, you can also use Spring Boot with Eclipse Vert.x starters to create new Spring Boot applications from scratch and deploy them to OpenShift.
Chapter 6. Debugging your Spring Boot-based application
This sections contains information about debugging your Spring Boot–based application both in local and remote deployments.
6.1. Remote debugging
To remotely debug an application, you must first configure it to start in a debugging mode, and then attach a debugger to it.
6.1.1. Starting your Spring Boot application locally in debugging mode
One of the ways of debugging a Maven-based project is manually launching the application while specifying a debugging port, and subsequently connecting a remote debugger to that port. This method is applicable at least when launching the application manually using the mvn spring-boot:run goal.
Prerequisites
- A Maven-based application
Procedure
- In a console, navigate to the directory with your application.
Launch your application and specify the necessary JVM arguments and the debug port using the following syntax:
$ mvn spring-boot:run -Drun.jvmArguments="-Xdebug -Xrunjdwp:transport=dt_socket,server=y,suspend=n,address=$PORT_NUMBER"
$PORT_NUMBERis an unused port number of your choice. Remember this number for the remote debugger configuration.If you want the JVM to pause and wait for remote debugger connection before it starts the application, change
suspendtoy.
6.1.2. Starting an uberjar in debugging mode
If you chose to package your application as a Spring Boot uberjar, debug it by executing it with the following parameters.
Prerequisites
- An uberjar with your application
Procedure
- In a console, navigate to the directory with the uberjar.
Execute the uberjar with the following parameters. Ensure that all the parameters are specified before the name of the uberjar on the line.
$ java -agentlib:jdwp=transport=dt_socket,server=y,suspend=n,address=$PORT_NUMBER -jar $UBERJAR_FILENAME
$PORT_NUMBERis an unused port number of your choice. Remember this number for the remote debugger configuration.If you want the JVM to pause and wait for remote debugger connection before it starts the application, change
suspendtoy.
6.1.3. Starting your application on OpenShift in debugging mode
To debug your Spring Boot-based application on OpenShift remotely, you must set the JAVA_DEBUG environment variable inside the container to true and configure port forwarding so that you can connect to your application from a remote debugger.
Prerequisites
- Your application running on OpenShift.
-
The
ocbinary installed on your machine. -
The ability to execute the
oc port-forwardcommand in your target OpenShift environment.
Procedure
Using the
occommand, list the available deployment configurations:$ oc get dc
Set the
JAVA_DEBUGenvironment variable in the deployment configuration of your application totrue, which configures the JVM to open the port number5005for debugging. For example:$ oc set env dc/MY_APP_NAME JAVA_DEBUG=true
Redeploy the application if it is not set to redeploy automatically on configuration change. For example:
$ oc rollout latest dc/MY_APP_NAME
Configure port forwarding from your local machine to the application pod:
List the currently running pods and find one containing your application:
$ oc get pod
NAME                            READY     STATUS      RESTARTS   AGE
MY_APP_NAME-3-1xrsp          0/1       Running     0          6s
...
Configure port forwarding:
$ oc port-forward MY_APP_NAME-3-1xrsp $LOCAL_PORT_NUMBER:5005
Here,
$LOCAL_PORT_NUMBERis an unused port number of your choice on your local machine. Remember this number for the remote debugger configuration.
When you are done debugging, unset the
JAVA_DEBUGenvironment variable in your application pod. For example:$ oc set env dc/MY_APP_NAME JAVA_DEBUG-
Additional resources
You can also set the JAVA_DEBUG_PORT environment variable if you want to change the debug port from the default, which is 5005.
6.1.4. Attaching a remote debugger to the application
When your application is configured for debugging, attach a remote debugger of your choice to it. In this guide, Red Hat CodeReady Studio is covered, but the procedure is similar when using other programs.
Prerequisites
- The application running either locally or on OpenShift, and configured for debugging.
- The port number that your application is listening on for debugging.
- Red Hat CodeReady Studio installed on your machine. You can download it from the Red Hat CodeReady Studio download page.
Procedure
- Start Red Hat CodeReady Studio.
Create a new debug configuration for your application:
- Click Run→Debug Configurations.
- In the list of configurations, double-click Remote Java application. This creates a new remote debugging configuration.
- Enter a suitable name for the configuration in the Name field.
- Enter the path to the directory with your application into the Project field. You can use the Browse… button for convenience.
- Set the Connection Type field to Standard (Socket Attach) if it is not already.
- Set the Port field to the port number that your application is listening on for debugging.
- Click Apply.
Start debugging by clicking the Debug button in the Debug Configurations window.
To quickly launch your debug configuration after the first time, click Run→Debug History and select the configuration from the list.
Additional resources
Debug an OpenShift Java Application with JBoss Developer Studio on Red Hat Knowledgebase.
Red Hat CodeReady Studio was previously called JBoss Developer Studio.
- A Debugging Java Applications On OpenShift and Kubernetes article on OpenShift Blog.
6.2. Debug logging
6.2.1. Add Spring Boot debug logging
Add debug logging to your application.
Prerequisites
- An application you want to debug. For example, the REST API Level 0 example.
Procedure
Declare a
org.apache.commons.logging.Logobject using theorg.apache.commons.logging.LogFactoryfor the class you want to add logging.import org.apache.commons.logging.Log; import org.apache.commons.logging.LogFactory; ... private static Log logger = LogFactory.getLog(TheClass.class);
For example, if you wanted to add logging to the
GreetingEndpointclass in the REST API Level 0 example, you would useGreetingEndpoint.class.Add debugging statements using
logger.debug("my logging message").Example logging statement
@GET
@Path("/greeting")
@Produces("application/json")
public Greeting greeting(@QueryParam("name") @DefaultValue("World") String name) {
    String message = String.format(properties.getMessage(), name);

    logger.debug("Message: " + message);

    return new Greeting(message);
}
Add a
logging.level.fully.qualified.name.of.TheClass=DEBUGinsrc/main/resources/application.properties.For example, if you added a logging statement to
io.openshift.booster.service.GreetingEndpointyou would use:logging.level.io.openshift.booster.service.GreetingEndpoint=DEBUG
This enables log messages at the
DEBUGlevel and above to be shown in the logs for your class.
6.2.2. Accessing Spring Boot debug logs on localhost
Start your application and interact with it to see the debugging statements.
Prerequisites
- An application with debug logging enabled.
Procedure
Start your application.
$ mvn spring-boot:run
Test your application to invoke debug logging.
For example, to test the REST API Level 0 example, you can invoke the
/api/greetingmethod:$ curl http://localhost:8080/api/greeting?name=Sarah
View your application logs to see your debug messages.
i.o.booster.service.GreetingEndpoint : Message: Hello, Sarah!
To disable debug logging, remove logging.level.fully.qualified.name.of.TheClass=DEBUG from src/main/resources/application.properties and restart your application.
6.2.3. Accessing debug logs on OpenShift
Start your application and interact with it to see the debugging statements in OpenShift.
Prerequisites
- A Maven-based application with debug logging enabled.
-
The
ocCLI client installed and authenticated.
Procedure
Deploy your application to OpenShift:
$ mvn clean fabric8:deploy -Popenshift
View the logs:
Get the name of the pod with your application:
$ oc get pods
Start watching the log output:
$ oc logs -f pod/MY_APP_NAME-2-aaaaa
Keep the terminal window displaying the log output open so that you can watch the log output.
Interact with your application:
For example, if you had debug logging in the REST API Level 0 example to log the
messagevariable in the/api/greetingmethod:Get the route of your application:
$ oc get routes
Make an HTTP request on the
/api/greetingendpoint of your application:$ curl $APPLICATION_ROUTE/api/greeting?name=Sarah
Return to the window with your pod logs and inspect debug logging messages in the logs.
i.o.booster.service.GreetingEndpoint : Message: Hello, Sarah!
-
To disable debug logging, remove
logging.level.fully.qualified.name.of.TheClass=DEBUGfromsrc/main/resources/application.propertiesand redeploy your application.
Chapter 7. Monitoring your application
This section contains information about monitoring your Spring Boot–based application running on OpenShift.
7.1. Accessing JVM metrics for your application on OpenShift
7.1.1. Accessing JVM metrics using Jolokia on OpenShift
Jolokia is a built-in lightweight solution for accessing JMX (Java Management Extension) metrics over HTTP on OpenShift. Jolokia allows you to access CPU, storage, and memory usage data collected by JMX over an HTTP bridge. Jolokia uses a REST interface and JSON-formatted message payloads. It is suitable for monitoring cloud applications thanks to its comparably high speed and low resource requirements.
For Java-based applications, the OpenShift Web console provides the integrated hawt.io console that collects and displays all relevant metrics output by the JVM running your application.
Prerequistes
-
the
occlient authenticated - a Java-based application container running in a project on OpenShift
- latest JDK 1.8.0 image
Procedure
List the deployment configurations of the pods inside your project and select the one that corresponds to your application.
oc get dc
NAME         REVISION   DESIRED   CURRENT   TRIGGERED BY
MY_APP_NAME   2          1         1         config,image(my-app:6)
...
Open the YAML deployment template of the pod running your application for editing.
oc edit dc/MY_APP_NAME
Add the following entry to the
portssection of the template and save your changes:... spec: ... ports: - containerPort: 8778 name: jolokia protocol: TCP ... ...Redeploy the pod running your application.
oc rollout latest dc/MY_APP_NAME
The pod is redeployed with the updated deployment configuration and exposes the port
8778.- Log into the OpenShift Web console.
- In the sidebar, navigate to Applications > Pods, and click on the name of the pod running your application.
- In the pod details screen, click Open Java Console to access the hawt.io console.
Additional resources
Chapter 8. Available examples Spring Boot
The Spring Boot runtime provides examples applications. When you start developing applications on OpenShift, you can use the examples applications as templates.
You can access these example applications on Developer Launcher.
8.1. REST API Level 0 example for Spring Boot
The following example is not meant to be run in a production environment.
Example proficiency level: Foundational.
What the REST API Level 0 example does
The REST API Level 0 example shows how to map business operations to a remote procedure call endpoint over HTTP using a REST framework. This corresponds to Level 0 in the Richardson Maturity Model. Creating an HTTP endpoint using REST and its underlying principles to define your API lets you quickly prototype and design the API flexibly.
This example introduces the mechanics of interacting with a remote service using the HTTP protocol. It allows you to:
-
Execute an HTTP
GETrequest on theapi/greetingendpoint. -
Receive a response in JSON format with a payload consisting of the
Hello, World!String. -
Execute an HTTP
GETrequest on theapi/greetingendpoint while passing in a String argument. This uses thenamerequest parameter in the query string. -
Receive a response in JSON format with a payload of
Hello, $name!with$namereplaced by the value of thenameparameter passed into the request.
8.1.1. REST API Level 0 design tradeoffs
Table 8.1. Design tradeoffs
| Pros | Cons |
|---|---|
|
|
8.1.2. Deploying the REST API Level 0 example application to OpenShift Online
Use one of the following options to execute the REST API Level 0 example application on OpenShift Online.
Although each method uses the same oc commands to deploy your application, using developers.redhat.com/launch provides an automated deployment workflow that executes the oc commands for you.
8.1.2.1. Deploying the example application using developers.redhat.com/launch
Prerequisites
- An account at OpenShift Online.
Procedure
- Navigate to the developers.redhat.com/launch URL in a browser.
- Follow on-screen instructions to create and launch your example application in Spring Boot.
8.1.2.2. Authenticating the oc CLI client
To work with example applications on OpenShift Online using the oc command-line client, you must authenticate the client using the token provided by the OpenShift Online web interface.
Prerequisites
- An account at OpenShift Online.
Procedure
- Navigate to the OpenShift Online URL in a browser.
- Click on the question mark icon in the top right-hand corner of the Web console, next to your user name.
- Select Command Line Tools in the drop-down menu.
-
Copy the
oc logincommand. Paste the command in a terminal. The command uses your authentication token to authenticate your
ocCLI client with your OpenShift Online account.$ oc login OPENSHIFT_URL --token=MYTOKEN
8.1.2.3. Deploying the REST API Level 0 example application using the oc CLI client
Prerequisites
- The example application created using developers.redhat.com/launch. For more information, see Section 8.1.2.1, “Deploying the example application using developers.redhat.com/launch”.
-
The
occlient authenticated. For more information, see Section 8.1.2.2, “Authenticating theocCLI client”.
Procedure
Clone your project from GitHub.
$ git clone git@github.com:USERNAME/MY_PROJECT_NAME.git
Alternatively, if you downloaded a ZIP file of your project, extract it.
$ unzip MY_PROJECT_NAME.zip
Create a new project in OpenShift.
$ oc new-project MY_PROJECT_NAME
- Navigate to the root directory of your application.
Use Maven to start the deployment to OpenShift.
$ mvn clean fabric8:deploy -Popenshift
This command uses the Fabric8 Maven Plugin to launch the S2I process on OpenShift and to start the pod.
Check the status of your application and ensure your pod is running.
$ oc get pods -w
NAME                             READY     STATUS      RESTARTS   AGE
MY_APP_NAME-1-aaaaa               1/1       Running     0          58s
MY_APP_NAME-s2i-1-build           0/1       Completed   0          2m
The
MY_APP_NAME-1-aaaaapod should have a status ofRunningonce it is fully deployed and started. Your specific pod name will vary. The number in the middle will increase with each new build. The letters at the end are generated when the pod is created.After your example application is deployed and started, determine its route.
Example Route Information
$ oc get routes
NAME                 HOST/PORT                                                     PATH      SERVICES        PORT      TERMINATION
MY_APP_NAME         MY_APP_NAME-MY_PROJECT_NAME.OPENSHIFT_HOSTNAME      MY_APP_NAME      8080
The route information of a pod gives you the base URL which you use to access it. In the example above, you would use
http://MY_APP_NAME-MY_PROJECT_NAME.OPENSHIFT_HOSTNAMEas the base URL to access the application.
8.1.3. Deploying the REST API Level 0 example application to Minishift or CDK
Use one of the following options to execute the REST API Level 0 example application locally on Minishift or CDK:
Although each method uses the same oc commands to deploy your application, using Fabric8 Launcher provides an automated deployment workflow that executes the oc commands for you.
8.1.3.1. Getting the Fabric8 Launcher tool URL and credentials
You need the Fabric8 Launcher tool URL and user credentials to create and deploy example applications on Minishift or CDK. This information is provided when the Minishift or CDK is started.
Prerequisites
- The Fabric8 Launcher tool installed, configured, and running.
Procedure
- Navigate to the console where you started Minishift or CDK.
Check the console output for the URL and user credentials you can use to access the running Fabric8 Launcher:
Example Console Output from a Minishift or CDK Startup
...
-- Removing temporary directory ... OK
-- Server Information ...
   OpenShift server started.
   The server is accessible via web console at:
       https://192.168.42.152:8443

   You are logged in as:
       User:     developer
       Password: developer

   To login as administrator:
       oc login -u system:admin
8.1.3.2. Deploying the example application using the Fabric8 Launcher tool
Prerequisites
- The URL of your running Fabric8 Launcher instance and the user credentials of your Minishift or CDK. For more information, see Section 8.1.3.1, “Getting the Fabric8 Launcher tool URL and credentials”.
Procedure
- Navigate to the Fabric8 Launcher URL in a browser.
- Follow the on-screen instructions to create and launch your example application in Spring Boot.
8.1.3.3. Authenticating the oc CLI client
To work with example applications on Minishift or CDK using the oc command-line client, you must authenticate the client using the token provided by the Minishift or CDK web interface.
Prerequisites
- The URL of your running Fabric8 Launcher instance and the user credentials of your Minishift or CDK. For more information, see Section 8.1.3.1, “Getting the Fabric8 Launcher tool URL and credentials”.
Procedure
- Navigate to the Minishift or CDK URL in a browser.
- Click on the question mark icon in the top right-hand corner of the Web console, next to your user name.
- Select Command Line Tools in the drop-down menu.
-
Copy the
oc logincommand. Paste the command in a terminal. The command uses your authentication token to authenticate your
ocCLI client with your Minishift or CDK account.$ oc login OPENSHIFT_URL --token=MYTOKEN
8.1.3.4. Deploying the REST API Level 0 example application using the oc CLI client
Prerequisites
- The example application created using Fabric8 Launcher tool on a Minishift or CDK. For more information, see Section 8.1.3.2, “Deploying the example application using the Fabric8 Launcher tool”.
- Your Fabric8 Launcher tool URL.
-
The
occlient authenticated. For more information, see Section 8.1.3.3, “Authenticating theocCLI client”.
Procedure
Clone your project from GitHub.
$ git clone git@github.com:USERNAME/MY_PROJECT_NAME.git
Alternatively, if you downloaded a ZIP file of your project, extract it.
$ unzip MY_PROJECT_NAME.zip
Create a new project in OpenShift.
$ oc new-project MY_PROJECT_NAME
- Navigate to the root directory of your application.
Use Maven to start the deployment to OpenShift.
$ mvn clean fabric8:deploy -Popenshift
This command uses the Fabric8 Maven Plugin to launch the S2I process on OpenShift and to start the pod.
Check the status of your application and ensure your pod is running.
$ oc get pods -w
NAME                             READY     STATUS      RESTARTS   AGE
MY_APP_NAME-1-aaaaa               1/1       Running     0          58s
MY_APP_NAME-s2i-1-build           0/1       Completed   0          2m
The
MY_APP_NAME-1-aaaaapod should have a status ofRunningonce it is fully deployed and started. Your specific pod name will vary. The number in the middle will increase with each new build. The letters at the end are generated when the pod is created.After your example application is deployed and started, determine its route.
Example Route Information
$ oc get routes
NAME                 HOST/PORT                                                     PATH      SERVICES        PORT      TERMINATION
MY_APP_NAME         MY_APP_NAME-MY_PROJECT_NAME.OPENSHIFT_HOSTNAME      MY_APP_NAME      8080
The route information of a pod gives you the base URL which you use to access it. In the example above, you would use
http://MY_APP_NAME-MY_PROJECT_NAME.OPENSHIFT_HOSTNAMEas the base URL to access the application.
8.1.4. Deploying the REST API Level 0 example application to OpenShift Container Platform
The process of creating and deploying example applications to OpenShift Container Platform is similar to OpenShift Online:
Prerequisites
- The example application created using developers.redhat.com/launch.
Procedure
- Follow the instructions in Section 8.1.2, “Deploying the REST API Level 0 example application to OpenShift Online”, only use the URL and user credentials from the OpenShift Container Platform Web Console.
8.1.5. Interacting with the unmodified REST API Level 0 example application for Spring Boot
The example provides a default HTTP endpoint that accepts GET requests.
Prerequisites
- Your application running
-
The
curlbinary or a web browser
Procedure
Use
curlto execute aGETrequest against the example. You can also use a browser to do this.$ curl http://MY_APP_NAME-MY_PROJECT_NAME.OPENSHIFT_HOSTNAME/api/greeting {"content":"Hello, World!"}Use
curlto execute aGETrequest with thenameURL parameter against the example. You can also use a browser to do this.$ curl http://MY_APP_NAME-MY_PROJECT_NAME.OPENSHIFT_HOSTNAME/api/greeting?name=Sarah {"content":"Hello, Sarah!"}
From a browser, you can also use a form provided by the example to perform these same interactions. The form is located at the root of the project http://MY_APP_NAME-MY_PROJECT_NAME.OPENSHIFT_HOSTNAME.
8.1.6. Running the REST API Level 0 example application integration tests
This example application includes a self-contained set of integration tests. When run inside an OpenShift project, the tests:
- Deploy a test instance of the application to the project.
- Execute the individual tests on that instance.
- Remove all instances of the application from the project when the testing is done.
Executing integration tests removes all existing instances of the example application from the target OpenShift project. To avoid accidentally removing your example application, ensure that you create and select a separate OpenShift project to execute the tests.
Prerequisites
-
The
occlient authenticated - An empty OpenShift project
Procedure
Execute the following command to run the integration tests:
$ mvn clean verify -Popenshift,openshift-it
8.1.7. REST resources
More background and related information on REST can be found here:
- Architectural Styles and the Design of Network-based Software Architectures - Representational State Transfer (REST)
- Richardson Maturity Model
- JSR 311: JAX-RS: The JavaTM API for RESTful Web Services
- Building a RESTful Service with Spring
- REST API Level 0 for Eclipse Vert.x
- REST API Level 0 for Thorntail
- REST API Level 0 for Node.js
8.2. Externalized Configuration example for Spring Boot
The following example is not meant to be run in a production environment.
Example proficiency level: Foundational.
Externalized Configuration provides a basic example of using a ConfigMap to externalize configuration. ConfigMap is an object used by OpenShift to inject configuration data as simple key and value pairs into one or more Linux containers while keeping the containers independent of OpenShift.
This example shows you how to:
-
Set up and configure a
ConfigMap. -
Use the configuration provided by the
ConfigMapwithin an application. -
Deploy changes to the
ConfigMapconfiguration of running applications.
8.2.1. The externalized configuration design pattern
Whenever possible, externalize the application configuration and separate it from the application code. This allows the application configuration to change as it moves through different environments, but leaves the code unchanged. Externalizing the configuration also keeps sensitive or internal information out of your code base and version control. Many languages and application servers provide environment variables to support externalizing an application’s configuration.
Microservices architectures and multi-language (polyglot) environments add a layer of complexity to managing an application’s configuration. Applications consist of independent, distributed services, and each can have its own configuration. Keeping all configuration data synchronized and accessible creates a maintenance challenge.
ConfigMaps enable the application configuration to be externalized and used in individual Linux containers and pods on OpenShift. You can create a ConfigMap object in a variety of ways, including using a YAML file, and inject it into the Linux container. ConfigMaps also allow you to group and scale sets of configuration data. This lets you configure a large number of environments beyond the basic Development, Stage, and Production. You can find more information about ConfigMaps in the OpenShift documentation.
8.2.2. Externalized Configuration design tradeoffs
Table 8.2. Design Tradeoffs
| Pros | Cons |
|---|---|
|
|
8.2.3. Deploying the Externalized Configuration example application to OpenShift Online
Use one of the following options to execute the Externalized Configuration example application on OpenShift Online.
Although each method uses the same oc commands to deploy your application, using developers.redhat.com/launch provides an automated deployment workflow that executes the oc commands for you.
8.2.3.1. Deploying the example application using developers.redhat.com/launch
Prerequisites
- An account at OpenShift Online.
Procedure
- Navigate to the developers.redhat.com/launch URL in a browser.
- Follow on-screen instructions to create and launch your example application in Spring Boot.
8.2.3.2. Authenticating the oc CLI client
To work with example applications on OpenShift Online using the oc command-line client, you must authenticate the client using the token provided by the OpenShift Online web interface.
Prerequisites
- An account at OpenShift Online.
Procedure
- Navigate to the OpenShift Online URL in a browser.
- Click on the question mark icon in the top right-hand corner of the Web console, next to your user name.
- Select Command Line Tools in the drop-down menu.
-
Copy the
oc logincommand. Paste the command in a terminal. The command uses your authentication token to authenticate your
ocCLI client with your OpenShift Online account.$ oc login OPENSHIFT_URL --token=MYTOKEN
8.2.3.3. Deploying the Externalized Configuration example application using the oc CLI client
Prerequisites
- The example application created using developers.redhat.com/launch. For more information, see Section 8.2.3.1, “Deploying the example application using developers.redhat.com/launch”.
-
The
occlient authenticated. For more information, see Section 8.2.3.2, “Authenticating theocCLI client”.
Procedure
Clone your project from GitHub.
$ git clone git@github.com:USERNAME/MY_PROJECT_NAME.git
Alternatively, if you downloaded a ZIP file of your project, extract it.
$ unzip MY_PROJECT_NAME.zip
Create a new OpenShift project.
$ oc new-project MY_PROJECT_NAME
Assign view access rights to the service account before deploying your example application, so that the application can access the OpenShift API in order to read the contents of the ConfigMap.
$ oc policy add-role-to-user view -n $(oc project -q) -z default
- Navigate to the root directory of your application.
Deploy your ConfigMap configuration to OpenShift using
application.yml.$ oc create configmap app-config --from-file=application.yml
Verify your ConfigMap configuration has been deployed.
$ oc get configmap app-config -o yaml

apiVersion: v1
data:
  application.yml: |
     # This properties file should be used to initialise a ConfigMap
     greeting:
       message: "Hello %s from a ConfigMap!"
...
Use Maven to start the deployment to OpenShift.
$ mvn clean fabric8:deploy -Popenshift
This command uses the Fabric8 Maven Plugin to launch the S2I process on OpenShift and to start the pod.
Check the status of your application and ensure your pod is running.
$ oc get pods -w
NAME                                       READY     STATUS      RESTARTS   AGE
MY_APP_NAME-1-aaaaa               1/1       Running     0          58s
MY_APP_NAME-s2i-1-build           0/1       Completed   0          2m
The
MY_APP_NAME-1-aaaaapod should have a status ofRunningonce its fully deployed and started. Your specific pod name will vary. The number in the middle will increase with each new build. The letters at the end are generated when the pod is created.After your example application is deployed and started, determine its route.
Example Route Information
$ oc get routes
NAME                 HOST/PORT                                                     PATH      SERVICES        PORT      TERMINATION
MY_APP_NAME         MY_APP_NAME-MY_PROJECT_NAME.OPENSHIFT_HOSTNAME      MY_APP_NAME      8080
The route information of a pod gives you the base URL which you use to access it. In the example above, you would use
http://MY_APP_NAME-MY_PROJECT_NAME.OPENSHIFT_HOSTNAMEas the base URL to access the application.
8.2.4. Deploying the Externalized Configuration example application to Minishift or CDK
Use one of the following options to execute the Externalized Configuration example application locally on Minishift or CDK:
Although each method uses the same oc commands to deploy your application, using Fabric8 Launcher provides an automated deployment workflow that executes the oc commands for you.
8.2.4.1. Getting the Fabric8 Launcher tool URL and credentials
You need the Fabric8 Launcher tool URL and user credentials to create and deploy example applications on Minishift or CDK. This information is provided when the Minishift or CDK is started.
Prerequisites
- The Fabric8 Launcher tool installed, configured, and running.
Procedure
- Navigate to the console where you started Minishift or CDK.
Check the console output for the URL and user credentials you can use to access the running Fabric8 Launcher:
Example Console Output from a Minishift or CDK Startup
...
-- Removing temporary directory ... OK
-- Server Information ...
   OpenShift server started.
   The server is accessible via web console at:
       https://192.168.42.152:8443

   You are logged in as:
       User:     developer
       Password: developer

   To login as administrator:
       oc login -u system:admin
8.2.4.2. Deploying the example application using the Fabric8 Launcher tool
Prerequisites
- The URL of your running Fabric8 Launcher instance and the user credentials of your Minishift or CDK. For more information, see Section 8.2.4.1, “Getting the Fabric8 Launcher tool URL and credentials”.
Procedure
- Navigate to the Fabric8 Launcher URL in a browser.
- Follow the on-screen instructions to create and launch your example application in Spring Boot.
8.2.4.3. Authenticating the oc CLI client
To work with example applications on Minishift or CDK using the oc command-line client, you must authenticate the client using the token provided by the Minishift or CDK web interface.
Prerequisites
- The URL of your running Fabric8 Launcher instance and the user credentials of your Minishift or CDK. For more information, see Section 8.2.4.1, “Getting the Fabric8 Launcher tool URL and credentials”.
Procedure
- Navigate to the Minishift or CDK URL in a browser.
- Click on the question mark icon in the top right-hand corner of the Web console, next to your user name.
- Select Command Line Tools in the drop-down menu.
-
Copy the
oc logincommand. Paste the command in a terminal. The command uses your authentication token to authenticate your
ocCLI client with your Minishift or CDK account.$ oc login OPENSHIFT_URL --token=MYTOKEN
8.2.4.4. Deploying the Externalized Configuration example application using the oc CLI client
Prerequisites
- The example application created using Fabric8 Launcher tool on a Minishift or CDK. For more information, see Section 8.2.4.2, “Deploying the example application using the Fabric8 Launcher tool”.
- Your Fabric8 Launcher tool URL.
-
The
occlient authenticated. For more information, see Section 8.2.4.3, “Authenticating theocCLI client”.
Procedure
Clone your project from GitHub.
$ git clone git@github.com:USERNAME/MY_PROJECT_NAME.git
Alternatively, if you downloaded a ZIP file of your project, extract it.
$ unzip MY_PROJECT_NAME.zip
Create a new OpenShift project.
$ oc new-project MY_PROJECT_NAME
Assign view access rights to the service account before deploying your example application, so that the application can access the OpenShift API in order to read the contents of the ConfigMap.
$ oc policy add-role-to-user view -n $(oc project -q) -z default
- Navigate to the root directory of your application.
Deploy your ConfigMap configuration to OpenShift using
application.yml.$ oc create configmap app-config --from-file=application.yml
Verify your ConfigMap configuration has been deployed.
$ oc get configmap app-config -o yaml

apiVersion: v1
data:
  application.yml: |
     # This properties file should be used to initialise a ConfigMap
     greeting:
       message: "Hello %s from a ConfigMap!"
...
Use Maven to start the deployment to OpenShift.
$ mvn clean fabric8:deploy -Popenshift
This command uses the Fabric8 Maven Plugin to launch the S2I process on OpenShift and to start the pod.
Check the status of your application and ensure your pod is running.
$ oc get pods -w
NAME                                       READY     STATUS      RESTARTS   AGE
MY_APP_NAME-1-aaaaa               1/1       Running     0          58s
MY_APP_NAME-s2i-1-build           0/1       Completed   0          2m
The
MY_APP_NAME-1-aaaaapod should have a status ofRunningonce its fully deployed and started. Your specific pod name will vary. The number in the middle will increase with each new build. The letters at the end are generated when the pod is created.After your example application is deployed and started, determine its route.
Example Route Information
$ oc get routes
NAME                 HOST/PORT                                                     PATH      SERVICES        PORT      TERMINATION
MY_APP_NAME         MY_APP_NAME-MY_PROJECT_NAME.OPENSHIFT_HOSTNAME      MY_APP_NAME      8080
The route information of a pod gives you the base URL which you use to access it. In the example above, you would use
http://MY_APP_NAME-MY_PROJECT_NAME.OPENSHIFT_HOSTNAMEas the base URL to access the application.
8.2.5. Deploying the Externalized Configuration example application to OpenShift Container Platform
The process of creating and deploying example applications to OpenShift Container Platform is similar to OpenShift Online:
Prerequisites
- The example application created using developers.redhat.com/launch.
Procedure
- Follow the instructions in Section 8.2.3, “Deploying the Externalized Configuration example application to OpenShift Online”, only use the URL and user credentials from the OpenShift Container Platform Web Console.
8.2.6. Interacting with the unmodified Externalized Configuration example application for Spring Boot
The example provides a default HTTP endpoint that accepts GET requests.
Prerequisites
- Your application running
-
The
curlbinary or a web browser
Procedure
Use
curlto execute aGETrequest against the example. You can also use a browser to do this.$ curl http://MY_APP_NAME-MY_PROJECT_NAME.OPENSHIFT_HOSTNAME/api/greeting {"content":"Hello World from a ConfigMap!"}Update the deployed ConfigMap configuration.
$ oc edit configmap app-config
Change the value for the
greeting.messagekey toBonjour!and save the file. After you save this, the changes will be propagated to your OpenShift instance.Deploy the new version of your application so the ConfigMap configuration changes are picked up.
$ oc rollout latest dc/MY_APP_NAME
Check the status of your example and ensure your new pod is running.
$ oc get pods -w
NAME                             READY     STATUS      RESTARTS   AGE
MY_APP_NAME-1-aaaaa       1/1       Running     0          58s
MY_APP_NAME-s2i-1-build   0/1       Completed   0          2m
The
MY_APP_NAME-1-aaaaapod should have a status ofRunningonce it’s fully deployed and started. Your specific pod name will vary. The number in the middle will increase with each new build. The letters at the end are generated when the pod is created.Execute a
GETrequest usingcurlagainst the example with the updated ConfigMap configuration to see your updated greeting. You can also do this from your browser using the web form provided by the application.$ curl http://MY_APP_NAME-MY_PROJECT_NAME.OPENSHIFT_HOSTNAME/api/greeting {"content":"Bonjour!"}
8.2.7. Running the Externalized Configuration example application integration tests
This example application includes a self-contained set of integration tests. When run inside an OpenShift project, the tests:
- Deploy a test instance of the application to the project.
- Execute the individual tests on that instance.
- Remove all instances of the application from the project when the testing is done.
Executing integration tests removes all existing instances of the example application from the target OpenShift project. To avoid accidentally removing your example application, ensure that you create and select a separate OpenShift project to execute the tests.
Prerequisites
-
The
occlient authenticated - An empty OpenShift project
View access permission assigned to the service account of your example application. This allows your application to read the configuration from the ConfigMap:
$ oc policy add-role-to-user view -n $(oc project -q) -z default
Procedure
Execute the following command to run the integration tests:
$ mvn clean verify -Popenshift,openshift-it
8.2.8. Externalized Configuration resources
More background and related information on Externalized Configuration and ConfigMap can be found here:
8.3. Relational Database Backend example for Spring Boot
The following example is not meant to be run in a production environment.
Limitation: Run this example application on a Minishift or CDK. You can also use a manual workflow to deploy this example to OpenShift Online Pro and OpenShift Container Platform. This example is not currently available on OpenShift Online Starter.
Example proficiency level: Foundational.
What the Relational Database Backend example does
The Relational Database Backend example expands on the REST API Level 0 application to provide a basic example of performing create, read, update and delete (CRUD) operations on a PostgreSQL database using a simple HTTP API. CRUD operations are the four basic functions of persistent storage, widely used when developing an HTTP API dealing with a database.
The example also demonstrates the ability of the HTTP application to locate and connect to a database in OpenShift. Each runtime shows how to implement the connectivity solution best suited in the given case. The runtime can choose between options such as using JDBC, JPA, or accessing ORM APIs directly.
The example application exposes an HTTP API, which provides endpoints that allow you to manipulate data by performing CRUD operations over HTTP. The CRUD operations are mapped to HTTP Verbs. The API uses JSON formatting to receive requests and return responses to the user. The user can also use a user interface provided by the example to use the application. Specifically, this example provides an application that allows you to:
-
Navigate to the application web interface in your browser. This exposes a simple website allowing you to perform CRUD operations on the data in the
my_datadatabase. -
Execute an HTTP
GETrequest on theapi/fruitsendpoint. - Receive a response formatted as a JSON array containing the list of all fruits in the database.
-
Execute an HTTP
GETrequest on theapi/fruits/*endpoint while passing in a valid item ID as an argument. - Receive a response in JSON format containing the name of the fruit with the given ID. If no item matches the specified ID, the call results in an HTTP error 404.
-
Execute an HTTP
POSTrequest on theapi/fruitsendpoint passing in a validnamevalue to create a new entry in the database. -
Execute an HTTP
PUTrequest on theapi/fruits/*endpoint passing in a valid ID and a name as an argument. This updates the name of the item with the given ID to match the name specified in your request. -
Execute an HTTP
DELETErequest on theapi/fruits/*endpoint, passing in a valid ID as an argument. This removes the item with the specified ID from the database and returns an HTTP code204(No Content) as a response. If you pass in an invalid ID, the call results in an HTTP error404.
This example also contains a set of automated integration tests that can be used to verify that the application is fully integrated with the database.
This example does not showcase a fully matured RESTful model (level 3), but it does use compatible HTTP verbs and status, following the recommended HTTP API practices.
8.3.1. Relational Database Backend design tradeoffs
Table 8.3. Design Tradeoffs
| Pros | Cons |
|---|---|
|
|
8.3.2. Deploying the Relational Database Backend example application to OpenShift Online
Use one of the following options to execute the Relational Database Backend example application on OpenShift Online.
Although each method uses the same oc commands to deploy your application, using developers.redhat.com/launch provides an automated deployment workflow that executes the oc commands for you.
8.3.2.1. Deploying the example application using developers.redhat.com/launch
Prerequisites
- An account at OpenShift Online.
Procedure
- Navigate to the developers.redhat.com/launch URL in a browser.
- Follow on-screen instructions to create and launch your example application in Spring Boot.
8.3.2.2. Authenticating the oc CLI client
To work with example applications on OpenShift Online using the oc command-line client, you must authenticate the client using the token provided by the OpenShift Online web interface.
Prerequisites
- An account at OpenShift Online.
Procedure
- Navigate to the OpenShift Online URL in a browser.
- Click on the question mark icon in the top right-hand corner of the Web console, next to your user name.
- Select Command Line Tools in the drop-down menu.
-
Copy the
oc logincommand. Paste the command in a terminal. The command uses your authentication token to authenticate your
ocCLI client with your OpenShift Online account.$ oc login OPENSHIFT_URL --token=MYTOKEN
8.3.2.3. Deploying the Relational Database Backend example application using the oc CLI client
Prerequisites
- The example application created using developers.redhat.com/launch. For more information, see Section 8.3.2.1, “Deploying the example application using developers.redhat.com/launch”.
-
The
occlient authenticated. For more information, see Section 8.3.2.2, “Authenticating theocCLI client”.
Procedure
Clone your project from GitHub.
$ git clone git@github.com:USERNAME/MY_PROJECT_NAME.git
Alternatively, if you downloaded a ZIP file of your project, extract it.
$ unzip MY_PROJECT_NAME.zip
Create a new OpenShift project.
$ oc new-project MY_PROJECT_NAME
- Navigate to the root directory of your application.
Deploy the PostgreSQL database to OpenShift. Ensure that you use the following values for user name, password, and database name when creating your database application. The example application is pre-configured to use these values. Using different values prevents your application from integrating with the database.
$ oc new-app -e POSTGRESQL_USER=luke -ePOSTGRESQL_PASSWORD=secret -ePOSTGRESQL_DATABASE=my_data centos/postgresql-10-centos7 --name=my-database
Check the status of your database and ensure the pod is running.
$ oc get pods -w
my-database-1-aaaaa   1/1       Running   0         45s
my-database-1-deploy   0/1       Completed   0         53s
The
my-database-1-aaaaapod should have a status ofRunningand should be indicated as ready once it is fully deployed and started. Your specific pod name will vary. The number in the middle will increase with each new build. The letters at the end are generated when the pod is created.Use maven to start the deployment to OpenShift.
$ mvn clean fabric8:deploy -Popenshift
This command uses the Fabric8 Maven Plugin to launch the S2I process on OpenShift and to start the pod.
Check the status of your application and ensure your pod is running.
$ oc get pods -w
NAME                             READY     STATUS      RESTARTS   AGE
MY_APP_NAME-1-aaaaa       1/1       Running     0          58s
MY_APP_NAME-s2i-1-build   0/1       Completed   0          2m
Your
MY_APP_NAME-1-aaaaapod should have a status ofRunningand should be indicated as ready once it is fully deployed and started.After your example application is deployed and started, determine its route.
Example Route Information
$ oc get routes
NAME                 HOST/PORT                                     PATH      SERVICES             PORT      TERMINATION
MY_APP_NAME   MY_APP_NAME-MY_PROJECT_NAME.OPENSHIFT_HOSTNAME      MY_APP_NAME   8080
The route information of a pod gives you the base URL which you use to access it. In the example above, you would use
http://MY_APP_NAME-MY_PROJECT_NAME.OPENSHIFT_HOSTNAMEas the base URL to access the application.
8.3.3. Deploying the Relational Database Backend example application to Minishift or CDK
Use one of the following options to execute the Relational Database Backend example application locally on Minishift or CDK:
Although each method uses the same oc commands to deploy your application, using Fabric8 Launcher provides an automated deployment workflow that executes the oc commands for you.
8.3.3.1. Getting the Fabric8 Launcher tool URL and credentials
You need the Fabric8 Launcher tool URL and user credentials to create and deploy example applications on Minishift or CDK. This information is provided when the Minishift or CDK is started.
Prerequisites
- The Fabric8 Launcher tool installed, configured, and running.
Procedure
- Navigate to the console where you started Minishift or CDK.
Check the console output for the URL and user credentials you can use to access the running Fabric8 Launcher:
Example Console Output from a Minishift or CDK Startup
...
-- Removing temporary directory ... OK
-- Server Information ...
   OpenShift server started.
   The server is accessible via web console at:
       https://192.168.42.152:8443

   You are logged in as:
       User:     developer
       Password: developer

   To login as administrator:
       oc login -u system:admin
8.3.3.2. Deploying the example application using the Fabric8 Launcher tool
Prerequisites
- The URL of your running Fabric8 Launcher instance and the user credentials of your Minishift or CDK. For more information, see Section 8.3.3.1, “Getting the Fabric8 Launcher tool URL and credentials”.
Procedure
- Navigate to the Fabric8 Launcher URL in a browser.
- Follow the on-screen instructions to create and launch your example application in Spring Boot.
8.3.3.3. Authenticating the oc CLI client
To work with example applications on Minishift or CDK using the oc command-line client, you must authenticate the client using the token provided by the Minishift or CDK web interface.
Prerequisites
- The URL of your running Fabric8 Launcher instance and the user credentials of your Minishift or CDK. For more information, see Section 8.3.3.1, “Getting the Fabric8 Launcher tool URL and credentials”.
Procedure
- Navigate to the Minishift or CDK URL in a browser.
- Click on the question mark icon in the top right-hand corner of the Web console, next to your user name.
- Select Command Line Tools in the drop-down menu.
-
Copy the
oc logincommand. Paste the command in a terminal. The command uses your authentication token to authenticate your
ocCLI client with your Minishift or CDK account.$ oc login OPENSHIFT_URL --token=MYTOKEN
8.3.3.4. Deploying the Relational Database Backend example application using the oc CLI client
Prerequisites
- The example application created using Fabric8 Launcher tool on a Minishift or CDK. For more information, see Section 8.3.3.2, “Deploying the example application using the Fabric8 Launcher tool”.
- Your Fabric8 Launcher tool URL.
-
The
occlient authenticated. For more information, see Section 8.3.3.3, “Authenticating theocCLI client”.
Procedure
Clone your project from GitHub.
$ git clone git@github.com:USERNAME/MY_PROJECT_NAME.git
Alternatively, if you downloaded a ZIP file of your project, extract it.
$ unzip MY_PROJECT_NAME.zip
Create a new OpenShift project.
$ oc new-project MY_PROJECT_NAME
- Navigate to the root directory of your application.
Deploy the PostgreSQL database to OpenShift. Ensure that you use the following values for user name, password, and database name when creating your database application. The example application is pre-configured to use these values. Using different values prevents your application from integrating with the database.
$ oc new-app -e POSTGRESQL_USER=luke -ePOSTGRESQL_PASSWORD=secret -ePOSTGRESQL_DATABASE=my_data centos/postgresql-10-centos7 --name=my-database
Check the status of your database and ensure the pod is running.
$ oc get pods -w
my-database-1-aaaaa   1/1       Running   0         45s
my-database-1-deploy   0/1       Completed   0         53s
The
my-database-1-aaaaapod should have a status ofRunningand should be indicated as ready once it is fully deployed and started. Your specific pod name will vary. The number in the middle will increase with each new build. The letters at the end are generated when the pod is created.Use maven to start the deployment to OpenShift.
$ mvn clean fabric8:deploy -Popenshift
This command uses the Fabric8 Maven Plugin to launch the S2I process on OpenShift and to start the pod.
Check the status of your application and ensure your pod is running.
$ oc get pods -w
NAME                             READY     STATUS      RESTARTS   AGE
MY_APP_NAME-1-aaaaa       1/1       Running     0          58s
MY_APP_NAME-s2i-1-build   0/1       Completed   0          2m
Your
MY_APP_NAME-1-aaaaapod should have a status ofRunningand should be indicated as ready once it is fully deployed and started.After your example application is deployed and started, determine its route.
Example Route Information
$ oc get routes
NAME                 HOST/PORT                                     PATH      SERVICES             PORT      TERMINATION
MY_APP_NAME   MY_APP_NAME-MY_PROJECT_NAME.OPENSHIFT_HOSTNAME      MY_APP_NAME   8080
The route information of a pod gives you the base URL which you use to access it. In the example above, you would use
http://MY_APP_NAME-MY_PROJECT_NAME.OPENSHIFT_HOSTNAMEas the base URL to access the application.
8.3.4. Deploying the Relational Database Backend example application to OpenShift Container Platform
The process of creating and deploying example applications to OpenShift Container Platform is similar to OpenShift Online:
Prerequisites
- The example application created using developers.redhat.com/launch.
Procedure
- Follow the instructions in Section 8.3.2, “Deploying the Relational Database Backend example application to OpenShift Online”, only use the URL and user credentials from the OpenShift Container Platform Web Console.
8.3.5. Interacting with the Relational Database Backend API
When you have finished creating your example application, you can interact with it the following way:
Prerequisites
- Your application running
-
The
curlbinary or a web browser
Procedure
Obtain the URL of your application by executing the following command:
$ oc get route MY_APP_NAME
NAME                 HOST/PORT                                         PATH      SERVICES             PORT      TERMINATION
MY_APP_NAME           MY_APP_NAME-MY_PROJECT_NAME.OPENSHIFT_HOSTNAME              MY_APP_NAME           8080
To access the web interface of the database application, navigate to the application URL in your browser:
http://MY_APP_NAME-MY_PROJECT_NAME.OPENSHIFT_HOSTNAME
Alternatively, you can make requests directly on the
api/fruits/*endpoint usingcurl:List all entries in the database:
$ curl http://MY_APP_NAME-MY_PROJECT_NAME.OPENSHIFT_HOSTNAME/api/fruits
[ {
  "id" : 1,
  "name" : "Apple",
  "stock" : 10
}, {
  "id" : 2,
  "name" : "Orange",
  "stock" : 10
}, {
  "id" : 3,
  "name" : "Pear",
  "stock" : 10
} ]
Retrieve an entry with a specific ID
$ curl http://MY_APP_NAME-MY_PROJECT_NAME.OPENSHIFT_HOSTNAME/api/fruits/3
{
  "id" : 3,
  "name" : "Pear",
  "stock" : 10
}
Create a new entry:
$ curl -H "Content-Type: application/json" -X POST -d '{"name":"Peach","stock":1}' http://MY_APP_NAME-MY_PROJECT_NAME.OPENSHIFT_HOSTNAME/api/fruits{ "id" : 4, "name" : "Peach", "stock" : 1 }Update an Entry
$ curl -H "Content-Type: application/json" -X PUT -d '{"name":"Apple","stock":"100"}' http://MY_APP_NAME-MY_PROJECT_NAME.OPENSHIFT_HOSTNAME/api/fruits/1{ "id" : 1, "name" : "Apple", "stock" : 100 }Delete an Entry:
$ curl -X DELETE http://MY_APP_NAME-MY_PROJECT_NAME.OPENSHIFT_HOSTNAME/api/fruits/1
Troubleshooting
-
If you receive an HTTP Error code
503as a response after executing these commands, it means that the application is not ready yet.
8.3.6. Running the Relational Database Backend example application integration tests
This example application includes a self-contained set of integration tests. When run inside an OpenShift project, the tests:
- Deploy a test instance of the application to the project.
- Execute the individual tests on that instance.
- Remove all instances of the application from the project when the testing is done.
Executing integration tests removes all existing instances of the example application from the target OpenShift project. To avoid accidentally removing your example application, ensure that you create and select a separate OpenShift project to execute the tests.
Prerequisites
-
The
occlient authenticated - An empty OpenShift project
Procedure
Execute the following command to run the integration tests:
$ mvn clean verify -Popenshift,openshift-it
8.3.7. Relational database resources
More background and related information on running relational databases in OpenShift, CRUD, HTTP API and REST can be found here:
- HTTP Verbs
- Architectural Styles and the Design of Network-based Software Architectures - Representational State Transfer (REST)
- The never ending REST API design debase
- REST APIs must be Hypertext driven
- Richardson Maturity Model
- JSR 311: JAX-RS: The JavaTM API for RESTful Web Services
- Building a RESTful Service with Spring
- Relational Database Backend for Eclipse Vert.x
- Relational Database Backend for Thorntail
- Relational Database Backend for Node.js
8.4. Health Check example for Spring Boot
The following example is not meant to be run in a production environment.
Example proficiency level: Foundational.
When you deploy an application, it is important to know if it is available and if it can start handling incoming requests. Implementing the health check pattern allows you to monitor the health of an application, which includes if an application is available and whether it is able to service requests.
If you are not familiar with the health check terminology, see the Section 8.4.1, “Health check concepts” section first.
The purpose of this use case is to demonstrate the health check pattern through the use of probing. Probing is used to report the liveness and readiness of an application. In this use case, you configure an application which exposes an HTTP health endpoint to issue HTTP requests. If the container is alive, according to the liveness probe on the health HTTP endpoint, the management platform receives 200 as return code and no further action is required. If the health HTTP endpoint does not return a response, for example if the thread is blocked, then the application is not considered alive according to the liveness probe. In that case, the platform kills the pod corresponding to that application and recreates a new pod to restart the application.
This use case also allows you to demonstrate and use a readiness probe. In cases where the application is running but is unable to handle requests, such as when the application returns an HTTP 503 response code during restart, this application is not considered ready according to the readiness probe. If the application is not considered ready by the readiness probe, requests are not routed to that application until it is considered ready according to the readiness probe.
8.4.1. Health check concepts
In order to understand the health check pattern, you need to first understand the following concepts:
- Liveness
- Liveness defines whether an application is running or not. Sometimes a running application moves into an unresponsive or stopped state and needs to be restarted. Checking for liveness helps determine whether or not an application needs to be restarted.
- Readiness
- Readiness defines whether a running application can service requests. Sometimes a running application moves into an error or broken state where it can no longer service requests. Checking readiness helps determine whether or not requests should continue to be routed to that application.
- Fail-over
- Fail-over enables failures in servicing requests to be handled gracefully. If an application fails to service a request, that request and future requests can then fail-over or be routed to another application, which is usually a redundant copy of that same application.
- Resilience and Stability
- Resilience and Stability enable failures in servicing requests to be handled gracefully. If an application fails to service a request due to connection loss, in a resilient system that request can be retried after the connection is re-established.
- Probe
- A probe is a Kubernetes action that periodically performs diagnostics on a running container.
8.4.2. Deploying the Health Check example application to OpenShift Online
Use one of the following options to execute the Health Check example application on OpenShift Online.
Although each method uses the same oc commands to deploy your application, using developers.redhat.com/launch provides an automated deployment workflow that executes the oc commands for you.
8.4.2.1. Deploying the example application using developers.redhat.com/launch
Prerequisites
- An account at OpenShift Online.
Procedure
- Navigate to the developers.redhat.com/launch URL in a browser.
- Follow on-screen instructions to create and launch your example application in Spring Boot.
8.4.2.2. Authenticating the oc CLI client
To work with example applications on OpenShift Online using the oc command-line client, you must authenticate the client using the token provided by the OpenShift Online web interface.
Prerequisites
- An account at OpenShift Online.
Procedure
- Navigate to the OpenShift Online URL in a browser.
- Click on the question mark icon in the top right-hand corner of the Web console, next to your user name.
- Select Command Line Tools in the drop-down menu.
-
Copy the
oc logincommand. Paste the command in a terminal. The command uses your authentication token to authenticate your
ocCLI client with your OpenShift Online account.$ oc login OPENSHIFT_URL --token=MYTOKEN
8.4.2.3. Deploying the Health Check example application using the oc CLI client
Prerequisites
- The example application created using developers.redhat.com/launch. For more information, see Section 8.4.2.1, “Deploying the example application using developers.redhat.com/launch”.
-
The
occlient authenticated. For more information, see Section 8.4.2.2, “Authenticating theocCLI client”.
Procedure
Clone your project from GitHub.
$ git clone git@github.com:USERNAME/MY_PROJECT_NAME.git
Alternatively, if you downloaded a ZIP file of your project, extract it.
$ unzip MY_PROJECT_NAME.zip
Create a new OpenShift project.
$ oc new-project MY_PROJECT_NAME
- Navigate to the root directory of your application.
Use Maven to start the deployment to OpenShift.
$ mvn clean fabric8:deploy -Popenshift
This command uses the Fabric8 Maven Plugin to launch the S2I process on OpenShift and to start the pod.
Check the status of your application and ensure your pod is running.
$ oc get pods -w
NAME                             READY     STATUS      RESTARTS   AGE
MY_APP_NAME-1-aaaaa               1/1       Running     0          58s
MY_APP_NAME-s2i-1-build           0/1       Completed   0          2m
The
MY_APP_NAME-1-aaaaapod should have a status ofRunningonce its fully deployed and started. You should also wait for your pod to be ready before proceeding, which is shown in theREADYcolumn. For example,MY_APP_NAME-1-aaaaais ready when theREADYcolumn is1/1. Your specific pod name will vary. The number in the middle will increase with each new build. The letters at the end are generated when the pod is created.After your example application is deployed and started, determine its route.
Example Route Information
$ oc get routes
NAME                 HOST/PORT                                                     PATH      SERVICES        PORT      TERMINATION
MY_APP_NAME         MY_APP_NAME-MY_PROJECT_NAME.OPENSHIFT_HOSTNAME      MY_APP_NAME      8080
The route information of a pod gives you the base URL which you use to access it. In the example above, you would use
http://MY_APP_NAME-MY_PROJECT_NAME.OPENSHIFT_HOSTNAMEas the base URL to access the application.
8.4.3. Deploying the Health Check example application to Minishift or CDK
Use one of the following options to execute the Health Check example application locally on Minishift or CDK:
Although each method uses the same oc commands to deploy your application, using Fabric8 Launcher provides an automated deployment workflow that executes the oc commands for you.
8.4.3.1. Getting the Fabric8 Launcher tool URL and credentials
You need the Fabric8 Launcher tool URL and user credentials to create and deploy example applications on Minishift or CDK. This information is provided when the Minishift or CDK is started.
Prerequisites
- The Fabric8 Launcher tool installed, configured, and running.
Procedure
- Navigate to the console where you started Minishift or CDK.
Check the console output for the URL and user credentials you can use to access the running Fabric8 Launcher:
Example Console Output from a Minishift or CDK Startup
...
-- Removing temporary directory ... OK
-- Server Information ...
   OpenShift server started.
   The server is accessible via web console at:
       https://192.168.42.152:8443

   You are logged in as:
       User:     developer
       Password: developer

   To login as administrator:
       oc login -u system:admin
8.4.3.2. Deploying the example application using the Fabric8 Launcher tool
Prerequisites
- The URL of your running Fabric8 Launcher instance and the user credentials of your Minishift or CDK. For more information, see Section 8.4.3.1, “Getting the Fabric8 Launcher tool URL and credentials”.
Procedure
- Navigate to the Fabric8 Launcher URL in a browser.
- Follow the on-screen instructions to create and launch your example application in Spring Boot.
8.4.3.3. Authenticating the oc CLI client
To work with example applications on Minishift or CDK using the oc command-line client, you must authenticate the client using the token provided by the Minishift or CDK web interface.
Prerequisites
- The URL of your running Fabric8 Launcher instance and the user credentials of your Minishift or CDK. For more information, see Section 8.4.3.1, “Getting the Fabric8 Launcher tool URL and credentials”.
Procedure
- Navigate to the Minishift or CDK URL in a browser.
- Click on the question mark icon in the top right-hand corner of the Web console, next to your user name.
- Select Command Line Tools in the drop-down menu.
-
Copy the
oc logincommand. Paste the command in a terminal. The command uses your authentication token to authenticate your
ocCLI client with your Minishift or CDK account.$ oc login OPENSHIFT_URL --token=MYTOKEN
8.4.3.4. Deploying the Health Check example application using the oc CLI client
Prerequisites
- The example application created using Fabric8 Launcher tool on a Minishift or CDK. For more information, see Section 8.4.3.2, “Deploying the example application using the Fabric8 Launcher tool”.
- Your Fabric8 Launcher tool URL.
-
The
occlient authenticated. For more information, see Section 8.4.3.3, “Authenticating theocCLI client”.
Procedure
Clone your project from GitHub.
$ git clone git@github.com:USERNAME/MY_PROJECT_NAME.git
Alternatively, if you downloaded a ZIP file of your project, extract it.
$ unzip MY_PROJECT_NAME.zip
Create a new OpenShift project.
$ oc new-project MY_PROJECT_NAME
- Navigate to the root directory of your application.
Use Maven to start the deployment to OpenShift.
$ mvn clean fabric8:deploy -Popenshift
This command uses the Fabric8 Maven Plugin to launch the S2I process on OpenShift and to start the pod.
Check the status of your application and ensure your pod is running.
$ oc get pods -w
NAME                             READY     STATUS      RESTARTS   AGE
MY_APP_NAME-1-aaaaa               1/1       Running     0          58s
MY_APP_NAME-s2i-1-build           0/1       Completed   0          2m
The
MY_APP_NAME-1-aaaaapod should have a status ofRunningonce its fully deployed and started. You should also wait for your pod to be ready before proceeding, which is shown in theREADYcolumn. For example,MY_APP_NAME-1-aaaaais ready when theREADYcolumn is1/1. Your specific pod name will vary. The number in the middle will increase with each new build. The letters at the end are generated when the pod is created.After your example application is deployed and started, determine its route.
Example Route Information
$ oc get routes
NAME                 HOST/PORT                                                     PATH      SERVICES        PORT      TERMINATION
MY_APP_NAME         MY_APP_NAME-MY_PROJECT_NAME.OPENSHIFT_HOSTNAME      MY_APP_NAME      8080
The route information of a pod gives you the base URL which you use to access it. In the example above, you would use
http://MY_APP_NAME-MY_PROJECT_NAME.OPENSHIFT_HOSTNAMEas the base URL to access the application.
8.4.4. Deploying the Health Check example application to OpenShift Container Platform
The process of creating and deploying example applications to OpenShift Container Platform is similar to OpenShift Online:
Prerequisites
- The example application created using developers.redhat.com/launch.
Procedure
- Follow the instructions in Section 8.4.2, “Deploying the Health Check example application to OpenShift Online”, only use the URL and user credentials from the OpenShift Container Platform Web Console.
8.4.5. Interacting with the unmodified Health Check example application
After you deploy the example application, you will have the MY_APP_NAME service running. The MY_APP_NAME service exposes the following REST endpoints:
- /api/greeting
- Returns a name as a String.
- /api/stop
- Forces the service to become unresponsive as means to simulate a failure.
The following steps demonstrate how to verify the service availability and simulate a failure. This failure of an available service causes the OpenShift self-healing capabilities to be trigger on the service.
Alternatively, you can use the web interface to perform these steps.
Use
curlto execute aGETrequest against theMY_APP_NAMEservice. You can also use a browser to do this.$ curl http://MY_APP_NAME-MY_PROJECT_NAME.OPENSHIFT_HOSTNAME/api/greeting
{"content":"Hello, World!"}Invoke the
/api/stopendpoint and verify the availability of the/api/greetingendpoint shortly after that.Invoking the
/api/stopendpoint simulates an internal service failure and triggers the OpenShift self-healing capabilities. When invoking/api/greetingafter simulating the failure, the service should return anApplication is not availablepage.$ curl http://MY_APP_NAME-MY_PROJECT_NAME.OPENSHIFT_HOSTNAME/api/stop
(followed by)
$ curl http://MY_APP_NAME-MY_PROJECT_NAME.OPENSHIFT_HOSTNAME/api/greeting
<html> <head> ... </head> <body> <div> <h1>Application is not available</h1> ... </div> </body> </html>NoteDepending on when OpenShift removes the pod after you invoke the
/api/stopendpoint, you might initially see a 404 error code. If continue to invoke the/api/greetingendpoint, you will see theApplication is not availablepage after OpenShift removes the pod.Use
oc get pods -wto continuously watch the self-healing capabilities in action.While invoking the service failure, you can watch the self-healing capabilities in action on OpenShift console, or with the
occlient tools. You should see the number of pods in theREADYstate move to zero (0/1) and after a short period (less than one minute) move back up to one (1/1). In addition to that, theRESTARTScount increases every time you you invoke the service failure.$ oc get pods -w NAME READY STATUS RESTARTS AGE MY_APP_NAME-1-26iy7 0/1 Running 5 18m MY_APP_NAME-1-26iy7 1/1 Running 5 19m
Optional: Use the web interface to invoke the service.
Alternatively to the interaction using the terminal window, you can use the web interface provided by the service to invoke the different methods and watch the service move through the life cycle phases.
http://MY_APP_NAME-MY_PROJECT_NAME.OPENSHIFT_HOSTNAME
Optional: Use the web console to view the log output generated by the application at each stage of the self-healing process.
- Navigate to your project.
- On the sidebar, click on Monitoring.
- In the upper right-hand corner of the screen, click on Events to display the log messages.
- Optional: Click View Details to display a detailed view of the Event log.
The health check application generates the following messages:
Message Status Unhealthy
Readiness probe failed. This message is expected and indicates that the simulated failure of the
/api/greetingendpoint has been detected and the self-healing process starts.Killing
The unavailable Docker container running the service is being killed before being re-created.
Pulling
Downloading the latest version of docker image to re-create the container.
Pulled
Docker image downloaded successfully.
Created
Docker container has been successfully created
Started
Docker container is ready to handle requests
8.4.6. Running the Health Check example application integration tests
This example application includes a self-contained set of integration tests. When run inside an OpenShift project, the tests:
- Deploy a test instance of the application to the project.
- Execute the individual tests on that instance.
- Remove all instances of the application from the project when the testing is done.
Executing integration tests removes all existing instances of the example application from the target OpenShift project. To avoid accidentally removing your example application, ensure that you create and select a separate OpenShift project to execute the tests.
Prerequisites
-
The
occlient authenticated - An empty OpenShift project
Procedure
Execute the following command to run the integration tests:
$ mvn clean verify -Popenshift,openshift-it
8.4.7. Health check resources
More background and related information on health checking can be found here:
8.5. Circuit Breaker example for Spring Boot
The following example is not meant to be run in a production environment.
Limitation: Run this example application on a Minishift or CDK. You can also use a manual workflow to deploy this example to OpenShift Online Pro and OpenShift Container Platform. This example is not currently available on OpenShift Online Starter.
Example proficiency level: Foundational.
The Circuit Breaker example demonstrates a generic pattern for reporting the failure of a service and then limiting access to the failed service until it becomes available to handle requests. This helps prevent cascading failure in other services that depend on the failed services for functionality.
This example shows you how to implement a Circuit Breaker and Fallback pattern in your services.
8.5.1. The circuit breaker design pattern
The Circuit Breaker is a pattern intended to:
Reduce the impact of network failure and high latency on service architectures where services synchronously invoke other services.
If one of the services:
- becomes unavailable due to network failure, or
- incurs unusually high latency values due to overwhelming traffic,
other services attempting to call its endpoint may end up exhausting critical resources in an attempt to reach it, rendering themselves unusable.
- Prevent the condition also known as cascading failure, which can render the entire microservice architecture unusable.
- Act as a proxy between a protected function and a remote function, which monitors for failures.
- Trip once the failures reach a certain threshold, and all further calls to the circuit breaker return an error or a predefined fallback response, without the protected call being made at all.
The Circuit Breaker usually also contain an error reporting mechanism that notifies you when the Circuit Breaker trips.
Circuit breaker implementation
- With the Circuit Breaker pattern implemented, a service client invokes a remote service endpoint via a proxy at regular intervals.
- If the calls to the remote service endpoint fail repeatedly and consistently, the Circuit Breaker trips, making all calls to the service fail immediately over a set timeout period and returns a predefined fallback response.
When the timeout period expires, a limited number of test calls are allowed to pass through to the remote service to determine whether it has healed, or remains unavailable.
- If the test calls fail, the Circuit Breaker keeps the service unavailable and keeps returning the fallback responses to incoming calls.
- If the test calls succeed, the Circuit Breaker closes, fully enabling traffic to reach the remote service again.
8.5.2. Circuit Breaker design tradeoffs
Table 8.4. Design Tradeoffs
| Pros | Cons |
|---|---|
|
|
8.5.3. Deploying the Circuit Breaker example application to OpenShift Online
Use one of the following options to execute the Circuit Breaker example application on OpenShift Online.
Although each method uses the same oc commands to deploy your application, using developers.redhat.com/launch provides an automated deployment workflow that executes the oc commands for you.
8.5.3.1. Deploying the example application using developers.redhat.com/launch
Prerequisites
- An account at OpenShift Online.
Procedure
- Navigate to the developers.redhat.com/launch URL in a browser.
- Follow on-screen instructions to create and launch your example application in Spring Boot.
8.5.3.2. Authenticating the oc CLI client
To work with example applications on OpenShift Online using the oc command-line client, you must authenticate the client using the token provided by the OpenShift Online web interface.
Prerequisites
- An account at OpenShift Online.
Procedure
- Navigate to the OpenShift Online URL in a browser.
- Click on the question mark icon in the top right-hand corner of the Web console, next to your user name.
- Select Command Line Tools in the drop-down menu.
-
Copy the
oc logincommand. Paste the command in a terminal. The command uses your authentication token to authenticate your
ocCLI client with your OpenShift Online account.$ oc login OPENSHIFT_URL --token=MYTOKEN
8.5.3.3. Deploying the Circuit Breaker example application using the oc CLI client
Prerequisites
- The example application created using developers.redhat.com/launch. For more information, see Section 8.5.3.1, “Deploying the example application using developers.redhat.com/launch”.
-
The
occlient authenticated. For more information, see Section 8.5.3.2, “Authenticating theocCLI client”.
Procedure
Clone your project from GitHub.
$ git clone git@github.com:USERNAME/MY_PROJECT_NAME.git
Alternatively, if you downloaded a ZIP file of your project, extract it.
$ unzip MY_PROJECT_NAME.zip
Create a new OpenShift project.
$ oc new-project MY_PROJECT_NAME
- Navigate to the root directory of your application.
Use Maven to start the deployment to OpenShift.
$ mvn clean fabric8:deploy -Popenshift
This command uses the Fabric8 Maven Plugin to launch the S2I process on OpenShift and to start the pod.
Check the status of your application and ensure your pod is running.
$ oc get pods -w
NAME                             READY     STATUS      RESTARTS   AGE
MY_APP_NAME-greeting-1-aaaaa     1/1       Running   0           17s
MY_APP_NAME-greeting-1-deploy    0/1       Completed 0           22s
MY_APP_NAME-name-1-aaaaa         1/1       Running   0           14s
MY_APP_NAME-name-1-deploy        0/1       Completed 0           28s
Both the
MY_APP_NAME-greeting-1-aaaaaandMY_APP_NAME-name-1-aaaaapods should have a status ofRunningonce they are fully deployed and started. You should also wait for your pods to be ready before proceeding, which is shown in theREADYcolumn. For example,MY_APP_NAME-greeting-1-aaaaais ready when theREADYcolumn is1/1. Your specific pod names will vary. The number in the middle will increase with each new build. The letters at the end are generated when the pod is created.After your example application is deployed and started, determine its route.
Example Route Information
$ oc get routes
NAME                 HOST/PORT                                                     PATH      SERVICES        PORT      TERMINATION
MY_APP_NAME-greeting   MY_APP_NAME-greeting-MY_PROJECT_NAME.OPENSHIFT_HOSTNAME            MY_APP_NAME-greeting   8080                    None
MY_APP_NAME-name       MY_APP_NAME-name-MY_PROJECT_NAME.OPENSHIFT_HOSTNAME            MY_APP_NAME-name       8080                    None
The route information of a pod gives you the base URL which you use to access it. In the example above, you would use
http://MY_APP_NAME-greeting-MY_PROJECT_NAME.OPENSHIFT_HOSTNAMEas the base URL to access the application.
8.5.4. Deploying the Circuit Breaker example application to Minishift or CDK
Use one of the following options to execute the Circuit Breaker example application locally on Minishift or CDK:
Although each method uses the same oc commands to deploy your application, using Fabric8 Launcher provides an automated deployment workflow that executes the oc commands for you.
8.5.4.1. Getting the Fabric8 Launcher tool URL and credentials
You need the Fabric8 Launcher tool URL and user credentials to create and deploy example applications on Minishift or CDK. This information is provided when the Minishift or CDK is started.
Prerequisites
- The Fabric8 Launcher tool installed, configured, and running.
Procedure
- Navigate to the console where you started Minishift or CDK.
Check the console output for the URL and user credentials you can use to access the running Fabric8 Launcher:
Example Console Output from a Minishift or CDK Startup
...
-- Removing temporary directory ... OK
-- Server Information ...
   OpenShift server started.
   The server is accessible via web console at:
       https://192.168.42.152:8443

   You are logged in as:
       User:     developer
       Password: developer

   To login as administrator:
       oc login -u system:admin
8.5.4.2. Deploying the example application using the Fabric8 Launcher tool
Prerequisites
- The URL of your running Fabric8 Launcher instance and the user credentials of your Minishift or CDK. For more information, see Section 8.5.4.1, “Getting the Fabric8 Launcher tool URL and credentials”.
Procedure
- Navigate to the Fabric8 Launcher URL in a browser.
- Follow the on-screen instructions to create and launch your example application in Spring Boot.
8.5.4.3. Authenticating the oc CLI client
To work with example applications on Minishift or CDK using the oc command-line client, you must authenticate the client using the token provided by the Minishift or CDK web interface.
Prerequisites
- The URL of your running Fabric8 Launcher instance and the user credentials of your Minishift or CDK. For more information, see Section 8.5.4.1, “Getting the Fabric8 Launcher tool URL and credentials”.
Procedure
- Navigate to the Minishift or CDK URL in a browser.
- Click on the question mark icon in the top right-hand corner of the Web console, next to your user name.
- Select Command Line Tools in the drop-down menu.
-
Copy the
oc logincommand. Paste the command in a terminal. The command uses your authentication token to authenticate your
ocCLI client with your Minishift or CDK account.$ oc login OPENSHIFT_URL --token=MYTOKEN
8.5.4.4. Deploying the Circuit Breaker example application using the oc CLI client
Prerequisites
- The example application created using Fabric8 Launcher tool on a Minishift or CDK. For more information, see Section 8.5.4.2, “Deploying the example application using the Fabric8 Launcher tool”.
- Your Fabric8 Launcher tool URL.
-
The
occlient authenticated. For more information, see Section 8.5.4.3, “Authenticating theocCLI client”.
Procedure
Clone your project from GitHub.
$ git clone git@github.com:USERNAME/MY_PROJECT_NAME.git
Alternatively, if you downloaded a ZIP file of your project, extract it.
$ unzip MY_PROJECT_NAME.zip
Create a new OpenShift project.
$ oc new-project MY_PROJECT_NAME
- Navigate to the root directory of your application.
Use Maven to start the deployment to OpenShift.
$ mvn clean fabric8:deploy -Popenshift
This command uses the Fabric8 Maven Plugin to launch the S2I process on OpenShift and to start the pod.
Check the status of your application and ensure your pod is running.
$ oc get pods -w
NAME                             READY     STATUS      RESTARTS   AGE
MY_APP_NAME-greeting-1-aaaaa     1/1       Running   0           17s
MY_APP_NAME-greeting-1-deploy    0/1       Completed 0           22s
MY_APP_NAME-name-1-aaaaa         1/1       Running   0           14s
MY_APP_NAME-name-1-deploy        0/1       Completed 0           28s
Both the
MY_APP_NAME-greeting-1-aaaaaandMY_APP_NAME-name-1-aaaaapods should have a status ofRunningonce they are fully deployed and started. You should also wait for your pods to be ready before proceeding, which is shown in theREADYcolumn. For example,MY_APP_NAME-greeting-1-aaaaais ready when theREADYcolumn is1/1. Your specific pod names will vary. The number in the middle will increase with each new build. The letters at the end are generated when the pod is created.After your example application is deployed and started, determine its route.
Example Route Information
$ oc get routes
NAME                 HOST/PORT                                                     PATH      SERVICES        PORT      TERMINATION
MY_APP_NAME-greeting   MY_APP_NAME-greeting-MY_PROJECT_NAME.OPENSHIFT_HOSTNAME            MY_APP_NAME-greeting   8080                    None
MY_APP_NAME-name       MY_APP_NAME-name-MY_PROJECT_NAME.OPENSHIFT_HOSTNAME            MY_APP_NAME-name       8080                    None
The route information of a pod gives you the base URL which you use to access it. In the example above, you would use
http://MY_APP_NAME-greeting-MY_PROJECT_NAME.OPENSHIFT_HOSTNAMEas the base URL to access the application.
8.5.5. Deploying the Circuit Breaker example application to OpenShift Container Platform
The process of creating and deploying example applications to OpenShift Container Platform is similar to OpenShift Online:
Prerequisites
- The example application created using developers.redhat.com/launch.
Procedure
- Follow the instructions in Section 8.5.3, “Deploying the Circuit Breaker example application to OpenShift Online”, only use the URL and user credentials from the OpenShift Container Platform Web Console.
8.5.6. Interacting with the unmodified Spring Boot Circuit Breaker example application
After you have the Spring Boot example application deployed, you have the following services running:
MY_APP_NAME-nameExposes the following endpoints:
-
the
/api/nameendpoint, which returns a name when this service is working, and an error when this service is set up to demonstrate failure. -
the
/api/stateendpoint, which controls the behavior of the/api/nameendpoint and determines whether the service works correctly or demonstrates failure.
-
the
MY_APP_NAME-greetingExposes the following endpoints:
the
/api/greetingendpoint that you can call to get a personalized greeting response.When you call the
/api/greetingendpoint, it issues a call against the/api/nameendpoint of theMY_APP_NAME-nameservice as part of processing your request. The call made against the/api/nameendpoint is protected by the Circuit Breaker.If the remote endpoint is available, the
nameservice responds with an HTTP code200(OK) and you receive the following greeting from the/api/greetingendpoint:{"content":"Hello, World!"}If the remote endpoint is unavailable, the
nameservice responds with an HTTP code500(Internal server error) and you receive a predefined fallback response from the/api/greetingendpoint:{"content":"Hello, Fallback!"}the
/api/cb-stateendpoint, which returns the state of the Circuit Breaker. The state can be:- open : the circuit breaker is preventing requests from reaching the failed service,
- closed: the circuit breaker is allowing requests to reach the service.
The following steps demonstrate how to verify the availability of the service, simulate a failure and receive a fallback response.
Use
curlto execute aGETrequest against theMY_APP_NAME-greetingservice. You can also use theInvokebutton in the web interface to do this.$ curl http://MY_APP_NAME-greeting-MY_PROJECT_NAME.LOCAL_OPENSHIFT_HOSTNAME/api/greeting {"content":"Hello, World!"}To simulate the failure of the
MY_APP_NAME-nameservice you can:-
use the
Togglebutton in the web interface. -
scale the number of replicas of the pod running the
MY_APP_NAME-nameservice down to 0. execute an HTTP
PUTrequest against the/api/stateendpoint of theMY_APP_NAME-nameservice to set its state tofail.$ curl -X PUT -H "Content-Type: application/json" -d '{"state": "fail"}' http://MY_APP_NAME-name-MY_PROJECT_NAME.LOCAL_OPENSHIFT_HOSTNAME/api/state
-
use the
Invoke the
/api/greetingendpoint. When several requests on the/api/nameendpoint fail:- the Circuit Breaker opens,
-
the state indicator in the web interface changes from
CLOSEDtoOPEN, the Circuit Breaker issues a fallback response when you invoke the
/api/greetingendpoint:$ curl http://MY_APP_NAME-greeting-MY_PROJECT_NAME.LOCAL_OPENSHIFT_HOSTNAME/api/greeting {"content":"Hello, Fallback!"}
Restore the name
MY_APP_NAME-nameservice to availability. To do this you can:-
use the
Togglebutton in the web interface. -
scale the number of replicas of the pod running the
MY_APP_NAME-nameservice back up to 1. execute an HTTP
PUTrequest against the/api/stateendpoint of theMY_APP_NAME-nameservice to set its state back took.$ curl -X PUT -H "Content-Type: application/json" -d '{"state": "ok"}' http://MY_APP_NAME-name-MY_PROJECT_NAME.LOCAL_OPENSHIFT_HOSTNAME/api/state
-
use the
Invoke the
/api/greetingendpoint again. When several requests on the/api/nameendpoint succeed:- the Circuit Breaker closes,
-
the state indicator in the web interface changes from
OPENtoCLOSED, the Circuit Breaker issues a returns the
Hello World!greeting when you invoke the/api/greetingendpoint:$ curl http://MY_APP_NAME-greeting-MY_PROJECT_NAME.LOCAL_OPENSHIFT_HOSTNAME/api/greeting {"content":"Hello, World!"}
8.5.7. Running the Circuit Breaker example application integration tests
This example application includes a self-contained set of integration tests. When run inside an OpenShift project, the tests:
- Deploy a test instance of the application to the project.
- Execute the individual tests on that instance.
- Remove all instances of the application from the project when the testing is done.
Executing integration tests removes all existing instances of the example application from the target OpenShift project. To avoid accidentally removing your example application, ensure that you create and select a separate OpenShift project to execute the tests.
Prerequisites
-
The
occlient authenticated - An empty OpenShift project
Procedure
Execute the following command to run the integration tests:
$ mvn clean verify -Popenshift,openshift-it
8.5.8. Using Hystrix Dashboard to monitor the circuit breaker
Hystrix Dashboard lets you easily monitor the health of your services in real time by aggregating Hystrix metrics data from an event stream and displaying them on one screen.
Prerequisites
- The application deployed
Procedure
Log in to your Minishift or CDK cluster.
$ oc login OPENSHIFT_URL --token=MYTOKEN
- To access the Web console, use your browser to navigate to your Minishift or CDK URL.
Navigate to the project that contains your Circuit Breaker application.
$ oc project MY_PROJECT_NAME
Import the YAML template for the Hystrix Dashboard application. You can do this by clicking Add to Project, then selecting the Import YAML / JSON tab, and copying the contents of the YAML file into the text box. Alternatively, you can execute the following command:
$ oc create -f https://raw.githubusercontent.com/snowdrop/openshift-templates/master/hystrix-dashboard/hystrix-dashboard.yml
Click the Create button to create the Hystrix Dashboard application based on the template. Alternatively, you can execute the following command.
$ oc new-app --template=hystrix-dashboard
- Wait for the pod containing Hystrix Dashboard to deploy.
Obtain the route of your Hystrix Dashboard application.
$ oc get route hystrix-dashboard
NAME                HOST/PORT                                                    PATH      SERVICES            PORT      TERMINATION   WILDCARD
hystrix-dashboard   hystrix-dashboard-MY_PROJECT_NAME.LOCAL_OPENSHIFT_HOSTNAME                 hystrix-dashboard   <all>                   None
- To access the Dashboard, open the Dashboard application route URL in your browser. Alternatively, you can navigate to the Overview screen in the Web console and click the route URL in the header above the pod containing your Hystrix Dashboard application.
To use the Dashboard to monitor the
MY_APP_NAME-greetingservice, replace the default event stream address with the following address and click the Monitor Stream button.http://MY_APP_NAME-greeting-MY_PROJECT_NAME.LOCAL_OPENSHIFT_HOSTNAME/hystrix.stream
Additional resources
- The Hystrix Dashboard wiki page
8.5.9. Circuit breaker resources
Follow the links below for more background information on the design principles behind the Circuit Breaker pattern
8.6. Secured example application for Spring Boot
The following example is not meant to be run in a production environment.
Limitation: Run this example application on a Minishift or CDK. You can also use a manual workflow to deploy this example to OpenShift Online Pro and OpenShift Container Platform. This example is not currently available on OpenShift Online Starter.
Example proficiency level: Advanced.
The Secured example application secures a REST endpoint using Red Hat SSO. (This example expands on the REST API Level 0 example).
Red Hat SSO:
- Implements the Open ID Connect protocol which is an extension of the OAuth 2.0 specification.
- Issues access tokens to provide clients with various access rights to secured resources.
Securing an application with SSO enables you to add security to your applications while centralizing the security configuration.
This example comes with Red Hat SSO pre-configured for demonstration purposes, it does not explain its principles, usage, or configuration. Before using this example, ensure that you are familiar with the basic concepts related to Red Hat SSO.
8.6.1. The Secured project structure
The SSO example contains:
- the sources for the Greeting service, which is the one which we are going to to secure
-
a template file (
service.sso.yaml) to deploy the SSO server - the Keycloak adapter configuration to secure the service
8.6.2. Red Hat SSO deployment configuration
The service.sso.yaml file in this example contains all OpenShift configuration items to deploy a pre-configured Red Hat SSO server. The SSO server configuration has been simplified for the sake of this exercise and does provide an out-of-the-box configuration, with pre-configured users and security settings. The service.sso.yaml file also contains very long lines, and some text editors, such as gedit, may have issues reading this file.
It is not recommended to use this SSO configuration in production. Specifically, the simplifications made to the example security configuration impact the ability to use it in a production environment.
Table 8.5. SSO Example Simplifications
| Change | Reason | Recommendation |
|---|---|---|
| The default configuration includes both public and private keys in the yaml configuration files. | We did this because the end user can deploy Red Hat SSO module and have it in a usable state without needing to know the internals or how to configure Red Hat SSO. | In production, do not store private keys under source control. They should be added by the server administrator. |
| The configured clients accept any callback url. | To avoid having a custom configuration for each runtime, we avoid the callback verification that is required by the OAuth2 specification. | An application-specific callback URL should be provided with a valid domain name. |
| Clients do not require SSL/TLS and the secured applications are not exposed over HTTPS. | The examples are simplified by not requiring certificates generated for each runtime. | In production a secure application should use HTTPS rather than plain HTTP. |
| The token timeout has been increased to 10 minutes from the default of 1 minute. | Provides a better user experience when working with the command line examples | From a security perspective, the window an attacker would have to guess the access token is extended. It is recommended to keep this window short as it makes it much harder for a potential attacker to guess the current token. |
8.6.3. Red Hat SSO realm model
The master realm is used to secure this example. There are two pre-configured application client definitions that provide a model for command line clients and the secured REST endpoint.
There are also two pre-configured users in the Red Hat SSO master realm that can be used to validate various authentication and authorization outcomes: admin and alice.
8.6.3.1. Red Hat SSO users
The realm model for the secured examples includes two users:
- admin
-
The
adminuser has a password ofadminand is the realm administrator. This user has full access to the Red Hat SSO administration console, but none of the role mappings that are required to access the secured endpoints. You can use this user to illustrate the behavior of an authenticated, but unauthorized user. - alice
The
aliceuser has a password ofpasswordand is the canonical application user. This user will demonstrate successful authenticated and authorized access to the secured endpoints. An example representation of the role mappings is provided in this decoded JWT bearer token:{ "jti": "0073cfaa-7ed6-4326-ac07-c108d34b4f82", "exp": 1510162193, "nbf": 0, "iat": 1510161593, "iss": "https://secure-sso-sso.LOCAL_OPENSHIFT_HOSTNAME/auth/realms/master", 1 "aud": "demoapp", "sub": "c0175ccb-0892-4b31-829f-dda873815fe8", "typ": "Bearer", "azp": "demoapp", "nonce": "90ff5d1a-ba44-45ae-a413-50b08bf4a242", "auth_time": 1510161591, "session_state": "98efb95a-b355-43d1-996b-0abcb1304352", "acr": "1", "client_session": "5962112c-2b19-461e-8aac-84ab512d2a01", "allowed-origins": [ "*" ], "realm_access": { "roles": [ 2 "example-admin" ] }, "resource_access": { 3 "secured-example-endpoint": { "roles": [ "example-admin" 4 ] }, "account": { "roles": [ "manage-account", "view-profile" ] } }, "name": "Alice InChains", "preferred_username": "alice", 5 "given_name": "Alice", "family_name": "InChains", "email": "alice@keycloak.org" }- 1
- The
issfield corresponds to the Red Hat SSO realm instance URL that issues the token. This must be configured in the secured endpoint deployments in order for the token to be verified. - 2
- The
rolesobject provides the roles that have been granted to the user at the global realm level. In this casealicehas been granted theexample-adminrole. We will see that the secured endpoint will look to the realm level for authorized roles. - 3
- The
resource_accessobject contains resource specific role grants. Under this object you will find an object for each of the secured endpoints. - 4
- The
resource_access.secured-example-endpoint.rolesobject contains the roles granted toalicefor thesecured-example-endpointresource. - 5
- The
preferred_usernamefield provides the username that was used to generate the access token.
8.6.3.2. The application clients
The OAuth 2.0 specification allows you to define a role for application clients that access secured resources on behalf of resource owners. The master realm has the following application clients defined:
- demoapp
-
This is a
confidentialtype client with a client secret that is used to obtain an access token. The token contains grants for thealiceuser which enablealiceto access the Thorntail, Eclipse Vert.x, Node.js and Spring Boot based REST example application deployments. - secured-example-endpoint
-
The
secured-example-endpointis a bearer-only type of client that requires aexample-adminrole for accessing the associated resources, specifically the Greeting service.
8.6.4. Spring Boot SSO adapter configuration
The SSO adapter is the client side, or client to the SSO server, component that enforces security on the web resources. In this specific case, it is the Greeting service.
Both the SSO adapter and endpoint security are configured in src/main/resources/application.properties.
Example application.properties file
$ # Adapter configuration
keycloak.realm=${realm:master} 1
keycloak.realm-key=...
keycloak.auth-server-url=${sso.auth.server.url} 2
keycloak.resource=${client.id:secured-example-endpoint} 3
keycloak.credentials.secret=${secret:1daa57a2-b60e-468b-a3ac-25bd2dc2eadc} 4
keycloak.use-resource-role-mappings=true 5
keycloak.bearer-only=true 6
# Endpoint security configuration
keycloak.securityConstraints[0].securityCollections[0].name=admin stuff 7
keycloak.securityConstraints[0].securityCollections[0].authRoles[0]=example-admin 8
keycloak.securityConstraints[0].securityCollections[0].patterns[0]=/api/greeting 9
- 1
- The security realm to be used.
- 2
- The address of the Red Hat SSO server (Interpolation at build time).
- 3
- The actual keycloak client configuration.
- 4
- Secret to access authentication server.
- 5
- Check the token for application level role mappings for the user.
- 6
- If enabled the adapter will not attempt to authenticate users, but only verify bearer tokens.
- 7
- A simple name for the security constraint.
- 8
- A roles needed to access a secured endpoint.
- 9
- A secured endpoints path pattern.
8.6.5. Deploying the Secured example application to Minishift or CDK
8.6.5.1. Getting the Fabric8 Launcher tool URL and credentials
You need the Fabric8 Launcher tool URL and user credentials to create and deploy example applications on Minishift or CDK. This information is provided when the Minishift or CDK is started.
Prerequisites
- The Fabric8 Launcher tool installed, configured, and running.
Procedure
- Navigate to the console where you started Minishift or CDK.
Check the console output for the URL and user credentials you can use to access the running Fabric8 Launcher:
Example Console Output from a Minishift or CDK Startup
...
-- Removing temporary directory ... OK
-- Server Information ...
   OpenShift server started.
   The server is accessible via web console at:
       https://192.168.42.152:8443

   You are logged in as:
       User:     developer
       Password: developer

   To login as administrator:
       oc login -u system:admin
8.6.5.2. Creating the Secured example application using Fabric8 Launcher
Prerequisites
- The URL and user credentials of your running Fabric8 Launcher instance. For more information, see Section 8.6.5.1, “Getting the Fabric8 Launcher tool URL and credentials”.
Procedure
- Navigate to the Fabric8 Launcher URL in a browser and log in.
- Follow the on-screen instructions to create your example in Spring Boot. When asked about which deployment type, select I will build and run locally.
Follow on-screen instructions.
When done, click the Download as ZIP file button and store the file on your hard drive.
8.6.5.3. Authenticating the oc CLI client
To work with example applications on Minishift or CDK using the oc command-line client, you must authenticate the client using the token provided by the Minishift or CDK web interface.
Prerequisites
- The URL of your running Fabric8 Launcher instance and the user credentials of your Minishift or CDK. For more information, see Section 8.6.5.1, “Getting the Fabric8 Launcher tool URL and credentials”.
Procedure
- Navigate to the Minishift or CDK URL in a browser.
- Click on the question mark icon in the top right-hand corner of the Web console, next to your user name.
- Select Command Line Tools in the drop-down menu.
-
Copy the
oc logincommand. Paste the command in a terminal. The command uses your authentication token to authenticate your
ocCLI client with your Minishift or CDK account.$ oc login OPENSHIFT_URL --token=MYTOKEN
8.6.5.4. Deploying the Secured example application using the oc CLI client
Prerequisites
- The example application created using the Fabric8 Launcher tool on a Minishift or CDK. For more information, see Section 8.6.5.2, “Creating the Secured example application using Fabric8 Launcher”.
- Your Fabric8 Launcher URL.
-
The
occlient authenticated. For more information, see Section 8.6.5.3, “Authenticating theocCLI client”.
Procedure
Clone your project from GitHub.
$ git clone git@github.com:USERNAME/MY_PROJECT_NAME.git
Alternatively, if you downloaded a ZIP file of your project, extract it.
$ unzip MY_PROJECT_NAME.zip
Create a new OpenShift project.
$ oc new-project MY_PROJECT_NAME
- Navigate to the root directory of your application.
Deploy the Red Hat SSO server using the
service.sso.yamlfile from your example ZIP file:$ oc create -f service.sso.yaml
Use Maven to start the deployment to Minishift or CDK.
$ mvn clean fabric8:deploy -Popenshift -DskipTests \
      -DSSO_AUTH_SERVER_URL=$(oc get route secure-sso -o jsonpath='{"https://"}{.spec.host}{"/auth\n"}')
This command uses the Fabric8 Maven Plugin to launch the S2I process on Minishift or CDK and to start the pod.
This process generates the uberjar file as well as the OpenShift resources and deploys them to the current project on your Minishift or CDK server.
8.6.6. Deploying the Secured example application to OpenShift Container Platform
In addition to the Minishift or CDK, you can create and deploy the example on OpenShift Container Platform with only minor differences. The most important difference is that you need to create the example application on Minishift or CDK before you can deploy it with OpenShift Container Platform.
Prerequisites
- The example created using Minishift or CDK.
8.6.6.1. Authenticating the oc CLI client
To work with example applications on OpenShift Container Platform using the oc command-line client, you must authenticate the client using the token provided by the OpenShift Container Platform web interface.
Prerequisites
- An account at OpenShift Container Platform.
Procedure
- Navigate to the OpenShift Container Platform URL in a browser.
- Click on the question mark icon in the top right-hand corner of the Web console, next to your user name.
- Select Command Line Tools in the drop-down menu.
-
Copy the
oc logincommand. Paste the command in a terminal. The command uses your authentication token to authenticate your
ocCLI client with your OpenShift Container Platform account.$ oc login OPENSHIFT_URL --token=MYTOKEN
8.6.6.2. Deploying the Secured example application using the oc CLI client
Prerequisites
- The example application created using the Fabric8 Launcher tool on a Minishift or CDK.
-
The
occlient authenticated. For more information, see Section 8.6.6.1, “Authenticating theocCLI client”.
Procedure
Clone your project from GitHub.
$ git clone git@github.com:USERNAME/MY_PROJECT_NAME.git
Alternatively, if you downloaded a ZIP file of your project, extract it.
$ unzip MY_PROJECT_NAME.zip
Create a new OpenShift project.
$ oc new-project MY_PROJECT_NAME
- Navigate to the root directory of your application.
Deploy the Red Hat SSO server using the
service.sso.yamlfile from your example ZIP file:$ oc create -f service.sso.yaml
Use Maven to start the deployment to OpenShift Container Platform.
$ mvn clean fabric8:deploy -Popenshift -DskipTests \
      -DSSO_AUTH_SERVER_URL=$(oc get route secure-sso -o jsonpath='{"https://"}{.spec.host}{"/auth\n"}')
This command uses the Fabric8 Maven Plugin to launch the S2I process on OpenShift Container Platform and to start the pod.
This process generates the uberjar file as well as the OpenShift resources and deploys them to the current project on your OpenShift Container Platform server.
8.6.7. Authenticating to the Secured example application API endpoint
The Secured example application provides a default HTTP endpoint that accepts GET requests if the caller is authenticated and authorized. The client first authenticates against the Red Hat SSO server and then performs a GET request against the Secured example application using the access token returned by the authentication step.
8.6.7.1. Getting the Secured example application API endpoint
When using a client to interact with the example, you must specify the Secured example application endpoint, which is the PROJECT_ID service.
Prerequisites
- The Secured example application deployed and running.
-
The
occlient authenticated.
Procedure
In a terminal application, execute the
oc get routescommand.A sample output is shown in the following table:
Example 8.1. List of Secured endpoints
Name Host/Port Path Services Port Termination secure-sso
secure-sso-myproject.LOCAL_OPENSHIFT_HOSTNAME
secure-sso
<all>
passthrough
PROJECT_ID
PROJECT_ID-myproject.LOCAL_OPENSHIFT_HOSTNAME
PROJECT_ID
<all>
sso
sso-myproject.LOCAL_OPENSHIFT_HOSTNAME
sso
<all>
In the above example, the example endpoint would be
http://PROJECT_ID-myproject.LOCAL_OPENSHIFT_HOSTNAME.PROJECT_IDis based on the name you entered when generating your example using developers.redhat.com/launch or the Fabric8 Launcher tool.
8.6.7.2. Authenticating HTTP requests using the command line
Request a token by sending a HTTP POST request to the Red Hat SSO server. In the following example, the jq CLI tool is used to extract the token value from the JSON response.
Prerequisites
- The secured example endpoint URL. For more information, see Section 8.6.7.1, “Getting the Secured example application API endpoint”.
-
The
jqcommand-line tool (optional). To download the tool and for more information, see https://stedolan.github.io/jq/.
Procedure
Request an access token with
curl, the credentials, and<SSO_AUTH_SERVER_URL>and extract the token from the response with thejqcommand:curl -sk -X POST https://<SSO_AUTH_SERVER_URL>/auth/realms/master/protocol/openid-connect/token \ -d grant_type=password \ -d username=alice\ -d password=password \ -d client_id=demoapp \ -d client_secret=1daa57a2-b60e-468b-a3ac-25bd2dc2eadc \ | jq -r '.access_token' eyJhbGciOiJSUzI1NiIsInR5cCIgOiAiSldUIiwia2lkIiA6ICJRek1nbXhZMUhrQnpxTnR0SnkwMm5jNTNtMGNiWDQxV1hNSTU1MFo4MGVBIn0.eyJqdGkiOiI0NDA3YTliNC04YWRhLTRlMTctODQ2ZS03YjI5MjMyN2RmYTIiLCJleHAiOjE1MDc3OTM3ODcsIm5iZiI6MCwiaWF0IjoxNTA3NzkzNzI3LCJpc3MiOiJodHRwczovL3NlY3VyZS1zc28tc3NvLWRlbW8uYXBwcy5jYWZlLWJhYmUub3JnL2F1dGgvcmVhbG1zL21hc3RlciIsImF1ZCI6ImRlbW9hcHAiLCJzdWIiOiJjMDE3NWNjYi0wODkyLTRiMzEtODI5Zi1kZGE4NzM4MTVmZTgiLCJ0eXAiOiJCZWFyZXIiLCJhenAiOiJkZW1vYXBwIiwiYXV0aF90aW1lIjowLCJzZXNzaW9uX3N0YXRlIjoiMDFjOTkzNGQtNmZmOS00NWYzLWJkNWUtMTU4NDI5ZDZjNDczIiwiYWNyIjoiMSIsImNsaWVudF9zZXNzaW9uIjoiMzM3Yzk0MTYtYTdlZS00ZWUzLThjZWQtODhlODI0MGJjNTAyIiwiYWxsb3dlZC1vcmlnaW5zIjpbIioiXSwicmVhbG1fYWNjZXNzIjp7InJvbGVzIjpbImJvb3N0ZXItYWRtaW4iXX0sInJlc291cmNlX2FjY2VzcyI6eyJzZWN1cmVkLWJvb3N0ZXItZW5kcG9pbnQiOnsicm9sZXMiOlsiYm9vc3Rlci1hZG1pbiJdfSwiYWNjb3VudCI6eyJyb2xlcyI6WyJtYW5hZ2UtYWNjb3VudCIsInZpZXctcHJvZmlsZSJdfX0sIm5hbWUiOiJBbGljZSBJbkNoYWlucyIsInByZWZlcnJlZF91c2VybmFtZSI6ImFsaWNlIiwiZ2l2ZW5fbmFtZSI6IkFsaWNlIiwiZmFtaWx5X25hbWUiOiJJbkNoYWlucyIsImVtYWlsIjoiYWxpY2VAa2V5Y2xvYWsub3JnIn0.mjmZe37enHpigJv0BGuIitOj-kfMLPNwYzNd3n0Ax4Nga7KpnfytGyuPSvR4KAG8rzkfBNN9klPYdy7pJEeYlfmnFUkM4EDrZYgn4qZAznP1Wzy1RfVRdUFi0-GqFTMPb37o5HRldZZ09QljX_j3GHnoMGXRtYW9RZN4eKkYkcz9hRwgfJoTy2CuwFqeJwZYUyXifrfA-JoTr0UmSUed-0NMksGrtJjjPggUGS-qOn6OgKcmN2vaVAQlxW32y53JqUXctfLQ6DhJzIMYTmOflIPy0sgG1mG7sovQhw1xTg0vTjdx8zQ-EJcexkj7IivRevRZsslKgqRFWs67jQAFQA
<SSO_AUTH_SERVER_URL>is the url of thesecure-ssoservice.The attributes, such as
username,password, andclient_secretare usually kept secret, but the above command uses the default provided credentials with this example for demonstration purpose.If you do not want to use
jqto extract the token, you can run just thecurlcommand and manually extract the access token.NoteThe
-skoption tells curl to ignore failures resulting from self-signed certificates. Do not use this option in a production environment. On macOS, you must havecurlversion7.56.1or greater installed. It must also be built with OpenSSL.
Invoke the Secured service. Attach the access (bearer) token to the HTTP headers:
$ curl -v -H "Authorization: Bearer <TOKEN>" http://<SERVICE_HOST>/api/greeting

{
    "content": "Hello, World!",
    "id": 2
}
Example 8.2. A sample
GETRequest Headers with an Access (Bearer) Token> GET /api/greeting HTTP/1.1 > Host: <SERVICE_HOST> > User-Agent: curl/7.51.0 > Accept: */* > Authorization: Bearer <TOKEN>
<SERVICE_HOST>is the URL of the secured example endpoint. For more information, see Section 8.6.7.1, “Getting the Secured example application API endpoint”.Verify the signature of the access token.
The access token is a JSON Web Token, so you can decode it using the JWT Debugger:
- In a web browser, navigate to the JWT Debugger website.
Select
RS256from the Algorithm drop down menu.NoteMake sure the web form has been updated after you made the selection, so it displays the correct RSASHA256(…) information in the Signature section. If it has not, try switching to HS256 and then back to RS256.
Paste the following content in the topmost text box into the VERIFY SIGNATURE section:
-----BEGIN PUBLIC KEY-----
MIIBIjANBgkqhkiG9w0BAQEFAAOCAQ8AMIIBCgKCAQEAoETnPmN55xBJjRzN/cs30OzJ9olkteLVNRjzdTxFOyRtS2ovDfzdhhO9XzUcTMbIsCOAZtSt8K+6yvBXypOSYvI75EUdypmkcK1KoptqY5KEBQ1KwhWuP7IWQ0fshUwD6jI1QWDfGxfM/h34FvEn/0tJ71xN2P8TI2YanwuDZgosdobx/PAvlGREBGuk4BgmexTOkAdnFxIUQcCkiEZ2C41uCrxiS4CEe5OX91aK9HKZV4ZJX6vnqMHmdDnsMdO+UFtxOBYZio+a1jP4W3d7J5fGeiOaXjQCOpivKnP2yU2DPdWmDMyVb67l8DRA+jh0OJFKZ5H2fNgE3II59vdsRwIDAQAB
-----END PUBLIC KEY-----
NoteThis is the master realm public key from the Red Hat SSO server deployment of the Secured example application.
Paste the
tokenoutput from the client output into the Encoded box.The Signature Verified sign is displayed on the debugger page.
8.6.7.3. Authenticating HTTP requests using the web interface
In addition to the HTTP API, the secured endpoint also contains a web interface to interact with.
The following procedure is an exercise for you to see how security is enforced, how you authenticate, and how you work with the authentication token.
Prerequisites
- The secured endpoint URL. For more information, see Section 8.6.7.1, “Getting the Secured example application API endpoint”.
Procedure
- In a web browser, navigate to the endpoint URL.
Perform an unauthenticated request:
Click the Invoke button.
Figure 8.1. Unauthenticated Secured Example Web Interface
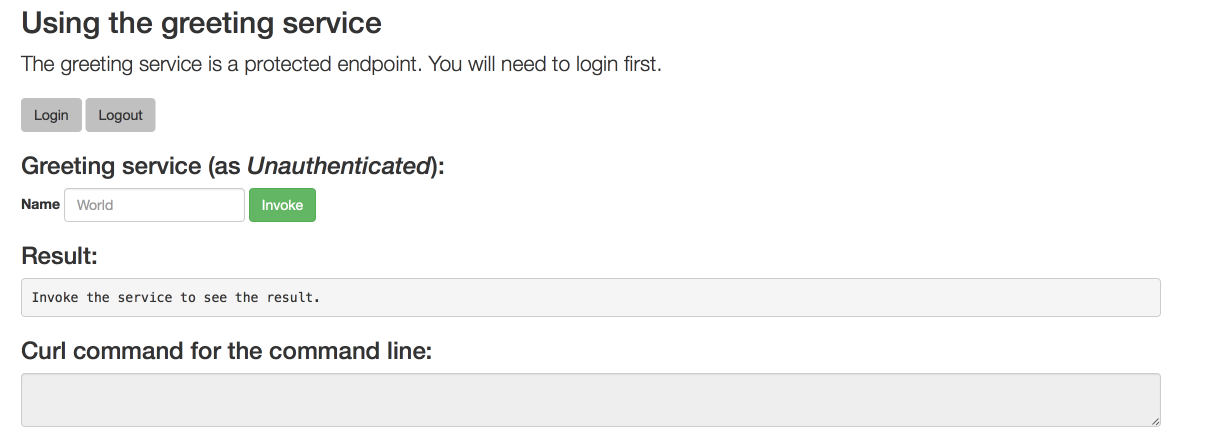
The services responds with an
HTTP 401 Unauthorizedstatus code.Figure 8.2. Unauthenticated Error Message
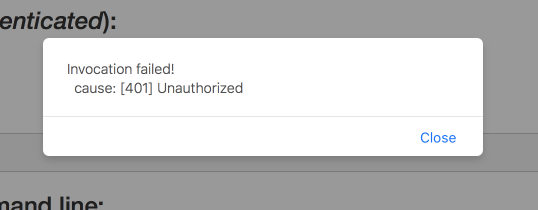
Perform an authenticated request as a user:
- Click the Login button to authenticate against Red Hat SSO. You will be redirected to the SSO server.
Log in as the Alice user. You will be redirected back to the web interface.
NoteYou can see the access (bearer) token in the command line output at the bottom of the page.
Figure 8.3. Authenticated Secured Example Web Interface (as Alice)
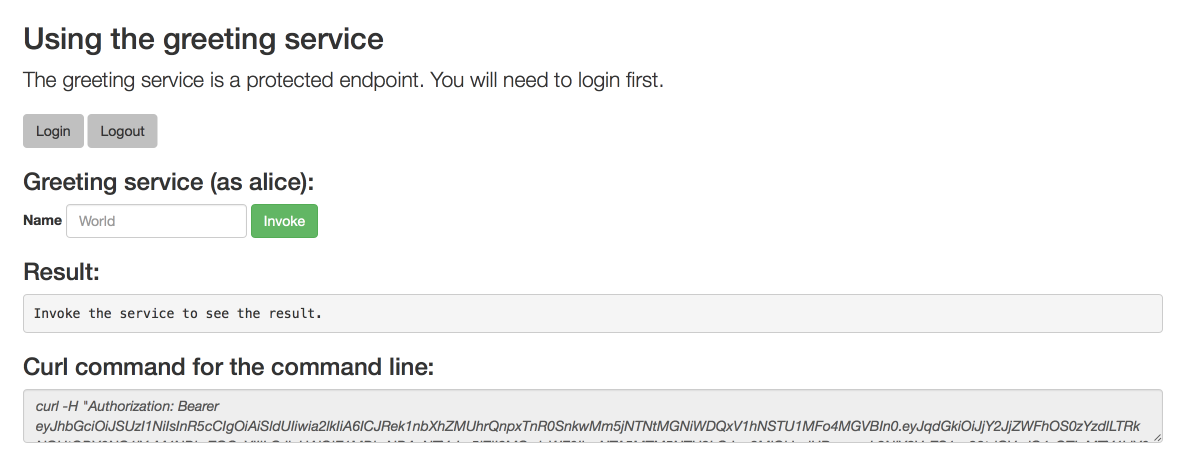
Click Invoke again to access the Greeting service.
Confirm that there is no exception and the JSON response payload is displayed. This means the service accepted your access (bearer) token and you are authorized access to the Greeting service.
Figure 8.4. The Result of an Authenticated Greeting Request (as Alice)
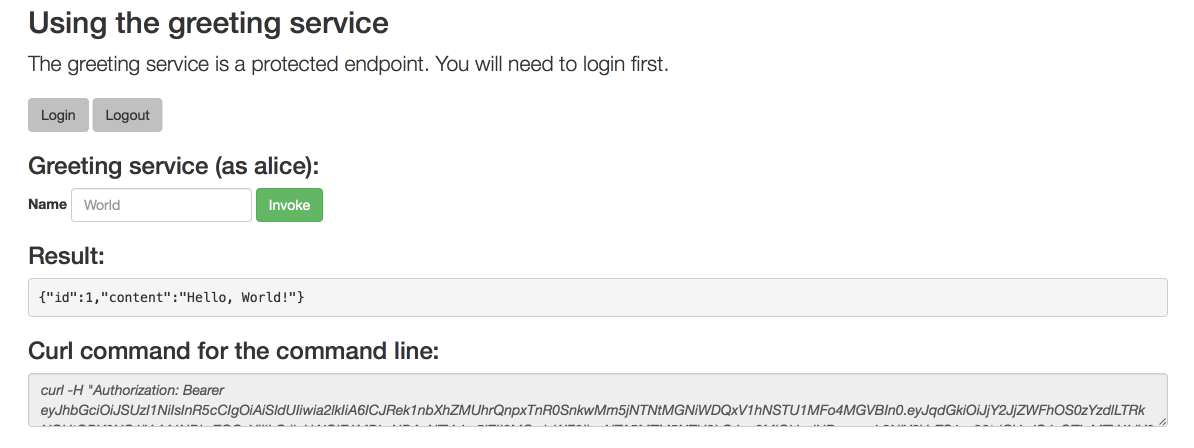
- Log out.
Perform an authenticated request as an admininstrator:
Click the Invoke button.
Confirm that this sends an unauthenticated request to the Greeting service.
Click the Login button and log in as the admin user.
Figure 8.5. Authenticated Secured Example Web Interface (as admin)
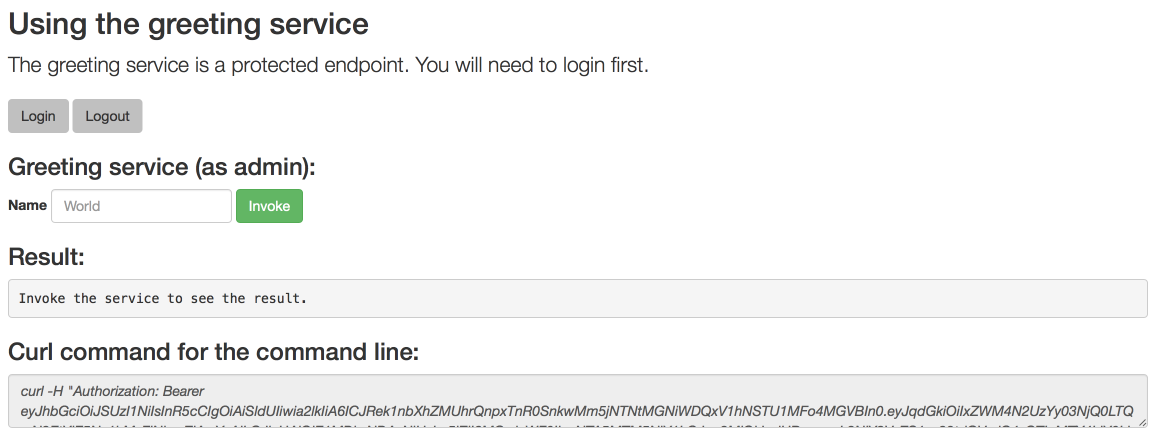
Click the Invoke button.
The service responds with an
HTTP 403 Forbiddenstatus code because the admin user is not authorized to access the Greeting service.Figure 8.6. Unauthorized Error Message
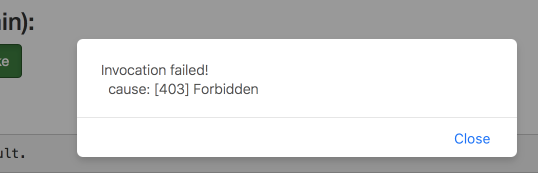
8.6.8. Running the Spring Boot Secured example application integration tests
Prerequisites
-
The
occlient authenticated.
Procedure
Executing integration tests removes all existing instances of the example application from the target OpenShift project. To avoid accidentally removing your example application, ensure that you create and select a separate OpenShift project to execute the tests.
- In a terminal application, navigate to the directory with your project.
Create the Red Hat SSO server application:
oc create -f service.sso.yaml
-
Wait until the Red Hat SSO server is ready. Go to the Web console or view the output of
oc get podsto check if the pod running the Red Hat SSO server is ready. Execute the integration tests:
mvn clean verify -Popenshift,openshift-it -DSSO_AUTH_SERVER_URL=$(oc get route secure-sso -o jsonpath='{"https://"}{.spec.host}{"/auth\n"}')
8.6.9. Secured SSO resources
Follow the links below for additional information on the principles behind the OAuth2 specification and on securing your applications using Red Hat SSO and Keycloak:
8.7. Cache example for Spring Boot
The following example is not meant to be run in a production environment.
Limitation: Run this example application on a Minishift or CDK. You can also use a manual workflow to deploy this example to OpenShift Online Pro and OpenShift Container Platform. This example is not currently available on OpenShift Online Starter.
Example proficiency level: Advanced.
The Cache example demonstrates how to use a cache to increase the response time of applications.
This example shows you how to:
- Deploy a cache to OpenShift.
- Use a cache within an application.
8.7.1. How caching works and when you need it
Caches allows you to store information and access it for a given period of time. You can access information in a cache faster or more reliably than repeatedly calling the original service. A disadvantage of using a cache is that the cached information is not up to date. However, that problem can be reduced by setting an expiration or TTL (time to live) on each value stored in the cache.
Example 8.3. Caching example
Assume you have two applications: service1 and service2:
Service1 depends on a value from service2.
- If the value from service2 infrequently changes, service1 could cache the value from service2 for a period of time.
- Using cached values can also reduce the number of times service2 is called.
- If it takes service1 500 ms to retrieve the value directly from service2, but 100 ms to retrieve the cached value, service1 would save 400 ms by using the cached value for each cached call.
- If service1 would make uncached calls to service2 5 times per second, over 10 seconds, that would be 50 calls.
- If service1 started using a cached value with a TTL of 1 second instead, that would be reduced to 10 calls over 10 seconds.
How the Cache example works
- The cache, cute name, and greeting services are deployed and exposed.
- User accesses the web frontend of the greeting service.
- User invokes the greeting HTTP API using a button on the web frontend.
The greeting service depends on a value from the cute name service.
- The greeting service first checks if that value is stored in the cache service. If it is, then the cached value is returned.
- If the value is not cached, the greeting service calls the cute name service, returns the value, and stores the value in the cache service with a TTL of 5 seconds.
- The web front end displays the response from the greeting service as well as the total time of the operation.
User invokes the service multiple times to see the difference between cached and uncached operations.
- Cached operations are significantly faster than uncached operations.
- User can force the cache to be cleared before the TTL expires.
8.7.2. Deploying the Cache example application to OpenShift Online
Use one of the following options to execute the Cache example application on OpenShift Online.
Although each method uses the same oc commands to deploy your application, using developers.redhat.com/launch provides an automated deployment workflow that executes the oc commands for you.
8.7.2.1. Deploying the example application using developers.redhat.com/launch
Prerequisites
- An account at OpenShift Online.
Procedure
- Navigate to the developers.redhat.com/launch URL in a browser.
- Follow on-screen instructions to create and launch your example application in Spring Boot.
8.7.2.2. Authenticating the oc CLI client
To work with example applications on OpenShift Online using the oc command-line client, you must authenticate the client using the token provided by the OpenShift Online web interface.
Prerequisites
- An account at OpenShift Online.
Procedure
- Navigate to the OpenShift Online URL in a browser.
- Click on the question mark icon in the top right-hand corner of the Web console, next to your user name.
- Select Command Line Tools in the drop-down menu.
-
Copy the
oc logincommand. Paste the command in a terminal. The command uses your authentication token to authenticate your
ocCLI client with your OpenShift Online account.$ oc login OPENSHIFT_URL --token=MYTOKEN
8.7.2.3. Deploying the Cache example application using the oc CLI client
Prerequisites
- The example application created using developers.redhat.com/launch. For more information, see Section 8.7.2.1, “Deploying the example application using developers.redhat.com/launch”.
-
The
occlient authenticated. For more information, see Section 8.7.2.2, “Authenticating theocCLI client”.
Procedure
Clone your project from GitHub.
$ git clone git@github.com:USERNAME/MY_PROJECT_NAME.git
Alternatively, if you downloaded a ZIP file of your project, extract it.
$ unzip MY_PROJECT_NAME.zip
Create a new project.
$ oc new-project MY_PROJECT_NAME
- Navigate to the root directory of your application.
Deploy the cache service.
$ oc apply -f service.cache.yml
Use Maven to start the deployment to OpenShift.
$ mvn clean fabric8:deploy -Popenshift
Check the status of your application and ensure your pod is running.
$ oc get pods -w
NAME                             READY     STATUS      RESTARTS   AGE
cache-server-123456789-aaaaa             1/1       Running     0          8m
MY_APP_NAME-cutename-1-bbbbb       1/1       Running     0          4m
MY_APP_NAME-cutename-s2i-1-build   0/1       Completed   0          7m
MY_APP_NAME-greeting-1-ccccc       1/1       Running     0          3m
MY_APP_NAME-greeting-s2i-1-build   0/1       Completed   0          3m
Your 3 pods should have a status of
Runningonce they are fully deployed and started.After your example application is deployed and started, determine its route.
Example Route Information
$ oc get routes
NAME                 HOST/PORT                                                     PATH      SERVICES        PORT      TERMINATION
MY_APP_NAME-cutename   MY_APP_NAME-cutename-MY_PROJECT_NAME.OPENSHIFT_HOSTNAME             MY_APP_NAME-cutename   8080                    None
MY_APP_NAME-greeting   MY_APP_NAME-greeting-MY_PROJECT_NAME.OPENSHIFT_HOSTNAME             MY_APP_NAME-greeting   8080                    None
The route information of a pod gives you the base URL which you use to access it. In the example above, you would use
http://MY_APP_NAME-greeting-MY_PROJECT_NAME.OPENSHIFT_HOSTNAMEas the base URL to access the greeting service.
8.7.3. Deploying the Cache example application to Minishift or CDK
Use one of the following options to execute the Cache example application locally on Minishift or CDK:
Although each method uses the same oc commands to deploy your application, using Fabric8 Launcher provides an automated deployment workflow that executes the oc commands for you.
8.7.3.1. Getting the Fabric8 Launcher tool URL and credentials
You need the Fabric8 Launcher tool URL and user credentials to create and deploy example applications on Minishift or CDK. This information is provided when the Minishift or CDK is started.
Prerequisites
- The Fabric8 Launcher tool installed, configured, and running.
Procedure
- Navigate to the console where you started Minishift or CDK.
Check the console output for the URL and user credentials you can use to access the running Fabric8 Launcher:
Example Console Output from a Minishift or CDK Startup
...
-- Removing temporary directory ... OK
-- Server Information ...
   OpenShift server started.
   The server is accessible via web console at:
       https://192.168.42.152:8443

   You are logged in as:
       User:     developer
       Password: developer

   To login as administrator:
       oc login -u system:admin
8.7.3.2. Deploying the example application using the Fabric8 Launcher tool
Prerequisites
- The URL of your running Fabric8 Launcher instance and the user credentials of your Minishift or CDK. For more information, see Section 8.7.3.1, “Getting the Fabric8 Launcher tool URL and credentials”.
Procedure
- Navigate to the Fabric8 Launcher URL in a browser.
- Follow the on-screen instructions to create and launch your example application in Spring Boot.
8.7.3.3. Authenticating the oc CLI client
To work with example applications on Minishift or CDK using the oc command-line client, you must authenticate the client using the token provided by the Minishift or CDK web interface.
Prerequisites
- The URL of your running Fabric8 Launcher instance and the user credentials of your Minishift or CDK. For more information, see Section 8.7.3.1, “Getting the Fabric8 Launcher tool URL and credentials”.
Procedure
- Navigate to the Minishift or CDK URL in a browser.
- Click on the question mark icon in the top right-hand corner of the Web console, next to your user name.
- Select Command Line Tools in the drop-down menu.
-
Copy the
oc logincommand. Paste the command in a terminal. The command uses your authentication token to authenticate your
ocCLI client with your Minishift or CDK account.$ oc login OPENSHIFT_URL --token=MYTOKEN
8.7.3.4. Deploying the Cache example application using the oc CLI client
Prerequisites
- The example application created using Fabric8 Launcher tool on a Minishift or CDK. For more information, see Section 8.7.3.2, “Deploying the example application using the Fabric8 Launcher tool”.
- Your Fabric8 Launcher tool URL.
-
The
occlient authenticated. For more information, see Section 8.7.3.3, “Authenticating theocCLI client”.
Procedure
Clone your project from GitHub.
$ git clone git@github.com:USERNAME/MY_PROJECT_NAME.git
Alternatively, if you downloaded a ZIP file of your project, extract it.
$ unzip MY_PROJECT_NAME.zip
Create a new project.
$ oc new-project MY_PROJECT_NAME
- Navigate to the root directory of your application.
Deploy the cache service.
$ oc apply -f service.cache.yml
Use Maven to start the deployment to OpenShift.
$ mvn clean fabric8:deploy -Popenshift
Check the status of your application and ensure your pod is running.
$ oc get pods -w
NAME                             READY     STATUS      RESTARTS   AGE
cache-server-123456789-aaaaa             1/1       Running     0          8m
MY_APP_NAME-cutename-1-bbbbb       1/1       Running     0          4m
MY_APP_NAME-cutename-s2i-1-build   0/1       Completed   0          7m
MY_APP_NAME-greeting-1-ccccc       1/1       Running     0          3m
MY_APP_NAME-greeting-s2i-1-build   0/1       Completed   0          3m
Your 3 pods should have a status of
Runningonce they are fully deployed and started.After your example application is deployed and started, determine its route.
Example Route Information
$ oc get routes
NAME                 HOST/PORT                                                     PATH      SERVICES        PORT      TERMINATION
MY_APP_NAME-cutename   MY_APP_NAME-cutename-MY_PROJECT_NAME.OPENSHIFT_HOSTNAME             MY_APP_NAME-cutename   8080                    None
MY_APP_NAME-greeting   MY_APP_NAME-greeting-MY_PROJECT_NAME.OPENSHIFT_HOSTNAME             MY_APP_NAME-greeting   8080                    None
The route information of a pod gives you the base URL which you use to access it. In the example above, you would use
http://MY_APP_NAME-greeting-MY_PROJECT_NAME.OPENSHIFT_HOSTNAMEas the base URL to access the greeting service.
8.7.4. Deploying the Cache example application to OpenShift Container Platform
The process of creating and deploying example applications to OpenShift Container Platform is similar to OpenShift Online:
Prerequisites
- The example application created using developers.redhat.com/launch.
Procedure
- Follow the instructions in Section 8.7.2, “Deploying the Cache example application to OpenShift Online”, only use the URL and user credentials from the OpenShift Container Platform Web Console.
8.7.5. Interacting with the unmodified Cache example application
Prerequisites
- Your application deployed
Procedure
-
Navigate to the
greetingservice using your browser. Click Invoke the service once.
Notice the
durationvalue is above2000. Also notice the cache state has changed formNo cached valuetoA value is cached.Wait 5 seconds and notice cache state has changed back to
No cached value.The TTL for the cached value is set to 5 seconds. When the TTL expires, the value is no longer cached.
- Click Invoke the service once more to cache the value.
Click Invoke the service a few more times over the course of a few seconds while cache state is
A value is cached.Notice a significantly lower
durationvalue since it is using a cached value. If you click Clear the cache, the cache is emptied.
8.7.6. Running the Cache example application integration tests
This example application includes a self-contained set of integration tests. When run inside an OpenShift project, the tests:
- Deploy a test instance of the application to the project.
- Execute the individual tests on that instance.
- Remove all instances of the application from the project when the testing is done.
Executing integration tests removes all existing instances of the example application from the target OpenShift project. To avoid accidentally removing your example application, ensure that you create and select a separate OpenShift project to execute the tests.
Prerequisites
-
The
occlient authenticated - An empty OpenShift project
Procedure
Execute the following command to run the integration tests:
$ mvn clean verify -Popenshift,openshift-it
8.7.7. Caching resources
More background and related information on caching can be found here:
Appendix A. The Source-to-Image (S2I) build process
Source-to-Image (S2I) is a build tool for generating reproducible Docker-formatted container images from online SCM repositories with application sources. With S2I builds, you can easily deliver the latest version of your application into production with shorter build times, decreased resource and network usage, improved security, and a number of other advantages. OpenShift supports multiple build strategies and input sources.
For more information, see the Source-to-Image (S2I) Build chapter of the OpenShift Container Platform documentation.
You must provide three elements to the S2I process to assemble the final container image:
- The application sources hosted in an online SCM repository, such as GitHub.
- The S2I Builder image, which serves as the foundation for the assembled image and provides the ecosystem in which your application is running.
- Optionally, you can also provide environment variables and parameters that are used by S2I scripts.
The process injects your application source and dependencies into the Builder image according to instructions specified in the S2I script, and generates a Docker-formatted container image that runs the assembled application. For more information, check the S2I build requirements, build options and how builds work sections of the OpenShift Container Platform documentation.
Appendix B. Updating the deployment configuration of an example application
The deployment configuration for an example application contains information related to deploying and running the application in OpenShift, such as route information or readiness probe location. The deployment configuration of an example application is stored in a set of YAML files. For examples that use the Fabric8 Maven Plugin, the YAML files are located in the src/main/fabric8/ directory. For examples using Nodeshift, the YAML files are located in the .nodeshift directory.
The deployment configuration files used by the Fabric8 Maven Plugin and Nodeshift do not have to be full OpenShift resource definitions. Both Fabric8 Maven Plugin and Nodeshift can take the deployment configuration files and add some missing information to create a full OpenShift resource definition. The resource definitions generated by the Fabric8 Maven Plugin are available in the target/classes/META-INF/fabric8/ directory. The resource definitions generated by Nodeshift are available in the tmp/nodeshift/resource/ directory.
Prerequisites
- An existing example project.
-
The
ocCLI client installed.
Procedure
Edit an existing YAML file or create an additional YAML file with your configuration update.
For example, if your example already has a YAML file with a
readinessProbeconfigured, you could change thepathvalue to a different available path to check for readiness:spec: template: spec: containers: readinessProbe: httpGet: path: /path/to/probe port: 8080 scheme: HTTP ...-
If a
readinessProbeis not configured in an existing YAML file, you can also create a new YAML file in the same directory with thereadinessProbeconfiguration.
- Deploy the updated version of your example using Maven or npm.
Verify that your configuration updates show in the deployed version of your example.
$ oc export all --as-template='my-template'

apiVersion: v1
kind: Template
metadata:
  creationTimestamp: null
  name: my-template
objects:
- apiVersion: v1
  kind: DeploymentConfig
  ...
  spec:
    ...
    template:
      ...
      spec:
        containers:
          ...
          livenessProbe:
            failureThreshold: 3
            httpGet:
              path: /path/to/different/probe
              port: 8080
              scheme: HTTP
            initialDelaySeconds: 60
            periodSeconds: 30
            successThreshold: 1
            timeoutSeconds: 1
          ...
Additional resources
If you updated the configuration of your application directly using the web-based console or the oc CLI client, export and add these changes to your YAML file. Use the oc export all command to show the configuration of your deployed application.
Appendix C. Configuring a Jenkins freestyle project to deploy your application with the Fabric8 Maven Plugin
Similar to using Maven and the Fabric8 Maven Plugin from your local host to deploy an application, you can configure Jenkins to use Maven and the Fabric8 Maven Plugin to deploy an application.
Prerequisites
- Access to an OpenShift cluster.
- The Jenkins container image running on same OpenShift cluster.
- A JDK and Maven installed and configured on your Jenkins server.
An application configured to use Maven, the Fabric8 Maven Plugin, and the Red Hat base image in the
pom.xml.NoteFor building and deploying your applications to OpenShift, Spring Boot 2.1.x only supports builder images based on OpenJDK 8 and OpenJDK 11. Oracle JDK and OpenJDK 9 builder images are not supported.
Example
pom.xml<properties> ... <fabric8.generator.from>registry.access.redhat.com/redhat-openjdk-18/openjdk18-openshift:latest</fabric8.generator.from> </properties>
- The source of the application available in GitHub.
Procedure
Create a new OpenShift project for your application:
- Open the OpenShift Web console and log in.
- Click Create Project to create a new OpenShift project.
- Enter the project information and click Create.
Ensure Jenkins has access to that project.
For example, if you configured a service account for Jenkins, ensure that account has
editaccess to the project of your application.Create a new freestyle Jenkins project on your Jenkins server:
- Click New Item.
- Enter a name, choose Freestyle project, and click OK.
- Under Source Code Management, choose Git and add the GitHub url of your application.
-
Under Build, choose Add build step and select
Invoke top-level Maven targets. Add the following to Goals:
clean fabric8:deploy -Popenshift -Dfabric8.namespace=MY_PROJECT
Substitute
MY_PROJECTwith the name of the OpenShift project for your application.- Click Save.
Click Build Now from the main page of the Jenkins project to verify your application builds and deploys to the OpenShift project for your application.
You can also verify that your application is deployed by opening the route in the OpenShift project of the application.
Next steps
-
Consider adding GITSCM polling or using the
Poll SCMbuild trigger. These options enable builds to run every time a new commit is pushed to the GitHub repository. - Consider adding a build step that executes tests before deploying.
Appendix D. Deploying a Spring Boot application using WAR files
As an alternative to the supported application packaging and deployment workflow using fat JAR files, you can package and deploy a Spring Boot application as a WAR (Web Application Archive) file. You must configure your build and deployment settings to ensure that your application builds and deploys correctly on OpenShift.
Prerequisites
- A Spring Boot application, such as an example.
- Fabric8 Maven Plugin used to deploy your application to OpenShift.
- Spring Boot Maven Plugin used to package your application.
Procedure
Add
warpackaging to thepom.xmlfile of your project:Example
pom.xml<project ...> ... <packaging>war</packaging> ... </project>
Specify
spring-boot-starter-tomcatas a dependency of your application:Example
pom.xml<project ...> ... <dependencies> ... <dependency> <groupId>org.springframework.boot</groupId> <artifactId>spring-boot-starter-tomcat</artifactId> </dependency> ... </dependencies> ... </project>Ensure the
repackageMaven goal for the Spring Boot Maven plugin is defined in thepom.xmlfile:Example
pom.xml<project ...> ... <build> ... <plugins> ... <plugin> <groupId>org.springframework.boot</groupId> <artifactId>spring-boot-maven-plugin</artifactId> <executions> <execution> <goals> <goal>repackage</goal> </goals> </execution> </executions> </plugin> </plugins> </build> ... </project>This ensures that the Spring Boot classes used to launch the application are included in the WAR file, and that the corresponding properties for these classes are defined in the
MANIFEST.mffile of the WAR file:-
Main-Class: org.springframework.boot.loader.WarLauncher -
Spring-Boot-Classes: WEB-INF/classes/ -
Spring-Boot-Lib: WEB-INF/lib/ -
Spring-Boot-Version: 2.1.15.RELEASE
-
Add the
ARTIFACT_COPY_ARGSenvironment variable to thepom.xmlfile.The Fabric8 Maven Plugin consumes this variable during the build process and ensures that the Build and Deploy tool uses the WAR file (rather than the default fat JAR file) to create the application container image:
Example
pom.xml... <profile> <id>openshift</id> <build> <plugins> <plugin> <groupId>io.fabric8</groupId> <artifactId>fabric8-maven-plugin</artifactId> <executions> ... </executions> <configuration> <images> <image> <name>${project.artifactId}:%t</name> <alias>${project.artifactId}</alias> <build> <from>registry.access.redhat.com/redhat-openjdk-18/openjdk18-openshift:${openjdk18-openshift.version}</from> <assembly> <basedir>/deployments</basedir> <descriptorRef>artifact</descriptorRef> </assembly> <env> <ARTIFACT_COPY_ARGS>*.war</ARTIFACT_COPY_ARGS> <JAVA_APP_DIR>/deployments</JAVA_APP_DIR> </env> <ports> <port>8080</port> </ports> </build> </image> </images> </configuration> </plugin> </plugins> </build> </profile> ...Add the
JAVA_APP_JARenvironment variable to thesrc/main/fabric8/deployment.ymlfile.This variable instructs the Fabric8 Maven Plugin to launch your application using the WAR file included with the container. If
src/main/fabric8/deployment.ymldoes not exist, you can create it.Example
deployment.ymlspec: template: spec: containers: ... env: - name: JAVA_APP_JAR value: ${project.artifactId}-${project.version}.warBuild and deploy your application:
mvn clean fabric8:deploy -Popenshift
Appendix E. Additional Spring Boot resources
Appendix F. Application development resources
For additional information about application development with OpenShift, see:
To reduce network load and shorten the build time of your application, set up a Nexus mirror for Maven on your Minishift or CDK:
Appendix G. Proficiency levels
Each available example teaches concepts that require certain minimum knowledge. This requirement varies by example. The minimum requirements and concepts are organized in several levels of proficiency. In addition to the levels described here, you might need additional information specific to each example.
Foundational
The examples rated at Foundational proficiency generally require no prior knowledge of the subject matter; they provide general awareness and demonstration of key elements, concepts, and terminology. There are no special requirements except those directly mentioned in the description of the example.
Advanced
When using Advanced examples, the assumption is that you are familiar with the common concepts and terminology of the subject area of the example in addition to Kubernetes and OpenShift. You must also be able to perform basic tasks on your own, for example, configuring services and applications, or administering networks. If a service is needed by the example, but configuring it is not in the scope of the example, the assumption is that you have the knowledge to properly configure it, and only the resulting state of the service is described in the documentation.
Expert
Expert examples require the highest level of knowledge of the subject matter. You are expected to perform many tasks based on feature-based documentation and manuals, and the documentation is aimed at most complex scenarios.
Appendix H. Glossary
H.1. Product and project names
- Developer Launcher (developers.redhat.com/launch)
- developers.redhat.com/launch called Developer Launcher is a stand-alone getting started experience provided by Red Hat. It helps you get started with cloud-native development on OpenShift. It contains functional example applications that you can download, build, and deploy on OpenShift.
- Minishift or CDK
- An OpenShift cluster running on your machine using Minishift.
H.2. Terms specific to Developer Launcher
- Example
An application specification, for example a web service with a REST API.
Examples generally do not specify which language or platform they should run on; the description only contains the intended functionality.
- Example application
A language-specific implementation of a particular example on a particular runtime. Example applications are listed in an examples catalog.
For example, an example application is a web service with a REST API implemented using the Thorntail runtime.
- Examples Catalog
- A Git repository that contains information about example applications.
- Runtime
- A platform that executes an example application. For example, Thorntail or Eclipse Vert.x.