Chapter 17. Account Console
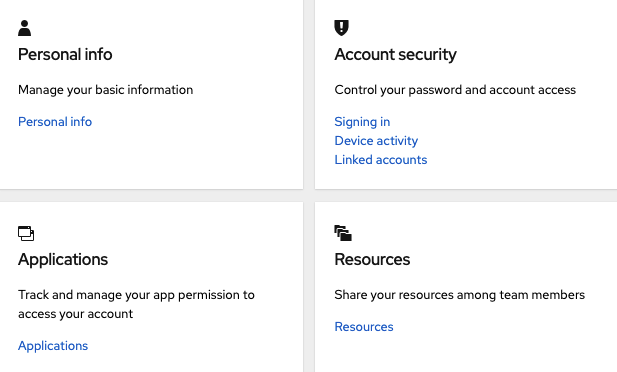
Red Hat Single Sign-On users can manage their accounts through the Account Console. Users can configure their profiles, add two-factor authentication, include identity provider accounts, and oversee device activity.
Additional resources
- The Account Console can be configured in terms of appearance and language preferences. An example is adding attributes to the Personal info page by clicking Personal info link and completing and saving details. For more information, see reference:https://access.redhat.com/documentation/en-us/red_hat_single_sign-on/7.6/html-single/server_developer_guide/[Server Developer Guide].
17.1. Accessing the Account Console
Any user can access the Account Console.
Procedure
- Make note of the realm name and IP address for the Red Hat Single Sign-On server where your account exists.
-
In a web browser, enter a URL in this format:
<server-root>/auth/realms/{realm-name}/account. - Enter your login name and password.
Account Console
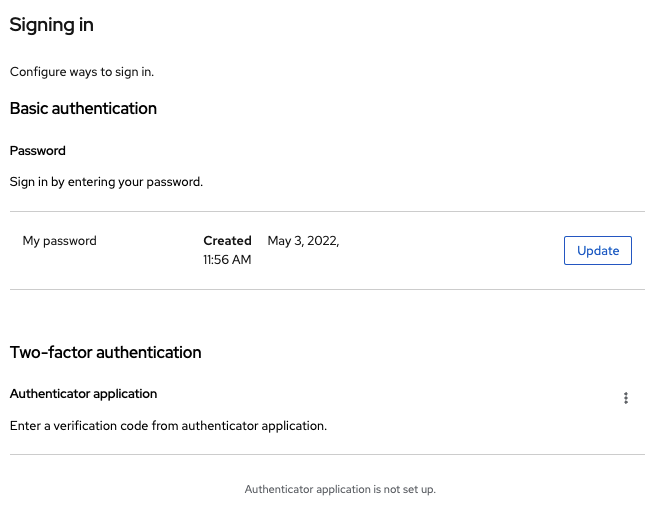
17.2. Configuring ways to sign in
You can sign in to this console using basic authentication (a login name and password) or two-factor authentication. For two-factor authentication, use one of the following procedures.
17.2.1. Two-factor authentication with OTP
Prerequisites
- OTP is a valid authentication mechanism for your realm.
Procedure
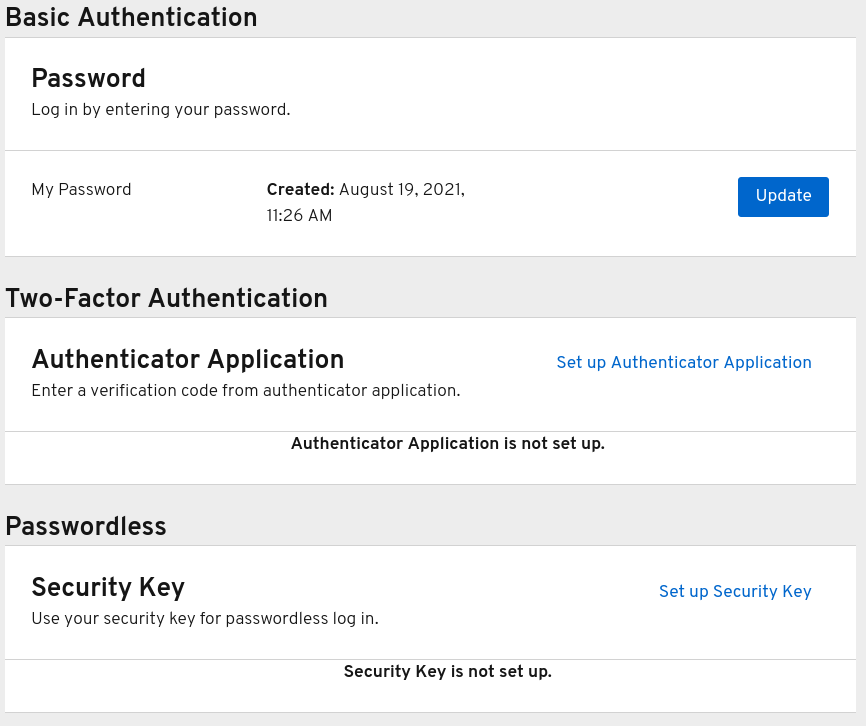
- Click Account security in the menu.
- Click Signing in.
Click Set up authenticator application.
Signing in
- Follow the directions that appear on the screen to use either FreeOTP or Google Authenticator on your mobile device as your OTP generator.
- Scan the QR code in the screen shot into the OTP generator on your mobile device.
- Log out and log in again.
- Respond to the prompt by entering an OTP that is provided on your mobile device.
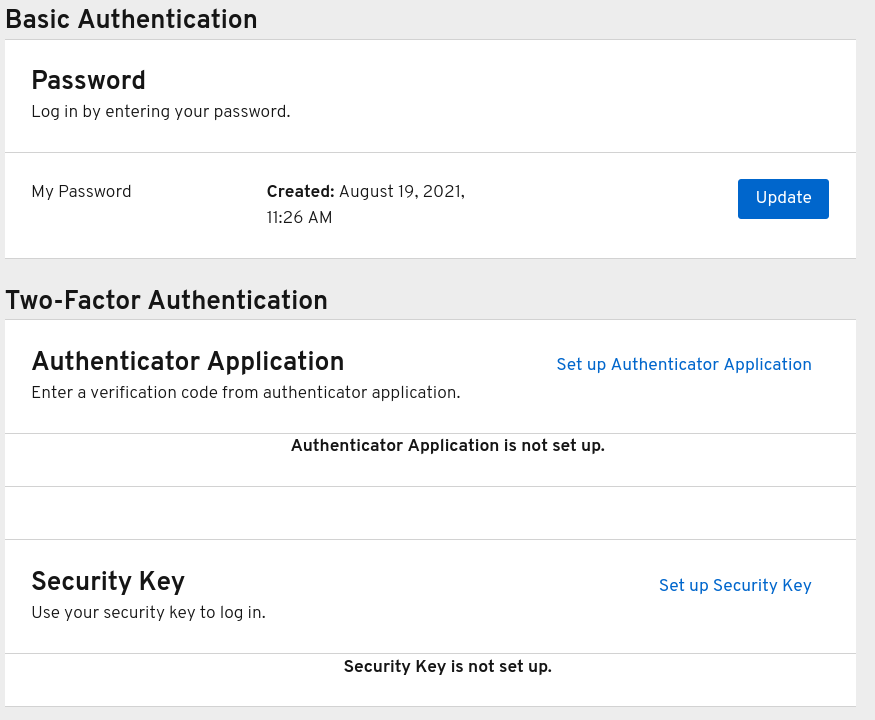
17.2.2. Two-factor authentication with WebAuthn
Prerequisites
- WebAuthn is a valid two-factor authentication mechanism for your realm. Please follow the WebAuthn section for more details.
Procedure
- Click Account Security in the menu.
- Click Signing In.
Click Set up Security Key.
Signing In
- Prepare your WebAuthn Security Key. How you prepare this key depends on the type of WebAuthn security key you use. For example, for a USB based Yubikey, you may need to put your key into the USB port on your laptop.
- Click Register to register your security key.
- Log out and log in again.
- Assuming authentication flow was correctly set, a message appears asking you to authenticate with your Security Key as second factor.
17.2.3. Passwordless authentication with WebAuthn
Prerequisites
- WebAuthn is a valid passwordless authentication mechanism for your realm. Please follow the Passwordless WebAuthn section for more details.
Procedure
- Click Account Security in the menu.
- Click Signing In.
Click Set up Security Key in the Passwordless section.
Signing In
- Prepare your WebAuthn Security Key. How you prepare this key depends on the type of WebAuthn security key you use. For example, for a USB based Yubikey, you may need to put your key into the USB port on your laptop.
- Click Register to register your security key.
- Log out and log in again.
- Assuming authentication flow was correctly set, a message appears asking you to authenticate with your Security Key as second factor. You no longer need to provide your password to log in.
17.3. Viewing device activity
You can view the devices that are logged in to your account.
Procedure
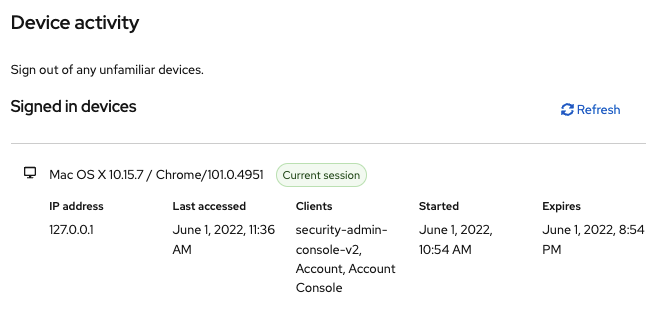
- Click Account security in the menu.
- Click Device activity.
- Log out a device if it looks suspicious.
Devices
17.4. Adding an identity provider account
You can link your account with an identity broker. This option is often used to link social provider accounts.
Procedure
- Log into the Admin Console.
- Click Identity providers in the menu.
- Select a provider and complete the fields.
- Return to the Account Console.
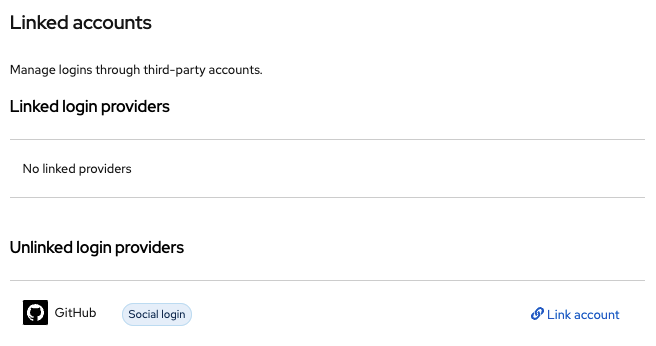
- Click Account security in the menu.
- Click Linked accounts.
The identity provider you added appears in this page.
Linked Accounts
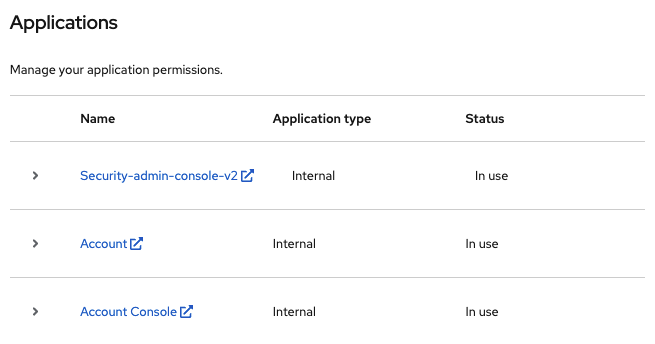
17.5. Accessing other applications
The Applications menu item shows users which applications you can access. In this case, only the Account Console is available.
Applications