
Server Developer Guide
For Use with Red Hat Single Sign-On 7.5
Abstract
Making open source more inclusive
Red Hat is committed to replacing problematic language in our code, documentation, and web properties. We are beginning with these four terms: master, slave, blacklist, and whitelist. Because of the enormity of this endeavor, these changes will be implemented gradually over several upcoming releases. For more details, see our CTO Chris Wright’s message.
Chapter 1. Preface
In some of the example listings, what is meant to be displayed on one line does not fit inside the available page width. These lines have been broken up. A '\' at the end of a line means that a break has been introduced to fit in the page, with the following lines indented. So:
Let's pretend to have an extremely \
long line that \
does not fit
This one is short
Is really:
Let's pretend to have an extremely long line that does not fit
This one is short
Chapter 2. Admin REST API
Red Hat Single Sign-On comes with a fully functional Admin REST API with all features provided by the Admin Console.
To invoke the API you need to obtain an access token with the appropriate permissions. The required permissions are described in the Server Administration Guide.
You can obtain a token by enabling authentication for your application using Red Hat Single Sign-On; see the Securing Applications and Services Guide. You can also use direct access grant to obtain an access token.
2.1. Examples of using CURL
2.1.1. Authenticating with a username and password
Procedure
Obtain an access token for user in the realm
masterwith usernameadminand passwordpassword:curl \ -d "client_id=admin-cli" \ -d "username=admin" \ -d "password=password" \ -d "grant_type=password" \ "http://localhost:8080/auth/realms/master/protocol/openid-connect/token"
NoteBy default this token expires in 1 minute
The result will be a JSON document.
-
Invoke the API you need by extracting the value of the
access_tokenproperty. Invoke the API by including the value in the
Authorizationheader of requests to the API.The following example shows how to get the details of the master realm:
curl \
  -H "Authorization: bearer eyJhbGciOiJSUz..." \
  "http://localhost:8080/auth/admin/realms/master"
2.1.2. Authenticating with a service account
To authenticate against the Admin REST API using a client_id and a client_secret, perform this procedure.
Procedure
Make sure the client is configured as follows:
-
client_idis a confidential client that belongs to the realm master -
client_idhasService Accounts Enabledoption enabled client_idhas a custom "Audience" mapper-
Included Client Audience:
security-admin-console
-
Included Client Audience:
-
-
Check that
client_idhas the role 'admin' assigned in the "Service Account Roles" tab. Obtain an access token for the Admin REST API using
client_idandclient_secret:curl \ -d "client_id=<YOUR_CLIENT_ID>" \ -d "client_secret=<YOUR_CLIENT_SECRET>" \ -d "grant_type=client_credentials" \ "http://localhost:8080/auth/realms/master/protocol/openid-connect/token"
2.2. Additional resources
Chapter 3. Themes
Red Hat Single Sign-On provides theme support for web pages and emails. This allows customizing the look and feel of end-user facing pages so they can be integrated with your applications.
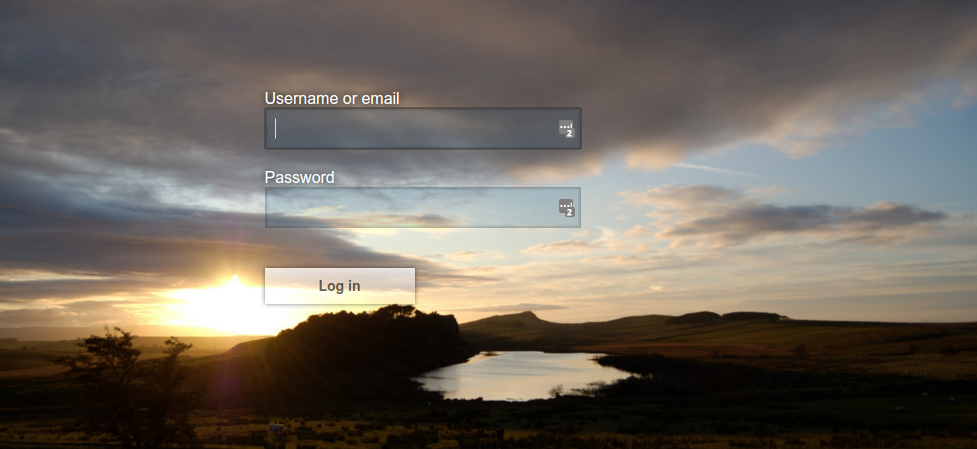
Figure 3.1. Login page with sunrise example theme
3.1. Theme types
A theme can provide one or more types to customize different aspects of Red Hat Single Sign-On. The types available are:
- Account - Account management
- Admin - Admin Console
- Email - Emails
- Login - Login forms
- Welcome - Welcome page
3.2. Configuring a theme
All theme types, except welcome, are configured through the Admin Console.
Procedure
- Log into the Admin Console.
- Select your realm from the drop-down box in the top left corner.
- Click Realm Settings from the menu.
Click the Themes tab.
NoteTo set the theme for the
masterAdmin Console you need to set the Admin Console theme for themasterrealm.- To see the changes to the Admin Console refresh the page.
-
Change the welcome theme by editing
standalone.xml,standalone-ha.xml, ordomain.xml. Add
welcomeThemeto the theme element, for example:<theme> ... <welcomeTheme>custom-theme</welcomeTheme> ... </theme>- Restart the server for the changes to the welcome theme to take effect.
3.3. Default themes
Red Hat Single Sign-On comes bundled with default themes in the server’s root themes directory. To simplify upgrading you should not edit the bundled themes directly. Instead create your own theme that extends one of the bundled themes.
3.4. Creating a theme
A theme consists of:
- HTML templates (Freemarker Templates)
- Images
- Message bundles
- Stylesheets
- Scripts
- Theme properties
Unless you plan to replace every single page you should extend another theme. Most likely you will want to extend the Red Hat Single Sign-On theme, but you could also consider extending the base theme if you are significantly changing the look and feel of the pages. The base theme primarily consists of HTML templates and message bundles, while the Red Hat Single Sign-On theme primarily contains images and stylesheets.
When extending a theme you can override individual resources (templates, stylesheets, etc.). If you decide to override HTML templates bear in mind that you may need to update your custom template when upgrading to a new release.
While creating a theme it’s a good idea to disable caching as this makes it possible to edit theme resources directly from the themes directory without restarting Red Hat Single Sign-On.
Procedure
-
Edit
standalone.xml. For
themesetstaticMaxAgeto-1and bothcacheTemplatesandcacheThemestofalse:<theme> <staticMaxAge>-1</staticMaxAge> <cacheThemes>false</cacheThemes> <cacheTemplates>false</cacheTemplates> ... </theme>NoteBe sure to re-enable caching in production as it will significantly impact performance.
Create a directory in the
themesdirectory.The name of the directory becomes the name of the theme. For example to create a theme called
mythemecreate the directorythemes/mytheme.Inside the theme directory, create a directory for each of the types your theme is going to provide.
For example, to add the login type to the
mythemetheme, create the directorythemes/mytheme/login.For each type create a file
theme.propertieswhich allows setting some configuration for the theme.For example, to configure the theme
themes/mytheme/loginto extend the base theme and import some common resources, create the filethemes/mytheme/login/theme.propertieswith following contents:parent=base import=common/keycloak
You have now created a theme with support for the login type.
- Log into the Admin Console to checkout your new theme
- Select your realm
- Click Realm Settings from the menu.
- Click on the Themes tab.
- For Login Theme select mytheme and click Save.
Open the login page for the realm.
You can do this either by logging in through your application or by opening the Account Management console (
/realms/{realm name}/account).-
To see the effect of changing the parent theme, set
parent=keycloakintheme.propertiesand refresh the login page.
3.4.1. Theme properties
Theme properties are set in the file <THEME TYPE>/theme.properties in the theme directory.
- parent - Parent theme to extend
- import - Import resources from another theme
- styles - Space-separated list of styles to include
- locales - Comma-separated list of supported locales
There are a list of properties that can be used to change the css class used for certain element types. For a list of these properties look at the theme.properties file in the corresponding type of the keycloak theme (themes/keycloak/<THEME TYPE>/theme.properties).
You can also add your own custom properties and use them from custom templates.
When doing so, you can substitute system properties or environment variables by using these formats:
-
${some.system.property}- for system properties -
${env.ENV_VAR}- for environment variables.
A default value can also be provided in case the system property or the environment variable is not found with ${foo:defaultValue}.
If no default value is provided and there’s no corresponding system property or environment variable, then nothing is replaced and you end up with the format in your template.
Here’s an example of what is possible:
javaVersion=${java.version}

unixHome=${env.HOME:Unix home not found}
windowsHome=${env.HOMEPATH:Windows home not found}
3.4.2. Add a stylesheet to a theme
You can add one or more stylesheets to a theme.
Procedure
-
Create a file in the
<THEME TYPE>/resources/cssdirectory of your theme. Add this file to the
stylesproperty intheme.properties.For example, to add
styles.cssto themytheme, createthemes/mytheme/login/resources/css/styles.csswith the following content:.login-pf body { background: DimGrey none; }Edit
themes/mytheme/login/theme.propertiesand add:styles=css/styles.css
To see the changes, open the login page for your realm.
You will notice that the only styles being applied are those from your custom stylesheet.
To include the styles from the parent theme, load the styles from that theme. Edit
themes/mytheme/login/theme.propertiesand changestylesto:styles=web_modules/@fortawesome/fontawesome-free/css/icons/all.css web_modules/@patternfly/react-core/dist/styles/base.css web_modules/@patternfly/react-core/dist/styles/app.css node_modules/patternfly/dist/css/patternfly.min.css node_modules/patternfly/dist/css/patternfly-additions.min.css css/login.css css/styles.css
NoteTo override styles from the parent stylesheets, ensure that your stylesheet is listed last.
3.4.3. Adding a script to a theme
You can add one or more scripts to a theme.
Procedure
-
Create a file in the
<THEME TYPE>/resources/jsdirectory of your theme. Add the file to the
scriptsproperty intheme.properties.For example, to add
script.jsto themytheme, createthemes/mytheme/login/resources/js/script.jswith the following content:alert('Hello');Then edit
themes/mytheme/login/theme.propertiesand add:scripts=js/script.js
3.4.4. Adding an image to a theme
To make images available to the theme add them to the <THEME TYPE>/resources/img directory of your theme. These can be used from within stylesheets or directly in HTML templates.
For example to add an image to the mytheme copy an image to themes/mytheme/login/resources/img/image.jpg.
You can then use this image from within a custom stylesheet with:
body {
    background-image: url('../img/image.jpg');
    background-size: cover;
}
Or to use directly in HTML templates add the following to a custom HTML template:
<img src="${url.resourcesPath}/img/image.jpg">3.4.5. Messages
Text in the templates is loaded from message bundles. A theme that extends another theme will inherit all messages from the parent’s message bundle and you can override individual messages by adding <THEME TYPE>/messages/messages_en.properties to your theme.
For example to replace Username on the login form with Your Username for the mytheme create the file themes/mytheme/login/messages/messages_en.properties with the following content:
usernameOrEmail=Your Username
Within a message values like {0} and {1} are replaced with arguments when the message is used. For example {0} in Log in to {0} is replaced with the name of the realm.
Texts of these message bundles can be overwritten by realm-specific values. The realm-specific values are manageable via UI and API.
3.4.6. Adding a language to a realm
Prerequisites
- To enable internationalization for a realm, see the Server Administration Guide.
Procedure
-
Create the file
<THEME TYPE>/messages/messages_<LOCALE>.propertiesin the directory of your theme. Add this file to the
localesproperty in<THEME TYPE>/theme.properties. For a language to be available to users the realmslogin,accountandemail, the theme has to support the language, so you need to add your language for those theme types.For example, to add Norwegian translations to the
mythemetheme create the filethemes/mytheme/login/messages/messages_no.propertieswith the following content:usernameOrEmail=Brukernavn password=Passord
If you omit a translation for messages, they will use English.
Edit
themes/mytheme/login/theme.propertiesand add:locales=en,no
-
Add the same for the
accountandemailtheme types. To do this createthemes/mytheme/account/messages/messages_no.propertiesandthemes/mytheme/email/messages/messages_no.properties. Leaving these files empty will result in the English messages being used. -
Copy
themes/mytheme/login/theme.propertiestothemes/mytheme/account/theme.propertiesandthemes/mytheme/email/theme.properties. Add a translation for the language selector. This is done by adding a message to the English translation. To do this add the following to
themes/mytheme/account/messages/messages_en.propertiesandthemes/mytheme/login/messages/messages_en.properties:locale_no=Norsk
By default message properties files should be encoded using ISO-8859-1. It’s also possible to specify the encoding using a special header. For example to use UTF-8 encoding:
# encoding: UTF-8
usernameOrEmail=....
Additional resources
- See Locale Selector for details on how the current locale is selected.
3.4.7. Adding custom Identity Providers icons
Red Hat Single Sign-On supports adding icons for custom Identity providers, which are displayed on the login screen.
Procedure
-
Define icon classes in your login
theme.propertiesfile (for example,themes/mytheme/login/theme.properties) with key patternkcLogoIdP-<alias>. For an Identity Provider with an alias
myProvider, you may add a line totheme.propertiesfile of your custom theme. For example:kcLogoIdP-myProvider = fa fa-lock
All icons are available on the official website of PatternFly4. Icons for social providers are already defined in base login theme properties (themes/keycloak/login/theme.properties), where you can inspire yourself.
3.4.8. Creating a custom HTML template
Red Hat Single Sign-On uses Apache Freemarker templates to generate HTML. You can override individual templates in your own theme by creating <THEME TYPE>/<TEMPLATE>.ftl. For a list of templates used see themes/base/<THEME TYPE>.
Procedure
- Copy the template from the base theme to your own theme.
Apply the modifications you need.
For example, to create a custom login form for the
mythemetheme, copythemes/base/login/login.ftltothemes/mytheme/loginand open it in an editor.After the first line (<#import …>), add
<h1>HELLO WORLD!</h1>as shown here:<#import "template.ftl" as layout> <h1>HELLO WORLD!</h1> ...
- Back up the modified template. When upgrading to a new version of Red Hat Single Sign-On you may need to update your custom templates to apply changes to the original template if applicable.
Additional resources
- See the FreeMarker Manual for details on how to edit templates.
3.4.9. Emails
To edit the subject and contents for emails, for example password recovery email, add a message bundle to the email type of your theme. There are three messages for each email. One for the subject, one for the plain text body and one for the html body.
To see all emails available take a look at themes/base/email/messages/messages_en.properties.
For example to change the password recovery email for the mytheme theme create themes/mytheme/email/messages/messages_en.properties with the following content:
passwordResetSubject=My password recovery
passwordResetBody=Reset password link: {0}
passwordResetBodyHtml=<a href="{0}">Reset password</a>
3.5. Deploying themes
Themes can be deployed to Red Hat Single Sign-On by copying the theme directory to themes or it can be deployed as an archive. During development you can copy the theme to the themes directory, but in production you may want to consider using an archive. An archive makes it simpler to have a versioned copy of the theme, especially when you have multiple instances of Red Hat Single Sign-On for example with clustering.
Procedure
- To deploy a theme as an archive, create a JAR archive with the theme resources.
Add a file
META-INF/keycloak-themes.jsonto the archive that lists the available themes in the archive as well as what types each theme provides.For example for the
mythemetheme createmytheme.jarwith the contents:- META-INF/keycloak-themes.json
- theme/mytheme/login/theme.properties
- theme/mytheme/login/login.ftl
- theme/mytheme/login/resources/css/styles.css
- theme/mytheme/login/resources/img/image.png
- theme/mytheme/login/messages/messages_en.properties
theme/mytheme/email/messages/messages_en.properties
The contents of
META-INF/keycloak-themes.jsonin this case would be:{ "themes": [{ "name" : "mytheme", "types": [ "login", "email" ] }] }A single archive can contain multiple themes and each theme can support one or more types.
-
To deploy the archive to Red Hat Single Sign-On, add it to the
standalone/deployments/directory of Red Hat Single Sign-On and it will be automatically loaded.
3.6. Theme selector
By default the theme configured for the realm is used, with the exception of clients being able to override the login theme. This behavior can be changed through the Theme Selector SPI.
This could be used to select different themes for desktop and mobile devices by looking at the user agent header, for example.
To create a custom theme selector you need to implement ThemeSelectorProviderFactory and ThemeSelectorProvider.
3.7. Theme resources
When implementing custom providers in Red Hat Single Sign-On there may often be a need to add additional templates, resources and messages bundles.
The easiest way to load additional theme resources is to create a JAR with templates in theme-resources/templates resources in theme-resources/resources and messages bundles in theme-resources/messages and drop it into the standalone/deployments/ directory of Red Hat Single Sign-On.
If you want a more flexible way to load templates and resources that can be achieved through the ThemeResourceSPI. By implementing ThemeResourceProviderFactory and ThemeResourceProvider you can decide exactly how to load templates and resources.
3.8. Locale selector
By default, the locale is selected using the DefaultLocaleSelectorProvider which implements the LocaleSelectorProvider interface. English is the default language when internationalization is disabled. With internationalization enabled, the locale is resolved according to the logic described in the Server Administration Guide.
This behaviour can be changed through the LocaleSelectorSPI by implementing the LocaleSelectorProvider and LocaleSelectorProviderFactory.
The LocaleSelectorProvider interface has a single method, resolveLocale, which must return a locale given a RealmModel and a nullable UserModel. The actual request is available from the KeycloakSession#getContext method.
Custom implementations can extend the DefaultLocaleSelectorProvider in order to reuse parts of the default behavior. For example to ignore the Accept-Language request header, a custom implementation could extend the default provider, override it’s getAcceptLanguageHeaderLocale, and return a null value. As a result the locale selection will fall back on the realms’s default language.
3.9. Additional resources
- For more details on creating and deploying a custom provider, see Service Provider Interfaces.
Chapter 4. Custom user attributes
You can add custom user attributes to the registration page and account management console with a custom theme.
4.1. Registration page
Use this procedure to enter custom attributes in the registration page.
Procedure
-
Copy the template
themes/base/login/register.ftlto the login type of your custom theme. Open the copy in an editor.
For example, to add a mobile number to the registration page, add the following snippet to the form:
<div class="form-group"> <div class="${properties.kcLabelWrapperClass!}"> <label for="user.attributes.mobile" class="${properties.kcLabelClass!}">Mobile number</label> </div> <div class="${properties.kcInputWrapperClass!}"> <input type="text" class="${properties.kcInputClass!}" id="user.attributes.mobile" name="user.attributes.mobile" value="${(register.formData['user.attributes.mobile']!'')}"/> </div> </div>-
Ensure the name of the input html element starts with
user.attributes. In the example above, the attribute will be stored by Red Hat Single Sign-On with the namemobile. - To see the changes, make sure your realm is using your custom theme for the login theme and open the registration page.
4.2. Account Management Console
Use this procedure to manage custom attributes in the user profile page in the account management console.
Procedure
-
Copy the template
themes/base/account/account.ftlto the account type of your custom theme. Open the copy in an editor.
As an example to add a mobile number to the account page add the following snippet to the form:
<div class="form-group"> <div class="col-sm-2 col-md-2"> <label for="user.attributes.mobile" class="control-label">Mobile number</label> </div> <div class="col-sm-10 col-md-10"> <input type="text" class="form-control" id="user.attributes.mobile" name="user.attributes.mobile" value="${(account.attributes.mobile!'')}"/> </div> </div>-
Ensure the name of the input html element starts with
user.attributes. - To see the changes, make sure your realm is using your custom theme for the account theme and open the user profile page in the account management console.
4.3. Additional resources
- See Themes for how to create a custom theme.
Chapter 5. Identity Brokering APIs
Red Hat Single Sign-On can delegate authentication to a parent IDP for login. A typical example of this is the case where you want users to be able to login through a social provider such as Facebook or Google. You can also link existing accounts to a brokered IDP. This section describes some APIs that your applications can use as it pertains to identity brokering.
5.1. Retrieving external IDP tokens
Red Hat Single Sign-On allows you to store tokens and responses from the authentication process with the external IDP. For that, you can use the Store Token configuration option on the IDP’s settings page.
Application code can retrieve these tokens and responses to pull in extra user information, or to securely invoke requests on the external IDP. For example, an application might want to use the Google token to invoke on other Google services and REST APIs. To retrieve a token for a particular identity provider you need to send a request as follows:
GET /auth/realms/{realm}/broker/{provider_alias}/token HTTP/1.1
Host: localhost:8080
Authorization: Bearer <KEYCLOAK ACCESS TOKEN>
An application must have authenticated with Red Hat Single Sign-On and have received an access token. This access token will need to have the broker client-level role read-token set. This means that the user must have a role mapping for this role and the client application must have that role within its scope. In this case, given that you are accessing a protected service in Red Hat Single Sign-On, you need to send the access token issued by Red Hat Single Sign-On during the user authentication. In the broker configuration page you can automatically assign this role to newly imported users by turning on the Stored Tokens Readable switch.
These external tokens can be re-established by either logging in again through the provider, or using the client initiated account linking API.
5.2. Client initiated account linking
Some applications want to integrate with social providers like Facebook, but do not want to provide an option to login via these social providers. Red Hat Single Sign-On offers a browser-based API that applications can use to link an existing user account to a specific external IDP. This is called client-initiated account linking. Account linking can only be initiated by OIDC applications.
The way it works is that the application forwards the user’s browser to a URL on the Red Hat Single Sign-On server requesting that it wants to link the user’s account to a specific external provider (i.e. Facebook). The server initiates a login with the external provider. The browser logs in at the external provider and is redirected back to the server. The server establishes the link and redirects back to the application with a confirmation.
There are some preconditions that must be met by the client application before it can initiate this protocol:
- The desired identity provider must be configured and enabled for the user’s realm in the admin console.
- The user account must already be logged in as an existing user via the OIDC protocol
-
The user must have an
account.manage-accountoraccount.manage-account-linksrole mapping. - The application must be granted the scope for those roles within its access token
- The application must have access to its access token as it needs information within it to generate the redirect URL.
To initiate the login, the application must fabricate a URL and redirect the user’s browser to this URL. The URL looks like this:
/{auth-server-root}/auth/realms/{realm}/broker/{provider}/link?client_id={id}&redirect_uri={uri}&nonce={nonce}&hash={hash}Here’s a description of each path and query param:
- provider
-
This is the provider alias of the external IDP that you defined in the
Identity Providersection of the admin console. - client_id
- This is the OIDC client id of your application. When you registered the application as a client in the admin console, you had to specify this client id.
- redirect_uri
- This is the application callback URL you want to redirect to after the account link is established. It must be a valid client redirect URI pattern. In other words, it must match one of the valid URL patterns you defined when you registered the client in the admin console.
- nonce
- This is a random string that your application must generate
- hash
-
This is a Base64 URL encoded hash. This hash is generated by Base64 URL encoding a SHA_256 hash of
nonce+token.getSessionState()+token.getIssuedFor()+provider. The token variable are obtained from the OIDC access token. Basically you are hashing the random nonce, the user session id, the client id, and the identity provider alias you want to access.
Here’s an example of Java Servlet code that generates the URL to establish the account link.
   KeycloakSecurityContext session = (KeycloakSecurityContext) httpServletRequest.getAttribute(KeycloakSecurityContext.class.getName());
   AccessToken token = session.getToken();
   String clientId = token.getIssuedFor();
   String nonce = UUID.randomUUID().toString();
   MessageDigest md = null;
   try {
      md = MessageDigest.getInstance("SHA-256");
   } catch (NoSuchAlgorithmException e) {
      throw new RuntimeException(e);
   }
   String input = nonce + token.getSessionState() + clientId + provider;
   byte[] check = md.digest(input.getBytes(StandardCharsets.UTF_8));
   String hash = Base64Url.encode(check);
   request.getSession().setAttribute("hash", hash);
   String redirectUri = ...;
   String accountLinkUrl = KeycloakUriBuilder.fromUri(authServerRootUrl)
                    .path("/auth/realms/{realm}/broker/{provider}/link")
                    .queryParam("nonce", nonce)
                    .queryParam("hash", hash)
                    .queryParam("client_id", clientId)
                    .queryParam("redirect_uri", redirectUri).build(realm, provider).toString();
Why is this hash included? We do this so that the auth server is guaranteed to know that the client application initiated the request and no other rogue app just randomly asked for a user account to be linked to a specific provider. The auth server will first check to see if the user is logged in by checking the SSO cookie set at login. It will then try to regenerate the hash based on the current login and match it up to the hash sent by the application.
After the account has been linked, the auth server will redirect back to the redirect_uri. If there is a problem servicing the link request, the auth server may or may not redirect back to the redirect_uri. The browser may just end up at an error page instead of being redirected back to the application. If there is an error condition and the auth server deems it safe enough to redirect back to the client app, an additional error query parameter will be appended to the redirect_uri.
While this API guarantees that the application initiated the request, it does not completely prevent CSRF attacks for this operation. The application is still responsible for guarding against CSRF attacks target at itself.
5.2.1. Refreshing external tokens
If you are using the external token generated by logging into the provider (i.e. a Facebook or GitHub token), you can refresh this token by re-initiating the account linking API.
Chapter 6. Service Provider Interfaces (SPI)
Red Hat Single Sign-On is designed to cover most use-cases without requiring custom code, but we also want it to be customizable. To achieve this Red Hat Single Sign-On has a number of Service Provider Interfaces (SPI) for which you can implement your own providers.
6.1. Implementing an SPI
To implement an SPI you need to implement its ProviderFactory and Provider interfaces. You also need to create a service configuration file.
For example, to implement the Theme Selector SPI you need to implement ThemeSelectorProviderFactory and ThemeSelectorProvider and also provide the file META-INF/services/org.keycloak.theme.ThemeSelectorProviderFactory.
Example ThemeSelectorProviderFactory:
package org.acme.provider;

import ...

public class MyThemeSelectorProviderFactory implements ThemeSelectorProviderFactory {

    @Override
    public ThemeSelectorProvider create(KeycloakSession session) {
        return new MyThemeSelectorProvider(session);
    }

    @Override
    public void init(Config.Scope config) {
    }

    @Override
    public void postInit(KeycloakSessionFactory factory) {
    }

    @Override
    public void close() {
    }

    @Override
    public String getId() {
        return "myThemeSelector";
    }
}Red Hat Single Sign-On creates a single instance of provider factories which makes it possible to store state for multiple requests. Provider instances are created by calling create on the factory for each request so these should be light-weight object.
Example ThemeSelectorProvider:
package org.acme.provider;

import ...

public class MyThemeSelectorProvider implements ThemeSelectorProvider {

    public MyThemeSelectorProvider(KeycloakSession session) {
    }


    @Override
    public String getThemeName(Theme.Type type) {
        return "my-theme";
    }

    @Override
	public void close() {
    }
}
Example service configuration file (META-INF/services/org.keycloak.theme.ThemeSelectorProviderFactory):
org.acme.provider.MyThemeSelectorProviderFactory
You can configure your provider through standalone.xml, standalone-ha.xml, or domain.xml.
For example by adding the following to standalone.xml:
<spi name="themeSelector">
    <provider name="myThemeSelector" enabled="true">
        <properties>
            <property name="theme" value="my-theme"/>
        </properties>
    </provider>
</spi>
Then you can retrieve the config in the ProviderFactory init method:
public void init(Config.Scope config) {
    String themeName = config.get("theme");
}
Your provider can also lookup other providers if needed. For example:
public class MyThemeSelectorProvider implements ThemeSelectorProvider {

    private KeycloakSession session;

    public MyThemeSelectorProvider(KeycloakSession session) {
        this.session = session;
    }

    @Override
    public String getThemeName(Theme.Type type) {
        return session.getContext().getRealm().getLoginTheme();
    }
}
6.1.1. Show info from your SPI implementation in the Admin Console
Sometimes it is useful to show additional info about your Provider to a Red Hat Single Sign-On administrator. You can show provider build time information (for example, version of custom provider currently installed), current configuration of the provider (eg. url of remote system your provider talks to) or some operational info (average time of response from remote system your provider talks to). Red Hat Single Sign-On Admin Console provides Server Info page to show this kind of information.
To show info from your provider it is enough to implement org.keycloak.provider.ServerInfoAwareProviderFactory interface in your ProviderFactory.
Example implementation for MyThemeSelectorProviderFactory from previous example:
package org.acme.provider;

import ...

public class MyThemeSelectorProviderFactory implements ThemeSelectorProviderFactory, ServerInfoAwareProviderFactory {
    ...

    @Override
    public Map<String, String> getOperationalInfo() {
        Map<String, String> ret = new LinkedHashMap<>();
        ret.put("theme-name", "my-theme");
        return ret;
    }
}
6.2. Use available providers
In your provider implementation, you can use other providers available in Red Hat Single Sign-On. The existing providers can be typically retrieved with the usage of the KeycloakSession, which is available to your provider as described in the section Implementing an SPI.
Red Hat Single Sign-On has two provider types:
Single-implementation provider types - There can be only a single active implementation of the particular provider type in Red Hat Single Sign-On runtime.
For example
HostnameProviderspecifies the hostname to be used by Red Hat Single Sign-On and that is shared for the whole Red Hat Single Sign-On server. Hence there can be only single implementation of this provider active for the Red Hat Single Sign-On server. If there are multiple provider implementations available to the server runtime, one of them needs to be specified in the keycloak subsystem configuration in thestandalone.xmlas the default one.For example such as:
<spi name="hostname">
    <default-provider>default</default-provider>
    ...
</spi>
The value
defaultused as the value ofdefault-providermust match the ID returned by theProviderFactory.getId()of the particular provider factory implementation. In the code, you can obtain the provider such askeycloakSession.getProvider(HostnameProvider.class)Multiple implementation provider types - Those are provider types, that allow multiple implementations available and working together in the Red Hat Single Sign-On runtime.
For example
EventListenerprovider allows to have multiple implementations available and registered, which means that particular event can be sent to all the listeners (jboss-logging, sysout etc). In the code, you can obtain a specified instance of the provider for example such assession.getProvider(EventListener.class, "jboss-logging"). You need to specifyprovider_idof the provider as the second argument as there can be multiple instances of this provider type as described above.The provider ID must match the ID returned by the
ProviderFactory.getId()of the particular provider factory implementation. Some provider types can be retrieved with the usage ofComponentModelas the second argument and some (for exampleAuthenticator) even need to be retrieved with the usage ofKeycloakSessionFactory. It is not recommended to implement your own providers this way as it may be deprecated in the future.
6.3. Registering provider implementations
There are two ways to register provider implementations. In most cases the simplest way is to use the Red Hat Single Sign-On deployer approach as this handles a number of dependencies automatically for you. It also supports hot deployment as well as re-deployment.
The alternative approach is to deploy as a module.
If you are creating a custom SPI you will need to deploy it as a module, otherwise we recommend using the Red Hat Single Sign-On deployer approach.
6.3.1. Using the Red Hat Single Sign-On deployer
If you copy your provider jar to the Red Hat Single Sign-On standalone/deployments/ directory, your provider will automatically be deployed. Hot deployment works too. Additionally, your provider jar works similarly to other components deployed in a JBoss EAP environment in that they can use facilities like the jboss-deployment-structure.xml file. This file allows you to set up dependencies on other components and load third-party jars and modules.
Provider jars can also be contained within other deployable units like EARs and WARs. Deploying with a EAR actually makes it really easy to use third party jars as you can just put these libraries in the EAR’s lib/ directory.
6.3.2. Register a provider using Modules
Procedure
Create a module using the jboss-cli script or manually create a folder.
For example, to add the event listener sysout example provider using the
jboss-cliscript, execute:KEYCLOAK_HOME/bin/jboss-cli.sh --command="module add --name=org.acme.provider --resources=target/provider.jar --dependencies=org.keycloak.keycloak-core,org.keycloak.keycloak-server-spi"
Alternatively, you can manually create the module inside
KEYCLOAK_HOME/modulesand add your jar and amodule.xml.For example, create the folder
KEYCLOAK_HOME/modules/org/acme/provider/main. Then copyprovider.jarto this folder and createmodule.xmlwith the following content:<?xml version="1.0" encoding="UTF-8"?> <module xmlns="urn:jboss:module:1.3" name="org.acme.provider"> <resources> <resource-root path="provider.jar"/> </resources> <dependencies> <module name="org.keycloak.keycloak-core"/> <module name="org.keycloak.keycloak-server-spi"/> </dependencies> </module>
Register this module with Red Hat Single Sign-On by editing the keycloak-server subsystem section of
standalone.xml,standalone-ha.xml, ordomain.xml, and adding it to the providers:<subsystem xmlns="urn:jboss:domain:keycloak-server:1.1"> <web-context>auth</web-context> <providers> <provider>module:org.keycloak.examples.event-sysout</provider> </providers> ...
6.3.3. Disabling a provider
You can disable a provider by setting the enabled attribute for the provider to false in standalone.xml, standalone-ha.xml, or domain.xml. For example to disable the Infinispan user cache provider add:
<spi name="userCache">
    <provider name="infinispan" enabled="false"/>
</spi>
6.4. Leveraging Jakarta EE
The service providers can be packaged within any Jakarta EE component so long as you set up the META-INF/services file correctly to point to your providers. For example, if your provider needs to use third party libraries, you can package up your provider within an ear and store these third party libraries in the ear’s lib/ directory. Also note that provider jars can make use of the jboss-deployment-structure.xml file that EJBs, WARS, and EARs can use in a JBoss EAP environment. See the JBoss EAP documentation for more details on this file. It allows you to pull in external dependencies among other fine grain actions.
ProviderFactory implementations are required to be plain java objects. But, we also currently support implementing provider classes as Stateful EJBs. This is how you would do it:
@Stateful
@Local(EjbExampleUserStorageProvider.class)
public class EjbExampleUserStorageProvider implements UserStorageProvider,
        UserLookupProvider,
        UserRegistrationProvider,
        UserQueryProvider,
        CredentialInputUpdater,
        CredentialInputValidator,
        OnUserCache
{
    @PersistenceContext
    protected EntityManager em;

    protected ComponentModel model;
    protected KeycloakSession session;

    public void setModel(ComponentModel model) {
        this.model = model;
    }

    public void setSession(KeycloakSession session) {
        this.session = session;
    }


    @Remove
    @Override
    public void close() {
    }
...
}
You define the @Local annotation and specify your provider class there. If you don’t do this, EJB will not proxy the provider instance correctly and your provider won’t work.
You put the @Remove annotation on the close() method of your provider. If you don’t, the stateful bean will never be cleaned up and you may eventually see error messages.
Implementations of ProviderFactory are required to be plain java objects. Your factory class would perform a JNDI lookup of the Stateful EJB in its create() method.
public class EjbExampleUserStorageProviderFactory
        implements UserStorageProviderFactory<EjbExampleUserStorageProvider> {

    @Override
    public EjbExampleUserStorageProvider create(KeycloakSession session, ComponentModel model) {
        try {
            InitialContext ctx = new InitialContext();
            EjbExampleUserStorageProvider provider = (EjbExampleUserStorageProvider)ctx.lookup(
                     "java:global/user-storage-jpa-example/" + EjbExampleUserStorageProvider.class.getSimpleName());
            provider.setModel(model);
            provider.setSession(session);
            return provider;
        } catch (Exception e) {
            throw new RuntimeException(e);
        }
    }
6.5. JavaScript providers
Red Hat Single Sign-On has the ability to execute scripts during runtime in order to allow administrators to customize specific functionalities:
- Authenticator
- JavaScript Policy
- OpenID Connect Protocol Mapper
6.5.1. Authenticator
Authentication scripts must provide at least one of the following functions: authenticate(..), which is called from Authenticator#authenticate(AuthenticationFlowContext)action(..), which is called from Authenticator#action(AuthenticationFlowContext)
Custom Authenticator should at least provide the authenticate(..) function. You can use the javax.script.Bindings script within the code.
script-
the
ScriptModelto access script metadata realm-
the
RealmModel user-
the current
UserModel session-
the active
KeycloakSession authenticationSession-
the current
AuthenticationSessionModel httpRequest-
the current
org.jboss.resteasy.spi.HttpRequest LOG-
a
org.jboss.logging.Loggerscoped toScriptBasedAuthenticator
You can extract additional context information from the context argument passed to the authenticate(context) action(context) function.
AuthenticationFlowError = Java.type("org.keycloak.authentication.AuthenticationFlowError");

function authenticate(context) {

  LOG.info(script.name + " --> trace auth for: " + user.username);

  if (   user.username === "tester"
      && user.getAttribute("someAttribute")
      && user.getAttribute("someAttribute").contains("someValue")) {

      context.failure(AuthenticationFlowError.INVALID_USER);
      return;
  }

  context.success();
}
6.5.2. Create a JAR with the scripts to deploy
JAR files are regular ZIP files with a .jar extension.
In order to make your scripts available to Red Hat Single Sign-On you need to deploy them to the server. For that, you should create a JAR file with the following structure:
META-INF/keycloak-scripts.json

my-script-authenticator.js
my-script-policy.js
my-script-mapper.js
The META-INF/keycloak-scripts.json is a file descriptor that provides metadata information about the scripts you want to deploy. It is a JSON file with the following structure:
{
    "authenticators": [
        {
            "name": "My Authenticator",
            "fileName": "my-script-authenticator.js",
            "description": "My Authenticator from a JS file"
        }
    ],
    "policies": [
        {
            "name": "My Policy",
            "fileName": "my-script-policy.js",
            "description": "My Policy from a JS file"
        }
    ],
    "mappers": [
        {
            "name": "My Mapper",
            "fileName": "my-script-mapper.js",
            "description": "My Mapper from a JS file"
        }
    ]
}
This file should reference the different types of script providers that you want to deploy:
authenticatorsFor OpenID Connect Script Authenticators. You can have one or multiple authenticators in the same JAR file
policiesFor JavaScript Policies when using Red Hat Single Sign-On Authorization Services. You can have one or multiple policies in the same JAR file
mappersFor OpenID Connect Script Protocol Mappers. You can have one or multiple mappers in the same JAR file
For each script file in your JAR file, you need a corresponding entry in META-INF/keycloak-scripts.json that maps your scripts files to a specific provider type. For that you should provide the following properties for each entry:
nameA friendly name that will be used to show the scripts through the Red Hat Single Sign-On Administration Console. If not provided, the name of the script file will be used instead
descriptionAn optional text that better describes the intend of the script file
fileNameThe name of the script file. This property is mandatory and should map to a file within the JAR.
6.5.3. Deploy the script JAR
Once you have a JAR file with a descriptor and the scripts you want to deploy, you just need to copy the JAR to the Red Hat Single Sign-On standalone/deployments/ directory.
6.5.4. Using the Red Hat Single Sign-On Admin Console to upload scripts
Ability to upload scripts through the Admin Console is deprecated and will be removed in a future version of Red Hat Single Sign-On.
Administrators cannot upload scripts to the server. This behavior prevents potential harm to the system in case malicious scripts are accidentally executed. Administrators should always deploy scripts directly to the server using a JAR file to prevent attacks when you run scripts at runtime.
Ability to upload scripts can be explicitly enabled. This should be used with great care and plans should be created to deploy all scripts directly to the server as soon as possible.
For more details about how to enable the upload_scripts feature, see Profiles.
6.6. Available SPIs
If you want to see list of all available SPIs at runtime, you can check Server Info page in Admin Console as described in Admin Console section.
Chapter 7. User Storage SPI
You can use the User Storage SPI to write extensions to Red Hat Single Sign-On to connect to external user databases and credential stores. The built-in LDAP and ActiveDirectory support is an implementation of this SPI in action. Out of the box, Red Hat Single Sign-On uses its local database to create, update, and look up users and validate credentials. Often though, organizations have existing external proprietary user databases that they cannot migrate to Red Hat Single Sign-On’s data model. For those situations, application developers can write implementations of the User Storage SPI to bridge the external user store and the internal user object model that Red Hat Single Sign-On uses to log in users and manage them.
When the Red Hat Single Sign-On runtime needs to look up a user, such as when a user is logging in, it performs a number of steps to locate the user. It first looks to see if the user is in the user cache; if the user is found it uses that in-memory representation. Then it looks for the user within the Red Hat Single Sign-On local database. If the user is not found, it then loops through User Storage SPI provider implementations to perform the user query until one of them returns the user the runtime is looking for. The provider queries the external user store for the user and maps the external data representation of the user to Red Hat Single Sign-On’s user metamodel.
User Storage SPI provider implementations can also perform complex criteria queries, perform CRUD operations on users, validate and manage credentials, or perform bulk updates of many users at once. It depends on the capabilities of the external store.
User Storage SPI provider implementations are packaged and deployed similarly to (and often are) Jakarta EE components. They are not enabled by default, but instead must be enabled and configured per realm under the User Federation tab in the administration console.
If your user provider implementation is using some user attributes as the metadata attributes for linking/establishing the user identity, then please make sure that users are not able to edit the attributes and the corresponding attributes are read-only. The example is the LDAP_ID attribute, which the built-in Red Hat Single Sign-On LDAP provider is using for to store the ID of the user on the LDAP server side. See the details in the Threat model mitigation chapter.
7.1. Provider interfaces
When building an implementation of the User Storage SPI you have to define a provider class and a provider factory. Provider class instances are created per transaction by provider factories. Provider classes do all the heavy lifting of user lookup and other user operations. They must implement the org.keycloak.storage.UserStorageProvider interface.
package org.keycloak.storage;

public interface UserStorageProvider extends Provider {


    /**
     * Callback when a realm is removed.  Implement this if, for example, you want to do some
     * cleanup in your user storage when a realm is removed
     *
     * @param realm
     */
    default
    void preRemove(RealmModel realm) {

    }

    /**
     * Callback when a group is removed.  Allows you to do things like remove a user
     * group mapping in your external store if appropriate
     *
     * @param realm
     * @param group
     */
    default
    void preRemove(RealmModel realm, GroupModel group) {

    }

    /**
     * Callback when a role is removed.  Allows you to do things like remove a user
     * role mapping in your external store if appropriate

     * @param realm
     * @param role
     */
    default
    void preRemove(RealmModel realm, RoleModel role) {

    }

}
You may be thinking that the UserStorageProvider interface is pretty sparse? You’ll see later in this chapter that there are other mix-in interfaces your provider class may implement to support the meat of user integration.
UserStorageProvider instances are created once per transaction. When the transaction is complete, the UserStorageProvider.close() method is invoked and the instance is then garbage collected. Instances are created by provider factories. Provider factories implement the org.keycloak.storage.UserStorageProviderFactory interface.
package org.keycloak.storage;

/**
 * @author <a href="mailto:bill@burkecentral.com">Bill Burke</a>
 * @version $Revision: 1 $
 */
public interface UserStorageProviderFactory<T extends UserStorageProvider> extends ComponentFactory<T, UserStorageProvider> {

    /**
     * This is the name of the provider and will be shown in the admin console as an option.
     *
     * @return
     */
    @Override
    String getId();

    /**
     * called per Keycloak transaction.
     *
     * @param session
     * @param model
     * @return
     */
    T create(KeycloakSession session, ComponentModel model);
...
}
Provider factory classes must specify the concrete provider class as a template parameter when implementing the UserStorageProviderFactory. This is a must as the runtime will introspect this class to scan for its capabilities (the other interfaces it implements). So for example, if your provider class is named FileProvider, then the factory class should look like this:
public class FileProviderFactory implements UserStorageProviderFactory<FileProvider> {

    public String getId() { return "file-provider"; }

    public FileProvider create(KeycloakSession session, ComponentModel model) {
       ...
    }
The getId() method returns the name of the User Storage provider. This id will be displayed in the admin console’s User Federation page when you want to enable the provider for a specific realm.
The create() method is responsible for allocating an instance of the provider class. It takes a org.keycloak.models.KeycloakSession parameter. This object can be used to look up other information and metadata as well as provide access to various other components within the runtime. The ComponentModel parameter represents how the provider was enabled and configured within a specific realm. It contains the instance id of the enabled provider as well as any configuration you may have specified for it when you enabled through the admin console.
The UserStorageProviderFactory has other capabilities as well which we will go over later in this chapter.
7.2. Provider capability interfaces
If you have examined the UserStorageProvider interface closely you might notice that it does not define any methods for locating or managing users. These methods are actually defined in other capability interfaces depending on what scope of capabilities your external user store can provide and execute on. For example, some external stores are read-only and can only do simple queries and credential validation. You will only be required to implement the capability interfaces for the features you are able to. You can implement these interfaces:
| SPI | Description |
|---|---|
|
| This interface is required if you want to be able to log in with users from this external store. Most (all?) providers implement this interface. |
|
| Defines complex queries that are used to locate one or more users. You must implement this interface if you want to view and manage users from the administration console. |
|
| Implement this interface if your provider supports adding and removing users. |
|
| Implement this interface if your provider supports bulk update of a set of users. |
|
| Implement this interface if your provider can validate one or more different credential types (for example, if your provider can validate a password). |
|
| Implement this interface if your provider supports updating one or more different credential types. |
7.3. Model interfaces
Most of the methods defined in the capability interfaces either return or are passed in representations of a user. These representations are defined by the org.keycloak.models.UserModel interface. App developers are required to implement this interface. It provides a mapping between the external user store and the user metamodel that Red Hat Single Sign-On uses.
package org.keycloak.models;

public interface UserModel extends RoleMapperModel {
    String getId();

    String getUsername();
    void setUsername(String username);

    String getFirstName();
    void setFirstName(String firstName);

    String getLastName();
    void setLastName(String lastName);

    String getEmail();
    void setEmail(String email);
...
}
UserModel implementations provide access to read and update metadata about the user including things like username, name, email, role and group mappings, as well as other arbitrary attributes.
There are other model classes within the org.keycloak.models package that represent other parts of the Red Hat Single Sign-On metamodel: RealmModel, RoleModel, GroupModel, and ClientModel.
7.3.1. Storage Ids
One important method of UserModel is the getId() method. When implementing UserModel developers must be aware of the user id format. The format must be:
"f:" + component id + ":" + external id
The Red Hat Single Sign-On runtime often has to look up users by their user id. The user id contains enough information so that the runtime does not have to query every single UserStorageProvider in the system to find the user.
The component id is the id returned from ComponentModel.getId(). The ComponentModel is passed in as a parameter when creating the provider class so you can get it from there. The external id is information your provider class needs to find the user in the external store. This is often a username or a uid. For example, it might look something like this:
f:332a234e31234:wburke
When the runtime does a lookup by id, the id is parsed to obtain the component id. The component id is used to locate the UserStorageProvider that was originally used to load the user. That provider is then passed the id. The provider again parses the id to obtain the external id and it will use to locate the user in external user storage.
7.4. Packaging and deployment
User Storage providers are packaged in a JAR and deployed or undeployed to the Red Hat Single Sign-On runtime in the same way you would deploy something in the JBoss EAP application server. You can either copy the JAR directly to the standalone/deployments/ directory of the server, or use the JBoss CLI to execute the deployment.
In order for Red Hat Single Sign-On to recognize the provider, you need to add a file to the JAR: META-INF/services/org.keycloak.storage.UserStorageProviderFactory. This file must contain a line-separated list of fully qualified classnames of the UserStorageProviderFactory implementations:
org.keycloak.examples.federation.properties.ClasspathPropertiesStorageFactory
org.keycloak.examples.federation.properties.FilePropertiesStorageFactory
Red Hat Single Sign-On supports hot deployment of these provider JARs. You’ll also see later in this chapter that you can package it within and as Jakarta EE components.
7.5. Simple read-only, lookup example
To illustrate the basics of implementing the User Storage SPI let’s walk through a simple example. In this chapter you’ll see the implementation of a simple UserStorageProvider that looks up users in a simple property file. The property file contains username and password definitions and is hardcoded to a specific location on the classpath. The provider will be able to look up the user by ID and username and also be able to validate passwords. Users that originate from this provider will be read-only.
7.5.1. Provider class
The first thing we will walk through is the UserStorageProvider class.
public class PropertyFileUserStorageProvider implements
        UserStorageProvider,
        UserLookupProvider,
        CredentialInputValidator,
        CredentialInputUpdater
{
...
}
Our provider class, PropertyFileUserStorageProvider, implements many interfaces. It implements the UserStorageProvider as that is a base requirement of the SPI. It implements the UserLookupProvider interface because we want to be able to log in with users stored by this provider. It implements the CredentialInputValidator interface because we want to be able to validate passwords entered in using the login screen. Our property file is read-only. We implement the CredentialInputUpdater because we want to post an error condition when the user attempts to update his password.
    protected KeycloakSession session;
    protected Properties properties;
    protected ComponentModel model;
    // map of loaded users in this transaction
    protected Map<String, UserModel> loadedUsers = new HashMap<>();

    public PropertyFileUserStorageProvider(KeycloakSession session, ComponentModel model, Properties properties) {
        this.session = session;
        this.model = model;
        this.properties = properties;
    }
The constructor for this provider class is going to store the reference to the KeycloakSession, ComponentModel, and property file. We’ll use all of these later. Also notice that there is a map of loaded users. Whenever we find a user we will store it in this map so that we avoid re-creating it again within the same transaction. This is a good practice to follow as many providers will need to do this (that is, any provider that integrates with JPA). Remember also that provider class instances are created once per transaction and are closed after the transaction completes.
7.5.1.1. UserLookupProvider implementation
    @Override
    public UserModel getUserByUsername(String username, RealmModel realm) {
        UserModel adapter = loadedUsers.get(username);
        if (adapter == null) {
            String password = properties.getProperty(username);
            if (password != null) {
                adapter = createAdapter(realm, username);
                loadedUsers.put(username, adapter);
            }
        }
        return adapter;
    }

    protected UserModel createAdapter(RealmModel realm, String username) {
        return new AbstractUserAdapter(session, realm, model) {
            @Override
            public String getUsername() {
                return username;
            }
        };
    }

    @Override
    public UserModel getUserById(String id, RealmModel realm) {
        StorageId storageId = new StorageId(id);
        String username = storageId.getExternalId();
        return getUserByUsername(username, realm);
    }

    @Override
    public UserModel getUserByEmail(String email, RealmModel realm) {
        return null;
    }
The getUserByUsername() method is invoked by the Red Hat Single Sign-On login page when a user logs in. In our implementation we first check the loadedUsers map to see if the user has already been loaded within this transaction. If it hasn’t been loaded we look in the property file for the username. If it exists we create an implementation of UserModel, store it in loadedUsers for future reference, and return this instance.
The createAdapter() method uses the helper class org.keycloak.storage.adapter.AbstractUserAdapter. This provides a base implementation for UserModel. It automatically generates a user id based on the required storage id format using the username of the user as the external id.
"f:" + component id + ":" + username
Every get method of AbstractUserAdapter either returns null or empty collections. However, methods that return role and group mappings will return the default roles and groups configured for the realm for every user. Every set method of AbstractUserAdapter will throw a org.keycloak.storage.ReadOnlyException. So if you attempt to modify the user in the Admin Console, you will get an error.
The getUserById() method parses the id parameter using the org.keycloak.storage.StorageId helper class. The StorageId.getExternalId() method is invoked to obtain the username embeded in the id parameter. The method then delegates to getUserByUsername().
Emails are not stored, so the getUserByEmail() method returns null.
7.5.1.2. CredentialInputValidator implementation
Next let’s look at the method implementations for CredentialInputValidator.
    @Override
    public boolean isConfiguredFor(RealmModel realm, UserModel user, String credentialType) {
        String password = properties.getProperty(user.getUsername());
        return credentialType.equals(CredentialModel.PASSWORD) && password != null;
    }

    @Override
    public boolean supportsCredentialType(String credentialType) {
        return credentialType.equals(CredentialModel.PASSWORD);
    }

    @Override
    public boolean isValid(RealmModel realm, UserModel user, CredentialInput input) {
        if (!supportsCredentialType(input.getType())) return false;

        String password = properties.getProperty(user.getUsername());
        if (password == null) return false;
        return password.equals(input.getChallengeResponse());
    }
The isConfiguredFor() method is called by the runtime to determine if a specific credential type is configured for the user. This method checks to see that the password is set for the user.
The supportsCredentialType() method returns whether validation is supported for a specific credential type. We check to see if the credential type is password.
The isValid() method is responsible for validating passwords. The CredentialInput parameter is really just an abstract interface for all credential types. We make sure that we support the credential type and also that it is an instance of UserCredentialModel. When a user logs in through the login page, the plain text of the password input is put into an instance of UserCredentialModel. The isValid() method checks this value against the plain text password stored in the properties file. A return value of true means the password is valid.
7.5.1.3. CredentialInputUpdater implementation
As noted before, the only reason we implement the CredentialInputUpdater interface in this example is to forbid modifications of user passwords. The reason we have to do this is because otherwise the runtime would allow the password to be overridden in Red Hat Single Sign-On local storage. We’ll talk more about this later in this chapter.
    @Override
    public boolean updateCredential(RealmModel realm, UserModel user, CredentialInput input) {
        if (input.getType().equals(CredentialModel.PASSWORD)) throw new ReadOnlyException("user is read only for this update");

        return false;
    }

    @Override
    public void disableCredentialType(RealmModel realm, UserModel user, String credentialType) {

    }

    @Override
    public Set<String> getDisableableCredentialTypes(RealmModel realm, UserModel user) {
        return Collections.EMPTY_SET;
    }
The updateCredential() method just checks to see if the credential type is password. If it is, a ReadOnlyException is thrown.
7.5.2. Provider factory implementation
Now that the provider class is complete, we now turn our attention to the provider factory class.
public class PropertyFileUserStorageProviderFactory
                 implements UserStorageProviderFactory<PropertyFileUserStorageProvider> {

    public static final String PROVIDER_NAME = "readonly-property-file";

    @Override
    public String getId() {
        return PROVIDER_NAME;
    }
First thing to notice is that when implementing the UserStorageProviderFactory class, you must pass in the concrete provider class implementation as a template parameter. Here we specify the provider class we defined before: PropertyFileUserStorageProvider.
If you do not specify the template parameter, your provider will not function. The runtime does class introspection to determine the capability interfaces that the provider implements.
The getId() method identifies the factory in the runtime and will also be the string shown in the admin console when you want to enable a user storage provider for the realm.
7.5.2.1. Initialization
    private static final Logger logger = Logger.getLogger(PropertyFileUserStorageProviderFactory.class);
    protected Properties properties = new Properties();

    @Override
    public void init(Config.Scope config) {
        InputStream is = getClass().getClassLoader().getResourceAsStream("/users.properties");

        if (is == null) {
            logger.warn("Could not find users.properties in classpath");
        } else {
            try {
                properties.load(is);
            } catch (IOException ex) {
                logger.error("Failed to load users.properties file", ex);
            }
        }
    }

    @Override
    public PropertyFileUserStorageProvider create(KeycloakSession session, ComponentModel model) {
        return new PropertyFileUserStorageProvider(session, model, properties);
    }
The UserStorageProviderFactory interface has an optional init() method you can implement. When Red Hat Single Sign-On boots up, only one instance of each provider factory is created. Also at boot time, the init() method is called on each of these factory instances. There’s also a postInit() method you can implement as well. After each factory’s init() method is invoked, their postInit() methods are called.
In our init() method implementation, we find the property file containing our user declarations from the classpath. We then load the properties field with the username and password combinations stored there.
The Config.Scope parameter is factory configuration that can be set up within standalone.xml, standalone-ha.xml, or domain.xml.
For example, by adding the following to standalone.xml:
<spi name="storage">
    <provider name="readonly-property-file" enabled="true">
        <properties>
            <property name="path" value="/other-users.properties"/>
        </properties>
    </provider>
</spi>
We can specify the classpath of the user property file instead of hardcoding it. Then you can retrieve the configuration in the PropertyFileUserStorageProviderFactory.init():
public void init(Config.Scope config) {
    String path = config.get("path");
    InputStream is = getClass().getClassLoader().getResourceAsStream(path);

    ...
}
7.5.2.2. Create method
Our last step in creating the provider factory is the create() method.
    @Override
    public PropertyFileUserStorageProvider create(KeycloakSession session, ComponentModel model) {
        return new PropertyFileUserStorageProvider(session, model, properties);
    }
We simply allocate the PropertyFileUserStorageProvider class. This create method will be called once per transaction.
7.5.3. Packaging and deployment
The class files for our provider implementation should be placed in a jar. You also have to declare the provider factory class within the META-INF/services/org.keycloak.storage.UserStorageProviderFactory file.
org.keycloak.examples.federation.properties.FilePropertiesStorageFactory
Once you create the jar you can deploy it using regular JBoss EAP means: copy the jar into the standalone/deployments/ directory or using the JBoss CLI.
7.5.4. Enabling the provider in the Admin Console
You enable user storage providers per realm within the User Federation page in the Admin Console.
Procedure
Select the provider we just created from the list:
readonly-property-file.The configuration page for our provider displays.
- Click Save because we have nothing to configure.
Return to the main User Federation page
You now see your provider listed.
You will now be able to log in with a user declared in the users.properties file. This user will only be able to view the account page after logging in.
7.6. Configuration techniques
Our PropertyFileUserStorageProvider example is a bit contrived. It is hardcoded to a property file that is embedded in the jar of the provider, which is not terribly useful. We might want to make the location of this file configurable per instance of the provider. In other words, we might want to reuse this provider multiple times in multiple different realms and point to completely different user property files. We’ll also want to perform this configuration within the Admin Console UI.
The UserStorageProviderFactory has additional methods you can implement that handle provider configuration. You describe the variables you want to configure per provider and the Admin Console automatically renders a generic input page to gather this configuration. When implemented, callback methods also validate the configuration before it is saved, when a provider is created for the first time, and when it is updated. UserStorageProviderFactory inherits these methods from the org.keycloak.component.ComponentFactory interface.
    List<ProviderConfigProperty> getConfigProperties();

    default
    void validateConfiguration(KeycloakSession session, RealmModel realm, ComponentModel model)
            throws ComponentValidationException
    {

    }

    default
    void onCreate(KeycloakSession session, RealmModel realm, ComponentModel model) {

    }

    default
    void onUpdate(KeycloakSession session, RealmModel realm, ComponentModel model) {

    }
The ComponentFactory.getConfigProperties() method returns a list of org.keycloak.provider.ProviderConfigProperty instances. These instances declare metadata that is needed to render and store each configuration variable of the provider.
7.6.1. Configuration example
Let’s expand our PropertyFileUserStorageProviderFactory example to allow you to point a provider instance to a specific file on disk.
PropertyFileUserStorageProviderFactory
public class PropertyFileUserStorageProviderFactory
                  implements UserStorageProviderFactory<PropertyFileUserStorageProvider> {

    protected static final List<ProviderConfigProperty> configMetadata;

    static {
        configMetadata = ProviderConfigurationBuilder.create()
                .property().name("path")
                .type(ProviderConfigProperty.STRING_TYPE)
                .label("Path")
                .defaultValue("${jboss.server.config.dir}/example-users.properties")
                .helpText("File path to properties file")
                .add().build();
    }

    @Override
    public List<ProviderConfigProperty> getConfigProperties() {
        return configMetadata;
    }
The ProviderConfigurationBuilder class is a great helper class to create a list of configuration properties. Here we specify a variable named path that is a String type. On the Admin Console configuration page for this provider, this configuration variable is labeled as Path and has a default value of ${jboss.server.config.dir}/example-users.properties. When you hover over the tooltip of this configuration option, it displays the help text, File path to properties file.
The next thing we want to do is to verify that this file exists on disk. We do not want to enable an instance of this provider in the realm unless it points to a valid user property file. To do this, we implement the validateConfiguration() method.
    @Override
    public void validateConfiguration(KeycloakSession session, RealmModel realm, ComponentModel config)
                   throws ComponentValidationException {
        String fp = config.getConfig().getFirst("path");
        if (fp == null) throw new ComponentValidationException("user property file does not exist");
        fp = EnvUtil.replace(fp);
        File file = new File(fp);
        if (!file.exists()) {
            throw new ComponentValidationException("user property file does not exist");
        }
    }
In the validateConfiguration() method we get the configuration variable from the ComponentModel and we check to see if that file exists on disk. Notice that we use the org.keycloak.common.util.EnvUtil.replace() method. With this method any string that has ${} within it will replace that with a system property value. The ${jboss.server.config.dir} string corresponds to the configuration/ directory of our server and is really useful for this example.
Next thing we have to do is remove the old init() method. We do this because user property files are going to be unique per provider instance. We move this logic to the create() method.
    @Override
    public PropertyFileUserStorageProvider create(KeycloakSession session, ComponentModel model) {
        String path = model.getConfig().getFirst("path");

        Properties props = new Properties();
        try {
            InputStream is = new FileInputStream(path);
            props.load(is);
            is.close();
        } catch (IOException e) {
            throw new RuntimeException(e);
        }

        return new PropertyFileUserStorageProvider(session, model, props);
    }
This logic is, of course, inefficient as every transaction reads the entire user property file from disk, but hopefully this illustrates, in a simple way, how to hook in configuration variables.
7.6.2. Configuring the provider in the Admin Console
Now that the configuration is enabled, you can set the path variable when you configure the provider in the Admin Console.
7.7. Add/Remove user and query capability interfaces
One thing we have not done with our example is allow it to add and remove users or change passwords. Users defined in our example are also not queryable or viewable in the Admin Console. To add these enhancements, our example provider must implement the UserQueryProvider and UserRegistrationProvider interfaces.
7.7.1. Implementing UserRegistrationProvider
Use this procedure to implement adding and removing users from the particular store, we first have to be able to save our properties file to disk.
PropertyFileUserStorageProvider
    public void save() {
        String path = model.getConfig().getFirst("path");
        path = EnvUtil.replace(path);
        try {
            FileOutputStream fos = new FileOutputStream(path);
            properties.store(fos, "");
            fos.close();
        } catch (IOException e) {
            throw new RuntimeException(e);
        }
    }
Then, the implementation of the addUser() and removeUser() methods becomes simple.
PropertyFileUserStorageProvider
    public static final String UNSET_PASSWORD="#$!-UNSET-PASSWORD";

    @Override
    public UserModel addUser(RealmModel realm, String username) {
        synchronized (properties) {
            properties.setProperty(username, UNSET_PASSWORD);
            save();
        }
        return createAdapter(realm, username);
    }

    @Override
    public boolean removeUser(RealmModel realm, UserModel user) {
        synchronized (properties) {
            if (properties.remove(user.getUsername()) == null) return false;
            save();
            return true;
        }
    }
Notice that when adding a user we set the password value of the property map to be UNSET_PASSWORD. We do this as we can’t have null values for a property in the property value. We also have to modify the CredentialInputValidator methods to reflect this.
The addUser() method will be called if the provider implements the UserRegistrationProvider interface. If your provider has a configuration switch to turn off adding a user, returning null from this method will skip the provider and call the next one.
PropertyFileUserStorageProvider
    @Override
    public boolean isValid(RealmModel realm, UserModel user, CredentialInput input) {
        if (!supportsCredentialType(input.getType()) || !(input instanceof UserCredentialModel)) return false;

        UserCredentialModel cred = (UserCredentialModel)input;
        String password = properties.getProperty(user.getUsername());
        if (password == null || UNSET_PASSWORD.equals(password)) return false;
        return password.equals(cred.getValue());
    }
Since we can now save our property file, it also makes sense to allow password updates.
PropertyFileUserStorageProvider
    @Override
    public boolean updateCredential(RealmModel realm, UserModel user, CredentialInput input) {
        if (!(input instanceof UserCredentialModel)) return false;
        if (!input.getType().equals(CredentialModel.PASSWORD)) return false;
        UserCredentialModel cred = (UserCredentialModel)input;
        synchronized (properties) {
            properties.setProperty(user.getUsername(), cred.getValue());
            save();
        }
        return true;
    }
We can now also implement disabling a password.
PropertyFileUserStorageProvider
    @Override
    public void disableCredentialType(RealmModel realm, UserModel user, String credentialType) {
        if (!credentialType.equals(CredentialModel.PASSWORD)) return;
        synchronized (properties) {
            properties.setProperty(user.getUsername(), UNSET_PASSWORD);
            save();
        }

    }

    private static final Set<String> disableableTypes = new HashSet<>();

    static {
        disableableTypes.add(CredentialModel.PASSWORD);
    }

    @Override
    public Set<String> getDisableableCredentialTypes(RealmModel realm, UserModel user) {

        return disableableTypes;
    }
With these methods implemented, you’ll now be able to change and disable the password for the user in the Admin Console.
7.7.2. Implementing UserQueryProvider
Without implementing UserQueryProvider the Admin Console would not be able to view and manage users that were loaded by our example provider. Let’s look at implementing this interface.
PropertyFileUserStorageProvider
    @Override
    public int getUsersCount(RealmModel realm) {
        return properties.size();
    }

    @Override
    public List<UserModel> getUsers(RealmModel realm) {
        return getUsers(realm, 0, Integer.MAX_VALUE);
    }

    @Override
    public List<UserModel> getUsers(RealmModel realm, int firstResult, int maxResults) {
        List<UserModel> users = new LinkedList<>();
        int i = 0;
        for (Object obj : properties.keySet()) {
            if (i++ < firstResult) continue;
            String username = (String)obj;
            UserModel user = getUserByUsername(username, realm);
            users.add(user);
            if (users.size() >= maxResults) break;
        }
        return users;
    }
The getUsers() method iterates over the key set of the property file, delegating to getUserByUsername() to load a user. Notice that we are indexing this call based on the firstResult and maxResults parameter. If your external store does not support pagination, you will have to do similar logic.
PropertyFileUserStorageProvider
    @Override
    public List<UserModel> searchForUser(String search, RealmModel realm) {
        return searchForUser(search, realm, 0, Integer.MAX_VALUE);
    }

    @Override
    public List<UserModel> searchForUser(String search, RealmModel realm, int firstResult, int maxResults) {
        List<UserModel> users = new LinkedList<>();
        int i = 0;
        for (Object obj : properties.keySet()) {
            String username = (String)obj;
            if (!username.contains(search)) continue;
            if (i++ < firstResult) continue;
            UserModel user = getUserByUsername(username, realm);
            users.add(user);
            if (users.size() >= maxResults) break;
        }
        return users;
    }
The first declaration of searchForUser() takes a String parameter. This is supposed to be a string that you use to search username and email attributes to find the user. This string can be a substring, which is why we use the String.contains() method when doing our search.
PropertyFileUserStorageProvider
    @Override
    public List<UserModel> searchForUser(Map<String, String> params, RealmModel realm) {
        return searchForUser(params, realm, 0, Integer.MAX_VALUE);
    }

    @Override
    public List<UserModel> searchForUser(Map<String, String> params, RealmModel realm, int firstResult, int maxResults) {
        // only support searching by username
        String usernameSearchString = params.get("username");
        if (usernameSearchString == null) return Collections.EMPTY_LIST;
        return searchForUser(usernameSearchString, realm, firstResult, maxResults);
    }
The searchForUser() method that takes a Map parameter can search for a user based on first, last name, username, and email. We only store usernames, so we only search based on usernames. We delegate to searchForUser() for this.
PropertyFileUserStorageProvider
    @Override
    public List<UserModel> getGroupMembers(RealmModel realm, GroupModel group, int firstResult, int maxResults) {
        return Collections.EMPTY_LIST;
    }

    @Override
    public List<UserModel> getGroupMembers(RealmModel realm, GroupModel group) {
        return Collections.EMPTY_LIST;
    }

    @Override
    public List<UserModel> searchForUserByUserAttribute(String attrName, String attrValue, RealmModel realm) {
        return Collections.EMPTY_LIST;
    }
We do not store groups or attributes, so the other methods return an empty list.
7.8. Augmenting external storage
The PropertyFileUserStorageProvider example is really limited. While we will be able to login with users stored in a property file, we won’t be able to do much else. If users loaded by this provider need special role or group mappings to fully access particular applications there is no way for us to add additional role mappings to these users. You also can’t modify or add additional important attributes like email, first and last name.
For these types of situations, Red Hat Single Sign-On allows you to augment your external store by storing extra information in Red Hat Single Sign-On’s database. This is called federated user storage and is encapsulated within the org.keycloak.storage.federated.UserFederatedStorageProvider class.
UserFederatedStorageProvider
package org.keycloak.storage.federated;

public interface UserFederatedStorageProvider extends Provider {

    Set<GroupModel> getGroups(RealmModel realm, String userId);
    void joinGroup(RealmModel realm, String userId, GroupModel group);
    void leaveGroup(RealmModel realm, String userId, GroupModel group);
    List<String> getMembership(RealmModel realm, GroupModel group, int firstResult, int max);

...
The UserFederatedStorageProvider instance is available on the KeycloakSession.userFederatedStorage() method. It has all different kinds of methods for storing attributes, group and role mappings, different credential types, and required actions. If your external store’s datamodel cannot support the full Red Hat Single Sign-On feature set, then this service can fill in the gaps.
Red Hat Single Sign-On comes with a helper class org.keycloak.storage.adapter.AbstractUserAdapterFederatedStorage that will delegate every single UserModel method except get/set of username to user federated storage. Override the methods you need to override to delegate to your external storage representations. It is strongly suggested you read the javadoc of this class as it has smaller protected methods you may want to override. Specifically surrounding group membership and role mappings.
7.8.1. Augmentation example
In our PropertyFileUserStorageProvider example, we just need a simple change to our provider to use the AbstractUserAdapterFederatedStorage.
PropertyFileUserStorageProvider
    protected UserModel createAdapter(RealmModel realm, String username) {
        return new AbstractUserAdapterFederatedStorage(session, realm, model) {
            @Override
            public String getUsername() {
                return username;
            }

            @Override
            public void setUsername(String username) {
                String pw = (String)properties.remove(username);
                if (pw != null) {
                    properties.put(username, pw);
                    save();
                }
            }
        };
    }
We instead define an anonymous class implementation of AbstractUserAdapterFederatedStorage. The setUsername() method makes changes to the properties file and saves it.
7.9. Import implementation strategy
When implementing a user storage provider, there’s another strategy you can take. Instead of using user federated storage, you can create a user locally in the Red Hat Single Sign-On built-in user database and copy attributes from your external store into this local copy. There are many advantages to this approach.
- Red Hat Single Sign-On basically becomes a persistence user cache for your external store. Once the user is imported you’ll no longer hit the external store thus taking load off of it.
- If you are moving to Red Hat Single Sign-On as your official user store and deprecating the old external store, you can slowly migrate applications to use Red Hat Single Sign-On. When all applications have been migrated, unlink the imported user, and retire the old legacy external store.
There are some obvious disadvantages though to using an import strategy:
- Looking up a user for the first time will require multiple updates to Red Hat Single Sign-On database. This can be a big performance loss under load and put a lot of strain on the Red Hat Single Sign-On database. The user federated storage approach will only store extra data as needed and may never be used depending on the capabilities of your external store.
- With the import approach, you have to keep local Red Hat Single Sign-On storage and external storage in sync. The User Storage SPI has capability interfaces that you can implement to support synchronization, but this can quickly become painful and messy.
To implement the import strategy you simply check to see first if the user has been imported locally. If so return the local user, if not create the user locally and import data from the external store. You can also proxy the local user so that most changes are automatically synchronized.
This will be a bit contrived, but we can extend our PropertyFileUserStorageProvider to take this approach. We begin first by modifying the createAdapter() method.
PropertyFileUserStorageProvider
    protected UserModel createAdapter(RealmModel realm, String username) {
        UserModel local = session.userLocalStorage().getUserByUsername(username, realm);
        if (local == null) {
            local = session.userLocalStorage().addUser(realm, username);
            local.setFederationLink(model.getId());
        }
        return new UserModelDelegate(local) {
            @Override
            public void setUsername(String username) {
                String pw = (String)properties.remove(username);
                if (pw != null) {
                    properties.put(username, pw);
                    save();
                }
                super.setUsername(username);
            }
        };
    }
In this method we call the KeycloakSession.userLocalStorage() method to obtain a reference to local Red Hat Single Sign-On user storage. We see if the user is stored locally, if not, we add it locally. Do not set the id of the local user. Let Red Hat Single Sign-On automatically generate the id. Also note that we call UserModel.setFederationLink() and pass in the ID of the ComponentModel of our provider. This sets a link between the provider and the imported user.
When a user storage provider is removed, any user imported by it will also be removed. This is one of the purposes of calling UserModel.setFederationLink().
Another thing to note is that if a local user is linked, your storage provider will still be delegated to for methods that it implements from the CredentialInputValidator and CredentialInputUpdater interfaces. Returning false from a validation or update will just result in Red Hat Single Sign-On seeing if it can validate or update using local storage.
Also notice that we are proxying the local user using the org.keycloak.models.utils.UserModelDelegate class. This class is an implementation of UserModel. Every method just delegates to the UserModel it was instantiated with. We override the setUsername() method of this delegate class to synchronize automatically with the property file. For your providers, you can use this to intercept other methods on the local UserModel to perform synchronization with your external store. For example, get methods could make sure that the local store is in sync. Set methods keep the external store in sync with the local one. One thing to note is that the getId() method should always return the id that was auto generated when you created the user locally. You should not return a federated id as shown in the other non-import examples.
If your provider is implementing the UserRegistrationProvider interface, your removeUser() method does not need to remove the user from local storage. The runtime will automatically perform this operation. Also note that removeUser() will be invoked before it is removed from local storage.
7.9.1. ImportedUserValidation interface
If you remember earlier in this chapter, we discussed how querying for a user worked. Local storage is queried first, if the user is found there, then the query ends. This is a problem for our above implementation as we want to proxy the local UserModel so that we can keep usernames in sync. The User Storage SPI has a callback for whenever a linked local user is loaded from the local database.
package org.keycloak.storage.user;
public interface ImportedUserValidation {
    /**
     * If this method returns null, then the user in local storage will be removed
     *
     * @param realm
     * @param user
     * @return null if user no longer valid
     */
    UserModel validate(RealmModel realm, UserModel user);
}
Whenever a linked local user is loaded, if the user storage provider class implements this interface, then the validate() method is called. Here you can proxy the local user passed in as a parameter and return it. That new UserModel will be used. You can also optionally do a check to see if the user still exists in the external store. If validate() returns null, then the local user will be removed from the database.
7.9.2. ImportSynchronization interface
With the import strategy you can see that it is possible for the local user copy to get out of sync with external storage. For example, maybe a user has been removed from the external store. The User Storage SPI has an additional interface you can implement to deal with this, org.keycloak.storage.user.ImportSynchronization:
package org.keycloak.storage.user;

public interface ImportSynchronization {
    SynchronizationResult sync(KeycloakSessionFactory sessionFactory, String realmId, UserStorageProviderModel model);
    SynchronizationResult syncSince(Date lastSync, KeycloakSessionFactory sessionFactory, String realmId, UserStorageProviderModel model);
}
This interface is implemented by the provider factory. Once this interface is implemented by the provider factory, the administration console management page for the provider shows additional options. You can manually force a synchronization by clicking a button. This invokes the ImportSynchronization.sync() method. Also, additional configuration options are displayed that allow you to automatically schedule a synchronization. Automatic synchronizations invoke the syncSince() method.
7.10. User caches
When a user object is loaded by ID, username, or email queries it is cached. When a user object is being cached, it iterates through the entire UserModel interface and pulls this information to a local in-memory-only cache. In a cluster, this cache is still local, but it becomes an invalidation cache. When a user object is modified, it is evicted. This eviction event is propagated to the entire cluster so that the other nodes' user cache is also invalidated.
7.10.1. Managing the user cache
You can access the user cache by calling KeycloakSession.userCache().
/**
 * All these methods effect an entire cluster of Keycloak instances.
 *
 * @author <a href="mailto:bill@burkecentral.com">Bill Burke</a>
 * @version $Revision: 1 $
 */
public interface UserCache extends UserProvider {
    /**
     * Evict user from cache.
     *
     * @param user
     */
    void evict(RealmModel realm, UserModel user);

    /**
     * Evict users of a specific realm
     *
     * @param realm
     */
    void evict(RealmModel realm);

    /**
     * Clear cache entirely.
     *
     */
    void clear();
}
There are methods for evicting specific users, users contained in a specific realm, or the entire cache.
7.10.2. OnUserCache callback interface
You might want to cache additional information that is specific to your provider implementation. The User Storage SPI has a callback whenever a user is cached: org.keycloak.models.cache.OnUserCache.
public interface OnUserCache {
    void onCache(RealmModel realm, CachedUserModel user, UserModel delegate);
}
Your provider class should implement this interface if it wants this callback. The UserModel delegate parameter is the UserModel instance returned by your provider. The CachedUserModel is an expanded UserModel interface. This is the instance that is cached locally in local storage.
public interface CachedUserModel extends UserModel {

    /**
     * Invalidates the cache for this user and returns a delegate that represents the actual data provider
     *
     * @return
     */
    UserModel getDelegateForUpdate();

    boolean isMarkedForEviction();

    /**
     * Invalidate the cache for this model
     *
     */
    void invalidate();

    /**
     * When was the model was loaded from database.
     *
     * @return
     */
    long getCacheTimestamp();

    /**
     * Returns a map that contains custom things that are cached along with this model.  You can write to this map.
     *
     * @return
     */
    ConcurrentHashMap getCachedWith();
}
This CachedUserModel interface allows you to evict the user from the cache and get the provider UserModel instance. The getCachedWith() method returns a map that allows you to cache additional information pertaining to the user. For example, credentials are not part of the UserModel interface. If you wanted to cache credentials in memory, you would implement OnUserCache and cache your user’s credentials using the getCachedWith() method.
7.10.3. Cache policies
On the administration console management page for your user storage provider, you can specify a unique cache policy.
7.11. Leveraging Jakarta EE
The user storage providers can be packaged within any Jakarta EE component if you set up the META-INF/services file correctly to point to your providers. For example, if your provider needs to use third-party libraries, you can package up your provider within an EAR and store these third-party libraries in the lib/ directory of the EAR. Also note that provider JARs can make use of the jboss-deployment-structure.xml file that EJBs, WARS, and EARs can use in a JBoss EAP environment. For more details on this file, see the JBoss EAP documentation. It allows you to pull in external dependencies among other fine-grained actions.
Provider implementations are required to be plain java objects. But we also currently support implementing UserStorageProvider classes as Stateful EJBs. This is especially useful if you want to use JPA to connect to a relational store. This is how you would do it:
@Stateful
@Local(EjbExampleUserStorageProvider.class)
public class EjbExampleUserStorageProvider implements UserStorageProvider,
        UserLookupProvider,
        UserRegistrationProvider,
        UserQueryProvider,
        CredentialInputUpdater,
        CredentialInputValidator,
        OnUserCache
{
    @PersistenceContext
    protected EntityManager em;

    protected ComponentModel model;
    protected KeycloakSession session;

    public void setModel(ComponentModel model) {
        this.model = model;
    }

    public void setSession(KeycloakSession session) {
        this.session = session;
    }


    @Remove
    @Override
    public void close() {
    }
...
}
You have to define the @Local annotation and specify your provider class there. If you do not do this, EJB will not proxy the user correctly and your provider won’t work.
You must put the @Remove annotation on the close() method of your provider. If you do not, the stateful bean will never be cleaned up and you might eventually see error messages.
Implementations of UserStorageProvider are required to be plain Java objects. Your factory class would perform a JNDI lookup of the Stateful EJB in its create() method.
public class EjbExampleUserStorageProviderFactory
        implements UserStorageProviderFactory<EjbExampleUserStorageProvider> {

    @Override
    public EjbExampleUserStorageProvider create(KeycloakSession session, ComponentModel model) {
        try {
            InitialContext ctx = new InitialContext();
            EjbExampleUserStorageProvider provider = (EjbExampleUserStorageProvider)ctx.lookup(
                     "java:global/user-storage-jpa-example/" + EjbExampleUserStorageProvider.class.getSimpleName());
            provider.setModel(model);
            provider.setSession(session);
            return provider;
        } catch (Exception e) {
            throw new RuntimeException(e);
        }
    }
This example also assumes that you have defined a JPA deployment in the same JAR as the provider. This means a persistence.xml file as well as any JPA @Entity classes.
When using JPA any additional datasource must be an XA datasource. The Red Hat Single Sign-On datasource is not an XA datasource. If you interact with two or more non-XA datasources in the same transaction, the server returns an error message. Only one non-XA resource is permitted in a single transaction. See the JBoss EAP manual for more details on deploying an XA datasource.
CDI is not supported.
7.12. REST management API
You can create, remove, and update your user storage provider deployments through the administrator REST API. The User Storage SPI is built on top of a generic component interface so you will be using that generic API to manage your providers.
The REST Component API lives under your realm admin resource.
/admin/realms/{realm-name}/components
We will only show this REST API interaction with the Java client. Hopefully you can extract how to do this from curl from this API.
public interface ComponentsResource {
    @GET
    @Produces(MediaType.APPLICATION_JSON)
    public List<ComponentRepresentation> query();

    @GET
    @Produces(MediaType.APPLICATION_JSON)
    public List<ComponentRepresentation> query(@QueryParam("parent") String parent);

    @GET
    @Produces(MediaType.APPLICATION_JSON)
    public List<ComponentRepresentation> query(@QueryParam("parent") String parent, @QueryParam("type") String type);

    @GET
    @Produces(MediaType.APPLICATION_JSON)
    public List<ComponentRepresentation> query(@QueryParam("parent") String parent,
                                               @QueryParam("type") String type,
                                               @QueryParam("name") String name);

    @POST
    @Consumes(MediaType.APPLICATION_JSON)
    Response add(ComponentRepresentation rep);

    @Path("{id}")
    ComponentResource component(@PathParam("id") String id);
}

public interface ComponentResource {
    @GET
    public ComponentRepresentation toRepresentation();

    @PUT
    @Consumes(MediaType.APPLICATION_JSON)
    public void update(ComponentRepresentation rep);

    @DELETE
    public void remove();
}
To create a user storage provider, you must specify the provider id, a provider type of the string org.keycloak.storage.UserStorageProvider, as well as the configuration.
import org.keycloak.admin.client.Keycloak;
import org.keycloak.representations.idm.RealmRepresentation;
...

Keycloak keycloak = Keycloak.getInstance(
    "http://localhost:8080/auth",
    "master",
    "admin",
    "password",
    "admin-cli");
RealmResource realmResource = keycloak.realm("master");
RealmRepresentation realm = realmResource.toRepresentation();

ComponentRepresentation component = new ComponentRepresentation();
component.setName("home");
component.setProviderId("readonly-property-file");
component.setProviderType("org.keycloak.storage.UserStorageProvider");
component.setParentId(realm.getId());
component.setConfig(new MultivaluedHashMap());
component.getConfig().putSingle("path", "~/users.properties");

realmResource.components().add(component);

// retrieve a component

List<ComponentRepresentation> components = realmResource.components().query(realm.getId(),
                                                                    "org.keycloak.storage.UserStorageProvider",
                                                                    "home");
component = components.get(0);

// Update a component

component.getConfig().putSingle("path", "~/my-users.properties");
realmResource.components().component(component.getId()).update(component);

// Remove a component

realmREsource.components().component(component.getId()).remove();
7.13. Migrating from an earlier user federation SPI
This chapter is only applicable if you have implemented a provider using the earlier (and now removed) User Federation SPI.
In Keycloak version 2.4.0 and earlier there was a User Federation SPI. Red Hat Single Sign-On version 7.0, although unsupported, had this earlier SPI available as well. This earlier User Federation SPI has been removed from Keycloak version 2.5.0 and Red Hat Single Sign-On version 7.1. However, if you have written a provider with this earlier SPI, this chapter discusses some strategies you can use to port it.
7.13.1. Import versus non-import
The earlier User Federation SPI required you to create a local copy of a user in the Red Hat Single Sign-On’s database and import information from your external store to the local copy. However, this is no longer a requirement. You can still port your earlier provider as-is, but you should consider whether a non-import strategy might be a better approach.
Advantages of the import strategy:
- Red Hat Single Sign-On basically becomes a persistence user cache for your external store. Once the user is imported you’ll no longer hit the external store, thus taking load off of it.
- If you are moving to Red Hat Single Sign-On as your official user store and deprecating the earlier external store, you can slowly migrate applications to use Red Hat Single Sign-On. When all applications have been migrated, unlink the imported user, and retire the earlier legacy external store.
There are some obvious disadvantages though to using an import strategy:
- Looking up a user for the first time will require multiple updates to Red Hat Single Sign-On database. This can be a big performance loss under load and put a lot of strain on the Red Hat Single Sign-On database. The user federated storage approach will only store extra data as needed and might never be used depending on the capabilities of your external store.
- With the import approach, you have to keep local Red Hat Single Sign-On storage and external storage in sync. The User Storage SPI has capability interfaces that you can implement to support synchronization, but this can quickly become painful and messy.
7.13.2. UserFederationProvider versus UserStorageProvider
The first thing to notice is that UserFederationProvider was a complete interface. You implemented every method in this interface. However, UserStorageProvider has instead broken up this interface into multiple capability interfaces that you implement as needed.
UserFederationProvider.getUserByUsername() and getUserByEmail() have exact equivalents in the new SPI. The difference between the two is how you import. If you are going to continue with an import strategy, you no longer call KeycloakSession.userStorage().addUser() to create the user locally. Instead you call KeycloakSession.userLocalStorage().addUser(). The userStorage() method no longer exists.
The UserFederationProvider.validateAndProxy() method has been moved to an optional capability interface, ImportedUserValidation. You want to implement this interface if you are porting your earlier provider as-is. Also note that in the earlier SPI, this method was called every time the user was accessed, even if the local user is in the cache. In the later SPI, this method is only called when the local user is loaded from local storage. If the local user is cached, then the ImportedUserValidation.validate() method is not called at all.
The UserFederationProvider.isValid() method no longer exists in the later SPI.
The UserFederationProvider methods synchronizeRegistrations(), registerUser(), and removeUser() have been moved to the UserRegistrationProvider capability interface. This new interface is optional to implement so if your provider does not support creating and removing users, you don’t have to implement it. If your earlier provider had switch to toggle support for registering new users, this is supported in the new SPI, returning null from UserRegistrationProvider.addUser() if the provider doesn’t support adding users.
The earlier UserFederationProvider methods centered around credentials are now encapsulated in the CredentialInputValidator and CredentialInputUpdater interfaces, which are also optional to implement depending on if you support validating or updating credentials. Credential management used to exist in UserModel methods. These also have been moved to the CredentialInputValidator and CredentialInputUpdater interfaces. One thing to note that if you do not implement the CredentialInputUpdater interface, then any credentials provided by your provider can be overridden locally in Red Hat Single Sign-On storage. So if you want your credentials to be read-only, implement the CredentialInputUpdater.updateCredential() method and return a ReadOnlyException.
The UserFederationProvider query methods such as searchByAttributes() and getGroupMembers() are now encapsulated in an optional interface UserQueryProvider. If you do not implement this interface, then users will not be viewable in the admin console. You’ll still be able to login though.
7.13.3. UserFederationProviderFactory versus UserStorageProviderFactory
The synchronization methods in the earlier SPI are now encapsulated within an optional ImportSynchronization interface. If you have implemented synchronization logic, then have your new UserStorageProviderFactory implement the ImportSynchronization interface.
7.13.4. Upgrading to a new model
The User Storage SPI instances are stored in a different set of relational tables. Red Hat Single Sign-On automatically runs a migration script. If any earlier User Federation providers are deployed for a realm, they are converted to the later storage model as is, including the id of the data. This migration will only happen if a User Storage provider exists with the same provider ID (i.e., "ldap", "kerberos") as the earlier User Federation provider.
So, knowing this there are different approaches you can take.
- You can remove the earlier provider in your earlier Red Hat Single Sign-On deployment. This will remove the local linked copies of all users you imported. Then, when you upgrade Red Hat Single Sign-On, just deploy and configure your new provider for your realm.
-
The second option is to write your new provider making sure it has the same provider ID:
UserStorageProviderFactory.getId(). Make sure this provider is in thestandalone/deployments/directory of the new Red Hat Single Sign-On installation. Boot the server, and have the built-in migration script convert from the earlier data model to the later data model. In this case all your earlier linked imported users will work and be the same.
If you have decided to get rid of the import strategy and rewrite your User Storage provider, we suggest that you remove the earlier provider before upgrading Red Hat Single Sign-On. This will remove linked local imported copies of any user you imported.
7.14. Stream-based interfaces
Many of the user storage interfaces in Red Hat Single Sign-On contain query methods that can return potentially large sets of objects, which might lead to significant impacts in terms of memory consumption and processing time. This is especially true when only a small subset of the objects' internal state is used in the query method’s logic.
To provide developers with a more efficient alternative to process large data sets in these query methods, a Streams sub-interface has been added to user storage interfaces. These Streams sub-interfaces replace the original collection-based methods in the super-interfaces with stream-based variants, making the collection-based methods default. The default implementation of a collection-based query method invokes its Stream counterpart and collects the result into the proper collection type.
The Streams sub-interfaces allow for implementations to focus on the stream-based approach for processing sets of data and benefit from the potential memory and performance optimizations of that approach. The interfaces that offer a Streams sub-interface to be implemented include a few capability interfaces, all interfaces in the org.keycloak.storage.federated package and a few others that might be implemented depending on the scope of the custom storage implementation.
See this list of the interfaces that offer a Streams sub-interface to developers.
| Package | Classes |
|
|
|
|
|
|
|
| All interfaces |
|
|
|
(*) indicates the interface is a capability interface
Custom user storage implementation that want to benefit from the streams approach should simply implement the Streams sub-interfaces instead of the original interfaces. For example, the following code uses the Streams variant of the UserQueryProvider interface:
public class CustomQueryProvider extends UserQueryProvider.Streams {
...
    @Override
    Stream<UserModel> getUsersStream(RealmModel realm, Integer firstResult, Integer maxResults) {
        // custom logic here
    }

    @Override
    Stream<UserModel> searchForUserStream(String search, RealmModel realm) {
        // custom logic here
    }
...
}
Chapter 8. Vault SPI
8.1. Vault provider
You can use a vault SPI from org.keycloak.vault package to write custom extension for Red Hat Single Sign-On to connect to arbitrary vault implementation.
The built-in files-plaintext provider is an example of the implementation of this SPI. In general the following rules apply:
-
To prevent a secret from leaking across realms, you may want to isolate or limit the secrets that can be retrieved by a realm. In that case, your provider should take into account the realm name when looking up secrets, for example by prefixing entries with the realm name. For example, an expression
${vault.key}would then evaluate generally to different entry names, depending on whether it was used in a realm A or realm B. To differentiate between realms, the realm needs to be passed to the createdVaultProviderinstance fromVaultProviderFactory.create()method where it is available from theKeycloakSessionparameter. -
The vault provider needs to implement a single method
obtainSecretthat returns aVaultRawSecretfor the given secret name. That class holds the representation of the secret either inbyte[]orByteBufferand is expected to convert between the two upon demand. Note that this buffer would be discarded after usage as explained below.
For details on how to package and deploy a custom provider refer to the Service Provider Interfaces chapter.
8.2. Consuming values from vault
The vault contains sensitive data and Red Hat Single Sign-On treats the secrets accordingly. When accessing a secret, the secret is obtained from the vault and retained in JVM memory only for the necessary time. Then all possible attempts to discard its content from JVM memory is done. This is achieved by using the vault secrets only within try-with-resources statement as outlined below:
    char[] c;
    try (VaultCharSecret cSecret = session.vault().getCharSecret(SECRET_NAME)) {
        // ... use cSecret
        c = cSecret.getAsArray().orElse(null);
        // if c != null, it now contains password
    }

    // if c != null, it now contains garbage
The example uses KeycloakSession.vault() as the entrypoint for accessing the secrets. Using the VaultProvider.obtainSecret method directly is indeed also possible. However the vault() method has the benefit of ability to interpret the raw secret (which is generally a byte array) as a character array (via vault().getCharSecret()) or a String (via vault().getStringSecret()) in addition to obtaining the original uninterpreted value (via vault().getRawSecret() method).
Note that since String objects are immutable, their content cannot be discarded by overriding with random garbage. Even though measures have been taken in the default VaultStringSecret implementation to prevent internalizing Strings, the secrets stored in String objects would live at least to the next GC round. Thus using plain byte and character arrays and buffers is preferable.