Chapter 3. Choosing an Operating Mode
Before deploying Red Hat Single Sign-On in a production environment you need to decide which type of operating mode you are going to use. Will you run Red Hat Single Sign-On within a cluster? Do you want a centralized way to manage your server configurations? Your choice of operating mode affects how you configure databases, configure caching and even how you boot the server.
The Red Hat Single Sign-On is built on top of the JBoss EAP Application Server. This guide will only go over the basics for deployment within a specific mode. If you want specific information on this, a better place to go would be the JBoss EAP Configuration Guide.
3.1. Standalone Mode
Standalone operating mode is only useful when you want to run one, and only one Red Hat Single Sign-On server instance. It is not usable for clustered deployments and all caches are non-distributed and local-only. It is not recommended that you use standalone mode in production as you will have a single point of failure. If your standalone mode server goes down, users will not be able to log in. This mode is really only useful to test drive and play with the features of Red Hat Single Sign-On
3.1.1. Standalone Boot Script
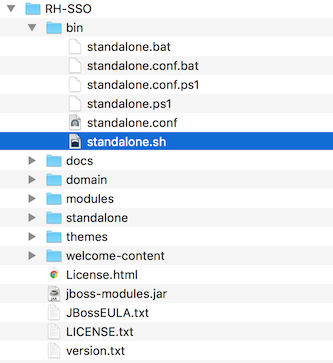
When running the server in standalone mode, there is a specific script you need to run to boot the server depending on your operating system. These scripts live in the bin/ directory of the server distribution.
Standalone Boot Scripts
To boot the server:
Linux/Unix
$ .../bin/standalone.sh
Windows
> ...\bin\standalone.bat
3.1.2. Standalone Configuration
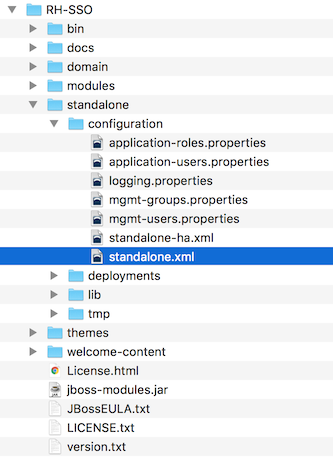
The bulk of this guide walks you through how to configure infrastructure level aspects of Red Hat Single Sign-On. These aspects are configured in a configuration file that is specific to the application server that Red Hat Single Sign-On is a derivative of. In the standalone operation mode, this file lives in …/standalone/configuration/standalone.xml. This file is also used to configure non-infrastructure level things that are specific to Red Hat Single Sign-On components.
Standalone Config File
Any changes you make to this file while the server is running will not take effect and may even be overwritten by the server. Instead use the command line scripting or the web console of JBoss EAP. See the JBoss EAP Configuration Guide for more information.
3.2. Standalone Clustered Mode
Standalone clustered operation mode is for when you want to run Red Hat Single Sign-On within a cluster. This mode requires that you have a copy of the Red Hat Single Sign-On distribution on each machine you want to run a server instance. This mode can be very easy to deploy initially, but can become quite cumbersome. To make a configuration change you’ll have to modify each distribution on each machine. For a large cluster this can become time consuming and error prone.
3.2.1. Standalone Clustered Configuration
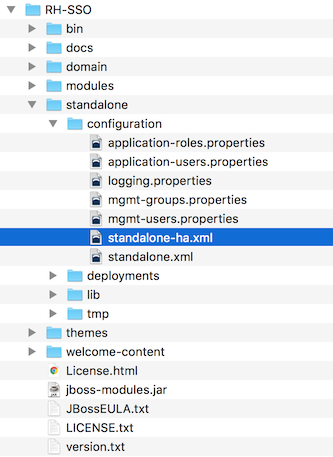
The distribution has a mostly pre-configured app server configuration file for running within a cluster. It has all the specific infrastructure settings for networking, databases, caches, and discovery. This file resides in …/standalone/configuration/standalone-ha.xml. There’s a few things missing from this configuration. You can’t run Red Hat Single Sign-On in a cluster without configuring a shared database connection. You also need to deploy some type of load balancer in front of the cluster. The clustering and database sections of this guide walk you through these things.
Standalone HA Config
Any changes you make to this file while the server is running will not take effect and may even be overwritten by the server. Instead use the command line scripting or the web console of JBoss EAP. See the JBoss EAP Configuration Guide for more information.
3.2.2. Standalone Clustered Boot Script
You use the same boot scripts to start Red Hat Single Sign-On as you do in standalone mode. The difference is that you pass in an additional flag to point to the HA config file.
Standalone Clustered Boot Scripts
To boot the server:
Linux/Unix
$ .../bin/standalone.sh --server-config=standalone-ha.xml
Windows
> ...\bin\standalone.bat --server-config=standalone-ha.xml
3.3. Domain Clustered Mode
Domain mode is a way to centrally manage and publish the configuration for your servers.
Running a cluster in standard mode can quickly become aggravating as the cluster grows in size. Every time you need to make a configuration change, you have to perform it on each node in the cluster. Domain mode solves this problem by providing a central place to store and publish configurations. It can be quite complex to set up, but it is worth it in the end. This capability is built into the JBoss EAP Application Server which Red Hat Single Sign-On derives from.
The guide will go over the very basics of domain mode. Detailed steps on how to set up domain mode in a cluster should be obtained from the JBoss EAP Configuration Guide.
Here are some of the basic concepts of running in domain mode.
- domain controller
- The domain controller is a process that is responsible for storing, managing, and publishing the general configuration for each node in the cluster. This process is the central point from which nodes in a cluster obtain their configuration.
- host controller
- The host controller is responsible for managing server instances on a specific machine. You configure it to run one or more server instances. The domain controller can also interact with the host controllers on each machine to manage the cluster. To reduce the number of running process, a domain controller also acts as a host controller on the machine it runs on.
- domain profile
- A domain profile is a named set of configuration that can be used by a server to boot from. A domain controller can define multiple domain profiles that are consumed by different servers.
- server group
- A server group is a collection of servers. They are managed and configured as one. You can assign a domain profile to a server group and every service in that group will use that domain profile as their configuration.
In domain mode, a domain controller is started on a master node. The configuration for the cluster resides in the domain controller. Next a host controller is started on each machine in the cluster. Each host controller deployment configuration specifies how many Red Hat Single Sign-On server instances will be started on that machine. When the host controller boots up, it starts as many Red Hat Single Sign-On server instances as it was configured to do. These server instances pull their configuration from the domain controller.
In some environments, such as Microsoft Azure, the domain mode is not applicable. Please consult the JBoss EAP documentation.
3.3.1. Domain Configuration
Various other chapters in this guide walk you through configuring various aspects like databases, HTTP network connections, caches, and other infrastructure related things. While standalone mode uses the standalone.xml file to configure these things, domain mode uses the …/domain/configuration/domain.xml configuration file. This is where the domain profile and server group for the Red Hat Single Sign-On server are defined.
domain.xml
Any changes you make to this file while the domain controller is running will not take effect and may even be overwritten by the server. Instead use the command line scripting or the web console of JBoss EAP. See the JBoss EAP Configuration Guide for more information.
Let’s look at some aspects of this domain.xml file. The auth-server-standalone
and auth-server-clustered
profile
XML blocks are where you are going to make the bulk of your configuration decisions. You’ll be configuring things here like network connections, caches, and database connections.
auth-server profile
<profiles> <profile name="auth-server-standalone"> ... </profile> <profile name="auth-server-clustered"> ... </profile>
The auth-server-standalone
profile is a non-clustered setup. The auth-server-clustered
profile is the clustered setup.
If you scroll down further, you’ll see various socket-binding-groups
defined.
socket-binding-groups
<socket-binding-groups> <socket-binding-group name="standard-sockets" default-interface="public"> ... </socket-binding-group> <socket-binding-group name="ha-sockets" default-interface="public"> ... </socket-binding-group> <!-- load-balancer-sockets should be removed in production systems and replaced with a better software or hardware based one --> <socket-binding-group name="load-balancer-sockets" default-interface="public"> ... </socket-binding-group> </socket-binding-groups>
This configration defines the default port mappings for various connectors that are opened with each Red Hat Single Sign-On server instance. Any value that contains ${…}
is a value that can be overridden on the command line with the -D
switch, i.e.
$ domain.sh -Djboss.http.port=80
The definition of the server group for Red Hat Single Sign-On resides in the server-groups
XML block. It specifies the domain profile that is used (default
) and also some default boot arguments for the Java VM when the host controller boots an instance. It also binds a socket-binding-group
to the server group.
server group
<server-groups> <!-- load-balancer-group should be removed in production systems and replaced with a better software or hardware based one --> <server-group name="load-balancer-group" profile="load-balancer"> <jvm name="default"> <heap size="64m" max-size="512m"/> </jvm> <socket-binding-group ref="load-balancer-sockets"/> </server-group> <server-group name="auth-server-group" profile="auth-server-clustered"> <jvm name="default"> <heap size="64m" max-size="512m"/> </jvm> <socket-binding-group ref="ha-sockets"/> </server-group> </server-groups>
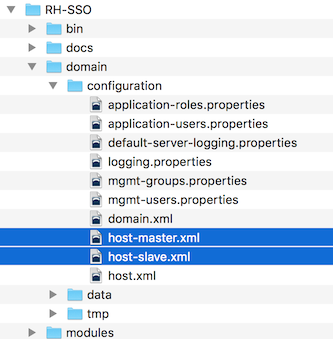
3.3.2. Host Controller Configuration
Red Hat Single Sign-On comes with two host controller configuration files that reside in the …/domain/configuration/ directory: host-master.xml and host-slave.xml. host-master.xml is configured to boot up a domain controller, a load balancer, and one Red Hat Single Sign-On server instance. host-slave.xml is configured to talk to the domain controller and boot up one Red Hat Single Sign-On server instance.
The load balancer is not a required service. It exists so that you can easily test drive clustering on your development machine. While usable in production, you have the option of replacing it if you have a different hardware or software based load balancer you want to use.
Host Controller Config
To disable the load balancer server instance, edit host-master.xml and comment out or remove the "load-balancer"
entry.
<servers> <!-- remove or comment out next line --> <server name="load-balancer" group="loadbalancer-group"/> ... </servers>
Another interesting thing to note about this file is the declaration of the authentication server instance. It has a port-offset
setting. Any network port defined in the domain.xml socket-binding-group
or the server group will have the value of port-offset
added to it. For this example domain setup we do this so that ports opened by the load balancer server don’t conflict with the authentication server instance that is started.
<servers> ... <server name="server-one" group="auth-server-group" auto-start="true"> <socket-bindings port-offset="150"/> </server> </servers>
3.3.3. Server Instance Working Directories
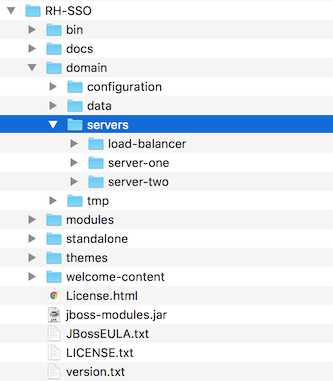
Each Red Hat Single Sign-On server instance defined in your host files creates a working directory under …/domain/servers/{SERVER NAME}. Additional configuration can be put there, and any temporary, log, or data files the server instance needs or creates go there too. The structure of these per server directories ends up looking like any other JBoss EAP booted server.
Working Directories
3.3.4. Domain Boot Script
When running the server in domain mode, there is a specific script you need to run to boot the server depending on your operating system. These scripts live in the bin/ directory of the server distribution.
Domain Boot Script
To boot the server:
Linux/Unix
$ .../bin/domain.sh --host-config=host-master.xml
Windows
> ...\bin\domain.bat --host-config=host-master.xml
When running the boot script you will need to pass in the host controlling configuration file you are going to use via the --host-config
switch.
3.3.5. Clustered Domain Example
You can test drive clustering using the out-of-the-box domain.xml configuration. This example domain is meant to run on one machine and boots up:
- a domain controller
- an HTTP load balancer
- 2 Red Hat Single Sign-On server instances
To simulate running a cluster on two machines, you’ll need to run the domain.sh
script twice to start two separate host controllers. The first will be the master host controller which will start a domain controller, an HTTP load balancer, and one Red Hat Single Sign-On authentication server instance. The second will be a slave host controller that only starts up an authentication server instance.
3.3.5.1. Setup Slave Connection to Domain Controller
Before you can boot things up though, you have to configure the slave host controller so that it can talk securely to the domain controller. If you do not do this, then the slave host will not be able to obtain the centralized configuration from the domain controller. To set up a secure connection, you have to create a server admin user and a secret that will be shared between the master and the slave. You do this by running the …/bin/add-user.sh
script.
When you run the script select Management User
and answer yes
when it asks you if the new user is going to be used for one AS process to connect to another. This will generate a secret that you’ll need to cut and paste into the …/domain/configuration/host-slave.xml file.
Add App Server Admin
$ add-user.sh What type of user do you wish to add? a) Management User (mgmt-users.properties) b) Application User (application-users.properties) (a): a Enter the details of the new user to add. Using realm 'ManagementRealm' as discovered from the existing property files. Username : admin Password recommendations are listed below. To modify these restrictions edit the add-user.properties configuration file. - The password should not be one of the following restricted values {root, admin, administrator} - The password should contain at least 8 characters, 1 alphabetic character(s), 1 digit(s), 1 non-alphanumeric symbol(s) - The password should be different from the username Password : Re-enter Password : What groups do you want this user to belong to? (Please enter a comma separated list, or leave blank for none)[ ]: About to add user 'admin' for realm 'ManagementRealm' Is this correct yes/no? yes Added user 'admin' to file '/.../standalone/configuration/mgmt-users.properties' Added user 'admin' to file '/.../domain/configuration/mgmt-users.properties' Added user 'admin' with groups to file '/.../standalone/configuration/mgmt-groups.properties' Added user 'admin' with groups to file '/.../domain/configuration/mgmt-groups.properties' Is this new user going to be used for one AS process to connect to another AS process? e.g. for a slave host controller connecting to the master or for a Remoting connection for server to server EJB calls. yes/no? yes To represent the user add the following to the server-identities definition <secret value="bWdtdDEyMyE=" />
The add-user.sh does not add user to Red Hat Single Sign-On server but to the underlying JBoss Enterprise Application Platform. The credentials used and generated in the above script are only for example purpose. Please use the ones generated on your system.
Next, cut and paste the secret value into the …/domain/configuration/host-slave.xml file as follows:
<management> <security-realms> <security-realm name="ManagementRealm"> <server-identities> <secret value="bWdtdDEyMyE="/> </server-identities>
You will also need to add the username of the created user in the …/domain/configuration/host-slave.xml file:
<remote security-realm="ManagementRealm" username="admin">
3.3.5.2. Run the Boot Scripts
Since we’re simulating a two node cluster on one development machine, you’ll run the boot script twice:
Boot up master
$ domain.sh --host-config=host-master.xml
Boot up slave
$ domain.sh --host-config=host-slave.xml
To try it out, open your browser and go to http://localhost:8080/auth.
3.4. Cross-Datacenter Replication Mode
Cross-Datacenter Replication Mode is Technology Preview and is not fully supported.
Cross-Datacenter Replication mode lets you run Red Hat Single Sign-On in a cluster across multiple data centers, most typically using data center sites that are in different geographic regions. When using this mode, each data center will have its own cluster of Red Hat Single Sign-On servers.
This documentation will refer to the following example architecture diagram to illustrate and describe a simple Cross-Datacenter Replication use case.
Example Architecture Diagram
3.4.1. Prerequisites
As this is an advanced topic, we recommend you first read the following, which provide valuable background knowledge:
- Clustering with Red Hat Single Sign-On When setting up for Cross-Datacenter Replication, you will use more independent Red Hat Single Sign-On clusters, so you must understand how a cluster works and the basic concepts and requirements such as load balancing, shared databases, and multicasting.
- Red Hat Data Grid Cross-Datacenter Replication Red Hat Single Sign-On uses Red Hat Data Grid (RHDG) for the replication of data between the data centers.
3.4.2. Technical details
This section provides an introduction to the concepts and details of how Red Hat Single Sign-On Cross-Datacenter Replication is accomplished.
Data
Red Hat Single Sign-On is stateful application. It uses the following as data sources:
- A database is used to persist permanent data, such as user information.
- An Infinispan cache is used to cache persistent data from the database and also to save some short-lived and frequently-changing metadata, such as for user sessions. Infinispan is usually much faster than a database, however the data saved using Infinispan are not permanent and is not expected to persist across cluster restarts.
In our example architecture, there are two data centers called site1
and site2
. For Cross-Datacenter Replication, we must make sure that both sources of data work reliably and that Red Hat Single Sign-On servers from site1
are eventually able to read the data saved by Red Hat Single Sign-On servers on site2
.
Based on the environment, you have the option to decide if you prefer:
-
Reliability - which is typically used in Active/Active mode. Data written on
site1
must be visible immediately onsite2
. -
Performance - which is typically used in Active/Passive mode. Data written on
site1
does not need to be visible immediately onsite2
. In some cases, the data may not be visible onsite2
at all.
For more details, see Section 3.4.4, “Modes”.
3.4.3. Request processing
An end user’s browser sends an HTTP request to the front end load balancer. This load balancer is usually HTTPD or WildFly with mod_cluster, NGINX, HA Proxy, or perhaps some other kind of software or hardware load balancer.
The load balancer then forwards the HTTP requests it receives to the underlying Red Hat Single Sign-On instances, which can be spread among multiple data centers. Load balancers typically offer support for sticky sessions, which means that the load balancer is able to always forward all HTTP requests from the same user to the same Red Hat Single Sign-On instance in same data center.
HTTP requests that are sent from client applications to the load balancer are called backchannel requests
. These are not seen by an end user’s browser and therefore can not be part of a sticky session between the user and the load balancer. For backchannel requests, the loadbalancer can forward the HTTP request to any Red Hat Single Sign-On instance in any data center. This is challenging as some OpenID Connect and some SAML flows require multiple HTTP requests from both the user and the application. Because we can not reliably depend on sticky sessions to force all the related requests to be sent to the same Red Hat Single Sign-On instance in the same data center, we must instead replicate some data across data centers, so the data are seen by subsequent HTTP requests during a particular flow.
3.4.4. Modes
According your requirements, there are two basic operating modes for Cross-Datacenter Replication:
-
Active/Passive - Here the users and client applications send the requests just to the Red Hat Single Sign-On nodes in just a single data center. The second data center is used just as a
backup
for saving the data. In case of the failure in the main data center, the data can be usually restored from the second data center. -
Active/Active - Here the users and client applications send the requests to the Red Hat Single Sign-On nodes in both data centers. It means that data need to be visible immediately on both sites and available to be consumed immediately from Red Hat Single Sign-On servers on both sites. This is especially true if Red Hat Single Sign-On server writes some data on
site1
, and it is required that the data are available immediately for reading by Red Hat Single Sign-On servers onsite2
immediately after the write onsite1
is finished.
The active/passive mode is better for performance. For more information about how to configure caches for either mode, see: Section 3.4.15, “SYNC or ASYNC backups”.
3.4.5. Database
Red Hat Single Sign-On uses a relational database management system (RDBMS) to persist some metadata about realms, clients, users, and so on. See this chapter of the server installation guide for more details. In a Cross-Datacenter Replication setup, we assume that either both data centers talk to the same database or that every data center has its own database node and both database nodes are synchronously replicated across the data centers. In both cases, it is required that when a Red Hat Single Sign-On server on site1
persists some data and commits the transaction, those data are immediately visible by subsequent DB transactions on site2
.
Details of DB setup are out-of-scope for Red Hat Single Sign-On, however many RDBMS vendors like MariaDB and Oracle offer replicated databases and synchronous replication. We test Red Hat Single Sign-On with these vendors:
- Oracle Database 19c RAC
- Galera 3.12 cluster for MariaDB server version 10.1.19-MariaDB
3.4.6. Infinispan caches
This section begins with a high level description of the Infinispan caches. More details of the cache setup follow.
Authentication sessions
In Red Hat Single Sign-On we have the concept of authentication sessions. There is a separate Infinispan cache called authenticationSessions
used to save data during authentication of particular user. Requests from this cache usually involve only a browser and the Red Hat Single Sign-On server, not the application. Here we can rely on sticky sessions and the authenticationSessions
cache content does not need to be replicated across data centers, even if you are in Active/Active mode.
Caching and invalidation of persistent data
Red Hat Single Sign-On uses Infinispan to cache persistent data to avoid many unnecessary requests to the database. Caching improves performance, however it adds an additional challenge. When some Red Hat Single Sign-On server updates any data, all other Red Hat Single Sign-On servers in all data centers need to be aware of it, so they invalidate particular data from their caches. Red Hat Single Sign-On uses local Infinispan caches called realms
, users
, and authorization
to cache persistent data.
We use a separate cache, work
, which is replicated across all data centers. The work cache itself does not cache any real data. It is used only for sending invalidation messages between cluster nodes and data centers. In other words, when data is updated, such as the user john
, the Red Hat Single Sign-On node sends the invalidation message to all other cluster nodes in the same data center and also to all other data centers. After receiving the invalidation notice, every node then invalidates the appropriate data from their local cache.
User sessions
There are Infinispan caches called sessions
, clientSessions
, offlineSessions
, and offlineClientSessions
, all of which usually need to be replicated across data centers. These caches are used to save data about user sessions, which are valid for the length of a user’s browser session. The caches must handle the HTTP requests from the end user and from the application. As described above, sticky sessions can not be reliably used in this instance, but we still want to ensure that subsequent HTTP requests can see the latest data. For this reason, the data are usually replicated across data centers.
Brute force protection
Finally the loginFailures
cache is used to track data about failed logins, such as how many times the user john
entered a bad password. The details are described here. It is up to the admin whether this cache should be replicated across data centers. To have an accurate count of login failures, the replication is needed. On the other hand, not replicating this data can save some performance. So if performance is more important than accurate counts of login failures, the replication can be avoided.
For more detail about how caches can be configured see Section 3.4.14, “Tuning the RHDG cache configuration”.
3.4.7. Communication details
Red Hat Single Sign-On uses multiple, separate clusters of Infinispan caches. Every Red Hat Single Sign-On node is in the cluster with the other Red Hat Single Sign-On nodes in same data center, but not with the Red Hat Single Sign-On nodes in different data centers. A Red Hat Single Sign-On node does not communicate directly with the Red Hat Single Sign-On nodes from different data centers. Red Hat Single Sign-On nodes use external RHDG servers for communication across data centers. This is done using the Infinispan Hot Rod protocol.
The Infinispan caches on the Red Hat Single Sign-On side use remoteStore
configuration to offload data to a remote RHDG cluster. RHDG clusters in separate data centers then replicate that data to ensure it is backed up.
The receiving RHDG server notifies the Red Hat Single Sign-On servers in its cluster through Client Listeners, which are a feature of the Hot Rod protocol. Red Hat Single Sign-On nodes on site2
then update their Infinispan caches and the particular user session is also visible on Red Hat Single Sign-On nodes on site2
.
See the Example Architecture Diagram for more details.
3.4.8. Setting Up Cross DC with RHDG 8.1
Use the following procedures for RHDG 8.1 to perform a basic setup of Cross-Datacenter replication.
This example for RHDG 8.1 involves two data centers, site1
and site2
. Each data center consists of 1 RHDG server and 2 Red Hat Single Sign-On servers. We will end up with 2 RHDG servers and 4 Red Hat Single Sign-On servers in total.
-
Site1
consists of RHDG server,server1
, and 2 Red Hat Single Sign-On servers,node11
andnode12
. -
Site2
consists of RHDG server,server2
, and 2 Red Hat Single Sign-On servers,node21
andnode22
. -
RHDG servers
server1
andserver2
are connected to each other through the RELAY2 protocol andbackup
based RHDG caches in a similar way as described in the RHDG documentation. -
Red Hat Single Sign-On servers
node11
andnode12
form a cluster with each other, but they do not communicate directly with any server insite2
. They communicate with the Infinispan serverserver1
using the Hot Rod protocol (Remote cache). See Section 3.4.7, “Communication details” for more information. -
The same details apply for
node21
andnode22
. They cluster with each other and communicate only withserver2
server using the Hot Rod protocol.
Our example setup assumes that the four Red Hat Single Sign-On servers talk to the same database. In production, we recommend that you use separate synchronously replicated databases across data centers as described in Section 3.4.5, “Database”.
3.4.8.1. Setting Up RHDG Servers
For Cross-Datacenter replication, you start by creating remote RHDG clusters that can back up Red Hat Single Sign-On data.
Prerequisites
- Download and install RHDG Server 8.1.
RHDG Server 8.1 requires Java 11.
Procedure
Create a user to authenticate client connections from RHDG, for example:
$ bin/cli.sh user create myuser -p "qwer1234!"
NoteYou specify these credentials in the Hot Rod client configuration when you create remote caches on Red Hat Single Sign-On.
Create an SSL keystore and truststore to secure connections between RHDG and Red Hat Single Sign-On, for example:
Create a keystore to provide an SSL identity to your RHDG cluster
keytool -genkey -alias server -keyalg RSA -keystore server.jks -keysize 2048
Export an SSL certificate from the keystore.
keytool -exportcert -keystore server.jks -alias server -file server.crt
Import the SSL certificate into a truststore that Red Hat Single Sign-On can use to verify the SSL identity for RHDG.
keytool -importcert -keystore truststore.jks -alias server -file server.crt
Remove
server.crt
.rm server.crt
3.4.8.2. Configuring RHDG Clusters
Configure RHDG clusters to replicate Red Hat Single Sign-On data across data centers.
Prerequisites
- Install and set up RHDG Server.
Procedure
Open
infinispan.xml
for editing.By default, RHDG Server uses
server/conf/infinispan.xml
for static configuration such as cluster transport and security mechanisms.Create a stack that uses TCPPING as the cluster discovery protocol.
<stack name="global-cluster" extends="tcp"> <!-- Remove MPING protocol from the stack and add TCPPING --> <TCPPING initial_hosts="server1[7800],server2[7800]" 1 stack.combine="REPLACE" stack.position="MPING"/> </stack>
- 1
- Lists the host names for
server1
andserver2
.
Configure the RHDG cluster transport to perform Cross-Datacenter replication.
Add the RELAY2 protocol to a JGroups stack.
<jgroups> <stack name="xsite" extends="udp"> 1 <relay.RELAY2 site="site1" 2 max_site_masters="1000"/> 3 <remote-sites default-stack="global-cluster"> 4 <remote-site name="site1"/> <remote-site name="site2"/> </remote-sites> </stack> </jgroups>
- 1
- Creates a stack named
xsite
that extends the default UDP cluster transport. - 2
- Adds the RELAY2 protocol and names the cluster you are configuring as
site1
. The site name must be unique to each RHDG cluster. - 3
- Sets 1000 as the number of relay nodes for the cluster. You should set a value that is equal to or greater than the maximum number of nodes in your RHDG cluster.
- 4
- Names all RHDG clusters that backup caches with RHDG data and uses the default TCP stack for inter-cluster transport.
Configure the RHDG cluster transport to use the stack.
<cache-container name="default" statistics="true"> <transport cluster="${infinispan.cluster.name:cluster}" stack="xsite"/> 1 </cache-container>
- 1
- Uses the
xsite
stack for the cluster.
Configure the keystore as an SSL identity in the server security realm.
<server-identities> <ssl> <keystore path="server.jks" 1 relative-to="infinispan.server.config.path" keystore-password="password" 2 alias="server" /> 3 </ssl> </server-identities>
Configure the authentication mechanism for the Hot Rod endpoint.
<endpoints socket-binding="default"> <hotrod-connector name="hotrod"> <authentication> <sasl mechanisms="SCRAM-SHA-512" 1 server-name="infinispan" /> 2 </authentication> </hotrod-connector> <rest-connector name="rest"/> </endpoints>
- 1
- Configures the SASL authentication mechanism for the Hot Rod endpoint. SCRAM-SHA-512 is the default SASL mechanism for Hot Rod. However you can use whatever is appropriate for your environment, such as GSSAPI.
- 2
- Defines the name that RHDG servers present to clients. You specify this name in the Hot Rod client configuration when you set up Red Hat Single Sign-On.
Create a cache template.
NoteAdd the cache template to
infinispan.xml
on each node in the RHDG cluster.<cache-container ... > <replicated-cache-configuration name="sessions-cfg" 1 mode="SYNC"> 2 <locking acquire-timeout="0" /> 3 <backups> <backup site="site2" strategy="SYNC" /> 4 </backups> </replicated-cache-configuration> </cache-container>
Start RHDG server1.
./server.sh -c infinispan.xml -b PUBLIC_IP_ADDRESS -k PUBLIC_IP_ADDRESS -Djgroups.mcast_addr=228.6.7.10
Start RHDG server2.
./server.sh -c infinispan.xml -b PUBLIC_IP_ADDRESS -k PUBLIC_IP_ADDRESS -Djgroups.mcast_addr=228.6.7.11
Check RHDG server logs to verify the clusters form cross-site views.
INFO [org.infinispan.XSITE] (jgroups-5,${server.hostname}) ISPN000439: Received new x-site view: [site1] INFO [org.infinispan.XSITE] (jgroups-7,${server.hostname}) ISPN000439: Received new x-site view: [site1, site2]
3.4.8.3. Creating Infinispan Caches
Create the Infinispan caches that Red Hat Single Sign-On requires.
We recommend that you create caches on RHDG clusters at runtime rather than adding caches to infinispan.xml
. This strategy ensures that your caches are automatically synchronized across the cluster and permanently stored.
The following procedure uses the RHDG Command Line Interface (CLI) to create all the required caches in a single batch command.
Prerequisites
- Configure your RHDG clusters.
Procedure
Create a batch file that contains caches, for example:
cat > /tmp/caches.batch<<EOF echo "creating caches..." create cache work --template=sessions-cfg create cache sessions --template=sessions-cfg create cache clientSessions --template=sessions-cfg create cache offlineSessions --template=sessions-cfg create cache offlineClientSessions --template=sessions-cfg create cache actionTokens --template=sessions-cfg create cache loginFailures --template=sessions-cfg echo "verifying caches" ls caches EOF
Create the caches with the CLI.
$ bin/cli.sh -c https://server1:11222 --trustall -f /tmp/caches.batch
NoteInstead of the
--trustall
argument you can specify the truststore with the-t
argument and the truststore password with the-s
argument.- Create the caches on the other site.
3.4.8.4. Configuring Remote Cache Stores on Red Hat Single Sign-On
After you set up remote RHDG clusters, you configure the Infinispan subsystem on Red Hat Single Sign-On to externalize data to those clusters through remote stores.
Prerequisites
- Set up remote RHDG clusters for cross-site configuration.
- Create a truststore that contains the SSL certificate with the RHDG Server identity.
Procedure
- Add the truststore to the Red Hat Single Sign-On deployment.
Create a socket binding that points to your RHDG cluster.
<outbound-socket-binding name="remote-cache"> 1 <remote-destination host="${remote.cache.host:server_hostname}" 2 port="${remote.cache.port:11222}"/> 3 </outbound-socket-binding>
Add the
org.keycloak.keycloak-model-infinispan
module to thekeycloak
cache container in the Infinispan subsystem.<subsystem xmlns="urn:jboss:domain:infinispan:11.0"> <cache-container name="keycloak" module="org.keycloak.keycloak-model-infinispan"/>
Update the
work
cache in the Infinispan subsystem so it has the following configuration:<replicated-cache name="work"> 1 <remote-store cache="work" 2 remote-servers="remote-cache" 3 passivation="false" fetch-state="false" purge="false" preload="false" shared="true"> <property name="rawValues">true</property> <property name="marshaller">org.keycloak.cluster.infinispan.KeycloakHotRodMarshallerFactory</property> <property name="infinispan.client.hotrod.auth_username">myuser</property> <property name="infinispan.client.hotrod.auth_password">qwer1234!</property> <property name="infinispan.client.hotrod.auth_realm">default</property> <property name="infinispan.client.hotrod.auth_server_name">infinispan</property> <property name="infinispan.client.hotrod.sasl_mechanism">SCRAM-SHA-512</property> <property name="infinispan.client.hotrod.trust_store_file_name">/path/to/truststore.jks</property> <property name="infinispan.client.hotrod.trust_store_type">JKS</property> <property name="infinispan.client.hotrod.trust_store_password">password</property> </remote-store> </replicated-cache>
The preceding cache configuration includes recommended settings for RHDG caches. Hot Rod client configuration properties specify the RHDG user credentials and SSL keystore and truststore details.
Refer to the RHDG documentation for descriptions of each property.
Add distributed caches to the Infinispan subsystem for each of the following caches:
- sessions
- clientSessions
- offlineSessions
- offlineClientSessions
- actionTokens
loginFailures
For example, add a cache named
sessions
with the following configuration:<distributed-cache name="sessions" 1 owners="1"> 2 <remote-store cache="sessions" 3 remote-servers="remote-cache" 4 passivation="false" fetch-state="false" purge="false" preload="false" shared="true"> <property name="rawValues">true</property> <property name="marshaller">org.keycloak.cluster.infinispan.KeycloakHotRodMarshallerFactory</property> <property name="infinispan.client.hotrod.auth_username">myuser</property> <property name="infinispan.client.hotrod.auth_password">qwer1234!</property> <property name="infinispan.client.hotrod.auth_realm">default</property> <property name="infinispan.client.hotrod.auth_server_name">infinispan</property> <property name="infinispan.client.hotrod.sasl_mechanism">SCRAM-SHA-512</property> <property name="infinispan.client.hotrod.trust_store_file_name">/path/to/truststore.jks</property> <property name="infinispan.client.hotrod.trust_store_type">JKS</property> <property name="infinispan.client.hotrod.trust_store_password">password</property> </remote-store> </distributed-cache>
-
Copy the
NODE11
to 3 other directories referred later asNODE12
,NODE21
andNODE22
. Start
NODE11
:cd NODE11/bin ./standalone.sh -c standalone-ha.xml -Djboss.node.name=node11 -Djboss.site.name=site1 \ -Djboss.default.multicast.address=234.56.78.1 -Dremote.cache.host=server1 \ -Djava.net.preferIPv4Stack=true -b PUBLIC_IP_ADDRESS
If you notice the following warning messages in logs, you can safely ignore them:
WARN [org.infinispan.CONFIG] (MSC service thread 1-5) ISPN000292: Unrecognized attribute 'infinispan.client.hotrod.auth_password'. Please check your configuration. Ignoring! WARN [org.infinispan.CONFIG] (MSC service thread 1-5) ISPN000292: Unrecognized attribute 'infinispan.client.hotrod.auth_username'. Please check your configuration. Ignoring!
Start
NODE12
:cd NODE12/bin ./standalone.sh -c standalone-ha.xml -Djboss.node.name=node12 -Djboss.site.name=site1 \ -Djboss.default.multicast.address=234.56.78.1 -Dremote.cache.host=server1 \ -Djava.net.preferIPv4Stack=true -b PUBLIC_IP_ADDRESS
The cluster nodes should be connected. Something like this should be in the log of both NODE11 and NODE12:
Received new cluster view for channel keycloak: [node11|1] (2) [node11, node12]
NoteThe channel name in the log might be different.
Start
NODE21
:cd NODE21/bin ./standalone.sh -c standalone-ha.xml -Djboss.node.name=node21 -Djboss.site.name=site2 \ -Djboss.default.multicast.address=234.56.78.2 -Dremote.cache.host=server2 \ -Djava.net.preferIPv4Stack=true -b PUBLIC_IP_ADDRESS
It shouldn’t be connected to the cluster with
NODE11
andNODE12
, but to a separate one:Received new cluster view for channel keycloak: [node21|0] (1) [node21]
Start
NODE22
:cd NODE22/bin ./standalone.sh -c standalone-ha.xml -Djboss.node.name=node22 -Djboss.site.name=site2 \ -Djboss.default.multicast.address=234.56.78.2 -Dremote.cache.host=server2 \ -Djava.net.preferIPv4Stack=true -b PUBLIC_IP_ADDRESS
It should be in cluster with
NODE21
:Received new cluster view for channel keycloak: [node21|1] (2) [node21, node22]
NoteThe channel name in the log might be different.
Test:
-
Go to
http://node11:8080/auth/
and create the initial admin user. -
Go to
http://node11:8080/auth/admin
and login as admin to admin console. -
Open a second browser and go to any of nodes
http://node12:8080/auth/admin
orhttp://node21:8080/auth/admin
orhttp://node22:8080/auth/admin
. After login, you should be able to see the same sessions in tabSessions
of particular user, client or realm on all 4 servers. - After making a change in the Red Hat Single Sign-On Admin Console, such as modifying a user or a realm, that change should be immediately visible on any of the four nodes. Caches should be properly invalidated everywhere.
Check server.logs if needed. After login or logout, the message like this should be on all the nodes
NODEXY/standalone/log/server.log
:2017-08-25 17:35:17,737 DEBUG [org.keycloak.models.sessions.infinispan.remotestore.RemoteCacheSessionListener] (Client-Listener-sessions-30012a77422542f5) Received event from remote store. Event 'CLIENT_CACHE_ENTRY_REMOVED', key '193489e7-e2bc-4069-afe8-f1dfa73084ea', skip 'false'
-
Go to
3.4.9. Setting up Cross DC with RHDG 7.3
This example for RHDG 7.3 involves two data centers, site1
and site2
. Each data center consists of 1 RHDG server and 2 Red Hat Single Sign-On servers. We will end up with 2 RHDG servers and 4 Red Hat Single Sign-On servers in total.
-
Site1
consists of RHDG server,server1
, and 2 Red Hat Single Sign-On servers,node11
andnode12
. -
Site2
consists of RHDG server,server2
, and 2 Red Hat Single Sign-On servers,node21
andnode22
. -
RHDG servers
server1
andserver2
are connected to each other through the RELAY2 protocol andbackup
based RHDG caches in a similar way as described in the RHDG documentation. -
Red Hat Single Sign-On servers
node11
andnode12
form a cluster with each other, but they do not communicate directly with any server insite2
. They communicate with the Infinispan serverserver1
using the Hot Rod protocol (Remote cache). See Section 3.4.7, “Communication details” for the details. -
The same details apply for
node21
andnode22
. They cluster with each other and communicate only withserver2
server using the Hot Rod protocol.
Our example setup assumes all that all 4 Red Hat Single Sign-On servers talk to the same database. In production, it is recommended to use separate synchronously replicated databases across data centers as described in Section 3.4.5, “Database”.
3.4.9.1. Setting up the RHDG server
Follow these steps to set up the RHDG server:
-
Download RHDG 7.3 server and unzip to a directory you choose. This location will be referred in later steps as
SERVER1_HOME
. Change those things in the
SERVER1_HOME/server/conf/infinispan-xsite.xml
in the configuration of JGroups subsystem:Add the
xsite
channel, which will usetcp
stack, underchannels
element:<channels default="cluster"> <channel name="cluster"/> <channel name="xsite" stack="tcp"/> </channels>
Add a
relay
element to the end of theudp
stack. We will configure it in a way that our site issite1
and the other site, where we will backup, issite2
:<stack name="udp"> ... <relay site="site1"> <remote-site name="site2" channel="xsite"/> <property name="relay_multicasts">false</property> </relay> </stack>
Configure the
tcp
stack to useTCPPING
protocol instead ofMPING
. Remove theMPING
element and replace it with theTCPPING
. Theinitial_hosts
element points to the hostsserver1
andserver2
:<stack name="tcp"> <transport type="TCP" socket-binding="jgroups-tcp"/> <protocol type="TCPPING"> <property name="initial_hosts">server1[7600],server2[7600]</property> <property name="ergonomics">false</property> </protocol> <protocol type="MERGE3"/> ... </stack>
NoteThis is just an example setup to have things quickly running. In production, you are not required to use
tcp
stack for the JGroupsRELAY2
, but you can configure any other stack. For example, you could use the default udp stack, if the network between your data centers is able to support multicast. Just make sure that the RHDG and Red Hat Single Sign-On clusters are mutually indiscoverable. Similarly, you are not required to useTCPPING
as discovery protocol. And in production, you probably won’t useTCPPING
due it’s static nature. Finally, site names are also configurable. Details of this more-detailed setup are out-of-scope of the Red Hat Single Sign-On documentation. See the RHDG documentation and JGroups documentation for more details.
Add this into
SERVER1_HOME/standalone/configuration/clustered.xml
under cache-container namedclustered
:<cache-container name="clustered" default-cache="default" statistics="true"> ... <replicated-cache-configuration name="sessions-cfg" mode="SYNC" start="EAGER" batching="false"> <transaction mode="NON_DURABLE_XA" locking="PESSIMISTIC"/> <locking acquire-timeout="0" /> <backups> <backup site="site2" failure-policy="FAIL" strategy="SYNC" enabled="true"> <take-offline min-wait="60000" after-failures="3" /> </backup> </backups> </replicated-cache-configuration> <replicated-cache name="work" configuration="sessions-cfg"/> <replicated-cache name="sessions" configuration="sessions-cfg"/> <replicated-cache name="clientSessions" configuration="sessions-cfg"/> <replicated-cache name="offlineSessions" configuration="sessions-cfg"/> <replicated-cache name="offlineClientSessions" configuration="sessions-cfg"/> <replicated-cache name="actionTokens" configuration="sessions-cfg"/> <replicated-cache name="loginFailures" configuration="sessions-cfg"/> </cache-container>
NoteDetails about the configuration options inside
replicated-cache-configuration
are explained in Section 3.4.14, “Tuning the RHDG cache configuration”, which includes information about tweaking some of those options.Some RHDG server releases require authorization before accessing protected caches over network.
NoteYou should not see any issue if you use recommended RHDG 7.3 server and this step can (and should) be ignored. Issues related to authorization may exist just for some other versions of RHDG server.
Red Hat Single Sign-On requires updates to
___script_cache
cache containing scripts. If you get errors accessing this cache, you will need to set up authorization inclustered.xml
configuration as described below:In the
<management>
section, add a security realm:<management> <security-realms> ... <security-realm name="AllowScriptManager"> <authentication> <users> <user username="___script_manager"> <password>not-so-secret-password</password> </user> </users> </authentication> </security-realm> </security-realms>
In the server core subsystem, add
<security>
as below:<subsystem xmlns="urn:infinispan:server:core:8.4"> <cache-container name="clustered" default-cache="default" statistics="true"> <security> <authorization> <identity-role-mapper/> <role name="___script_manager" permissions="ALL"/> </authorization> </security> ...
In the endpoint subsystem, add authentication configuration to Hot Rod connector:
<subsystem xmlns="urn:infinispan:server:endpoint:8.1"> <hotrod-connector cache-container="clustered" socket-binding="hotrod"> ... <authentication security-realm="AllowScriptManager"> <sasl mechanisms="DIGEST-MD5" qop="auth" server-name="keycloak-jdg-server"> <policy> <no-anonymous value="false" /> </policy> </sasl> </authentication>
-
Copy the server to the second location, which will be referred to later as
SERVER2_HOME
. In the
SERVER2_HOME/standalone/configuration/clustered.xml
exchangesite1
withsite2
and vice versa, both in the configuration ofrelay
in the JGroups subsystem and in configuration ofbackups
in the cache-subsystem. For example:The
relay
element should look like this:<relay site="site2"> <remote-site name="site1" channel="xsite"/> <property name="relay_multicasts">false</property> </relay>
The
backups
element like this:<backups> <backup site="site1" .... ...
NoteThe PUBLIC_IP_ADDRESS below refers to the IP address or hostname, which can be used for your server to bind to. Note that every RHDG server and Red Hat Single Sign-On server needs to use different address. During example setup with all the servers running on the same host, you may need to add the option
-Djboss.bind.address.management=PUBLIC_IP_ADDRESS
as every server needs to use also different management interface. But this option usually should be omitted in production environments to avoid the ability for remote access to your server. For more information, see the JBoss EAP Configuration Guide.
Start server
server1
:cd SERVER1_HOME/bin ./standalone.sh -c clustered.xml -Djava.net.preferIPv4Stack=true \ -Djboss.default.multicast.address=234.56.78.99 \ -Djboss.node.name=server1 -b PUBLIC_IP_ADDRESS
Start server
server2
. There is a different multicast address, so theserver1
andserver2
servers are not directly clustered with each other; rather, they are just connected through the RELAY2 protocol, and the TCP JGroups stack is used for communication between them. The start up command looks like this:cd SERVER2_HOME/bin ./standalone.sh -c clustered.xml -Djava.net.preferIPv4Stack=true \ -Djboss.default.multicast.address=234.56.78.100 \ -Djboss.node.name=server2 -b PUBLIC_IP_ADDRESS
To verify that channel works at this point, you may need to use JConsole and connect either to the running
SERVER1
or theSERVER2
server. When you use the MBeanjgroups:type=protocol,cluster="cluster",protocol=RELAY2
and operationprintRoutes
, you should see output like this:site1 --> _server1:site1 site2 --> _server2:site2
When you use the MBean
jgroups:type=protocol,cluster="cluster",protocol=GMS
, you should see that the attribute member contains just single member:On
SERVER1
it should be like this:(1) server1
And on SERVER2 like this:
(1) server2
NoteIn production, you can have more RHDG servers in every data center. You just need to ensure that RHDG servers in same data center are using the same multicast address (In other words, the same
jboss.default.multicast.address
during startup). Then in jconsole inGMS
protocol view, you will see all the members of current cluster.
3.4.9.2. Setting up Red Hat Single Sign-On servers
-
Unzip Red Hat Single Sign-On server distribution to a location you choose. It will be referred to later as
NODE11
. Configure a shared database for KeycloakDS datasource. It is recommended to use MySQL or MariaDB for testing purposes. See Section 3.4.5, “Database” for more details.
In production you will likely need to have a separate database server in every data center and both database servers should be synchronously replicated to each other. In the example setup, we just use a single database and connect all 4 Red Hat Single Sign-On servers to it.
Edit
NODE11/standalone/configuration/standalone-ha.xml
:Add the attribute
site
to the JGroups UDP protocol:<stack name="udp"> <transport type="UDP" socket-binding="jgroups-udp" site="${jboss.site.name}"/>
Add this
module
attribute undercache-container
element of namekeycloak
:<cache-container name="keycloak" module="org.keycloak.keycloak-model-infinispan">
Add the
remote-store
underwork
cache:<replicated-cache name="work"> <remote-store cache="work" remote-servers="remote-cache" passivation="false" fetch-state="false" purge="false" preload="false" shared="true"> <property name="rawValues">true</property> <property name="marshaller">org.keycloak.cluster.infinispan.KeycloakHotRodMarshallerFactory</property> <property name="protocolVersion">2.6</property> </remote-store> </replicated-cache>
Add the
remote-store
like this undersessions
cache:<distributed-cache name="sessions" owners="1"> <remote-store cache="sessions" remote-servers="remote-cache" passivation="false" fetch-state="false" purge="false" preload="false" shared="true"> <property name="rawValues">true</property> <property name="marshaller">org.keycloak.cluster.infinispan.KeycloakHotRodMarshallerFactory</property> <property name="protocolVersion">2.6</property> </remote-store> </distributed-cache>
Do the same for
offlineSessions
,clientSessions
,offlineClientSessions
,loginFailures
, andactionTokens
caches (the only difference fromsessions
cache is thatcache
property value are different):<distributed-cache name="offlineSessions" owners="1"> <remote-store cache="offlineSessions" remote-servers="remote-cache" passivation="false" fetch-state="false" purge="false" preload="false" shared="true"> <property name="rawValues">true</property> <property name="marshaller">org.keycloak.cluster.infinispan.KeycloakHotRodMarshallerFactory</property> <property name="protocolVersion">2.6</property> </remote-store> </distributed-cache> <distributed-cache name="clientSessions" owners="1"> <remote-store cache="clientSessions" remote-servers="remote-cache" passivation="false" fetch-state="false" purge="false" preload="false" shared="true"> <property name="rawValues">true</property> <property name="marshaller">org.keycloak.cluster.infinispan.KeycloakHotRodMarshallerFactory</property> <property name="protocolVersion">2.6</property> </remote-store> </distributed-cache> <distributed-cache name="offlineClientSessions" owners="1"> <remote-store cache="offlineClientSessions" remote-servers="remote-cache" passivation="false" fetch-state="false" purge="false" preload="false" shared="true"> <property name="rawValues">true</property> <property name="marshaller">org.keycloak.cluster.infinispan.KeycloakHotRodMarshallerFactory</property> <property name="protocolVersion">2.6</property> </remote-store> </distributed-cache> <distributed-cache name="loginFailures" owners="1"> <remote-store cache="loginFailures" remote-servers="remote-cache" passivation="false" fetch-state="false" purge="false" preload="false" shared="true"> <property name="rawValues">true</property> <property name="marshaller">org.keycloak.cluster.infinispan.KeycloakHotRodMarshallerFactory</property> <property name="protocolVersion">2.6</property> </remote-store> </distributed-cache> <distributed-cache name="actionTokens" owners="2"> <object-memory size="-1"/> <expiration max-idle="-1" interval="300000"/> <remote-store cache="actionTokens" remote-servers="remote-cache" passivation="false" fetch-state="false" purge="false" preload="true" shared="true"> <property name="rawValues">true</property> <property name="marshaller">org.keycloak.cluster.infinispan.KeycloakHotRodMarshallerFactory</property> <property name="protocolVersion">2.6</property> </remote-store> </distributed-cache>
Add outbound socket binding for the remote store into
socket-binding-group
element configuration:<outbound-socket-binding name="remote-cache"> <remote-destination host="${remote.cache.host:localhost}" port="${remote.cache.port:11222}"/> </outbound-socket-binding>
-
The configuration of distributed cache
authenticationSessions
and other caches is left unchanged. Optionally enable DEBUG logging under the
logging
subsystem:<logger category="org.keycloak.cluster.infinispan"> <level name="DEBUG"/> </logger> <logger category="org.keycloak.connections.infinispan"> <level name="DEBUG"/> </logger> <logger category="org.keycloak.models.cache.infinispan"> <level name="DEBUG"/> </logger> <logger category="org.keycloak.models.sessions.infinispan"> <level name="DEBUG"/> </logger>
-
Copy the
NODE11
to 3 other directories referred later asNODE12
,NODE21
andNODE22
. Start
NODE11
:cd NODE11/bin ./standalone.sh -c standalone-ha.xml -Djboss.node.name=node11 -Djboss.site.name=site1 \ -Djboss.default.multicast.address=234.56.78.1 -Dremote.cache.host=server1 \ -Djava.net.preferIPv4Stack=true -b PUBLIC_IP_ADDRESS
Start
NODE12
:cd NODE12/bin ./standalone.sh -c standalone-ha.xml -Djboss.node.name=node12 -Djboss.site.name=site1 \ -Djboss.default.multicast.address=234.56.78.1 -Dremote.cache.host=server1 \ -Djava.net.preferIPv4Stack=true -b PUBLIC_IP_ADDRESS
The cluster nodes should be connected. Something like this should be in the log of both NODE11 and NODE12:
Received new cluster view for channel keycloak: [node11|1] (2) [node11, node12]
NoteThe channel name in the log might be different.
Start
NODE21
:cd NODE21/bin ./standalone.sh -c standalone-ha.xml -Djboss.node.name=node21 -Djboss.site.name=site2 \ -Djboss.default.multicast.address=234.56.78.2 -Dremote.cache.host=server2 \ -Djava.net.preferIPv4Stack=true -b PUBLIC_IP_ADDRESS
It shouldn’t be connected to the cluster with
NODE11
andNODE12
, but to separate one:Received new cluster view for channel keycloak: [node21|0] (1) [node21]
Start
NODE22
:cd NODE22/bin ./standalone.sh -c standalone-ha.xml -Djboss.node.name=node22 -Djboss.site.name=site2 \ -Djboss.default.multicast.address=234.56.78.2 -Dremote.cache.host=server2 \ -Djava.net.preferIPv4Stack=true -b PUBLIC_IP_ADDRESS
It should be in cluster with
NODE21
:Received new cluster view for channel keycloak: [node21|1] (2) [node21, node22]
NoteThe channel name in the log might be different.
Test:
-
Go to
http://node11:8080/auth/
and create the initial admin user. -
Go to
http://node11:8080/auth/admin
and login as admin to admin console. -
Open a second browser and go to any of nodes
http://node12:8080/auth/admin
orhttp://node21:8080/auth/admin
orhttp://node22:8080/auth/admin
. After login, you should be able to see the same sessions in tabSessions
of particular user, client or realm on all 4 servers. - After doing any change in Keycloak admin console (eg. update some user or some realm), the update should be immediately visible on any of 4 nodes as caches should be properly invalidated everywhere.
Check server.logs if needed. After login or logout, the message like this should be on all the nodes
NODEXY/standalone/log/server.log
:2017-08-25 17:35:17,737 DEBUG [org.keycloak.models.sessions.infinispan.remotestore.RemoteCacheSessionListener] (Client-Listener-sessions-30012a77422542f5) Received event from remote store. Event 'CLIENT_CACHE_ENTRY_REMOVED', key '193489e7-e2bc-4069-afe8-f1dfa73084ea', skip 'false'
-
Go to
3.4.10. Administration of Cross DC deployment
This section contains some tips and options related to Cross-Datacenter Replication.
-
When you run the Red Hat Single Sign-On server inside a data center, it is required that the database referenced in
KeycloakDS
datasource is already running and available in that data center. It is also necessary that the RHDG server referenced by theoutbound-socket-binding
, which is referenced from the Infinispan cacheremote-store
element, is already running. Otherwise the Red Hat Single Sign-On server will fail to start. -
Every data center can have more database nodes if you want to support database failover and better reliability. Refer to the documentation of your database and JDBC driver for the details how to set this up on the database side and how the
KeycloakDS
datasource on Keycloak side needs to be configured. - Every datacenter can have more RHDG servers running in the cluster. This is useful if you want some failover and better fault tolerance. The Hot Rod protocol used for communication between RHDG servers and Red Hat Single Sign-On servers has a feature that RHDG servers will automatically send new topology to the Red Hat Single Sign-On servers about the change in the RHDG cluster, so the remote store on Red Hat Single Sign-On side will know to which RHDG servers it can connect. Read the RHDG and WildFly documentation for more details.
-
It is highly recommended that a master RHDG server is running in every site before the Red Hat Single Sign-On servers in any site are started. As in our example, we started both
server1
andserver2
first, before all Red Hat Single Sign-On servers. If you still need to run the Red Hat Single Sign-On server and the backup site is offline, it is recommended to manually switch the backup site offline on the RHDG servers on your site, as described in Section 3.4.11, “Bringing sites offline and online”. If you do not manually switch the unavailable site offline, the first startup may fail or they may be some exceptions during startup until the backup site is taken offline automatically due the configured count of failed operations.
3.4.11. Bringing sites offline and online
For example, assume this scenario:
-
Site
site2
is entirely offline from thesite1
perspective. This means that all RHDG servers onsite2
are off or the network betweensite1
andsite2
is broken. -
You run Red Hat Single Sign-On servers and RHDG server
server1
in sitesite1
-
Someone logs in on a Red Hat Single Sign-On server on
site1
. -
The Red Hat Single Sign-On server from
site1
will try to write the session to the remote cache onserver1
server, which is supposed to backup data to theserver2
server in thesite2
. See Section 3.4.7, “Communication details” for more information. -
Server
server2
is offline or unreachable fromserver1
. So the backup fromserver1
toserver2
will fail. -
The exception is thrown in
server1
log and the failure will be propagated fromserver1
server to Red Hat Single Sign-On servers as well because the defaultFAIL
backup failure policy is configured. See Backup failure policy for details around the backup policies. - The error will happen on Red Hat Single Sign-On side too and user may not be able to finish his login.
According to your environment, it may be more or less probable that the network between sites is unavailable or temporarily broken (split-brain). In case this happens, it is good that RHDG servers on site1
are aware of the fact that RHDG servers on site2
are unavailable, so they will stop trying to reach the servers in the server2
site and the backup failures won’t happen. This is called Take site offline
.
Take site offline
There are 2 ways to take the site offline.
Manually by admin - Admin can use the jconsole
or other tool and run some JMX operations to manually take the particular site offline. This is useful especially if the outage is planned. With jconsole
or CLI, you can connect to the server1
server and take the site2
offline. More details about this are available in the RHDG documentation.
These steps usually need to be done for all the Red Hat Single Sign-On caches mentioned in Section 3.4.15, “SYNC or ASYNC backups”.
Automatically - After some amount of failed backups, the site2
will usually be taken offline automatically. This is done due the configuration of take-offline
element inside the cache configuration as configured in Section 3.4.9.1, “Setting up the RHDG server”.
<take-offline min-wait="60000" after-failures="3" />
This example shows that the site will be taken offline automatically for the particular single cache if there are at least 3 subsequent failed backups and there is no any successful backup within 60 seconds.
Automatically taking a site offline is useful especially if the broken network between sites is unplanned. The disadvantage is that there will be some failed backups until the network outage is detected, which could also mean failures on the application side. For example, there will be failed logins for some users or big login timeouts. Especially if failure-policy
with value FAIL
is used.
The tracking of whether a site is offline is tracked separately for every cache.
Take site online
Once your network is back and site1
and site2
can talk to each other, you may need to put the site online. This needs to be done manually through JMX or CLI in similar way as taking a site offline. Again, you may need to check all the caches and bring them online.
Once the sites are put online, it’s usually good to:
- Do the Section 3.4.12, “State transfer”.
- Manually Section 3.4.13, “Clear caches”.
3.4.12. State transfer
State transfer is a required, manual step. RHDG server does not do this automatically, for example during split-brain, it is only the admin who may decide which site has preference and hence if state transfer needs to be done bidirectionally between both sites or just unidirectionally, as in only from site1
to site2
, but not from site2
to site1
.
A bidirectional state transfer will ensure that entities which were created after split-brain on site1
will be transferred to site2
. This is not an issue as they do not yet exist on site2
. Similarly, entities created after split-brain on site2
will be transferred to site1
. Possibly problematic parts are those entities which exist before split-brain on both sites and which were updated during split-brain on both sites. When this happens, one of the sites will win and will overwrite the updates done during split-brain by the second site.
Unfortunately, there is no any universal solution to this. Split-brains and network outages are just state, which is usually impossible to be handled 100% correctly with 100% consistent data between sites. In the case of Red Hat Single Sign-On, it typically is not a critical issue. In the worst case, users will need to re-login again to their clients, or have the improper count of loginFailures tracked for brute force protection. See the RHDG/JGroups documentation for more tips how to deal with split-brain.
The state transfer can be also done on the RHDG server side through JMX. The operation name is pushState
. There are few other operations to monitor status, cancel push state, and so on. More info about state transfer is available in the RHDG docs.
3.4.13. Clear caches
After split-brain it is safe to manually clear caches in the Red Hat Single Sign-On admin console. This is because there might be some data changed in the database on site1
and because of the event, that the cache should be invalidated wasn’t transferred during split-brain to site2
. Hence Red Hat Single Sign-On nodes on site2
may still have some stale data in their caches.
To clear the caches, see Clearing Server Caches.
When the network is back, it is sufficient to clear the cache just on one Red Hat Single Sign-On node on any random site. The cache invalidation event will be sent to all the other Red Hat Single Sign-On nodes in all sites. However, it needs to be done for all the caches (realms, users, keys). See Clearing Server Caches for more information.
3.4.14. Tuning the RHDG cache configuration
This section contains tips and options for configuring your JDG cache.
Backup failure policy
By default, the configuration of backup failure-policy
in the Infinispan cache configuration in the RHDG clustered.xml
file is configured as FAIL
. You may change it to WARN
or IGNORE
, as you prefer.
The difference between FAIL
and WARN
is that when FAIL
is used and the RHDG server tries to back data up to the other site and the backup fails then the failure will be propagated back to the caller (the Red Hat Single Sign-On server). The backup might fail because the second site is temporarily unreachable or there is a concurrent transaction which is trying to update same entity. In this case, the Red Hat Single Sign-On server will then retry the operation a few times. However, if the retry fails, then the user might see the error after a longer timeout.
When using WARN
, the failed backups are not propagated from the RHDG server to the Red Hat Single Sign-On server. The user won’t see the error and the failed backup will be just ignored. There will be a shorter timeout, typically 10 seconds as that’s the default timeout for backup. It can be changed by the attribute timeout
of backup
element. There won’t be retries. There will just be a WARNING message in the RHDG server log.
The potential issue is, that in some cases, there may be just some a short network outage between sites, where the retry (usage of the FAIL
policy) may help, so with WARN
(without retry), there will be some data inconsistencies across sites. This can also happen if there is an attempt to update the same entity concurrently on both sites.
How bad are these inconsistencies? Usually only means that a user will need to re-authenticate.
When using the WARN
policy, it may happen that the single-use cache, which is provided by the actionTokens
cache and which handles that particular key is really single use, but may "successfully" write the same key twice. But, for example, the OAuth2 specification mentions that code must be single-use. With the WARN
policy, this may not be strictly guaranteed and the same code could be written twice if there is an attempt to write it concurrently in both sites.
If there is a longer network outage or split-brain, then with both FAIL
and WARN
, the other site will be taken offline after some time and failures as described in Section 3.4.11, “Bringing sites offline and online”. With the default 1 minute timeout, it is usually 1-3 minutes until all the involved caches are taken offline. After that, all the operations will work fine from an end user perspective. You only need to manually restore the site when it is back online as mentioned in Section 3.4.11, “Bringing sites offline and online”.
In summary, if you expect frequent, longer outages between sites and it is acceptable for you to have some data inconsistencies and a not 100% accurate single-use cache, but you never want end-users to see the errors and long timeouts, then switch to WARN
.
The difference between WARN
and IGNORE
is, that with IGNORE
warnings are not written in the RHDG log. See more details in the Infinispan documentation.
Lock acquisition timeout
The default configuration is using transaction in NON_DURABLE_XA mode with acquire timeout 0. This means that transaction will fail-fast if there is another transaction in progress for the same key.
The reason to switch this to 0 instead of default 10 seconds was to avoid possible deadlock issues. With Red Hat Single Sign-On, it can happen that the same entity (typically session entity or loginFailure) is updated concurrently from both sites. This can cause deadlock under some circumstances, which will cause the transaction to be blocked for 10 seconds. See this JIRA report for details.
With timeout 0, the transaction will immediately fail and then will be retried from Red Hat Single Sign-On if backup failure-policy
with the value FAIL
is configured. As long as the second concurrent transaction is finished, the retry will usually be successful and the entity will have applied updates from both concurrent transactions.
We see very good consistency and results for concurrent transaction with this configuration, and it is recommended to keep it.
The only (non-functional) problem is the exception in the RHDG server log, which happens every time when the lock is not immediately available.
3.4.15. SYNC or ASYNC backups
An important part of the backup
element is the strategy
attribute. You must decide whether it needs to be SYNC
or ASYNC
. We have 7 caches which might be Cross-Datacenter Replication aware, and these can be configured in 3 different modes regarding cross-dc:
- SYNC backup
- ASYNC backup
- No backup at all
If the SYNC
backup is used, then the backup is synchronous and operation is considered finished on the caller (Red Hat Single Sign-On server) side once the backup is processed on the second site. This has worse performance than ASYNC
, but on the other hand, you are sure that subsequent reads of the particular entity, such as user session, on site2
will see the updates from site1
. Also, it is needed if you want data consistency. As with ASYNC
the caller is not notified at all if backup to the other site failed.
For some caches, it is even possible to not backup at all and completely skip writing data to the RHDG server. To set this up, do not use the remote-store
element for the particular cache on the Red Hat Single Sign-On side (file KEYCLOAK_HOME/standalone/configuration/standalone-ha.xml
) and then the particular replicated-cache
element is also not needed on the RHDG server side.
By default, all 7 caches are configured with SYNC
backup, which is the safest option. Here are a few things to consider:
-
If you are using active/passive mode (all Red Hat Single Sign-On servers are in single site
site1
and the RHDG server insite2
is used purely as backup. See Section 3.4.4, “Modes” for more details), then it is usually fine to useASYNC
strategy for all the caches to save the performance. -
The
work
cache is used mainly to send some messages, such as cache invalidation events, to the other site. It is also used to ensure that some special events, such as userStorage synchronizations, happen only on single site. It is recommended to keep this set toSYNC
. -
The
actionTokens
cache is used as single-use cache to track that some tokens/tickets were used just once. For example action tokens or OAuth2 codes. It is possible to set this toASYNC
to slightly improved performance, but then it is not guaranteed that particular ticket is really single-use. For example, if there is concurrent request for same ticket in both sites, then it is possible that both requests will be successful with theASYNC
strategy. So what you set here will depend on whether you prefer better security (SYNC
strategy) or better performance (ASYNC
strategy). -
The
loginFailures
cache may be used in any of the 3 modes. If there is no backup at all, it means that count of login failures for a user will be counted separately for every site (See Section 3.4.6, “Infinispan caches” for details). This has some security implications, however it has some performance advantages. Also it mitigates the possible risk of denial of service (DoS) attacks. For example, if an attacker simulates 1000 concurrent requests using the username and password of the user on both sites, it will mean lots of messages being passed between the sites, which may result in network congestion. TheASYNC
strategy might be even worse as the attacker requests won’t be blocked by waiting for the backup to the other site, resulting in potentially even more congested network traffic. The count of login failures also will not be accurate with theASYNC
strategy.
For the environments with slower network between data centers and probability of DoS, it is recommended to not backup the loginFailures
cache at all.
It is recommended to keep the
sessions
andclientSessions
caches inSYNC
. Switching them toASYNC
is possible only if you are sure that user requests and backchannel requests (requests from client applications to Red Hat Single Sign-On as described in Section 3.4.3, “Request processing”) will be always processed on same site. This is true, for example, if:- You use active/passive mode as described Section 3.4.4, “Modes”.
- All your client applications are using the Red Hat Single Sign-On JavaScript Adapter. The JavaScript adapter sends the backchannel requests within the browser and hence they participate on the browser sticky session and will end on same cluster node (hence on same site) as the other browser requests of this user.
Your load balancer is able to serve the requests based on client IP address (location) and the client applications are deployed on both sites.
For example you have 2 sites LON and NYC. As long as your applications are deployed in both LON and NYC sites too, you can ensure that all the user requests from London users will be redirected to the applications in LON site and also to the Red Hat Single Sign-On servers in LON site. Backchannel requests from the LON site client deployments will end on Red Hat Single Sign-On servers in LON site too. On the other hand, for the American users, all the Red Hat Single Sign-On requests, application requests and backchannel requests will be processed on NYC site.
-
For
offlineSessions
andofflineClientSessions
it is similar, with the difference that you even don’t need to backup them at all if you never plan to use offline tokens for any of your client applications.
Generally, if you are in doubt and performance is not a blocker for you, it’s safer to keep the caches in SYNC
strategy.
Regarding the switch to SYNC/ASYNC backup, make sure that you edit the strategy
attribute of the backup
element. For example like this:
<backup site="site2" failure-policy="FAIL" strategy="ASYNC" enabled="true">
Note the mode
attribute of cache-configuration element.
3.4.16. Troubleshooting
The following tips are intended to assist you should you need to troubleshoot:
- It is recommended to go through the Section 3.4.9, “Setting up Cross DC with RHDG 7.3” and have this one working first, so that you have some understanding of how things work. It is also wise to read this entire document to have some understanding of things.
- Check in jconsole cluster status (GMS) and the JGroups status (RELAY) of RHDG as described in Section 3.4.9.1, “Setting up the RHDG server”. If things do not look as expected, then the issue is likely in the setup of RHDG servers.
For the Red Hat Single Sign-On servers, you should see a message like this during the server startup:
18:09:30,156 INFO [org.keycloak.connections.infinispan.DefaultInfinispanConnectionProviderFactory] (ServerService Thread Pool -- 54) Node name: node11, Site name: site1
Check that the site name and the node name looks as expected during the startup of Red Hat Single Sign-On server.
- Check that Red Hat Single Sign-On servers are in cluster as expected, including that only the Red Hat Single Sign-On servers from the same data center are in cluster with each other. This can be also checked in JConsole through the GMS view. See cluster troubleshooting for additional details.
If there are exceptions during startup of Red Hat Single Sign-On server like this:
17:33:58,605 ERROR [org.infinispan.client.hotrod.impl.operations.RetryOnFailureOperation] (ServerService Thread Pool -- 59) ISPN004007: Exception encountered. Retry 10 out of 10: org.infinispan.client.hotrod.exceptions.TransportException:: Could not fetch transport ... Caused by: org.infinispan.client.hotrod.exceptions.TransportException:: Could not connect to server: 127.0.0.1:12232 at org.infinispan.client.hotrod.impl.transport.tcp.TcpTransport.<init>(TcpTransport.java:82)
it usually means that Red Hat Single Sign-On server is not able to reach the RHDG server in his own datacenter. Make sure that firewall is set as expected and RHDG server is possible to connect.
If there are exceptions during startup of Red Hat Single Sign-On server like this:
16:44:18,321 WARN [org.infinispan.client.hotrod.impl.protocol.Codec21] (ServerService Thread Pool -- 57) ISPN004005: Error received from the server: javax.transaction.RollbackException: ARJUNA016053: Could not commit transaction. ...
then check the log of corresponding RHDG server of your site and check if has failed to backup to the other site. If the backup site is unavailable, then it is recommended to switch it offline, so that RHDG server won’t try to backup to the offline site causing the operations to pass successfully on Red Hat Single Sign-On server side as well. See Section 3.4.10, “Administration of Cross DC deployment” for more information.
-
Check the Infinispan statistics, which are available through JMX. For example, try to login and then see if the new session was successfully written to both RHDG servers and is available in the
sessions
cache there. This can be done indirectly by checking the count of elements in thesessions
cache for the MBeanjboss.datagrid-infinispan:type=Cache,name="sessions(repl_sync)",manager="clustered",component=Statistics
and attributenumberOfEntries
. After login, there should be one more entry fornumberOfEntries
on both RHDG servers on both sites. - Enable DEBUG logging as described Section 3.4.9.2, “Setting up Red Hat Single Sign-On servers”. For example, if you log in and you think that the new session is not available on the second site, it’s good to check the Red Hat Single Sign-On server logs and check that listeners were triggered as described in the Section 3.4.9.2, “Setting up Red Hat Single Sign-On servers”. If you do not know and want to ask on keycloak-user mailing list, it is helpful to send the log files from Red Hat Single Sign-On servers on both datacenters in the email. Either add the log snippets to the mails or put the logs somewhere and reference them in the email.
-
If you updated the entity, such as
user
, on Red Hat Single Sign-On server onsite1
and you do not see that entity updated on the Red Hat Single Sign-On server onsite2
, then the issue can be either in the replication of the synchronous database itself or that Red Hat Single Sign-On caches are not properly invalidated. You may try to temporarily disable the Red Hat Single Sign-On caches as described here to nail down if the issue is at the database replication level. Also it may help to manually connect to the database and check if data are updated as expected. This is specific to every database, so you will need to consult the documentation for your database. Sometimes you may see the exceptions related to locks like this in RHDG server log:
(HotRodServerHandler-6-35) ISPN000136: Error executing command ReplaceCommand, writing keys [[B0x033E243034396234..[39]]: org.infinispan.util.concurrent.TimeoutException: ISPN000299: Unable to acquire lock after 0 milliseconds for key [B0x033E243034396234..[39] and requestor GlobalTx:server1:4353. Lock is held by GlobalTx:server1:4352
Those exceptions are not necessarily an issue. They may happen anytime when a concurrent edit of the same entity is triggered on both DCs. This is common in a deployment. Usually the Red Hat Single Sign-On server is notified about the failed operation and will retry it, so from the user’s point of view, there is usually not any issue.
If there are exceptions during startup of Red Hat Single Sign-On server, like this:
16:44:18,321 WARN [org.infinispan.client.hotrod.impl.protocol.Codec21] (ServerService Thread Pool -- 55) ISPN004005: Error received from the server: java.lang.SecurityException: ISPN000287: Unauthorized access: subject 'Subject with principal(s): []' lacks 'READ' permission ...
These log entries are the result of Red Hat Single Sign-On automatically detecting whether authentication is required on RHDG and mean that authentication is necessary. At this point you will notice that either the server starts successfully and you can safely ignore these or that the server fails to start. If the server fails to start, ensure that RHDG has been configured properly for authentication as described in Section 3.4.9.1, “Setting up the RHDG server”. To prevent this log entry from being included, you can force authentication by setting
remoteStoreSecurityEnabled
property totrue
inspi=connectionsInfinispan/provider=default
configuration:<subsystem xmlns="urn:jboss:domain:keycloak-server:1.1"> ... <spi name="connectionsInfinispan"> ... <provider name="default" enabled="true"> <properties> ... <property name="remoteStoreSecurityEnabled" value="true"/> </properties> </provider> </spi>
If you try to authenticate with Red Hat Single Sign-On to your application, but authentication fails with an infinite number of redirects in your browser and you see the errors like this in the Red Hat Single Sign-On server log:
2017-11-27 14:50:31,587 WARN [org.keycloak.events] (default task-17) type=LOGIN_ERROR, realmId=master, clientId=null, userId=null, ipAddress=aa.bb.cc.dd, error=expired_code, restart_after_timeout=true
it probably means that your load balancer needs to be set to support sticky sessions. Make sure that the provided route name used during startup of Red Hat Single Sign-On server (Property
jboss.node.name
) contains the correct name used by the load balancer server to identify the current server.If the RHDG
work
cache grows indefinitely, you may be experiencing this RHDG issue, which is caused by cache items not being properly expired. In that case, update the cache declaration with an empty<expiration />
tag like this:<replicated-cache name="work" configuration="sessions-cfg"> <expiration /> </replicated-cache>
If you see Warnings in the RHDG server log like:
18:06:19,687 WARN [org.infinispan.server.hotrod.Decoder2x] (HotRod-ServerWorker-7-12) ISPN006011: Operation 'PUT_IF_ABSENT' forced to return previous value should be used on transactional caches, otherwise data inconsistency issues could arise under failure situations 18:06:19,700 WARN [org.infinispan.server.hotrod.Decoder2x] (HotRod-ServerWorker-7-10) ISPN006010: Conditional operation 'REPLACE_IF_UNMODIFIED' should be used with transactional caches, otherwise data inconsistency issues could arise under failure situations
you can just ignore them. To avoid the warning, the caches on RHDG server side could be changed to transactional caches, but this is not recommended as it can cause some other issues caused by the bug https://issues.redhat.com/browse/ISPN-9323. So for now, the warnings just need to be ignored.
If you see errors in the RHDG server log like:
12:08:32,921 ERROR [org.infinispan.server.hotrod.CacheDecodeContext] (HotRod-ServerWorker-7-11) ISPN005003: Exception reported: org.infinispan.server.hotrod.InvalidMagicIdException: Error reading magic byte or message id: 7 at org.infinispan.server.hotrod.HotRodDecoder.readHeader(HotRodDecoder.java:184) at org.infinispan.server.hotrod.HotRodDecoder.decodeHeader(HotRodDecoder.java:133) at org.infinispan.server.hotrod.HotRodDecoder.decode(HotRodDecoder.java:92) at io.netty.handler.codec.ByteToMessageDecoder.callDecode(ByteToMessageDecoder.java:411) at io.netty.handler.codec.ByteToMessageDecoder.channelRead(ByteToMessageDecoder.java:248)
and you see some similar errors in the Red Hat Single Sign-On log, it can indicate that there are incompatible versions of the Hot Rod protocol being used. This is likely happen when you try to use Red Hat Single Sign-On with an old version of the Infinispan server. It will help if you add the
protocolVersion
property as an additional property to theremote-store
element in the Red Hat Single Sign-On configuration file. For example:<property name="protocolVersion">2.6</property>