
Securing Applications and Services Guide
Securing Applications and Services Guide
Abstract
Chapter 1. Overview
Red Hat Single Sign-On supports both OpenID Connect (an extension to OAuth 2.0) and SAML 2.0. When securing clients and services the first thing you need to decide is which of the two you are going to use. If you want you can also choose to secure some with OpenID Connect and others with SAML.
To secure clients and services you are also going to need an adapter or library for the protocol you’ve selected. Red Hat Single Sign-On comes with its own adapters for selected platforms, but it is also possible to use generic OpenID Connect Resource Provider and SAML Service Provider libraries.
1.1. What are Client Adapters?
Red Hat Single Sign-On client adapters are libraries that makes it very easy to secure applications and services with Red Hat Single Sign-On. We call them adapters rather than libraries as they provide a tight integration to the underlying platform and framework. This makes our adapters easy to use and they require less boilerplate code than what is typically required by a library.
1.2. Supported Platforms
1.2.1. OpenID Connect
1.2.1.1. Java
1.2.1.2. Apache Cordova
1.2.2. SAML
1.2.2.1. Java
1.2.2.2. Apache HTTP Server
1.3. Supported Protocols
1.3.1. OpenID Connect
Open ID Connect (OIDC) is an authentication protocol that is an extension of OAuth 2.0. While OAuth 2.0 is only a framework for building authorization protocols and is mainly incomplete, OIDC is a full-fledged authentication and authorization protocol. OIDC also makes heavy use of the Json Web Token (JWT) set of standards. These standards define an identity token JSON format and ways to digitally sign and encrypt that data in a compact and web-friendly way.
There is really two types of use cases when using OIDC. The first is an application that asks the Red Hat Single Sign-On server to authenticate a user for them. After a successful login, the application will receive an identity token and an access token. The identity token contains information about the user such as username, email, and other profile information. The access token is digitally signed by the realm and contains access information (like user role mappings) that the application can use to determine what resources the user is allowed to access on the application.
The second type of use cases is that of a client that wants to gain access to remote services. In this case, the client asks Red Hat Single Sign-On to obtain an access token it can use to invoke on other remote services on behalf of the user. Red Hat Single Sign-On authenticates the user then asks the user for consent to grant access to the client requesting it. The client then receives the access token. This access token is digitally signed by the realm. The client can make REST invocations on remote services using this access token. The REST service extracts the access token, verifies the signature of the token, then decides based on access information within the token whether or not to process the request.
1.3.2. SAML 2.0
SAML 2.0 is a similar specification to OIDC but a lot older and more mature. It has its roots in SOAP and the plethora of WS-* specifications so it tends to be a bit more verbose than OIDC. SAML 2.0 is primarily an authentication protocol that works by exchanging XML documents between the authentication server and the application. XML signatures and encryption are used to verify requests and responses.
In Red Hat Single Sign-On SAML serves two types of use cases: browser applications and REST invocations.
There is really two types of use cases when using SAML. The first is an application that asks the Red Hat Single Sign-On server to authenticate a user for them. After a successful login, the application will receive an XML document that contains something called a SAML assertion that specifies various attributes about the user. This XML document is digitally signed by the realm and contains access information (like user role mappings) that the application can use to determine what resources the user is allowed to access on the application.
The second type of use cases is that of a client that wants to gain access to remote services. In this case, the client asks Red Hat Single Sign-On to obtain a SAML assertion it can use to invoke on other remote services on behalf of the user.
1.3.3. OpenID Connect vs. SAML
Choosing between OpenID Connect and SAML is not just a matter of using a newer protocol (OIDC) instead of the older more mature protocol (SAML).
In most cases Red Hat Single Sign-On recommends using OIDC.
SAML tends to be a bit more verbose than OIDC.
Beyond verbosity of exchanged data, if you compare the specifications you’ll find that OIDC was designed to work with the web while SAML was retrofitted to work on top of the web. For example, OIDC is also more suited for HTML5/JavaScript applications because it is easier to implement on the client side than SAML. As tokens are in the JSON format, they are easier to consume by JavaScript. You will also find several nice features that make implementing security in your web applications easier. For example, check out the iframe trick that the specification uses to easily determine if a user is still logged in or not.
SAML has its uses though. As you see the OIDC specifications evolve you see they implement more and more features that SAML has had for years. What we often see is that people pick SAML over OIDC because of the perception that it is more mature and also because they already have existing applications that are secured with it.
Chapter 2. OpenID Connect
This section describes how you can secure applications and services with OpenID Connect using either Red Hat Single Sign-On adapters or generic OpenID Connect Resource Provider libraries.
2.1. Java Adapters
Red Hat Single Sign-On comes with a range of different adapters for Java application. Selecting the correct adapter depends on the target platform.
All Java adapters share a set of common configuration options described in the Java Adapters Config chapter.
2.1.1. Java Adapter Config
Each Java adapter supported by Red Hat Single Sign-On can be configured by a simple JSON file. This is what one might look like:
{
  "realm" : "demo",
  "resource" : "customer-portal",
  "realm-public-key" : "MIGfMA0GCSqGSIb3D...31LwIDAQAB",
  "auth-server-url" : "https://localhost:8443/auth",
  "ssl-required" : "external",
  "use-resource-role-mappings" : false,
  "enable-cors" : true,
  "cors-max-age" : 1000,
  "cors-allowed-methods" : "POST, PUT, DELETE, GET",
  "bearer-only" : false,
  "enable-basic-auth" : false,
  "expose-token" : true,
   "credentials" : {
      "secret" : "234234-234234-234234"
   },

   "connection-pool-size" : 20,
   "disable-trust-manager": false,
   "allow-any-hostname" : false,
   "truststore" : "path/to/truststore.jks",
   "truststore-password" : "geheim",
   "client-keystore" : "path/to/client-keystore.jks",
   "client-keystore-password" : "geheim",
   "client-key-password" : "geheim"
}
You can use ${…} enclosure for system property replacement. For example ${jboss.server.config.dir} would be replaced by /path/to/Red Hat Single Sign-On.
The initial config file can be obtained from the the admin console. This can be done by opening the admin console, select Clients from the menu and clicking on the corresponding client. Once the page for the client is opened click on the Installation tab and select Keycloak OIDC JSON.
Here is a description of each configuration option:
- realm
- Name of the realm. This is REQUIRED.
- resource
- The client-id of the application. Each application has a client-id that is used to identify the application. This is REQUIRED.
- realm-public-key
- PEM format of the realm public key. You can obtain this from the administration console. This is OPTIONAL. If not set the adapter will download this from Red Hat Single Sign-On.
- auth-server-url
-
The base URL of the Red Hat Single Sign-On server. All other Red Hat Single Sign-On pages and REST service endpoints are derived from this. It is usually of the form
https://host:port/auth. This is REQUIRED. - ssl-required
-
Ensures that all communication to and from the Red Hat Single Sign-On server is over HTTPS. In production this should be set to
all. This is OPTIONAL. The default value is external meaning that HTTPS is required by default for external requests. Valid values are 'all', 'external' and 'none'. - use-resource-role-mappings
- If set to true, the adapter will look inside the token for application level role mappings for the user. If false, it will look at the realm level for user role mappings. This is OPTIONAL. The default value is false.
- public-client
- If set to true, the adapter will not send credentials for the client to Red Hat Single Sign-On. This is OPTIONAL. The default value is false.
- enable-cors
- This enables CORS support. It will handle CORS preflight requests. It will also look into the access token to determine valid origins. This is OPTIONAL. The default value is false.
- cors-max-age
-
If CORS is enabled, this sets the value of the
Access-Control-Max-Ageheader. This is OPTIONAL. If not set, this header is not returned in CORS responses. - cors-allowed-methods
-
If CORS is enabled, this sets the value of the
Access-Control-Allow-Methodsheader. This should be a comma-separated string. This is OPTIONAL. If not set, this header is not returned in CORS responses. - cors-allowed-headers
-
If CORS is enabled, this sets the value of the
Access-Control-Allow-Headersheader. This should be a comma-separated string. This is OPTIONAL. If not set, this header is not returned in CORS responses. - bearer-only
- This should be set to true for services. If enabled the adapter will not attempt to authenticate users, but only verify bearer tokens. This is OPTIONAL. The default value is false.
- enable-basic-auth
- This tells the adapter to also support basic authentication. If this option is enabled, then secret must also be provided. This is OPTIONAL. The default value is false.
- expose-token
-
If
true, an authenticated browser client (via a Javascript HTTP invocation) can obtain the signed access token via the URLroot/k_query_bearer_token. This is OPTIONAL. The default value is false. - credentials
-
Specify the credentials of the application. This is an object notation where the key is the credential type and the value is the value of the credential type. Currently
passwordandjwtis supported. This is REQUIRED. - connection-pool-size
-
Adapters will make separate HTTP invocations to the Red Hat Single Sign-On server to turn an access code into an access token. This config option defines how many connections to the Red Hat Single Sign-On server should be pooled. This is OPTIONAL. The default value is
20. - disable-trust-manager
-
If the Red Hat Single Sign-On server requires HTTPS and this config option is set to
trueyou do not have to specify a truststore. This setting should only be used during development and never in production as it will disable verification of SSL certificates. This is OPTIONAL. The default value isfalse. - allow-any-hostname
-
If the Red Hat Single Sign-On server requires HTTPS and this config option is set to
truethe Red Hat Single Sign-On server’s certificate is validated via the truststore, but host name validation is not done. This setting should only be used during development and never in production as it will disable verification of SSL certificates. This seting may be useful in test environments This is OPTIONAL. The default value isfalse. - truststore
-
The value is the file path to a keystore file. If you prefix the path with
classpath:, then the truststore will be obtained from the deployment’s classpath instead. Used for outgoing HTTPS communications to the Red Hat Single Sign-On server. Client making HTTPS requests need a way to verify the host of the server they are talking to. This is what the trustore does. The keystore contains one or more trusted host certificates or certificate authorities. You can create this truststore by extracting the public certificate of the Red Hat Single Sign-On server’s SSL keystore. This is REQUIRED unlessssl-requiredisnoneordisable-trust-manageristrue. - truststore-password
-
Password for the truststore keystore. This is REQUIRED if
truststoreis set and the truststore requires a password. - client-keystore
- This is the file path to a keystore file. This keystore contains client certificate for two-way SSL when the adapter makes HTTPS requests to the Red Hat Single Sign-On server. This is OPTIONAL.
- client-keystore-password
-
Password for the client keystore. This is REQUIRED if
client-keystoreis set. - client-key-password
-
Password for the client’s key. This is REQUIRED if
client-keystoreis set. - always-refresh-token
- If true, the adapter will refresh token in every request.
- register-node-at-startup
- If true, then adapter will send registration request to Red Hat Single Sign-On. It’s false by default and useful only when application is clustered. See Application Clustering for details
- register-node-period
- Period for re-registration adapter to Red Hat Single Sign-On. Useful when application is clustered. See Application Clustering for details
- token-store
- Possible values are session and cookie. Default is session, which means that adapter stores account info in HTTP Session. Alternative cookie means storage of info in cookie. See Application Clustering for details
- principal-attribute
-
OpenID Connection ID Token attribute to populate the UserPrincipal name with. If token attribute is null, defaults to
sub. Possible values aresub,preferred_username,email,name,nickname,given_name,family_name. - turn-off-change-session-id-on-login
- The session id is changed by default on a successful login on some platforms to plug a security attack vector. Change this to true if you want to turn this off This is OPTIONAL. The default value is false.
2.1.2. JBoss EAP Adapter
To be able to secure WAR apps deployed on JBoss EAP, you must install and configure the Red Hat Single Sign-On adapter subsystem. You then have two options to secure your WARs.
You can provide an adapter config file in your WAR and change the auth-method to KEYCLOAK within web.xml.
Alternatively, you don’t have to modify your WAR at all and you can secure it via the Red Hat Single Sign-On adapter subsystem configuration in standalone.xml. Both methods are described in this section.
2.1.2.1. Adapter Installation
Adapters are available as a separate archive and are also available as Maven artifacts.
Install on JBoss EAP 7:
$ cd $EAP_HOME
$ unzip rh-sso-7.0.0-eap7-adapter.zip
Install on JBoss EAP 6:
$ cd $EAP_HOME
$ unzip rh-sso-7.0.0-eap6-adapter.zip
This ZIP archive contains JBoss Modules specific to the Red Hat Single Sign-On adapter. It also contains JBoss CLI scripts to install and configure the adapter.
Once the ZIP archive is extracted you have to enable the Red Hat Single Sign-On subystem in the server configuration (i.e. standalone.xml). The easiest way to do this is to use the supplied JBoss CLI scripts.
To install and configure the adapter, first start the server and then run the JBoss CLI installation script :
$ ./bin/jboss-cli.sh -c --file=adapter-install.cli
The script will add the required configuration to the server configuration file.
For JBoss EAP 7 there is also an offline CLI script that can be used to install the adapter while the server is not running:
$ ./bin/jboss-cli.sh --file=adapter-install-offline.cli
If you are planning to add it manually you need to add the extension and subsystem definition to the server configuration:
<extensions>
    <extension module="org.keycloak.keycloak-adapter-subsystem"/>
    ...
</extensions>

<profile>
    <subsystem xmlns="urn:jboss:domain:keycloak:1.1"/>
    ...
</profile>
If you need to be able to propagate the security context from the web tier to the EJB tier you also need to add the keycloak security domain:
<subsystem xmlns="urn:jboss:domain:security:...">
    <security-domains>
        ...
        <security-domain name="keycloak">
            <authentication>
                <login-module code="org.keycloak.adapters.jboss.KeycloakLoginModule"
                              flag="required"/>
            </authentication>
        </security-domain>
    </security-domains>
    ...
For example, if you have a JAX-RS service that is an EJB within your WEB-INF/classes directory, you’ll want to annotate it with the @SecurityDomain annotation as follows:
import org.jboss.ejb3.annotation.SecurityDomain;
import org.jboss.resteasy.annotations.cache.NoCache;

import javax.annotation.security.RolesAllowed;
import javax.ejb.EJB;
import javax.ejb.Stateless;
import javax.ws.rs.GET;
import javax.ws.rs.Path;
import javax.ws.rs.Produces;
import java.util.ArrayList;
import java.util.List;

@Path("customers")
@Stateless
@SecurityDomain("keycloak")
public class CustomerService {

    @EJB
    CustomerDB db;

    @GET
    @Produces("application/json")
    @NoCache
    @RolesAllowed("db_user")
    public List<String> getCustomers() {
        return db.getCustomers();
    }
}
2.1.2.2. Required Per WAR Configuration
This section describes how to secure a WAR directly by adding config and editing files within your WAR package.
The first thing you must do is create a keycloak.json adapter config file within the WEB-INF directory of your WAR.
The format of this config file is describe in the Java adapter configuration section.
Next you must set the auth-method to KEYCLOAK in web.xml. You also have to use standard servlet security to specify role-base constraints on your URLs.
Here’s an example:
<web-app xmlns="http://java.sun.com/xml/ns/javaee"
      xmlns:xsi="http://www.w3.org/2001/XMLSchema-instance"
      xsi:schemaLocation="http://java.sun.com/xml/ns/javaee http://java.sun.com/xml/ns/javaee/web-app_3_0.xsd"
      version="3.0">

    <module-name>application</module-name>

    <security-constraint>
        <web-resource-collection>
            <web-resource-name>Admins</web-resource-name>
            <url-pattern>/admin/*</url-pattern>
        </web-resource-collection>
        <auth-constraint>
            <role-name>admin</role-name>
        </auth-constraint>
        <user-data-constraint>
            <transport-guarantee>CONFIDENTIAL</transport-guarantee>
        </user-data-constraint>
    </security-constraint>
    <security-constraint>
        <web-resource-collection>
            <web-resource-name>Customers</web-resource-name>
            <url-pattern>/customers/*</url-pattern>
        </web-resource-collection>
        <auth-constraint>
            <role-name>user</role-name>
        </auth-constraint>
        <user-data-constraint>
            <transport-guarantee>CONFIDENTIAL</transport-guarantee>
        </user-data-constraint>
    </security-constraint>

    <login-config>
        <auth-method>KEYCLOAK</auth-method>
        <realm-name>this is ignored currently</realm-name>
    </login-config>

    <security-role>
        <role-name>admin</role-name>
    </security-role>
    <security-role>
        <role-name>user</role-name>
    </security-role>
</web-app>
2.1.2.3. Securing WARs via Adapter Subsystem
You do not have to modify your WAR to secure it with Red Hat Single Sign-On. Instead you can externally secure it via the Red Hat Single Sign-On Adapter Subsystem. While you don’t have to specify KEYCLOAK as an auth-method, you still have to define the security-constraints in web.xml. You do not, however, have to create a WEB-INF/keycloak.json file. This metadata is instead defined within server configuration (i.e. standalone.xml) in the Red Hat Single Sign-On subsystem definition.
<extensions>
  <extension module="org.keycloak.keycloak-adapter-subsystem"/>
</extensions>

<profile>
  <subsystem xmlns="urn:jboss:domain:keycloak:1.1">
     <secure-deployment name="WAR MODULE NAME.war">
        <realm>demo</realm>
        <realm-public-key>MIGfMA0GCSqGSIb3DQEBAQUAA</realm-public-key>
        <auth-server-url>http://localhost:8081/auth</auth-server-url>
        <ssl-required>external</ssl-required>
        <resource>customer-portal</resource>
        <credential name="secret">password</credential>
     </secure-deployment>
  </subsystem>
</profile>
The secure-deployment name attribute identifies the WAR you want to secure. Its value is the module-name defined in web.xml with .war appended. The rest of the configuration corresponds pretty much one to one with the keycloak.json configuration options defined in Java adapter configuration.
The exception is the credential element.
To make it easier for you, you can go to the Red Hat Single Sign-On Administration Console and go to the Client/Installation tab of the application this WAR is aligned with. It provides an example XML file you can cut and paste.
If you have multiple deployments secured by the same realm you can share the realm configuration in a separate element. For example:
<subsystem xmlns="urn:jboss:domain:keycloak:1.1">
    <realm name="demo">
        <realm-public-key>MIGfMA0GCSqGSIb3DQEBA...</realm-public-key>
        <auth-server-url>http://localhost:8080/auth</auth-server-url>
        <ssl-required>external</ssl-required>
    </realm>
    <secure-deployment name="customer-portal.war">
        <realm>demo</realm>
        <resource>customer-portal</resource>
        <credential name="secret">password</credential>
    </secure-deployment>
    <secure-deployment name="product-portal.war">
        <realm>demo</realm>
        <resource>product-portal</resource>
        <credential name="secret">password</credential>
    </secure-deployment>
    <secure-deployment name="database.war">
        <realm>demo</realm>
        <resource>database-service</resource>
        <bearer-only>true</bearer-only>
    </secure-deployment>
</subsystem>
2.1.3. JBoss Fuse Adapter
JBoss Fuse is a Technology Preview feature and is not fully supported
Currently Red Hat Single Sign-On supports securing your web applications running inside JBoss Fuse .
What is supported for Fuse is:
- Security for classic WAR applications deployed on Fuse with Pax Web War Extender.
- Security for servlets deployed on Fuse as OSGI services with Pax Web Whiteboard Extender.
- Security for Apache Camel Jetty endpoints running with Camel Jetty component.
- Security for Apache CXF endpoints running on their own separate Jetty engine.
- Security for Apache CXF endpoints running on default engine provided by CXF servlet.
- Security for SSH and JMX admin access.
2.1.3.1. How to secure your web applications inside Fuse
Basically all mentioned web applications require to inject Red Hat Single Sign-On Jetty authenticator into underlying Jetty server . The steps to achieve it are bit different according to application type. The details are described in individual sub-chapters.
2.1.3.2. Secure Classic WAR application
The needed steps to secure your WAR are:
-
Declare needed security constraints in
/WEB-INF/web.xml. You also need to declare login-config and all the roles inside security-role. The example configuration can look like this:
<?xml version="1.0" encoding="UTF-8"?>
<web-app xmlns="http://java.sun.com/xml/ns/javaee"
         xmlns:xsi="http://www.w3.org/2001/XMLSchema-instance"
         xsi:schemaLocation="http://java.sun.com/xml/ns/javaee http://java.sun.com/xml/ns/javaee/web-app_3_0.xsd"
         version="3.0">

    <module-name>customer-portal</module-name>

    <welcome-file-list>
        <welcome-file>index.html</welcome-file>
    </welcome-file-list>

    <security-constraint>
        <web-resource-collection>
            <web-resource-name>Customers</web-resource-name>
            <url-pattern>/customers/*</url-pattern>
        </web-resource-collection>
        <auth-constraint>
            <role-name>user</role-name>
        </auth-constraint>
    </security-constraint>

    <login-config>
        <auth-method>BASIC</auth-method>
        <realm-name>does-not-matter</realm-name>
    </login-config>

    <security-role>
        <role-name>admin</role-name>
    </security-role>
    <security-role>
        <role-name>user</role-name>
    </security-role>
</web-app>-
Add
jetty-web.xmlfile with the authenticator to/WEB-INF/jetty-web.xml. Typically it will look like this:
<?xml version="1.0"?>
<!DOCTYPE Configure PUBLIC "-//Mort Bay Consulting//DTD Configure//EN"
 "http://www.eclipse.org/jetty/configure_9_0.dtd">
<Configure class="org.eclipse.jetty.webapp.WebAppContext">
    <Get name="securityHandler">
        <Set name="authenticator">
            <New class="org.keycloak.adapters.jetty.KeycloakJettyAuthenticator">
            </New>
        </Set>
    </Get>
</Configure>-
Add
/WEB-INF/keycloak.jsonwith your Red Hat Single Sign-On configuration. The format of this config file is described in the Java Adapters Config section. -
Make sure your WAR imports
org.keycloak.adapters.jettyand maybe some more packages inMETA-INF/MANIFEST.MFfile in headerImport-Package. It’s recommended to usemaven-bundle-pluginin your project to properly generate OSGI headers in manifest. Note that "*" resolution for package doesn’t importorg.keycloak.adapters.jettypackage as it’s not used by application or Blueprint or Spring descriptor, but it’s used just injetty-web.xmlfile. So list of the packages to import may look like this:
org.keycloak.adapters.jetty;version="1.9.8.Final-redhat-1",
org.keycloak.adapters;version="1.9.8.Final-redhat-1",
org.keycloak.constants;version="1.9.8.Final-redhat-1",
org.keycloak.util;version="1.9.8.Final-redhat-1",
org.keycloak.*;version="1.9.8.Final-redhat-1",
*;resolution:=optional
2.1.3.3. Secure Servlet deployed as OSGI service
This is useful for the case, when you have sevlet class inside your OSGI bundle project, which is not deployed as classic WAR. Fuse uses Pax Web Whiteboard Extender for deploy such servlet as web application.
The needed steps to secure your servlet with Red Hat Single Sign-On are:
-
Red Hat Single Sign-On provides PaxWebIntegrationService, which allows to inject jetty-web.xml and configure security constraints for your application. You need to declare such service in
OSGI-INF/blueprint/blueprint.xmlinside your application. Note that your servlet needs to depend on it. The example configuration can look like this:
<?xml version="1.0" encoding="UTF-8"?>
<blueprint xmlns="http://www.osgi.org/xmlns/blueprint/v1.0.0"
           xmlns:xsi="http://www.w3.org/2001/XMLSchema-instance"
           xsi:schemaLocation="http://www.osgi.org/xmlns/blueprint/v1.0.0
           http://www.osgi.org/xmlns/blueprint/v1.0.0/blueprint.xsd">

    <!-- Using jetty bean just for the compatibility with other fuse services -->
    <bean id="servletConstraintMapping" class="org.eclipse.jetty.security.ConstraintMapping">
        <property name="constraint">
            <bean class="org.eclipse.jetty.util.security.Constraint">
                <property name="name" value="cst1"/>
                <property name="roles">
                    <list>
                        <value>user</value>
                    </list>
                </property>
                <property name="authenticate" value="true"/>
                <property name="dataConstraint" value="0"/>
            </bean>
        </property>
        <property name="pathSpec" value="/product-portal/*"/>
    </bean>

    <bean id="keycloakPaxWebIntegration" class="org.keycloak.adapters.osgi.PaxWebIntegrationService"
          init-method="start" destroy-method="stop">
        <property name="jettyWebXmlLocation" value="/WEB-INF/jetty-web.xml" />
        <property name="bundleContext" ref="blueprintBundleContext" />
        <property name="constraintMappings">
            <list>
                <ref component-id="servletConstraintMapping" />
            </list>
        </property>
    </bean>

    <bean id="productServlet" class="org.keycloak.example.ProductPortalServlet" depends-on="keycloakPaxWebIntegration">
    </bean>

    <service ref="productServlet" interface="javax.servlet.Servlet">
        <service-properties>
            <entry key="alias" value="/product-portal" />
            <entry key="servlet-name" value="ProductServlet" />
            <entry key="keycloak.config.file" value="/keycloak.json" />
        </service-properties>
    </service>

</blueprint>-
You may need to have directory
WEB-INFinside your project (even if your project is not web application) and create files/WEB-INF/jetty-web.xmland/WEB-INF/keycloak.jsonin similar way like it’s in Classic WAR application. Note you don’t needweb.xmlas the security-constrains are declared in blueprint configuration file. -
The
Import-PackageinMETA-INF/MANIFEST.MFneeds to contain at least those imports:
org.keycloak.adapters.jetty;version="1.9.8.Final-redhat-1",
org.keycloak.adapters;version="1.9.8.Final-redhat-1",
org.keycloak.constants;version="1.9.8.Final-redhat-1",
org.keycloak.util;version="1.9.8.Final-redhat-1",
org.keycloak.*;version="1.9.8.Final-redhat-1",
*;resolution:=optional
2.1.3.4. Apache Camel Application
-
You can secure your Apache camel endpoint using camel-jetty component by adding securityHandler with
KeycloakJettyAuthenticatorand proper security constraints injected. You can add fileOSGI-INF/blueprint/blueprint.xmlinto your camel application with the configuration similar to below. The roles, security constraint mappings and Red Hat Single Sign-On adapter configuration may be a bit different according to your environment and needs:
<?xml version="1.0" encoding="UTF-8"?>
<blueprint xmlns="http://www.osgi.org/xmlns/blueprint/v1.0.0"
xmlns:xsi="http://www.w3.org/2001/XMLSchema-instance"
xmlns:camel="http://camel.apache.org/schema/blueprint"
xsi:schemaLocation="
http://www.osgi.org/xmlns/blueprint/v1.0.0 http://www.osgi.org/xmlns/blueprint/v1.0.0/blueprint.xsd
http://camel.apache.org/schema/blueprint http://camel.apache.org/schema/blueprint/camel-blueprint.xsd">
<bean id="kcAdapterConfig" class="org.keycloak.representations.adapters.config.AdapterConfig">
<property name="realm" value="demo"/>
<property name="resource" value="admin-camel-endpoint"/>
<property name="realmKey" value="MIGfMA0G..."/>
<property name="bearerOnly" value="true"/>
<property name="authServerUrl" value="http://localhost:8080/auth" />
<property name="sslRequired" value="EXTERNAL"/>
</bean>
<bean id="keycloakAuthenticator" class="org.keycloak.adapters.jetty.KeycloakJettyAuthenticator">
<property name="adapterConfig" ref="kcAdapterConfig"/>
</bean>
<bean id="constraint" class="org.eclipse.jetty.util.security.Constraint">
<property name="name" value="Customers"/>
<property name="roles">
<list>
<value>admin</value>
</list>
</property>
<property name="authenticate" value="true"/>
<property name="dataConstraint" value="0"/>
</bean>
<bean id="constraintMapping" class="org.eclipse.jetty.security.ConstraintMapping">
<property name="constraint" ref="constraint"/>
<property name="pathSpec" value="/*"/>
</bean>
<bean id="securityHandler" class="org.eclipse.jetty.security.ConstraintSecurityHandler">
<property name="authenticator" ref="keycloakAuthenticator" />
<property name="constraintMappings">
<list>
<ref component-id="constraintMapping" />
</list>
</property>
<property name="authMethod" value="BASIC"/>
<property name="realmName" value="does-not-matter"/>
</bean>
<bean id="sessionHandler" class="org.keycloak.adapters.jetty.spi.WrappingSessionHandler">
<property name="handler" ref="securityHandler" />
</bean>
<bean id="helloProcessor" class="org.keycloak.example.CamelHelloProcessor" />
<camelContext id="blueprintContext"
trace="false"
xmlns="http://camel.apache.org/schema/blueprint">
<route id="httpBridge">
<from uri="jetty:http://0.0.0.0:8383/admin-camel-endpoint?handlers=sessionHandler&matchOnUriPrefix=true" />
<process ref="helloProcessor" />
<log message="The message from camel endpoint contains ${body}"/>
</route>
</camelContext>
</blueprint>-
The
Import-PackageinMETA-INF/MANIFEST.MFneeds to contain those imports:
javax.servlet;version="[3,4)",
javax.servlet.http;version="[3,4)",
org.apache.camel.*,
org.apache.camel;version="[2.13,3)",
org.eclipse.jetty.security;version="[8,10)",
org.eclipse.jetty.server.nio;version="[8,10)",
org.eclipse.jetty.util.security;version="[8,10)",
org.keycloak.*;version="1.9.8.Final-redhat-1",
org.osgi.service.blueprint,
org.osgi.service.blueprint.container,
org.osgi.service.event,
2.1.3.5. Secure Apache CXF Endpoint on separate Jetty
It’s recommended to run your CXF endpoints secured by Red Hat Single Sign-On on separate Jetty engine. This is the setup described in this section.
-
You need to add
META-INF/spring/beans.xmlto your application and then declarehttpj:engine-factorywith Jetty SecurityHandler with injectedKeycloakJettyAuthenticatorinside. The configuration may look like this for CXF JAX-WS application:
<?xml version="1.0" encoding="UTF-8"?>

<beans xmlns="http://www.springframework.org/schema/beans"
       xmlns:xsi="http://www.w3.org/2001/XMLSchema-instance"
       xmlns:jaxws="http://cxf.apache.org/jaxws"
       xmlns:httpj="http://cxf.apache.org/transports/http-jetty/configuration"
       xsi:schemaLocation="
        http://www.springframework.org/schema/beans http://www.springframework.org/schema/beans/spring-beans.xsd
        http://cxf.apache.org/jaxws http://cxf.apache.org/schemas/jaxws.xsd
        http://www.springframework.org/schema/osgi http://www.springframework.org/schema/osgi/spring-osgi.xsd
        http://cxf.apache.org/transports/http-jetty/configuration http://cxf.apache.org/schemas/configuration/http-jetty.xsd">

    <import resource="classpath:META-INF/cxf/cxf.xml" />

    <bean id="kcAdapterConfig" class="org.keycloak.representations.adapters.config.AdapterConfig">
        <property name="realm" value="demo"/>
        <property name="resource" value="custom-cxf-endpoint"/>
        <property name="realmKey" value="MIGfMA0..."/>
        <property name="bearerOnly" value="true"/>
        <property name="authServerUrl" value="http://localhost:8080/auth" />
        <property name="sslRequired" value="EXTERNAL"/>
    </bean>

    <bean id="keycloakAuthenticator" class="org.keycloak.adapters.jetty.KeycloakJettyAuthenticator">
        <property name="adapterConfig">
            <ref local="kcAdapterConfig" />
        </property>
    </bean>

    <bean id="constraint" class="org.eclipse.jetty.util.security.Constraint">
        <property name="name" value="Customers"/>
        <property name="roles">
            <list>
                <value>user</value>
            </list>
        </property>
        <property name="authenticate" value="true"/>
        <property name="dataConstraint" value="0"/>
    </bean>

    <bean id="constraintMapping" class="org.eclipse.jetty.security.ConstraintMapping">
        <property name="constraint" ref="constraint"/>
        <property name="pathSpec" value="/*"/>
    </bean>

    <bean id="securityHandler" class="org.eclipse.jetty.security.ConstraintSecurityHandler">
        <property name="authenticator" ref="keycloakAuthenticator" />
        <property name="constraintMappings">
            <list>
                <ref local="constraintMapping" />
            </list>
        </property>
        <property name="authMethod" value="BASIC"/>
        <property name="realmName" value="does-not-matter"/>
    </bean>

    <httpj:engine-factory bus="cxf" id="kc-cxf-endpoint">
        <httpj:engine port="8282">
            <httpj:handlers>
                <ref local="securityHandler" />
            </httpj:handlers>
            <httpj:sessionSupport>true</httpj:sessionSupport>
        </httpj:engine>
    </httpj:engine-factory>

    <jaxws:endpoint
                    implementor="org.keycloak.example.ws.ProductImpl"
                    address="http://localhost:8282/ProductServiceCF" depends-on="kc-cxf-endpoint" />

</beans>- For the CXF JAX-RS application, the only difference might be in the configuration of the endpoint dependent on engine-factory:
<jaxrs:server serviceClass="org.keycloak.example.rs.CustomerService" address="http://localhost:8282/rest"
    depends-on="kc-cxf-endpoint">
    <jaxrs:providers>
        <bean class="com.fasterxml.jackson.jaxrs.json.JacksonJsonProvider" />
    </jaxrs:providers>
</jaxrs:server>-
The
Import-PackageinMETA-INF/MANIFEST.MFneeds to contain those imports:
META-INF.cxf;version="[2.7,3.2)",
META-INF.cxf.osgi;version="[2.7,3.2)";resolution:=optional,
org.apache.cxf.bus;version="[2.7,3.2)",
org.apache.cxf.bus.spring;version="[2.7,3.2)",
org.apache.cxf.bus.resource;version="[2.7,3.2)",
org.apache.cxf.transport.http;version="[2.7,3.2)",
org.apache.cxf.*;version="[2.7,3.2)",
org.springframework.beans.factory.config,
org.eclipse.jetty.security;version="[8,10)",
org.eclipse.jetty.util.security;version="[8,10)",
org.keycloak.*;version="1.9.8.Final-redhat-1"
2.1.3.6. Secure Apache CXF Endpoint on default Jetty Engine
Some services automatically come with deployed servlets on startup. One of such services is CXF servlet running on http://localhost:8181/cxf context. Securing such endpoints is quite tricky. The approach, which Red Hat Single Sign-On is currently using, is providing ServletReregistrationService, which undeploys builtin servlet at startup, so you are able to re-deploy it again on context secured by Red Hat Single Sign-On. This is how configuration file OSGI-INF/blueprint/blueprint.xml inside your application may look like. Note it adds JAX-RS customerservice endpoint, which is endpoint specific to your application, but more importantly, it secures whole /cxf context.
<?xml version="1.0" encoding="UTF-8"?>
<blueprint xmlns="http://www.osgi.org/xmlns/blueprint/v1.0.0"
           xmlns:xsi="http://www.w3.org/2001/XMLSchema-instance"
           xmlns:jaxrs="http://cxf.apache.org/blueprint/jaxrs"
           xsi:schemaLocation="
		http://www.osgi.org/xmlns/blueprint/v1.0.0 http://www.osgi.org/xmlns/blueprint/v1.0.0/blueprint.xsd
		http://cxf.apache.org/blueprint/jaxrs http://cxf.apache.org/schemas/blueprint/jaxrs.xsd">

    <!-- JAXRS Application -->

    <bean id="customerBean" class="org.keycloak.example.rs.CxfCustomerService" />

    <jaxrs:server id="cxfJaxrsServer" address="/customerservice">
        <jaxrs:providers>
            <bean class="com.fasterxml.jackson.jaxrs.json.JacksonJsonProvider" />
        </jaxrs:providers>
        <jaxrs:serviceBeans>
            <ref component-id="customerBean" />
        </jaxrs:serviceBeans>
    </jaxrs:server>


    <!-- Securing of whole /cxf context by unregister default cxf servlet from paxweb and re-register with applied security constraints -->

    <bean id="cxfConstraintMapping" class="org.eclipse.jetty.security.ConstraintMapping">
        <property name="constraint">
            <bean class="org.eclipse.jetty.util.security.Constraint">
                <property name="name" value="cst1"/>
                <property name="roles">
                    <list>
                        <value>user</value>
                    </list>
                </property>
                <property name="authenticate" value="true"/>
                <property name="dataConstraint" value="0"/>
            </bean>
        </property>
        <property name="pathSpec" value="/cxf/*"/>
    </bean>

    <bean id="cxfKeycloakPaxWebIntegration" class="org.keycloak.adapters.osgi.PaxWebIntegrationService"
          init-method="start" destroy-method="stop">
        <property name="bundleContext" ref="blueprintBundleContext" />
        <property name="jettyWebXmlLocation" value="/WEB-INF/jetty-web.xml" />
        <property name="constraintMappings">
            <list>
                <ref component-id="cxfConstraintMapping" />
            </list>
        </property>
    </bean>

    <bean id="defaultCxfReregistration" class="org.keycloak.adapters.osgi.ServletReregistrationService" depends-on="cxfKeycloakPaxWebIntegration"
          init-method="start" destroy-method="stop">
        <property name="bundleContext" ref="blueprintBundleContext" />
        <property name="managedServiceReference">
            <reference interface="org.osgi.service.cm.ManagedService" filter="(service.pid=org.apache.cxf.osgi)" timeout="5000"  />
        </property>
    </bean>

</blueprint>
As a side effect, all other CXF services running on default CXF HTTP destination will be secured too. Similarly when the application is undeployed, then whole /cxf context will become unsecured too. For this reason, it’s recommended to use your own Jetty engine for your apps like described in Secure CXF Application on separate Jetty Engine as then you have more control over security for each application individually.
-
You may need to have directory
WEB-INFinside your project (even if your project is not web application) and create files/WEB-INF/jetty-web.xmland/WEB-INF/keycloak.jsonin similar way like it’s in Classic WAR application. Note you don’t needweb.xmlas the security-constrains are declared in blueprint configuration file. -
The
Import-PackageinMETA-INF/MANIFEST.MFneeds to contain those imports:
META-INF.cxf;version="[2.7,3.2)",
META-INF.cxf.osgi;version="[2.7,3.2)";resolution:=optional,
org.apache.cxf.transport.http;version="[2.7,3.2)",
org.apache.cxf.*;version="[2.7,3.2)",
com.fasterxml.jackson.jaxrs.json;version="[2.5,3)",
org.eclipse.jetty.security;version="[8,10)",
org.eclipse.jetty.util.security;version="[8,10)",
org.keycloak.*;version="1.9.8.Final-redhat-1",
org.keycloak.adapters.jetty;version="1.9.8.Final-redhat-1",
*;resolution:=optional
2.1.3.7. Secure Fuse Admin Services
2.1.3.7.1. SSH authentication to Fuse terminal
Red Hat Single Sign-On mainly addresses usecases for authentication of web applications, however if your other web services and applications are protected with Red Hat Single Sign-On, it may be good to protect non-web admin services like SSH with Red Hat Single Sign-On credentials too. It’s possible to do it by using JAAS login module, which allows to remotely connect to Red Hat Single Sign-On and verify credentials based on Resource Owner Password Credentials.
Example steps for enable SSH authentication:
-
In Red Hat Single Sign-On you need to create client (assume it’s called
ssh-jmx-admin-client), which will be used for SSH authentication. This client needs to have switchDirect grant enabledto true. -
You need to update/specify this property in file
$FUSE_HOME/etc/org.apache.karaf.shell.cfg:
sshRealm=keycloak
-
Add file
$FUSE_HOME/etc/keycloak-direct-access.jsonwith the content similar to this (change based on your environment and Red Hat Single Sign-On client settings):
{
    "realm": "demo",
    "resource": "ssh-jmx-admin-client",
    "realm-public-key": "MIGfMA...",
    "ssl-required" : "external",
    "auth-server-url" : "http://localhost:8080/auth",
    "credentials": {
        "secret": "password"
    }
}
This file contains configuration of the client application, which is used by JAAS DirectAccessGrantsLoginModule from keycloak JAAS realm for SSH authentication.
-
Start Fuse and install
keycloakJAAS realm into Fuse. This could be done easily by installingkeycloak-jaasfeature, which has JAAS realm predefined (you are able to override it by using your ownkeycloakJAAS realm with higher ranking). Use those commands in Fuse terminal:
features:addurl mvn:org.keycloak/keycloak-osgi-features/7.0.0/xml/features
features:install keycloak-jaas
-
Now let’s type this from your terminal to login via SSH as
adminuser:
ssh -o PubkeyAuthentication=no -p 8101 admin@localhost
And login with password password. Note that your user needs to have realm role admin . The required roles are configured in $FUSE_HOME/etc/org.apache.karaf.shell.cfg
2.1.3.7.2. JMX authentication
This may be needed in case if you really want to use jconsole or other external tool to perform remote connection to JMX through RMI. Otherwise it may be better to use just hawt.io/jolokia as jolokia agent is installed in hawt.io by default.
-
In file
$FUSE_HOME/etc/org.apache.karaf.management.cfgyou can change this property:
jmxRealm=keycloak
-
You need
keycloak-jaasfeature and file$FUSE_HOME/etc/keycloak-direct-access.jsonas described in SSH section above. - In jconsole you can fill URL like:
service:jmx:rmi://localhost:44444/jndi/rmi://localhost:1099/karaf-root
and credentials: admin/password (based on the user with admin privileges according to your environment)
Note again that users without admin role are not able to login as they are not authorized. However users with access to Hawt.io admin console may be still able to access MBeans remotely via HTTP (Hawtio). So make sure to protect Hawt.io web console with same roles like JMX through RMI to really protect JMX mbeans.
2.1.3.7.3. Secure Fuse admin console
Fuse admin console is Hawt.io. See Hawt.io documentation for more info about how to secure it with Red Hat Single Sign-On. ==== Security Context
The KeycloakSecurityContext interface is available if you need to access to the tokens directly. This could be useful if you want to retrieve additional details from the token (such as user profile information) or you want to invoke a RESTful service that is protected by Red Hat Single Sign-On.
In servlet environments it is available in secured invocations as an attribute in HttpServletRequest:
httpServletRequest
    .getAttribute(KeycloakSecurityContext.class.getName());
Or, it is available in secure and insecure requests in the HttpSession:
httpServletRequest.getSession()
    .getAttribute(KeycloakSecurityContext.class.getName());
2.1.4. Error Handling
Red Hat Single Sign-On has some error handling facilities for servlet based client adapters. When an error is encountered in authentication, Red Hat Single Sign-On will call HttpServletResponse.sendError(). You can set up an error-page within your web.xml file to handle the error however you want. Red Hat Single Sign-On may throw 400, 401, 403, and 500 errors.
<error-page>
    <error-code>404</error-code>
    <location>/ErrorHandler</location>
</error-page>
Red Hat Single Sign-On also sets a HttpServletRequest attribute that you can retrieve. The attribute name is org.keycloak.adapters.spi.AuthenticationError, which should be casted to org.keycloak.adapters.OIDCAuthenticationError.
For example:
import org.keycloak.adapters.OIDCAuthenticationError;
import org.keycloak.adapters.OIDCAuthenticationError.Reason;
...

OIDCAuthenticationError error = (OIDCAuthenticationError) httpServletRequest
    .getAttribute('org.keycloak.adapters.spi.AuthenticationError');

Reason reason = error.getReason();
System.out.println(reason.name());
2.1.5. Logout
You can log out of a web application in multiple ways. For Java EE servlet containers, you can call HttpServletRequest.logout(). For other browser applications, you can redirect the browser to http://auth-server/auth/realms/{realm-name}/protocol/openid-connect/logout?redirect_uri=encodedRedirectUri, which logs you out if you have an SSO session with your browser.
2.1.6. Multi Tenancy
Multi Tenancy, in our context, means that a single target application (WAR) can be secured with multiple Red Hat Single Sign-On realms. The realms can be located one the same Red Hat Single Sign-On instance or on different instances.
In practice, this means that the application needs to have multiple keycloak.json adapter configuration files.
You could have multiple instances of your WAR with different adapter configuration files deployed to different context-paths. However, this may be inconvenient and you may also want to select the realm based on something else than context-path.
Red Hat Single Sign-On makes it possible to have a custom config resolver so you can choose what adapter config is used for each request.
To achieve this first you need to create an implementation of org.keycloak.adapters.KeycloakConfigResolver. For example:
package example;

import org.keycloak.adapters.KeycloakConfigResolver;
import org.keycloak.adapters.KeycloakDeployment;
import org.keycloak.adapters.KeycloakDeploymentBuilder;

public class PathBasedKeycloakConfigResolver implements KeycloakConfigResolver {

    @Override
    public KeycloakDeployment resolve(OIDCHttpFacade.Request request) {
        if (path.startsWith("alternative")) {
            KeycloakDeployment deployment = cache.get(realm);
            if (null == deployment) {
                InputStream is = getClass().getResourceAsStream("/tenant1-keycloak.json");
                return KeycloakDeploymentBuilder.build(is);
            }
        } else {
            InputStream is = getClass().getResourceAsStream("/default-keycloak.json");
            return KeycloakDeploymentBuilder.build(is);
        }
    }

}
You also need to configure which KeycloakConfigResolver implementation to use with the keycloak.config.resolver context-param in your web.xml:
<web-app>
    ...
    <context-param>
        <param-name>keycloak.config.resolver</param-name>
        <param-value>example.PathBasedKeycloakConfigResolver</param-value>
    </context-param>
</web-app>
2.1.7. Application Clustering
This chapter is related to supporting clustered applications deployed to JBoss EAP.
There are a few options available depending on whether your application is:
- Stateless or stateful
- Distributable (replicated http session) or non-distributable
- Relying on sticky sessions provided by load balancer
- Hosted on same domain as Red Hat Single Sign-On
Dealing with clustering is not quite as simple as for a regular application. Mainly due to the fact that both the browser and the server-side application sends requests to Red Hat Single Sign-On, so it’s not as simple as enabling sticky sessions on your load balancer.
2.1.7.1. Stateless token store
By default, the web application secured by Red Hat Single Sign-On uses the HTTP session to store security context. This means that you either have to enable sticky sessions or replicate the HTTP session.
As an alternative to storing the security context in the HTTP session the adapter can be configured to store this in a cookie instead. This is useful if you want to make your application stateless or if you don’t want to store the security context in the HTTP session.
To use the cookie store for saving the security context, edit your applications WEB-INF/keycloak.json and add:
"token-store": "cookie"
The default value for token-store is session, which stores the security context in the HTTP session.
One limitation of using the cookie store is that the whole security context is passed in the cookie for every HTTP request. This may impact performance.
Another small limitation is limited support for Single-Sign Out. It works without issues if you init servlet logout (HttpServletRequest.logout) from the application itself as the adapter will delete the KEYCLOAK_ADAPTER_STATE cookie. However, back-channel logout initialized from a different application isn’t propagated by Red Hat Single Sign-On to applications using cookie store. Hence it’s recommended to use a short value for the access token timeout (for example 1 minute).
2.1.7.2. Relative URI optimization
In deployment scenarios where Red Hat Single Sign-On and the application is hosted on the same domain (through a reverse proxy or load balancer) it can be convenient to use relative URI options in your client configuration.
With relative URIs the URI is resolved as relative to the URL of the URL used to access Red Hat Single Sign-On.
For example if the URL to your application is https://acme.org/myapp and the URL to Red Hat Single Sign-On is https://acme.org/auth, then you can use the redirect-uri /myapp instead of https://acme.org/myapp.
2.1.7.3. Admin URL configuration
Admin URL for a particular client can be configured in the Red Hat Single Sign-On Administration Console. It’s used by the Red Hat Single Sign-On server to send backend requests to the application for various tasks, like logout users or push revocation policies.
For example the way backchannel logout works is:
- User sends logout request from one application
- The application sends logout request to Red Hat Single Sign-On
- The Red Hat Single Sign-On server invalidates the user session
- The Red Hat Single Sign-On server then sends a backchannel request to application with an admin url that are associated with the session
- When an application receives the logout request it invalidates the corresponding HTTP session
If admin URL contains ${application.session.host} it will be replaced with the URL to the node associated with the HTTP session.
2.1.7.4. Registration of application nodes
The previous section describes how Red Hat Single Sign-On can send logout request to node associated with a specific HTTP session. However, in some cases admin may want to propagate admin tasks to all registered cluster nodes, not just one of them. For example to push a new not before policy to the application or to logout all users from the application.
In this case Red Hat Single Sign-On needs to be aware of all application cluster nodes, so it can send the event to all of them. To achieve this, we support auto-discovery mechanism:
- When a new application node joins the cluster, it sends a registration request to the Red Hat Single Sign-On server
- The request may be re-sent to Red Hat Single Sign-On in configured periodic intervals
- If the Red Hat Single Sign-On server doesn’t receive a re-registration request within a specified timeout then it automatically unregisters the specific node
- The node is also unregistered in Red Hat Single Sign-On when it sends an unregistration request, which is usually during node shutdown or application undeployment. This may not work properly for forced shutdown when undeployment listeners are not invoked, which results in the need for automatic unregistration
Sending startup registrations and periodic re-registration is disabled by default as it’s only required for some clustered applications.
To enable the feature edit the WEB-INF/keycloak.json file for your application and add:
"register-node-at-startup": true,
"register-node-period": 600,
This means the adapter will send the registration request on startup and re-register every 10 minutes.
In the Red Hat Single Sign-On Administration Console you can specify the maximum node re-registration timeout (should be larger than register-node-period from the adapter configuration). You can also manually add and remove cluster nodes in through the Adminstration Console, which is useful if you don’t want to rely on the automatic registration feature or if you want to remove stale application nodes in the event your not using the automatic unregistration feature.
2.1.7.5. Refresh token in each request
By default the application adapter will only refresh the access token when it’s expired. However, you can also configure the adapter to refresh the token on every request. This may have a performance impact as your application will send more requests to the Red Hat Single Sign-On server.
To enable the feature edit the WEB-INF/keycloak.json file for your application and add:
"always-refresh-token": true
This may have a significant impact on performance. Only enable this feature if you can’t rely on backchannel messages to propagate logout and not before policies. Another thing to consider is that by default access tokens has a short expiration so even if logout is not propagated the token will expire within minutes of the logout.
2.2. Javascript Adapter
Red Hat Single Sign-On comes with a client-side JavaScript library that can be used to secure HTML5/JavaScript applications. The JavaScript adapter has built-in support for Cordova applications.
The library can be retrieved directly from the Red Hat Single Sign-On server at /auth/js/keycloak.js and is also distributed as a ZIP archive.
One important thing to note about using client-side applications is that the client has to be a public client as there is no secure way to store client credentials in a client-side application. This makes it very important to make sure the redirect URIs you have configured for the client are correct and as specific as possible.
To use the JavaScript adapter you must first create a client for your application in the Red Hat Single Sign-On Administration Console. Make sure public is selected for Access Type.
You also need to configure valid redirect URIs and valid web origins. Be as specific as possible as failing to do so may result in a security vulnerability.
Once the client is created click on the Installation tab select Keycloak OIDC JSON for Format Option then click on Download. The downloaded keycloak.json file should be hosted on your web server at the same location as your HTML pages.
Alternatively, you can skip the configuration file and manually configure the adapter.
The following example shows how to initialize the JavaScript adapter:
<head>
    <script src="keycloak.js"></script>
    <script>
        var keycloak = Keycloak();
        keycloak.init().success(function(authenticated) {
            alert(authenticated ? 'authenticated' : 'not authenticated');
        }).error(function() {
            alert('failed to initialize');
        });
    </script>
</head>
If the keycloak.json file is in a different location you can specify it:
var keycloak = Keycloak('http://localhost:8080/myapp/keycloak.json'));Alternatively, you can pass in a JavaScript object with the required configuration instead:
var keycloak = Keycloak({
    url: 'http://keycloak-server/auth',
    realm: 'myrealm',
    clientId: 'myapp'
});
By default to authenticate you need to call the login function. However, there are two options available to make the adapter automatically authenticate. You can pass login-required or check-sso to the init function. login-required will authenticate the client if the user is logged-in to Red Hat Single Sign-On or display the login page if not. check-sso will only authenticate the client if the user is already logged-in, if the user is not logged-in the browser will be redirected back to the application and remain unauthenticated.
To enable login-required set onLoad to login-required and pass to the init method:
keycloak.init({ onLoad: 'login-required' })
After the user is authenticated the application can make requests to RESTful services secured by Red Hat Single Sign-On by including the bearer token in the Authorization header. For example:
var loadData = function () {
    document.getElementById('username').innerText = keycloak.username;

    var url = 'http://localhost:8080/restful-service';

    var req = new XMLHttpRequest();
    req.open('GET', url, true);
    req.setRequestHeader('Accept', 'application/json');
    req.setRequestHeader('Authorization', 'Bearer ' + keycloak.token);

    req.onreadystatechange = function () {
        if (req.readyState == 4) {
            if (req.status == 200) {
                alert('Success');
            } else if (req.status == 403) {
                alert('Forbidden');
            }
        }
    }

    req.send();
};
One thing to keep in mind is that the access token by default has a short life expiration so you may need to refresh the access token prior to sending the request. You can do this by the updateToken method. The updateToken method returns a promise object which makes it easy to invoke the service only if the token was successfully refreshed and for example display an error to the user if it wasn’t. For example:
keycloak.updateToken(30).success(function() {
    loadData();
}).error(function() {
    alert('Failed to refresh token');
);
2.2.1. Session status iframe
By default, the JavaScript adapter creates a hidden iframe that is used to detect if a Single-Sign Out has occurred. This does not require any network traffic, instead the status is retrieved by looking at a special status cookie. This feature can be disabled by setting checkLoginIframe: false in the options passed to the init method.
You should not rely on looking at this cookie directly. It’s format can change and it’s also associated with the URL of the Red Hat Single Sign-On server, not your application.
2.2.2. Implicit and Hybrid Flow
By default, the JavaScript adapter uses the Authorization Code flow.
With this flow the Red Hat Single Sign-On server returns an authorization code, not an authentication token, to the application. The JavaScript adapter exchanges the code for an access token and a refresh token after the browser is redirected back to the application.
Red Hat Single Sign-On also supports the Implicit flow where an access token is sent immediately after successful authentication with Red Hat Single Sign-On. This may have better performance than standard flow, as there is no additional request to exchange the code for tokens, but it has implications when the access token expires.
However, sending the access token in the URL fragment can be a security vulnerability. For example the token could be leaked through web server logs and or browser history.
To enable implicit flow, you need to enable the Implicit Flow Enabled flag for the client in the Red Hat Single Sign-On Administration Console. You also need to pass the parameter flow with value implicit to init method:
keycloak.init({ flow: 'implicit' })One thing to note is that only an access token is provided and there is no refresh token. This means that once the access token has expired the application has to do the redirect to the Red Hat Single Sign-On again to obtain a new access token.
Red Hat Single Sign-On also supports the Hybrid flow.
This requires the client to have both the Standard Flow Enabled and Implicit Flow Enabled flags enabled in the admin console. The Red Hat Single Sign-On server will then send both the code and tokens to your application. The access token can be used immediately while the code can be exchanged for access and refresh tokens. Similar to the implicit flow, the hybrid flow is good for performance because the access token is available immediately. But, the token is still sent in the URL, and the security vulnerability mentioned earlier may still apply.
One advantage in the Hybrid flow is that the refresh token is made available to the application.
For the Hybrid flow, you need to pass the parameter flow with value hybrid to the init method:
keycloak.init({ flow: 'hybrid' })2.2.3. Older browsers
The JavaScript adapter depends on Base64 (window.btoa and window.atob) and HTML5 History API. If you need to support browsers that don’t have these available (for example IE9) you need to add polyfillers.
Example polyfill libraries:
2.2.4. JavaScript Adapter reference
2.2.4.1. Constructor
new Keycloak();
new Keycloak('http://localhost/keycloak.json');
new Keycloak({ url: 'http://localhost/auth', realm: 'myrealm', clientId: 'myApp' });
2.2.4.2. Properties
- authenticated
-
Is
trueif the user is authenticated,falseotherwise. - token
-
The base64 encoded token that can be sent in the
Authorizationheader in requests to services. - tokenParsed
- The parsed token as a JavaScript object.
- subject
- The user id.
- idToken
- The base64 encoded ID token.
- idTokenParsed
- The parsed id token as a JavaScript object.
- realmAccess
- The realm roles associated with the token.
- resourceAccess
- The resource roles assocaited with the token.
- refreshToken
- The base64 encoded refresh token that can be used to retrieve a new token.
- refreshTokenParsed
- The parsed refresh token as a JavaScript object.
- timeSkew
- The estimated time difference between the browser time and the Red Hat Single Sign-On server in seconds. This value is just an estimation, but is accurate enough when determining if a token is expired or not.
- responseMode
- Response mode passed in init (default value is fragment).
- flow
- Flow passed in init.
- responseType
- Response type sent to Red Hat Single Sign-On with login requests. This is determined based on the flow value used during initialization, but can be overridden by setting this value.
2.2.4.3. Methods
2.2.4.3.1. init(options)
Called to initialize the adapter.
Options is an Object, where:
- onLoad - Specifies an action to do on load. Supported values are 'login-required' or 'check-sso'.
- token - Set an initial value for the token.
- refreshToken - Set an initial value for the refresh token.
- idToken - Set an initial value for the id token (only together with token or refreshToken).
- timeSkew - Set an initial value for skew between local time and Red Hat Single Sign-On server in seconds (only together with token or refreshToken).
- checkLoginIframe - Set to enable/disable monitoring login state (default is true).
- checkLoginIframeInterval - Set the interval to check login state (default is 5 seconds).
- responseMode - Set the OpenID Connect response mode send to Red Hat Single Sign-On server at login request. Valid values are query or fragment . Default value is fragment, which means that after successful authentication will Red Hat Single Sign-On redirect to javascript application with OpenID Connect parameters added in URL fragment. This is generally safer and recommended over query.
- flow - Set the OpenID Connect flow. Valid values are standard, implicit or hybrid.
Returns promise to set functions to be invoked on success or error.
2.2.4.3.2. login(options)
Redirects to login form on (options is an optional object with redirectUri and/or prompt fields).
Options is an Object, where:
- redirectUri - Specifies the uri to redirect to after login.
-
prompt - By default the login screen is displayed if the user is not logged-in to Red Hat Single Sign-On. To only authenticate to the application if the user is already logged-in and not display the login page if the user is not logged-in, set this option to
none. - loginHint - Used to pre-fill the username/email field on the login form.
- action - If value is 'register' then user is redirected to registration page, otherwise to login page.
- locale - Specifies the desired locale for the UI.
2.2.4.3.3. createLoginUrl(options)
Returns the URL to login form on (options is an optional object with redirectUri and/or prompt fields).
Options is an Object, where:
- redirectUri - Specifies the uri to redirect to after login.
- prompt - Can be set to 'none' to check if the user is logged in already (if not logged in, a login form is not displayed).
2.2.4.3.4. logout(options)
Redirects to logout.
Options is an Object, where:
- redirectUri - Specifies the uri to redirect to after logout.
2.2.4.3.5. createLogoutUrl(options)
Returns the URL to logout the user.
Options is an Object, where:
- redirectUri - Specifies the uri to redirect to after logout.
2.2.4.3.6. register(options)
Redirects to registration form. Shortcut for login with option action = 'register'
Options are same as for the login method but 'action' is set to 'register'
2.2.4.3.7. createRegisterUrl(options)
Returns the url to registration page. Shortcut for createLoginUrl with option action = 'register'
Options are same as for the createLoginUrl method but 'action' is set to 'register'
2.2.4.3.8. accountManagement()
Redirects to the Account Management Console.
2.2.4.3.9. createAccountUrl()
Returns the URL to the Account Management Console.
2.2.4.3.10. hasRealmRole(role)
Returns true if the token has the given realm role.
2.2.4.3.11. hasResourceRole(role, resource)
Returns true if the token has the given role for the resource (resource is optional, if not specified clientId is used).
2.2.4.3.12. loadUserProfile()
Loads the users profile.
Returns promise to set functions to be invoked on success or error.
2.2.4.3.13. isTokenExpired(minValidity)
Returns true if the token has less than minValidity seconds left before it expires (minValidity is optional, if not specified 0 is used).
2.2.4.3.14. updateToken(minValidity)
If the token expires within minValidity seconds (minValidity is optional, if not specified 0 is used) the token is refreshed. If the session status iframe is enabled, the session status is also checked.
Returns promise to set functions that can be invoked if the token is still valid, or if the token is no longer valid. For example:
keycloak.updateToken(5).success(function(refreshed) {
        if (refreshed) {
            alert('Token was successfully refreshed');
        } else {
            alert('Token is still valid');
        }
    }).error(function() {
        alert('Failed to refresh the token, or the session has expired');
    });
2.2.4.3.15. clearToken()
Clear authentication state, including tokens. This can be useful if application has detected the session was expired, for example if updating token fails.
Invoking this results in onAuthLogout callback listener being invoked.
2.2.4.4. Callback Events
The adapter supports setting callback listeners for certain events.
For example:
keycloak.onAuthSuccess = function() { alert('authenticated'); }The available events are:
- onReady(authenticated) - Called when the adapter is initialized.
- onAuthSuccess - Called when a user is successfully authenticated.
- onAuthError - Called if there was an error during authentication.
- onAuthRefreshSuccess - Called when the token is refreshed.
- onAuthRefreshError - Called if there was an error while trying to refresh the token.
- onAuthLogout - Called if the user is logged out (will only be called if the session status iframe is enabled, or in Cordova mode).
- onTokenExpired - Called when the access token is expired. When this happens you can for refresh the token, or if refresh is not available (ie. with implicit flow) you can redirect to login screen.
2.3. Other OpenID Connect libraries
Using Red Hat Single Sign-On with generic OpenID Connect libraries is a Technology Preview feature and is not fully supported
Red Hat Single Sign-On can be secured by supplied adapters that usually are easier to use and provide better integration with Red Hat Single Sign-On. However, if there is no adapter available for your programming language, framework or platform you may opt to use a generic OpenID Connect Resource Provider (RP) library instead. This chapter describes details specific to Red Hat Single Sign-On and doesn’t go into low-level details of the protocols. For more details refer to the OpenID Connect specifications and OAuth2 specification.
2.3.1. Endpoints
The most important endpoint to know is the well-known configuration endpoint. It lists endpoints and other configuration options relevant to the OpenID Connect implementation in Red Hat Single Sign-On. The endpoint is:
/realms/{realm-name}/.well-known/openid-configuration
To get the full URL add the base URL for Red Hat Single Sign-On and replace {realm-name} with the name of your realm. For example:
http://localhost:8080/auth/realms/master/.well-known/openid-configuration
Some RP libraries will retrieve all required endpoints from this endpoint, but for others you may need to list the endpoints individually.
2.3.1.1. Authorization Endpoint
/realms/{realm-name}/protocol/openid-connect/authPerforms authentication of the end-user. This is done by redirecting user agent to this endpoint.
For more details see Authorization Endpoint section in OpenID Connect specification.
2.3.1.2. Token Endpoint
/realms/{realm-name}/protocol/openid-connect/tokenUsed to obtain tokens. Tokens can either be obtained by exchanging an authorization code or by supplying credentials directly depending on what flow is used. The token endpoint is also used to obtain new access tokens when they expire.
For more details see Token Endpoint section in OpenID Connect specification.
2.3.1.3. Userinfo Endpoint
/realms/{realm-name}/protocol/openid-connect/userinfoReturns standard claims about the authenticated user. Protected by a bearer token.
For more details see Userinfo Endpoint section in OpenID Connect specification.
2.3.1.4. Logout Endpoint
/realms/{realm-name}/protocol/openid-connect/logoutLogs out the authenticated user.
User agent can be redirected to the endpoint in which case the active user session will be logged out. Afterwards the user agent is redirected back to the application.
The endpoint can also be invoked directly by the application. To invoke this endpoint directly the refresh token needs to be included as well as credentials required to authenticate the client.
2.3.1.5. Certificate Endpoint
/realms/{realm-name}/protocol/openid-connect/certsPublic key used by realm encoded as a JSON Web Key (JWK). This key can be used to verify tokens issued by Red Hat Single Sign-On without making invocations to the server.
For more details see JSON Web Key specification.
2.3.1.6. Introspection Endpoint
/realms/{realm-name}/protocol/openid-connect/token/introspectUsed to retrieve the active state of a token. Protected by a bearer token and can only be invoked by confidential clients.
For more details see OAuth 2.0 Token Introspection specification.
2.3.1.7. Dynamic Client Registration Endpoint
/realms/{realm-name}/clients-registrations/openid-connectUsed to dynamically register clients.
For more details see Client Registration chapter and the OpenID Connect Dynamic Client Registration specification.
2.3.2. Flows
2.3.2.1. Authorization Code
The Authorization Code flow redirects the user agent to Red Hat Single Sign-On. Once the user has successfully authenticated with Red Hat Single Sign-On an Authorization Code is created and the user agent is redirected back to the application. The application then uses the authorization code along with its credentials to obtain an Access Token, Refresh Token and ID Token from Red Hat Single Sign-On.
The flow is targeted towards web applications, but is also recommended for native applications, including mobile applications, where it is possible to embed a user agent.
For more details refer to the Authorization Code Flow in the OpenID Connect specification.
2.3.2.2. Implicit
The Implicit flow redirects works similarly to the Authorization Code flow, but instead of returning a Authorization Code the Access Token and ID Token is returned. This reduces the need for the extra invocation to exchange the Authorization Code for an Access Token. However, it does not include a Refresh Token. This results in the need to either permit Access Tokens with a long expiration, which is problematic as it’s very hard to invalidate these. Or requires a new redirect to obtain new Access Token once the initial Access Token has expired. The Implicit flow is useful if the application only wants to authenticate the user and deals with logout itself.
There’s also a Hybrid flow where both the Access Token and an Authorization Code is returned.
One thing to note is that both the Implicit flow and Hybrid flow has potential security risks as the Access Token may be leaked through web server logs and browser history. This is somewhat mitigated by using short expiration for Access Tokens.
For more details refer to the Implicit Flow in the OpenID Connect specification.
2.3.2.3. Resource Owner Password Credentials
Resource Owner Password Credentials, referred to as Direct Grant in Red Hat Single Sign-On, allows exchanging user credentials for tokens. It’s not recommended to use this flow unless you absolutely need to. Examples where this could be useful are legacy applications and command-line interfaces.
There are a number of limitations of using this flow, including:
- User credentials are exposed to the application
- Applications need login pages
- Application needs to be aware of the authentication scheme
- Changes to authentication flow requires changes to application
- No support for identity brokering or social login
- Flows are not supported (user self-registration, required actions, etc.)
For a client to be permitted to use the Resource Owner Password Credentials grant the client has to have the Direct Access Grants Enabled option enabled.
This flow is not included in OpenID Connect, but is a part of the OAuth 2.0 specification.
For more details refer to the Resource Owner Password Credentials Grant chapter in the OAuth 2.0 specification.
2.3.2.3.1. Example using CURL
The following example shows how to obtain an access token for a user in the realm master with username user and password password. The example is using the confidential client myclient:
curl \
  -d "client_id=myclient" \
  -d "client_secret=40cc097b-2a57-4c17-b36a-8fdf3fc2d578" \
  -d "username=user" \
  -d "password=password" \
  -d "grant_type=password" \
  "http://localhost:8080/auth/realms/master/protocol/openid-connect/token"
2.3.2.4. Client Credentials
Client Credentials is used when clients (applications and services) wants to obtain access on behalf of themselves rather than on behalf of a user. This can for example be useful for background services that applies changes to the system in general rather than for a specific user.
Red Hat Single Sign-On provides support for clients to authenticate either with a secret or with public/private keys.
This flow is not included in OpenID Connect, but is a part of the OAuth 2.0 specification.
For more details refer to the Client Credentials Grant chapter in the OAuth 2.0 specification.
2.3.3. Redirect URIs
When using the redirect based flows it’s important to use valid redirect uris for your clients. The redirect uris should be as specific as possible. This especially applies to client-side (public clients) applications. Failing to do so could result in:
- Open redirects - this can allow attackers to create spoof links that looks like they are coming from your domain
- Unauthorized entry - when users are already authenticated with Red Hat Single Sign-On an attacker can use a public client where redirect uris have not be configured correctly to gain access by redirecting the user without the users knowledge
In production for web applications always use https for all redirect URIs. Do not allow redirects to http.
There’s also a few special redirect URIs:
http://localhost- This redirect URI is useful for native applications and allows the native application to create a web server on a random port that can be used to obtain the authorization code. This redirect uri allows any port.
urn:ietf:wg:oauth:2.0:oob-
If its not possible to start a web server in the client (or a browser is not available) it is possible to use the special
urn:ietf:wg:oauth:2.0:oobredirect uri. When this redirect uri is used Red Hat Single Sign-On displays a page with the code in the title and in a box on the page. The application can either detect that the browser title has changed, or the user can copy/paste the code manually to the application. With this redirect uri it is also possible for a user to use a different device to obtain a code to paste back to the application.
Chapter 3. SAML
This section describes how you can secure applications and services with SAML using either Red Hat Single Sign-On client adapters or generic SAML provider libraries.
3.1. Java Adapters
Red Hat Single Sign-On comes with a range of different adapters for Java application. Selecting the correct adapter depends on the target platform.
3.1.1. General Adapter Config
Each SAML client adapter supported by Red Hat Single Sign-On can be configured by a simple XML text file. This is what one might look like:
<keycloak-saml-adapter>
    <SP entityID="http://localhost:8081/sales-post-sig/"
        sslPolicy="EXTERNAL"
        nameIDPolicyFormat="urn:oasis:names:tc:SAML:1.1:nameid-format:unspecified"
        logoutPage="/logout.jsp"
        forceAuthentication="false"
        isPassive="false"
        turnOffChangeSessionIdOnLogin="false">
        <Keys>
            <Key signing="true" >
                <KeyStore resource="/WEB-INF/keystore.jks" password="store123">
                    <PrivateKey alias="http://localhost:8080/sales-post-sig/" password="test123"/>
                    <Certificate alias="http://localhost:8080/sales-post-sig/"/>
                </KeyStore>
            </Key>
        </Keys>
        <PrincipalNameMapping policy="FROM_NAME_ID"/>
        <RoleIdentifiers>
            <Attribute name="Role"/>
        </RoleIdentifiers>
        <IDP entityID="idp"
             signaturesRequired="true">
        <SingleSignOnService requestBinding="POST"
                             bindingUrl="http://localhost:8081/auth/realms/demo/protocol/saml"
                    />

            <SingleLogoutService
                    requestBinding="POST"
                    responseBinding="POST"
                    postBindingUrl="http://localhost:8081/auth/realms/demo/protocol/saml"
                    redirectBindingUrl="http://localhost:8081/auth/realms/demo/protocol/saml"
                    />
            <Keys>
                <Key signing="true">
                    <KeyStore resource="/WEB-INF/keystore.jks" password="store123">
                        <Certificate alias="demo"/>
                    </KeyStore>
                </Key>
            </Keys>
        </IDP>
     </SP>
</keycloak-saml-adapter>
Some of these configuration switches may be adapter specific and some are common across all adapters. For Java adapters you can use $\{…} enclosure as System property replacement. For example $\{jboss.server.config.dir}.
3.1.1.1. SP Element
Here is the explanation of the SP element attributes
<SP entityID="sp"
    sslPolicy="ssl"
    nameIDPolicyFormat="format"
    forceAuthentication="true"
    isPassive="false">
...
</SP>- entityID
- This is the identifier for this client. The IDP needs this value to determine who the client is that is communicating with it. This setting is REQUIRED.
- sslPolicy
-
This is the SSL policy the adapter will enforce. Valid values are:
ALL,EXTERNAL, andNONE. ForALL, all requests must come in via HTTPS. ForEXTERNAL, only non-private IP addresses must come over the wire via HTTPS. ForNONE, no requests are required to come over via HTTPS. This settings is OPTIONAL. Default value isEXTERNAL. - nameIDPolicyFormat
-
SAML clients can request a specific NameID Subject format. Fill in this value if you want a specific format. It must be a standard SAML format identifier, i.e.
urn:oasis:names:tc:SAML:2.0:nameid-format:transient. This setting is OPTIONAL. By default, no special format is requested. - forceAuthentication
-
SAML clients can request that a user is re-authenticated even if they are already logged in at the IDP. Set this to
trueto enable. This setting is OPTIONAL. Default value isfalse. - isPassive
-
SAML clients can request that a user is never asked to authenticate even if they are not logged in at the IDP. Set this to
trueif you want this. Do not use together withforceAuthenticationas they are opposite. This setting is OPTIONAL. Default value isfalse. - turnOffChangeSessionIdOnLogin
-
The session id is changed by default on a successful login on some platforms to plug a security attack vector. Change this to
trueto disable this. It is recommended you do not turn it off. Default value isfalse.
3.1.1.2. SP Keys and Key elements
If the IDP requires that the client application (SP) sign all of its requests and/or if the IDP will encrypt assertions, you must define the keys used to do this. For client signed documents you must define both the private and public key or certificate that will be used to sign documents. For encryption, you only have to define the private key that will be used to decrypt.
There are two ways to describe your keys. They can be stored within a Java KeyStore or you can copy/paste the keys directly within keycloak-saml.xml in the PEM format.
        <Keys>
            <Key signing="true" >
               ...
            </Key>
        </Keys>
The Key element has two optional attributes signing and encryption. When set to true these tell the adapter what the key will be used for. If both attributes are set to true, then the key will be used for both signing documents and decrypting encrypted assertions. You must set at least one of these attributes to true.
3.1.1.2.1. KeyStore element
Within the Key element you can load your keys and certificates from a Java Keystore. This is declared within a KeyStore element.
        <Keys>
            <Key signing="true" >
                <KeyStore resource="/WEB-INF/keystore.jks" password="store123">
                    <PrivateKey alias="myPrivate" password="test123"/>
                    <Certificate alias="myCertAlias"/>
                </KeyStore>
            </Key>
        </Keys>
Here are the XML config attributes that are defined with the KeyStore element.
- file
- File path to the key store. This option is OPTIONAL. The file or resource attribute must be set.
- resource
- WAR resource path to the KeyStore. This is a path used in method call to ServletContext.getResourceAsStream(). This option is OPTIONAL. The file or resource attribute must be set.
- password
- The password of the KeyStore. This option is REQUIRED.
If you are defining keys that the SP will use to sign document, you must also specify references to your private keys and certificates within the Java KeyStore. The PrivateKey and Certificate elements in the above example define an alias that points to the key or cert within the keystore. Keystores require an additional password to access private keys. In the PrivateKey element you must define this password within a password attribute.
3.1.1.2.2. Key PEMS
Within the Key element you declare your keys and certificates directly using the sub elements PrivateKeyPem, PublicKeyPem, and CertificatePem. The values contained in these elements must conform to the PEM key format. You usually use this option if you are generating keys using openssl or similar command line tool.
<Keys>
   <Key signing="true>
      <PrivateKeyPem>
         2341251234AB31234==231BB998311222423522334
      </PrivateKeyPem>
      <CertificatePem>
         211111341251234AB31234==231BB998311222423522334
      </CertificatePem>
   </Key>
</Keys>
3.1.1.3. SP PrincipalNameMapping element
This element is optional. When creating a Java Principal object that you obtain from methods like HttpServletRequest.getUserPrincipal(), you can define what name that is returned by the Principal.getName() method.
<SP ...>
  <PrincipalNameMapping policy="FROM_NAME_ID"/>
</SP>

<SP ...>
  <PrincipalNameMapping policy="FROM_ATTRIBUTE" attribute="email" />
</SP>
The policy attribute defines the policy used to populate this value. The possible values for this attribute are:
- FROM_NAME_ID
- This policy just uses whatever the SAML subject value is. This is the default setting
- FROM_ATTRIBUTE
-
This will pull the value from one of the attributes declared in the SAML assertion received from the server. You’ll need to specify the name of the SAML assertion attribute to use within the
attributeXML attribute.
3.1.1.4. RoleIdentifiers element
The RoleIdentifiers element defines what SAML attributes within the assertion received from the user should be used as role identifiers within the Java EE Security Context for the user.
<RoleIdentifiers>
     <Attribute name="Role"/>
     <Attribute name="member"/>
     <Attribute name="memberOf"/>
</RoleIdentifiers>
By default Role attribute values are converted to Java EE roles. Some IDPs send roles via a member or memberOf attribute assertion. You can define one or more Attribute elements to specify which SAML attributes must be converted into roles.
3.1.1.5. IDP Element
Everything in the IDP element describes the settings for the identity provider (authentication server) the SP is communicating with.
<IDP entityID="idp"
     signaturesRequired="true"
     signatureAlgorithm="RSA_SHA1"
     signatureCanonicalizationMethod="http://www.w3.org/2001/10/xml-exc-c14n#">
...
</IDP>
Here are the attribute config options you can specify within the IDP element declaration.
- entityID
- This is the issuer ID of the IDP. This setting is REQUIRED.
- signaturesRequired
-
If set to
true, the client adapter will sign every document it sends to the IDP. Also, the client will expect that the IDP will be signing any documents sent to it. This switch sets the default for all request and response types, but you will see later that you have some fine grain control over this. This setting is OPTIONAL and will default tofalse. - signatureAlgorithm
-
This is the signature algorithm that the IDP expects signed documents to use. Allowed values are:
RSA_SHA1,RSA_SHA256,RSA_SHA512, andDSA_SHA1. This setting is OPTIONAL and defaults toRSA_SHA256. - signatureCanonicalizationMethod
-
This is the signature canonicalization method that the IDP expects signed documents to use. This setting is OPTIONAL. The default value is
http://www.w3.org/2001/10/xml-exc-c14n#and should be good for most IDPs.
3.1.1.6. IDP SingleSignOnService sub element
The SingleSignOnService sub element defines the login SAML endpoint of the IDP. The client adapter will send requests to the IDP formatted via the settings within this element when it wants to login.
<SingleSignOnService signRequest="true"
                     validateResponseSignature="true"
                     requestBinding="post"
                     bindingUrl="url"/>
Here are the config attributes you can define on this element:
- signRequest
-
Should the client sign authn requests? This setting is OPTIONAL. Defaults to whatever the IDP
signaturesRequiredelement value is. - validateResponseSignature
-
Should the client expect the IDP to sign the assertion response document sent back from an auhtn request? This setting OPTIONAL. Defaults to whatever the IDP
signaturesRequiredelement value is. - requestBinding
-
This is the SAML binding type used for communicating with the IDP. This setting is OPTIONAL. The default value is
POST, but you can set it toREDIRECTas well. - responseBinding
-
SAML allows the client to request what binding type it wants authn responses to use. The values of this can be
POSTorREDIRECT. This setting is OPTIONAL. The default is that the client will not request a specific binding type for responses. - bindingUrl
- This is the URL for the IDP login service that the client will send requests to. This setting is REQUIRED.
3.1.1.7. IDP SingleLogoutService sub element
The SingleLogoutService sub element defines the logout SAML endpoint of the IDP. The client adapter will send requests to the IDP formatted via the settings within this element when it wants to logout.
<SingleLogoutService validateRequestSignature="true"
                     validateResponseSignature="true"
                     signRequest="true"
                     signResponse="true"
                     requestBinding="redirect"
                     responseBinding="post"
                     postBindingUrl="posturl"
redirectBindingUrl="redirecturl">- signRequest
-
Should the client sign logout requests it makes to the IDP? This setting is OPTIONAL. Defaults to whatever the IDP
signaturesRequiredelement value is. - signResponse
-
Should the client sign logout responses it sends to the IDP requests? This setting is OPTIONAL. Defaults to whatever the IDP
signaturesRequiredelement value is. - validateRequestSignature
-
Should the client expect signed logout request documents from the IDP? This setting is OPTIONAL. Defaults to whatever the IDP
signaturesRequiredelement value is. - validateResponseSignature
-
Should the client expect signed logout response documents from the IDP? This setting is OPTIONAL. Defaults to whatever the IDP
signaturesRequiredelement value is. - requestBinding
-
This is the SAML binding type used for communicating SAML requests to the IDP. This setting is OPTIONAL. The default value is
POST, but you can set it to REDIRECT as well. - responseBinding
-
This is the SAML binding type used for communicating SAML responses to the IDP. The values of this can be
POSTorREDIRECT. This setting is OPTIONAL. The default value isPOST, but you can set it toREDIRECTas well. - postBindingUrl
-
This is the URL for the IDP’s logout service when using the POST binding. This setting is REQUIRED if using the
POSTbinding. - redirectBindingUrl
- This is the URL for the IDP’s logout service when using the REDIRECT binding. This setting is REQUIRED if using the REDIRECT binding.
3.1.1.8. IDP Keys subelement
The Keys sub element of IDP is only used to define the certificate or public key to use to verify documents signed by the IDP. It is defined in the same way as the SP’s Key’s element. But again, you only have to define one certificate or public key reference.
       <IDP entityID="idp">
            ...
            <Keys>
                <Key signing="true">
                    <KeyStore resource="/WEB-INF/keystore.jks" password="store123">
                        <Certificate alias="demo"/>
                    </KeyStore>
                </Key>
            </Keys>
        </IDP>
3.1.2. JBoss EAP Adapter
To be able to secure WAR apps deployed on JBoss EAP, you must install and configure the Red Hat Single Sign-On SAML Adapter Subsystem.
You then provide a keycloak config, /WEB-INF/keycloak-saml.xml file in your WAR and change the auth-method to KEYCLOAK-SAML within web.xml. Both methods are described in this section.
3.1.2.1. Adapter Installation
Each adapter is a separate download on the Red Hat Single Sign-On download site.
Install on JBoss EAP 6.x:
$ cd $JBOSS_HOME
$ unzip rh-sso-saml-eap6-adapter.zip
Install on JBoss EAP 7.x:
$ cd $JBOSS_HOME
$ unzip rh-sso-saml-eap7-adapter.zip
These zip files create new JBoss Modules specific to the Wildfly/JBoss EAP SAML Adapter within your Wildfly or JBoss EAP distro.
After adding the modules, you must then enable the Red Hat Single Sign-On SAML Subsystem within your app server’s server configuration: domain.xml or standalone.xml.
There is a CLI script that will help you modify your server configuration. Start the server and run the script from the server’s bin directory:
$ cd $JBOSS_HOME/bin
$ jboss-cli.sh -c --file=adapter-install-saml.cli
The script will add the extension, subsystem, and optional security-domain as described below.
<server xmlns="urn:jboss:domain:1.4">

    <extensions>
        <extension module="org.keycloak.keycloak-saml-adapter-subsystem"/>
          ...
    </extensions>

    <profile>
        <subsystem xmlns="urn:jboss:domain:keycloak-saml:1.1"/>
         ...
    </profile>
The keycloak security domain should be used with EJBs and other components when you need the security context created in the secured web tier to be propagated to the EJBs (other EE component) you are invoking. Otherwise this configuration is optional.
<server xmlns="urn:jboss:domain:1.4">
 <subsystem xmlns="urn:jboss:domain:security:1.2">
    <security-domains>
...
      <security-domain name="keycloak">
         <authentication>
           <login-module code="org.keycloak.adapters.jboss.KeycloakLoginModule"
                         flag="required"/>
          </authentication>
      </security-domain>
    </security-domains>
For example, if you have a JAX-RS service that is an EJB within your WEB-INF/classes directory, you’ll want to annotate it with the @SecurityDomain annotation as follows:
import org.jboss.ejb3.annotation.SecurityDomain;
import org.jboss.resteasy.annotations.cache.NoCache;

import javax.annotation.security.RolesAllowed;
import javax.ejb.EJB;
import javax.ejb.Stateless;
import javax.ws.rs.GET;
import javax.ws.rs.Path;
import javax.ws.rs.Produces;
import java.util.ArrayList;
import java.util.List;

@Path("customers")
@Stateless
@SecurityDomain("keycloak")
public class CustomerService {

    @EJB
    CustomerDB db;

    @GET
    @Produces("application/json")
    @NoCache
    @RolesAllowed("db_user")
    public List<String> getCustomers() {
        return db.getCustomers();
    }
}
We hope to improve our integration in the future so that you don’t have to specify the @SecurityDomain annotation when you want to propagate a keycloak security context to the EJB tier.
3.1.2.2. Per WAR Configuration
This section describes how to secure a WAR directly by adding config and editing files within your WAR package.
The first thing you must do is create a keycloak-saml.xml adapter config file within the WEB-INF directory of your WAR. The format of this config file is described in the General Adapter Config section.
Next you must set the auth-method to KEYCLOAK-SAML in web.xml. You also have to use standard servlet security to specify role-base constraints on your URLs. Here’s an example web.xml file:
<web-app xmlns="http://java.sun.com/xml/ns/javaee"
      xmlns:xsi="http://www.w3.org/2001/XMLSchema-instance"
      xsi:schemaLocation="http://java.sun.com/xml/ns/javaee http://java.sun.com/xml/ns/javaee/web-app_3_0.xsd"
      version="3.0">

	<module-name>customer-portal</module-name>

    <security-constraint>
        <web-resource-collection>
            <web-resource-name>Admins</web-resource-name>
            <url-pattern>/admin/*</url-pattern>
        </web-resource-collection>
        <auth-constraint>
            <role-name>admin</role-name>
        </auth-constraint>
        <user-data-constraint>
            <transport-guarantee>CONFIDENTIAL</transport-guarantee>
        </user-data-constraint>
    </security-constraint>
    <security-constraint>
        <web-resource-collection>
            <web-resource-name>Customers</web-resource-name>
            <url-pattern>/customers/*</url-pattern>
        </web-resource-collection>
        <auth-constraint>
            <role-name>user</role-name>
        </auth-constraint>
        <user-data-constraint>
            <transport-guarantee>CONFIDENTIAL</transport-guarantee>
        </user-data-constraint>
    </security-constraint>

    <login-config>
        <auth-method>KEYCLOAK-SAML</auth-method>
        <realm-name>this is ignored currently</realm-name>
    </login-config>

    <security-role>
        <role-name>admin</role-name>
    </security-role>
    <security-role>
        <role-name>user</role-name>
    </security-role>
</web-app>
All standard servlet settings except the auth-method setting.
3.1.2.3. Securing WARs via Red Hat Single Sign-On SAML Subsystem
You do not have to crack open a WAR to secure it with Red Hat Single Sign-On. Alternatively, you can externally secure it via the Red Hat Single Sign-On SAML Adapter Subsystem. While you don’t have to specify KEYCLOAK-SAML as an auth-method, you still have to define the security-constraints in web.xml. You do not, however, have to create a WEB-INF/keycloak-saml.xml file. This metadata is instead defined within the XML in your server’s domain.xml or standalone.xml subsystem configuration section.
<extensions>
  <extension module="org.keycloak.keycloak-saml-adapter-subsystem"/>
</extensions>

<profile>
  <subsystem xmlns="urn:jboss:domain:keycloak-saml:1.1">
    <secure-deployment name="WAR MODULE NAME.war">
      <SP entityID="APPLICATION URL">
        ...
      </SP>
    </secure-deployment>
  </subsystem>
</profile>
The secure-deployment name attribute identifies the WAR you want to secure. Its value is the module-name defined in web.xml with .war appended. The rest of the configuration uses the same XML syntax as keycloak-saml.xml configuration defined in General Adapter Config.
An example configuration:
<subsystem xmlns="urn:jboss:domain:keycloak-saml:1.1">
  <secure-deployment name="saml-post-encryption.war">
    <SP entityID="http://localhost:8080/sales-post-enc/"
        sslPolicy="EXTERNAL"
        nameIDPolicyFormat="urn:oasis:names:tc:SAML:1.1:nameid-format:unspecified"
        logoutPage="/logout.jsp"
        forceAuthentication="false">
      <Keys>
        <Key signing="true" encryption="true">
          <KeyStore resource="/WEB-INF/keystore.jks" password="store123">
            <PrivateKey alias="http://localhost:8080/sales-post-enc/" password="test123"/>
            <Certificate alias="http://localhost:8080/sales-post-enc/"/>
          </KeyStore>
        </Key>
      </Keys>
      <PrincipalNameMapping policy="FROM_NAME_ID"/>
      <RoleIdentifiers>
        <Attribute name="Role"/>
      </RoleIdentifiers>
      <IDP entityID="idp">
        <SingleSignOnService signRequest="true"
            validateResponseSignature="true"
            requestBinding="POST"
            bindingUrl="http://localhost:8080/auth/realms/saml-demo/protocol/saml"/>

        <SingleLogoutService
            validateRequestSignature="true"
            validateResponseSignature="true"
            signRequest="true"
            signResponse="true"
            requestBinding="POST"
            responseBinding="POST"
            postBindingUrl="http://localhost:8080/auth/realms/saml-demo/protocol/saml"
            redirectBindingUrl="http://localhost:8080/auth/realms/saml-demo/protocol/saml"/>
        <Keys>
          <Key signing="true" >
            <KeyStore resource="/WEB-INF/keystore.jks" password="store123">
              <Certificate alias="saml-demo"/>
            </KeyStore>
          </Key>
        </Keys>
      </IDP>
    </SP>
   </secure-deployment>
</subsystem>
3.1.3. Registering with an IDP
For each servlet based adapter, the endpoint you register for the assert consumer service url and and single logout service must be the base url of your servlet application with /saml appended to it i.e. https://example.com/contextPath/saml
3.1.4. Logout
There are multiple ways you can logout from a web application. For Java EE servlet containers, you can call HttpServletRequest.logout(). For any other browser application, you can point the browser at any url of your web application that has a security constraint and pass in a query parameter GLO, i.e. http://myapp?GLO=true. This will log you out if you have an SSO session with your browser.
3.1.5. Obtaining Assertion Attributes
After a successful SAML login, your application code may want to obtain attribute values passed with the SAML assertion. HttpServletRequest.getUserPrincipal() returns a Principal object that you can typecast into a Red Hat Single Sign-On specific class called org.keycloak.adapters.saml.SamlPrincipal. This object allows you to look at the raw assertion and also has convenience functions to look up attribute values.
package org.keycloak.adapters.saml;

public class SamlPrincipal implements Serializable, Principal {
    /**
     * Get full saml assertion
     *
     * @return
     */
    public AssertionType getAssertion() {
       ...
    }

    /**
     * Get SAML subject sent in assertion
     *
     * @return
     */
    public String getSamlSubject() {
        ...
    }

    /**
     * Subject nameID format
     *
     * @return
     */
    public String getNameIDFormat() {
        ...
    }

    @Override
    public String getName() {
        ...
    }

    /**
     * Convenience function that gets Attribute value by attribute name
     *
     * @param name
     * @return
     */
    public List<String> getAttributes(String name) {
        ...

    }

    /**
     * Convenience function that gets Attribute value by attribute friendly name
     *
     * @param friendlyName
     * @return
     */
    public List<String> getFriendlyAttributes(String friendlyName) {
        ...
    }

    /**
     * Convenience function that gets first  value of an attribute by attribute name
     *
     * @param name
     * @return
     */
    public String getAttribute(String name) {
        ...
    }

    /**
     * Convenience function that gets first  value of an attribute by attribute name
     *
     *
     * @param friendlyName
     * @return
     */
    public String getFriendlyAttribute(String friendlyName) {
        ...
    }

    /**
     * Get set of all assertion attribute names
     *
     * @return
     */
    public Set<String> getAttributeNames() {
        ...
    }

    /**
     * Get set of all assertion friendly attribute names
     *
     * @return
     */
    public Set<String> getFriendlyNames() {
        ...
    }
}
3.1.6. Error Handling
Red Hat Single Sign-On has some error handling facilities for servlet based client adapters. When an error is encountered in authentication, the client adapter will call HttpServletResponse.sendError(). You can set up an error-page within your web.xml file to handle the error however you want. The client adapter may throw 400, 401, 403, and 500 errors.
<error-page>
    <error-code>404</error-code>
    <location>/ErrorHandler</location>
</error-page>
The client adapter also sets an HttpServletRequest attribute that you can retrieve. The attribute name is org.keycloak.adapters.spi.AuthenticationError. Typecast this object to: org.keycloak.adapters.saml.SamlAuthenticationError. This class can tell you exactly what happened. If this attribute is not set, then the adapter was not responsible for the error code.
public class SamlAuthenticationError implements AuthenticationError {
    public static enum Reason {
        EXTRACTION_FAILURE,
        INVALID_SIGNATURE,
        ERROR_STATUS
    }

    public Reason getReason() {
        return reason;
    }
    public StatusResponseType getStatus() {
        return status;
    }
}
3.1.7. Troubleshooting
The best way to troubleshoot some problems is to turn on debugging for saml in both the client adapter and the Red Hat Single Sign-On server. To do this turn on debugging int the org.keycloak.saml package to debug in your log4j or other logging framework. Turning this on allows you to see the SAML requests and response documents being sent to and from the server.
3.2. mod_auth_mellon Apache HTTPD Module
The mod_auth_mellon is an Apache HTTPD plugin for SAML. If your language/environment supports using Apache HTTPD as a proxy, then you can use mod_auth_mellon to secure your web application with SAML. Configuration of this adapter is beyond the scope of this document. Please see the mod_auth_mellon Github repo for more details on configuration.
To configure mod_auth_mellon you’ll need
- IDP entity descriptor XML file. This describes the connection to Red Hat Single Sign-On or another SAML IDP
- SP entity descriptor XML file. This describes the SAML connections and config for the application you are securing.
- Private key PEM file. This is a text file that defines the private key the application will use to sign documents. It is in the PEM format
- Certificate PEM file. This is a text file that defines the certificate for your application.
- mod_auth_mellon specific Apache HTTPD module config.
If you have already defined and registered the client application within a realm on the Red Hat Single Sign-On application server, Red Hat Single Sign-On can generate all the files you need except the Apache HTTPD module config. Go to the Installation tab of your SAML client and select the Mod Auth Mellon files option.
mod_auth_mellon config download
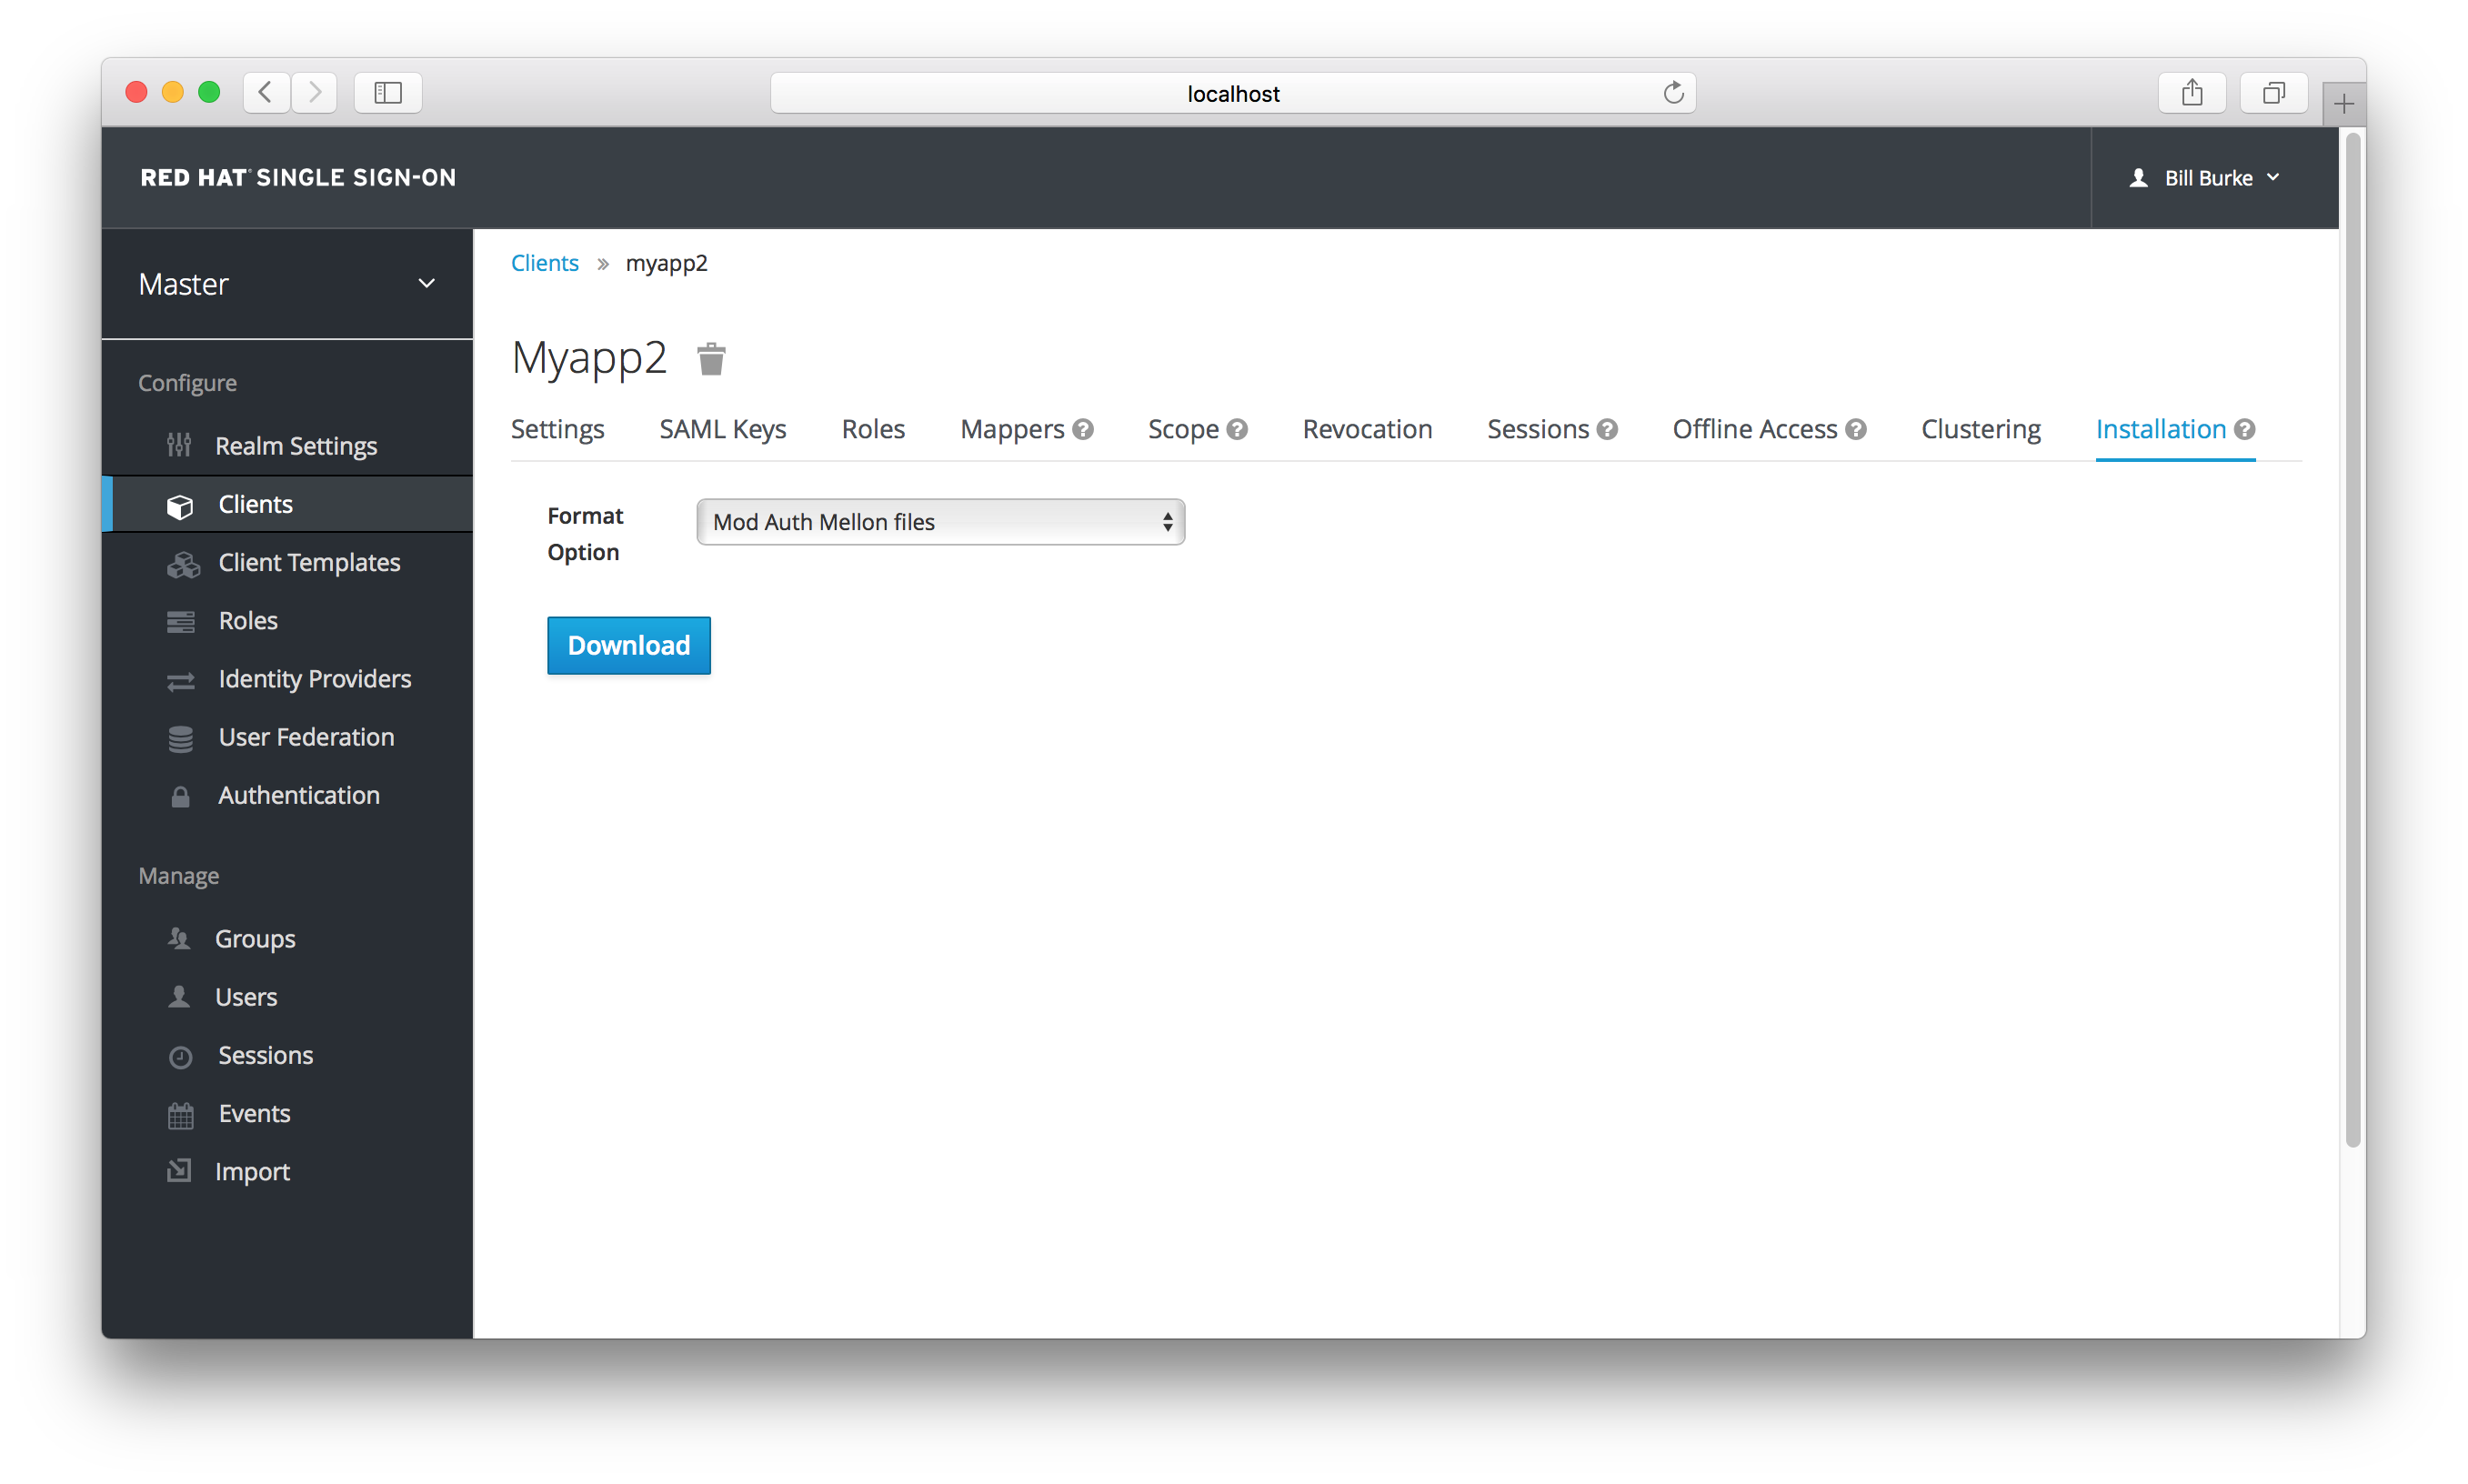
Click the Download button and you will download a zip file that contains the XML descriptor and pem files you need.
Chapter 4. Client Registration
In order for an application or service to utilize Red Hat Single Sign-On it has to register a client in Red Hat Single Sign-On. An admin can do this through the admin console (or admin REST endpoints), but clients can also register themselves through the Red Hat Single Sign-On client registration service.
The Client Registration Service provides built-in support for Red Hat Single Sign-On Client Representations, OpenID Connect Client Meta Data and SAML Entity Descriptors. The Client Registration Service endpoint is /realms/<realm>/clients-registrations/<provider>.
The built-in supported providers are:
- default - Red Hat Single Sign-On Client Representation (JSON)
- install - Red Hat Single Sign-On Adapter Configuration (JSON)
- openid-connect - OpenID Connect Client Metadata Description (JSON)
- saml2-entity-descriptor - SAML Entity Descriptor (XML)
The following sections will describe how to use the different providers.
4.1. Authentication
To invoke the Client Registration Services you need a token. The token can be a bearer token, an initial access token or a registration access token.
4.1.1. Bearer Token
The bearer token can be issued on behalf of a user or a Service Account. The following permissions are required to invoke the endpoints (see Server Administration Guide for more details):
- create-client or manage-client - To create clients
- view-client or manage-client - To view clients
- manage-client - To update or delete client
If you are using a bearer token to create clients it’s recommend to use a token from a Service Account with only the create-client role (see Server Administration Guide for more details).
4.1.2. Initial Access Token
The recommended approach to registering new clients is by using initial access tokens. An initial access token can only be used to create clients and has a configurable expiration as well as a configurable limit on how many clients can be created.
An initial access token can be created through the admin console. To create a new initial access token first select the realm in the admin console, then click on Realm Settings in the menu on the left, followed by Initial Access Tokens in the tabs displayed in the page.
You will now be able to see any existing initial access tokens. If you have access you can delete tokens that are no longer required. You can only retrieve the value of the token when you are creating it. To create a new token click on Create. You can now optionally add how long the token should be valid, also how many clients can be created using the token. After you click on Save the token value is displayed.
It is important that you copy/paste this token now as you won’t be able to retrieve it later. If you forget to copy/paste it, then delete the token and create another one.
The token value is used as a standard bearer token when invoking the Client Registration Services, by adding it to the Authorization header in the request. For example:
Authorization: bearer eyJhbGciOiJSUz...
4.1.3. Registration Access Token
When you create a client through the Client Registration Service the response will include a registration access token. The registration access token provides access to retrieve the client configuration later, but also to update or delete the client. The registration access token is included with the request in the same way as a bearer token or initial access token. Registration access tokens are only valid once when it’s used the response will include a new token.
If a client was created outside of the Client Registration Service it won’t have a registration access token associated with it. You can create one through the admin console. This can also be useful if you loose the token for a particular client. To create a new token find the client in the admin console and click on Credentials. Then click on Generate registration access token.
4.2. Red Hat Single Sign-On Representations
The default client registration provider can be used to create, retrieve, update and delete a client. It uses Red Hat Single Sign-On Client Representation format which provides support for configuring clients exactly as they can be configured through the admin console, including for example configuring protocol mappers.
To create a client create a Client Representation (JSON) then do a HTTP POST to /realms/<realm>/clients-registrations/default.
It will return a Client Representation that also includes the registration access token. You should save the registration access token somewhere if you want to retrieve the config, update or delete the client later.
To retrieve the Client Representation then do a HTTP GET to /realms/<realm>/clients-registrations/default/<client id>.
It will also return a new registration access token.
To update the Client Representation then do a HTTP PUT to with the updated Client Representation to: /realms/<realm>/clients-registrations/default/<client id>.
It will also return a new registration access token.
To delete the Client Representation then do a HTTP DELETE to: /realms/<realm>/clients-registrations/default/<client id>
4.3. Red Hat Single Sign-On Adapter Configuration
The installation client registration provider can be used to retrieve the adapter configuration for a client. In addition to token authentication you can also authenticate with client credentials using HTTP basic authentication. To do this include the following header in the request:
Authorization: basic BASE64(client-id + ':' + client-secret)
To retrieve the Adapter Configuration then do a HTTP GET to /realms/<realm>/clients-registrations/install/<client id>.
No authentication is required for public clients. This means that for the JavaScript adapter you can load the client configuration directly from Red Hat Single Sign-On using the above URL.
4.4. OpenID Connect Dynamic Client Registration
Red Hat Single Sign-On implements OpenID Connect Dynamic Client Registration, which extends OAuth 2.0 Dynamic Client Registration Protocol and OAuth 2.0 Dynamic Client Registration Management Protocol.
The endpoint to use these specifications to register clients in Red Hat Single Sign-On is /realms/<realm>/clients-registrations/openid-connect[/<client id>].
This endpoints can also be found in the OpenID Connect Discovery endpoint for the realm, /realms/<realm>/.well-known/openid-configuration.
4.5. SAML Entity Descriptors
The SAML Entity Descriptor endpoint only supports using SAML v2 Entity Descriptors to create clients. It doesn’t support retrieving, updating or deleting clients. For those operations the Red Hat Single Sign-On representation endpoints should be used. When creating a client a Red Hat Single Sign-On Client Representation is returned with details about the created client, including a registration access token.
To create a client do a HTTP POST with the SAML Entity Descriptor to /realms/<realm>/clients-registrations/saml2-entity-descriptor.
4.6. Example using CURL
The following example creates a client with the clientId myclient using CURL. You need to replace eyJhbGciOiJSUz… with a proper initial access token or bearer token.
curl -X POST \
    -d '{ "clientId": "myclient" }' \
    -H "Content-Type:application/json" \
    -H "Authorization: bearer eyJhbGciOiJSUz..." \
    http://localhost:8080/auth/realms/master/clients-registrations/default
4.7. Example using Java Client Registration API
The Client Registration Java API makes it easy to use the Client Registration Service using Java. To use include the dependency org.keycloak:keycloak-client-registration-api:>VERSION< from Maven.
For full instructions on using the Client Registration refer to the JavaDocs. Below is an example of creating a client. You need to replace eyJhbGciOiJSUz… with a proper initial access token or bearer token.
String token = "eyJhbGciOiJSUz...";

ClientRepresentation client = new ClientRepresentation();
client.setClientId(CLIENT_ID);

ClientRegistration reg = ClientRegistration.create().url("http://localhost:8080/auth/realms/myrealm/clients").build();
reg.auth(Auth.token(token));

client = reg.create(client);

String registrationAccessToken = client.getRegistrationAccessToken();