
Chapter 2. Creating a repository
A repository provides a central location for storing a related set of container images. These images can be used to build applications along with their dependencies in a standardized format.
Repositories are organized by namespaces. Each namespace can have multiple repositories. For example, you might have a namespace for your personal projects, one for your company, or one for a specific team within your organization.
Red Hat Quay provides users with access controls for their repositories. Users can make a repository public, meaning that anyone can pull, or download, the images from it, or users can make it private, restricting access to authorized users or teams.
There are two ways to create a repository in Red Hat Quay: by pushing an image with the relevant docker or podman command, or by using the Red Hat Quay UI.
2.1. Creating an image repository by using the UI
Use the following procedure to create a repository using the Red Hat Quay UI.
Procedure
- Log in to your user account through the web UI.
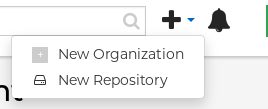
On the Red Hat Quay landing page, click Create New Repository. Alternatively, you can click the + icon → New Repository. For example:
On the Create New Repository page:
Append a Repository Name to your username or to the Organization that you wish to use.
ImportantDo not use the following words in your repository name: *
build*trigger*tagWhen these words are used for repository names, users are unable access the repository, and are unable to permanently delete the repository. Attempting to delete these repositories returns the following error:
Failed to delete repository <repository_name>, HTTP404 - Not Found.- Optional. Click Click to set repository description to add a description of the repository.
- Click Public or Private depending on your needs.
- Optional. Select the desired repository initialization.
- Click Create Private Repository to create a new, empty repository.
2.2. Creating an image repository by using the CLI
With the proper credentials, you can push an image to a repository using either Docker or Podman that does not yet exist in your Red Hat Quay instance. Pushing an image refers to the process of uploading a container image from your local system or development environment to a container registry like Quay.io. After pushing an image to Quay.io, a repository is created.
Use the following procedure to create an image repository by pushing an image.
Prerequisites
-
You have download and installed the
podmanCLI. - You have logged into Quay.io.
- You have pulled an image, for example, busybox.
Procedure
Pull a sample page from an example registry. For example:
$ sudo podman pull busybox
Example output
Trying to pull docker.io/library/busybox...
Getting image source signatures
Copying blob 4c892f00285e done
Copying config 22667f5368 done
Writing manifest to image destination
Storing signatures
22667f53682a2920948d19c7133ab1c9c3f745805c14125859d20cede07f11f9
Tag the image on your local system with the new repository and image name. For example:
$ sudo podman tag docker.io/library/busybox quay-server.example.com/quayadmin/busybox:test
Push the image to the registry. Following this step, you can use your browser to see the tagged image in your repository.
$ sudo podman push --tls-verify=false quay-server.example.com/quayadmin/busybox:test
Example output
Getting image source signatures
Copying blob 6b245f040973 done
Copying config 22667f5368 done
Writing manifest to image destination
Storing signatures