
Chapter 5. Deploying Red Hat Quay
To deploy the Red Hat Quay service on the nodes in your cluster, you use the same quay container you used to create the configuration file. The differences here are that you:
- Identify directories where the configuration files and data are stored
-
Run the command with
--sysctl net.core.somaxconn=4096 -
Don’t use the
configoption or password
For a basic setup, you can deploy on a single node; for high availability you probably want three or more nodes (for example, quay01, quay02, and quay03).
The resulting Red Hat Quay service will listen on regular port 8080 and SSL port 8443. This is different from previous releases of Red Hat Quay, which listened on standard ports 80 and 443, respectively. In this document, we map 8080 and 8443 to standard ports 80 and 443 on the host, respectively. Througout the rest of this document, we assume you have mapped the ports in this way.
Here is what you do:
Create directories: Create two directories to store configuration information and data on the host. For example:
# mkdir -p /mnt/quay/config
# #optional: if you don't choose to install an Object Store
# mkdir -p /mnt/quay/storage
Copy config files: Copy the tarball (
quay-config.tar.gz) to the configuration directory and unpack it. For example:# cp quay-config.tar.gz /mnt/quay/config/ # tar xvf quay-config.tar.gz config.yaml ssl.cert ssl.key
Deploy Red Hat Quay: Having already authenticated to Quay.io (see Accessing Red Hat Quay) run Red Hat Quay as a container, as follows:
NoteAdd
-e DEBUGLOG=trueto thedocker runcommand line for the quay container to enable debug level logging.# docker run --restart=always -p 443:8443 -p 80:8080 \ --sysctl net.core.somaxconn=4096 \ --privileged=true \ -v /mnt/quay/config:/conf/stack:Z \ -v /mnt/quay/storage:/datastorage:Z \ -d quay.io/redhat/quay:v3.3.4
- Open browser to UI: Once the quay container has started, go to your web browser and open the URL, to the node running the quay container.
- Log into Red Hat Quay: Using the superuser account you created during configuration, log in and make sure Red Hat Quay is working properly.
- Add more Red Hat Quay nodes: At this point, you have the option of adding more nodes to this Red Hat Quay cluster by simply going to each node, then adding the tarball and starting the quay container as just shown.
- Add optional features: To add more features to your Red Hat Quay cluster, such as Clair images scanning and Repository Mirroring, continue on to the next section.
5.1. Add Clair image scanning to Red Hat Quay
Setting up and deploying Clair image scanning for your Red Hat Quay deployment requires the following basic steps:
- Restarting the Red Hat Quay Setup tool
- Creating authentication keys for Clair
- Setting up a database for Clair
- Deploying the Clair container
These steps are described in Red Hat Quay Security Scanning with Clair.
5.2. Add repository mirroring Red Hat Quay
Enabling repository mirroring allows you to create container image repositories on your Red Hat Quay cluster that exactly match the content of a selected external registry, then sync the contents of those repositories on a regular schedule and on demand.
To add the repository mirroring feature to your Red Hat Quay cluster:
-
Run the repository mirroring worker. To do this, you start a quay pod with the
repomirroroption. - Select "Enable Repository Mirroring in the Red Hat Quay Setup tool.
- Log into your Red Hat Quay Web UI and begin creating mirrored repositories as described in Repository Mirroring in Red Hat Quay.
The following procedure assumes you already have a running Red Hat Quay cluster on an OpenShift platform, with the Red Hat Quay Setup container running in your browser:
Start the repo mirroring worker: Start the quay container in
repomirrormode. This example assumes you have configured TLS communications using a certificate that is currently stored in/root/ca.crt. If not, then remove the line that adds/root/ca.crtto the container:$ docker run -d --name mirroring-worker \ -v /mnt/quay/config:/conf/stack \ -v /root/ca.crt:/etc/pki/ca-trust/source/anchors/ca.crt \ quay.io/redhat/quay:v3.3.4 repomirror
- Log into config tool: Log into the Red Hat Quay Setup Web UI (config tool).
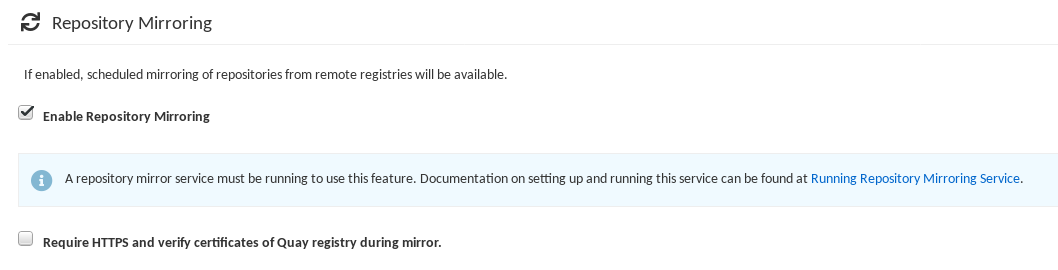
- Enable repository mirroring: Scroll down the the Repository Mirroring section and select the Enable Repository Mirroring check box, as shown here:
-
Select HTTPS and cert verification: If you want to require HTTPS communications and verify certificates during mirroring, select this check box.
- Save configuration: Select the Save Configuration Changes button. Repository mirroring should now be enabled on your Red Hat Quay cluster. Refer to Repository Mirroring in Red Hat Quay for details on setting up your own mirrored container image repositories.