
Deploy Red Hat Quay on OpenShift with Quay Operator
Deploy Red Hat Quay on OpenShift with Quay Setup Operator
Abstract
Preface
Red Hat Quay is an enterprise-quality container registry. Use Red Hat Quay to build and store container images, then make them available to deploy across your enterprise.
Red Hat currently supports two approaches to deploying Red Hat Quay on OpenShift:
- Deploy Red Hat Quay on OpenShift with Quay Operator: The Quay Operator provides a simple method to deploy and manage a Red Hat Quay cluster. This is the now preferred procedure for deploying Red Hat Quay on OpenShift and is covered in this guide.
- Deploy Red Hat Quay objects individually: This procedure provides a set of yaml files that you deploy individually to set up your Red Hat Quay cluster. This procedure is expected to eventually be deprecated.
As of Red Hat Quay v3.3, this operator changed from the "Quay Setup Operator" to simply the "Quay Operator." That is because the operator can now be used for more that just initially deploying Red Hat Quay, but can also be used for on-going configuration and maintenance of a Red Hat Quay cluster.
Chapter 1. Overview
Features of Red Hat Quay include:
- High availability
- Geo-replication
- Repository mirroring
- Docker v2, schema 2 (multiarch) support
- Continuous integration
- Security scanning with Clair
- Custom log rotation
- Zero downtime garbage collection
- 24/7 support
Red Hat Quay provides support for:
- Multiple authentication and access methods
- Multiple storage backends
- Custom certificates for Quay, Clair, and storage backends
- Application registries
- Different container image types
Chapter 2. Architecture
Red Hat Quay is made up of several core components.
- Database: Used by Red Hat Quay as its primary metadata storage (not for image storage).
- Redis (key, value store): Stores live builder logs and the Red Hat Quay tutorial.
- Quay (container registry): Runs the quay container as a service, consisting of several components in the pod.
- Clair: Scans container images for vulnerabilities and suggests fixes.
For supported deployments, you need to use one of the following types of storage:
- Public cloud storage: In public cloud environments, you should use the cloud provider’s object storage, such as Amazon S3 (for AWS) or Google Cloud Storage (for Google Cloud).
- Private cloud storage: In private clouds, an S3 or Swift compliant Object Store is needed, such as Ceph RADOS, or OpenStack Swift.
Do not use "Locally mounted directory" Storage Engine for any production configurations. Mounted NFS volumes are not supported. Local storage is meant for Red Hat Quay test-only installations.
Chapter 3. Prerequisites for Red Hat Quay on OpenShift
Here are a few things you need to know before you begin the Red Hat Quay on OpenShift deployment:
- OpenShift cluster: You need a privileged account to an OpenShift 4.2 or later cluster on which to deploy the Red Hat Quay. That account must have the ability to create namespaces at the cluster scope.
Storage: AWS cloud storage is used as an example in the following procedure. As an alternative, you can create Ceph cloud storage using steps from the Set up Ceph section of the high availability Red Hat Quay deployment guide. The following is a list of other supported cloud storage:
- Amazon S3 (see S3 IAM Bucket Policy for details on configuring an S3 bucket policy for Red Hat Quay)
- Azure Blob Storage
- Google Cloud Storage
- Ceph Object Gateway (RADOS)
- OpenStack Swift
- CloudFront + S3
- OpenShift Container Storage (NooBaa S3 Storage). (See Configuring Red Hat OpenShift Container Storage for Red Hat Quay)
Services: The OpenShift cluster must have enough capacity to run the following containerized services:
Database: We recommend you use an enterprise-quality database for production use of Red Hat Quay. PostgreSQL is used as an example in this document. Other options include:
- Crunchy Data PostgreSQL Operator: Although not supported directly by Red Hat, the CrunchDB Operator is available from Crunchy Data for use with Red Hat Quay. If you take this route, you should have a support contract with Crunchy Data and work directly with them for usage guidance or issues relating to the operator and their database.
- If your organization already has a high-availability (HA) database, you can use that database with Red Hat Quay. See the Red Hat Quay Support Policy for details on support for third-party databases and other components.
- Key-value database: Redis is used to serve live builder logs and Red Hat Quay tutorial content to your Red Hat Quay configuration.
- Red Hat Quay: The quay container provides the features to manage the Red Hat Quay registry.
- Clair: The clair-jwt container provides Clair scanning services for the registry.
Chapter 4. Deploying Red Hat Quay
This procedure:
- Installs the Red Hat Quay Operator on OpenShift from the OperatorHub
- Deploys a Red Hat Quay cluster on OpenShift with the Quay Operator
You have the option of changing dozens of settings before deploying the Red Hat Quay Operator. The Operator automates the entire start-up process, by-passing the Red Hat Quay config tool. You can choose to skip the Operator’s automated configuration and use the config tool directly.
As of Red Hat Quay 3.3, the Quay Setup Operator is now simply called the Quay Operator. Features have been added to this operator to allow it to be used to maintain and update your Red Hat Quay cluster after deployment. Updates can be done directly through the Operator or using the Red Hat Quay Config Tool.
Prerequisites
- An OpenShift 4.2 (or later) cluster
- Cluster-scope admin privilege to the OpenShift cluster
4.1. Production deployments
For a non-production deployment, you can take the defaults and get a Red Hat Quay cluster up and running quickly. For a production deployment, you should go through all the configuration options described later in this document. Of those, however, you should certainly consider at least the following:
- Superuser password: Change the default superuser password.
- Config tool password: Change the Red Hat Quay Config Tool password from the default.
- Quay image: If available, replace the quay image associated with the current Operator with a later quay image.
- Replica count: Based on your expected demand, increase the replica count to set how many instances of the quay container will run.
- Memory request: Choose how much memory to assign to the quay container, based on expected demand.
- CPU request: Select the amount of CPU you want assigned, based on expected demand.
- Quay database: Consider using an existing PostgreSQL database that is outside of the OpenShift cluster and one that has commercial support.
- Storage backend: Choose a reliable and supported storage backend. Local storage and NFS storage are not supported for production deployments!
- Certificates: Supply your own certificates to communicate with Red Hat Quay, as well as to access other services, such as storage and LDAP services.
4.2. Install the Red Hat Quay Operator
- From the OpenShift console, create a new namespace in which to run Red Hat Quay. For example, select Projects → Create Project. Then type the name (quay-enterprise is used in this example), and optionally a Display Name and Description. Then click Create.
- Select Operators → OperatorHub, then select the Red Hat Quay Operator. If there is more than one, be sure to use the Red Hat certified Operator and not the community version.
- Select Install. The Operator Subscription page appears.
Choose the following then select Subscribe:
- Installation Mode: Select a specific namespace to install to (quay-enterprise, by default)
- Update Channel: Choose the update channel (only one may be available)
- Approval Strategy: Choose to approve automatic or manual updates
- Select Subscribe.
4.3. Deploy a Red Hat Quay ecosystem
- See the Accessing Red Hat Quay article for information on getting credentials needed to obtain the Quay and Clair containers from Quay.io. Then put those credentials in a file. In this example, we create a config.json in the local directory.
Change to the project (namespace) you chose for deploying Red Hat Quay:
$ oc project quay-enterprise
Create a secret that includes your credentials, as follows:
$ oc create secret generic redhat-pull-secret \
    --from-file=".dockerconfigjson=config.json" --type='kubernetes.io/dockerconfigjson'
Create a custom resource file (in this example, named
quayecosystem_cr.yaml) or copy one from the quay-operator examples page. This example uses default settings:apiVersion: redhatcop.redhat.io/v1alpha1 kind: QuayEcosystem metadata: name: example-quayecosystem spec: quay: imagePullSecretName: redhat-pull-secret-
Go through the
Customizing your Red Hat Quay clustersection to choose configuration settings you want to change. Deploy the Quay ecosystem from your custom resource file as follows:
$ oc create -f quayecosystem_cr.yaml
Deploying the custom resource automatically creates and configures the Red Hat Quay cluster, which includes the Red Hat Quay, PostgreSQL, and Redis services.
To check the status of your Red Hat Quay cluster, log in to your OpenShift web console, select Projects, then select the
quay-enterpriseproject to see the following: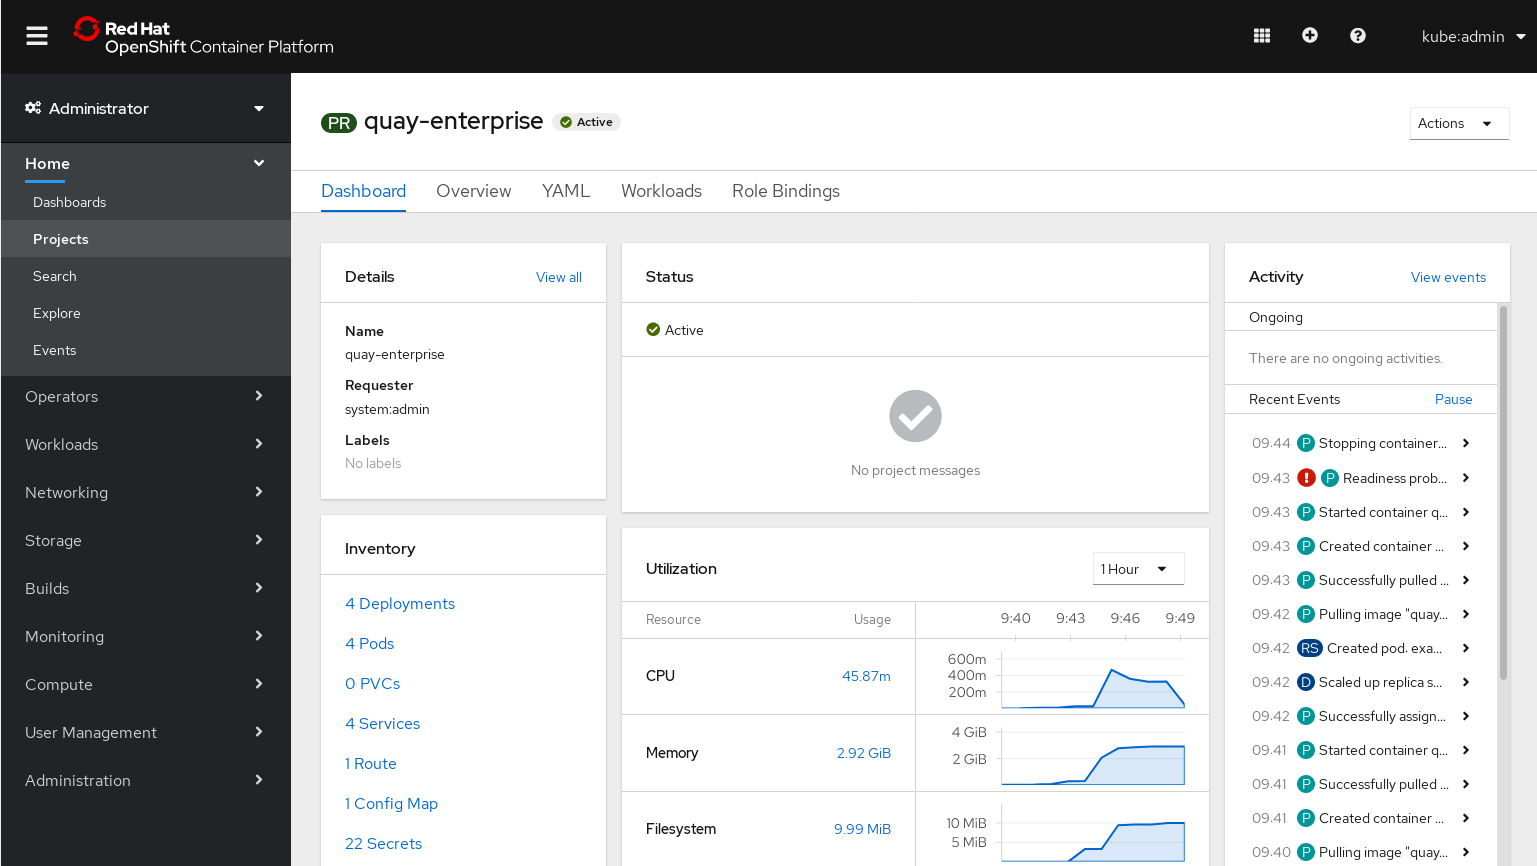
If Red Hat Quay is running, here is how to get started using your Red Hat Quay configuration:
Get the route to your new Red Hat Quay cluster as follows:
$ oc get route example-quayecosystem-quay NAME HOST/PORT PATH SERVICES PORT TERMINATION WILDCARD ... example-quayecosystem-quay example-quayecosystem-quay-example.com example-quayecosystem-quay 8443 passthrough/Redirect None
-
Using the route, log in with the Superuser credentials (Username:
quayand Password:passwordor change credentials as described in the next section).
At this point you can begin using the Red Hat Quay cluster. To further configure the cluster, you can either:
-
Use the Config Tool to manually change settings for your Red Hat Quay cluster. (The Config tool continues to run, with the route to it available by typing
oc get route example-quayecosystem-quay-config.) - Modify Red Hat Quay via the Operator, as described in the following sections.
Additional resources
- For more details on the Red Hat Quay Operator, see the upstream quay-operator project.
Chapter 5. Customizing your Red Hat Quay cluster
Although you can run a default Red Hat Quay setup by simply creating a secret and the QuayEcosystem custom resource, the following sections describe how you can modify the default setup.
5.1. Changing your Red Hat Quay credentials
The Red Hat Quay Operator sets up default administrative credentials. Review the default superuser and configuration credentials and change as needed.
5.1.1. Red Hat Quay superuser credentials
The Red Hat Quay superuser credentials let you manage the users, projects and other components of your Red Hat Quay deployment. Here’s how superuser credentials are set by default:
-
Username:
quay -
Password:
password -
Email:
quay@redhat.com
To change the superuser credentials, create a new secret:
$ oc create secret generic <secret_name> \ --from-literal=superuser-username=<username> \ --from-literal=superuser-password=<password> \ --from-literal=superuser-email=<email>
The superuser password must be at least 8 characters.
It is recommended that you also set the superusers field of the quay property in the QuayEcosystem object so as to ensure consistency between the the various properties. See the Superusers section below.
5.1.2. Red Hat Quay configuration credentials
A dedicated Red Hat Quay deployment runs to manage Red Hat Quay configuration settings. Using the route to that configuration, you log in with the following credentials:
-
Username:
quayconfig -
Password:
quay
You cannot change the username, but you can change the password as follows:
$ oc create secret generic quay-config-app \
--from-literal=config-app-password=<password>5.2. Providing persistent storage using PostgreSQL database
The PostgreSQL relational database is used by default as the persistent store for Red Hat Quay. PostgreSQL can either be deployed by the Operator within the namespace or leverage an existing instance. The determination of whether to provision an instance or not within the current namespace depends on whether the server property within the QuayEcosystem is defined.
The following options are a portion of the available options to configure the PostgreSQL database:
| Property | Description |
| image | Location of the database image |
| volumeSize | Size of the volume in Kubernetes capacity units |
It is important to note that persistent storage for the database will only be provisioned if the volumeSize property is specified when provisioned by the operator.
Define the values as shown below:
apiVersion: redhatcop.redhat.io/v1alpha1
kind: QuayEcosystem
metadata:
name: example-quayecosystem
spec:
quay:
database:
volumeSize: 10Gi5.3. Specifying database credentials
The credentials for accessing the server can be specified through a Secret or when being provisioned by the operator, leverage the following default values:
-
Username:
quay -
Password:
quay -
Root Password:
quayAdmin -
Database Name:
quay
To define alternate values, create a secret as shown below:
oc create secret generic <secret_name> \
--from-literal=database-username=<username> \
--from-literal=database-password=<password> \
--from-literal=database-root-password=<root-password> \
--from-literal=database-name=<database-name>
Reference the name of the secret in the QuayEcosystem custom resource as shown below:
apiVersion: redhatcop.redhat.io/v1alpha1
kind: QuayEcosystem
metadata:
name: example-quayecosystem
spec:
quay:
database:
credentialsSecretName: <secret_name>5.3.1. Using an existing PostgreSQL database instance
Instead of having the operator deploy an instance of PostgreSQL in the project, an existing instance can be leveraged by specifying the location in the server field along with the credentials for access as described in the previous section. The following is an example of how to specify connecting to a remote PostgreSQL instance:
apiVersion: redhatcop.redhat.io/v1alpha1
kind: QuayEcosystem
metadata:
name: example-quayecosystem
spec:
quay:
database:
credentialsSecretName: <secret_name>
server: postgresql.databases.example.com5.4. Choosing a registry storage backend
Red Hat Quay supports multiple backends for the purpose of image storage and consist of a variety of local and cloud storage options. The following sections provide an overview how to configure the Red Hat Quay Operator to make use of these backends.
5.4.1. Overview of storage backends
Storage for Red Hat Quay can be configured using the registryBackend field within the quay property in the QuayEcosystem resource which contain an array of backends. The ability to define multiple backends enables replication and high availability of images.
apiVersion: redhatcop.redhat.io/v1alpha1
kind: QuayEcosystem
metadata:
name: example-quayecosystem
spec:
quay:
registryBackends:
- name: backend1
s3:
...
The definition of a registryBackend is an optional field, and if omitted, LocalStorage will be configured (ephemeral, through the use of a PersistentVolume, can be enabled if desired).
5.4.2. Sensitive storage values
In many cases, access to storage requires the use of sensitive values. Each backend that requires such configuration can be included in a Secret and defined within the credentialsSecretName property of the backend.
Instead of declaring the registry backend properties within the specific backend, the values can be added to a secret as shown below:
oc create secret generic s3-credentials \ --from-literal=accessKey=<accessKey> \ --from-literal=secretKey=<secretKey>
With the values now present in the secret, the properties explicitly declared in the backend can be removed.
Specific details on the types of properties supported for each backend are found in the registry backend details below.
5.4.3. Storage replication
Support is available to replicate the registry storage to multiple backends. To activate storage replication, set the enableStorageReplication property to the value of true. Individual registry backends can also be configured to be replicated by default by setting the replicateByDefault property to the value of true. A full configuration demonstrating the replication options available is shown below:
apiVersion: redhatcop.redhat.io/v1alpha1
kind: QuayEcosystem
metadata:
name: example-quayecosystem
spec:
quay:
enableStorageReplication: true
registryBackends:
- name: azure-ussouthcentral
credentialsSecretName: azure-ussouthcentral-registry
replicateByDefault: true
azure:
containerName: quay
- name: azure-seasia
credentialsSecretName: azure-seasia-registry
replicateByDefault: true
azure:
containerName: quaySupport for replicated storage is not available for the local registry backend and will result in an error during the verification phase.
5.4.4. Registry storage backend types
One or more of the following registry storage backends can be defined to specify the underlying storage for the Red Hat Quay registry:
5.4.4.1. Local Storage
The following is an example for configuring the registry to make use of local storage (note that local storage is not supported for production deployments):
apiVersion: redhatcop.redhat.io/v1alpha1
kind: QuayEcosystem
metadata:
name: example-quayecosystem
spec:
quay:
registryBackends:
- name: local
local:
storagePath: /opt/quayregistry
The following is a comprehensive list of properties for the local registry backend:
| Property | Description | Credential Secret Supported | Required |
| storagePath | Storage Directory | No | No |
5.4.4.2. Configuring persistent local storage
By default, Red Hat Quay uses an ephemeral volume for local storage. In order to avoid data loss, persistent storage is required. To enable the use of a PersistentVolume to store images, specify the registryStorage parameter underneath the quay property.
The following example will cause a PersistentVolumeClaim to be created within the project requesting storage of 10Gi and an access mode of ReadWriteOnce. The default value is ReadWriteMany.
apiVersion: redhatcop.redhat.io/v1alpha1
kind: QuayEcosystem
metadata:
  name: example-quayecosystem
spec:
  quay:
    imagePullSecretName: redhat-pull-secret
registryStorage:
persistentVolumeAccessModes:
- ReadWriteOnce
persistentVolumeSize: 10Gi
A Storage Class can also be provided using the persistentVolumeStorageClassName property.
5.4.4.3. Amazon Web Services (S3)
The following is an example for configuring the registry to make use of S3 storage on Amazon Web Services.
apiVersion: redhatcop.redhat.io/v1alpha1
kind: QuayEcosystem
metadata:
  name: example-quayecosystem
spec:
  quay:
    registryBackends:
      - name: s3
        s3:
          accessKey: <accessKey>
          bucketName: <bucketName>
          secretKey: <secretKey
          host: <host>
The following is a comprehensive list of properties for the s3 registry backend:
| Property | Description | Credential Secret Supported | Required |
| storagePath | Storage Directory | No | No |
| bucketName | S3 Bucket | No | Yes |
| accessKey | AWS Access Key | Yes | Yes |
| secretKey | AWS Secret Key | Yes | Yes |
| host | S3 Host | No | No |
| port | S3 Port | No | No |
5.4.4.4. Microsoft Azure storage
The following is an example for configuring the registry to make use of Blob storage on the Microsoft Azure platform.
apiVersion: redhatcop.redhat.io/v1alpha1
kind: QuayEcosystem
metadata:
  name: example-quayecosystem
spec:
  quay:
    registryBackends:
      - name: azure
        azure:
          containerName: <containerName>
          accountName: <accountName>
          accountKey: <accountKey>
The following is a comprehensive list of properties for the azure registry backend:
| Property | Description | Credential Secret Suppazureorted | Required |
| storagePath | Storage Directory | No | No |
| containerName | Azure Storage Container | No | Yes |
| accountName | Azure Account Name | No | Yes |
| accountKey | Azure Account Key | No | Yes |
| sas_token | Azure SAS Token | No | No |
5.4.4.5. Google Cloud storage
The following is an example for configuring the registry to make use of Blob storage on the Google Cloud Platform.
apiVersion: redhatcop.redhat.io/v1alpha1azure
kind: QuayEcosystem
metadata:
  name: example-quayecosystem
spec:
  quay:
    registryBackends:
      - name: googleCloud
        googleCloud:
        accessKey: <accessKey>
        secretKey: <secretKey>
        bucketName: <bucketName>
The following is a comprehensive list of properties for the googlecloud registry backend:
| Property | Description | Credential Secret Supported | Required |
| storagePath | Storage Directory | No | No |
| accessKey | Cloud Access Key | Yes | Yes |
| secretKey | Cloud Secret Key | Yes | Yes |
| bucketName | GCS Bucket | No | Yes |
5.4.4.6. NooBaa (RHOCS) storage
The following is an example for configuring the registry to make use of NooBaa (Red Hat OpenShift Container Storage) storage.
apiVersion: redhatcop.redhat.io/v1alpha1
kind: QuayEcosystem
metadata:
  name: example-quayecosystem
spec:
  quay:
    registryBackends:
      - name: rhocs
        rhocs:
          hostname: <hostname>
          secure: <secure>
          accessKey: <accessKey>
          secretKey: <secretKey>
          bucketName: <bucketName>
The following is a comprehensive list of properties for the rhocs registry backend:
| Property | Description | Credential Secret Supported | Required |
| storagePath | Storage Directory | No | No |
| hostname | NooBaa Server Hostname | No | Yes |
| port | Custom Port | No | No |
| secure | Is Secure | No | No |
| secretKey | Secret Key | Yes | Yes |
| bucketName | Bucket Name | No | Yes |
5.4.4.7. RADOS storage
The following is an example for configuring the registry to make use of RADOS storage.
apiVersion: redhatcop.redhat.io/v1alpha1
kind: QuayEcosystem
metadata:
  name: example-quayecosystem
spec:
  quay:
    registryBackends:
      - name: rados
        rados:
          hostname: <hostname>
          secure: <is_secure>
          accessKey: <accessKey>
          secretKey: <secretKey>
          bucketName: <bucketName>
The following is a comprehensive list of properties for the rados registry backend:
| Property | Description | Credential Secret Supported | Required |
| storagePath | Storage Directory | No | No |
| hostname | Rados Server Hostname | No | Yes |
| port | Custom Port | No | No |
| secure | Is Secure | No | No |
| accessKey | Access Key | Yes | Yes |
| secretKey | Secret Key | Yes | Yes |
| bucketName | Bucket Name | No | Yes |
5.4.4.8. Swift (OpenStack) storage
The following is an example for configuring the registry to make use of Swift storage.
apiVersion: redhatcop.redhat.io/v1alpha1
kind: QuayEcosystem
metadata:
  name: example-quayecosystem
spec:
  quay:
    registryBackends:
      - name: swift
        swift:
          authVersion: <authVersion>
          authURL: <authURL>
          container: <container>
          user: <user>
          password: <password>
          caCertPath: <caCertPath>
          osOptions:
            object_storage_url: <object_storage_url>
            user_domain_name: <user_domain_name>
            project_id: <project_id>
The following is a comprehensive list of properties for the swift registry backend:
| Property | Description | Credential Secret Supported | Required |
| storagePath | Storage Directory | No | No |
| authVersion | Swift Auth Version | No | Yes |
| authURL | Swift Auth URL | No | Yes |
| container | Swift Container Name | No | Yes |
| user | Username | Yes | Yes |
| password | Key/Password | Yes | Yes |
| caCertPath | CA Cert Filename | No | No |
| tempURLKey | Temp URL Key | No | No |
| osOptions | OS Options | Yes | Yes |
5.4.4.9. CloudFront (S3) storage
The following is an example for configuring the registry to make use of S3 storage on Amazon Web Services.
CloudFront configuration cannot currently be configured using the CR, due to a known issue. You can, however, manage it through the Red Hat Quay Config Tool.
apiVersion: redhatcop.redhat.io/v1alpha1
kind: QuayEcosystem
metadata:
  name: example-quayecosystem
spec:
  quay:
    registryBackends:
      - name: s3
        s3:
          accessKey: <accessKey>
          bucketName: <bucketName>
          secretKey: <secretKey>
          host: <host>
          distributionDomain: <distributionDomain>
          key_ID: <key_ID>
          privateKeyFilename: <privateKeyFilename>
The following is a comprehensive list of properties for the cloudfrontS3 registry backend:
| Property | Description | Credential Secret Supported | Required |
| storagePath | Storage Directory | No | No |
| bucketName | S3 Bucket | No | Yes |
| accessKey | AWS Access Key | Yes | Yes |
| secretKey | AWS Secret Key | Yes | Yes |
| host | S3 Host | No | No |
| port | S3 Port | No | No |
| distributionDomain | CloudFront Distribution Domain Name | No | Yes |
| keyID | CloudFront Key ID | No | Yes |
| privateKeyFilename | CloudFront Private Key | No | Yes |
5.5. Repository mirroring
Red Hat Quay provides the capability to create container image repositories that exactly match the content of external registries. This functionality can be enabled by setting the enableRepoMirroring: true as shown below:
apiVersion: redhatcop.redhat.io/v1alpha1
kind: QuayEcosystem
metadata:
  name: example-quayecosystem
spec:
  quay:
    enableRepoMirroring: true
The following additional options are also available:
- repoMirrorTLSVerify - Require HTTPS and verify certificates of Quay registry during mirror
- repoMirrorServerHostname - URL for use by the skopeo copy command
- repoMirrorEnvVars - Environment variables to be applied to the repository mirror container
- repoMirrorResources - Compute resources to be applied to the repository mirror container
5.6. Injecting configuration files
Files related to the configuration of Red Hat Quay and Clair can be provided to be injected at runtime. Common examples include certificates, private keys and configuration files. The Quay Operator supports the injection of these assets within the configFiles property in the quay or clair property of the QuayEcosystem object where one or more assets can be specified.
Two types of configuration files can be specified by the type property:
- config: Configuration files
- extraCaCert: Certificates to be trusted by the quay container
The following table illustrates the location for which configFiles are injected:
| Component | Type | Injection Location |
| Quay |
|
Mounted within the |
| Quay |
|
Added to the |
| Clair |
|
Added to the |
| Clair |
|
Added to the |
Configuration files are stored as values within Secrets. The following describes several of the ways that this feature can be leveraged.
The first step is to create a secret containing these files. The following command illustrates how a private key can be added:
$ oc create secret generic quayconfigfile --from-file=<path_to_file>
With the secret created, the secret containing the configuration file can be referenced in the QuayEcosystem object as shown below:
apiVersion: redhatcop.redhat.io/v1alpha1
kind: QuayEcosystem
metadata:
  name: example-quayecosystem
spec:
  quay:
    configFiles:
      - secretName: quayconfigfile
By default, the config type is assumed. If the contents of the secret contains certificates that should be added as a trusted certificate, specify the type as extraCaCert as shown below:
apiVersion: redhatcop.redhat.io/v1alpha1
kind: QuayEcosystem
metadata:
  name: example-quayecosystem
spec:
  quay:
    configFiles:
      - secretName: quayconfigfile
        type: extraCaCert
Individual keys within a secret can be referenced to fine tune the resources that are added to the configuration using the files property as shown below:
apiVersion: redhatcop.redhat.io/v1alpha1
kind: QuayEcosystem
metadata:
  name: example-quayecosystem
spec:
  quay:
    configFiles:
      - secretName: quayconfigfile
        files:
          - key: myprivatekey.pem
            filename: cloudfront.pem
          - key: myExtraCaCert.crt
            type: extraCaCert
The example above assumes that two files have been added to a secret called quayconfigfile. The file myprivatekey.pem that was added to the secret will be mounted in the quay pod at the path /conf/stack/cloudfront.pem since it is a config file type and specifies a custom filename that should be projected into the pod. The myExtraCaCert.crt file will be added to the Quay pod within at the path /conf/stack/extra_certs/myExtraCert.crt
The type property within files property overrides the value in the configFiles property.
5.7. Skipping automated setup
The operator by default is configured to complete the automated setup process for Red Hat Quay. This can be bypassed by setting the skipSetup field to true as shown below:
apiVersion: redhatcop.redhat.io/v1alpha1
kind: QuayEcosystem
metadata:
  name: example-quayecosystem
spec:
  quay:
    skipSetup: true
5.8. Methods for external access
Support is available to access Quay through a number of OpenShift and Kubernetes mechanisms for ingress. When running on OpenShift, a Route is used while a LoadBalancer Service and Ingress is used.
All of the properties for defining the configuration for external access can be managed within the externalAccess property. The type of external access can be specified by setting the type property within externalAccess using one of the available options in the table below:
| External Access Type | Description | Notes |
|
| Can only be specified when running in OpenShift | |
|
| ||
|
|
A dns based hostname or IP address must be specified using the | |
|
| Kubernetes native solution for external access |
An example of how to specify the type is shown below:
apiVersion: redhatcop.redhat.io/v1alpha1
kind: QuayEcosystem
metadata:
  name: example-quayecosystem
spec:
  quay:
    externalAccess:
      type: LoadBalancer
5.8.1. NodePorts
By default, NodePort type Services are allocated a randomly assigned network port between 30000-32767. To support a predictive allocation of resources, the NodePort services for Quay and Quay Config can be define using the nodePort as shown below:
apiVersion: redhatcop.redhat.io/v1alpha1
kind: QuayEcosystem
metadata:
  name: example-quayecosystem
spec:
  quay:
    externalAccess:
      type: NodePort
      nodePort: 30100
      hostname: quay.example.com
The hostname field must be specified to refer to the location (DNS or IP) for which the Quay server will be available. The port number allocated to tke service will be added automatically as necessary.
5.8.2. Ingress
Ingress makes use of a similar concept as an OpenShift route, but requires a separate deployment of an ingress controller that manages external traffic. There are a variety of ingress controllers that can be used and implementation specific properties are typically defined through the use of annotations on the ingress resource.
The following is an example of how to define an Ingress type of External Access using annotations specific for an Nginx controller:
apiVersion: redhatcop.redhat.io/v1alpha1
kind: QuayEcosystem
metadata:
  name: example-quayecosystem
spec:
  quay:
    externalAccess:
      type: Ingress
      annotations:
        nginx.ingress.kubernetes.io/ssl-passthrough: "true"
        nginx.ingress.kubernetes.io/backend-protocol: "HTTPS"
      hostname: quay.example.com
Annotations can also be applied for the Config ingress by using the configAnnotations property
The hostname field must be specified to refer to the location for which the Quay server will be available.
5.9. Specifying the Red Hat Quay route
Red Hat Quay makes use of an OpenShift route to enable ingress. The hostname for this route is automatically generated as per the configuration of the OpenShift cluster. Alternatively, the hostname for this route can be explicitly specified using the hostname property under the externalAccess field as shown below:
apiVersion: redhatcop.redhat.io/v1alpha1
kind: QuayEcosystem
metadata:
  name: example-quayecosystem
spec:
  quay:
    externalAccess:
      hostname: example-quayecosystem-quay-quay-enterprise.apps.openshift.example.com
5.10. Specifying a Red Hat Quay configuration route
During the development process, you may want to test the provisioning and setup of your Red Hat Quay server. By default, the operator will use the internal service to communicate with the configuration pod. However, when running external to the cluster, you will need to specify the hostname location that the setup process can use.
Specify the configHostname as shown below:
apiVersion: redhatcop.redhat.io/v1alpha1
kind: QuayEcosystem
metadata:
  name: example-quayecosystem
spec:
  quay:
    externalAccess:
      configHostname: example-quayecosystem-quay-config-quay-enterprise.apps.openshift.example.com
5.11. Providing SSL certificates
Red Hat Quay, as a secure registry, makes use of SSL certificates to secure communication between the various components within the ecosystem. Transport to the Quay user interface and container registry is secured via SSL certificates. These certificates are generated at startup with the OpenShift route being configured with a TLS termination type of Passthrough.
5.11.1. User-provided certificates
SSL certificates can be provided and used instead of having the operator generate certificates. Certificates can be provided in a secret which is then referenced in the QuayEcosystem custom resource.
Create a secret containing the certificate and private key:
oc create secret tls custom-quay-ssl \
   --key=<ssl_private_key> --cert<ssl_certificate>
The secret containing the certificates are referenced using the secretName underneath a property called tls as defined within the externalAccess property as shown below:
apiVersion: redhatcop.redhat.io/v1alpha1
kind: QuayEcosystem
metadata:
  name: example-quayecosystem
spec:
  quay:
    externalAccess:
      tls:
        secretName: custom-quay-ssl
        termination: passthrough
5.12. TLS Termination
Red Hat Quay can be configured to protect connections using SSL certificates. By default, SSL communication is terminated within Red Hat Quay. There are several different ways that SSL termination can be configured including omitting the use of certificates altogether. TLS termination is determined by the termination property as shown below:
apiVersion: redhatcop.redhat.io/v1alpha1
kind: QuayEcosystem
metadata:
  name: example-quayecosystem
spec:
  quay:
    externalAccess:
      tls:
        termination: passthrough
The example above is the default configuration applied to Red Hat Quay. Alternate options are available as described in the table below:
| TLS Termination Type | Description | Notes |
| passthrough | SSL communication is terminated at Quay | Default configuration |
| edge | SSL communication is terminated prior to reaching Quay. Traffic reaching quay is not encrypted (HTTP) | |
| none | All communication is unencrypted |
Chapter 6. Configuration deployment after initial setup
By default, the Red Hat Quay Config Tool pod is left running even after the initial setup process. To configure the Config Tool pod to be removed after setup, the keepConfigDeployment property within the Red Hat Quay object can can be set as false as shown below:
apiVersion: redhatcop.redhat.io/v1alpha1
kind: QuayEcosystem
metadata:
  name: example-quayecosystem
spec:
  quay:
    keepConfigDeployment: false
6.1. Superusers
Superusers in Quay have elevated rights and the ability to administer the server. By default, a superuser with the username quay will be created. Additional superusers may be desired in order to aid in managing the server. The full list of superusers can be specifed in the superusers field of the quay object as shown below:
apiVersion: redhatcop.redhat.io/v1alpha1
kind: QuayEcosystem
metadata:
  name: example-quayecosystem
spec:
  quay:
    superusers:
      - jim
      - joe
If multiple superusers are specified, during the initial setup of Red Hat Quay, the first user specified will be configured unless specified within a secret as described earlier. After the initial setup, passwords are managed within Red Hat Quay itself and not using either the default value or the value provided in the secret.
6.2. Setting Redis password
By default, the operator-managed Redis instance is deployed without a password. A password can be specified by creating a secret containing the password in the key password. The following command can be used to create the secret:
$ oc create secret generic <secret_name> \
   --from-literal=password=<password>
The secret can then be specified within the redis section using the credentialsSecretName as shown below:
apiVersion: redhatcop.redhat.io/v1alpha1
kind: QuayEcosystem
metadata:
  name: example-quayecosystem
spec:
  redis:
    credentialsSecretName: <secret_name>
6.3. Enabling Clair image scanning
Clair is a vulnerability assessment tool for application containers. Support is available to automatically provision and configure both Clair and its integration with Red Hat Quay. A property called clair can be specified in the QuayEcosystem object along with enabled: true within this field in order to deploy Clair. An example is shown below:
apiVersion: redhatcop.redhat.io/v1alpha1
kind: QuayEcosystem
metadata:
  name: example-quayecosystem
spec:
  quay: {}
  clair:
    enabled: true
The Red Hat Quay Operator sets the Clair database connection string with the parameter sslmode=disable if no parameters are specified in the QuayEcosystem custom resource. In case you have SSL enabled Postgres database, or want to add other parameters, provide key: value pairs as strings (for example, connect_timeout: '10') under connectionParameters object.
For example:
apiVersion: redhatcop.redhat.io/v1alpha1
kind: QuayEcosystem
metadata:
  name: example-quayecosystem
spec:
  quay: {}
  clair:
    enabled: true
    database:
      connectionParameters:
        sslmode: require
        connect_timeout: '10'
Supported connection string parameters:
- sslmode - Whether or not to use SSL (default is disable, this is not the default for libpq)
- connect_timeout - Maximum wait for connection, in seconds. Zero or not specified means wait indefinitely.
- sslcert - Cert file location. The file must contain PEM encoded data.
- sslkey - Key file location. The file must contain PEM encoded data.
- sslrootcert - The location of the root certificate file. The file must contain PEM encoded data.
Valid values for sslmode are:
- disable - No SSL
- require - Always SSL (skip verification)
- verify-ca - Always SSL (verify that the certificate presented by the server was signed by a trusted CA)
- verify-full - Always SSL (verify that the certification presented by the server was signed by a trusted CA and the server host name matches the one in the certificate)
6.3.1. Clair update interval
Clair routinely queries CVE databases in order to build its own internal database. By default, this value is set at 500m. You can modify the time interval between checks by setting the updateInterval property as shown below:
apiVersion: redhatcop.redhat.io/v1alpha1
kind: QuayEcosystem
metadata:
  name: example-quayecosystem
spec:
  quay: {}
  clair:
    enabled: true
    updateInterval: "60m"
The above configuration would have Clair update every 60 minutes.
6.4. Setting common attributes
Each of the following components expose a set of similar properties that can be specified in order to customize the runtime execution:
- Red Hat Quay
- Red Hat Quay Configuration
- Red Hat Quay PostgreSQL
- Redis
- Clair
- Clair PostgreSQL
6.4.1. Image pull secret
As referenced in prior sections, an Image Pull Secret can specify the name of the secret containing credentials to an image from a protected registry using the property imagePullSecret.
6.4.2. Image
There may be a desire to make use of an alternate image or source location for each of the components in the Quay ecosystem. The most common use case is to make use of an image registry that contains all of the needed images instead of being sourced from the public internet. Each component has a property called image where the location of the related image can be referenced from.
The following is an example of how a customized image location can be specified:
apiVersion: redhatcop.redhat.io/v1alpha1
kind: QuayEcosystem
metadata:
  name: example-quayecosystem
spec:
  quay:
    image: myregistry.example.com/quay/quay:v99.1.0
6.4.3. Compute resources
Compute Resources such as memory and CPU can be specified in the same form as any other value in a PodTemplate. CPU and Memory values for requests and limits can be specified under a property called resources.
In the case of the QuayConfiguration deployment, configResources is the property which should be referenced underneath the quay property.
The following is an example of how compute resources can be specified:
apiVersion: redhatcop.redhat.io/v1alpha1
kind: QuayEcosystem
metadata:
  name: example-quayecosystem
spec:
  quay:
    resources:
      requests:
        memory: 512Mi
6.4.4. Probes
Readiness and Liveness Probes can be specified in the same form as any other value in a PodTemplate.
The following is how a readinessProbe and livenessProbe can be specified:
apiVersion: redhatcop.redhat.io/v1alpha1
kind: QuayEcosystem
metadata:
  name: example-quayecosystem
spec:
  quay:
    livenessProbe:
      initialDelaySeconds: 120
      httpGet:
        path: /health/instance
        port: 8443
        scheme: HTTPS
    readinessProbe:
      initialDelaySeconds: 10
      httpGet:
        path: /health/instance
        port: 8443
scheme: HTTPSIf a value for either property is not specified, an opinionated default value is applied.
6.4.5. Node Selector
Components of the QuayEcosystem may need to be deployed to only a subset of available nodes in a Kubernetes cluster. This functionality can be set on each of the resources using the nodeSelector property as shown below:
apiVersion: redhatcop.redhat.io/v1alpha1
kind: QuayEcosystem
metadata:
  name: example-quayecosystem
spec:
  quay:
    nodeSelector:
      node-role.kubernetes.io/infra: true
6.4.6. Deployment strategy
Each of the core components consist of Kubernetes Deployments. This resource supports the method in which new versions are released. This operator supports making use of the RollingUpdate and Recreate strategies. Either value can be defined by using the deploymentStrategy property on the desired resource as shown below:
apiVersion: redhatcop.redhat.io/v1alpha1
kind: QuayEcosystem
metadata:
  name: example-quayecosystem
spec:
  quay:
    deploymentStrategy: RollingUpdate
The absence of a defined value will make use of the RollingUpdate strategy.
6.4.7. Environment Variables
In addition to environment variables that are automatically configured by the operator, users can define their own set of environment variables in order to customize the managed resources. Each core component includes a property called envVars where environment variables can be defined. An example is shown below:
apiVersion: redhatcop.redhat.io/v1alpha1
kind: QuayEcosystem
metadata:
  name: example-quayecosystem
spec:
  quay:
    envVars:
      - name: FOO
        value: bar
Environment variables for the Quay configuration pod can be managed by specifying the configEnvVars property on the quay resource.
User defined environment variables are given precedence over those managed by the operator. Undesirable results may occur if conflicting keys are used.
Chapter 7. Configuring Red Hat Quay (post-deployment)
After the Quay Operator deploys Red Hat Quay, by default the Config Tool continues to run. Going forward, you can use the Config Tool or the Red Hat Quay Operator itself to update and maintain your Red Hat Quay deployment.
7.1. Using the Config Tool
The Red Hat Quay Config Tool provides a web UI for enabling or modifying many of the settings in your Red Hat Quay cluster. To use the Config Tool:
Get the route to the Config Tool by typing:
$ oc get route
NAME  HOST/PORT                                      PATH SERVICES PORT TERMINATION WILDCARD
...   example-quayecosystem-quay-config.example.com  ...
-
Add
https://to the HOST/PORT entry for the Config Tool and enter it into your web browser. -
When prompted, log in using the Config Tool user name and password (
quayconfigandquay, by default). -
Select
Modify configuration for this cluster.
At this point you can change the configuration as you choose. When you are done, select Save Configuration Changes. Here are a few things you should know about using the Config Tool:
- Most changes you make will be checked for accuracy. For example, if you change the location of a service, the Config Tool will check that it can reach that service before saving the configuration. If the connection fails, you have the chance to modify the setting before saving.
- After checking for accuracy, you now have the choice of continuing to edit or completing your changes.
- After you make changes and they are accepted, those changes are deployed to all Red Hat Quay instances in the cluster. There is no need to stop and restart those pods manually.
7.2. Using the Red Hat Quay Operator
Updating your Red Hat Quay cluster using the Red Hat Quay Operator offers a way to deploy changes without having to click through a web UI. Here are some things you should know about changing settings through the Operator:
- The same level of error checking is not performed when you change settings directly through the Red Hat Quay Operator. If, for example, you provide the wrong address to a service, the connection to that service will probably just fail and you would have to track down the problem through OpenShift.
- Once you make a change, those changes will not automatically be applied to your Red Hat Quay instances. To have the changes take effect, you will have to restart the Red Hat Quay pods manually.
Chapter 8. Troubleshooting
To resolve issues running, configuring and utilizing the operator, the following steps may be utilized:
8.1. Errors during initial setup
The QuayEcosystem custom resource will attempt to provide the progress of the status of the deployment and configuration of Red Hat Quay. Additional information related to any errors in the setup process can be found by viewing the log messages of the config pod as shown below:
$ oc logs $(oc get pods -l=quay-enterprise-component=config -o name)
From the OpenShift console, you can follow the Pods and Deployments that are created for your Red Hat Quay cluster.
Chapter 9. Local Development
Execute the following steps to develop the functionality locally. It is recommended that development be done using a cluster with cluster-admin permissions.
Clone the repository, then resolve all dependencies using go mod:
$ export GO111MODULE=on
$ go mod vendor
Using the operator-sdk, run the operator locally:
$ operator-sdk up local --namespace=quay-enterprise
Chapter 10. Upgrading Red Hat Quay
The Red Hat Quay Operator v3.3.4 has many changes from v1.0.2. The most notable which affects the upgrade process is the backwards-incompatible change to the CRD. Ultimately, the CR (Custom Resource) used to deploy Red Hat Quay using the operator may have to be modified accordingly.
10.1. Upgrade Prerequisites
Ensure that your deployment is using a supported persistence layer and
database. A production Red Hat Quay deployment run by the Operator should not be relying on the Postgres instance or a OpenShift volume that has been created by the Operator.
If you are using a Postgres instance or OpenShift volume that was created by the Operator, the upgrade path is not supported as the removal of the old Operator will cascade the deletion of your database and volume. It may be possible to manually migrate your data to supported storage mechanisms but this is not within the scope of the typical, or supported, upgrade path.
Please read through the entire guide before following any steps, as this upgrade path is potentially destructive and there is no guaranteed roll-back mechanism.
10.2. Upgrade Process Summary
Here are the basic steps for upgrading the Red Hat Quay cluster you originally deployed from the v1.0.2 Quay Setup Operator to the v3.3.4 Quay Operator:
- Document all configuration related to your current deployment.
- Copy your CR and modify any configuration values as needed.
-
Remove your current deployment using
oc delete -f deployment.yaml - Ensure that only one quay pod will be started, as this Pod will perform any database migrations needed before scaling up the entire cluster.
- Uninstall the old Quay Operator (v1.0.2 or older)
- Install the latest Quay Operator (v3.3.4)
-
Create your CR by issuing the command
oc create -f new_deployment.yaml - Watch the logs of your quay Pod until all migrations have finished.
- At this point, it is safe to scale up your Red Hat Quay cluster if desired.
10.2.1. Document the existing Red Hat Quay deployment
For the purpose of ensuring a smooth upgrade, it is important to ensure you have all available configuration details before deleting your existing deployment. In the case that you must work with Red Hat Support, this information will aid them with the details needed to bring your cluster back to its original state. At minimum, the following information should be gathered:
- The Custom Resource used to create your current Red Hat Quay deployment.
-
The output of running
oc get QuayEcosystem -o yaml > quayecosystem.yamlin your Project or Namespace. -
The hostnames currently used to access Quay, Clair, Quay’s Config App, Postgres, Redis, and Clair’s Postgres instance. This can be achieved by executing:
oc get routes -o yaml > old_routes.yamlor (if you are using a loadbalancer)oc get service - Any authentication details required to connect to your Postgres instance(s) for Quay and Clair pods.
- Any authentication details required to connect to your data persistence provider such as AWS S3.
Backup your Red Hat Quay configuration secret which contains the
config.yamlalong with any certificates needed. This can be accomplished by using the following command:$ oc get secret quay-enterprise-config-secret -o yaml > config-secret.yaml
10.2.2. Update the CR
Ensure a backup is created of your original Custom Resource (CR) before making any changes.
If your deployment does not specify any specific network-related configuration values, this step may not be necessary. Please refer to the documentation to ensure that the configuration options in your current CR are still accurate for the Quay Operator v3.3.4.
In the case that you have specified options related to the management of networking, such as using a LoadBalancer or specifying a custom hostname, please reference the latest documentation to update them with the schema changes included in Quay Operator v3.3.4.
If you have overridden the image used for Quay or Clair, please keep in mind that Quay Operator v3.3.4 specifically supports Quay v3.3.4 and Clair v3.3.4. It is advisable to remove those image overrides to use the latest, supported releases of Quay and Clair in your deployment. Any other images may not be supported.
10.2.3. Remove the existing deployment
This step will remove your entire Red Hat Quay deployment. Use caution and ensure you understand all steps required to recreate your cluster before removing your existing deployment.
The Quay Operator v3.3.4 is now distributed using the official Red Hat channels. Previously, Quay Operator v1.0.2 (and below) were provided using "Community" channels. Additionally, Red Hat Quay v3.3.4 offers no automatic upgrade path which requires your Red Hat Quay deployment and the Quay Operator to be completely removed and replaced.
Fortunately, the important data is stored in your Postgres database and your storage backend, so it is advisable to ensure you have proper backups for both.
Once you are ready, remove your existing deployment by issuing the following command:
$ oc delete -f deployment.yaml
All Quay and Clair pods will be removed as well as the Redis pod. At this point, your Red Hat Quay cluster will be completely down and inaccessible. It is suggested to inform your users of a maintenance window as they will not be able to access their images during this time.
10.2.4. Ensure only the quay pod is started
When Red Hat Quay pods start, they will look at the database to determine whether all required database schema changes are applied. If the schema changes are not applied, which is more than likely going to be the case when upgrading from Red Hat Quay v3.2 to v3.3.4, then the Quay pod will automatically begin running all migrations. If multiple Red Hat Quay instances are running simultaneously, they may all attempt to update or modify the database at the same time which may result in unexpected issues.
To ensure that the migrations are run correctly, do not specify more than a single Quay replica to be started. Note that the default quantity of Quay pod replicas is 1, so unless you changed it, there is no work to be done here.
10.2.5. Uninstall the Quay Operator
Verify that all Red Hat Quay-related deployments and pods no longer exist within your namespace. Ensure that no other Red Hat Quay deployments depend upon the installed Quay Operator v1.0.2 (or earlier). Type oc get pod and oc get deployment to make sure they are gone.
Using OpenShift, navigate to the Operators > Installed Operators page. The UI will present you with the option to delete the operator.
10.2.6. Install the new Quay Operator
Previously, the Quay Operator (v1.0.2 and prior) were provided using the "community" Operator Hub catalog. In the latest release, the Quay Operator is released through official Red Hat channels.
In the OpenShift console, navigate to Operators > OperatorHub and then simply search for Quay. Ensure you are choosing the correct Quay Operator v3.3.4 in the event that you encounter multiple, similar results. Simply click install and choose the correct namespace/project to install the operator.
10.2.7. Recreate the deployment
At this point, the following assumptions are made based upon the previous steps documented in this upgrade process:
- Your CR is updated to reflect any differences in the latest operator’s schema (CRD).
- Quay Operator v3.3.4 is installed into your project/namespace
- Any secrets necessary to deploy Red Hat Quay exist
- Your CR defines either 1 Quay Pod replica or does not specify any quantity of Quay replicas which defaults to 1.
Once you are ready, simply create your QuayEcosystem by executing the command:
$ oc create -f new_deployment.yaml
At this point, the Quay Operator will begin to deploy Redis, the Quay Config Application, and finally your (single) Quay Pod.
10.2.8. Monitor the database schema update progress
Assuming that you are upgrading from Quay v3.2 to Quay v3.3, it will be necessary for Quay to perform schema updates to your database. These can be viewed in your Quay pod’s logs.
Do not proceed with any additional steps until you are sure that the database migrations are complete.
10.2.9. Monitor the database schema update progress
Assuming that you are upgrading from Red Hat Quay v3.2 to Red Hat Quay v3.3, it will be necessary for Quay to perform schema updates to your database. These can be viewed in your Quay pod’s logs.
Do not proceed with any additional steps until you are sure that the database migrations are complete.
These migrations should occur early in the pod’s logs so it may be easy to overlook them.
10.2.10. Finalize the Red Hat Quay cluster upgrade
Now that the latest release of Red Hat Quay, and optionally Clair, have been deployed to your Openshift cluster, it is time to verify your configuration and scale as needed.
You can compare the results of the current configuration with the previous configuration referencing the documentation gathered in the first step of this
process. It is recommended to pay close attention to your hostname(s) and glance at all logs to look for any issues that may not have been obvious or caught by the Quay Operator.
It is also recommended to perform a quick "smoke test" on your environment to ensure that the major functionality is working as expected. One example test may include performing pushes and pulls from the registry on existing, and new, images. Another example may be accessing the Red Hat Quay UI as a registered user and
ensuring that the expected TLS certificate is used. If you rely on the Quay Operator to generate a self-signed TLS certificate then keep in mind that a new certificate may have been created by this process.
If multiple replicas are needed to scale your Red Hat Quay registry, it is now safe to change the replica count to your desired quantity. For example, to scale out the quay pod, your might run oc edit quayecosystem demo-quayecosystem, then change replicas: 1 to replicas: 2, or other desired number.
Finally, it would be highly recommended to ensure you store your configuration
and any relevant OpenShift secrets in a safe, preferably encrypted, backup.
Chapter 11. Starting to use Red Hat Quay
With Red Hat Quay now running, you can:
- Select Tutorial from the Quay home page to try the 15-minute tutorial. In the tutorial, you learn to log into Quay, start a container, create images, push repositories, view repositories, and change repository permissions with Quay.
- Refer to the Use Red Hat Quay for information on working with Red Hat Quay repositories.